

Page 1
Item No. 92-AE120
Aluminum Easel Assembly Instructions
Carton Contains: [A] Easel Assembly, [B] Lower Canvas Support (large),
Napoli
[C] Upper Canvas Support (small) & Parts Bag
Part A
[5] Adjustment
Knobs
Step 1.
Empty contents of carton. Remove all plastic packaging.
Step 2.
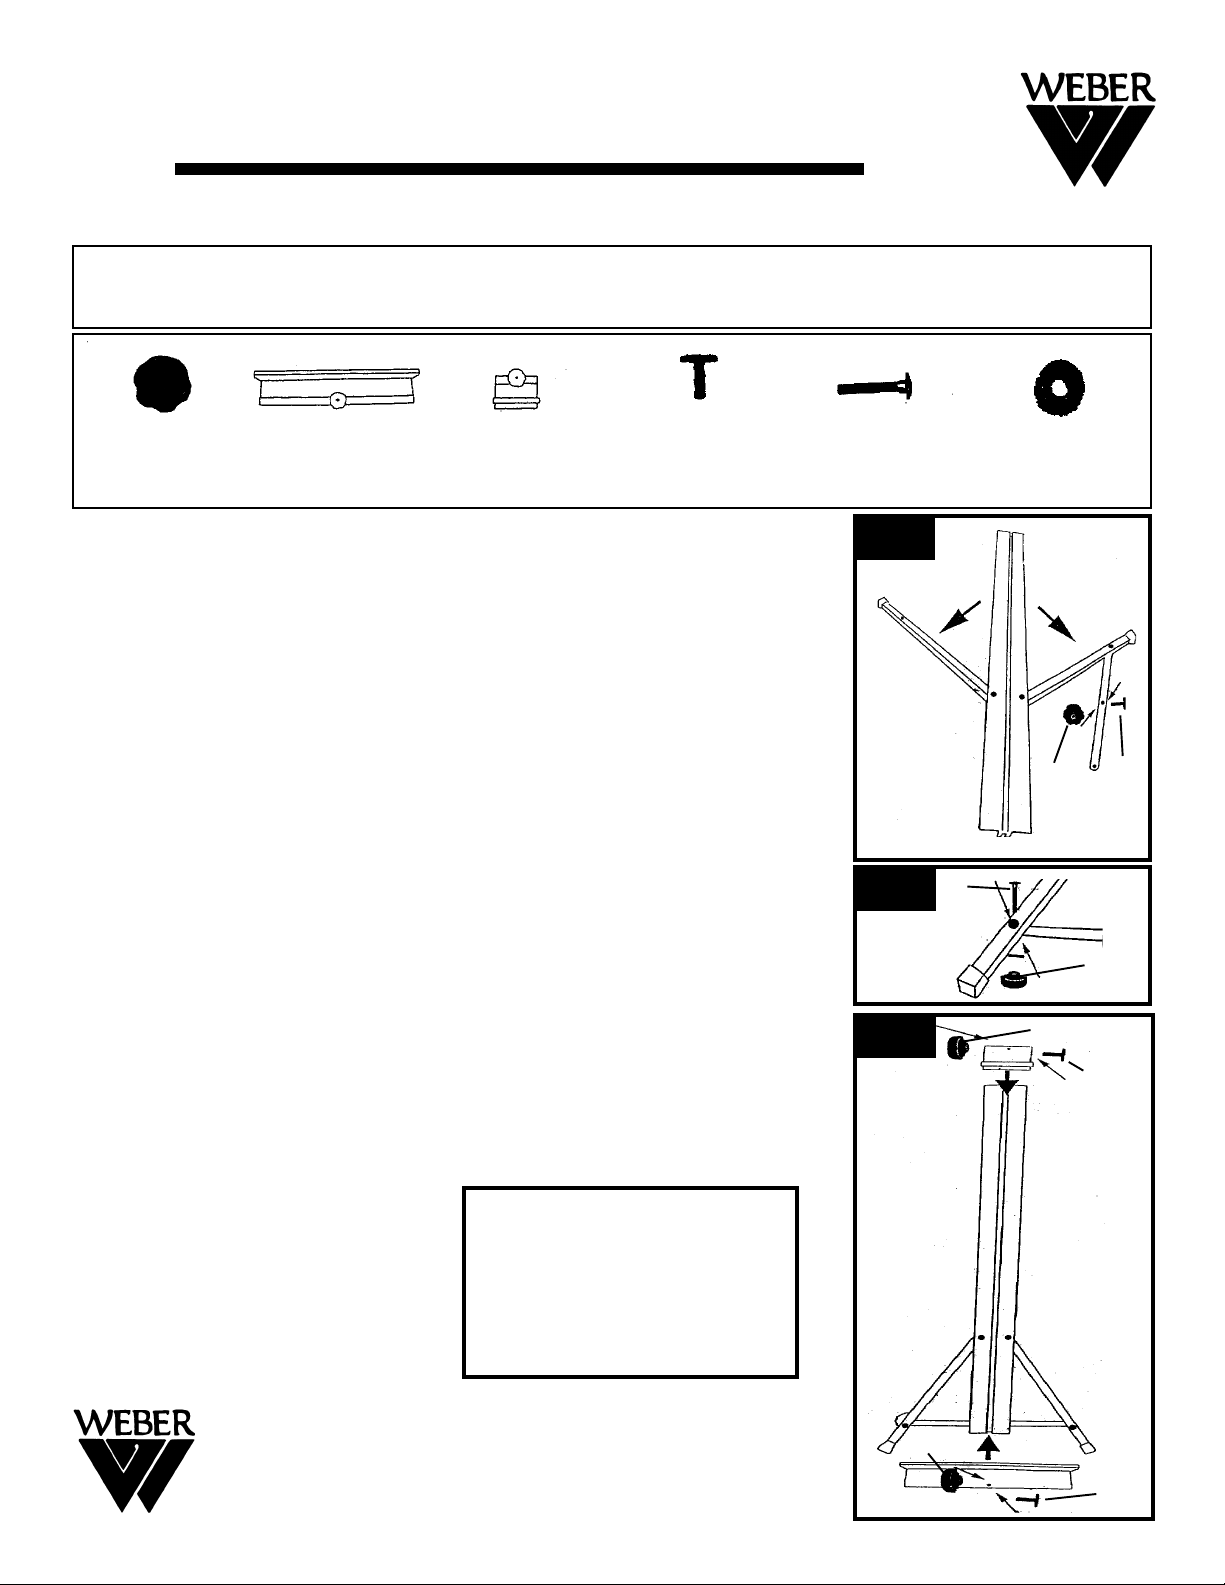
Take Easel Assembly and spread out the lower legs and
position cross member support so that it lines up with hole in
rear of left leg. See FIG 1 & Fig. 2
Step 3.
Remove knob and screw from cross member. Center hole in
cross member needs to line up with channel in center column.
Slide screw with plate into groove in center column while
positioning cross member hole onto screw.
Attach knob but DO NOT tighten.
Step 4.
Attach cross member to left leg of easel by removing knob from
rear of leg and positioning hole in cross member over screw in
leg. Attach knob and tighten to secure.
Step 5.
Tighten knob on rear of cross member to secure.
Step 6.
Loosen knob above rear leg to adjust tilt of easel. Tighten at
desired angle.
Step 7.
Slide the lower canvas support [B] down onto the center
column, tighten knob to secure. Repeat with upper canvas
support [C]. See FIG 3.
Part B
[1] Lower Canvas
Tray
Part C
[1] Upper Canvas
Support
[3] T-Bolts
Part D
Part E
[1] Long Bolt
FIG 1
FIG 2
FIG 3
[E]
Part F
[1] Plastic Mat
[A]
[A]
[A]
[D]
[E]
Your easel is now ready to use.
Martin/F. Weber Co., Detroit, MI USA
www.weberart.com
Email: Mudmfwdet@aol.com
Made in China
If you have any
questions or difficulties
assembling this easel.
Please call our
Customer Service Hotline
at: (313)895-0700
[A]
[D]
 Loading...