

Page 1
92-3032 DeluxeFrench Sketchbox Easel Assembly Instructions
This french sketchbox easel is 95% assembled. All one must do is set-up the legs and open the
sketchbox for proper use and handling.
Assembly Instructions
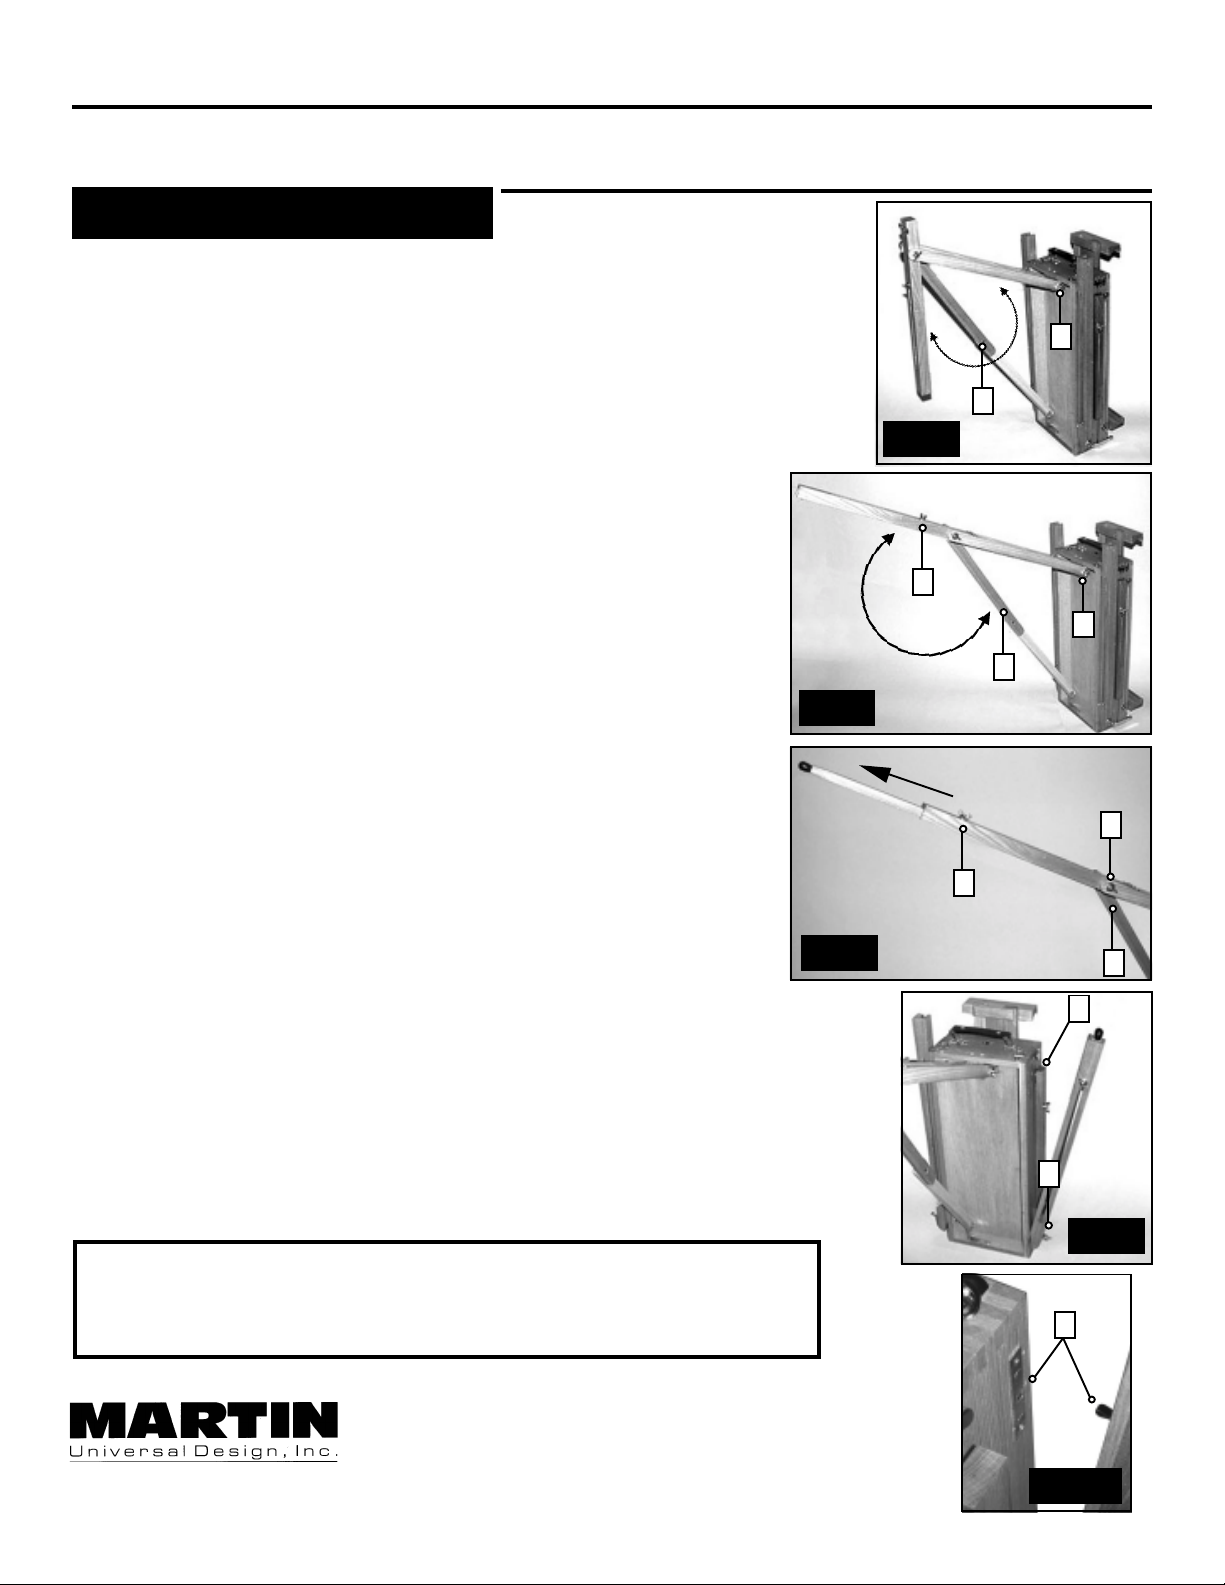
1. After removing Sketchbox Easel from box, remove styro-foam
sides and discard.
B
2. Begin by loosening wing nut [A] found under top rear edge of
easel sketchbox. After loosening wing-nut [A], swing center leg
outward while swinging hinged support [B] out until it stops
against support plate. Tighten wing-nut [A] to secure. See FIG 1.
FIG 1
C
A
3. Loosen wing-nut [C] and swing middle section of center leg up
until it stops against support plate. Tighten wing-nut [C] to
secure. See FIG 2.
4. Finish center leg assembly by loosening wing-nut [D] and sliding
out the lower section of leg completely . Tighten wing-nut to
secure. See FIG 3.
5. Assemble Side Legs by slightly loosening wing-nut [E] and
pulling legs away from easel box by unsnapping it from the
easel sketchbox at [F] Please Note: Y ou may have to pull
firmly. See FIG 4 and review FIG 4A.
Turn page over to complete assembly instructions.
FIG 2
FIG 3
A
B
C
D
B
F
E
IMPORTANT
If you have difficulty assembling your easel or need customer service assistance.
Please call: Martin Universal Design, Inc. Customer Service Hot Line at
1-800-366-7337. If you need additional parts, it is not necessary to contact your
dealer, our Customer Service Rep. will forward them to you immediately.
4444 Lawton Avenue, Detroit, MI 48208 USA • T el:(313)895-0700 / Fax:(313)895-0709
E-mail: Mudmfwdet@aol.com • www.MartinUniversalDesign.com
FIG 4
F
FIG 4A
pg.1
Page 2
92-3032 French Sketchbox Easel Assembly Instructions, continued
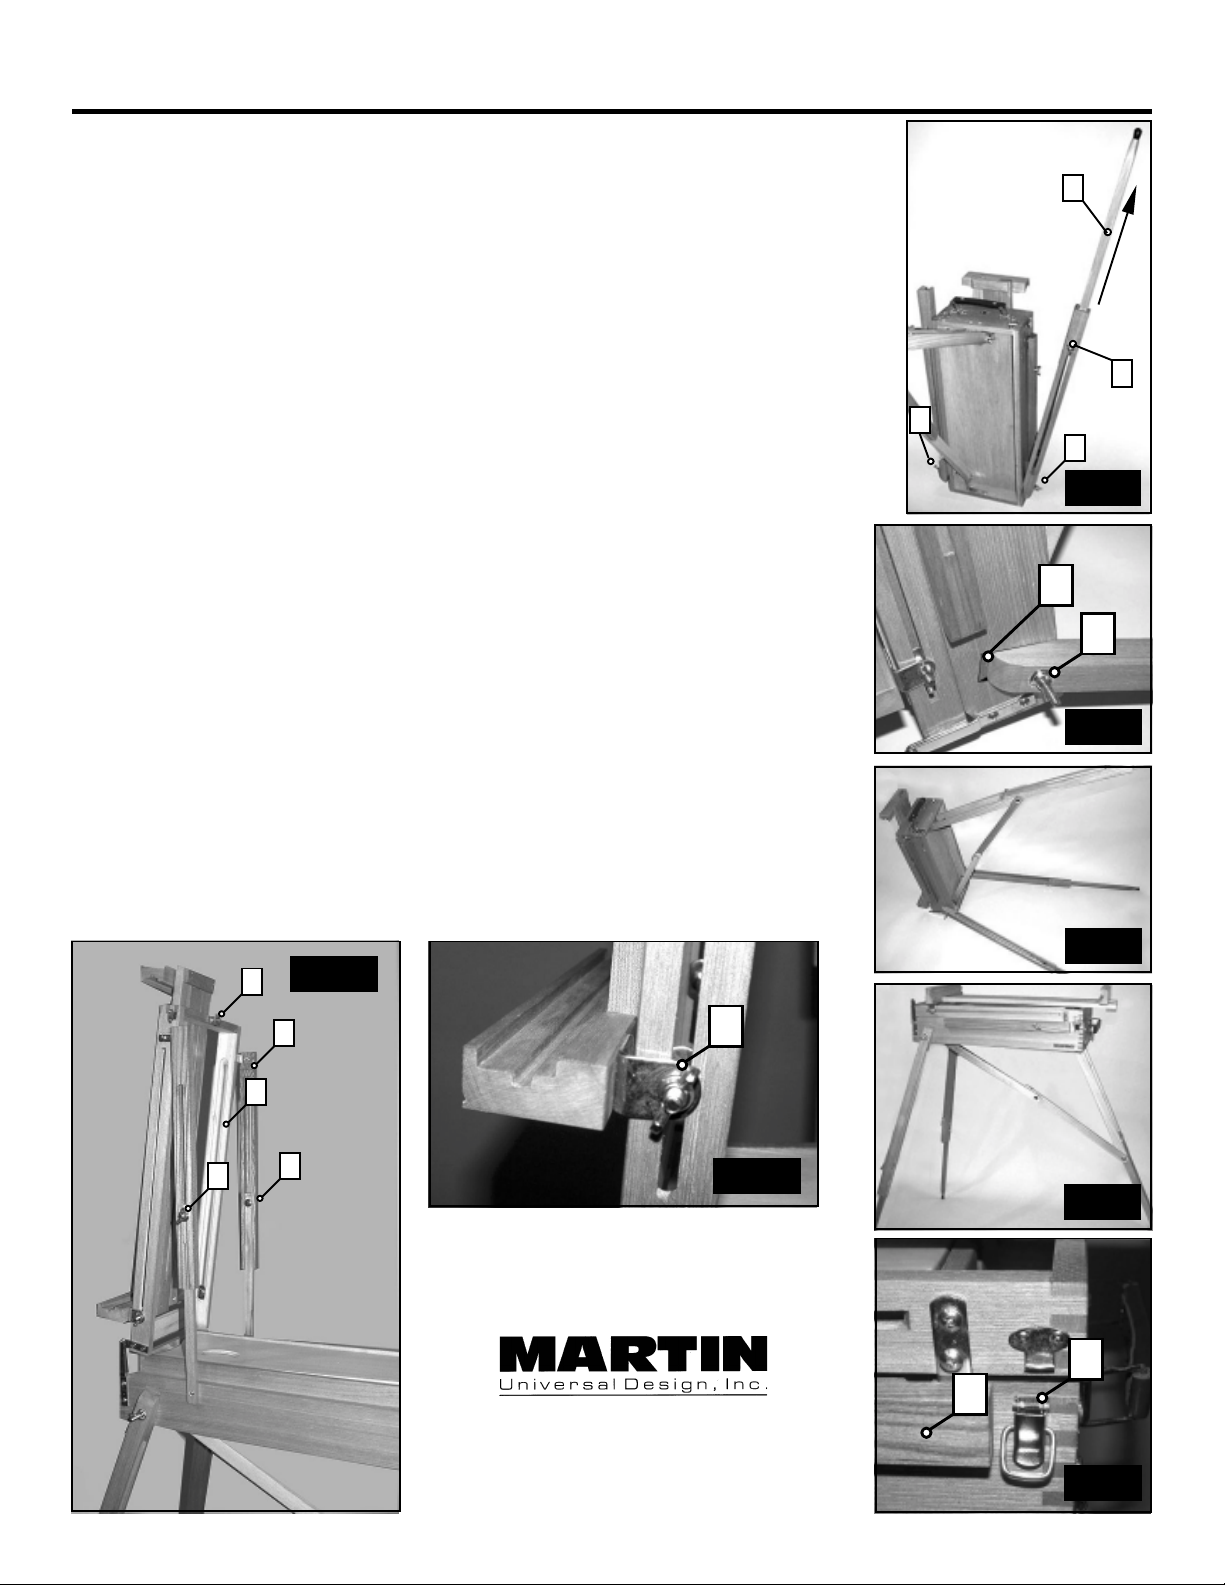
6. Continue by extending lower portion of right leg by loosening wing-nut [G]
and extending lower leg [H] completely . Tighten wing-nut to secure.
See FIG 5. REPEA T with left side.
7. Loosen wing-nuts [I] and [J]. Twist left and right leg towards rear of easel
making certain legs are positioned into slotted grooves [K] then
re-tighten wing-nuts [I] and [J] to secure. See FIG 6.
Before going to step 8, easel should look like FIG 7.
H
G
8. Making certain all wing-nuts on all legs are tightened, continue by
carefully turning easel up onto all 3 legs. See FIG 8.
9. T o open Sketchbox, release each hinge [L] on both sides of sketchbox
and loosen wing-nuts [N] and [O] positioned along tilt supports [M].
See FIG 9 and 10.
10. Lift up on sketchbox to swing up and open. Lock into desired position/
angle by tightening down wing-nuts along tilt supports [M]. See FIG 10.
1 1.T o adjust upper canvas support loosen metal knob [Q] on rear of upper
canvas support. See FIG 10. Tighten at desired height.
T o adjust lower canvas support loosen wing-nuts [P] along outer edge of
canvas support. See FIG. 1 1. Tighten at desired position.
Your easel is now ready for your painting enjoyment!
FIG 10
Q
I
J
FIG 5
K
J
FIG 6
Q
FIG 7
M
M
N
O
P
FIG 1 1
FIG 8
L
M
4444 Lawton Avenue, Detroit, MI 48208 USA
T el:(313)895-0700 / Fax:(313)895-0709
E-mail: Mudmfwdet@aol.com
www.MartinUniversalDesign.com
FIG 9
pg.2
 Loading...