

Page 1
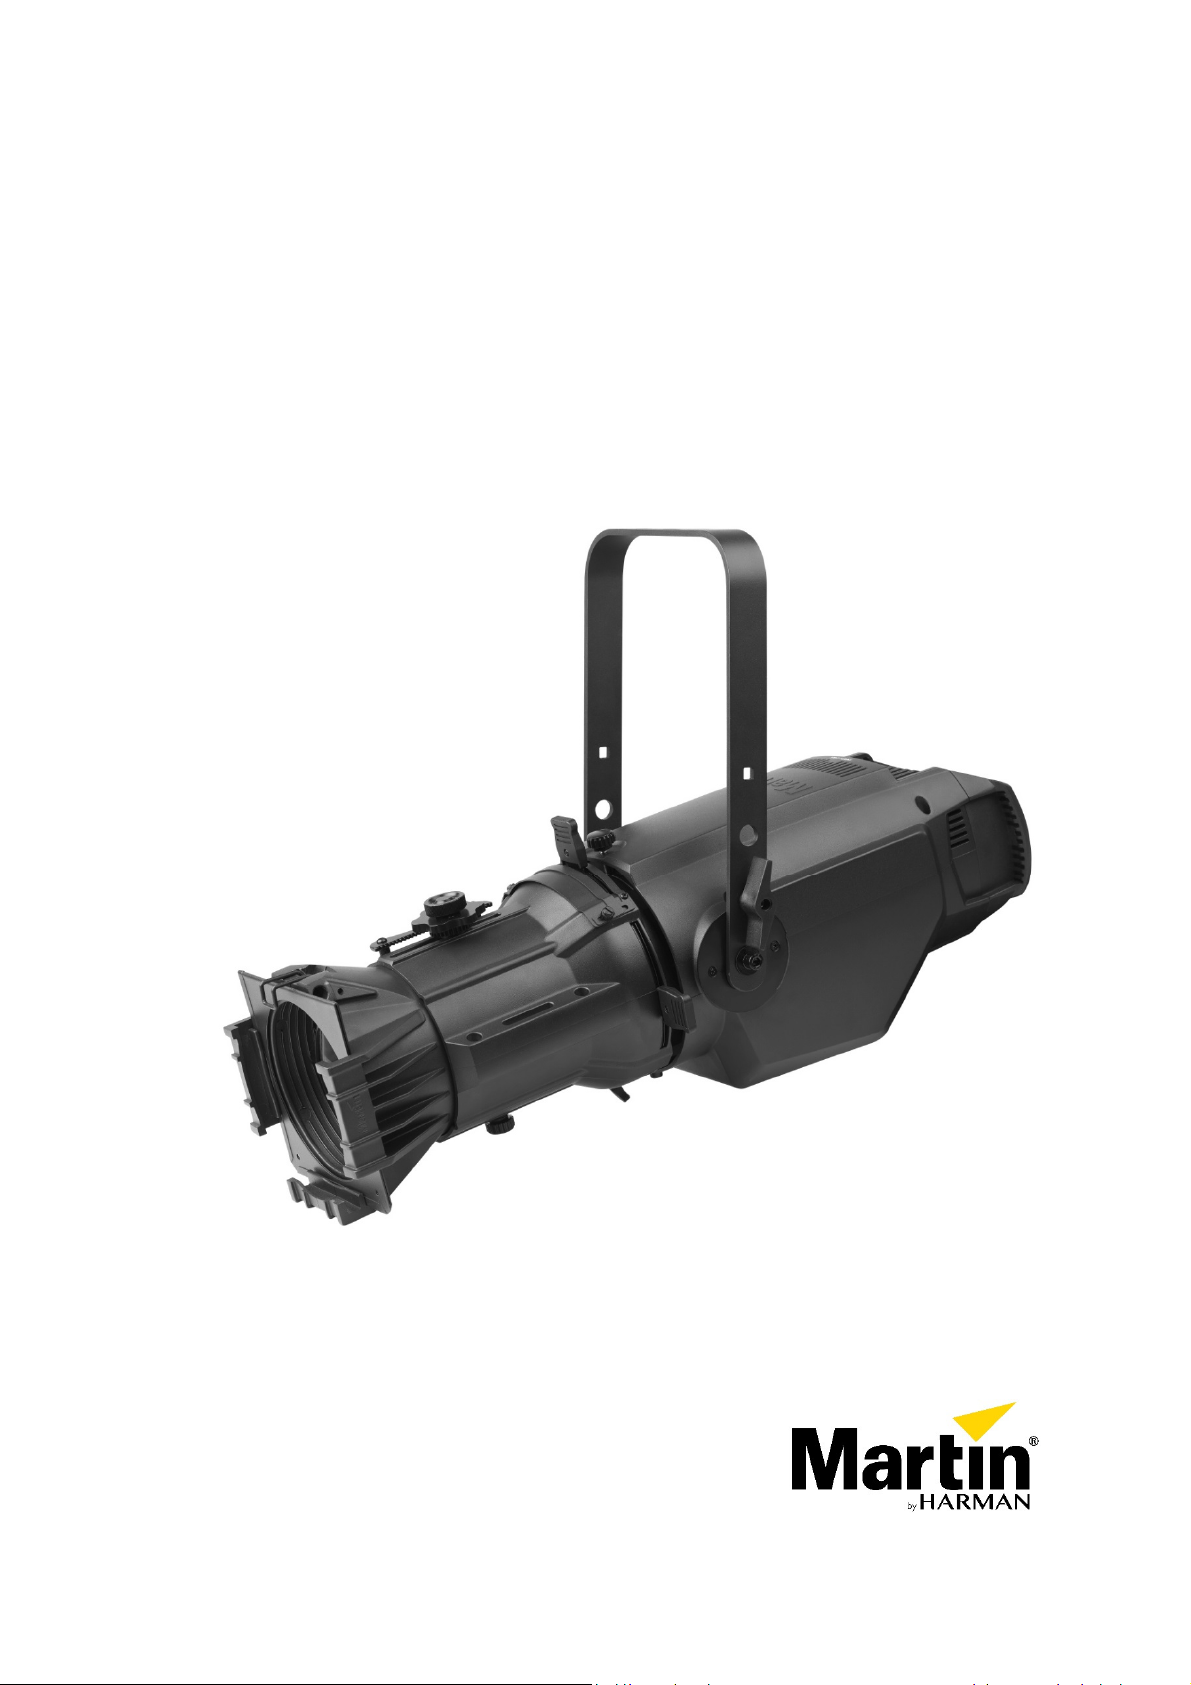
ELP CL LED Profile
User Manual
Page 2
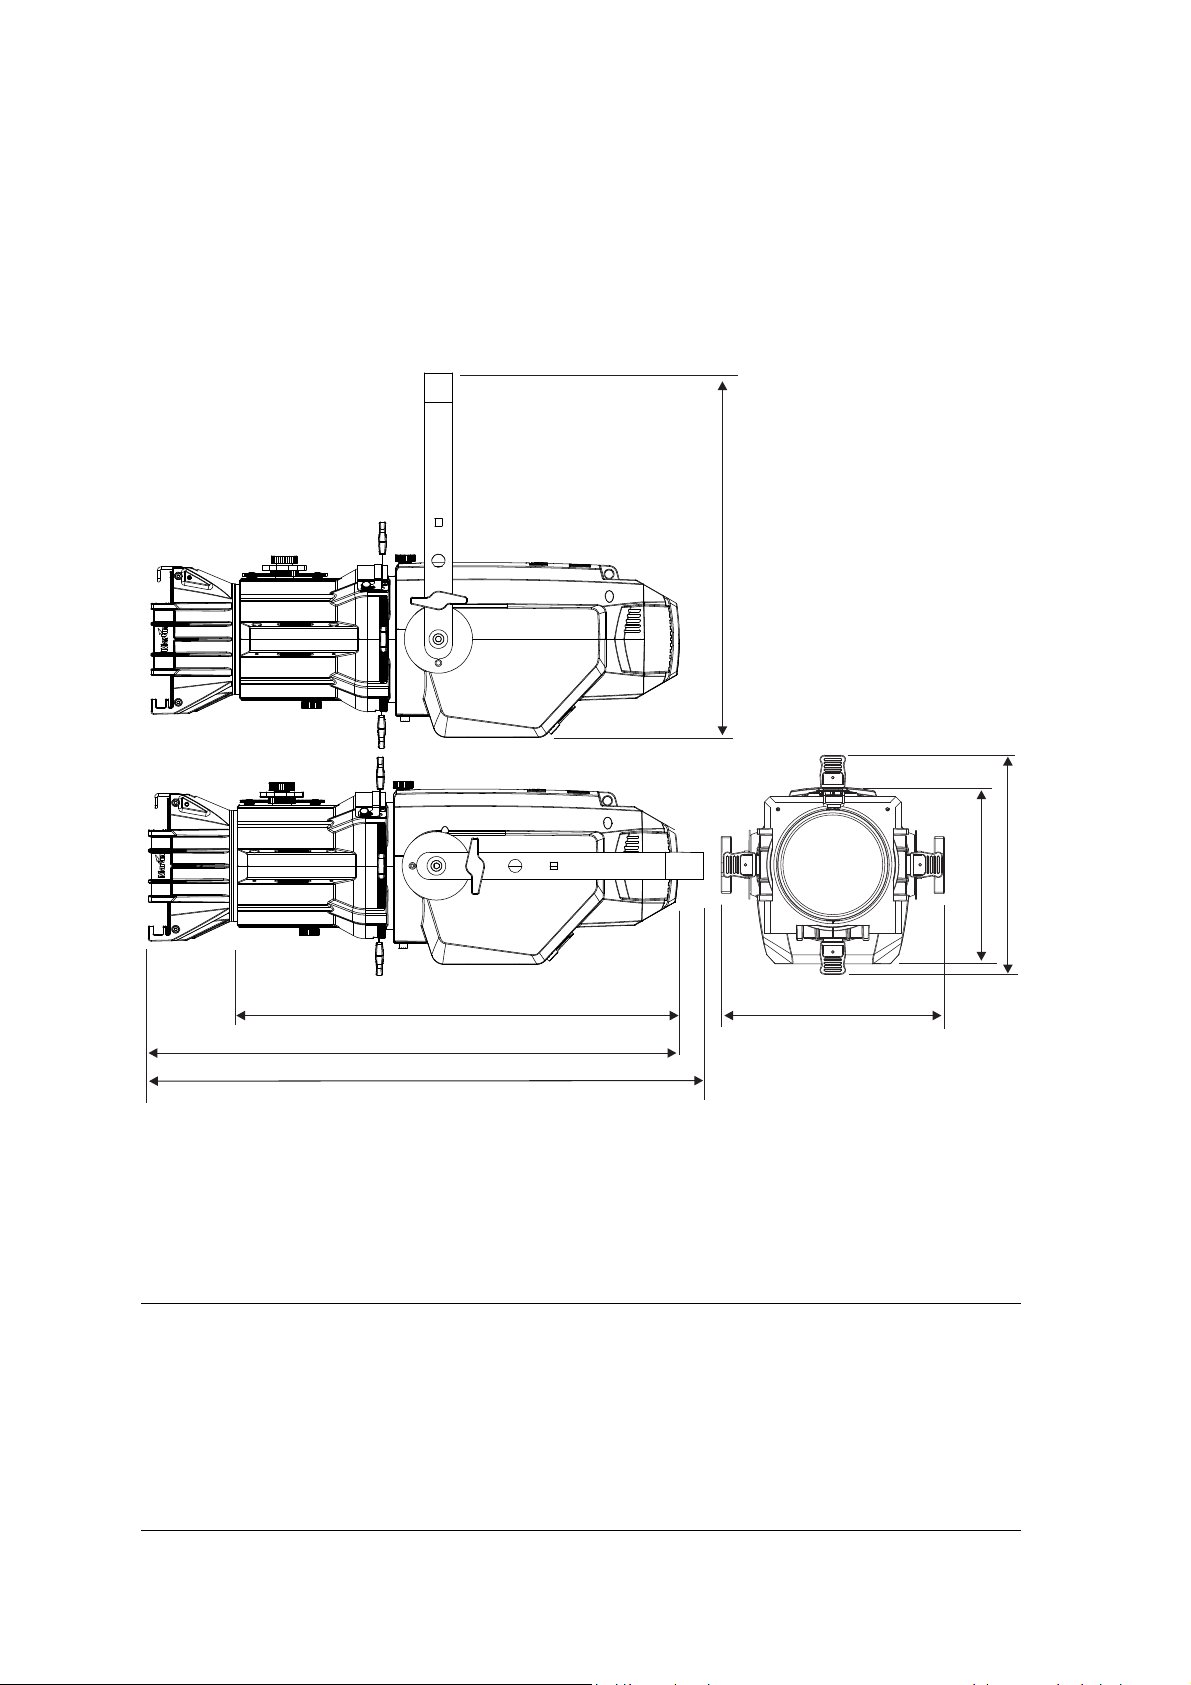
Dimensions
427
254
205
514 259
618
648
All dimensions are given in millimeters.
© 2018-2020 HARMAN® Professional Denmark ApS. Information subject to change without notice. HARMAN Professional
Denmark and all affiliated companies disclaim liability for any injury
economic loss or any other loss occasioned by the use of, inability to use or reliance on the information contained in this
manual. Martin®, HARMAN and all other trademarks in this document pertaining to services or products by Martin
Professional or its affiliates and subsidiaries are registered as the property of HARMAN Professional Denmark.
HARMAN PROFESSIONAL DENMARK ApS, Olof Palmes Alle 44, 8200 Aarhus N, Denmark
HARMAN PROFESSIONAL SOLUTIONS U.S., 8500 Balboa Blvd., Northridge CA 91329, USA
www.martin.com
, damage, direct or indirect loss, consequential or
Martin ELP CL User Manual Revision E
Page 3

Table of contents
Dimensions ........................................................................................... 2
Safety information ................................................................................. 5
Introduction ........................................................................................... 9
Before using the product for the first time .................................. 9
Fixture overview .................................................................................. 10
Physical installation ............................................................................. 11
Fixture location ......................................................................... 11
Mounting the fixture .................................................................. 11
Fastening the fixture to a flat surface ....................................... 11
Mounting the fixture on a truss ................................................. 12
Securing with a safety cable ..................................................... 12
Changing the lens tube ............................................................. 13
AC power ............................................................................................ 14
Linking fixtures to power in a chain .......................................... 14
Control data ........................................................................................ 15
Tips for reliable data transmission ............................................ 15
Connecting the DMX data link .................................................. 15
Fixture Setup ....................................................................................... 16
Using the control menus ........................................................... 16
Control panel display ................................................................ 16
Fast focus mode ....................................................................... 16
Setting the DMX address .......................................................... 16
Setting DMX personality ........................................................... 17
Other fixture settings ................................................................ 17
Display ...................................................................................... 19
Set all settings to factory default ............................................... 19
Fixture test ................................................................................ 19
Fixture information .................................................................... 19
Viewing live DMX values .......................................................... 19
Setting control values manually ................................................ 19
Reset ........................................................................................ 19
Setting values ........................................................................... 19
Setting a sequence of scenes .................................................. 20
Color calibration ........................................................................ 20
Setting options by RDM ...................................................................... 21
Scanning for RDM devices on the data link ............................. 21
Getting status and setting options by RDM .............................. 21
RDM .......................................................................................... 21
Effects ................................................................................................. 23
Dimming .................................................................................... 23
Strobe effects ............................................................................ 23
CTC .......................................................................................... 23
Color mix ................................................................................... 23
Color Scene .............................................................................. 23
Manual focus ............................................................................ 23
Page 4

Manual beam shaping shutters ................................................ 23
Use of filters .............................................................................. 24
Use of gobos and irises ............................................................ 24
Service and maintenance ................................................................... 25
Cleaning .................................................................................... 25
Fuse replacement ..................................................................... 25
Uploading new firmware ........................................................... 25
Service and repairs ................................................................... 26
DMX protocol ...................................................................................... 27
Control menus ..................................................................................... 29
Troubleshooting .................................................................................. 33
Specifications ...................................................................................... 34
Page 5
Safety information
Read the safety precautions in this manual before installing, operating or
WARNING!
servicing this product.
The follo
manual:
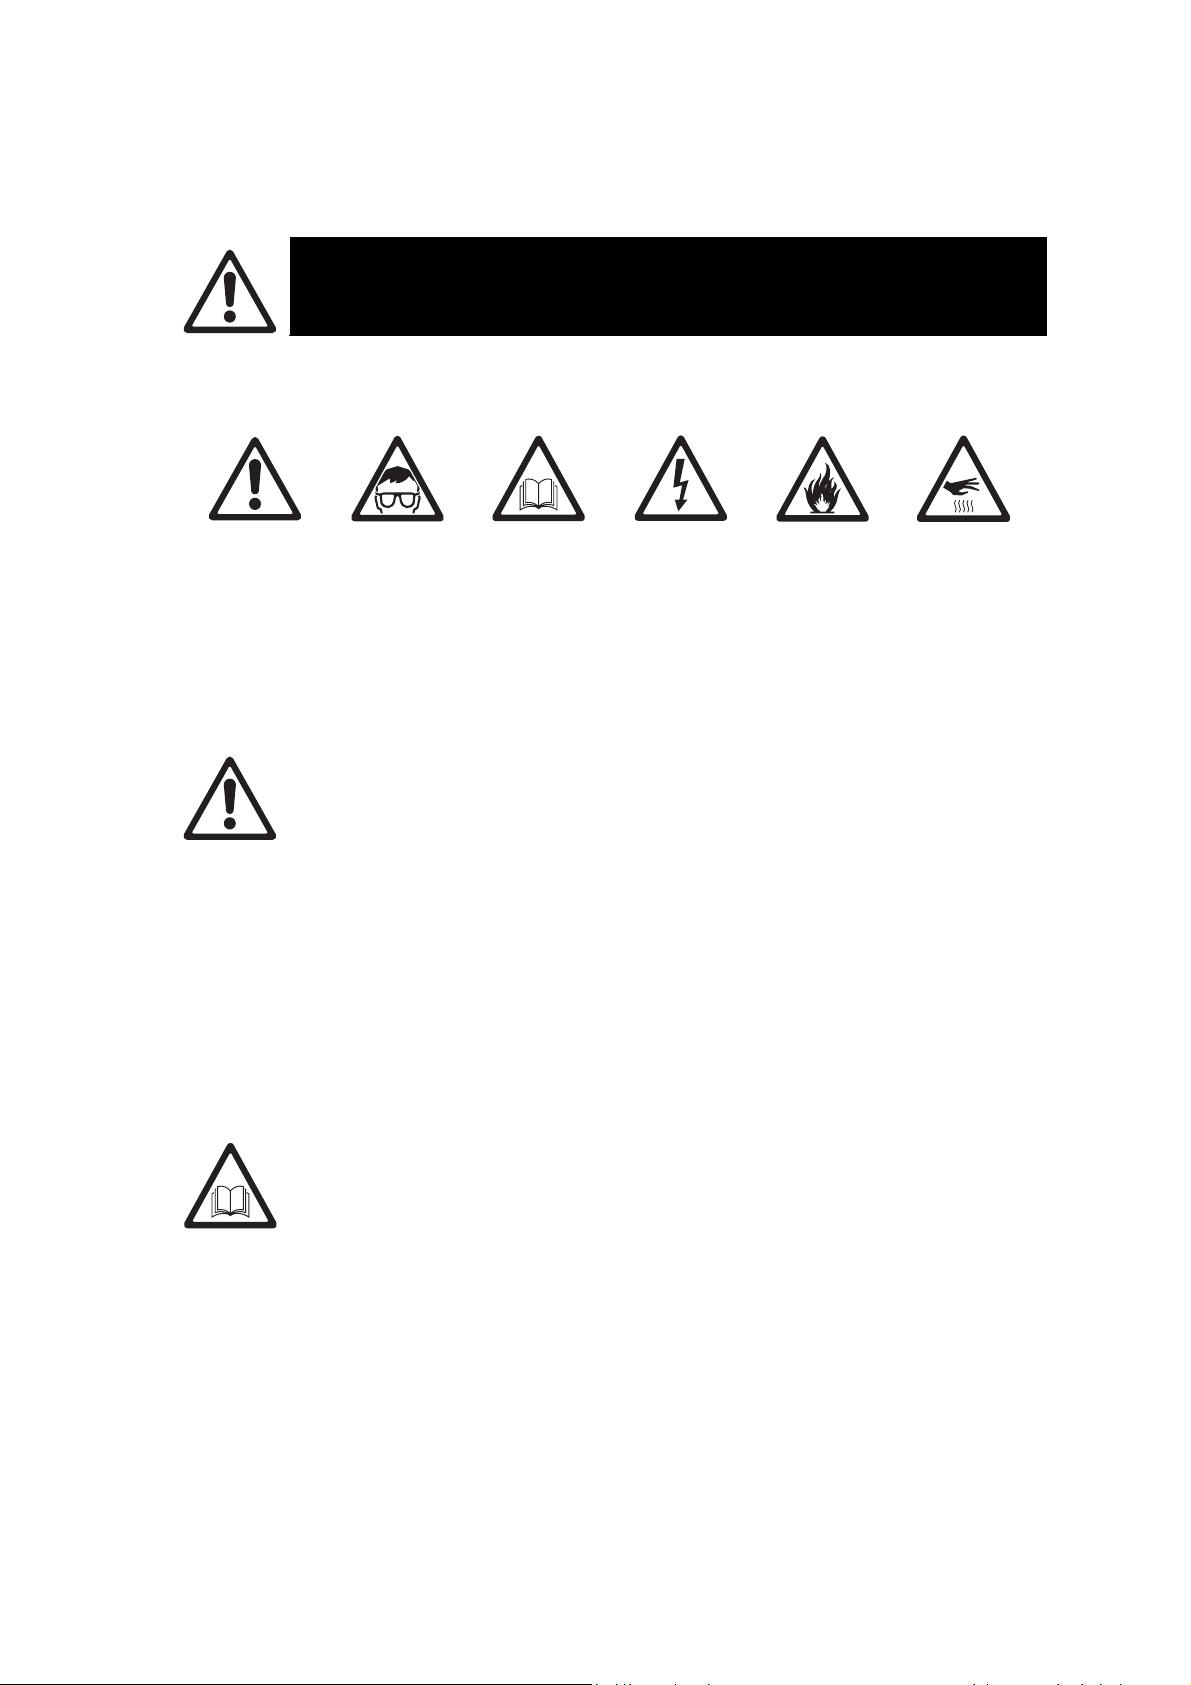
wing symbols are used to identify important safety information on the product and in this
Warning!
Safety
hazard. Risk
of severe
injury or
death.
Warning!
Powerful
light
emission.
Risk of eye
injury.
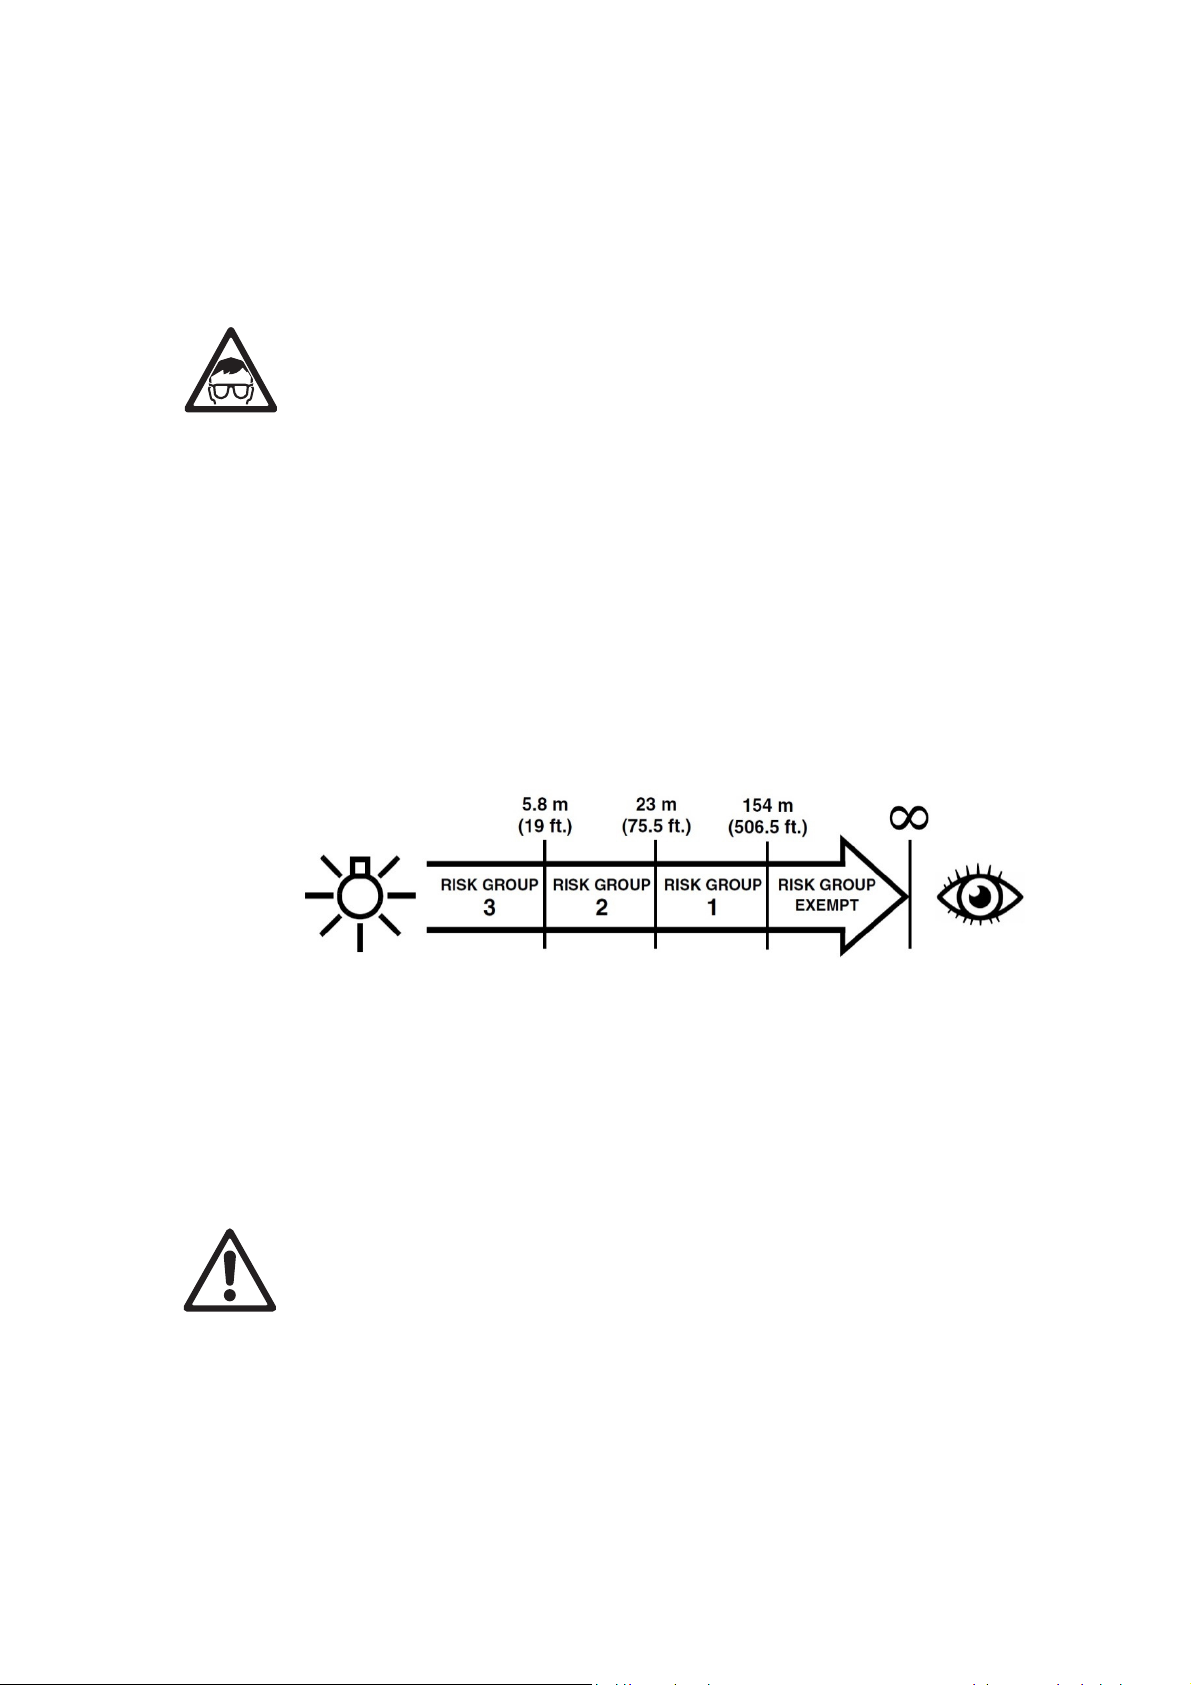
Warning! Risk Group 3 product (see “Protection from eye injury” on page 6
for full details). This product produces intense light output that may be
hazardous if suitable precautions are not taken. Do not view the light output
with optical instruments or any device that may concentrate the beam.
Possibly hazardous optical radiation emitted from this product. Do not look
at operating light source. Eye injury may result.
This lighting fixture is for professional use only and must be installed by a qualified
technician. It is not for household use. It presents risks of severe injury or death
due to fire hazards, electric shock and falls. It can create a fire hazard or a risk of
eye injury if the safety precautions below are not followed.
Respect all locally applicable laws, codes and regulations when installing, applying
power to, operating or servicing the fixture.
The light source contained in this luminaire shall only be replaced by the
manufacturer or his service agent or a similar qualified person.
Warning!
See user
manual for
important
safety
information.
Warning!
Hazardous
voltage. Risk
of lethal or
severe
electric
shock.
Warning!
Fire hazard.
Warning!
Hot surfaces.
Install, operate and service Martin products only as directed in their user manuals,
or you may create a safety hazard or cause damage that is not covered by product
warranties. Follow the safety precautions listed below and observe all warnings in
this manual and printed on the product. Keep this user manual for future use.
For the latest user documentation and other information about this and all Martin
products, please visit the Martin website at http://www.martin.com
Technical Support
If you have questions about how to install, service or operate the fixture safely,
please contact Harman Professional Technical support:
• For technical support in North America, please contac
HPro
[email protected] / phone: (844) 776-4899
• For technical support outside North America, please contact yo
distri
butor.
t
ur national
Martin® ELP CL User Manual 5
Page 6
Protec
tion from electric shock
Ensure that the fixture is electrically connected to ground (earth).
Disconnect the fixture from AC power when not in use.
Do not open the fixture or remove any cover. Refer any service operation not
described in this manual to an authorized Martin Service partner.
Shut down power to the entire installation at the main power distribution board and
lock out power before carrying out any installation or maintenance work.
Use only a source of AC power that complies with local building and electrical
codes and has both overload and ground-fault (earth-fault) protection.
2
The 0.75 mm
/ 18 AWG mains power input cable supplied with the fixture is rated
6 A and can supply only one fixture with mains power. Do not connect any device
to the fixture’s MAINS OUT socket when using this input cable.
Before you can connect other devices to the fixture’s MAINS OUT socket, you
must use one of the 16 A rated power input cables available as optional
accessories from Martin to connect the fixture to power at the MAINS IN socket.
Use one of the 16 A rated power relay cables available as optional accessories
from Martin to relay power from the fixture’s MAINS OUT socket to the MAINS IN
socket of the next fixture. If you link fixtures to power in a chain in this way, do not
exceed the following limits:
• Connect a maximum of four (4) ELP PROFILE fixtures
n at 100
chai
• Con
nect a maximum of nine (9) ELP PROFILE fixtur
-120 V, or
in total to power in a
es in total to power in a
chain at 200-240 V.
Before u
sing the fixture, check that all power distribution equipment and cables are
in perfect condition, are rated for the current requirements of all connected
devices, and are of suitable type for the location (including water, pollution,
temperature and UV resistance).
The voltage and AC frequency of the power at the MAINS OUT socket are the
same as those applied at the MAINS IN socket.
Isolate the fixture from power immediately if any seal, cover, cable, or other
component is damaged, defective, deformed or showing signs of overheating. Do
not reapply power until repairs have been completed
Do not immerse the fixture in water or any other fluid. Do not install the fixture in a
location where flooding may occur.
Protection from burns and fire
Do not operate the fixture if the ambient temperature (Ta) exceeds 40° C (104° F).
The surface of the fixture can reach up to 55° C (131° F) if the fixture is operated at
the maximum permitted ambient temperature. Allow the fixture to cool for at least 5
minutes before handling.
Install the fixture on a non-combustible surface (brick, concrete, plaster etc.) only.
Do not aim the fixture towards combustible materials (fabric, wood, paper etc.) that
are within 50 cm (19 in.) of the fixture.
Keep the fixture well away from flammable materials (volatile liquids etc.).
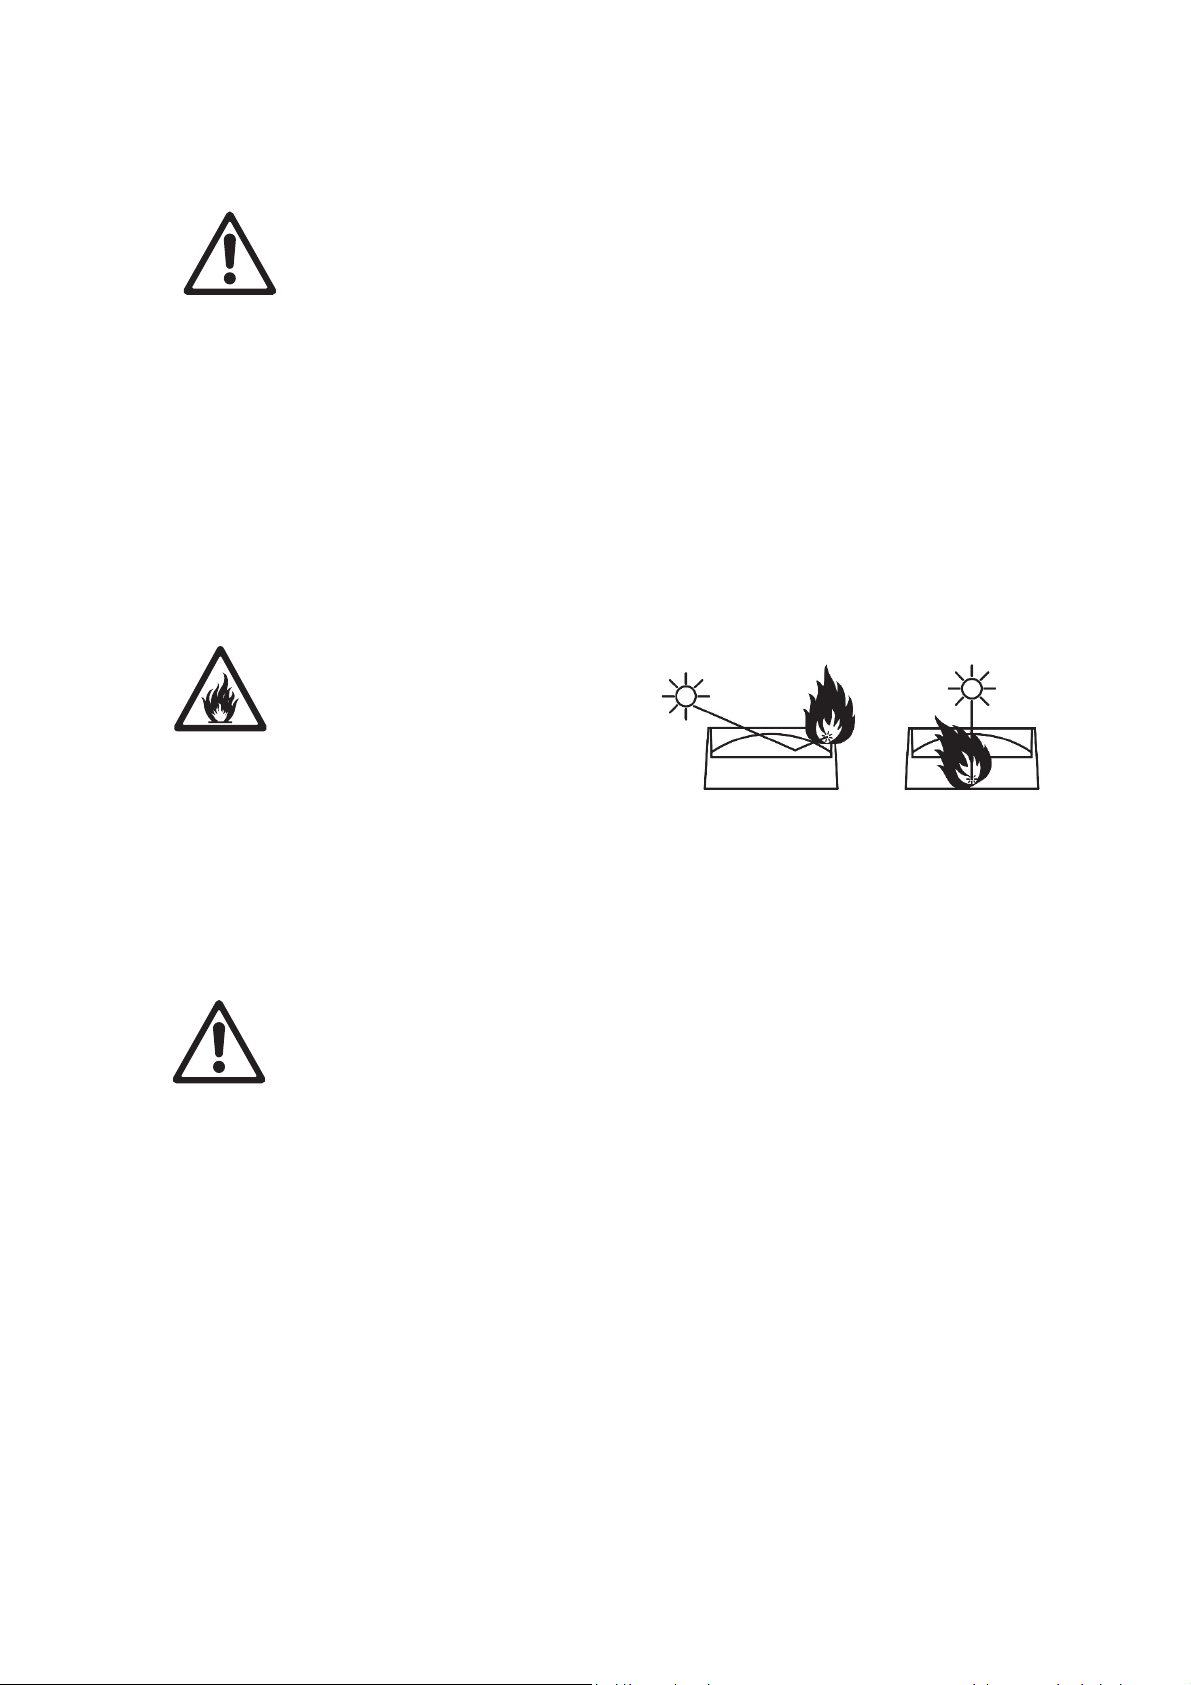
Do not expose the front glass to sunlight or any other strong light source from any
angle. Lenses can focus the sun's rays inside the fixture, creating a potential fire
hazard.
Ensure that there is free and unobstructed airflow around the fixture.
Allow at least 0.2 m (8 in.) free space around the fixture.
6 Martin® ELP CL User Manual
Page 7
Do not attempt to bypass thermostatic switches or fuses.
Do not modify the fixture in any way not described in this manual or install other
than genuine Martin parts. Do not stick filters, masks or other materials onto any
lens or other optical component. Use only accessories approved by Martin to
modify the light beam.
Protection from eye injury
Do not look directly into the product’s light output.
Do not look at operating light source. Eye injury may result.
Do not look at the light output with magnifiers, telescopes, binoculars or similar
optical instruments that may concentrate the light output.
Ensure that persons are not looking directly into the front of the fixture when the
product lights up suddenly. This can happen when power is applied, when the
product receives a DMX signal, or when certain control menu items are selected.
To minimize the risk of eye irritation or injury, disconnect the fixture from power at
all times when the fixture is not in use and provide well-lit conditions to reduce the
pupil diameter of anyone working on or near the fixture.
This fixture corresponds to Risk Group 3 according to EN 62471 when all
photobiological risks are considered and Risk Group 2 product according to
IEC/TR 62778 for blue light only. It emits possibly hazardous optical radiation. It
falls into the Risk Group categories shown below according to both EN 62471 and
IEC/TR 62778 under worst-case conditions.
At a distance of less than 5.8 m (19 ft.) from the fixture, the light output can
potentially cause eye or skin injury before an exposed person's natural aversion
responses (blink reflex and reaction to skin discomfort) can protect them. At
distances greater than 5.8 m (19 ft.), potential eye and skin injury hazards from the
light output are normally prevented by natural aversion reflexes.
Position the fixture so that persons cannot be exposed to the fixture's light output
at a distance of less than 5.8 m (19 ft.) from the fixture, and so that prolonged
staring into the light output at less than 23 m (75.5 ft.) from the fixture is not
expected.
Protection from injury
Fasten the fixture securely to a fixed surface or structure when in use. The fixture
is not portable when installed.
Ensure that all supporting structures, surfaces, fasteners and lifting equipment can
bear the weight of all the devices they are intended to support plus an adequate
safety margin, and that they conform to local building and safety regulations.
If the fixture is installed in a location where it may cause injury or damage if it falls,
install as described in this manual a secondary attachment such as a safety cable
that is approved by an official body such as TÜV as a safety attachment for the
weight that it secures. The safety cable must comply with EN 60598-2-17 Section
17.6.6 or BGV C1 / DGUV 17, and must be capable of bearing a static suspended
Martin® ELP CL User Manual 7
Page 8

load at least six times (or more if required by locally applicable regulations) the
weight that it secures.
Eliminate as much slack as possible in the safety cable (by looping it more than
once around the rigging truss, for example). Make sure that, if the primary
attachment fails, the fixture cannot fall more than 20 cm (8 inches) maximum
before the safety cable catches it.
If the safety cable attachment point becomes deformed, do not suspend the fixture.
Have the fixture repaired by an authorized Martin service partner.
Ensure that any accessories such as gel frames, gobo holders are securely
fastened.
Block access below the work area and work from a stable platform whenever
installing, setting, adjusting, or cleaning the fixture.
Do not operate the fixture with missing or damaged covers, shields or any optical
component.
If an operating problem occurs, stop using the fixture immediately and disconnect it
from power. Do not attempt to use a fixture that is obviously damaged.
8 Martin® ELP CL User Manual
Page 9

Introduction
The ELP CL from Martin® is an ellipsoidal/profile lighting fixture with a 260 W red, green, blue,
amber & lime LED engine that produces a sharp gobo projection with a flat field.
Four fixed beam angle lens tubes and two zoom lens tubes are available for the fixture. We
recommend that you order the lens tube of your choice at the same time as ordering the fixture
body.
The fixture provides a calibrated color mixing system that offers 2 modes of operation:
• High-quality mode with a CRI of 90 and CCT of 5500 K at 5900 lumens outpu
• High
The fixture ha
gear-based fine focus system which is still compatible with industry standard accessories. The
fixture is ideal for theatre, gobo projection, art lighting, architectural lighting and key lighting
applications.
The Martin ELP CL can be controlled using any DMX-compliant controller and can be remotely
configured by RDM. It also features stand-alone operation with capacity for up to 20 scenes.
The fixture is supplied with this user manual, a 1.5 m (4.9 ft.) power cable ready for a local power
plug (not included) and a yoke for attachment of suitable user-supplied rigging clamps.
-performance mode with a CRI of 85 and CCT of 6000 K at 6900 lumens out
s 16-bit dimming with 4 selectable curves. It includes innovative features including a
Before using the product for the first time
1. Read ‘Safety information’ on page 5 before installing, operating or servicing the fixture.
Unpack and ensure that there is no transportation damage before using the fixture.
2.
attempt to oper
3.
Before operating, ensure that the voltage and frequency of the power supply match the powe
req
uirements of the fixture.
4.
If the fixture is not going to be hard-wired to a mains supply, install a local powe
plied) on the end of the supplied power cable.
sup
If fixtures are exposed to a sudden temperature change, give them time to warm or co
5.
nt temperature before applying power. This will help avoid damage due to condensation.
ambie
Check the support pages on the Martin website at www.martin.com for the most recent user
6.
documentation and technical information about the fixture. Martin user manual revisions ar
identified b
ate a damaged fixture.
y the revision letter at the bottom of the inside cover.
t
put.
Do not
r plug (not
ol to the
e
r
Martin® ELP CL User Manual 9
Page 10
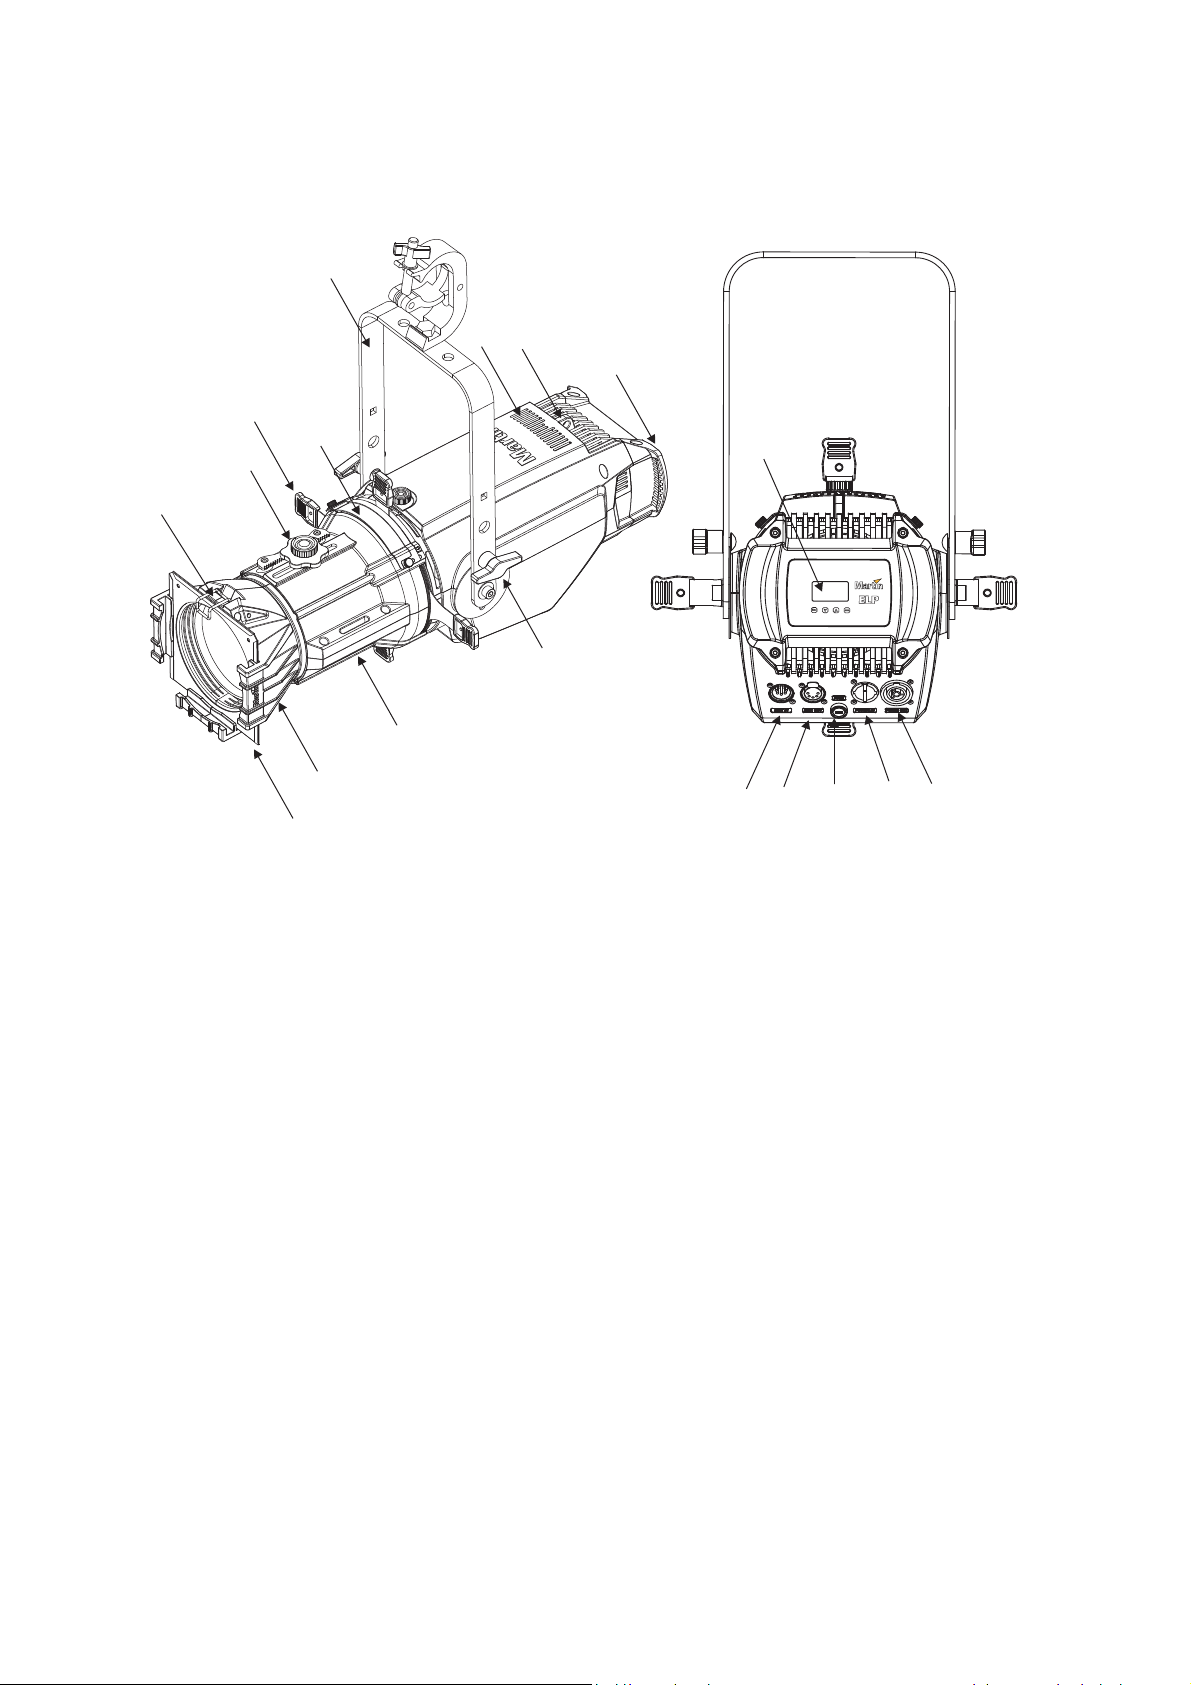
Fixture overview
8
6
7
5
1
4
10
11
12
9
3
2
1 – Filter ret
2 – Filter frame
3 – Interchangeable optical lens tube
4 – Lens tube housing
5 – Upper lens tube locking thumbscrew
Fine focus adjustment wheel
6 – Beam shaping shutter handles
7 – Gobo / accessory gate with sliding
cover
8 – Mounting bracket / yoke
9 – Tilt locking knob
aining clip
14 15 161317
10 – Heatsink vent
11 – Safety cable attachment point
12 – Rear handles for positioning
13 – Control panel.
14 – DMX input (5-pin XLR)
15 – DMX output (5-pin XLR)
16 – Mains fuse
17 – Mains power input (Neutrik
powerCON TRUE1).
18 – Mains power output (Neutrik
powerCON TRUE1)
18
10 Martin® ELP CL User Manual
Page 11
Physical installation
Warning
Warning! The safety and suitability of lifting equipment, installation location,
anchoring method, mounting hardware and electrical installation are the
responsibility of the installer. All local safety regulations and legal requirements
must be observed when installing and connecting the fixture. Installation must be
carried out by qualified professionals only.
Contact your Martin supplier for assistance if you have any questions about how to install this
product safely.
! Read ‘Safety information’ on page 5 before installing the fixture.
Fixture location
The ELP Profile fixture is intended for interior use only. Do not install outside or in wet or humid
locations. The fixture requires free and unobstructed airflow around it to ensure adequate cooling.
Observe the following limitations in selecting a location:
• Respect the precautions listed under Safety information’ on page
• Do not lo
Important! Do not point the output from other lighting fixtures at the fixture, as powerful light can
damage the display.
cate the fixture in an unventilated sp
Warning
Lenses can focus sunlight and strong
light, presenting a risk of fire and
damage to the fixture, creating a
potential fire hazard and causing
damage. Position or shade the head
so that the front lens will not be
exposed to sunlight or another strong
light source from any angle – even for
a few seconds.
! See drawing on right.
ace.
5.
Mounting the fixture
Warning
hold the fixture safely. Install a washer directly under the head of each fastener when
anchoring the mounting bracket to the installation surface.
Fastening the fixture to a flat surface
The fixture can be fastened to a hard, fixed, flat surface in any orientation. Ensure that the surface
and all fasteners used can support at least 10 times the weight of all fixtures and equipment they
will support.
Fasten the fixture securely. Do not stand it on a surface where it may fall over. If you install the
fixture in a location where it may cause injury or damage if it falls, secure it as directed below with
a securely anchored, approved safety cable that will hold the fixture if the primary fastening
method fails.
! All fasteners used to mount ELP Profile fixtures must be strong enough to
Martin® ELP CL User Manual 11
Page 12
Mounting the fixture on a truss
The fixture can be clamped to a truss or similar rigging structure in any
orientation. Use a suitable rigging clamp such as a G-clamp or a half-coupler
clamp (see illustration on right) fastened to the mounting yoke.
To clamp the fixture to a truss:
Check that the rigging structure can support at least 10 times the we
1.
of all fixture
2.
Block access under the work area
Bolt a rigging clamp securely to the mounting yoke. The bolts used must be M12, gr
3.
steel minim
4. Working from a stable platform, mount the fixture on the truss and fasten the rigging clam
onto the tr
5.
Secure the fixture with a safety cable attached to the rear safety eye as directed below.
s and equipment to be installed
.
um, and fastened with a self-locking nut.
uss.
on it.
ight
ade 8.8
p
Securing with a safety cable
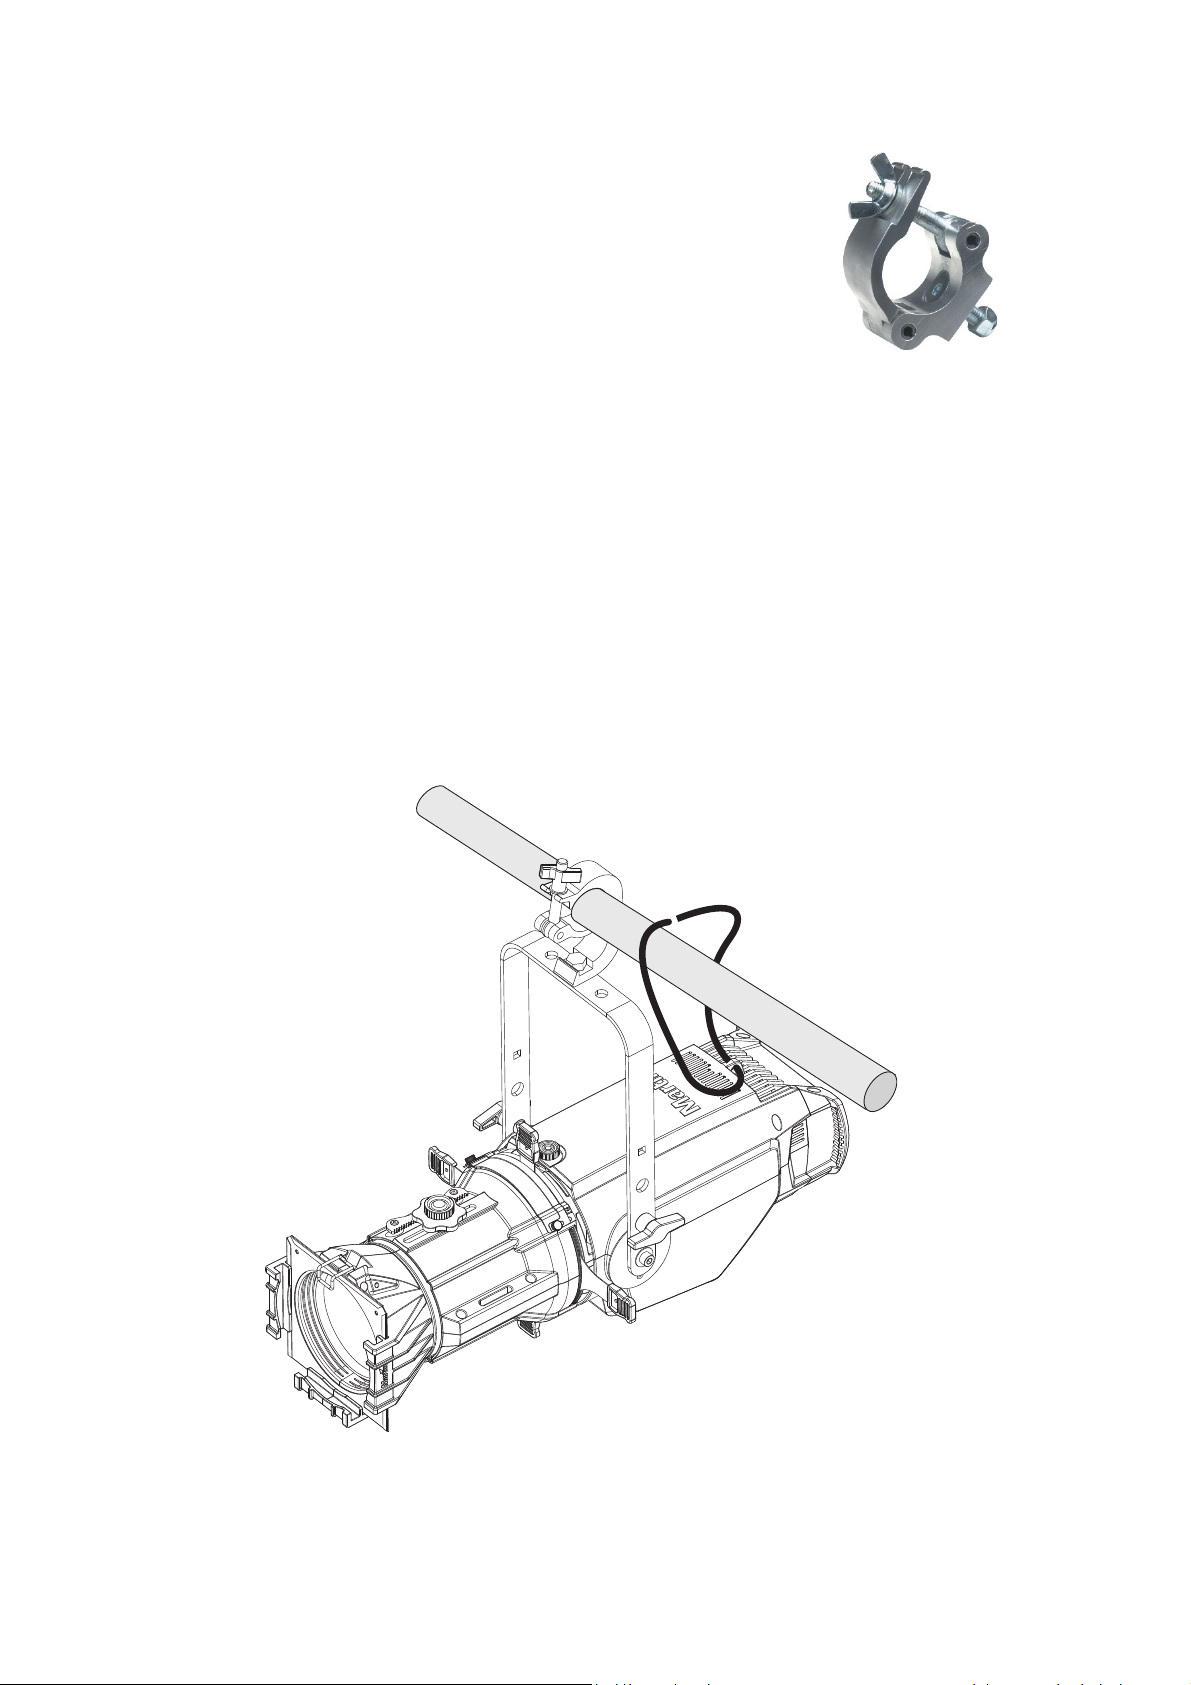
Secure the fixture with a safety cable (or other suitable secondary attachment) that is approved for
the weight of the fixture so that the safety cable will hold the fixture if the primary attachment fails.
Fasten the safety cable to the attachment eye at the rear of the fixture (see illustration below) and
loop it around a secure anchoring point. Take up as much slack in the cable as possible to
minimize any drop if the primary attachment fails.
If a safety cable attachment point becomes damaged or deformed, do not use the fixture. Return it
to a Martin Service Centre for repair.
12 Martin® ELP CL User Manual
Page 13
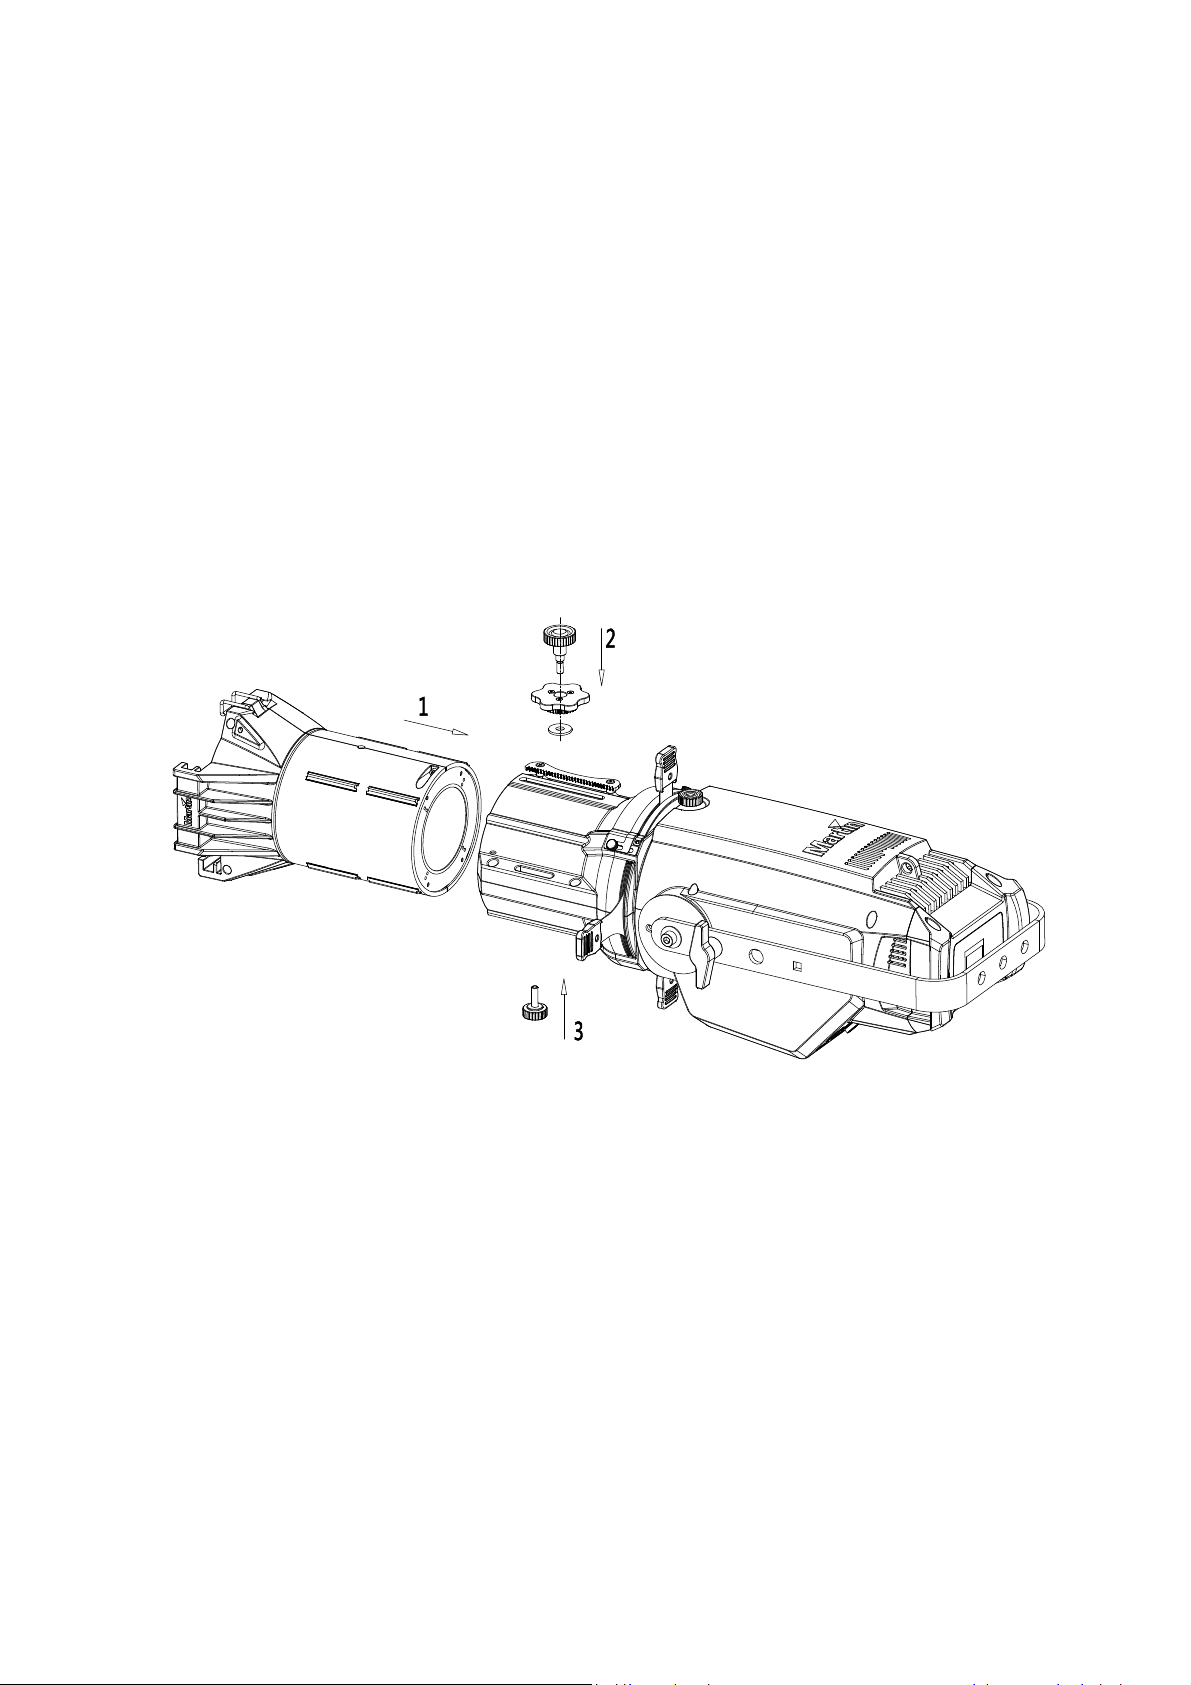
Changing the lens tube
Four different lens tubes with fixed beam angles of 19°, 26°, 36° or 50° are available for the fixture.
Two zoom lens tubes with either 15°-30° or 25°-50° zoom ranges are also availabl
vailable in black or white finish. See ‘Ordering Information’ on page 36 for ordering details.
are a
To change the lens tube, refer to the diagram below:
Hold the front of the lens assembly with one hand so that it cannot fa
1.
2.
Remove the thumbscrews (2) and (3) from the top and bottom of the lens tube. The top scre
as the focusing wheel attached.
also h
Slide the lens tube forward out of the fixture.
3.
4.
Slide in the new lens tube (1).
5.
Begin to thread the thumbscrews (2) and (3) into their holes. For the top screw (2), en
ocusing wheel sits on the screw with the gear teeth facing downwards, towards the fixture.
the f
Rotate the focusing wheel until the gear teeth mesh with the toothed rack on the lens tube
housing.
6.
Tighten the thumbscrews (2) and (3
).
ll out.
e. All lens tubes
w
sure that
Martin® ELP CL User Manual 13
Page 14
AC power
Warning
Warning! The 18 AWG / 0.75 mm
! Read ‘Safety information’ on page 5 before installing the fixture.
2
mains power input cable supplied with the
fixture is rated 6 A and can supply only one fixture with mains power. Do not
connect any device to the fixture’s MAINS OUT socket when using this input
cable. If you want to connect other fixtures to the MAINS OUT socket, see
‘Linking fixtures to power in a chain’ below.
For protection from electric shock, the fixture must be grounded (earthed). The
power distribution circuit must be equipped with a fuse or circuit breaker and
ground-fault (earth-fault) protection.
Important! Do not use an external dimming system to supply power to the fixture, as this may
cause damage to the fixture that is not covered by the product warranty.
The fixture has an auto-ranging power supply that accepts AC mains power at 100-240 V at 50/60
Hz. Do not apply AC mains power at any other voltage or frequency to the fixture.
The fixture can be hard-wired to a building electrical installation if you want to install it
permanently, or a power plug (not supplied) that is suitable for the local power outlets can be
installed on the power cable. Socket outlets or external power switches used to supply the fixture
with power must be located near the fixture and easily accessible so that the fixture can easily be
disconnected from power.
If you install a power plug on the supplied power cable, install a grounding type (earthed) plug with
integral cable grip that is suitable for your local mains voltage and is rated minimum 6 A. Follow
the plug manufacturer’s instructions and connect the wires in the power cable as shown in this
table:
US system
EU system
Live or L Neutral or N
ck White
Bla
Brow
n Blu
e Yellow/gre
Earth, Ground or
Gree
n
en
Linking fixtures to power in a chain
The mains power input cable supplied with the fixture is rated 6 A and can safely supply power to
one fixture only.
If you want to use the MAINS OUT socket on the fixture to link power to another fixture in a daisychain, you must first replace the supplied power input cable with one of the 16 amp rated 12 AWG
/ 2.5 mm
page 36). If you install a power plug on a 12 AWG / 2.5 mm
type (earthed) plug with integral cable grip that is rated minimum 16 A, 250 V.
To link fixtures to power in a daisy-chain, use the 16 amp rated 12 AWG / 2.5 mm
cables available from Martin (see ‘Accessories’ on page 36) to link fixtures’ MAINS OUT sockets to
MAINS IN sockets. Using the 16 amp rated cables available as accessories from Martin, you can
link:
• Maximum four (4) ELP PROFILE fixtures
• Maxim
Do not e
If you create
under ‘Accessories’ on page 36.
2
power input cables available as optional accessories from Martin (see ‘Accessories’ on
2
power input cable, install a grounding
2
power relay
in total at 100-120 V, or
um nine (9) ELP PROFILE fixtures
xceed these limit
s.
in total at 200-240 V.
custom power relay cables, use only the Neutrik PowerCON TRUE1 connectors listed
14 Martin® ELP CL User Manual
Page 15
Control data
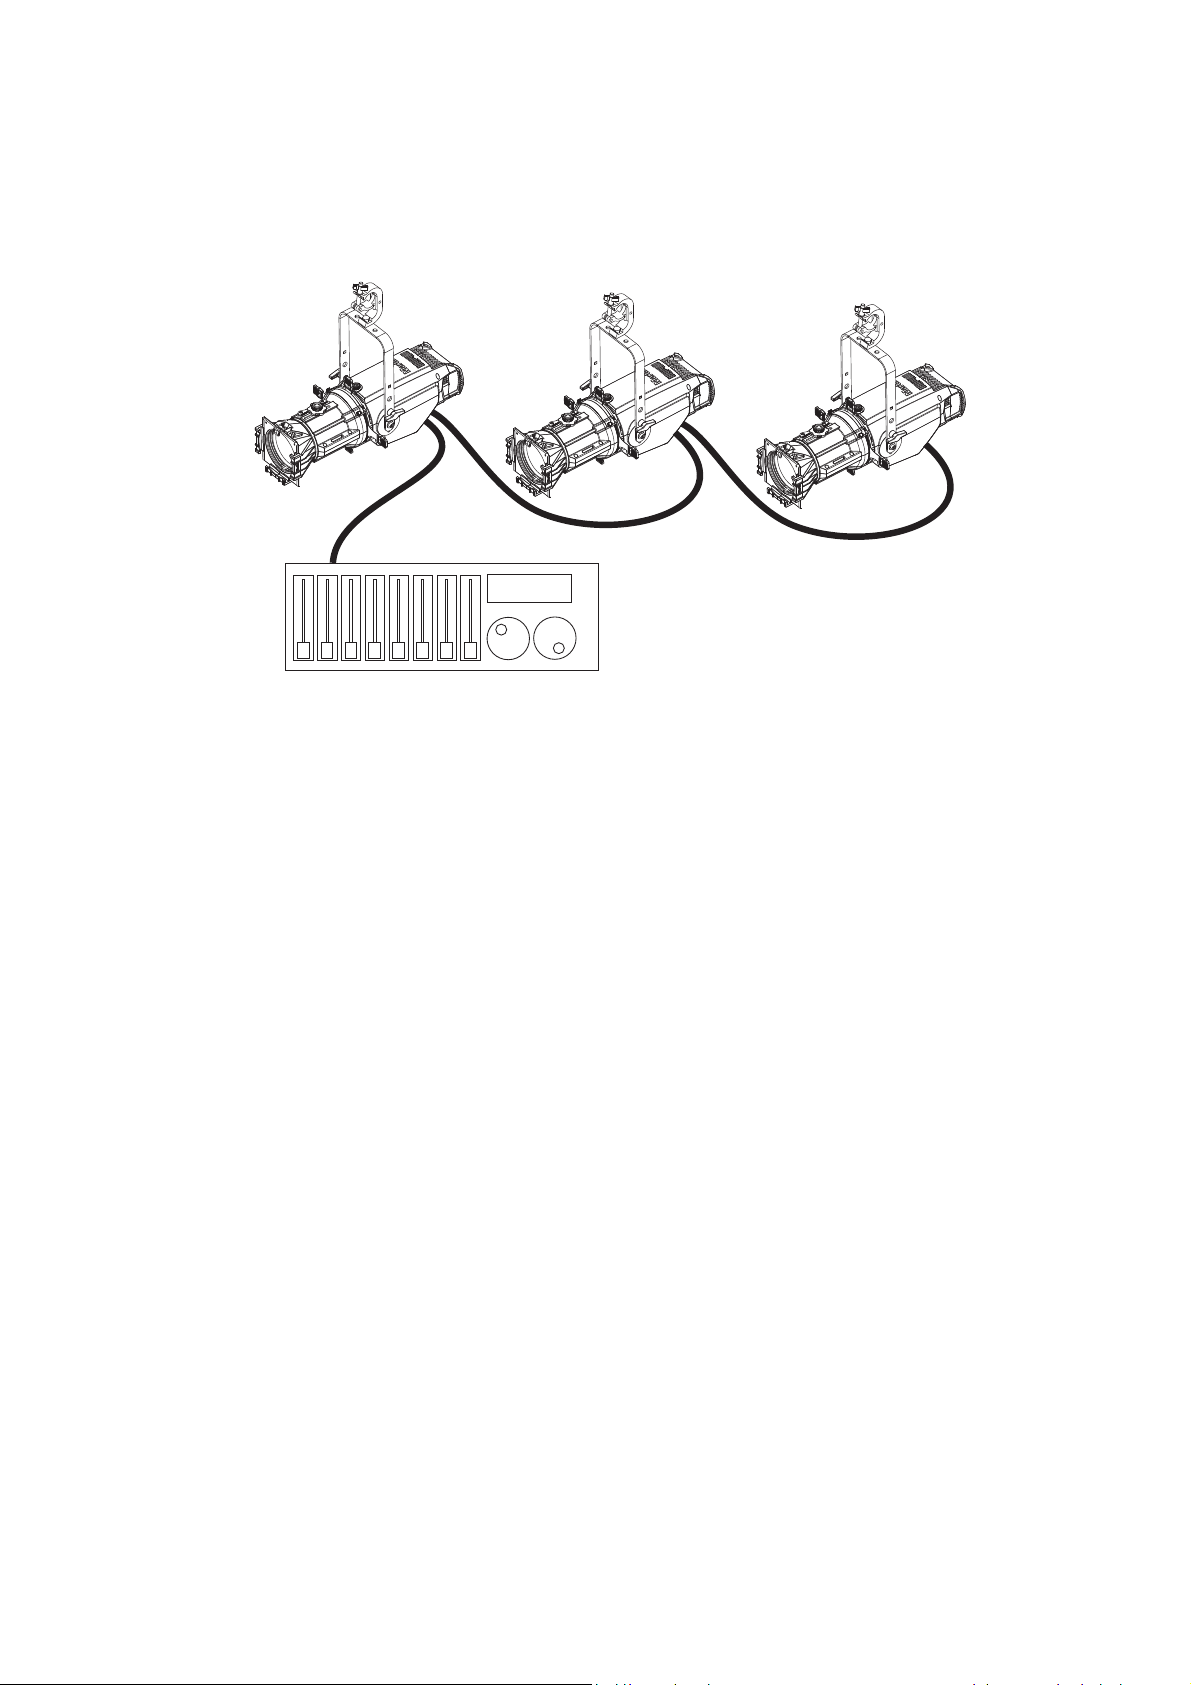
A DMX 512 data link is required in order to control the fixture via DMX. The fixture has 5-pin XLR
connectors for DMX data input and output.
Up to 32 devices can be linked together on a single daisy chain. The total number of fixtures in one
512-channel DMX universe is limited by the number of DMX channels required by the fixtures
Note that if indepe
Fixtures that
To add mo
universe o
re fixtures or groups of fixtures when the above limits are reached, add another DM
r split the daisy-chained link into branches using a powered DMX split
ndent control of a fixture is required, it must have its own DMX channel
are required to behave identically can share the same DMX address and channe
ter.
.
s.
ls.
X
Tips for reliable data transmission
Use shielded twisted-pair cable designed for RS-485 devices: standard microphone cable cannot
transmit control data reliably over long runs. 24 AWG cable is suitable for runs up to 300 meters
(1000 ft.). Heavier gauge cable and/or a DMX buffer is recommended for longer runs. The pin-out
on all connectors is:
• pin 1 = shield
• pin 2 =
• pin 3 = hot (+).
Pins 4 an
additional data signals as required by the DMX512-A standard. Standard pin-out is pin 4 = data 2
cold (-) and pin 5 = data 2 hot (+).
To split the link into branches, use an opto-isolated splitter such as the Martin RDM 5.5 Splitter.
Terminate the link by installing a termination plug in the output socket of the last fixture. The
termination plug, which is a male XLR plug with a 120 Ohm, 0.25 W resistor soldered between
pins 2 and 3, “soaks up” the control signal so it does not reflect and cause interference. If a splitter
is used, terminate each branch of the link.
cold (-)
d 5 in the XLR connectors are not used in the fixture but are passed through for possible
Connecting the DMX data link
To connect the fixture to data:
• Connect the DMX data output from the controller to the closest fixture’s male XLR
c
onnector.
• Connect the first fixture’s DMX output to the DMX input of the next fixture and cont
con
necting fixtures output to input. Terminate the last fixture on the link with a DM
terminatio
n pl
ug.
DMX input
inue
X
Martin® ELP CL User Manual 15
Page 16
Fixture setup
This section explains the fixture characteristics you can set that determine how it can be controlled
and will behave. You choose the settings using the menus available from the control panel, and
they are retained even when the fixture is powered off.
Options can also be set over the DMX link using RDM from a suitable controller, see “Setting
options by RDM” on page 21.
Only the main functions are described in this section. You can see a complete map of the control
menu structure and brief explanations of their purposes in “Control menus” on page 29.
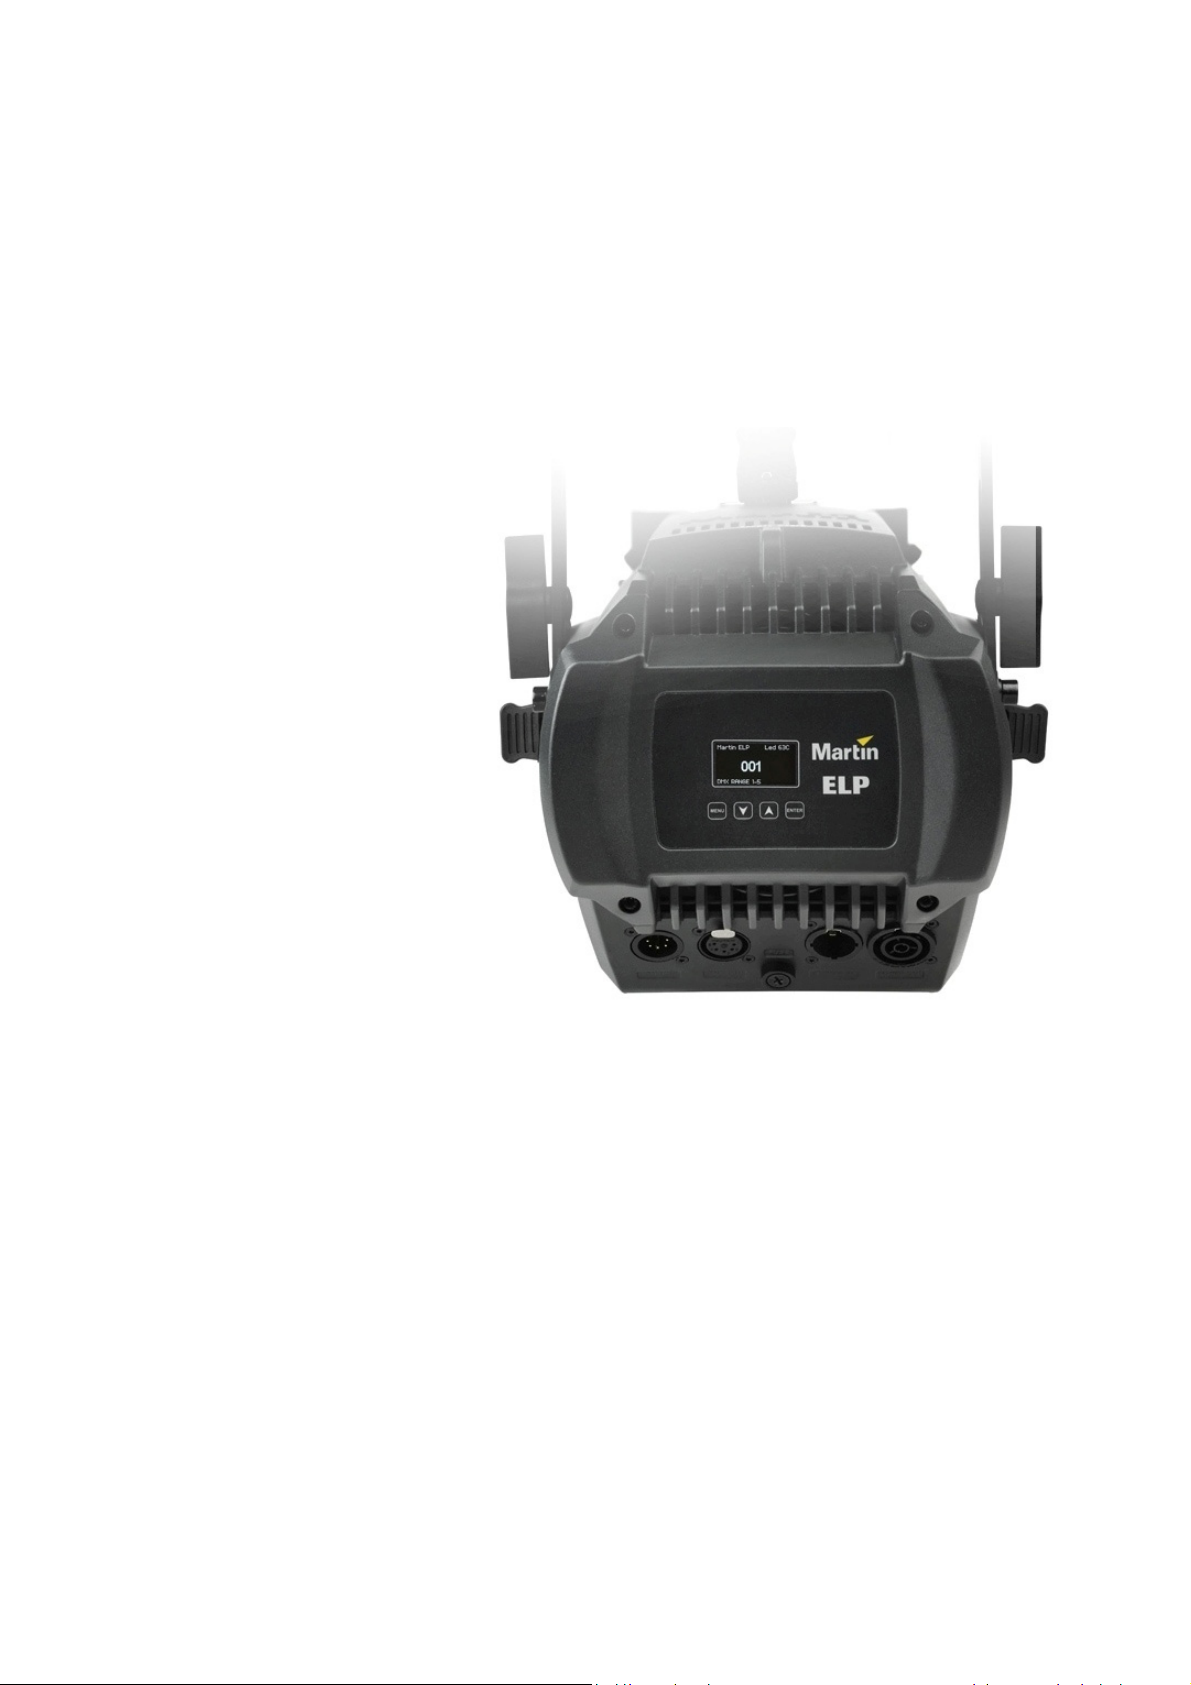
Using the control menus
See photo on right. Use the
fixture’s control panel as follows:
• To access the control menu
pre
ss the MENU bu
• Na
• To sel
• To return to a higher level in
• To exit the co
vigate the menu stru
usin
g the ENTER, DOWN
and UP
confi
ENTER b
the menu
maki
MEN
com
MEN
buttons.
ect a menu option or
rm a selection, press
u
tton.
structure withou
ng a change, press th
U butto
pletely, press and hold
U butto
n.
n.
tton.
ntrol menu
s,
cture
to
the
t
e
s
the
Control panel display
See photo on right. When you
power the fixture on it resets and
then shows the following data in
the control panel display:
• Name of product
• Temperature of LED modul
• DMX add
• DMX Channels currently occupied
The display flashes when the fixture is not receiving a valid DMX signal.
ress currently used
e
Fast focus mode
If you need to focus the fixture but there is nobody to operate the lighting console, you can quickly
turn the fixture on in “Fast Focus mode” using the control panel. Hold down the ENTER button for
5 seconds and the fixture will come on at full brightness in open white for 60 seconds, allowing you
to set the focus. After 60 seconds the fixture will return to normal operation.
Setting the DMX address
Each fixture must be assigned a DMX address. The DMX address, also known as the start
channel, is the first channel used to receive instructions from a DMX controller. The fixture is
controlled using between 1 and 17 DMX channels depending on the personality set. If a fixture
using 17 channels has a DMX address of 1, then it uses channels 1 to 17 inclusive. The following
fixture in the DMX chain can then be set to a DMX address of 18.
16 Martin® ELP CL User Manual
Page 17

For independent control, each fixture must be assigned its own control channels. Two fixtures of
the same type may share the same address if identical behavior is desired. Address sharing can
be useful for diagnostic purposes and symmetric control.
To set the fixture’s DMX address:
1. Enter the control menu and select DMX SETUP. Press ENTER.
2. Select DMX ADDRESS and press ENTER.
3. Use the UP and DOWN buttons to select the desired address setting.
4. Press ENTER to confirm your selection (or to return to the top-level menu without changing the
settings, press the MENU button).
Setting DMX personality
DMX personality sets how many control channels are used. There are 3 personalities to choose
from:
• 1 channel – dimmer only
• 10 channel – 8-bit dimmer with 8-bit control of functions (default)
• 17 channel – 16-bit dimmer with 16-bit control of functions
The commands available on each channel are described in the section “DMX protocol” on page
27.
To set the DMX personality:
1. Enter the control menu and select DMX SETUP. Press ENTER.
2. Select DMX MODE and press ENTER.
3. Use the UP and DOWN buttons to select 1, 10 or 17.
4. Press ENTER to confirm your selection (or to return to the top-level menu without changing the
settings, press the MENU button).
ther fixture settings
O
The PERSONALITY menu allows you to set other options for the fixture.
Stand-alone mode
The fixture can operate in stand-alone mode allowing control of multiple fixtures from a single
host fixture if no DMX console is connected. The options are OFF (default), HOST and
CLIENT. Stand-alone operation will be automatically overridden by incoming DMX signal.
Light quality
The ELP offers two options in the QUALITY menu that let you prioritize either color rendering or
power in the fixture’s light output. The settings available are:
• HIGH QUALITY mode: CRI = 90, color temperature = 6000 K, max. output = 5600 lumens, or
• HIGH OUTPUT mode: CRI = 85, color temperature = 5500 K, max. output = 6900 lumens.
The QUALITY menu also includes a TUNGSTEN setting in which the fixture color temperature
emulates the warm output from a fixture with a tungsten lamp: the color temperature is set to
3000 K and becomes warmer at lower intensity levels.
Besides the TUNGSTEN setting, you can also enter a custom color temperature from 2000 K to
10 000 K.
in 1-Channel DMX Mode, the TUNGSTEN and custom color temperature settings determine the
color temperature of the fixture’s white light output.
In 10-Channel and 17-Channel Modes these settings also determine the base color temperature of
the fixture’s white light output. In these modes you can use color mixing on top of this color
temperature.
Martin® ELP CL User Manual 17
Page 18
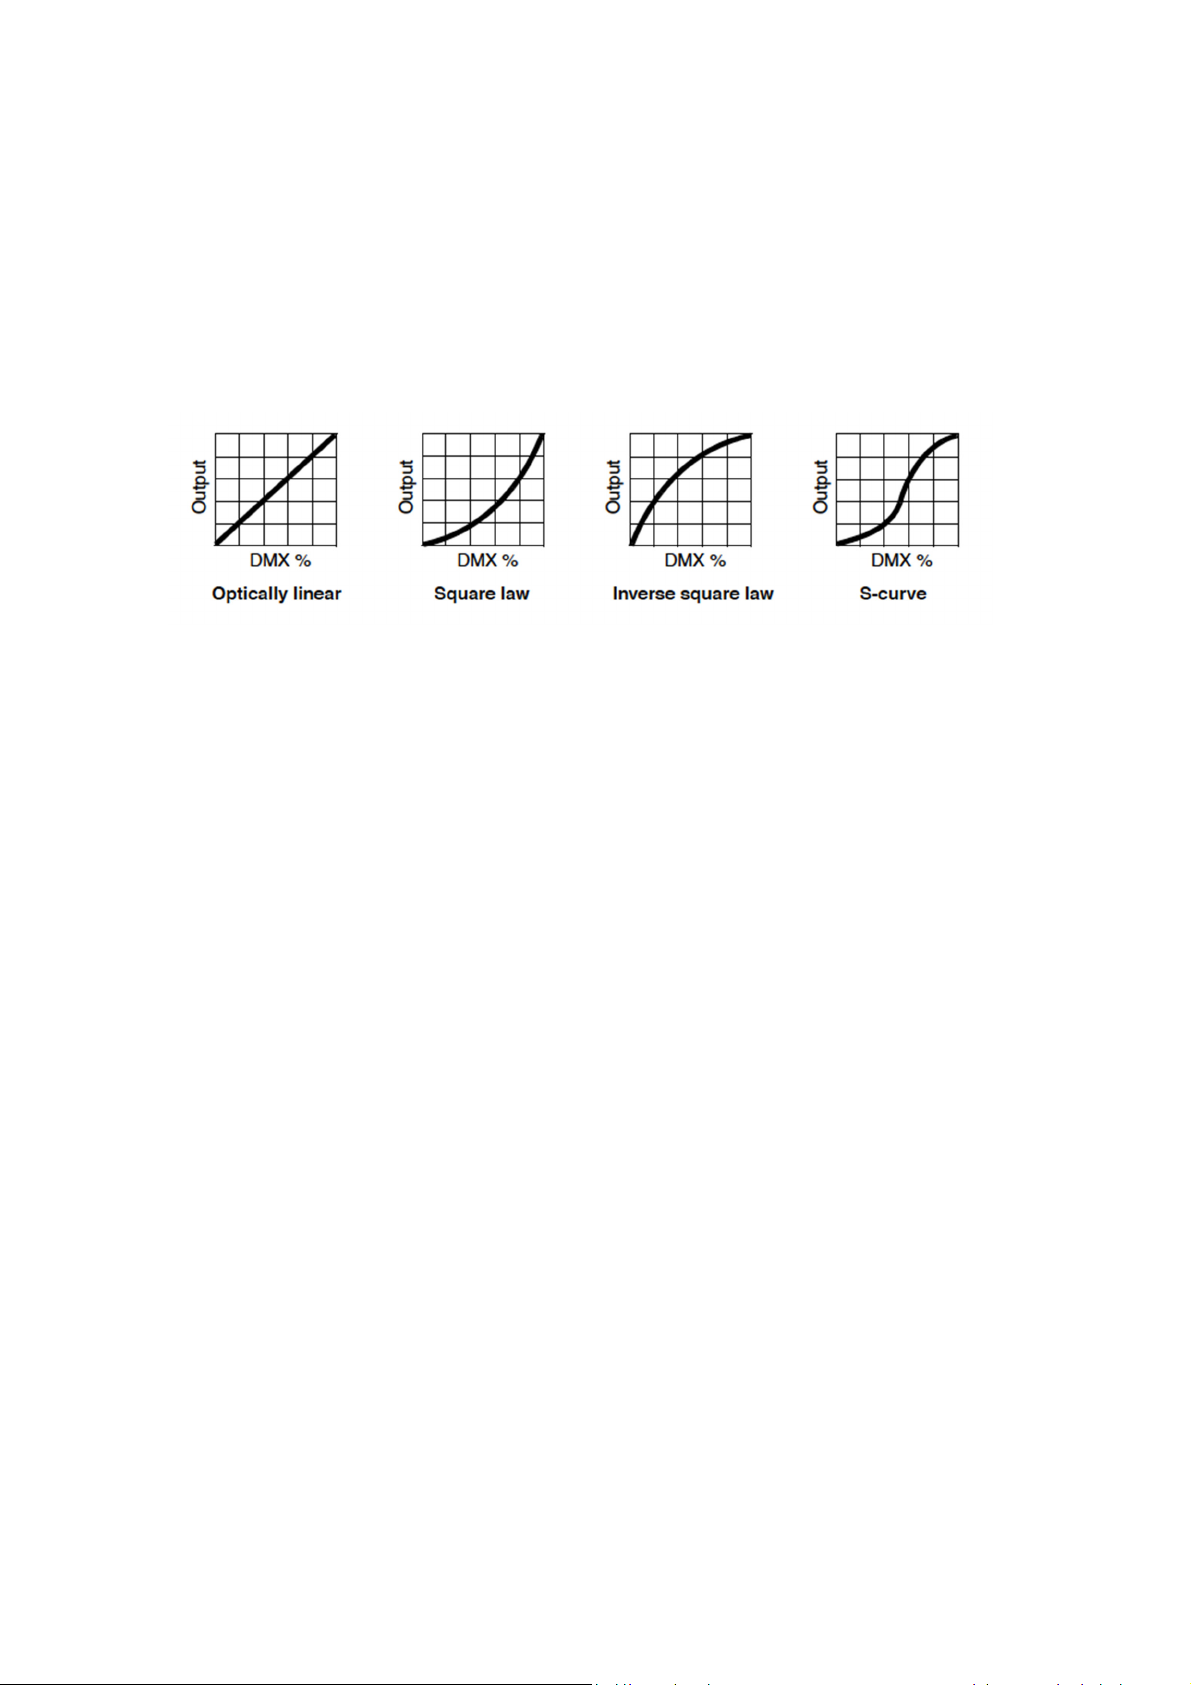
Dimming curves
Four dimming modes are available:
LINEAR The increase in light intensity appears to be linear as DMX value is
increased.
SQUARE LAW light intensity control is finer at low levels and coarser at high levels.
INV SQ LAW (Inverse square law) light intensity control is coarser at low levels and finer
at high levels.
S-CURVE light intensity control is finer at low levels and high levels and coarser at
medium levels.
To set the fixture’s dimmer curve, select DIMMER CURVE from the PERSONALITY menu and
press ENTER to confirm. Use the UP and DOWN buttons to select the desired mode. Press
ENTER to save your selection.
PWM Frequency
Sets the frequency of the PWM dimming used on the fixture. It can sometimes be necessary to
change this if flickering is seen on TV cameras running at a high shutter speed.
The PWM frequency settings available range from 600 Hz to 2400 Hz. The default frequency is
1200 Hz.
No Data Mode
This option sets what will happen when DMX data is not present.
To set No Data Mode, select NO DATA MODE from the PERSONALITY menu and press ENTER
to confirm. Use the UP and DOWN buttons to select:
• BLACKOUT – If data connection is lost, fixture blacks
• HOL
Press ENTER to confirm.
D – If data connection is lost, fixture obeys the last DMX commands received
nnels (default).
cha
out.
on all
Cooling Mode
This option sets whether cooling fan speed is regulated depending on fixture temperature or
whether the cooling fans run at a constant speed.
To set cooling mode, select COOLING MODE from the PERSONALITY menu
to confirm. Use the UP and DOWN buttons to select:
• REGULATED FANS – Fan speed is controlled by fixture temperature. Fans on
spe
ed necessary to keep the fixture within its normal operating temperature ra
output is not redu
ope
rating temperature range
• FUL
• LOW – Fans are set to constant low speed. The maximum light output available is reduced by
Press ENTER to confirm.
L – Fans are set to constant full speed. Light output is not reduced unless full fan spee
not enou
approx. 15% and fan noise is significantly reduced.
gh to keep the fixture within its safe operating temperature range.
ced unless full fan speed is not enough to keep the fixture with
.
and press ENTER
ly run at the
nge. Light
in its safe
d is
18 Martin® ELP CL User Manual
Page 19

Display
This option allows you to set some parameters for the display screen.
Select DISPLAY from the PERSONALITY menu and press ENTER to confirm.
Use the UP and DOWN buttons to select:
• DISPLAY SLEEP – Use the UP and DOWN buttons to select display sl
ON (Di
• DISPLAY ROTATION –Use the UP and DOWN buttons to select Normal (Display ori
norm
• DISPLAY INTENSITY –Use the UP and
100% (defaul
• TEMPERAT
Press ENTER to confir
splay permanently on), 2 MINUTES, 5 MINUTES or 10 MINUTES
al) or ROTATE 180 (Display orientation rotated 180°
DOWN buttons to adjust display intensity from 10%-
t = 100%)
URE UNIT – Use the UP and DOWN buttons to select °C or °F
m.
)
eep time, settings are
entation
Set all settings to factory default
To return all settings to factory default, select DEFAULT SETTINGS and press ENTER to confirm,
FACTORY DEFAULT will show on the display. Press ENTER again.
Use the UP and DOWN buttons to select NO (cancel) or YES (return all settings except
calibrations to factory defaults).
Press ENTER to confirm (or press MENU to exit without making a change).
Fixture test
This menu allows you to run self-test sequences on the fixture’s LED emitters. Each color of
emitters will be switched on in turn.
Fixture information
The INFORMATION menu allows you to view various fixture information: Power on time, LED
hours, Software version, Fixture ID, RDM unique ID, Fan speeds, temperatures.
Viewing live DMX values
This menu allows you to view the current DMX values for any function.
Select the DMX LIVE menu and press ENTER.
Use the UP and DOWN buttons to select the function you wish to view.
Setting control values manually
You can manually set control values. This may be useful when testing, or to use the fixture in a
static setting without a DMX controller.
This menu also allows you to reset the fixture.
Reset
To reset the fixture, go to the MANUAL CONTROL menu and press ENTER. Use the UP and
DOWN buttons to select RESET and press ENTER again.
Then use UP and DOWN to select YES, and press ENTER to activate.
Setting values
Go to the MANUAL CONTROL menu and press ENTER. Use the UP and DOWN buttons to select
the function you wish to control.
Once you have selected a function, press ENTER, then use the UP and DOWN buttons to select a
value from 0 to 255.
Press MENU to go back up and select a different function to control.
Martin® ELP CL User Manual 19
Page 20

Setting a sequence of scenes
The SHOW menu allows the fixture to store up to 20 scenes internally and display them in a timed
sequence.
SET SCENE TOTALS sets how many scenes will be in the sequence, from 1 to 20.
To store scenes, select EDIT SCENE COLOR and press ENTER. Then use the UP and DOWN
buttons to select the scene number to be edited. Press ENTER. Use the UP and DOWN buttons to
select the color to be set (RED, GREEN, BLUE, LIME, AMBER), then press ENTER and finally
use the UP and DOWN buttons to set the brightness of the color.
The FADE TIME option sets the fade time between scenes, from 0-120 seconds (default 3
seconds).
The HOLD TIME option sets the time each scene is shown for, from 0-600 seconds (default 3
seconds).
Color calibration
From the SERVICE menu you can select CALIBRATION. This menu allows you to adjust the
overall brightness and individual colors of the fixture to match with other fixtures. The fixture is
calibrated in the factory but over time the brightness of the LED emitters will gradually decrease,
so this function can be useful if you need to match a new fixture with older ones.
• DIMMER sets the overall maximum brightness of the fixture.
• RED, GREEN, BLUE, LIME, AMBER can be made dimmer or brighter from -128
• LOAD
Because two light quality modes – high-quality and high-output mode – are available in the
PERSONALITY QUALITY menu, from software v.1.2 you can adjust the calibration settings of
each mode separately:
• DEF HQ SET replaces the factory-set calibration values for high-quality mode with the curre
• DEF HO SET replaces the factory-set calibration values for high-output mode with the curre
You must enter a password (019 by default) before you can access these two menu items.
Important! The DEF HQ SET and DEF HO SET commands permanently overwrite the factory-set
calibration values. It is not possible to restore the factory-set values by powering the fixture off and
on, resetting the fixture or uploading new firmware. Once you have saved custom calibration
values using DEF HQ SET and DEF HO SET commands, the only way to return to the original
factory-set values is to re-adjust the calibration settings for the dimmer and the individual colors
back to their original values..
DEFAULTS will load the factory-set calibration values. If you have replaced the factoryset values with custom values using DEF HQ SET or DEF HO SET (see below) it
cu
stom values.
cu
stom calibration values that you have set using the commands listed above.
cu
stom calibration values that you have set using the commands listed above.
to 127.
will load the
nt
nt
20 Martin® ELP CL User Manual
Page 21
Setting options by RDM
You can remotely configure the fixture over the DMX line using a suitable RDM-compatible
controller that is connected to the installation via a DMX data link.
A full list of the RDM functions that the ELP fixture supports is given at the end of this chapter.
These functions are generally referred to using the more specific term ‘PIDs’ or ‘Parameter IDs’.
Scanning for RDM devices on the data link
Before you can communicate with fixtures using RDM, you must send a scan command (also
called a device discovery command) to all the devices on the data link so that the RDM controller
can identify them. It does this by retrieving each device’s factory-set unique identifier (UID). This
process can take some time depending on the number of devices on the link.
Getting status and setting options by RDM
The status and options listed in the table below can be read and set by RDM.
You can set an option on one fixture by sending a unicast RDM command to that one fixture only,
or you can set the same option on all the fixtures on the data link by sending a broadcast RDM
command to all the devices on the link.
For status reading, you can only use unicast RDM to read information from an individual fixture.
RDM
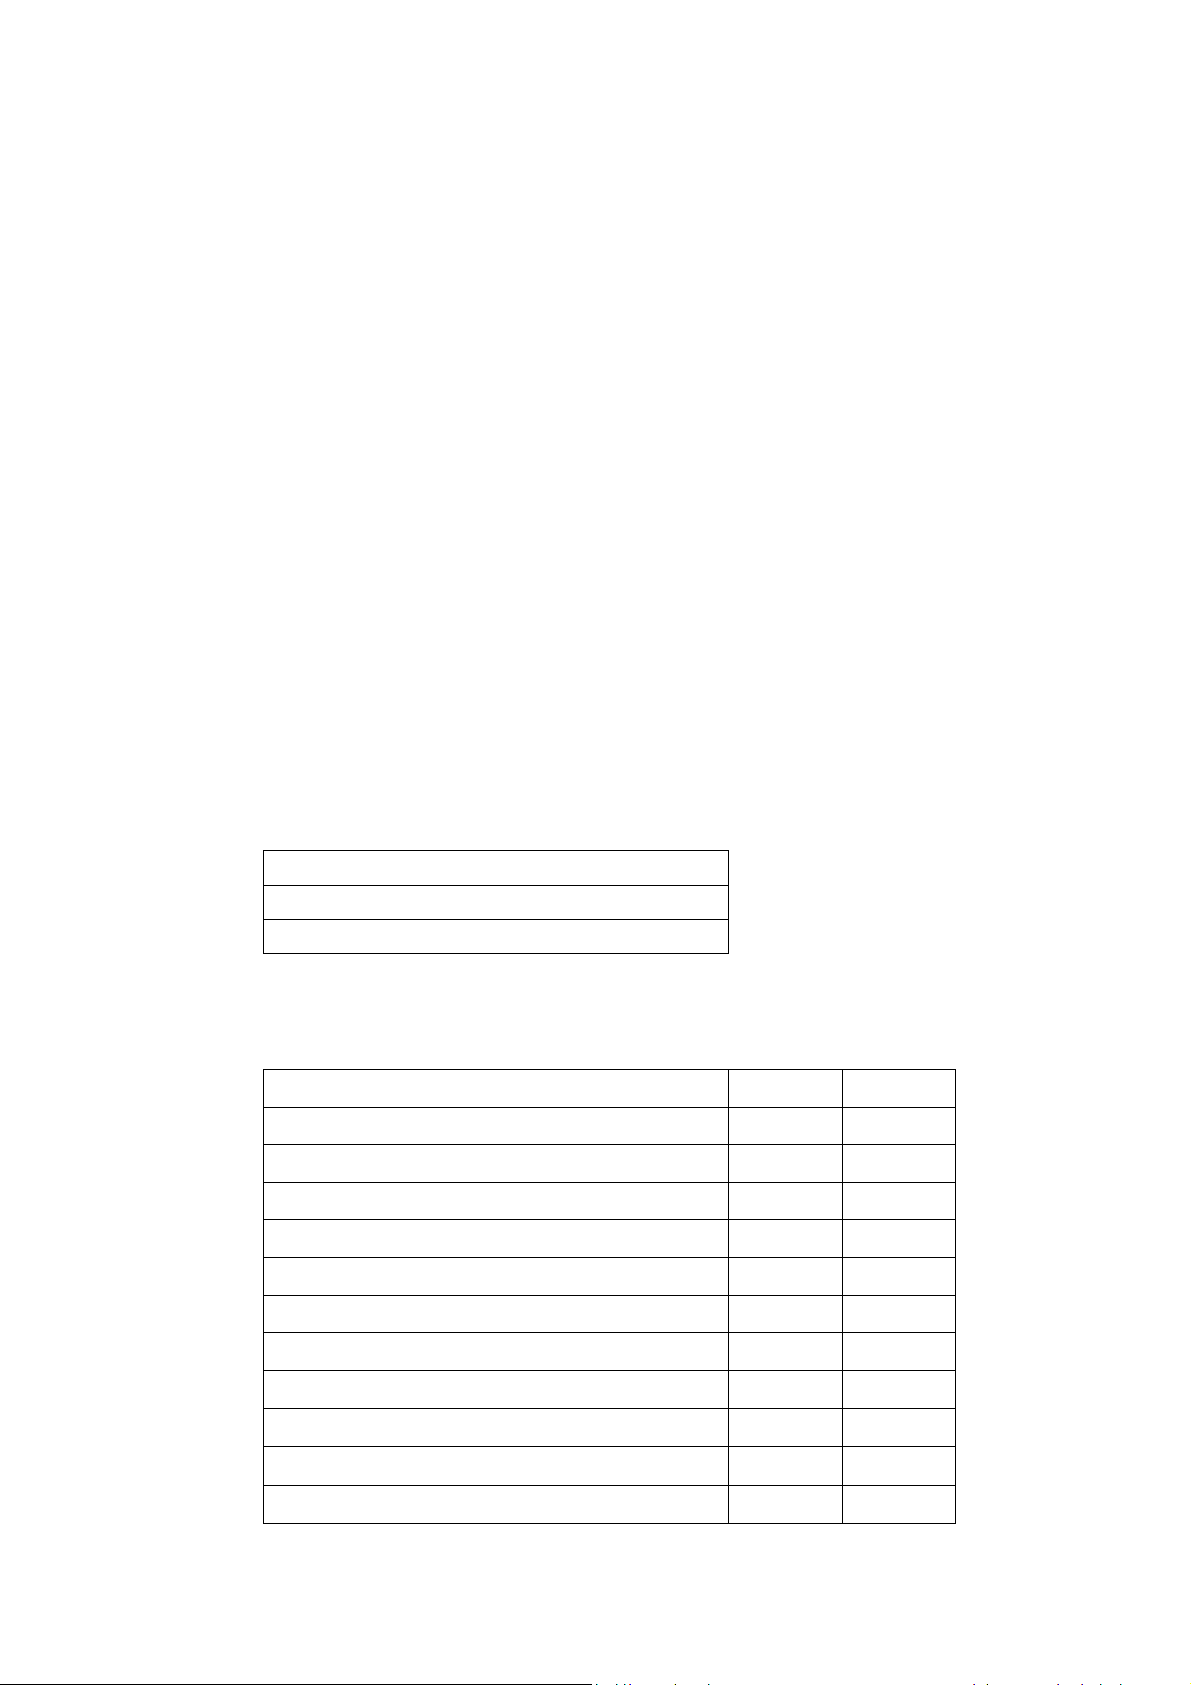
As a minimum, the ELP CL supports the following RDM functions:
Device discovery
DISC_UNIQUE_BRANCH
DISC_MUTE
DISC_UN_MUTE
Device management
UED_MESSAGE
QUE
STATUS_MESSAGES
STATUS_ID_DESCRIPTION
SUPPORTED_PARAMETERS
DEVICE_INFO
DEVICE_MODEL_DESCRIPTION
MANUFACTURER_LABEL
GET SET
DEVICE_LABEL
SOFTWARE_VERSION_LABEL
BOOT_SOFTWARE_VERSION_ID
BOOT_SOFTWARE_VERSION_LABEL
DMX_PERSONALITY
Martin® ELP CL User Manual 21
Page 22

DMX_START_ADDRESS
DEVICE_HOURS
IDENTIFY_DEVICE
LAST_STATE
DIMMER_CURVE
22 Martin® ELP CL User Manual
Page 23
Effects
This section describes the effects provided by the ELP CL. See ‘DMX protocol’ on page 27 for a
full list of the DMX channels and values required to control the different effects.
In 17Ch DMX control mode, all intensity controls are 16-bit. In 10Ch mode all controls are 8-bit.
Dimming
Overall intensity can be precisely adjusted from 0 to 100% using 16-bit coarse and fine control. In
10Ch mode the control is 8-bit. In 1Ch mode this is the only control and the fixture is fixed in white.
Strobe effects
An electronic shutter provides instant open and blackout, random and variable speed flash from 1
to 12 flashes per second, and pulse effects.
CTC
The color temperature of the fixture can be set from 2000K to 10000K using 16-bit coarse and fine
control. When the CTC function is active, the color control channels are not used.
Color mix
The fixture is equipped with Red, Green, Blue, Lime and Amber emitters which can be individually
controlled using 16-bit coarse and fine control.
Color Scene
You can select from a range of fixed color temperatures and LEE color filters. If the Color Scene
function is active the Color mix channels are not used.
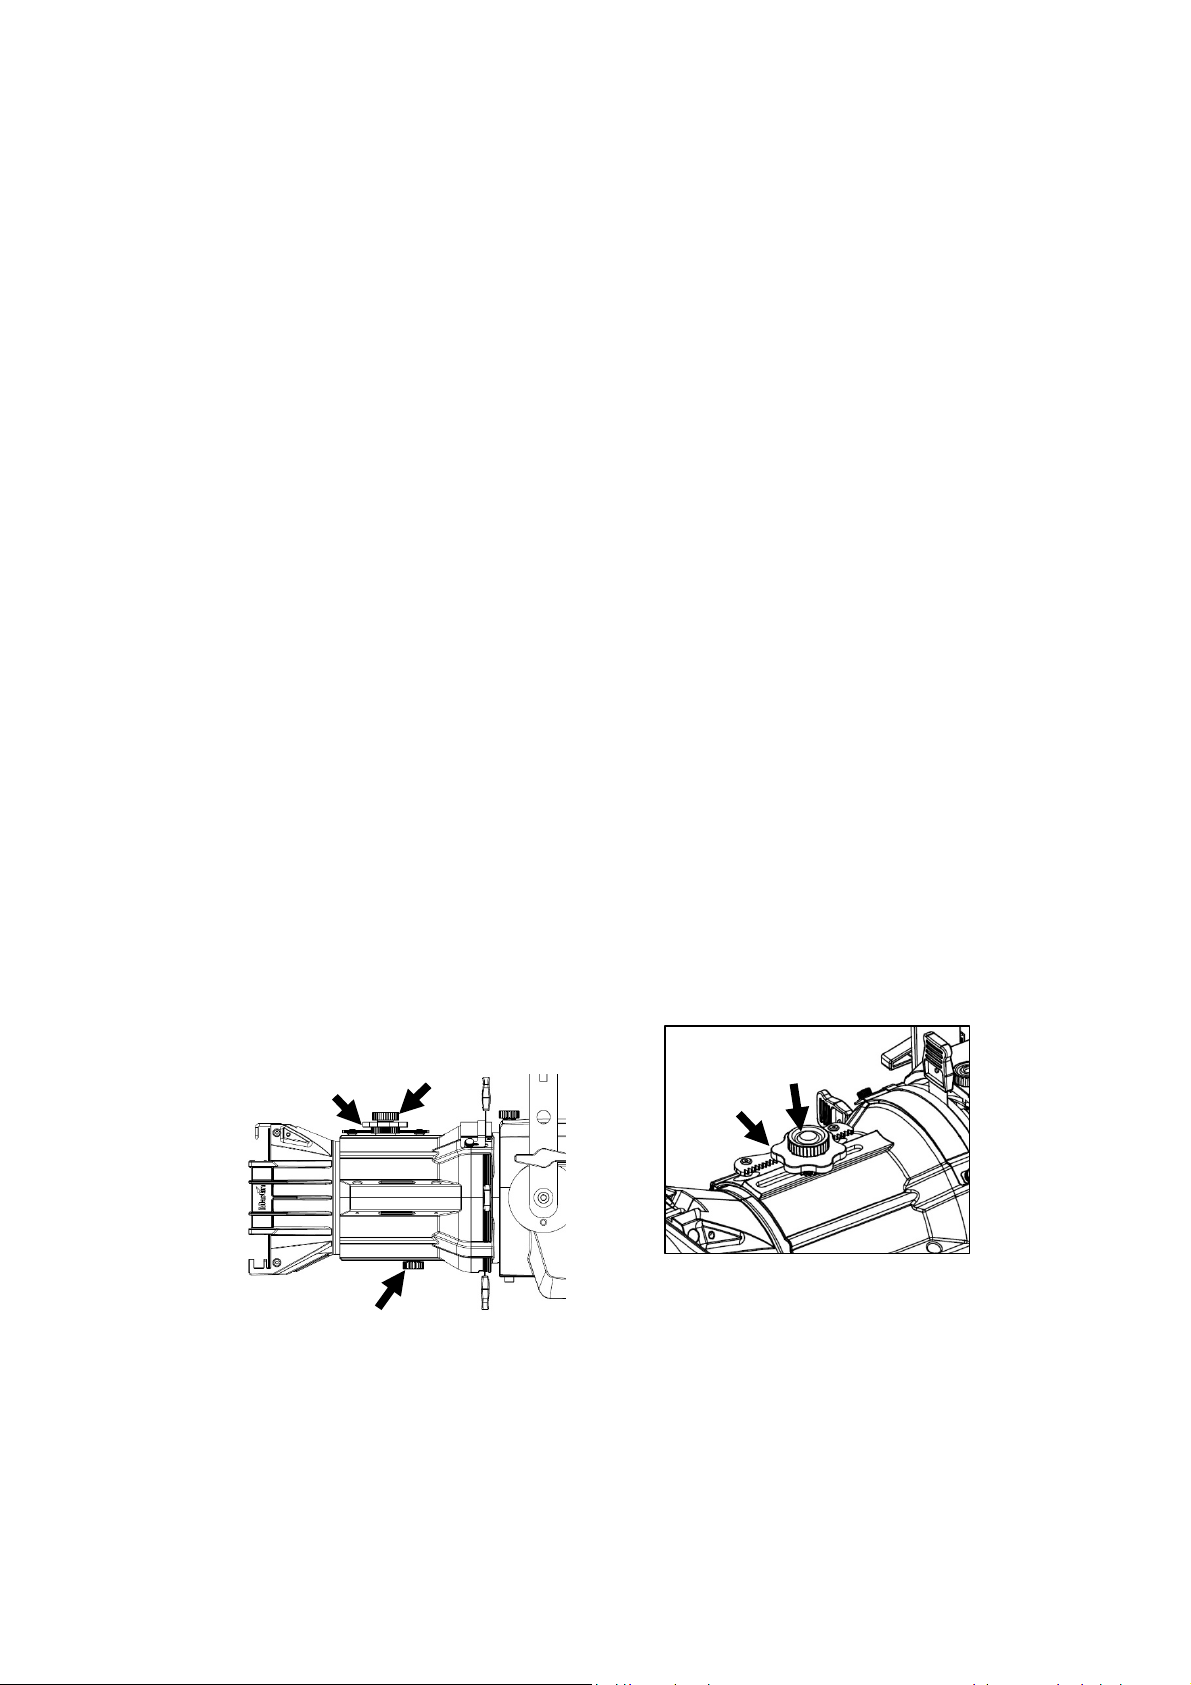
Manual focus
The ELP CL has a unique “Fine Focus” system which allows you to easily make small focus
adjustments using a gear-based wheel on top of the lens tube. To focus the fixture, see drawings
below. Loosen the thumbscrews A and B on the top and bottom of the lens tube slightly, then turn
the focus wheel C to slide the lens in or out of the tube. Tighten the thumbscrews A and B again to
hold the focus setting.
A
C
A
C
B
Manual beam shaping shutters
The fixture has 4 manually operated beam shaping shutters.
To change the shape of the beam, power the fixture on and aim the beam at the target. Use the
four shutter blade handles (see 6 in ‘Fixture overview’ on page 10) to adjust the position of the
shutter blades and obtain the desired beam shape.
Martin® ELP CL User Manual 23
Page 24
Use of filters
The color filter frame that is supplied with the lens tube lets you add color correction or diffusion
filters to the front of the fixture. Push the filter retaining clip (see 1 in ‘Fixture overview’ on page 10)
to one side to insert and remove filters. Click the retaining clip back into place after inserting a filter
and check that the clip is secure to prevent the color filter frame from falling out.
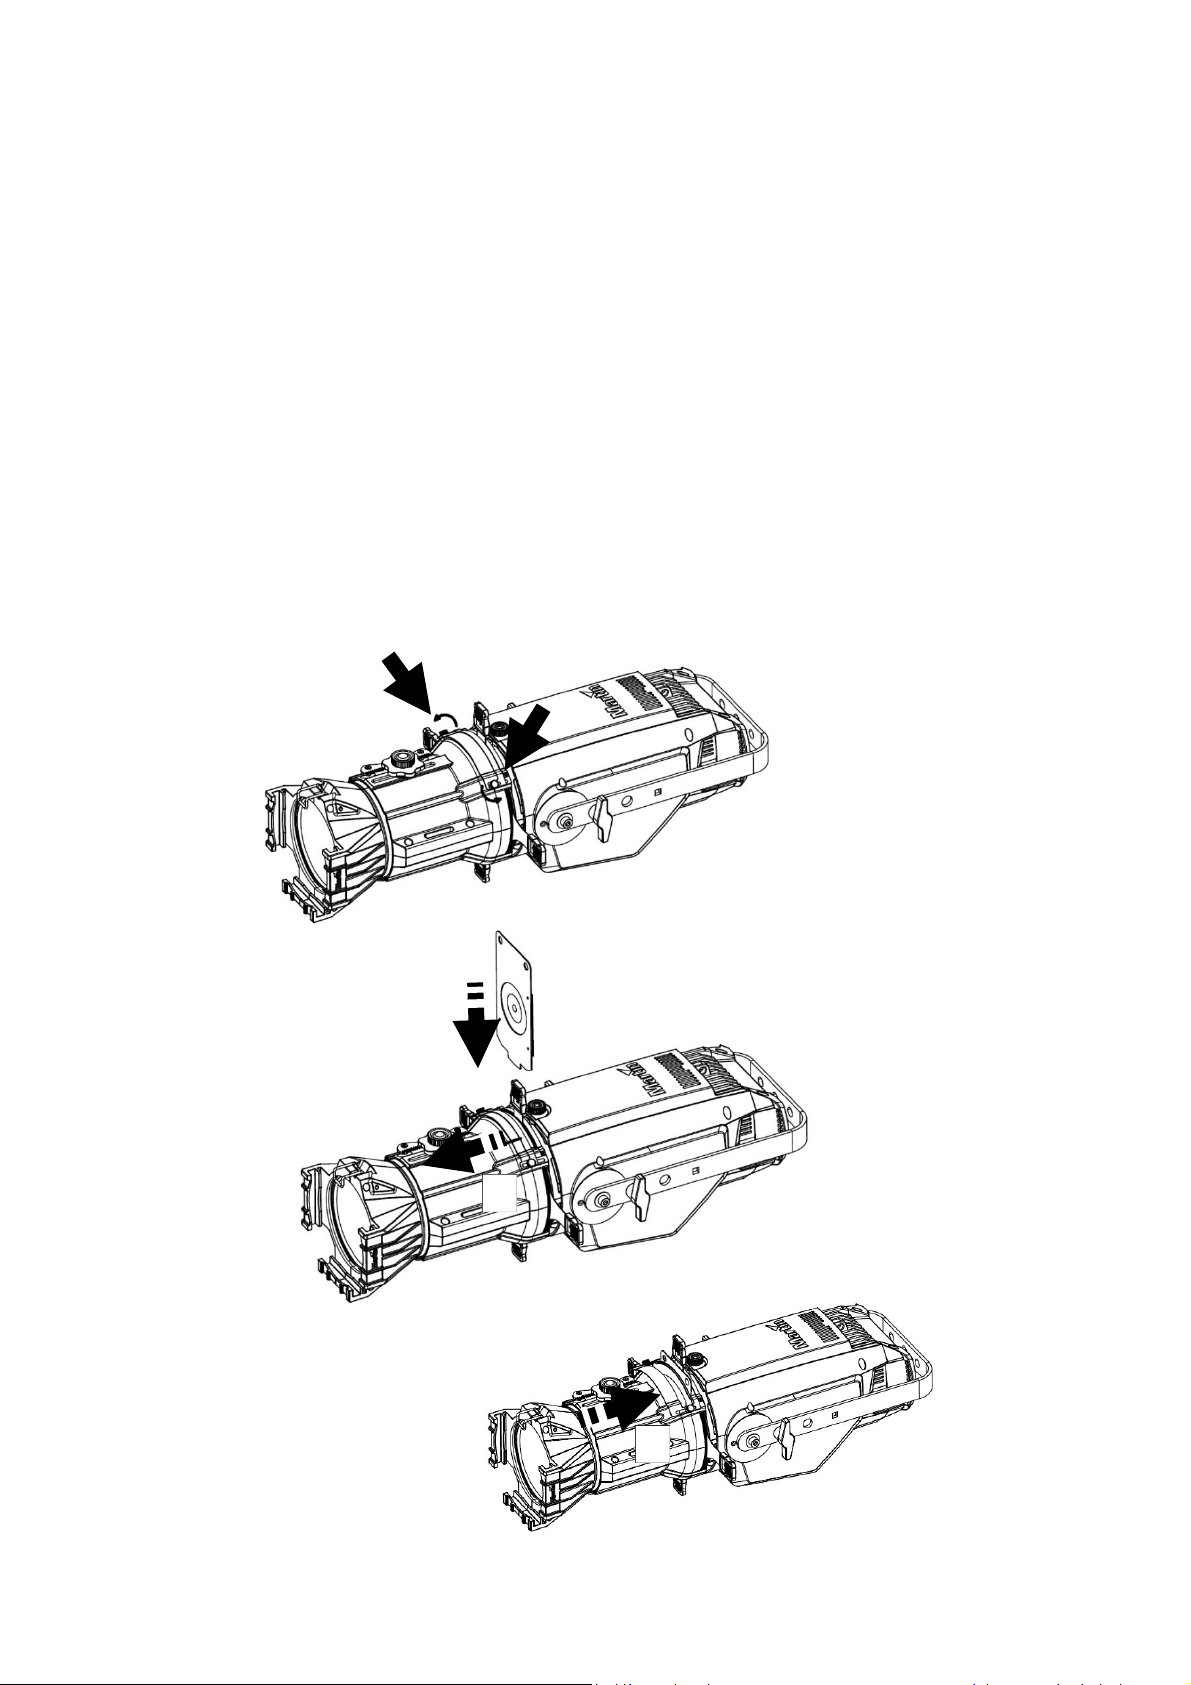
Use of gobos and irises
The fixture will accept an A-size or B-size goboholder or an iris (items not included) in the
gobo/accessory gate. There is a sliding cover over the gate to prevent light spill and retain the
goboholder in the fixture. To install a goboholder or iris:
1. Allow the fixture to cool. See drawing below. Loosen, but do not remove, the two thumbscrews
(arrowed) at the sides of the cover.
2. Slide the cover towards the front of the fixture.
3. Slide the goboholder into the accessory gate in the fixture.
4. Slide the cover back so that it holds the goboholder in place and tighten the thumbscrews.
1
2
3
4
24 Martin® ELP CL User Manual
Page 25

Service and maintenance
Warning
Refer any service operation not described in this user manual to a qualified
service technician.
Excessive dust, smoke fluid, and particle buildup degrades performance,
causes overheating and will damage the fixture. Damage caused by inadequate
cleaning or maintenance is not covered by the product warranty.
Disconnect mains power before cleaning or servicing the fixture.
Service fixtures in an area where there is no risk of injury from failing parts, tools
or other materials.
! Read ‘Safety information’ on page 5 before servicing the fixture.
Cleaning
The cleaning of external optical lenses must be carried out periodically to optimize light output.
Cleaning schedules for lighting fixtures vary greatly depending on the operating environment. It is
therefore impossible to specify precise cleaning intervals for the fixture. Environmental factors that
may result in a need for frequent cleaning include:
• Use of smoke or fog machi
• High ai
• Presen
• Airbo
outdoo
If one or more of these factors i
see whether cleaning is necessary. Check again at frequent intervals. This procedure will allow
you to assess cleaning requirements in your particular situation. If in doubt, consult your Martin
dealer about a suitable maintenance schedule.
Use gentle pressure only when cleaning, and work in a clean, well-lit area. Do not use any product
that contains solvents or abrasives, as these can cause surface damage.
To clean the fixture:
1. Disconnect the fixture from power and allow it to cool for at least 10 minutes
2. Vacu
vent
3. Clean the lens by
detergent sol
with a soft, cl
an un
remo
4. Check that the fixture is dry before reapplying powe
rflow rates (near air conditioning vents, for exam
ce of cigarette smok
rne dust (from stage effects, building structures and fittings or the natural environm
r events, for exampl
um or gently blow away dust and loose particles from the outside of the fixture an
s at the back and sides of the head and in the base with low-pressure compressed ai
wiping gently with a soft, clean lint-free cloth mois
ution. Do not rub the surface hard: lift particles off with a soft repeated pres
ean, lint-free cloth or low-pressure compressed air. Remove stuck parti
scented tissue or cotton swab moistened with glass cleaner or distilled water. You ca
ve the lens tube to clean the rear side of the lens if needed.
nes.
ple).
e.
ent at
e).
s present, inspect fixtures within their first 100 hours of operation to
.
d the air
r.
tened with a weak
s. Dry
cles with
n
r.
Fuse replacement
If you need to replace a fuse:
1. Disconnect the fixture from power and allow it to cool for at least 10 minutes
2. Un
3. Reinstall the fuseholder cap before reapplying powe
screw the cap of the fuseholder (see Fixture overview on page 10) and remo
ace with a fuse of the same size and rating only.
Repl
r.
.
ve the fuse.
Uploading new firmware
Martin releases new firmware (fixture software) from time to time if it can improve functionality of
Martin fixtures. All firmware versions are available from the Martin website. You can install
firmware using a Windows PC running the Martin Companion software suite with a Martin
Martin® ELP CL User Manual 25
Page 26

Companion Cable USB/DMX hardware interface connected to the DMX link or directly to the
fixture’s DMX IN connector.
You can check the currently installed firmware version in the INFORMATION menu in the fixture’s
control panel.
If you update firmware to a newer version, check the ELP area of www.martin.com to see whether
an updated version of this User Manual is available for the new firmware.
Installing using a PC running Martin Companion
Important! Do not switch the fixture off or disconnect the source of the firmware during an upload,
or the firmware will be corrupted.
The following are required in order to install firmware using a PC:
• A Windows PC running the latest version of the Martin Companion software suite (availa
downloa
• The late
Martin fixtu
the Internet.
• A Martin Companion Cable USB-DMX hardware interface, available from your Martin supplier
by o
To install the
1. Apply power to the fixture(s) and allow to boot. Connect the Martin Compani
hardware inte
ELP fixture
updated.
2. Start the PC and lau
3. Locate the latest ELP firmwa
CL
4. Start the firmwa
Do not di
com
5. If you are updating multiple fixtures over a DMX link, check that they have all reb
co
d from the Martin website at www.martin.com
st ELP CL firmware file. Martin Companion automatically download
re firmware cloud when Martin Companion is launched on a PC that is connected to
rdering P/N 9161609
ELP CL firmware using Martin Companion:
rface to your PC and to the fixture’s DMX IN connecto
s that are powered on and connected to the DMX link will have thei
).
re upload by clicking
sconnect the Martin Companion cable or power off the fixture(s) until the uploa
plete and the fixture(s) has successfully rebooted.
rrectly.
1.
nch the Martin Companion applic
re in the Martin Companion application (
Update Firmware
).
r or to the DMX link. All
ation.
Firmware ELP ELP
in the Martin Companion application.
s this file from the
on Cable
r firmware
ooted
ble for
d is
Service and repairs
There are no user-serviceable parts inside the fixture. Do not open the housing.
Do not try to repair the fixture by yourself as this may result in damage, malfunction and it may
potentially void your product warranty. The equipment must only be serviced or repaired by an
authorized Martin service technician.
Installation, on-site service and maintenance can be provided worldwide by the Martin Professional
Global Service organization and its approved agents, giving owners access to Martin’s expertise
and product knowledge in a partnership that will ensure the highest level of performance
throughout the product’s lifetime. Please contact your Martin supplier for details.
26 Martin® ELP CL User Manual
Page 27
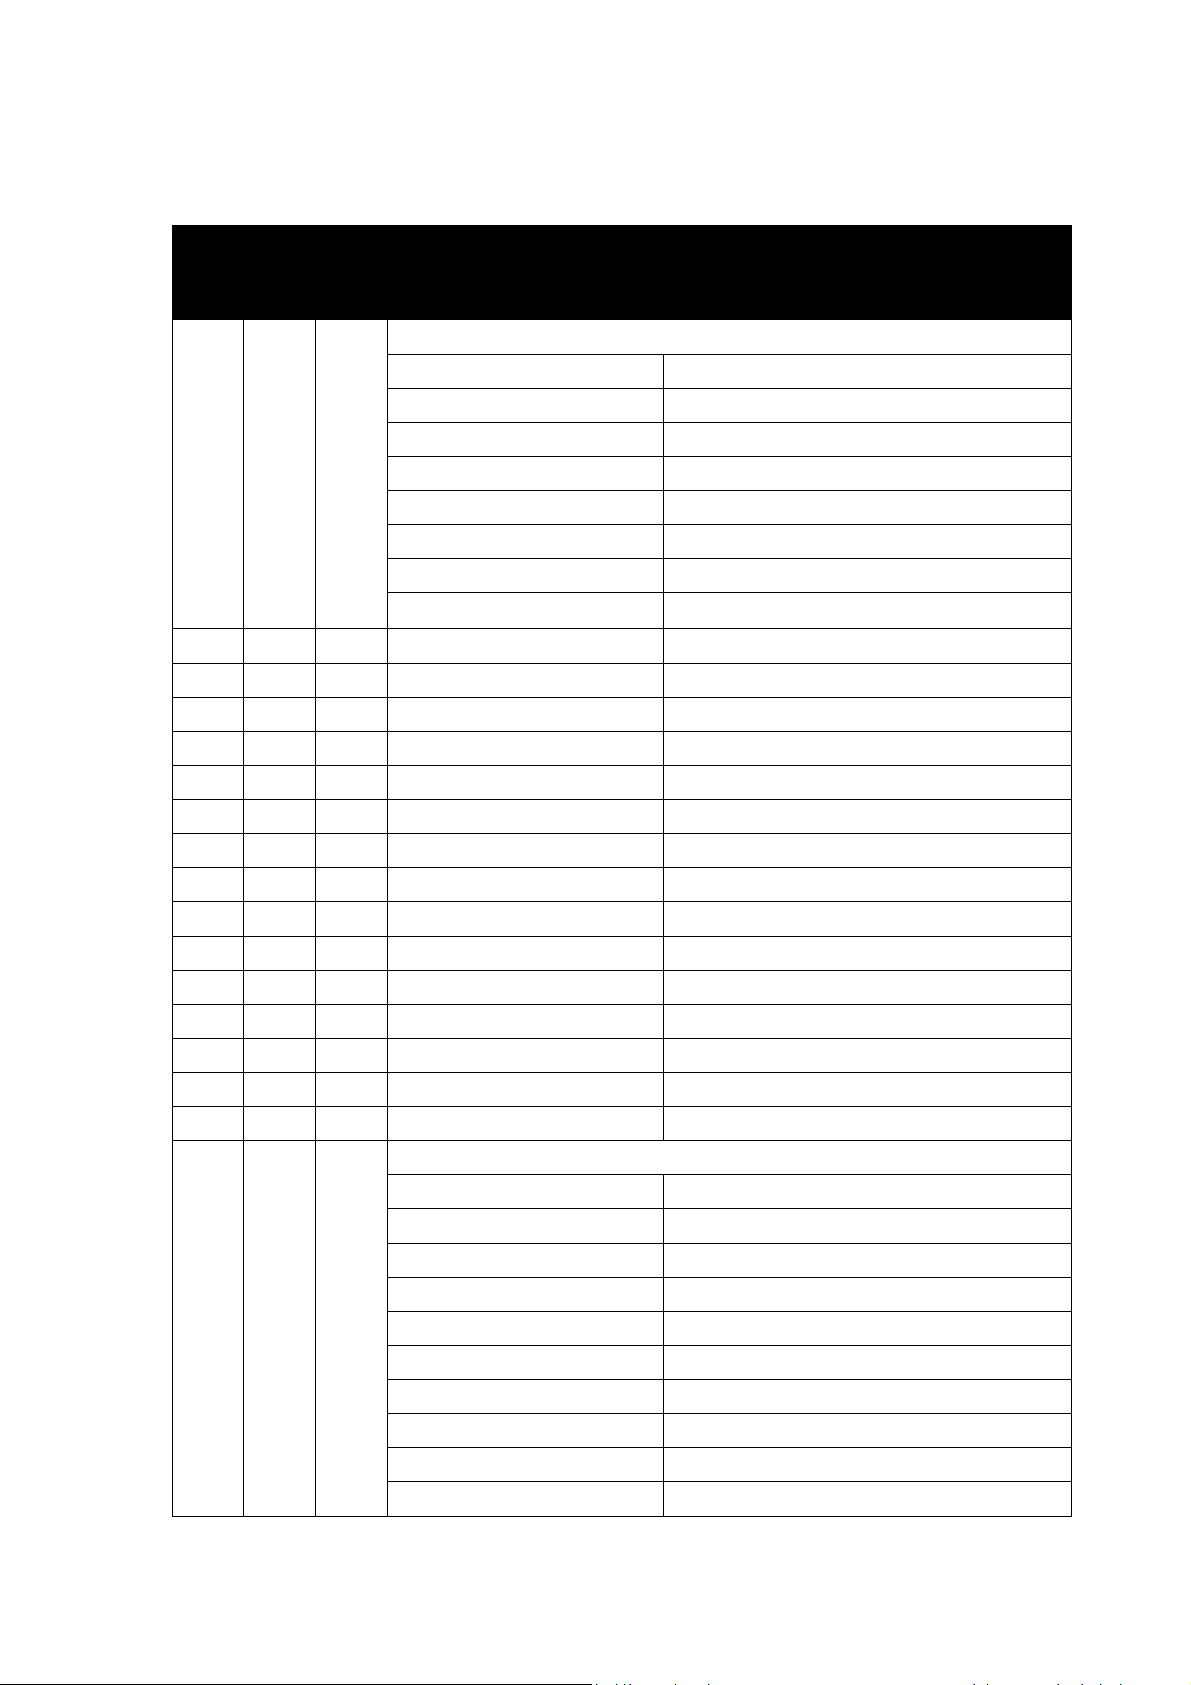
DMX protocol
Channel
1CH 10CH 17CH
DMX range Function
Shutter
000-009 Blackout
010-019 Open
020-089 Strobe (Slow-Fast)
1 1
1 2 2
3
3 4
4 5
6
5 7
8
6 9
10
7 11
12
8 13
090-099 Open
100-169 Pulse effect in sequences
170-179 Open
180-249 Random strobe effect (Slow-Fast)
250-255 Open
0-255 Dimmer 0-100%
0-255 Dimmer Fine
0-255 Dimmer fade time
0-255 CTC 2000K – 10000K
0-255 CTC fine
0-255 Red 0-100%
0-255 Red fine
0-255 Green 0-100%
0-255 Green fine
0-255 Blue 0-100%
0-255 Blue fine
0-255 Lime 0-100%
14
9 15
16
10 17
0-255 Lime fine
0-255 Amber 0-100%
0-255 Amber fine
Color Scene
0-10 No function
11-19 2000K-2700K
20-28 2700K-3200K
29-37 3200K-4200K
38-46 4200K-5600K
47-55 5600K-8000K
56-65 8000K-10,000K
66-74 Light Pink
75-84 Pale Amber Gold
85-93 Yellow
Martin® ELP CL User Manual 27
Page 28
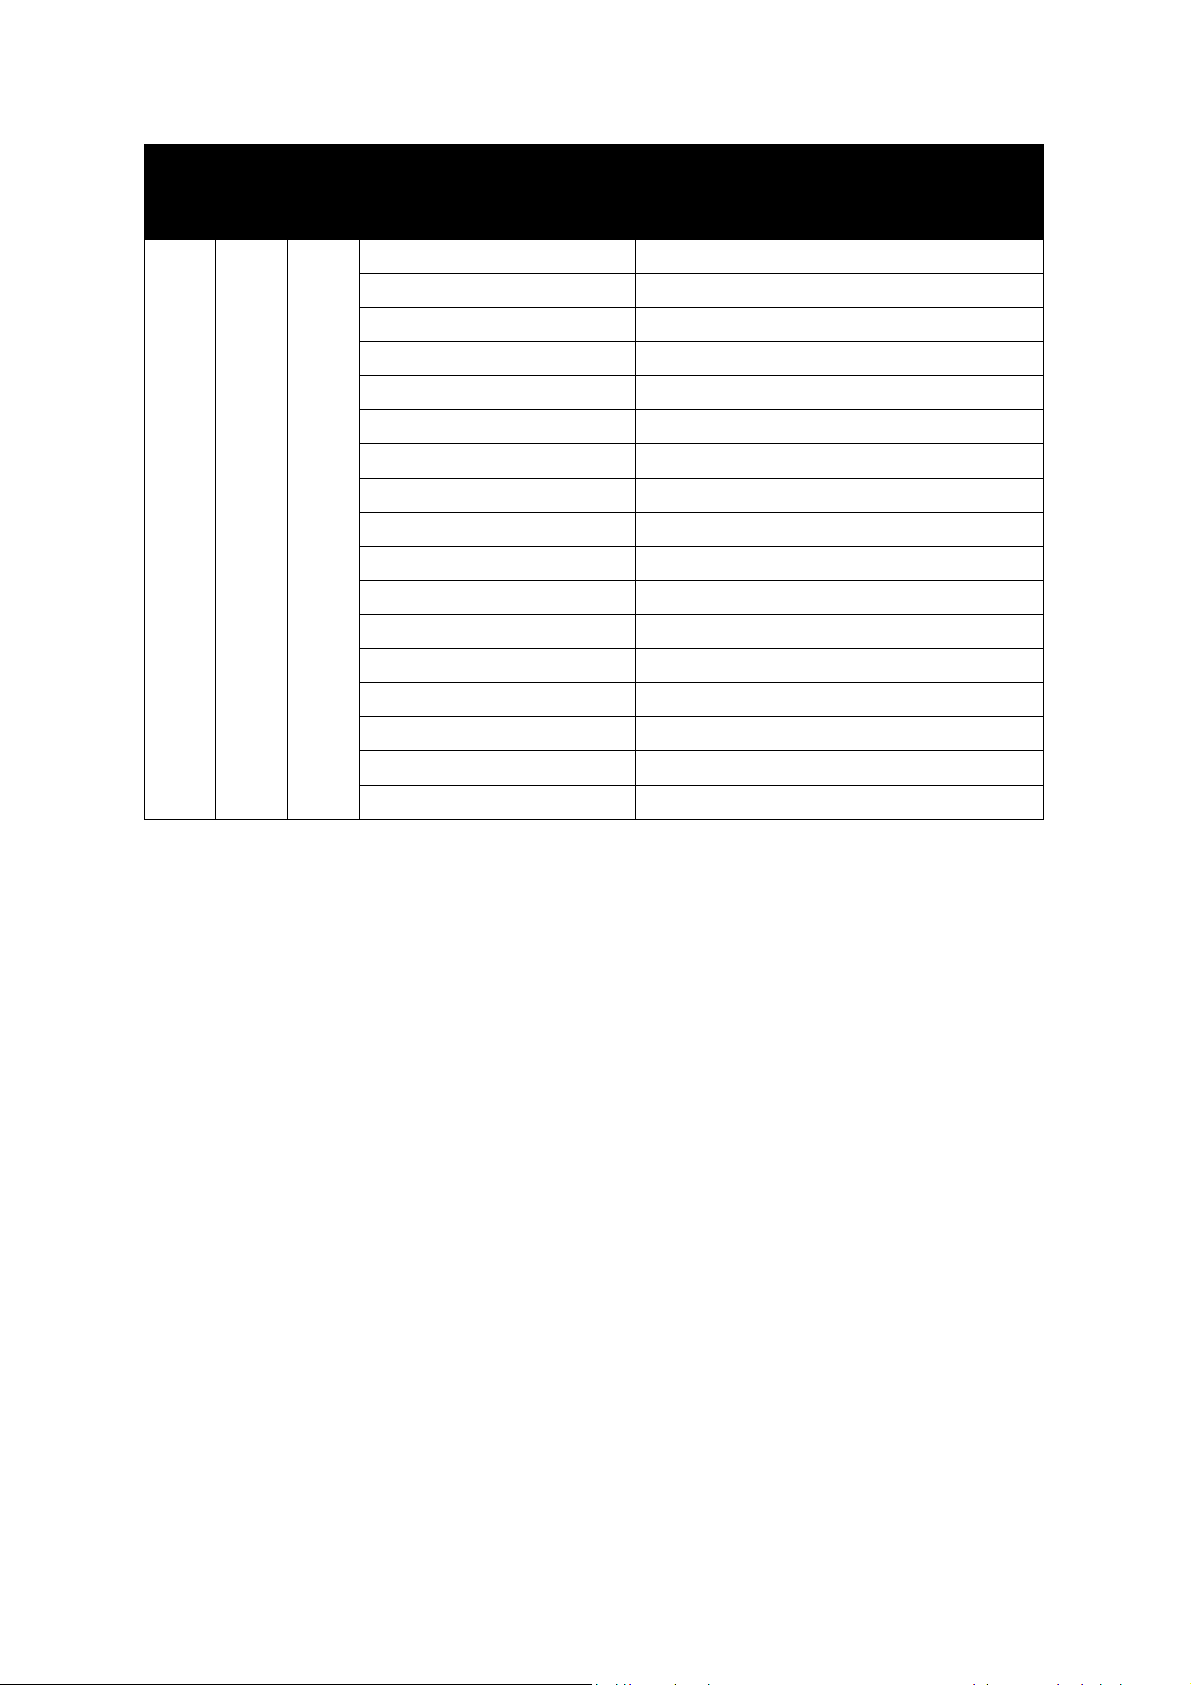
Channel
1CH 10CH 17CH
DMX range Function
94-103 Deep straw
104-112 Deep Amber
113-122 Orange
123-131 Primary Red
132-141 Medium Pink
142-150 Dark Pink
151-160 Magenta
161-169 Medium Purple
170-179 Dark Lavender
180-188 Deep Purple
189-198 Sky Blue
199-207 Light Blue
208-217 Medium Blue
218-226 Deep Blue
227-236 Blue Green
237-245 Moss Green
246-255 Primary Green
28 Martin® ELP CL User Manual
Page 29
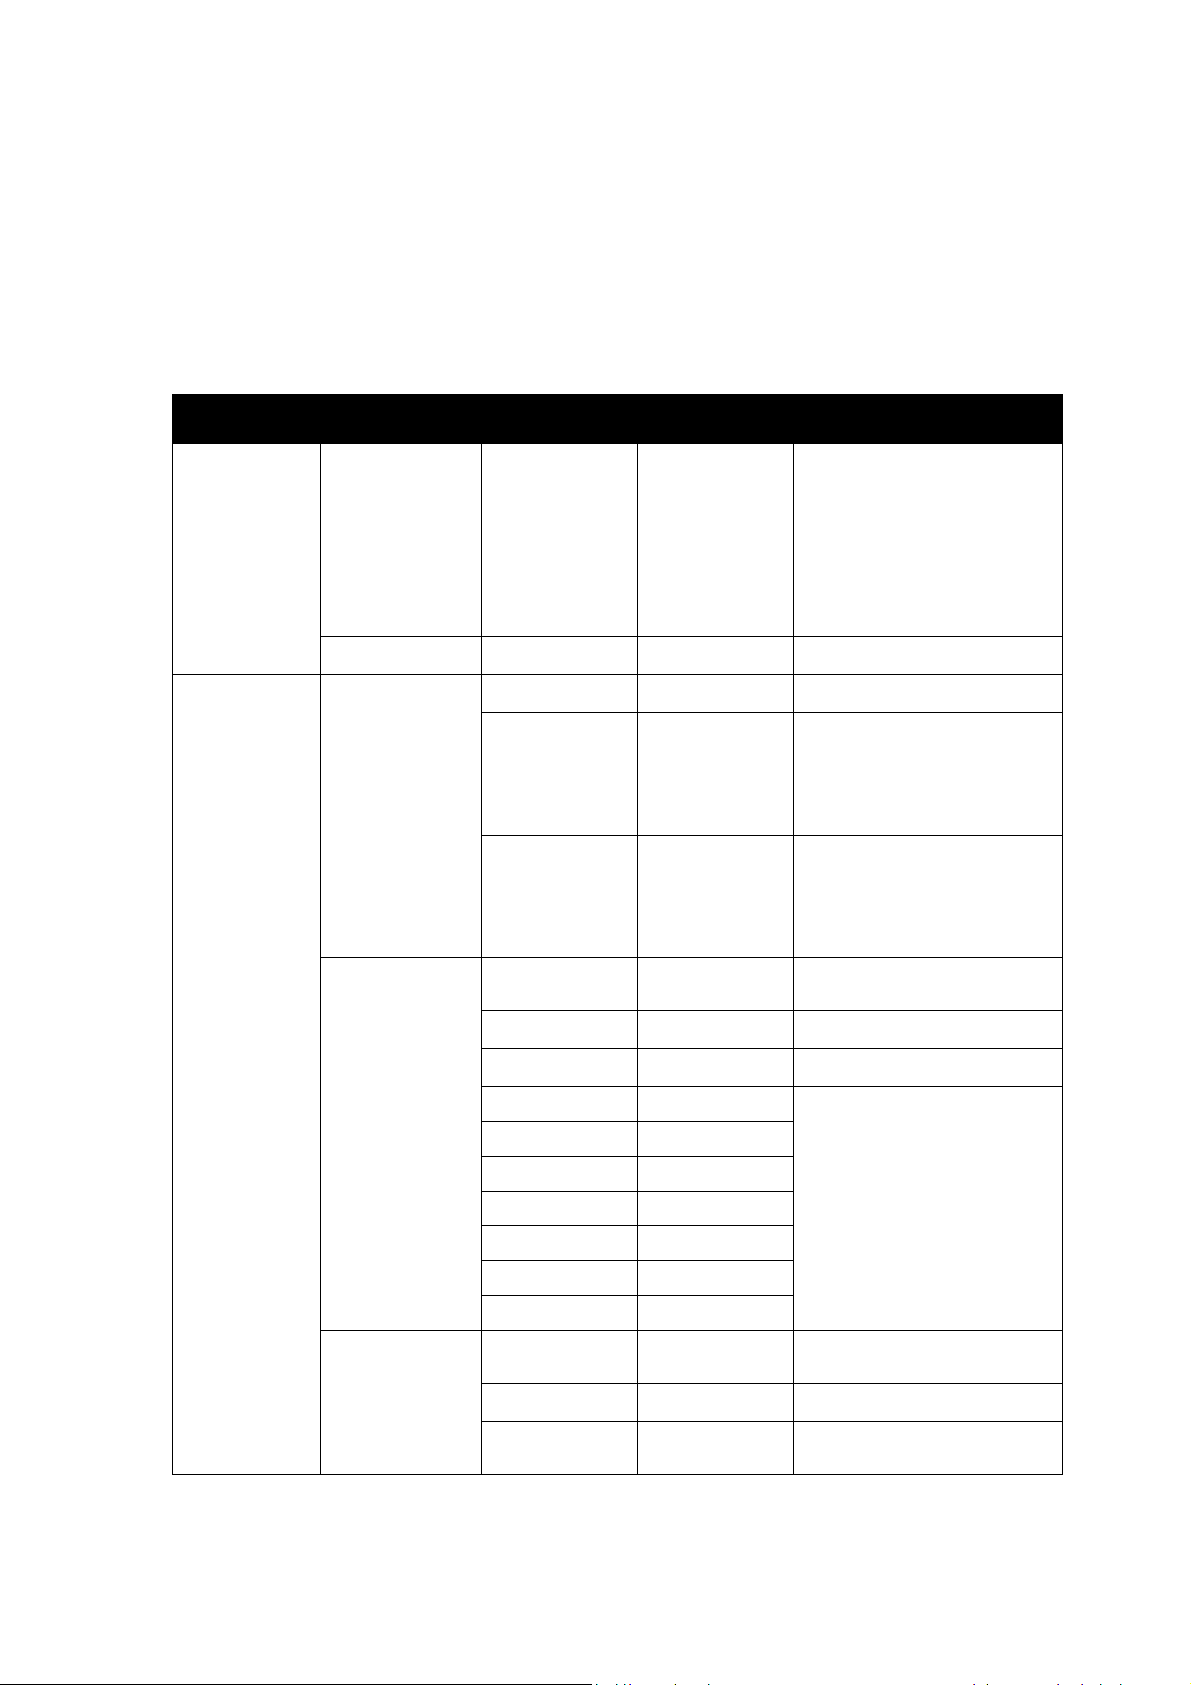
Control menus
To access the control menus, press the MENU button. Use the UP and DOWN buttons to navigate
the menus. Select any required menu option using the ENTER button. For more information, see
‘Only the main functions are described in this section. You can see a complete map of the control
menu structure and brief explanations of their purposes in “Control menus” on page 29.
Using the control menus’ on page 16.
Default fixture settings are shown in bold.
Top Menu Menu level 2 Menu level 3 Menu level 4 Notes
DMX Setup DMX Addr
DMX Mode
Personality Stand-Alone
Quality
1 - XXX DMX address (default
address = 1). The
DMX address range is
limited so that the
fixture will always have
enough DMX
channels within the 512
available.
1/10/17
Off
Host Fixture acts
Client Fixture copies master in
Hi Quality
Hi Output Full output mode
DMX control mode
as host in
host/client operation DMX/RDM signal will
override host/client
operation
host/client operation DMX/RDM signal will
override host/client
operation
Output optimized for high
CRI and CCT of 6000K
Tungsten Tungsten lamp emulation
2000K Custom Color Temperature
2700K
3200K
4200K
5600K
8000K
10,000K
Dim Curve Linear Optically linear dimming
Square
Inv Sq Inverse square law
adjustment
curve
Square law dimming curve
dimming curve
Martin® ELP CL User Manual 29
Page 30
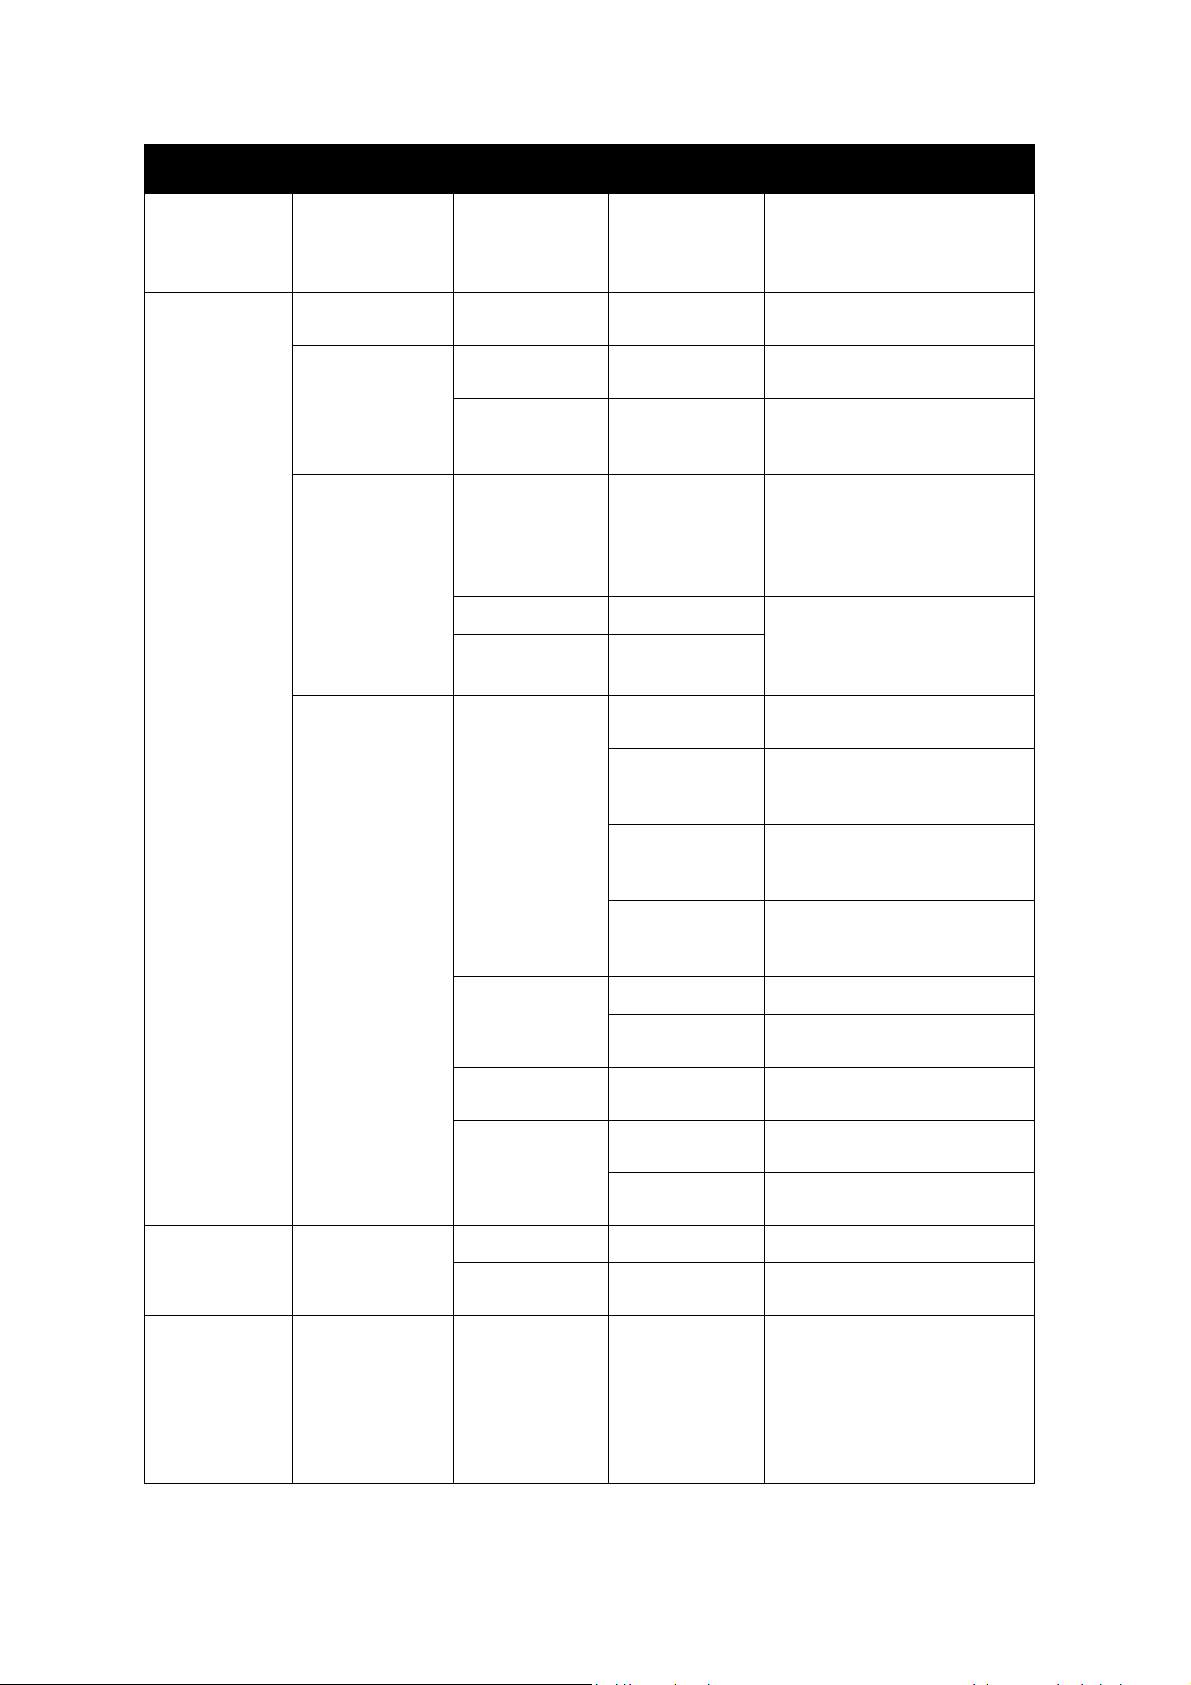
Top Menu Menu level 2 Menu level 3 Menu level 4 Notes
S-curve S-curve (fixture emulates
inca
ndescent
lamp voltage linea
dimming curve)
Personality
(continued)
PWM Freq 600-2400Hz LED PWM frequency
(Default = 1200 Hz)
No Data Blackout If data connection is lost,
fixture will blackout
Hold
Cool mode
Display Sleep On Display remains
Reg fan
Full Fans set to full/low constant
Low
2 min
5 min Display goes into sleep
10 min Display goes into sleep
Rotation
Normal
If data connection is lost,
fixture holds latest received
data value at all channels
Fan optimized for light
intensity, temperature
controlled by regulating
fan speed, light output
unaffected
speed, temperature
controlled by regulating
light output.
permanently on
Display goes into sleep
mode 2 minutes after last
key press
mode 5 minutes after last
key press
mode 10 minutes after last
key press
Display orientation normal
r RMS
Rotate 180 Display orientation rotated
180°
Intensity
Temp Unit
Default Set Fac Default
Fixture test Test LEDs Run test sequence of LEDs
No
Yes Return all settings to
10-100
°C
°F All temperature readouts in
Set display intensity in %
(default = 100)
All temperature readouts in
C°
F°
factory defaults
(Red, Green, Blue, Lime,
Amber in each order),
Dimmer and Strobe effect.
Press Enter to restart test
sequence. Press Menu
button to exit test.
30 Martin® ELP CL User Manual
Page 31
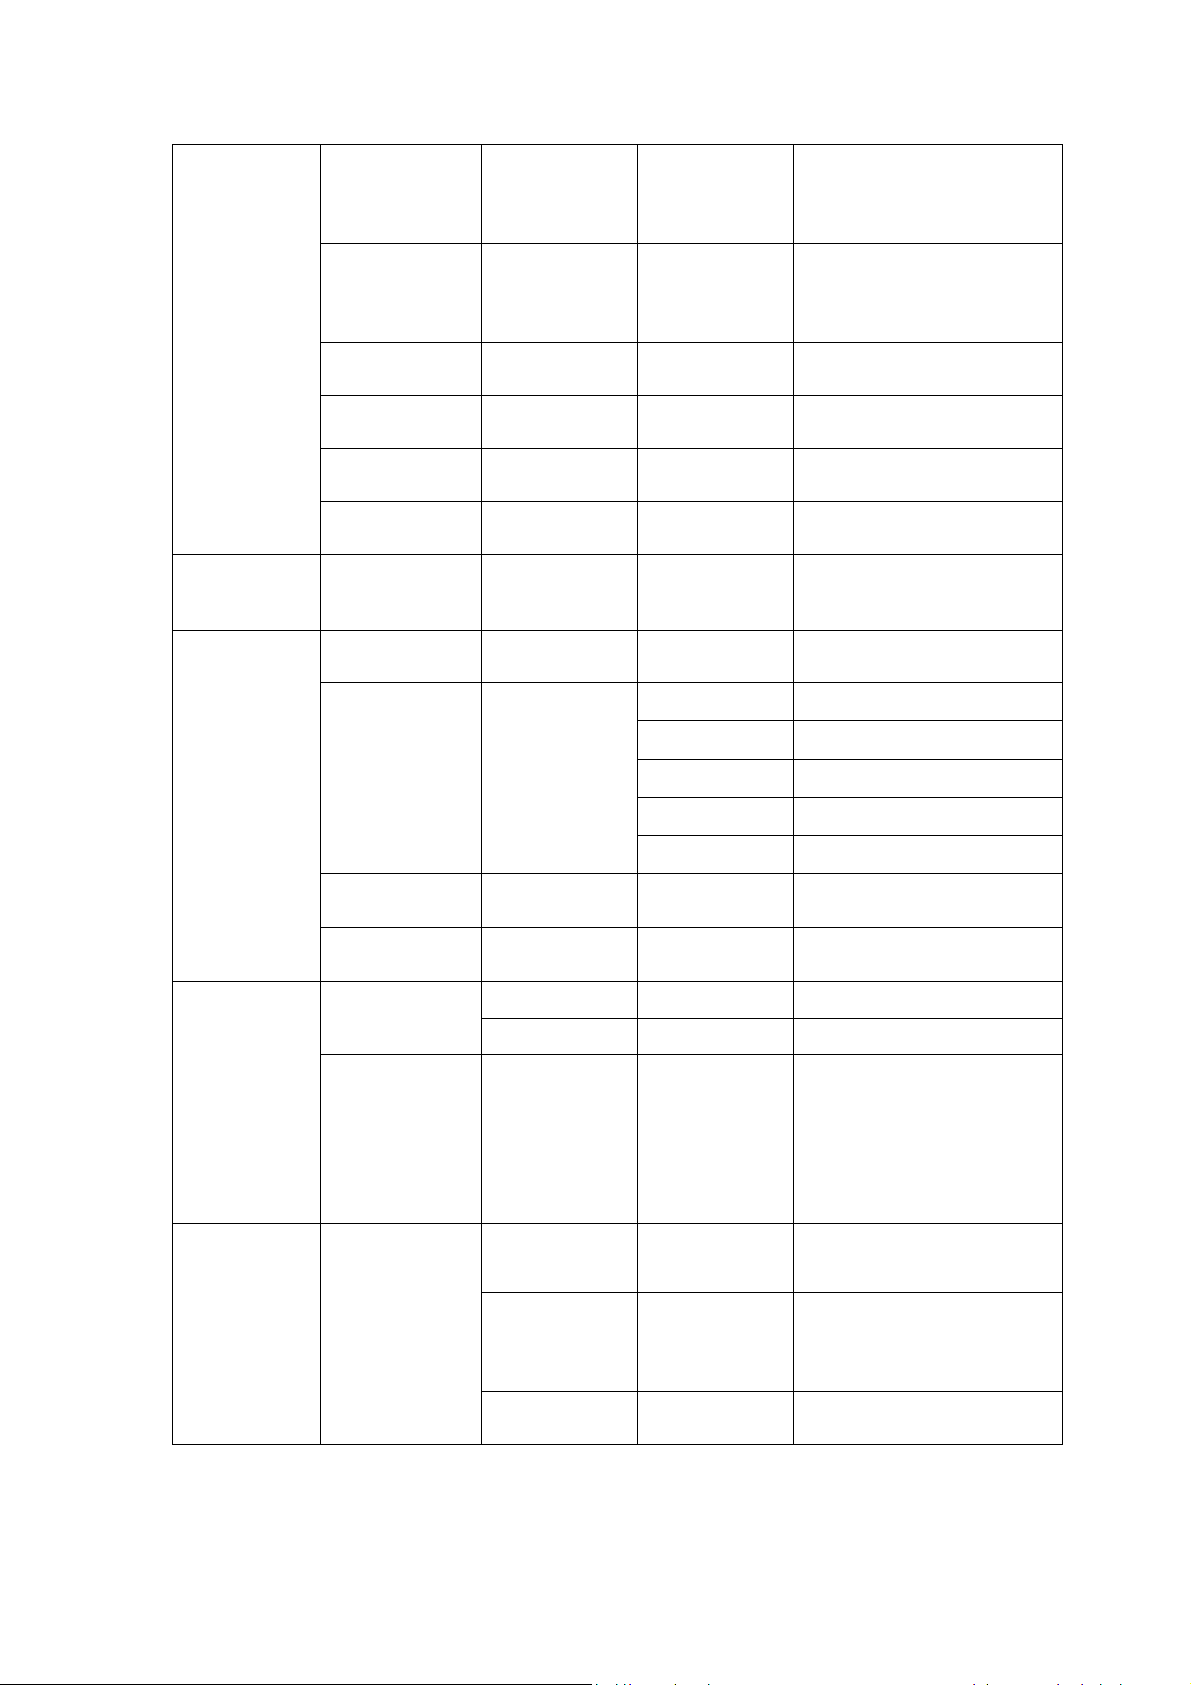
Information Power On 0 - XXXX h Hours fixture has been
powered on since
manufacture (not userresettable)
LED Hours 0 - XXXX h Number of hours fixture
LEDs have been powered
on since manufacture (not
user-resettable)
SW Version XX.XX.XX Displays currently active
software version
Fixture ID 0 - 9999 User-settable fixture ID
number
RDM UID XXXXXXXXXX
XX
Temperature LED / CPU
Temp
DMX Live Dimmer,
Shutter etc.
…..
Show Set Scene 1-20 Number of standalone
Scene Color 1 - last scene Red 0-255
0 - 255
…
Green 0-255
Displays fixture’s unique
RDM ID
Displays temperature in °C
of all PCBs and LED
Scroll to see values being
received on each DMX
channel
scenes
Fade Time
Hold Time
Manual
control
Service Calibration Dimmer
Reset
Dimmer,
Dimmer Fine,
Dimmer Fade,
CTC, Red,
Green, Blue,
Lime, Amber,
Color Scene
0-120 secs (3
secs)
0- 60
0 secs
)
secs
No
Yes Reset fixture
0-255 Manual control of all 10
Red, Green,
Blue, Lime,
Amber
Load Def Load Load factory default
Blue 0-255
Lime 0-255
Amber 0-255
Transition time between
scenes
(3
0-100 %
-128 -> 127 Fine tune offset position of
Length of time scenes are
displayed
channels (Shutter should
be set to open)
Intensity master, defining
maximum intensity
emitters to achieve uniform
behavior across multiple
fixtures
calibration settings
Martin® ELP CL User Manual 31
Page 32

Service
(continued)
Calibration
(continued)
Password XXX Enter password (019)
Def HQ Set Save Replace factory default
Def HO Set Save Replace factory default
before replacing default
calibration settings
calibration settings
with current high-quality
calibration settings
calibration settings
with current high-output
calibration settings
32 Martin® ELP CL User Manual
Page 33

Troubleshooting
This section describes a few common problems that may occur during operation and provides
some suggestions for easy troubleshooting:
Symptom Potential cause Remedies
No light from fixture. Shutters are all pushed
in, blocking the light.
Power supply issue,
such as blown fuse,
faulty connector or
damaged cable.
Fixture does not
respond to DMX
control.
Fault in the DMX
network due to wiring
problem, connector or
cable damaged, or…
incorrect DMX
addressing, or…
…potential interference
from proximity to a highvoltage installation.
Pull out the 4 shutter blades.
Ensure that the mains supply is connected
and supplying power to the fixture.
Ensure that the fixture’s display screen
lights up when a button is pressed.
Check all power connections and cables.
Replace the fixture fuse.
Check if the fixture display is flashing to
show that DMX is not being received, and if
so, check all DMX cables and connections
to ensure the integrity of the physical
network.
Ensure that the DMX network is terminated.
Check that the components in the DMX
network all use standard DMX polarity.
Ensure that the fixture is set to the correct
DMX address, one that matches that set on
the DMX control device.
Check the pins on the connectors from the
previous fixture in the DMX network.
Attempt to control the fixture with another
DMX control device.
Move the fixture if it is being operated very
close to an unshielded high-voltage
installation.
Martin® ELP CL User Manual 33
Page 34

Specifications
Physical
Length ...................................................................................................... 648 mm (25.5 in.)
Width ........................................................................................................ 259 mm (10.2 in.)
Height ....................................................................................................... 254 mm (10.0 in.)
Height (with bracket ................................................................................. 427 mm (16.8 in.)
Weight ............................................................................................................ 7.7 kg (17 lb.)
Dynamic Effects
Color mixing ............................................................................................................. RGBLA
Color selection ............................................................................................ 26 color presets
Electronic dimming ................................................................................................ 0 - 100%
Strobe and pulse effects .................................. Variable speed and action, random strobe
Electronic 'shutter' effect ............................................................ Instant open and blackout
Electronic dimming .................................................................. Four dimming curve options
Control and Programming
DMX channels .......................................................................................................... 1/10/17
16-bit control ................................................................................... Intensity, CTC, RGBLA
Control options ........................................................................................ DMX, stand-alone
PWM ................................................................................................................ 600-1200 Hz
DMX address setting ..................................... Control panel with OLED display or via RDM
Stand-alone programming ............................................... Control panel with OLED display
DMX compliance ..................................................................................... USITT DMX512-A
RDM compliance ..................................................................................... ANSI/ESTA E1.20
Transceiver ........................................................................................ Opto-isolated RS-485
Optics
Light source ..................................................................... 91 x RGBAL Luxeon Rebel LEDs
.................................. (19 x Red, 24 x Green, 12 x Blue, 24 x Lime, 12 x Amber)
Color Temperature ....................................................................................... 2000-10 000 K
Lens Tube Options ............................................................................ 19°, 26°, 36° and 50°
Minimum LED lifetime ....................................... 30 000 hours (to >70% luminous output)*
*Figure obtained under manufacturer's test conditions
Photometric Data (High-Quality Mode @ 6000 K)
Light engine luminous output ........................................................................ 20 000 lumens
Fixture luminous output .................................................................................... 5900 lumens
CRI (Color Rendering Index) ......................................................................................... >90
CQS (Color Quality Scale) ............................................................................................. >87
TM-30 Rf (IES TM-30-15 Fidelity Index) ........................................................................ >84
TM-30 Rg (IES TM-30-15 Gamut Index) ..................................................................... >106
TLCI (Television Lighting Consistency Index) ............................................................... >87
Photometric Data (High-Output Mode @ 5500 K)
Light engine luminous output ........................................................................ 20 000 lumens
Fixture luminous output .................................................................................... 6900 lumens
CRI (Color Rendering Index) ......................................................................................... >85
CQS (Color Quality Scale) ............................................................................................. >90
TM-30 Rf (IES TM-30-15 Fidelity Index) ........................................................................ >84
TM-30 Rg (IES TM-30-15 Gamut Index) ..................................................................... >111
TLCI (Television Lighting Consistency Index) ............................................................... >85
Construction
Color(s) .............................................................................................. Black or white variant
Housing .................................................................................................. Die-cast aluminum
Protection rating ............................................................................................................ IP20
34 Martin® ELP CL User Manual
Page 35

Gobos and Color Frame
Gobo size ..................................................................... A size, 100 mm OD, 75 mm image*
Gobo size .................................................................... B size, 86 mm OD, 64.5 mm image*
Color frame size .............................................................. 159 x 159 mm (6.25 in. x 6.25 in.)
* Goboholder not included
Installation
Mounting ................................................................................................. Adjustable bracket
Location ....................................................................................................... Indoor use only
Orientation ..................................................................................................................... Any
Minimum distance to combustible materials ................................................... 0.2 m (0.7 ft.)
Minimum distance to illuminated surfaces ...................................................... 0.5 m (1.6 ft.)
Connections
AC power in/thru ....................................................................... Neutrik PowerCON TRUE1
DMX & RDM data in/thru ..................................................................................... 5-pin XLR
Electrical
AC power ............................................................................... 100-240 V nominal, 50/60 Hz
Power supply unit ...................................................... Auto-ranging electronic switch-mode
Idle power (zero intensity) .............................................................................................. 5 W
Half-cycle RMS inrush current at 230 V, 50 Hz ........................................................ 18.0 A
Fixture link via PowerCON at 100-120 V ..................................................... Up to 4 fixtures
Fixture link via PowerCON at 200-240 V ..................................................... Up to 9 fixtures
Power consumption figures are typical, not maximum. Allow for +/-10% variation.:
Typical Power and Current
110 V, 60 Hz ..................................................................................... 2.4 A, 259 W, PF 0.99
208 V, 60 Hz .................................................................................... 1.3 A, 250 W, PF 0.96
230 V, 50 Hz ..................................................................................... 1.3 A, 249 W, PF 0.95
240 V, 50 Hz ..................................................................................... 1.1 A, 249 W, PF 0.95
Measurements made at nominal voltage with all LEDs at full intensity. Allow for a deviation of
+/- 10%.
Thermal
Cooling ......................................................... Forced air (temperature-regulated, low noise)
Maximum ambient temperature (Ta max.) ................................................... 40° C (104° F)
Minimum ambient temperature (Ta min.) ......................................................... 0° C (32° F)
Total heat dissipation (calculated, +/- 10%, at full intensity, full white)........... 1000 BTU/hr.
Approvals
Global CB Certification/IECEE ........................................... IEC 60598-2-17 (IEC 60598-1)
EU safety .......................................... EN 60598-2-17 (EN 60598-1), EN 62471, EN 62493
EU EMC .......................... EN 55015, EN 55032, EN 55103-2, EN 61000-3-2-3, EN 61547
US safety ................................................................................................................ UL 1573
US EMC .............................................................................................. FCC Part 15 Class B
Canadian safety .................................................................................... CSA C22.2 No. 166
Canadian EMC ......................................................... ICES-003 Class B, ICES-005 Class B
Australia/NZ ................................................................................................................. RCM
Included Items
Power input cable (0.75mm2, 18 AWG), bare ends to Neutrik TRUE1 NAC3FX-W
(female), 1.5 m (4.9 ft.)
Mounting bracket
User manual
Martin® ELP CL User Manual 35
Page 36

Accessories
Cables, 16 A, for connection to power in chains
Power input cables
Power Input Cable, H07RN-F, 2.5 mm2, bare ends to
TRUE1 NAC3FX-W (female), 1.5 m (4.9 ft.) ......................................... P/N 91611797
Power Input Cable, H07RN-F, 2.5 mm2, bare ends to
TRUE1 NAC3FX-W (female), 5 m (16.4 ft.) ......................................... P/N 91611786
Power Input Cable, SJOOW, 12 AWG, bare ends to
TRUE1 NAC3FX-W (female), 1.5 m (4.9 ft.) ......................................... P/N 91610173
Power Input Cable, SJOOW, 12 AWG, bare ends to
TRUE1 NAC3FX-W (female), 5 m (16.4 ft.) .......................................... P/N 91610174
Power relay cables
Power Relay Cable, H07RN-F, 2.5 mm2, TRUE1-TRUE1 0.45 m (1.5 ft.) ... P/N 91611784
2
Power Relay Cable, H07RN-F, 2.5 mm
Power Relay Cable, H07RN-F, 2.5 mm
, TRUE1-TRUE1 1.2 m (3.9 ft.) ..... P/N 91611785
2
, TRUE1-TRUE1 2.5 m (8.2 ft.) ..... P/N 91611796
Power Relay Cable, SJOOW, 12 AWG, TRUE1-TRUE1, 0.45 m (1.5 ft.) .... P/N 91610170
Power Relay Cable, SJOOW, 12 AWG, TRUE1-TRUE1, 1.2 m (3.9 ft.) ...... P/N 91610171
Power Relay Cable, SJOOW, 12 AWG, TRUE1-TRUE1, 2.5 m (8.2 ft.) ...... P/N 91610172
Power connectors
Neutrik PowerCON TRUE1 NAC3MX-W (male) ...................................... P/N 91611788HU
Neutrik PowerCON TRUE1 NAC3FX-W (female) ................................... P/N 91611789HU
Related Items
Martin RDM 5.5 Splitter ................................................................................. P/N 90758150
Martin Companion Cable USB/DMX Interface .............................................. P/N 91616091
Martin Companion software suite ............................ Free download from www.martin.com
Ordering Information
Fixtures without lens tubes
Martin ELP CL (fixture body only) ............................................................. P/N 9045107780
Martin ELP CL (fixture body only), White .................................................. P/N 9045107780
Lens tube options*
Martin ELP Lens Tube 19° ........................................................................ P/N 9045107782
Martin ELP Lens Tube 26° ........................................................................ P/N 9045107783
Martin ELP Lens Tube 36° ........................................................................ P/N 9045107784
Martin ELP Lens Tube 50° ........................................................................ P/N 9045107785
Martin ELP Zoom Lens Tube 15-30° ........................................................ P/N 9045121618
Martin ELP Zoom Lens Tube 25-50° ........................................................ P/N 9045121619
Martin ELP Lens Tube 19°, White ............................................................ P/N 9045115166
Martin ELP Lens Tube 26°, White ............................................................ P/N 9045115167
Martin ELP Lens Tube 36°, White ............................................................ P/N 9045115168
Martin ELP Lens Tube 50°, White ............................................................ P/N 9045115170
Martin ELP Zoom Lens Tube 15-30°, White ............................................. P/N 9045122108
Martin ELP Zoom Lens Tube 25-50°, White ............................................. P/N 9045122109
*All lens tubes include a filter frame.
Specifications are subject to change without notice. For the latest product specifications, see www.martin.com
36 Martin® ELP CL User Manual
Page 37

Supplier’s declaration of conformity
Harman Professional, Inc. have issued an FCC Supplier’s Declaration of Conformity for this
product. The Declaration of Conformity is available for download from the product’s pages on the
Martin website at www.martin.com
Disposing of the product
Martin products are supplied in compliance with Directive 2012/19/EC of the
European Parliament and of the Council of the European Union on WEEE (Waste
Electrical and Electronic Equipment), where applicable. Help preserve the
environment! Ensure that this product is recycled at the end of its life. Your supplier
can give details of local arrangements for the disposal of Martin products
Radio interference
This equipment has been tested and found to comply with the limits for a Class B digital device,
pursuant to part 15 of the FCC Rules. These limits are designed to provide reasonable protection
against harmful interference in a residential installation. This equipment generates, uses and can
radiate radio frequency energy and, if not installed and used in accordance with the instructions,
may cause harmful interference to radio communications. However, there is no guarantee that
interference will not occur in a particular installation. If this equipment does cause harmful
interference to radio or television reception, which can be determined by turning the equipment off
and on, the user is encouraged to try to correct the interference by one or more of the following
measures:
• Reorient or relocate the receiving antenna.
• Increase the separation between the equipment and receiver.
• Connect the equipment into an outlet on a circuit different from that to which the receiver is
connected.
• Consult the dealer or an experienced radio/TV technician for help.
Martin® ELP CL User Manual 37
Page 38

Page 39

Page 40

www.martin.com
 Loading...