

Page 1
THRILL Mini Profile
Safety and Installation Guide
WARNING!
Read the safety precautions in this guide before
installing or using this product.
Introduction
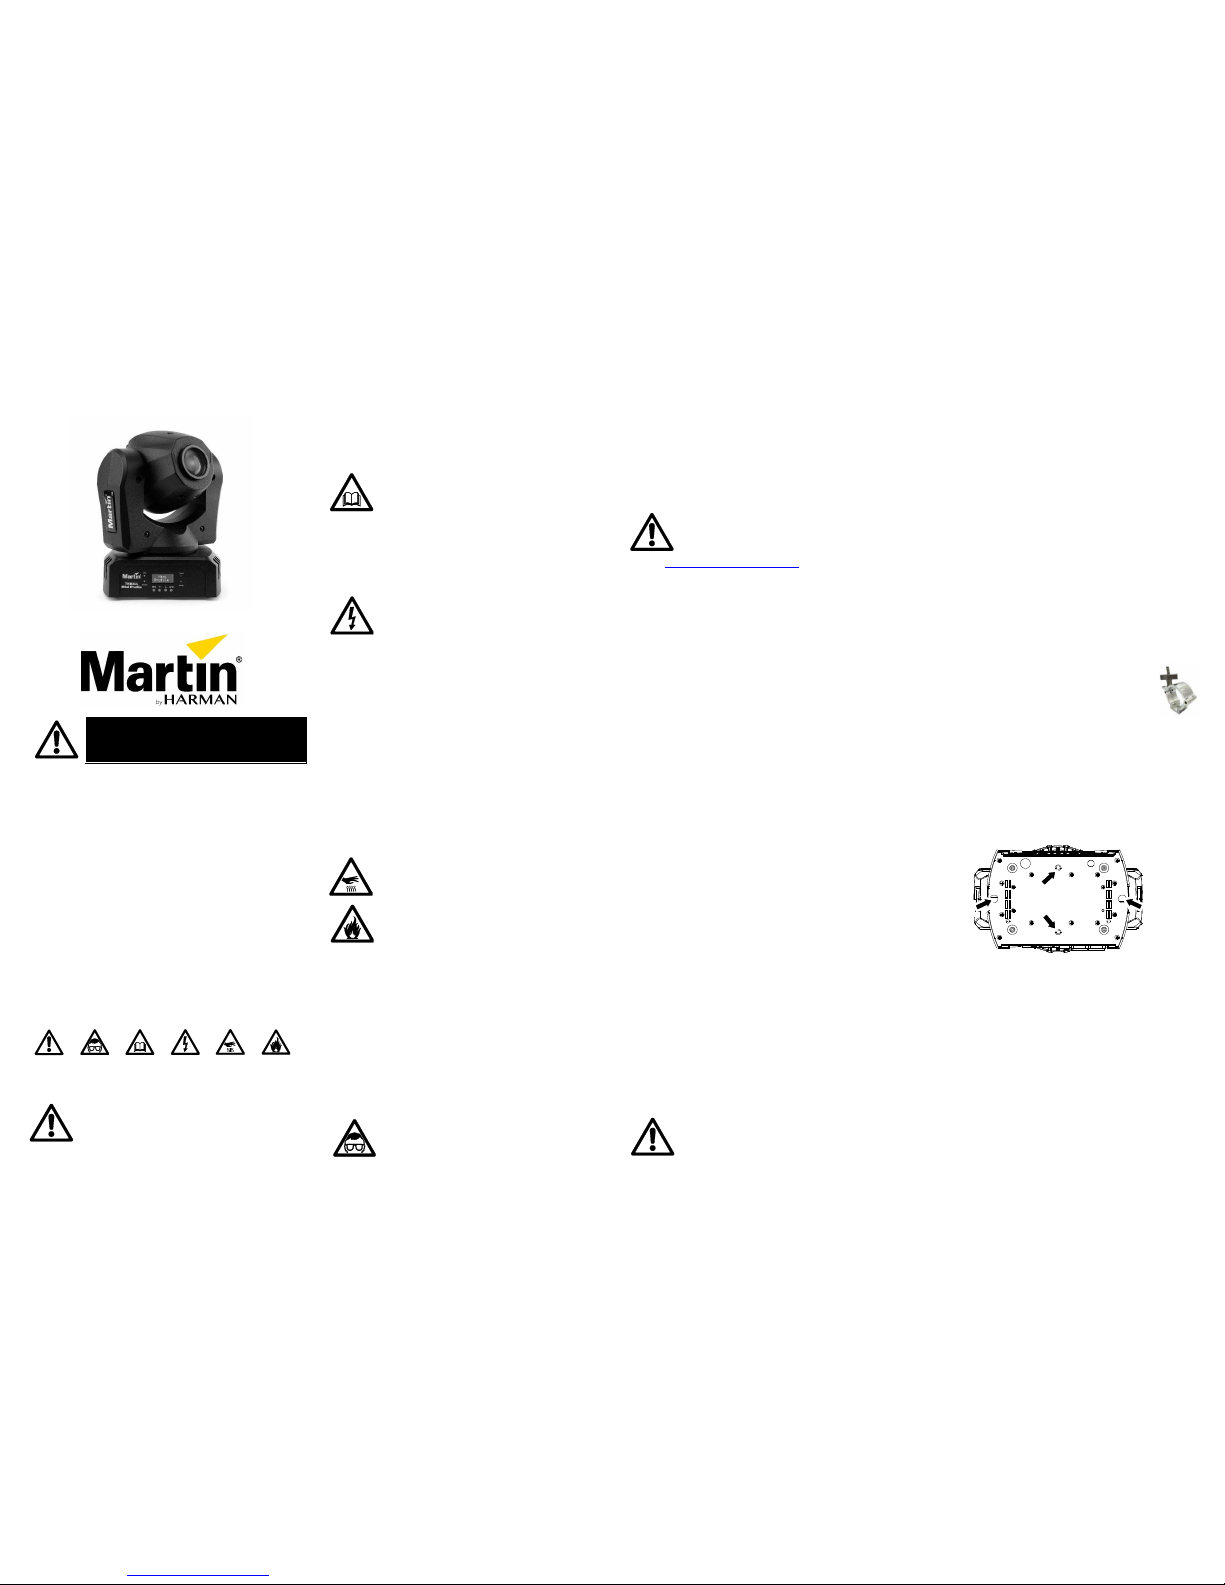
The THRILL Mini Profile is a compact moving-head lighting
fixture with an 18 watt long-life LED light source. It provides
8 pattern gobos, 8 glass color filters, full-range dimming, strobe
effects, and manually adjustable focus. The rugged, lightweight
construction makes it ideal for mobile DJs and small venues.
It is supplied with this guide, a user guide, power cables, and
bracket for attachment of a suitable, user-supplied rigging clamp.
Before installing and using the fixture:
1. Read the safety information.
2. Unpack the fixture and ensure that there is no
transportation damage. Do not attempt to operate
a damaged fixture.
3. Ensure that your AC voltage and frequency match
the power requirements of the fixture.
4. Check the Martin Professional website at www.martin.com
for the most recent product documentation and technical
information. Martin document revisions are identified by
the revision letter below the legal notices.
Safety information
The following symbols identify important safety information:
Warning!
Safety hazard.
Risk of severe
injury or death.
Warning!
Powerful light
emission. Risk
of eye injury.
Warning!
See user
manual for
important
safety
information.
Warning!
Hazardous
voltage. Risk of
lethal electric
shock.
Warning!
Hot surfaces.
Warning!
Fire hazard.
Warning! Risk Group 2 product according to
EN 62471. Possibly hazardous radiation emitted
from this product. May be harmful to the eyes.
Do not stare at operating lamp and do not view
the light output with optical instruments or any device that may
concentrate the beam.
This lighting fixture presents risks of severe injury or death due
to fire hazards, electric shock and falls. It produces a powerful,
concentrated beam of light that can create a fire hazard or a risk
of eye injury if the safety precautions are not followed.
Install, operate and service this product only as directed,
or you may create a safety hazard or cause damage that is
not covered by product warranties.
Follow the safety precautions below and observe
all warnings on the product. Follow the instructions
and observe all warnings in the product’s user
guide. Keep this information for future reference.
For the latest user documentation and other information about
this and all Martin products, visit the Martin website at
http://www.martin.com.
Respect all locally applicable laws, codes and regulations
when installing, operating or servicing the product.
Protection from electric shock
Do not expose the product to water or moisture.
Disconnect the product from AC power before
carrying out installation or maintenance and
when the product is not in use.
Ensure that the product is electrically connected to ground
(earth).
Use only a source of AC power that complies with local building
and electrical codes and has both overload and ground-fault
(earth-fault) protection.
Socket outlets or external power switches used to supply the
product with power must be located near the product and easily
accessible so that it can easily be disconnected from power.
Replace blown fuses with ones of the specified type and rating.
Isolate the product from power immediately if the power plug
or any seal, cover, cable, or other component is damaged,
defective, deformed, wet or showing signs of overheating.
Do not reapply power until the problem is corrected.
Before connecting the product to power, check that all power
distribution equipment and cables are undamaged and rated
for the electrical requirements of all connected products.
Protection from burns and fire
Do not operate the fixture if the ambient
temperature (Ta) exceeds 40° C (104° F).
The surface of the product casing can reach up
to 45° C (113° F) after 5 minutes of operation and
during a steady on state. Avoid contact by persons
and materials. Allow the fixture to cool for at least
10 minutes before handling.
Keep flammable materials well away from the
fixture. Keep all combustible materials (e.g. fabric, wood, paper)
at least 100 mm (4 in.) away from the fixture head.
Ensure that there is free and unobstructed airflow around the
fixture. Provide a minimum clearance of 100 mm (4 in.) around
fans and air vents.
Do not illuminate surfaces within 200 mm (8 in.) of the fixture.
Do not attempt to bypass thermostatic switches or fuses.
Do not stick filters, masks or other materials onto any optical
component.
The fixture’s lenses can focus the sun’s rays ins ide the fixture,
creating a risk of fire and damage. Do not expose the front of
the fixture to sunlight or any other bright light source.
Protection from eye injury
Lighting fixtures emit possibly hazardous radiation.
Do not look at an operating lamp. Eye injury
may result.
To minimize the risk of eye injury or irritation,
disconnect lighting fixtures from power at all times when not in
use, and provide well-lit conditions to reduce the pupil diameter
of anyone working on or near them.
Do not look at output from lighting fixtures with magnifiers,
telescopes, binoculars or similar optical instruments that may
concentrate the light.
Ensure that persons are not looking directly into a lighting fixture
when it lights up suddenly. This can happen when power is
applied, when the fixture receives a remote control signal,
or when certain control menu items are selected.
Protection from injury
Do not attempt to repair a defective product or
modify the product in any way. LEDs are not userreplaceable. Refer all service to your Martin dealer
or contact Martin directly for technical support
through www.martin.com/contact-support.
Fasten the fixture securely to a fixed surface or structure when
in use. The fixture is not portable when installed.
Ensure that any supporting structure and/or hardware used can
hold at least 10 times the weight of all the devices they support
and complies with locally applicable regulations.
If suspending from a rigging structure, fasten the fixture to a
rigging clamp. Do not use safety cables as the primary means
of support.
If the product is installed in a location where it may cause injury
or damage if it falls, install as directed a secondary attachment
such as a safety cable that will hold the machine if a primary
attachment fails. The secondary attachment must be approved
by an official body such as TÜV as a safety attachment for the
weight that it secures, must comply with EN 60598-2-17 Section
17.6.6 or BGV C1 / DGUV 17, and must be capable of bearing a
static suspended load at least six times the weight of the fixture
(or more if required by locally applicable regulations).
Allow enough clearance around the head to ensure that it
cannot collide with an object or another fixture when it moves.
Check that all external covers and rigging hardware are
securely fastened.
Block access below the work area and work from a stable
platform whenever installing, servicing or moving the fixture.
Do not operate the fixture with missing or damaged covers,
shields or any optical component.
Do not lift or carry the fixture by its head. Support the fixture
by its base only.
In the event of an operating problem, stop using the fixture
immediately and disconnect it from power. Do not attempt
to use a fixture that is obviously damaged.
Do not modify the fixture in any way not described in this
manual or install other than genuine Martin parts.
Refer any service operation not described in this manual
to a qualified technician.
Flashing light can trigger epileptic seizures in flicker-sensitive
persons. Provide notice when strobe lighting is in use at the
entrance(s) to the venue. Mount flashing lights as high above
head height as practicable and avoid extended periods of
continuous flashing, particularly at 10 to 20 flashes per second.
Stop lights from flashing immediately if a person has an epileptic
seizure.
Note that whenever power is applied to the fixture, it will reset
moving parts to their home (neutral) positions. Be prepared for
the head to move. A reset usually takes around 20 seconds.
Physical installation
The THRILL Mini Profile is designed for indoor
use only and must be used in a dry location with
adequate ventilation. Ensure that none of the
fixture’s ventilation slots are blocked and all
minimum distances are observed.
The fixture must be oriented vertically, either upright on the floor
or other horizontal surface, or suspended upside-down from
a suitable structure.
Fasten the THRILL Mini Profile to a secure structure or surface.
Do not stand it on a surface or leave it where it can be moved
or fall over. If you install the fixture in a location where it may
cause injury or damage if it falls, secure it as directed using a
securely anchored safety cable that will hold the fixture if the
primary fastening method fails.
Fastening the fixture to a flat surface
The fixture can be fastened to a hard, fixed, flat surface. Ensure
that the surface and all fasteners used can support at least 10
times the weight of all fixtures and equipment they support and
comply with locally applicable regulations.
Fasten the fixture securely. Do not stand it on a surface or leave
it where it can be moved or fall over. If you install the THRILL
Mini Profile in a location where it may cause injury or damage
if it falls, secure it as directed with a securely anchored safety
cable that will hold the fixture if the primary fastening method
fails and complies with locally applicable regulations.
Mounting the fixture on a truss
The fixture can be clamped to a truss or similar
rigging structure. It must be suspended vertically,
hanging downwards only. Use a suitable rigging
clamp such as a half-coupler clamp (shown to right)
fastened to the included clamp attachment bracket.
To clamp the fixture to a truss:
1. Check that the rigging structure can support at least 10
times the weight of all fixtures and equipment to be installed
on it and complies with locally applicable regulations.
2. Block access under the work area.
3. Fasten a rigging clamp securely to the supplied clamp
attachment bracket. The bolt used must be M12, grade 8.8
steel minimum, and fastened with a self-locking nut or
wing-nut/self-locking washer combination. Comply with
instructions provided from the manufacturer of the clamp
being used.
4. Fasten the hanging bracket to the fixture by screwing the
two hex type socket cap screws provided fully into holes A
in the base (see above) using the lock washers provided.
5. Working from a stable platform, hang the fixture vertically
on the truss and fasten the rigging clamp onto the truss.
6. Secure the fixture with a safety cable as directed.
7. Check that the head will not collide with other objects.
Note – Use only the socket cap screws provided to fasten the
bracket to the fixture. Using a screw longer than 12 mm (0.5 in.)
may damage the fixture. If screws are missing or damaged,
contact Martin® service and support for assistance.
Securing with a safety cable
Secure the THRILL Mini Profile with a safety cable or other
secondary attachment that is approved for the weight of the
fixture so that the safety cable will prevent it from falling if the
primary attachment fails. Loop the safety cable through one of
the two attachment points B in the base (see illustration above)
and around a secure anchoring point.
A
B
B
Page 2
Information subject to change without notice. HARMAN
Professional Denmark ApS disclaims liability for any injury,
damage, direct or indirect loss, consequential or economic
loss or any other loss occasioned by the use of, inability to
use or reliance on the information contained in this document.
©2017 HARMAN Professional Denmark ApS. All rights reserved.
Martin® is a trademark of HARMAN Professional Denmark ApS
registered in the United States and/or other countries. Features,
specifications and appearance are subject to change without
notice.
HARMAN Professional Denmark ApS
Olof Palmes Allé 18 • 8200 Aarhus N • Denmark
www.martin.com
Document revision: A
If a safety cable attachment point becomes damaged
or deformed, do not suspend the fixture.
AC power
For protection from electric shock, the fixture must
be grounded (earthed). The power distribution
circuit must be equipped with a fuse or circuit
breaker and ground-fault (earth-fault) protection.
Socket outlets or external power switches used to
supply power must be located near the fixture and
easily accessible so that it can easily be
disconnected from power.
Do not use an external dimming system to supply power to the
THRILL Mini Profile, as this may cause damage to the fixture
that is not covered by the product warranty.
The fixture has an auto-ranging power supply that accepts AC
mains power at 100-240 V at 50/60 Hz. Do not apply AC mains
power at any other voltage or frequency.
Control data link
If using a DMX controller for fixture control, connect them to the
controller’s output. The THRILL Mini Profile ha s 3-pin and 5-pin
XLR connectors for DMX-standard data input and output. The
pin-out on all connectors is pin 1 = shield, pin 2 = cold (-), and
pin 3 = hot (+). Pins 4 and 5 are not used by the fixture but allow
for throughput to devices that may use them.
Up to 32 DMX devices can be linked together on a single daisy
chain. The total number of devices connected to a 512 channel
controller output is limited by the number of DMX channels
required by the devices. Use shielded twisted-pair cable
designed for RS-485 devices: standard microphone cable cannot
transmit control data reliably over long runs. 24 AWG cable is
suitable for runs up to 300 meters (1000 ft.). Heavier gauge cable
and/or an amplifier is recommended for longer runs.
Terminate the data link by installing a termination plug in the
output of the last fixture. The termination plug “soaks u p” the
control signal so it does not reflect and cause interference.
If a splitter is used, terminate each branch of the link.
Maintenance
The user may carry out the maintenance
operations described in this manual. Do not open
the housing, there are no user serviceable parts
inside the fixture, and do not try to repair a
defective fixture.
Disconnect the fixture from mains power before performing
maintenance.
Service fixtures in an area where there is no risk of injury
from falling parts, tools or other materials.
Cleaning
Excessive dust, effects fluid, and particle buildup degrades
performance, causes overheating and will damage the fixture.
Damage caused by inadequate cleaning or maintenance is not
covered by the product warranty.
The cleaning of external optical lenses must be carried out
periodically to optimize light output. Cleaning schedules for
lighting fixtures vary greatly depending on the operating
environment. It is therefore impossible to specify precise
cleaning intervals for the fixture. Environmental factors that may
result in a need for frequent cleaning include:
Use of effect machines.
High airflow rates (near air conditioning vents, for example).
Presence of cigarette smoke.
Airborne dust.
If one or more of these factors is present, inspect fixtures within
their first 100 hours of operation to see whether cleaning is
necessary. Check again at frequent intervals. This procedure
will allow you to assess cleaning requirements in your particular
situation.
Use gentle pressure only when cleaning, and work in a clean,
well-lit area. Do not use any fixture that contains solvents or
abrasives, as these can cause surface damage.
To clean the fixture:
1. Disconnect the fixture from power and allow it to cool for at
least 10 minutes.
2. Vacuum or gently blow away dust and loose particles from
the outside of the fixture and the air vents at the back and
sides of the head and in the base with low-pressure
compressed air.
3. Clean surfaces by wiping gently with a soft, clean lint-free
cloth moistened with a weak detergent solution. Do not rub
glass surfaces hard: lift particles off with a soft repeated
press. Dry with a soft, clean, lint-free cloth or low-pressure
compressed air. Remove stuck particles with an unscented
tissue or cotton swab moistened with glass cleaner or
distilled water.
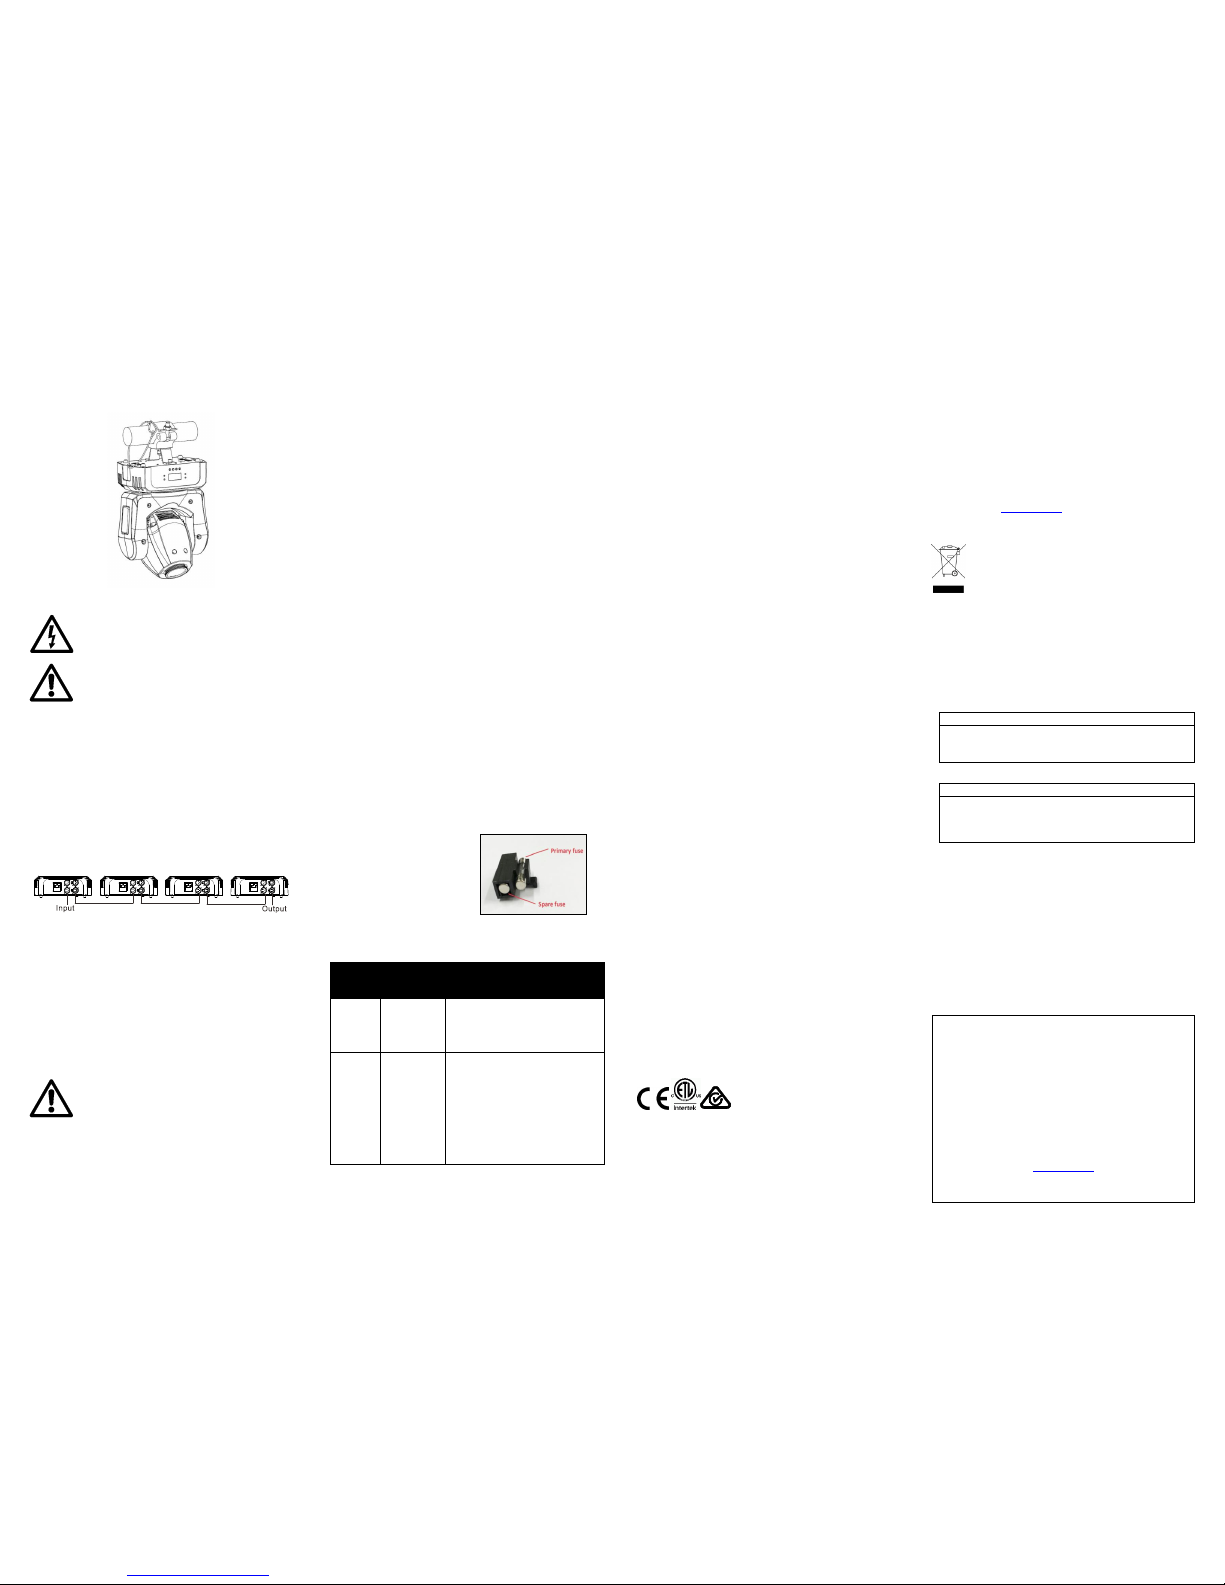
Replacing the primary fuse
If the fixture is completely dead,
the primary fuse may have blown
and it may be necessary to install
a new fuse. Replace with a fuse
of the same size and specified
rating only. A spare fuse is
located in the fuse holder.
Troubleshooting
This section describes some typical problems and how to solve
them.
Symptom
Potential
Causes
Remedies
No light
from fixture,
or fans not
working.
Power supply
issue such as
blown fuse,
faulty connector
or damaged
cable.
Ensure that the mains supply is connected
and supplying power to the fixture.
Check all power connections and cables.
Check and if necessary replace the fuse.
Fixture
does not
respond to
DMX
control.
Fault in the
DMX network
due to
connector or
cable damage,
incorrect DMX
addressing, or
potential
interference
from proximity to
a high voltage
installation.
Ensure that fixture’s DMX address matches
address set on DMX control device.
Check that DMX LED is on, and if not, check
all DMX cables and connections.
Ensure that DMX link is terminated.
Check that all components on DMX link use
standard DMX polarity.
Attempt to control the fixture with another
DMX control device.
Move or shield link if it is close to an
unshielded high-voltage installation.
Specifications
Physical
Dimensions (L x W x H) ........ 237 x 155 x 338 mm (9.3 x 6.1 x 13.3 in.)
Weight ............................................................................ 4.3 kg (9.5 lbs.)
Dynamic Effects
Color wheel................ 8 colors plus open, variable and random rotation
Static gobo wheel ...... 8 gobos plus open, variable and random rotation
Strobe ...................Variable 3 - 20 Hz, pulse effects and random strobe
Electronic dimming ......................0 - 100%, four dimming curve options
Pan ...................................................................................................540°
Tilt .....................................................................................................230°
Control and Programming
Control options ...................... DMX, 4 stand-alone shows, master/slave
DMX channels ..................................................................................... 10
Stand-alone trigger ............................................ Sound-trigger, auto-run
User Interface ............................. Control panel with backlit LCD display
DMX compliance ........................................................ USITT DMX512-A
Optics
Light source ....................................................... 18 W white LED engine
Minimum LED lifetime ...........50 000 hours (to >70% luminous output)*
Beam angle ........................................................................................ 14°
Focus ........................................................................................... Manual
*Figure obtained under manufacturer´s test conditions
Construction
Color ............................................................................................... Black
Housing ... High-impact flame-retardant thermoplastic on metal chassis
IP rating ........................................................................................... IP 20
Installation
Orientation .............................................................. Standing or hanging
Mounting points ................. Bracket for single rigging clamp, M12 or ½”
Location ........................................................................ Dry location only
Minimum distance to Iilluminated surfaces ......................200 mm (8 in.)
Minimum distance to combustible materials ....................100 mm (4 in.)
Minimum clearance around fans and vents .....................100 mm (4 in.)
Connections
AC power input ......................................................... IEC male inlet, C14
DMX data in/out .............................................. 3-pin & 5-pin locking XLR
Electrical
AC power .................................................. 100-240 V nominal, 50/60 Hz
Fuse .................................................................................. T 2.0 A, 250 V
Typical power and current
120 V, 60 Hz ......................................................................... 52 W, 0.9 A
230 V, 50 Hz ......................................................................... 50 W, 0.4 A
Typical half-cycle RMS inrush current ............................................ 6.4 A
Measurements made at nominal voltage with all LEDs at full intensity.
Allow for a deviation of +/- 10%.
Thermal
Cooling ........................... Forced air (temperature-regulated, low noise)
Maximum ambient temperature (Ta max.) ...................... 40° C (104° F)
Minimum ambient temperature (Ta min) ............................... 0°C (32° F)
Total heat dissipation* ......................................................... 180 BTU/hr.
*Calculated, +/- 10%, at full intensity, full white
Approvals
EU safety ........... EN 60598-2-17, EN 61000-3-3, EN 62471, EN 62493
EU EMC ...................................................................................................
.............. EN 55015, EN 55032, EN 55103-2, EN 61000-3-2, EN 61547
US safety ................................................................................... UL 1573
US EMC .................................................. CFR Title 47, Part 15, Class A
Canadian safety ...................................................... CSA C22.2 No. 166
Canadian EMC ........................................................... ICES-003 Class A
Australia/NZ (pending) .................................................................... RCM
Included Items
Power Cable, EU, IEC C13 female, molded Schuko, 1.9 m (6.3 ft.)
Power Cable, US, IEC C13 female, molded NEMA 5-15, 1.9 m (6.3 ft.)
Bracket and hardware for rigging clamp attachment
Accessories
Super-llightweight half-coupler clamp, black ................... PN: 91602018
Safety Cable, SWL 60 kg (132 lb.),
BGV C1/DGUV 17, black ................................................ PN: 91604006
Related Items
RUSH® Software Uploader ............................................. PN: 91611399
Martin® M-Touch ............................................................. PN: 90737040
Martin® M-Play ................................................................ PN: 90737030
Ordering Information
THRILL Mini Profile ......................................................... PN: 90240090
Specifications subject to change without notice. For latest product
specifications, see www.martin.com
Disposing of this product
THRILL by Martin® products are supplied in
compliance with Directive 2012/19/EC of the
European Parliament and of the Council of the
European Union on WEEE (Waste Electrical and
Electronic Equipment), where applicable. Help
preserve the environment! Ensure that this product is recycled
at the end of its life. Your supplier can give details of local
arrangements for the disposal of THRILL by Martin® products
Photo Biological Safety Warning
The warning shown below is displayed on this fixture. If it
becomes difficult or impossible to read, it must be replaced
using the illustration below to reproduce a new label sized 45 x
18 mm, in black on a yellow background.
RISK GROUP 2
CAUTION. Possibly hazardous optical radiation emitted from this
fixture.
Do not stare at operating lamp. May be harm ful to the eyes.
GROUPE DE RISQUE 2
PRUDENCE. Produit à émission de radiations visibles potentiellement
dangereuses.
Ne pas fixer le faisceau en fonctionnement. Risque de lésions
oculaires.
FCC Compliance
This device complies with Part 15, Class B, of the FCC Rules. Operation is subject
to the following two conditions: (1) This device may not cause harmful interference,
and (2) this device must accept any interference received, including interference
that may cause undesired operation.
Canadian Interference-Causing Equipment Régulations - Règlement sur le
Matériel Brouilleur du Canada
This Class B digital apparatus meets all requir ements of the Canadian
Interference-Causing Equipment Regulations.
Cet appareil numérique de la classe B respecte toutes les exigences du
Règlement sur le Matériel Brouilleur du Canada.
 Loading...