

Page 1
RoboScan Pro 518
user manual
Page 2

© 1998-2000 Martin Professional A/S, Denmark.
All rights reserved. No part of this manual may be
reproduced, in any form or by any means, without
permission in writing from Martin Professional A/S,
Denmark.
Printed in Denmark.
P/N 35000059 Rev. D
Page 3

section 1
Introduction
RoboScan Pro 518 Safety Information ............................ .....................................4
Features ...............................................................................................................5
Accessories ..........................................................................................................5
section 2
Installation
Installing and Changing the Lamp ........................................................................6
Checking Voltage and Frequency Settings ..........................................................6
Installing a Plug on the Power Cord .......................... ...........................................7
Releasing the Pan/Tilt Lock ..................................................................................7
Rigging .................................................................................................................7
Setup for Controller Operation ..............................................................................8
section 3
Operation
Stand-Alone Operation .......................................................................................10
Controller Operation ...........................................................................................10
Focus ..................................................................................................................12
Operating with Martin Controllers ....................................................................... 12
section 4
Service and Maintenance
Adjusting the Lamp .............................................................................................13
DMX Mode Selection ..........................................................................................14
Selecting Voltage and Frequency .......................................................................15
Adjusting the Mirror ............................................................................................16
appendix a
DMX 512 Protocol
..........................................................................................................................18
appendix b
Specifications
...........................................................................................................................21
appendix c
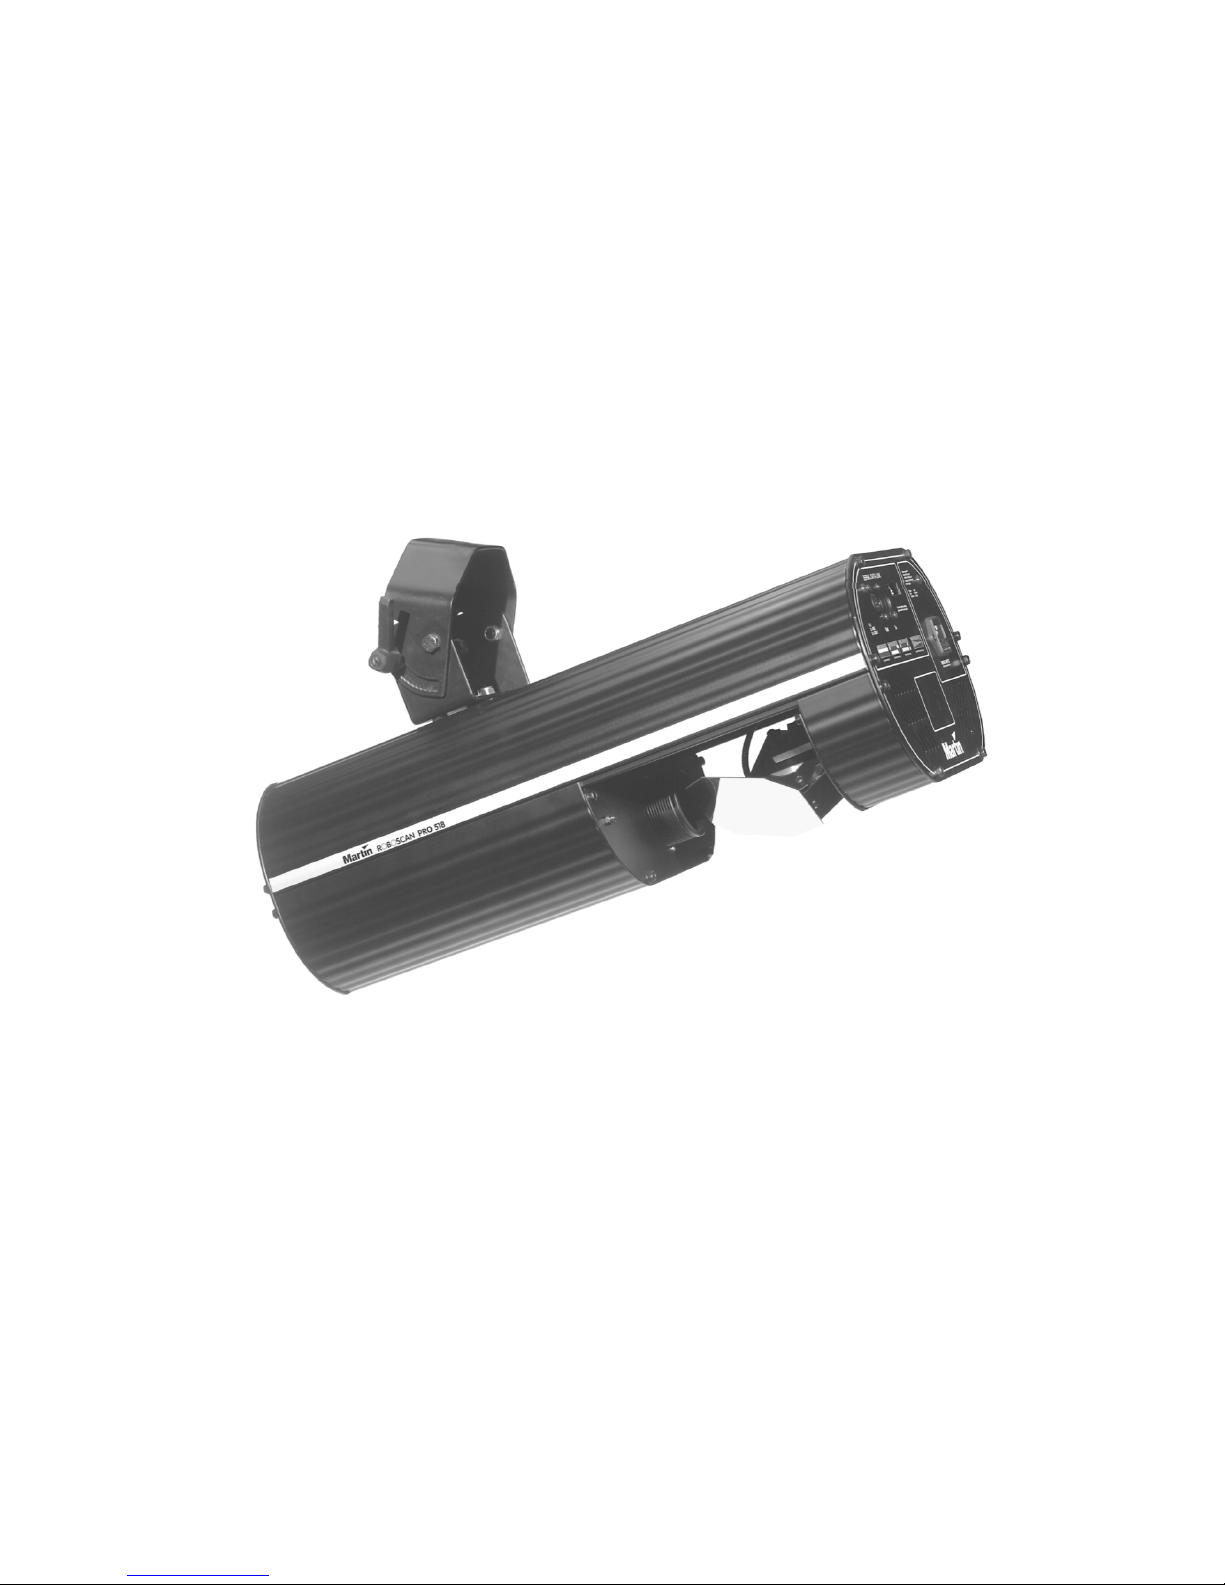
Exterior View
..........................................................................................................................22
appendix d
DIP-Switch Table
..........................................................................................................................23
3
Page 4

section 1
INTRODUCTION
Thank you fo r purchas ing the Martin Ro boScan P ro 518 movin g-mirror intell igent pr ojector. It is designed, built, and programmed to be bright, reliable, safe and easy to use. With
proper setup and maintenance, the RoboScan Pro 518 will provide years of trouble-free
operation.
This manual co vers the RoboScan Pro 518 with so ftware version 6.4. The latest info rmat ion
on the RoboS can Pro 51 8 is always available from your deal er and th e Martin web site at
http://www.martin.dk.
RoboScan Pro 518 Safety Information
WARNING!
This product is for professional use only. It is not for household use.
This product pre sent s r isks of le thal or severe injury du e t o fire and hea t, e lect ric sho ck, ult raviolet radiation, lamp explosion, and falls.
fixture, follow the safety precautio ns li sted below and obs erve all warnin gs in this man ual an d
printed on the fixture. If you have questions about how to operate the fixture safely, please contact your Martin dealer or call the Martin 24-hour service hotline at +45 70 200 201.
Read this manual
before powering or installing the
To protect yourself and others from electric shock
• Disconnect the fixture from AC power before removing or installing the lamp, fuses,
or any part, and when not in use.
• Always ground (earth) the fixture electrically.
• Use only a source of AC power that complies with local building and electrical codes
and has both overload and ground-fault protection.
• Do not expose the fixture to rain or moisture.
• Refer any service operation not described in this manual to a qualified technician.
To protect yourself and others from UV radiation and
lamp explosion
• Never operate the fixture with missing or damaged lenses and/or covers.
• When replacing the lamp, allow the fixture to cool for at least 5 minutes before opening the fixture or removing the lamp. Protect your hands and eyes with gloves and
safety glasses.
• Do not stare directly into the light. Never look at an exposed lamp while it is lit.
• Replace the lamp if it becomes defective or worn out.
4 RoboScan Pro 518
Page 5

To protect yourself and others from burns and fire
• Never attempt to bypass the thermostatic switch or fuses. Always replace defect ive
fuses with ones of the specified type and rating.
• Keep all combustible materi als (for example fabric, wood, paper) at least 0.1 meters (4
inches) away from the fixture. Keep flammable mat erials well away from the fixture.
• Do not illuminate surfaces within 0.3 meters (12 inches) of the fixture.
• Provide a minimum clearance of 0.1 meters (4 inches) around fans and air vents.
• Never place filters or other materials over the lens or mirror.
• The exterior of the fixture can reach temp eratures up to 65° C (15 0° F). Allow the fixture to cool for at least 5 minutes before handling.
• Do not modify the fixture or install other than genuine Martin parts.
• Do not operate the fixture if the ambient t emperature (Ta) exceeds 40° C (104° F).
To protect yourself and others from injury due to falls
• When suspending the fixture above ground level, verify that the structure can hold at
least 10 times the weight of all installed devices.
• Verify that all external covers and rigging hardware are securely fastened and use an
approved means of secondary attachment such as a safety cable.
• Block access below the work area whenever installing or removing the fixture.
Features
• Remote lamp on/off
• Coated precision optics with adjustable focus
• Smooth, f ull-range dimm ing
• “Instant” blackout an d variable strobe effects up to 9 Hz
• 3-facet prism
• Frost filter
• 17 dichroic colors plus CTC filter and white (36 color combinations)
• Continuous bi-directio na l scroll color whe el
• 5 interchangeable rotating gobos
• 176° pan and 85° tilt with 16-bit microstep precision
• Works with Martin and DMX 512 co ntrollers
• Variable speed control on all functions
• Prepr og r am m ed stand-alone oper a t ion
• Music trigger using built-in microphone
• Power factor correction for low current consumption
• Overheating protection
Accessories
Your Martin dealer can provide you with the following RoboScan Pro 518 accessories:
• Optional gobo set (6 pcs).........................................................................P/N 43010007
5Introduction
Page 6

section 2
INSTALLATION
The RoboScan Pro 518 pack age comes complete with the following items:
• 5 meters XLR-XLR cable
• mains cable
• mounting bracke t and hardware
• this user manual
WARNING!
Disconnect the fixture from AC power before proceeding.
Installing and Changing the Lamp
The RoboScan Pro 518 is designed to use the Osram HSD 250 and Philips MSD-250/2 discharge lamps. Installing other lamps may damage the fixture. The lamp holder is preadjusted at the factory. For precise alignment, see “Adjusting the Lamp” on page 13.
To minimize the risk of lamp explosion, replace the lamp before usage exceeds 2200 hours.
Remove the 3 thumbs crews sec ur ing the lam p-s ocket assembly to t he rea r of
1.
the Robo Scan. Gently pull out the assembly.
If replacing the lamp, remove the old lamp from the socket.
2.
Holding the new lamp in a clean cloth (do not touch the glass), carefully
3.
insert it fir mly and squarely into the lamp socket.
If your fingers touch the glass, clean the bulb with a clean, lint-free cloth
4.
wetted with denatured alcohol.
Replace the lamp-socket assembly and tighten the thumbscrews.
5.
Checking Voltage and Frequency Settings
The voltage and frequency settings must match the local AC power supply! Operating at the
incorrect setting can result in poor light output, shortened lamp life, overheating and damage to the fi xture. Th e setting s are printed o n the se rial numb er labe l on the fron t of th e case.
If the voltage is not with in 5 p ercent of t he local su pply, or if the frequenc y (5 0/60 Hz) is not
the same, then the ballast and/or transformer must be rewired as described on page 15.
6 RoboScan Pro 518
Page 7

Installing a Plug on the Power Cord
WARNING!
For safe operation, the fixture must be grounded (earthed).
The RoboSca n Pro 518 may be del ivered without a plug on the power cord. Following the
manufacturer’s instructions, install an ap proved 3-prong g rounding- type plug that fits your
supply. Connect the wires to the pins as listed below. If the pins are not clearly identified, or
if you have any doubts ab/out proper installation, consult a qualified electrician.
Wire Pin Marking Screw color (US)
brown live “L” yellow or bras s
blue neutral “N” silver
yellow/green ground green
Releasing the Pan/Tilt Lock
The pan/tilt assembly floats in a rubber mount in order to reduce noise. To protect the
assembly from damage during shipment, it is locked with plastic straps and 2 thumbscrews.
These must be removed before using the RoboScan !
Cut and remove the 2 plastic straps.
1.
Remove the thumbscrews from positions A1 and A2 on either side of the
2.
pan/tilt assembly and store them in positions B1 and B2.
Note: It is strongly recommended that the pan/tilt as sembly be locked for transportation by
replacing the thumbscrews in positions A1 and A2.
Carefully remove the protection foil and warning notice from the mirror.
3.
Rigging
Secure the mounting bracket to the 3 bolts located on the top of the chassis
1.
with 3 M8 self-locking nuts (included).
Verify that the clamp (not included) is undamaged and can bear at least
2.
10 times the fixture’s weight. Bolt the clamp securely to the bracket w ith a
grade 8.8 (minimum) M10 bolt and lock nut, or as recommended by the
clamp manufacturer, through the 11 mm hole in the center of the mounting bracke t.
If permanently installing the fixture, verify that the hardware (not
3.
included) and mounting surface can bear at least 10 times the fixture’s
weight.
7Installation
Page 8

Verify that the structure can support at least 10 times the weight of all
4.
installed fixtures, clamps, cables, auxiliary equipment, etc.
Working from a stable platfor m, clamp or fasten the fixture to the str uc-
5.
ture.
Install a safety cable that can hold at least 10 times the weight of the fix-
6.
ture through/over the support and mounting bracket.
Loosen the swivel locks and tilt the fixture to the desired angle. Turn the
7.
swivel locks clockwise to tighten. If a swivel lock does not tighten fully,
pull the handle out, turn it counterclockwise, and retighten. Repeat as
necessary.
Verify that the fixture is located at least 0.3 meters (12 in.) away from the
8.
surface to be illuminated and at least 0.1 meters (4 in.) from any combustible materials. Verify that the clearance around the fan and air vents is at
least 0.1 meters (4 in.). Verify that there are no flammable materials
nearby.
Setup for Controller Operation
Connect the Serial Link
The RoboScan Pro 5 18 may be used with DMX an d Martin prot ocol control lers. The outputs on these co ntrollers are different. DMX contr ollers usually have 5-pin XLR out puts
and are wired wi th pin 2 cold (-) a nd pin 3 ho t (+). Mart in-sta ndard cont rollers h ave 3-pin
XLR outputs wired with pin 2 hot (+) and pin 3 cold (-). The Pro 518’s XLR input is configured for the Martin standard. When connecting a RoboScan Pro 518 to any DMX-standard
device, you must swap the hot and cold signals with a phase reversing cable.
Connect the controller’s data output to the RoboScan Pro 518’s input. If using
1.
a Martin-standard controller, use a direct 3-pin to 3-pin cable such as the one
included. If using a DMX controller, use a phase reversing cable, either 3-pin
to 3-pin, or 5-pin to 3-pin, depending on the output of the controller.
Continue the link: connect the output of the fixture closest to the control-
2.
ler to the input of the next fixture. Use a direct cable when connecting
same-standard fixtures. Use a phase reversing cable only when connecting a DMX-standard fixture to a Martin fixture with pin 2 hot. Up to 32 fixtures may be connected on a ser ial link.
Insert a male 120
3.
on the link. The termination plug is simply a 3-pin male XLR plug with a
120
resistor soldered between pins 2 and 3.
Ω
required for error-free communication.
XLR termination plug in the output of the last fixture
Ω
The termination plug is
Set the Address
When using the RoboScan Pro 518 with a controller, you must set the DIP-switch to the
start channel, also known as the address, which is the first chan nel the controller uses to
send instructions to the RoboScan Pro 518.
8 RoboScan Pro 518
Page 9

3-pin to 3-pin
Phase Reversing
Cable
5-pin to 3-pin
Phase Reversing
Cable
3-pin to 5-pin
Phase Reversing
Cable
Connections
Male Female
1
2
3
1
2
3
P/N 11820006
Connections
Male Female
1
2
3
1
2
3
4
5
P/N 11820003
Connections
Male Female
1
2
3
1
2
3
4
5
P/N 11820002
For independent co ntrol, e ach fixture mu st h ave its own address a nd co ntrol ch ann els. Two
or more RoboScan Pro 518s may have the same address; however, they will receive the
same instructions and behave identically.
Martin mode: The RoboScan Pro 518 uses 1 channel to communicate wit h the controller.
The address may be any channel between 1 and 32.
DMX mode: The RoboScan Pro 518 may be operated in 3 DMX modes; see the DMX protocol starting o n pa ge 18 for d etai ls. It u ses 7 co nsec utive DMX chann els in m ode 1, and 9
consecutive DMX channels in modes 2 and 3. The factory default is mode 3. The address
may be any channel up to 504 within the cont roller’s range (506 if 7 channels are used).
Example: 4 Pro 518s using mode 3 can be addressed as follows:
1234567891011121314151617181920212223242526272829303132333435
Pro 518 No. 1
Address: 1
Pro 518 No. 2
Address: 10
Pro 518 No. 3
Address: 19
Pro 518 No. 4
Address: 28
Use the following procedure to set a Martin or DMX address.
Select an available address within the c ontroller’s range.
1.
Find the DIP-switch setting in the address table on page 23.
2.
Set the DIP-switch by flipping pins 1 through 9 ON or OFF as listed in the
3.
address table. Flip pin 10 to OFF.
36
9Installation
Page 10

section 3
OPERATION
Stand-Alone Operation
The Roboscan Pro 518 may be operated without a controller in stand-alone mode. In this
mode, the fixture performs a random sequence that is triggered by the beat of the music or at
a set speed. The DIP -switch must be set to the desired stand-al one mode before applyi ng
power.
With the fixture powered off, set the DIP-switch as shown below for the
1.
desired mode.
Apply power to the RoboScan Pro 518 to run the sequence.
2.
Stand-Alone Modes
Description Pins Switched ON
Pins not listed must be switched off.
Random sequence, wide pan/tilt, auto trigger 2, 10
Random sequence, wide pan/tilt, music trigger 1, 2, 10
Random sequence, narrow pan/tilt, auto trigger 2, 3, 10
Random sequence, narrow pan/tilt, music trigger 1, 2, 3, 10
Lamp ON 8, 10
Lamp OFF 7, 10
Adjustment sequence (for service use only) (1), 5, 10
Adjustment sequence (for service use only) (1), 2, 5, 10
L.E.D. chase auto-trig (for service use only) 4, 10
L.E.D. chase music-trig (for service use only) 1, 4, 10
Controller Operation
Getting Started
The RoboScan Pro 518 may be used with DMX-512 and Martin protocol controllers; it
automatically determines which protocol is used. Protocol auto-detection can be reactivated
if necessary by switching on all ten DIP-switches and then resetting the address.
Connect the RoboScan Pro 518 to the controller as described under “Setup
1.
for Controller Operation” on page 8.
Switch on and configure the controller.
2.
Apply power to the RoboScan. After a short reset procedure it will
3.
respond to the controller.
10 RoboScan Pro 518
Page 11

The controllable effects are described bel ow. See your controller manual and the DMX protocol for additional informati on.
Lamp
A relay inside the fixture allows you to turn on and off the lamp via the controller without
affecting the rest of the fixture. After switching on the RoboScan Pro 518, the lamp will
remain off until you send a “lamp on” command from the controller.
It's important to note that the lamp is a cold restrike type, meaning that it must be cold
before re-striking is possible. You must wait approximately 10 minutes after having powered off the lamp before you can turn it back on again.
To turn the lamp off via DMX, you must set values on 3 channels and hold them for 5 seconds as follows:
Channel DMX Value Percent Effect
1 253 - 255 99 - 100 Lamp Off
3 120 - 123 47 - 48 UV Pass
5 64 - 127 25 - 50
5500 Æ 3400K
CTC filter
Pan/Tilt
The moving mirror allows you to pan the beam 176° and tilt it 85°. Microstep motors provide smooth and acc urate movement at all spe eds. DMX modes 1 and 2 offer 8-bit pan/til t
resolution, while DMX mod e 3 a nd Martin mo de pr o v id es finer position control with 16-bit
resolution. Selecting the B/O speed blacks out the light while the mirror is moving.
Color Wheel
The Pro 518 has 17 color positions on the color wheel: 14 with saturated dichroic colors, 2
with multi-colors, 1 with a special UV-pass filter, and 1 open white position . The wheel can
be positioned between 2 colors to split the beam. Acceleration control allo ws variable speed
color scrolling. Selecting the B/O speed blacks out the light while scrolling at highest
speed.
Rotating Gobos
The Pro 518 has five rotating gobos. The go bo s can b e rotate d in bo th direc tio ns a t different
speeds. The B/O speed blacks out the light while the gobos are changing.
11Operation
Page 12

Dimmer/Shutter
High resolution, 0 to 100% smooth dimming is provided by the combined dimmer/shutter
system. Use hi gh speed dimming to open or close the dimmer instantly. It's also possible to
strobe at up to 9 flashes per second.
Effects Wheel
The effects wheel has a frost filter, a 3-facet prism for multiplying images, and a 5500 to
3400K color temperature corrector (CTC). Combining the CTC with a color filter yields
another shade of the color.
Fan
Fan speed can be reduced for short periods if quieter operation is required. Low fan speed
reduces cooling ability and should only be used when absolutely necessary and only if the
ambient temperat ure is 25° C (77° F) or l ess. If the temperature inside the fixture exceeds a
certain level, a built-in thermostat will automatically power off the lamp. You can turn off
the lamp if the fan must be run at low sp eed for more than a few minutes.
Focus
Focus may be adjusted manually by turning the lens barrel.
Operating with Martin Controllers
Beginning with software version 6.4, an im proved speed array has been prog rammed for
use with the Martin controllers. This increases the range of speeds available for controlling
effects. To use this feature, the DMX-mode jumper must be set to mode 3. This is the factory default setting . See “DMX Mode Selection” on page 14 if you need to change the mode
setting.
12 RoboScan Pro 518
Page 13

section 4
SERVICE AND MAINTENANCE
IMPORTANT!
Read the procedures carefully. If you do not feel completely compe-
tent to perform the service, consult qualified service
personnel for assistance.
Adjusting the Lamp
The RoboScan Pro 518 comes fully adjusted from the factory, however, readjustment of the
lamp may be necessary due to differences between lamps. The lamp is adjusted by turning
the 3 Phillips-head screws on the lamp access plate. Turning these clockwise pulls the lamp
back towards the rear and vice versa. Keep adjustments small to avoid pulling the lamp so
far off center that it hits the reflector.
WARNING!
The fixture must be cool and disconnected from AC pow er.
Remove the 3 thumbscrews from the lamp access plate and remove the lamp
1.
assembly.
Make a preliminary adjustment: turn the adjustment screws so that the
2.
inside-to-inside measurement between the lamp socket mounting plate
and the lamp access plate is 13 mm (1/2 in). Replace the lamp assembly.
Flip DIP-switch pins 8 and 10 on. Flip all other pins off.
3.
Apply power to the RoboScan Pro 518. After it has reset, it produces a
4.
white light with an open gobo for adjustment purposes. Wait approximately 5 minutes for the lamp to reach full brightness.
Manually position the fixture and/or mirror so the light shines on a flat
5.
surface and focus the beam.
If there is an off-center “hot spot,” the lamp is not centered in the reflec-
6.
tor. “Pull” the hot spot into the center of the field with small adjustments
of one or more of the screws.
If the light is significantly brighter in the center of the field than it is at the
7.
edge, the lamp is too far forward in the reflector. P ull the lamp in by turning all three screws clockwise 1/4-turn at a time until the light is evenly
distributed.
13Service and Maintenance
Page 14

If the light is brighter around the edge than it is in the center, or if light
8.
output is low, the lamp is too far back in the reflector. “Push” the lamp out
by turning the screws counter-clockwise 1/4-tur n at a time until the light is
bright and evenly distr ibuted.
DMX Mode Selection
The DMX mode is set by a jumper inside the RoboScan Pro 518. The factory de fault is
mode 3 (jumper on pins 4 and 5). Follow the procedure below to enable modes 1 or 2.
Make sure the fixture is disconnected from AC power
Remove the 6 screws labelled 'D' and 'C' in figure 1 and carefully r emove
1.
the complete pan/tilt section. Avoid unplugging the motor cables from the
circuit board.
WARNING!
before proceeding.
Locate jumper PL432 on the circuit board (refer to the nearby label). To
2.
enable DMX mode 1, simply remove this jumper. To enable DMX mode 2,
move the jumper to pins 5 and 6.
Reassemble the fixture before connecting to AC power.
3.
ballast
circuit board
transformer
14 RoboScan Pro 518
Figure 1
DMX jumper
Page 15

Selecting Voltage and Frequency
The voltage and frequency settings must match the local AC power supply! Operating at the
incorrect setting can result in poor light output, shortened lamp life, overheating and damage to the fixture. The settings are print ed on the serial number label on the front of the
case: if the volta g e is not wi thi n 5 p erce nt of the loc al su p ply or th e frequ e ncy (50/60 Hz) is
different, then the ballast and transformer must be rewired.
Selectable
Model
RoboScan Pro 518 EU 230 V / 240 V / 250 V 50 Hz
RoboScan Pro 518 US 100 V / 110 V / 120 V 50/60 Hz
Voltages
Selectable
Frequencies
WARNING!
Make sure the fixture is disconnected from AC power before pro-
ceeding.
RoboScan Pro 518 US
Unscrew the 8 screws, labelled 'A' and 'B' in figure 1, that secure the casing
1.
over the lamp housing, and remove the casing.
Locate the ballast at the rear-left corner (see figure 1) and move the
2.
GREY wire, labelled 'F', to either the 50 Hz or the 60 Hz terminal to select
the local frequency.
Locate the transformer at the rear-right corner of the unit, and move the
3.
BROWN wire, labelled 'V', to either the 100 V, 110 V, or 120 V ter minal to
select the local AC voltage.
Reassemble the unit before connecting to AC power.
4.
RoboScan Pro 518 EU
Unscrew the 8 screws, labelled 'A' and 'B' in figure 1, that secure the casing
1.
over the lamp housing, and remove the casing.
Locate the ballast at the rear-left corner (see figure 1) and move the
2.
GREY wire, labelled 'V', to either the 220 V, 230 V, or 250 V ter minal to
select the local AC voltage.
Locate the transformer at the rear-right cor ner of the unit and move the
3.
BROWN wire, also labelled 'V', to either the 225 V or 240 V terminal to
select the local AC voltage.
Reassemble the unit before connecting to AC power.
4.
15Service and Maintenance
Page 16

Adjusting the Mirror
Readjusting the mech anica l st op on the Ro bo Scan P ro 5 18 mirror a dap tor is req uired if the
pan or tilt motor occasionally loses step, leaving the mirror incorrectly positioned after a
reset. This error occurs when the recoil of the mechanical reset bounces the mirror and
bracket a whole pa n or tilt motor step.
Figure 2
Pan Adjustment
Connect the RoboScan Pro 518 to a controller and set the address. Switch on
1.
the controller and then the fixture.
Use the controller to move the mirror to the extreme left position, thus
2.
positioning screw A1 at the upper mechanical stop (A2).
Release the lock-nut on adjustment screw A1.
3.
Turn screw A1 clockwise 1/2 - 1 turn to increase the distance between the
4.
head of the screw and the mechanical stop (A2).
Tighten the lock-nut on screw A1.
5.
Reset the fixture a number of times to check the new reset position.
6.
Use the controller to move the mirror through all extreme positions,
7.
checking that adjustment screw B1 does not touch mechanical stop B2.
during these steps. If it does, then adjust screw B1 accordingly.
Tilt Adjustment
Use the controller to move the mirror to the upper-left position until the top
1.
mechanical stop (C1) is positioned at the edge of the mirror bracket (C2).
Loosen the 2 set crews (E) holding the motor axle while taking care that
2.
the motor does not slide vertically from its current position.
16 RoboScan Pro 518
Page 17

Carefully turn the motor and mirror clockwise (make sure the motor axle
3.
does not turn) until there is a distance of 1/2 to 1 mm (1/64 - 1/32”)
between the edge of the mirror bracket (C2) and the top mechanical stop
(C1).
Tighten the set screws.
4.
Use the controller to reset the fixture and move the mirror through all
5.
extreme positions, checking that the bottom mechanical stop (D1) does
not touch the edge of the mirror bracket (D2). If it does, then readjust as
described above, making the distance between C2 and C1 even smaller.
17Service and Maintenance
Page 18

appendix a
DMX 512 PROTOCOL
The RoboScan Pro 518 supports tracking and vector mode and 8 and 16 bit pan/tilt resolution. The 3 DMX mode s and the channel requiremen ts for each are shown below. The correct mode will depend on your programming preferences and your controller’s abilitie s.
In tracking mode , movement speed is determined directly by the controller’s fade time.
In vector mode, spe ed is determi ned by a value programmed on a separate DMX chan nel.
For smooth movement in vector mod e, the controller’s fade time must be set to 0, i.e., the
position must bump from the current value to the next. If the RoboScan Pro 518 is set to run
vector mode, tracking mode can be enabled by programming the speed channels to 0.
With 8-b it pa n/ tilt re solu tio n, pan an d til t are divided into 256 positions. Finer po sitio n c ontrol is possible with 16-bit pan/tilt resolution, which divides each position into smaller
increments.
DMX Mode Channels PL432 Jumper
Mode 1 - 8 bit Pan/Tilt, Tracking 7 No jumper
Mode 2 - 8 bit Pan/Tilt, Vector 9 Jumper on pin 5 and 6
Mode 3 (default) - 16 bit Pan/Tilt, Tracking 9 Jumper on pin 4 and 5
Channel DMX
Mode 1Mode 2Mode
3
1
* Set color to UV Pass
and effects wheel to
5500 Æ 3400K CTC
filter. Hold 5 seconds.
Values Percent
0 - 5
6 - 10
11 - 138
139 - 170
171 - 202
203 - 235
236 - 252
253 - 255
0 - 2
2 - 4
4 - 54
55 - 67
67 - 79
80 - 92
93 - 98
99 - 100
Effect
Strobe/Stand-Alone/Reset/Lamp On/Off
Default
Fan low (Fan high at all other values.)
Strobe, fast Æ slow
Remote stand-alone, auto trigger
Remote stand alone, music trigger
Reset fixture
Lamp power ON
Lamp power OFF*
2
18 RoboScan Pro 518
0 - 14
15 - 239
240 - 255
0 - 5
6 - 94
94 - 100
Dimmer
Full dimming
Dimming, 100 Æ 0%
No dimming
Page 19

Channel DMX
Mode 1Mode 2Mode
3
3
Values Percent
0 - 3
4 - 7
8 - 11
12 - 15
16 - 19
20 - 23
24 - 27
28 - 31
32 - 35
36 - 39
40 - 43
44 - 47
48 - 51
52 - 55
56 - 59
60 - 63
64 - 67
68 - 71
72 - 75
76 - 79
80 - 83
84 - 87
88 - 91
92 - 95
96 - 99
100 - 103
104 - 107
108 - 111
112 - 115
116 - 119
120 - 123
124 - 127
128 - 131
132 - 135
136 - 139
140 - 197
198 - 255
0 - 1
2 - 3
3 - 4
5 - 6
6 - 7
8 - 9
9 - 11
11 - 12
13 - 14
14 - 15
16 - 17
17 - 18
19 - 20
20 - 22
22 - 23
24 - 25
25 - 26
27 - 28
28 - 29
30 - 31
31 - 33
33 - 34
35 - 36
36 - 37
38 - 39
39 - 40
41 - 42
42 - 44
44 - 45
45 - 47
47 - 48
49 - 50
50 - 51
52 - 53
53 - 55
58 - 77
78 - 100
Effect
Color
White
White / Pink split
Pink
Pink / Magenta split
Magenta
Magenta / Primary Red split
Primar y Red
Primar y Red / Flame Red split
Flame Red
Flame Red / Dark Orange split
Dark Orange
Dark Orange / Orange split
Orange
Orange / Yellow split
Yellow
Yellow / Light Green split
Light Green
Light Green / Fern Green split
Fern Green
Fern Green / Turquoise split
Turquoise
Tu rquoise / Cyan split
Cyan
Cyan / Light Blue split
Light Blue
Light Blue / Dark Lavender Split
Dark Lavender
Dark Lavender / Dark Blue split
Dark Blue
Dark Blue / UV Pass split
UV Pass
UV Pass / Multi Color 1 s plit
Multi Color 1
Multi Color 1 / Multi Color 2 split
Multi Color 2
CW rotation, fast Æ slow
CCW rotation, slow Æ fast
19DMX 512 Protocol
Page 20

Channel DMX
Mode 1Mode 2Mode
3
Values Percent
0
1 - 24
25 - 27
28 - 51
0
0 - 9
10 - 11
11 - 20
Effect
Rotating Gobo Wheel
Open
Gobo 1, CCW, fast Æ slow
Gobo 1, static
Gobo 1, CW, slow Æ fast
52 - 75
76 - 78
79 - 102
4
5
6
103 - 126
127 - 129
130 - 153
154 - 177
178 - 180
181 - 204
205 - 228
229 - 231
232 - 255
0 - 63
64 - 127
128 - 191
192 - 255
0 - 255 0 - 100
20 - 29
30 - 31
31 - 40
40 - 49
50 - 51
51 - 60
60 - 69
70 - 71
71 - 80
80 - 89
90 - 91
91 - 100
0 - 25
25 - 50
50 - 75
75 - 100
Gobo 2, CCW, fast Æ slow
Gobo 2, static
Gobo 2, CW, slow Æ fast
Gobo 3, CCW, fast Æ slow
Gobo 3, static
Gobo 3, CW, slow Æ fast
Gobo 4, CCW, fast Æ slow
Gobo 4, static
Gobo 4, CW, slow Æ fast
Gobo 5, CCW, fast Æ slow
Gobo 5, static
Gobo 5, CW, slow Æ fast
Effects Wheel
Open
5500 Æ 3400K CTC filter
Frost
3-facet prism
Pan
Left Æ Right (127 = neutral)
--7
778
--9
-8-
-9-
20 RoboScan Pro 518
0 - 255 0 - 100
0 - 255 0 - 100
0 - 255 0 - 100
0
1 - 251
252 - 255
0
1 - 251
252 - 255
0 - 251
252 - 255
0
0 - 98
99 - 100
0
0 - 98
99 - 100
0 - 98
99 - 100
Pan Fine (LSB)
Left Æ Right (127 = neutral)
Tilt
Up Æ Down (127 = neutral)
Tilt Fine (LSB)
Up Æ Down (127 = neutral)
Pan/Tilt Speed
Tracking
Fast Æ Slow
Blackout while moving
Color Speed
Tracking
Fast Æ Slow
Blackout while moving
Dimmer Speed
Fast Æ Slow
Fast
Page 21

appendix b
SPECIFICATIONS
Dimensions
• Length:...................................................................................................533 mm (21.0")
• Height with bracket: ..............................................................................325 mm (12.8")
• Height without bracket:...........................................................................185 mm (7.3")
• Wi dth:................ ....................................................................................280 mm (11.0")
• Weight:........................................................................................................14 kg (31 lb)
Electrical
• Power and current consumption:...................................335 W, 1.6 A @ 230 V / 50 Hz
• AC voltage and frequency (EU model):..........................230 V / 240 V / 250 V, 50 Hz
• AC voltage and frequency (US model):.........100 V / 110 V / 120 V / 225 V, 50/60 Hz
• Fuse:...................................................................................T 3.15A (EU) / T 6.3A (US)
Lamps
• Osram HSD 250................................................2000 hr, 250 W, 6000K, P/N 97010103
• Philips MSD 250/2 ...........................................2000 hr, 250 W, 8500K, P/N 97010100
Photometric
• Focused beam ang le: ............... .... ... .... .......................................................................16°
Serial Data Link
• Data input .............. ... .... ........................................................................ 3-pin XLR male
• Data output ............ ... .... .....................................................................3-pin XLR female
• Pin 1.....................................................................................................................ground
• Pin 2...........................................................................................................signal + (hot)
• Pin 3..........................................................................................................signal - (cold)
21Specifications
Page 22

appendix c
bracket mounting bo lts
AC input & fuse
EXTERIOR VIEW
wrap safety wire
through bracket
(clamp not shown)
lamp access plate
lamp adjustment screws
22 RoboScan Pro 518
(dimensions in millimeters)
DIP switch
serial number label
Page 23

appendix d
DIP-SWITCH TABLE
This table shows DIP-switch settings for channels 1- 511. To find a setting, locate the channel in the table. Fol lo w the ro w to th e left to f ind the settin gs for pins 1 throu gh 5; follow the
column to the top to find the settings for pins 6 through 9. A “0” indicates the pin is turned
off and a “1” indicate s the pin is turned on. Pin 10 is always switched OFF when setting a
controller address.
Example: The t able shows the set ting f or chan nel 21 2 is 00101 for pi ns 1 - 5 and 011 0 for
pins 6 - 9. Pins 3, 5, 7, and 8 are set to on; pins 1, 2, 4, 6, 9, and 10 are set to off.
',306ZLWFK#6HWWLQJ
3# #2))
4# #21
&4 &5 &6 &7 &8
3 3 3 3 3 65 97 <9 45; 493 4<5 557 589 5;; 653 685 6;7 749 77; 7;3
4 3 3 3 3 4 66 98 <: 45< 494 4<6 558 58: 5;< 654 686 6;8 74: 77< 7;4
3 4 3 3 3 5 67 99 <; 463 495 4<7 559 58; 5<3 655 687 6;9 74; 783 7;5
4 4 3 3 3 6 68 9: << 464 496 4<8 55: 58< 5<4 656 688 6;: 74< 784 7;6
3 3 4 3 3 7 69 9; 433 465 497 4<9 55; 593 5<5 657 689 6;; 753 785 7;7
4 3 4 3 3 8 6: 9< 434 466 498 4<: 55< 594 5<6 658 68: 6;< 754 786 7;8
3 4 4 3 3 9 6; :3 435 467 499 4<; 563 595 5<7 659 68; 6<3 755 787 7;9
4 4 4 3 3 : 6< :4 436 468 49: 4<< 564 596 5<8 65: 68< 6<4 756 788 7;:
3 3 3 4 3 ; 73 :5 437 469 49; 533 565 597 5<9 65; 693 6<5 757 789 7;;
4 3 3 4 3 < 74 :6 438 46: 49< 534 566 598 5<: 65< 694 6<6 758 78: 7;<
3 4 3 4 3 43 75 :7 439 46; 4:3 535 567 599 5<; 663 695 6<7 759 78; 7<3
4 4 3 4 3 44 76 :8 43: 46< 4:4 536 568 59: 5<< 664 696 6<8 75: 78< 7<4
3 3 4 4 3 45 77 :9 43; 473 4:5 537 569 59; 633 665 697 6<9 75; 793 7<5
4 3 4 4 3 46 78 :: 43< 474 4:6 538 56: 59< 634 666 698 6<: 75< 794 7<6
3 4 4 4 3 47 79 :; 443 475 4:7 539 56; 5:3 635 667 699 6<; 763 795 7<7
4 4 4 4 3 48 7: :< 444 476 4:8 53: 56< 5:4 636 668 69: 6<< 764 796 7<8
3 3 3 3 4 49 7; ;3 445 477 4:9 53; 573 5:5 637 669 69; 733 765 797 7<9
4 3 3 3 4 4: 7< ;4 446 478 4:: 53< 574 5:6 638 66: 69< 734 766 798 7<:
3 4 3 3 4 4; 83 ;5 447 479 4:; 543 575 5:7 639 66; 6:3 735 767 799 7<;
4 4 3 3 4 4< 84 ;6 448 47: 4:< 544 576 5:8 63: 66< 6:4 736 768 79: 7<<
3 3 4 3 4 53 85 ;7 449 47; 4;3 545 577 5:9 63; 673 6:5 737 769 79; 833
4 3 4 3 4 54 86 ;8 44: 47< 4;4 546 578 5:: 63< 674 6:6 738 76: 79< 834
3 4 4 3 4 55 87 ;9 44; 483 4;5 547 579 5:; 643 675 6:7 739 76; 7:3 835
4 4 4 3 4 56 88 ;: 44< 484 4;6 548 57: 5:< 644 676 6:8 73: 76< 7:4 836
3 3 3 4 4 57 89 ;; 453 485 4;7 549 57; 5;3 645 677 6:9 73; 773 7:5 837
4 3 3 4 4 58 8: ;< 454 486 4;8 54: 57< 5;4 646 678 6:: 73< 774 7:6 838
3 4 3 4 4 59 8; <3 455 487 4;9 54; 583 5;5 647 679 6:; 743 775 7:7 839
4 4 3 4 4 5: 8< <4 456 488 4;: 54< 584 5;6 648 67: 6:< 744 776 7:8 83:
3 3 4 4 4 5; 93 <5 457 489 4;; 553 585 5;7 649 67; 6;3 745 777 7:9 83;
4 3 4 4 4 5< 94 <6 458 48: 4;< 554 586 5;8 64: 67< 6;4 746 778 7:: 83<
3 4 4 4 4 63 95 <7 459 48; 4<3 555 587 5;9 64; 683 6;5 747 779 7:; 843
4 4 4 4 4 64 96 <8 45: 48< 4<4 556 588 5;: 64< 684 6;6 748 77: 7:< 844
&<3333333344444444
&;3333444433334444
&:3344334433443344
&93434343434343434
23DIP-Switch Table
Page 24

 Loading...