

Page 1
MC-1
user manual
Page 2

NTRODUCTION
I
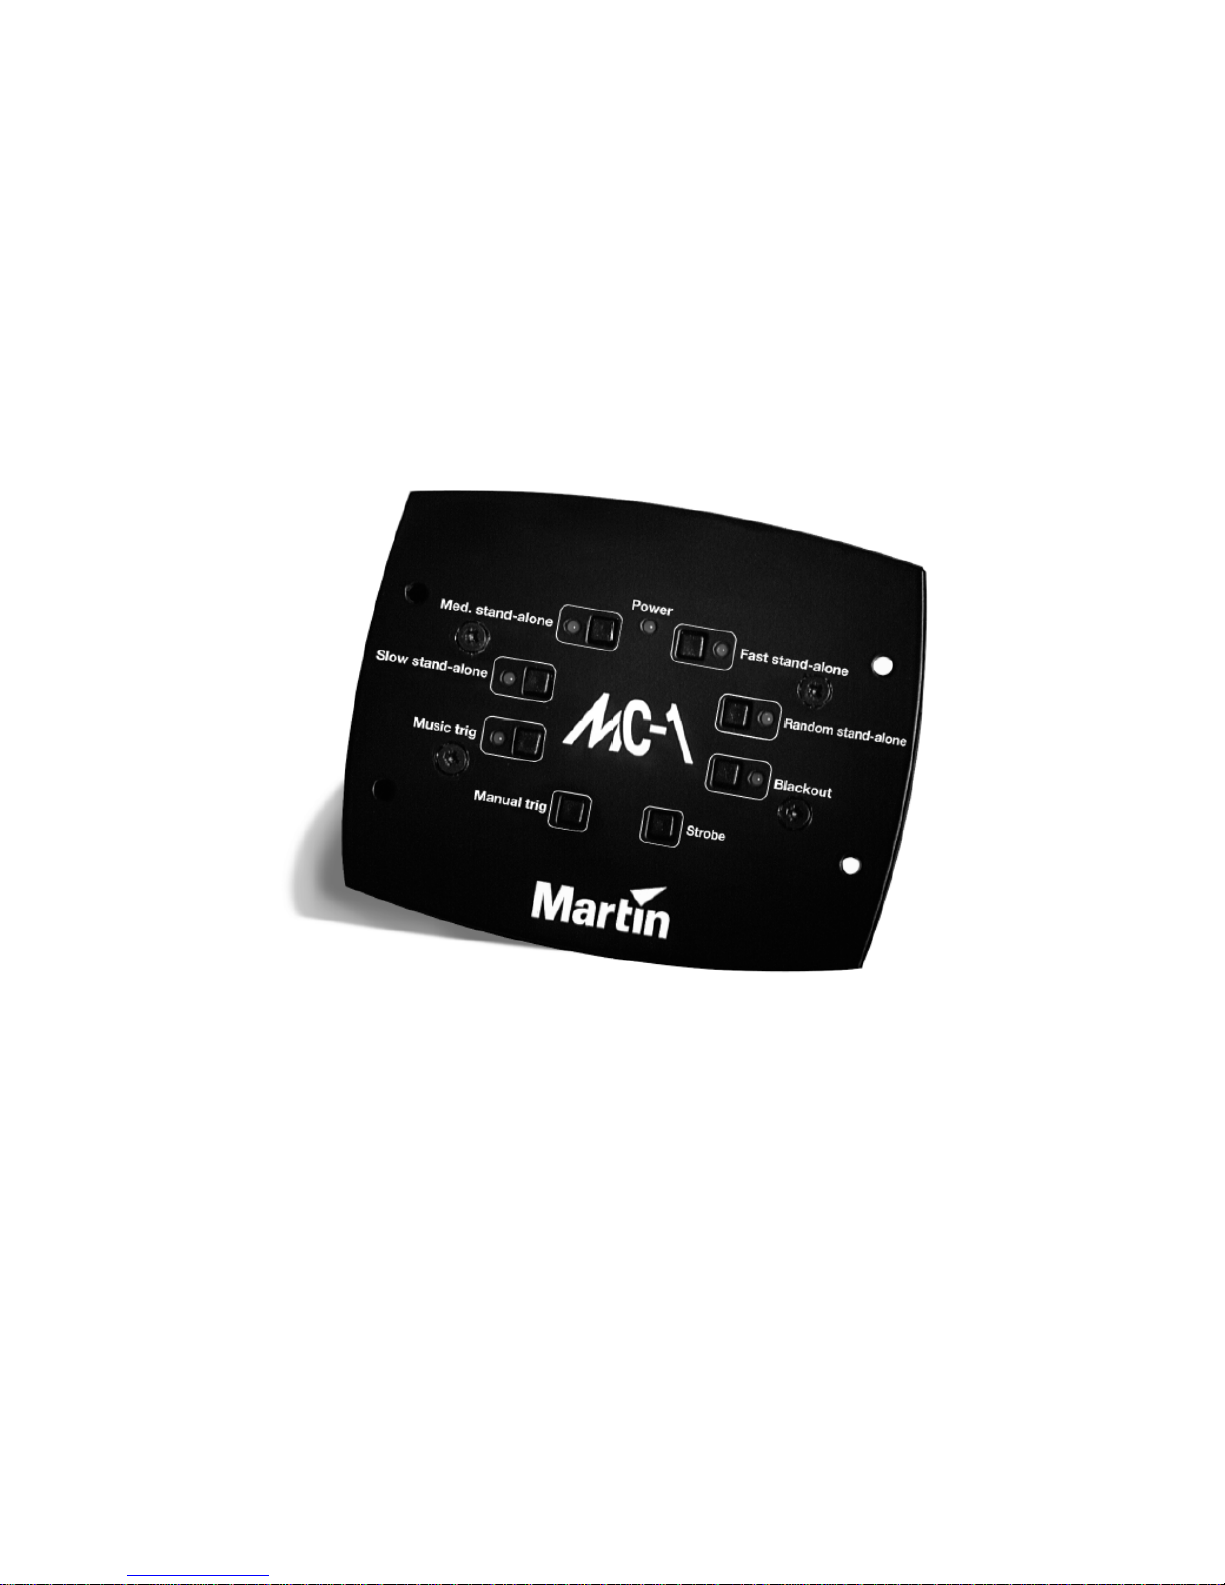
The MC-1 is a remote-control device that provides
basic sound-activated operation of compatible Martin
fixtures. This use r manual describes the fea tures
programmed in firmware version 1.1.
SAFETY PRECAUTIONS
The MC-1 is not for household use. For safe operation,
read this manual before use and follow the safety
precautions listed below. If you have questions about
how to operate the controller safely, please contact
your Martin dis tr ibutor or dea l er.
• Disconnect the fixture from AC power when not in use.
• Always ground (earth) the fixture electrically.
• Use only a source of AC power that complies with
local building and electrical codes and has both
overload and ground-fault protection.
• Refer all service to a qualified technician.
• Do not expose the device to rain or moisture.
• Do not open the device or remove an y part; there are
no user-serviceable parts inside.
P/N 35000078, Rev. C. ©1999, 2000 Martin Professional A/S, Denmark.
Page 3

UNPACKING
The MC-1 comes with:
• 1.5-meter IEC power cable
• 5-meter 3-pin XL R data cable
• 3-p in male XLR terminatio n plu g
• user manual
3
Page 4

MC-1
SETUP
AC POWER CONNECTION
Warning ! F or protec tion f rom elect ric s hock, the
fixtur e must be grounded ( ear thed).
The AC mains supply sh all have
overload and g round-faul t protect ion.
The fixture’s mains lead must be fitted with a
grounding-type cord cap that fits your power
distribution cable or outlet. Consult a qualified
electrician if you have any doubts about proper
installation.
To install a plug on the mains lead
• Followi ng the cord cap manufacturer’s instructions,
connect the yellow and green wire to ground (earth),
the brown wire to live, and the blue wire to neutral.
The table shows some pin identification schemes.
Wire Pin Marking Screw color
brown live “L” yellow or brass
blue neutral “N” silver
yellow/green ground green
4
Page 5

DATA CONNECTION
A reliable data connection begins with the right cable.
Microphone cable cannot transmit data reliably over
long runs. For best results, use only cable designed for
RS-485 appl ications. One cable for connecting th e first
fixture is included; y ou will need additional cab les to
connect additional fixtures. Your Martin dealer can
supply suitable cable in various lengths.
The MC-1’s data output, which is wired pin 1 to
ground, pin 2 to signal - (cold), and pin 3 to signal +
(hot), is configured for direct connec tion to all MC-1
compatible Martin fixtures.
To connect the data link
1 Connect a data cable to the MC-1’s data output. Lead
the cable to the first fixture and plug it into the data input.
2 Connect the data output of the first fixture to the data
input of the next fixture. Continue connecting fixtures
output to input; up to 32 fixtures may be connected.
3 Terminate the link by inserting the male termination
plug, included, into the data output of the last fixture. A
term ination plug i s an XLR co nnector w ith a 120 oh m
resistor soldered across pins 2 and 3.
5
Page 6

IXTURE SETUP
F
FULLY COMPATIBLE FIXTURES
Fully compatible Mart in fixtures automatically detect
the MC-1 and
factory-default operation.
Optional fixture settings may be available to modify
behavior and create m ore varied light sh ows. These
options are set using the fixture’s DIP-switch; refer to
the fixtu re manual for de ta ils.
Full compatibility with t he MC-1 may require an
update of the fixture software. Contact your Martin
dealer for software updates. The table below shows the
software version required for full compatibility.
Fixture Compatible from
Acrobat v. 1.4
no DIP-switch setting is re quired
for
CX-2 v. 1.2
MiniMAC Profile v. 1.1
MiniMAC Wash v. 1.1
MX-1 v. 1.7
MX-4 v. 1.1
6
Page 7

PARTIALLY COMPATIBLE
ìíë ê é èì åç æ ä
21
ìëìì
ìíë ê é èì åç æ ä
21
FIXTURES
The Martin Synch roZap, Punisher an d Destroyer as
well as the above products with earlier software
versions are partially compatible with the MC-1.
Though synchronized control and special options are
not available, the MC-1 may be used to control some or
all of the fixtures’ 1-channel DMX mode functions.
Partially compatible fixtures must be set to 1 -channel
DMX mode and addressed to channel 1 as described
below.
EARLY ACROBAT, X-SERIES
• Flip DIP-switch pins 1 and
11 on. Flip pins 2 - 10 off.
Set pin 12 on or off as
desired.
DESTROYER, PUNISHER, AND SYNCHROZAP
• Flip DIP-switch pins 1, 9,
and 10 ON. Flip all other
pins OFF.
7
Page 8

O
PERATION
This section describes the operating features available
with fully compatible fixtures.
To control lights with the MC-1
1 Set up the MC-1 and the lights as described in the
previous sections .
2 Apply power to the MC-1 and the fixtures. Allow the
fixtur es to reset.
3 For non-synchronized action at different speeds, press
the
Slow, Medium, Fast, and Random Stand-alone
keys.
4 For synchronized action at different speeds, press the
Stand-alone key for the desir ed spe ed (slow, medium,
fast, or random) and then press the
5 To freeze action press the active control key.
6 To strobe fixtures, press and hold
operation resumes when the key is released.
7 To send a single trigger pulse press
may be used on its own, with no function selected, or to
supplement sound-activated triggers
Music trig
Strobe
Manual trig
key.
. Normal
. This
8 To black out all fixtures, press
to return to normal operation.
8
Blackout
. Press it again
Page 9

ROUBLESHOOTING
T
Problem Probable cause(s) Remedy
No power. Check that power is
switched on and cables
are plugged in.
LEDs fail to light.
Fixtures fail to
respond to controller.
Internal circuit
breaker open.
Bad data connection. Inspect data cables and
The data link is not
connected.
Missing termination. Insert termination plug
Incorrect address or
mode setting.
Disconn ec t the
controller for several
minutes to reset the
circuit breaker. Consult
service technician if
problem reoccurs.
connections, repair or
replace da maged
cables.
Connect data link.
in output of last fixture.
Check and correct DIP-
switch settings.
Fixtures respond to
blackout and manual
trig but not to music.
Vo lume is to o low. Place speakers closer
to fixtures or in crease
volume.
Damaged
microphon e or other
compon ent.
Refer fixture for
service if problem
occurs in stand-alone
modes. Refer MC-1 to
service if it occurs in
Music trig mod e.
9
Page 10

PECIFICATIONS
S
PHYSICAL
• Size............................ 142 x 113 x 75 mm (5.6 x 4. 4 x 3. 0 in)
• Weight ................................................................ 1 kg (2.2 lbs)
CONTROL
• Data output connection...............................3-pin XLR, female
• Pin-out ........... .. . ... ......pi n 1 shield, pin 2 co ld (-), pin 3 hot (+)
• Control protocol .......................................................DMX-512
• DMX channel.................. ............ ............ ....................... ........ 1
AC POWER
• Input ........... ... ... ... ... ... ..... ... ... ... ... ... .. 3-prong IEC male socket
• Maximum power and current...............see serial number label
ACCESSORIES
• 3U 19 inch ra ck mount kit for MC-1...... ... .. . ... .. P/N 91613019
10
 Loading...