

Page 1

LightCorder
user manual
Page 2

133
Measurements are in millimeters.
483
465
57
69
395
© 2002 Martin Professional A/S, Denmark.
All rights reserved. No part of this manual may be
reproduced, in any form or by any means, without
permission in writing from Martin Professional A/S,
Denmark.
Printed in Denmark.
P/N 35000106, Rev. D
Page 3

INTRODUCTION.......................................................................... 5
Functional highlights ................................................................................ 5
Configure and record shows ............................................................. 5
SImple show playback ...................................................................... 6
Schedule shows ................................................................................ 6
Monitor DMX ..................................................................................... 6
Real time backup to a DMX control system ...................................... 6
Control via a computer ...................................................................... 6
Safety precautions ................................................................................... 6
Included items .......................................................................................... 7
SETUP...................................................................................... 8
Connections ............................................................................................. 8
AC power .......................................................................................... 8
RS-232 .............................................................................................. 9
DMX out ............................................................................................ 9
DMX in .............................................................................................. 9
MIDI................................................................................................. 10
Hardware installation.............................................................................. 10
Software installation ............................................................................... 10
ADVANCED MODE.................................................................... 11
Play/Rec................................................................................................. 12
Recording........................................................................................ 12
Playback.......................................................................................... 13
DMX Monitor .......................................................................................... 14
Control.................................................................................................... 14
Performing a lamp on command ..................................................... 14
Performing a lamp off command ..................................................... 15
Teaching lamp on commands ......................................................... 15
Teaching lamp off commands ......................................................... 15
Teaching dimmed scene commands .............................................. 16
Configuring manual intensity control ............................................... 16
Options................................................................................................... 18
Changing to another mode.............................................................. 18
Communicating with a PC............................................................... 19
Setting the time ............................................................................... 19
Setting the date ............................................................................... 20
Setting the display contrast ............................................................. 20
Calibrating faders ............................................................................ 20
Updating firmware ........................................................................... 21
Show Manager ....................................................................................... 22
Playing a show ................................................................................ 22
Renaming a show ........................................................................... 22
3
Page 4

Deleting a show............................................................................... 23
Setting the default show.................................................................. 23
Card Manager ........................................................................................ 24
How much can be stored on a memory card? ................................ 24
Checking card information .............................................................. 26
Labelling a memory card................................................................. 26
Formatting a memory card .............................................................. 26
PLAYER MODE ........................................................................ 27
Starting Player mode.............................................................................. 27
Performing a lamp on command ............................................................ 27
Selecting and playing a show................................................................. 27
Performing a lamp off command ............................................................ 28
Exiting Player mode ............................................................................... 28
SCHEDULING .......................................................................... 29
Setting up the schedule.......................................................................... 29
Developing the schedule off-line ..................................................... 32
Running the Schedule............................................................................ 32
Exiting Scheduler mode ......................................................................... 33
PURE DMX MONITOR MODE .................................................... 34
Starting Pure DMX Monitor mode .......................................................... 34
Exiting Pure DMX Monitor mode ............................................................ 35
FAIL-SAFE MODE .................................................................... 36
Starting Fail-Safe mode ......................................................................... 36
Exiting Fail-Safe mode ........................................................................... 36
RS-232 COMMAND MODE........................................................ 37
Commands............................................................................................. 37
Starting RS-232 Command mode .......................................................... 37
Exiting RS-232 Command mode............................................................ 38
SPECIFICATIONS ..................................................................... 39
4
Page 5

I
NTRODUCTION
Thank you for selecting the Martin LightCorder. The LightCorder is a DMX
recorder that can be used to record and playback DMX control signals. Please
familiarize yourself with this manual before using the LightCorder.
The LightCorder:
• Can be connected to any lighting console's DMX outlet and is ready to record.
• Allows you to easily transport DMX lighting programs wherever you go. Then
playback recorded shows at the touch of a button.
• Is a cost effective substitute for expensive on-site controllers. You can also use the
LightCorder to a back-up to your main lighting console.
FUNCTIONAL HIGHLIGHTS
1
Some functional highlights of the product are:
• Record and playback DMX-512 shows in real time
• 6 minutes to 3 hours of recording time on an 8 MB memory card, with more than 28
hours on a 64 MB card
• 8Mb removable memory card included - up to 64Mb available
• PC-based scheduling program for scheduling of light shows
• Assignable faders allow for instant access to any lighting parameter
• Built in DMX monitor
The LightCorder is designed to be used by a range of people with a varying degree
of technical expertise. With that in mind a number of modes are used to restrict or
modify the functionality that is available for the various tasks and product users.
Configure and record shows
Advanced mode is used to configure the LightCorder and to record DMX and is
designed for users who are used to working with intelligently controlled lighting
and DMX. This is the standard mode unless another mode is set and is described in
“Advanced mode” on page 11.
Introduction
5
Page 6

SImple show playback
Player mode is designed for users with no intelligent lighting experience to select
and play a show from those saved on the memory card. No access to recording or
configuration functions is available in this mode. This mode is described in “Player
mode” on page 27.
Schedule shows
Scheduler mode is used for playing back shows according to a schedules developed
using the PC-based LightCorder Scheduler program. Scheduling is described in
“Scheduling” on page 29.
Monitor DMX
Pure DMX monitor mode restricts the LightCorder to display DMX information in
real time and is a useful test tool. This mode is described in “Pure DMX monitor
mode” on page 34.
Real time backup to a DMX control system
Fail-safe mode enables the LightCorder to be used as a real-time back-up system if
your DMX controller fails. In this case the LightCorder will start running its default
show until DMX input form the controller is restored. This mode is described in
“Fail-Safe mode” on page 36.
Control via a computer
RS-232 command mode can be used to send instructions from a computer or
computer-based control system (such as the Martin ProScenium) to the
LightCorder. This mode is described in “RS-232 command mode” on page 37.
SAFETY PRECAUTIONS
• The LightCorder is NOT for household use.
• For protection against fire and electrical shock, ensure that the fixture is properly
grounded (earthed), and do not expose it to rain or moisture.
• Use only a source of AC power that complies with local building and electrical
codes and has both overload and ground-fault protection.
• Refer all service to a qualified technician.
6
Introduction
Page 7

INCLUDED ITEMS
The LightCorder comes with:
• Martin LightCorder CD-ROM
• Power cable
• 9-pin RS-232 cable
• 5-pin male to 3-pin female XLR cable
• 5-pin female to 3-pin male XLR cable
• User manual
Introduction
7
Page 8
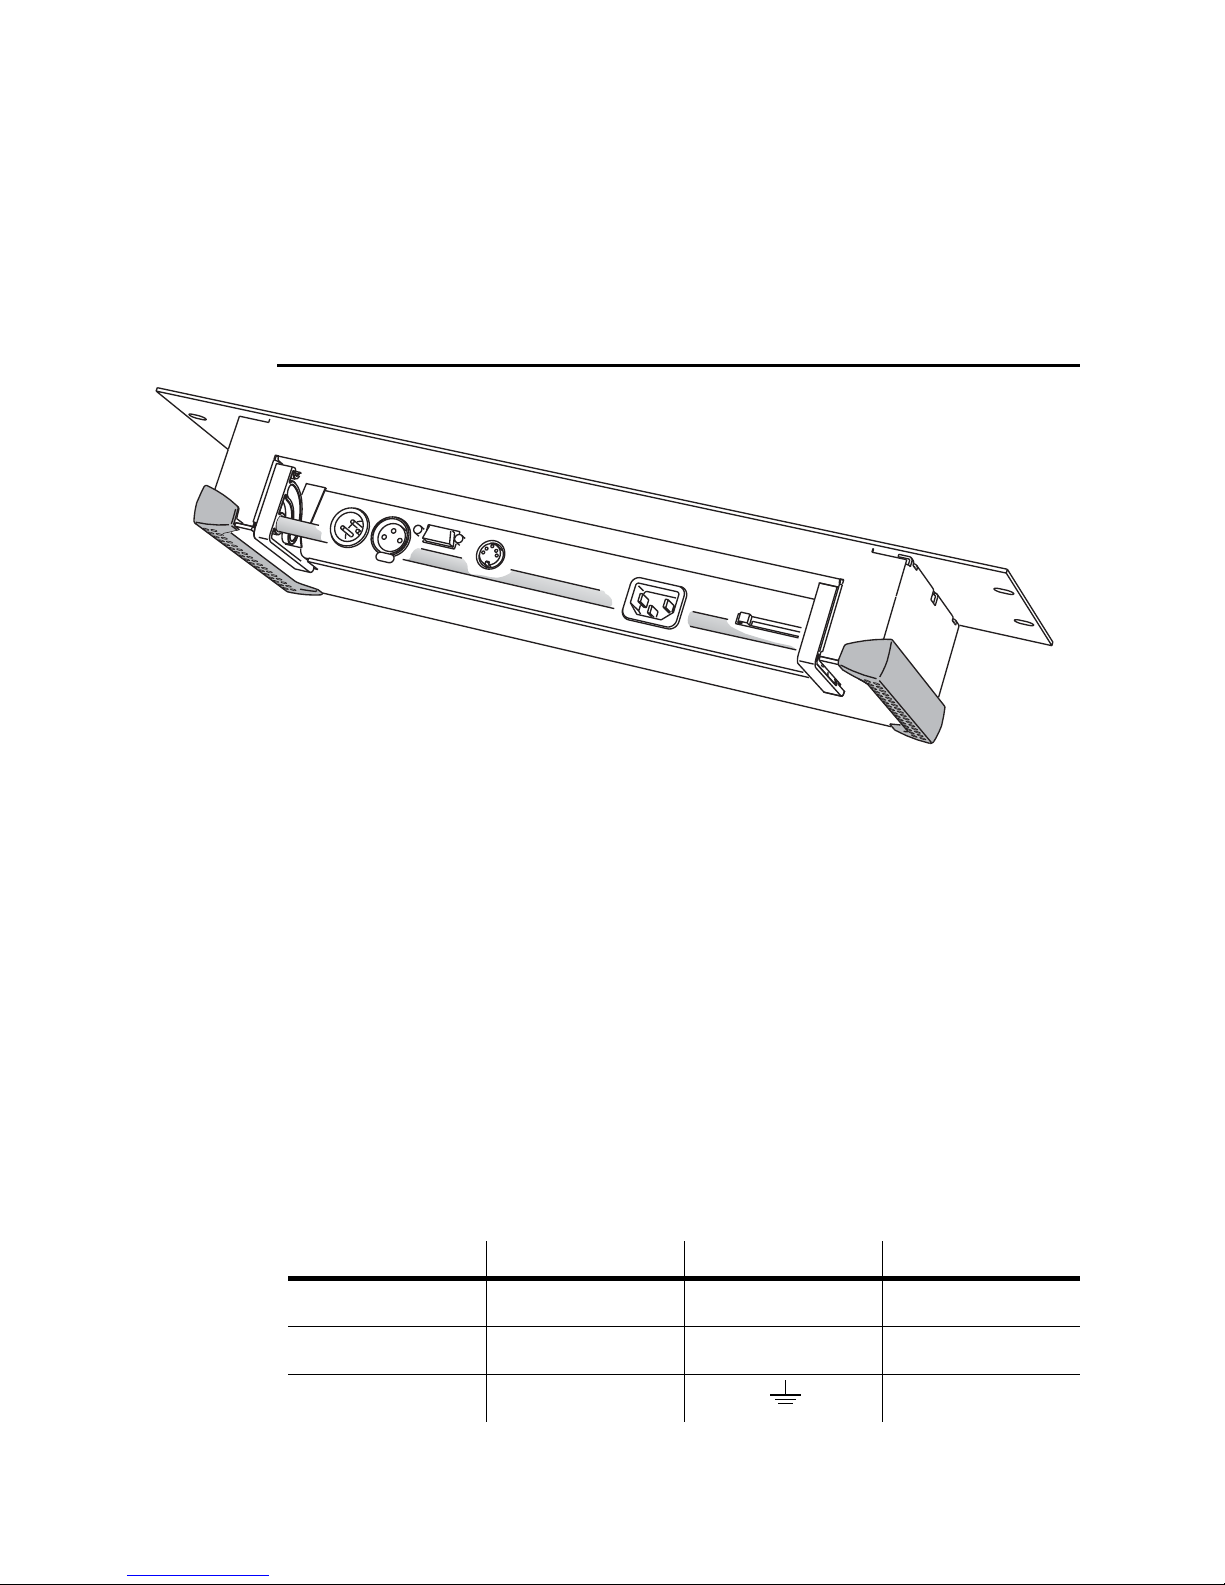
S
ETUP
CONNECTIONS
1 - DMX in
2 - DMX out
3 - RS-232 port
4 - MIDI port
5 - AC power input
6 - Memory card slot
2
1
2
3
4
5
6
AC power
WARNING! For safe operation, the LightCorder must be grounded
(earthed).
The LightCorder may be connected to any 50 or 60 Hz AC mains power supply
from 90 to 250 V that complies with local electrical codes and has both overload
and ground-fault protection. The power cable must be fitted with a grounding-type
cord cap that fits your power distribution system. Consult an electrician if you have
any doubts about proper installation.
1 Following the cord cap manufacturer’s instructions, connect the yellow and
green wire to ground (earth), the brown wire to live, and the blue wire to neutral.
The following table shows some pin identification schemes.
Wire Pin Marking Screw color
brown live “L” yellow or brass
blue neutral “N” silver
yellow/green ground green
8
Table 1: Cord cap connections
Setup
Page 9

RS-232
2 Plug the power cord into the MAINS INPUT socket and the AC outlet.
Some functions require the LightCorder to be connected to a Windows
95/98/ME/2000/XP PC.
The LightCorder connects to the computer through a COM port using the included
9-pin serial cable.
The cable connections are shown below, to right. If your computer has a 25-pin
serial output, you will need a 9-pin male to 25-pin cable as shown below, to left.
9-pin to 25-pin
serial cable
9-pin 25-pin
male female
R
X
2
3
5
D
SG
D
2
X
T
3
7
9-pin to 9-pin
serial cable
9-pin 9-pin
male female
RXD
2
TXD
3
SG
5
2
3
5
4
5
6
TO CONNECT TO A PC
1 With the power off, connect the RS-232 cable to the LightCorder and an
available COM port on the computer.
2 Turn on the LightCorder and the computer.
3 See “Software installation” on page 10.
DMX out
The LightCorder connects to the DMX data link just like a controller. The XLR
socket is wired pin 1 to ground, pin 2 to signal cold (-), and pin 3 to signal hot (+).
Connect the LightCorder’s DMX output to the DMX input of the first fixture. Or
simply disconnect the link from the controller output and connect it to the
LightCorder.
DMX in
To read and record DMX data, connect the output of the controller or other
transmitting device to the LightCorder’s DMX input. Note that the LightCorder is
serial device: DMX input passes through to the DMX output.
The DMX input provides 120 ohm link termination.
Setup
9
Page 10
MIDI
The 5-pole DIN socket is not used.
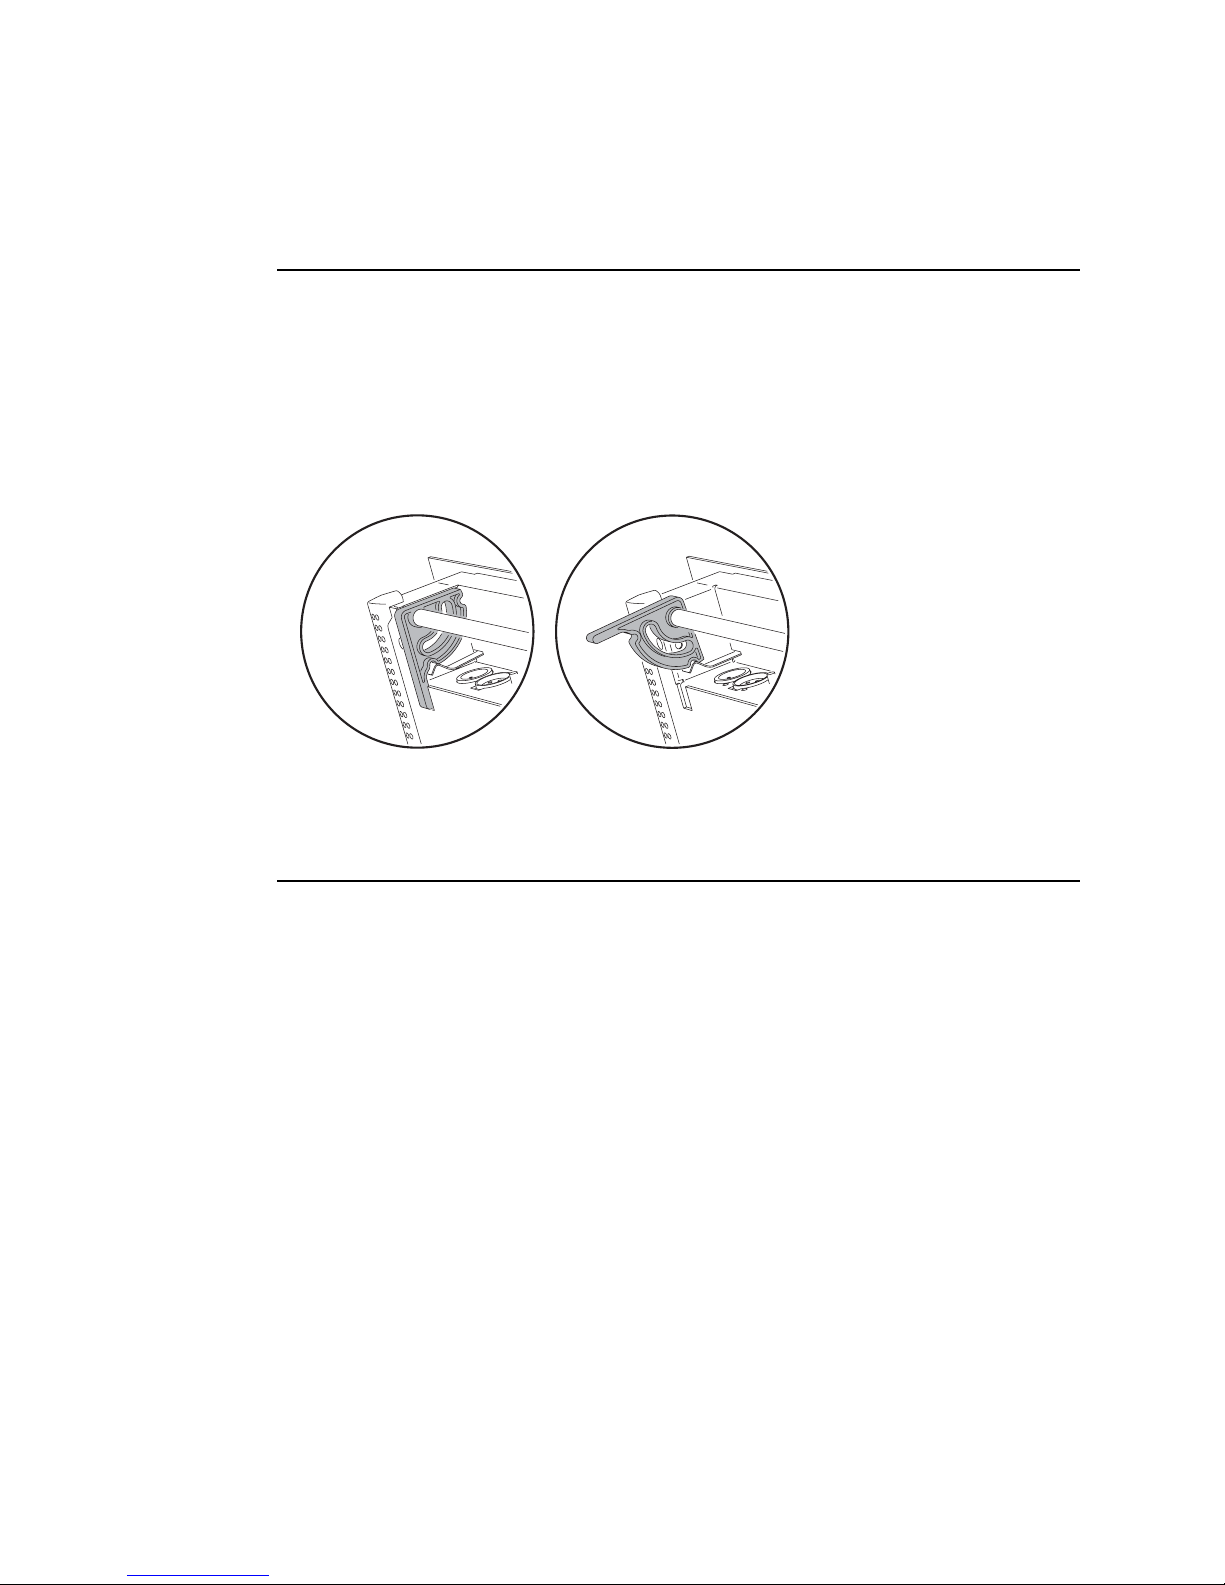
HARDWARE INSTALLATION
The LightCorder can be fixed with mounting hardware in a rack, wall, or flat
surface. The required dimensions can be found on the inside of the cover of this
manual.
The LightCorder can also be used as a portable device and operated from any flat
surface. A pair of legs are located at the rear of the device and can be extended to
enhance usability.
SOFTWARE INSTALLATION
If you want to schedule light shows using a PC then the Martin LightCorder
Scheduler program (included) must be installed on a PC running Windows
95/98/ME/2000/XP.
To install the LightCorder Scheduler:
1 Insert the Scheduler CD-ROM in the computer
2 Open Windows Explorer to display the root folder of the CD-ROM
3 Execute setup.exe and follow the on-screen instructions.
4 For information on using the LightCorder Scheduler, see “Scheduling” on page
29.
10
Setup
Page 11
A
DVANCED MODE
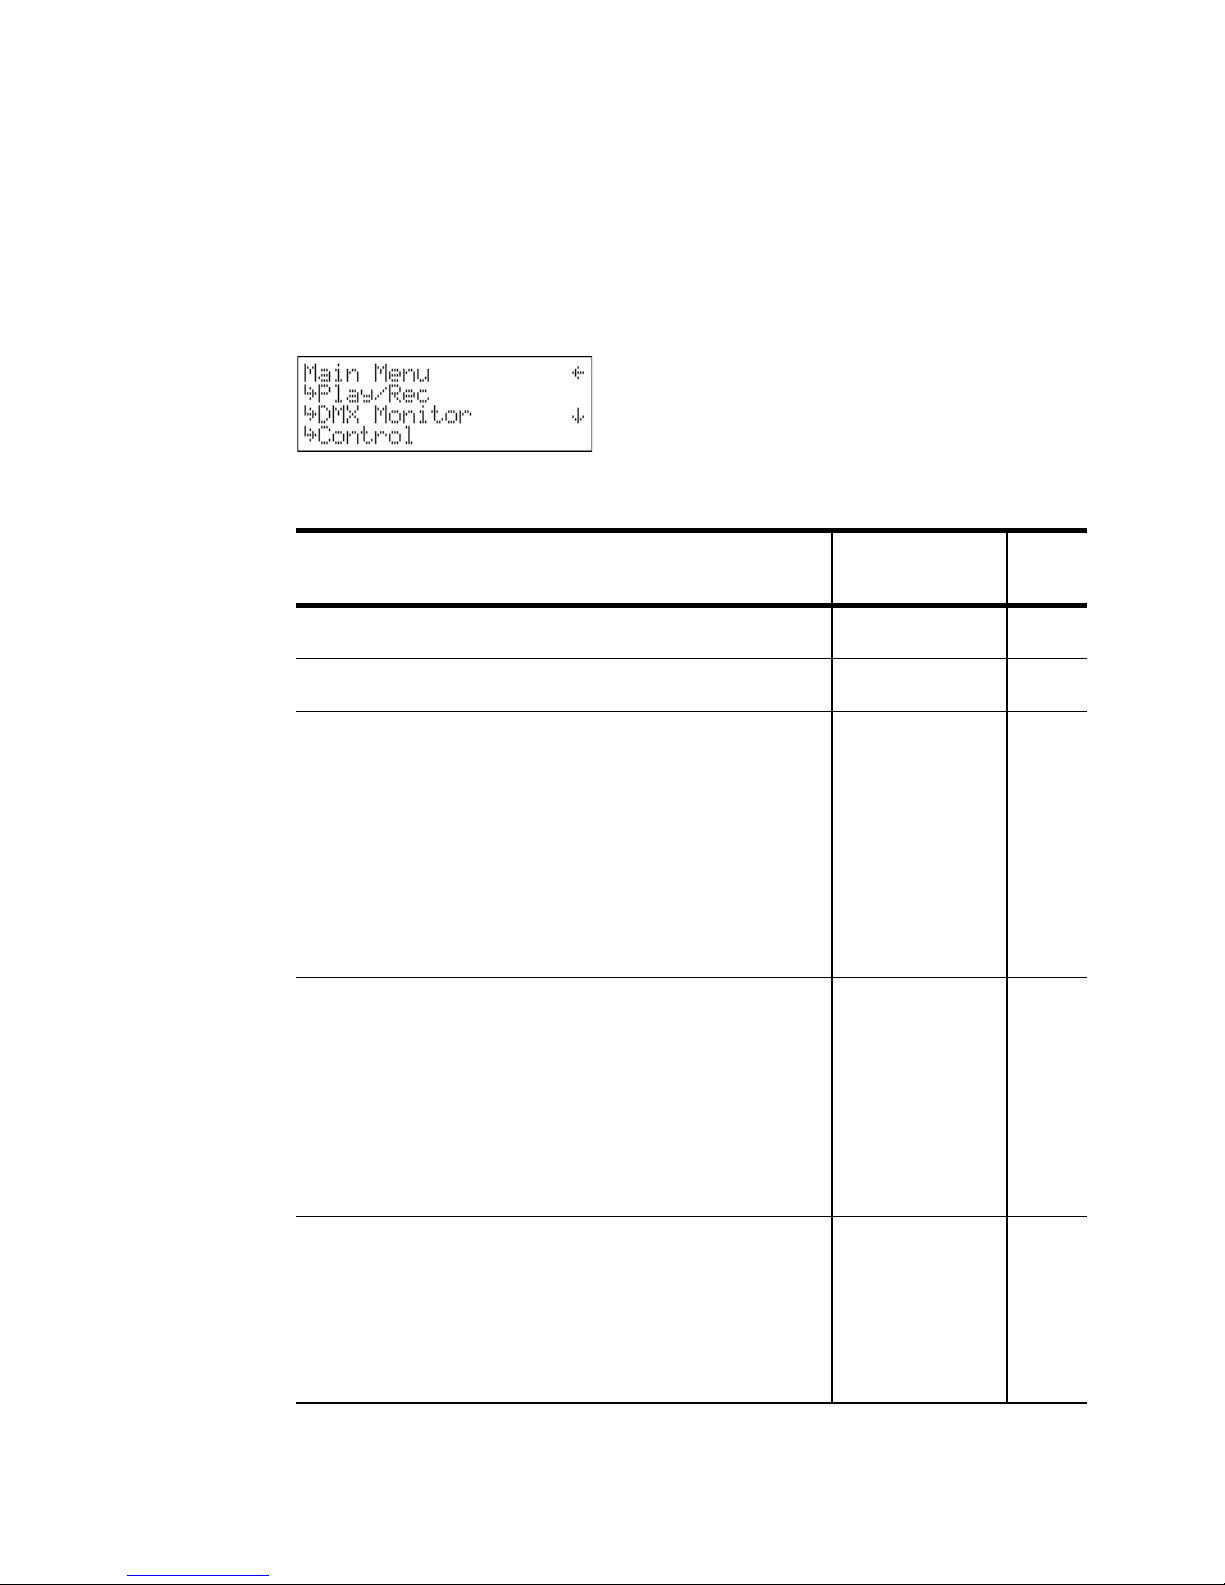
All the menus in Advanced mode are described in this section.
The functions available are as follows::
Function Use menu See
Recording and playback of shows. “Play/Rec” 12
Viewing DMX input in real time. “DMX Monitor” 14
3
page
• Teaching the LightCorder lamp on and off and
dimming commands for the fixtures on the data link
that it will be controlling. This is a required step if you
want the LightCorder to be able to remotely switch
fixtures on and off, before and after playing shows,
and for it to be able to dim fixtures between scheduled
shows.
• Assigning any of the three faders on the LightCorder
to be able to dim fixtures during show playback.
• Setting the mode that the LightCorder is operating in
• Activating communication with the LightCorder
Scheduler application on a PC
• Setting the date and time - necessary if you plan to
run shows according to a schedule.
• Setting the display contrast
• Calibrating the faders
• Updating the LightCorder’s control software
• Playing shows
• Renaming shows
• Deleting shows
• Setting the default show. This is the show that will be
used in Fail-Safe mode if the external DMX control
signal fails.
“Control” 14
“Options” 18
“Show Manager” 22
Advanced mode
11
Page 12
Function Use menu See
page
• Reviewing how much space has been used/is left on
a memory card
• Formatting a memory card
• Labeling a memory card
Note To return to Advanced mode from other modes, simultaneously
press and hold the upper button to the left, and the two upper
buttons to the right of the display.
“Card Manager” 24
PLAY/REC
The Play/rec menu is used to record and play back DMX files. The Create
New File
memory card.
option is always shown followed by a list of files that are stored on the
Recording
The LightCorder can record up to 32 individual shows on a single memory card.
Note The LightCorder will play a show in a loop unless otherwise
instructed. To avoid sudden scene shifts when a show restarts
it is a good idea to record a similar beginning and ending. For
example, in a show with multiple scenes, record the first scene
again as the final scene.
To record a show:
1 Connect the LightCorder to a DMX control device.
2From the
3 Create a name for the file using the
Play/Rec
menu select
Create New File
↑
and ↓ buttons, or the faders (fader 1 =
.
UPPER CASE characters, fader 2 = lower case characters, and fader 3 =
12
Advanced mode
Page 13

numbers and special characters), to select characters.
a-z
0-9/special characters
A-Z
Use the
4 Press
5 Select the number of channels that will be recorded - 64, 128, 256, or 512. Note
that the number of channels has a direct relationship with the duration that can
be recorded. Recording a high number of channels requires more space so do
not select more channels than are necessary.
6 Select the sample frequency - 10, 20, 30, or 40 hertz. This represents the
frequency at which DMX signals will be recorded and has a direct relationship
on the duration that can be recorded on the memory card (see “How much can
Next Character
•
once you have set the file name.
button to move to the next position.
7 The LightCorder is now ready to record. To start record press
8 Press
Playback
1 Connect the LightCorder to the DMX network that the lighting fixtures are
2 From the
be stored on a memory card?” on page 24). High quality frequencies such as 40
Hz require more memory, but may result in a better result for some effects, such
as movement. Conversely, shows that contain other effects, such as simple
color changes might only need a lower sampling frequency.
RECORD
LightCorder functions like a tape recorder, saving to the memory card in real
time. During recording you can use the
press PAUSE again to continue recording.
STOP
To play back a DMX file:
attached to.
to complete recording. The message ‘
Play/Rec
menu select the file that you want to play.
PAUS E
button to break the recording -
Stopped...
. The
’ will appear.
3 The show will appear ready to play with the message ‘Stopped...’
Advanced mode
13
Page 14

4Press
break the show - press PAUSE again to continue playback. The show will loop
continuously until stopped.
Play
to start the show. During playback you can use the
PAUS E
button to
5Press
STOP
to end.
DMX MONITOR
The DMX monitor displays DMX information in real time.
The second line of the display shows:
Id An identifier corresponding to the mode that the controller is using
Ch The number of channels being received
Re The frequency, in hertz, at which the controller is transmitting
The lower lines show the DMX channels from 0 to 512 in four columns (0-3. 4- 7,
8-11, and so on). Each row displays the DMX values of four DMX channels. The
column to the left indicates the ID of the first of the four DMX channels that are
displayed in the respective row.
You can use the ↑
For each channel the monitor displays its current DMX value from 0 to 255.
and ↓ buttons to scroll to a specific channel.
CONTROL
The control menu is used to set and use control overrides such as lamp on, lamp off,
dim, and also to set the assignable faders on the LightCorder.
Performing a lamp on command
This function can be used to issue DMX lamp on instructions from the LightCorder
provided that these have first been configured (see “Teaching lamp on commands”
on page 15).
To issue a lamp on command:
14
Advanced mode
Page 15

1 From the Control Menu select Do Lamp on.
2 The message ‘Doing lamp on...’ will appear.
Performing a lamp off command
This function can be used to issue DMX lamp off instructions from the LightCorder
provided that these have first been configured (see “Teaching lamp off commands”
on page 15).
To issue a lamp on command:
1 From the Control Menu select Do Lamp off.
2 The message ‘Doing lamp off...’ will appear.
Teaching lamp on commands
To enable the LightCorder to be able to issue lamp on commands before playing
shows you need to “teach” the LightCorder the DMX settings that achieve this
result.
Warning If you have a relatively large number of fixtures on the data link
it is not a good idea to have them all strike at once as this may
result in fuses blowing. In this case a safer alternative is to
record a lamp-on show with a delay between the lamp strikes on
different channels.
To teach these lamp on instructions:
1 Connect the LightCorder to a DMX control device.
2 From the Control Menu select Learn Lamp on.
3 Set the DMX control device to issue lamp on.
•
4 Press
appear.
5 Select
To test that the procedure has been successful, perform the steps described in
“Performing a lamp on command” on page 14.
to save the lamp on commands. The message ‘DMX values saved’ will
√
to finish.
Teaching lamp off commands
To enable the LightCorder to be able to issue lamp off commands after playing
shows you need to “teach” the LightCorder the DMX settings that achieve this
result. To teach these lamp off instructions:
1 Connect the LightCorder to a DMX control device.
Advanced mode
15
Page 16

2 From the Control Menu select Learn Lamp off.
3 Set the DMX control device to issue lamp off.
4Press • to save the lamp off commands. The message ‘DMX values saved’ will
appear.
5 Select
To test that the procedure has been successful, perform the steps described in
“Performing a lamp off command” on page 15.
√
to finish.
Teaching dimmed scene commands
If there is a gap between scheduled shows and the lamps remain on, the LightCorder
can set all fixtures to a specific scene, usually with all fixtures dimmed, until the
next scheduled show starts.
To take advantage of this function you need to “teach” the LightCorder the
“dimmed scene”. It is up to you whether or not the fixtures are actually dimmed;
you can program any effect.
The LightCorder will issue these instructions whenever a scheduled show ends,
does not restart, is not followed by another scheduled show, and there is no
associated lamp off command scheduled.
To record the dimmed scene settings:
1 Connect the LightCorder to a DMX control device.
2 From the LightCorder Control Menu select Learn Dimmed.
3 Set the DMX control device to achieve the desired scene.
•
4Press
5 Select
to save. The message ‘DMX values saved’ will appear.
√
to finish.
Configuring manual intensity control
The three assignable faders are designed to directly control intensity channels
during playback of a show. This enables you to dim up to three groups of fixtures
during playback of any recorded show, and then allows you to return them all to
16
Advanced mode
Page 17

their relative intensities. This can be done when shows are running in Player or
Schedule modes.
When assigning a fader the LightCorder needs to be “taught”:
• Which intensity channels/fixtures are to be assigned to the fader.
• What intensity each channel/fixture is normally set at during the show. This is
necessary because when you adjust the intensity of multiple fixtures with a single
fader, it is desirable to keep the same relative levels of intensity. For example, if you
have two fixtures running during a show, one which uses an intensity of 128 and the
other which uses 96, then the assigned fader’s maximum value (100%) will result in
a value of 128 on the one channel and 96 on the other channel.
In theory you can assign any channels to these faders, but they are designed
specifically for use with intensity channels.
ASSIGNING A FADER
To configure an assignable fader:
1 Connect the LightCorder to a DMX control device.
2 From the
Control menu
select
Assign fader
3 Select the appropriate Assign Fader in the menu.
4 From the DMX control device set all non-intensity channels to 0. This enables
the LightCorder to identify the channels that are not to be assigned.
5 Set the intensity channels for each fixture to their normal relative intensity - a
value from 1% to 100%.
6 Press
•
to assign the fader and then √ to finish. The fader is now assigned to the
intensity channels and you can use it to issue dim fixtures in real time whenever
a show is being played in Player or Schedule mode.
This process can be repeated for any/all of the three assignable faders.
Advanced mode
17
Page 18

CLEARING A FADER
To clear a fader of its assignments:
1From the
2 Select the appropriate Clear Fader in the menu.
3 Select Yes.
4 Select
Control menu
√
to finish.
select
Assign fader
OPTIONS
The Options menu is used to:
• Set the mode that the LightCorder operates in
• Activate communication with the scheduling program on a PC
• Set the date and time
• Set the display contrast
• Calibrate the faders
• Update the LightCorder’s control software
Changing to another mode
Modes are used to restrict or modify the functionality that is available for different
tasks and users:
• Player mode is designed for users with no intelligent lighting experience to select
and play a show from those saved on the memory card. No access to recording or
configuration functions is available in this mode. This mode is described in “Player
mode” on page 27.
• Scheduler mode is used for playing back shows according to a schedules developed
using the PC-based LightCorder Scheduler program. Scheduling is described in
“Scheduling” on page 29.
• Pure DMX monitor mode restricts the LightCorder to display DMX information in
real time and is a useful test tool. This mode is described in “Pure DMX monitor
mode” on page 34.
• Fail-safe mode enables the LightCorder to be used as a real-time back-up system if
your DMX controller fails. In this case the LightCorder will start running its default
show until DMX input form the controller is restored. This mode is described in
“Fail-Safe mode” on page 36.
18
Advanced mode
Page 19

• RS-232 command mode can be used to send instructions from a computer or
computer-based control system (such as the Martin ProScenium) to the
LightCorder. This mode is described in “RS-232 command mode” on page 37.
To change mode:
1 From the
2 Select the appropriate mode.
3 Select
Options
Yes
menu select
to confirm.
Communicating with a PC
When using the PC-based LightCorder Scheduler this menu is used to activate
communication from the LightCorder
To activate PC communication:
1 Connect the RS-232 cable from to the LightCorder and to a COM port on the
PC.
2 Start the LightCorder Scheduler program on the PC.
Change System Mode
.
3 Configure the appropriate COM port in the Scheduler program.
4 Select
5 A message will appear, both in the Scheduler program and on the LightCorder
when communication is successfully established.
PC Communication
Setting the time
To set the time:
1 From the
2 Using the
change position, set the time.
•
3 Press
to save it and finish.
from the
Options menu
↑
and ↓ buttons to change the numbers, and the Shift button to
select
Options
Set time
menu on the LightCorder.
.
Advanced mode
19
Page 20

Setting the date
To set the date:
1From the
2 Using the
change position, set the time.
3Press
Options menu
↑
and ↓ buttons to change the numbers, and the
•
to save the date.
Setting the display contrast
To set the contrast on the LightCorder display:
1 Select
2 Using the ↑ and ↓ buttons, adjust the contrast.
3Press
Set Contrast
•
to end.
from the
Calibrating faders
select
Set date
Options
.
menu.
Shift
button to
To calibrate the assignable faders on the LightCorder:
1 Select
2 Using the
3 Move each of the faders through its full range of movement.
Calibrate Fader
↓
button, read the message and then press → to continue.
from the
Options
menu.
4Press • to continue to the Test Faders screen.
20
Advanced mode
Page 21

5 Move each of the faders once again through its full range of movement and
confirm that the values change the full range from 0 to 255. If they do not then
you may need to calibrate the faders once again.
6 Press • to end.
Updating firmware
LightCorder firmware has to be updated via the PC’s COM port. A DMX
connection may be used if the computer is equipped with a Martin LightJockey ISA
DMX Interface (4064) card, or a Martin MP-2 software uploader.
TO UPDATE WITH A COMPUTER USING THE AVR
UPLOADER PROGRAM
1 Connect the LightCorder to the computer COM port (or DMX interface if you are
using a Martin 4064 DMX interface).
2 Turn on the computer and the LightCorder. Start the AVR uploader program
(available from Martin).
3 Configure the hardware as necessary and copy the LightCorder update file to
the PC as you would any other update file. (See AVR help.)
4 Click Update Fixture or Device. Select LightCorder from the Fixture or Device
menu and select the desired Update File. Click Update via RS232 or Update via
DMX link (4064) depending on the connection.
5 Select
Options
Firmware
DMX?
Device in the update dialog. The upload process takes several minutes.
TO UPDATE WITH AN MP-2
1 Update an MP-2 memory card with the latest LightCorder update file.
2 Connect the DMX output of the MP-2 to the DMX input of the LightCorder.
3 On the MP-2, select
slot that holds the LightCorder update file.
4 Select
, depending on the connection. Wait five seconds and then click Update
Update Software
from the LightCorder main menu. Select
, then select either
Read Memory Card
Update via RS232
from the main menu. Select the
. Press
Yes
to confirm. Select
Update
? or
Update via
Update in
BOOT
5 On the LightCorder, select
select
6 On the MP-2 select
mode
Update via DMX?
.
Options, Update firmware
Wait five seconds.
Ok
to start the upload.
Advanced mode
, and then
21
Page 22

SHOW MANAGER
The Show Manager is used to manage the files that are saved on the memory card.
You can play, rename, or delete any show.
Playing a show
From the Show Manager menu:
1 Select a file.
2 Select
3 The show will appear ready to play with the message ‘Stopped...’
4Press
break the show - press PAUSE again to continue playback. The show will play
continuously in a loop until stopped.
5Press
Note that during playback of a show that any of the assignable faders can be used to
directly issue DMX instructions on a single DMX channel. This allows you
independent control of effects during playback of any recorded show. For
information on assigning a fader to a DMX channel see “Advanced mode” on page
11.
Play Show
Play
STOP
Renaming a show
From the Show Manager menu:
1 Select a file.
.
to start the show. During playback you can use the
to end.
PAUS E
button to
2 Select
3 Select
4 Create a new name for the file using the
UPPER CASE characters, fader 2 = lower case characters, and fader 3 =
numbers and special characters), to select characters. Use the
Rename Show
Yes
to confirm.
Character
A-Z
22
.
↑
and ↓ buttons, or the faders (fader 1 =
button to move to the next position.
a-z
Advanced mode
0-9/special characters
Next
Page 23

5 Press • once you have set the new file name.
Deleting a show
From the Show Manager menu:
1 Select a file.
2 Select
3 Select
Delete Show
Yes
to confirm.
Setting the default show
The default show is used when the LightCorder runs in Fail-Safe mode (see “FailSafe mode” on page 36) where it is the show that runs whenever the LightCorder is
not receiving DMX instructions.
From the Show Manager menu:
1 Select a file.
2 Select
3 Select
Set as default
Yes
to confirm.
.
.
Advanced mode
23
Page 24

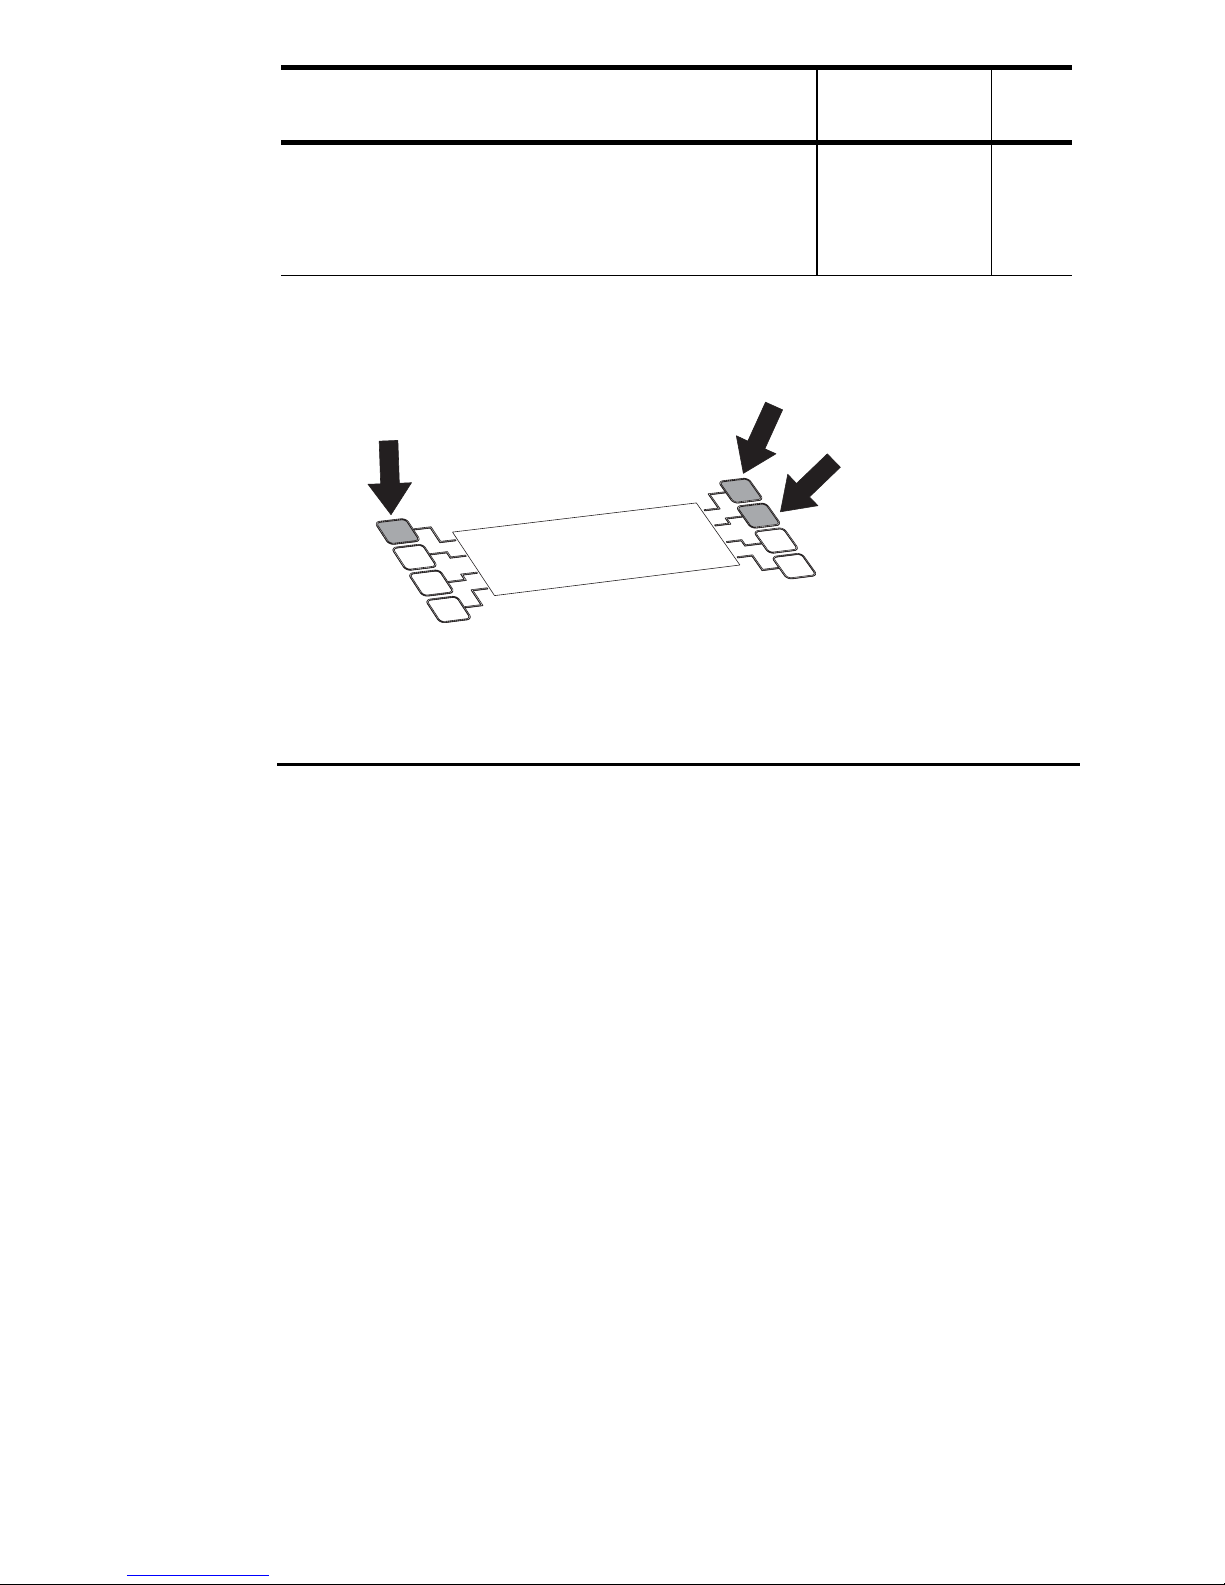
CARD MANAGER
From the Main menu select Card Manager to access memory card
management functions.
DMX files are stored on a removable flash
memory card. One 8 MB card is included.
Insert the memory card in the rear panel slot as
shown. To remove the card, press the eject button
next to the slot.
New memory cards must be formatted before
use. See “Formatting a memory card” on page
26.
The LightCorder does not work with all flash
memory cards. It will work with cards that you order from Martin, or cards from
Toshiba and Samsung. Cards in the following sizes can be used 4 MB, 8 MB, 16
MB, 32 MB, and 64 Mb.
How much can be stored on a memory card?
The total recording time on a memory card depends on three main factors:
• Size of the memory card - from 4 MB to 64 MB.
• Frequency at which recordings are made - from 10 Hz to 40 Hz.
represents the frequency at which DMX signals will be recorded. High quality
frequencies such as 40 Hz require more memory, but may result in a better
result for some effects, such as movement. Conversely, shows that contain other
effects, such as simple color changes, might only require a lower sampling
frequency.
• Number of DMX channels that are recorded. This will depend on the type
and number of fixtures on the data link.
The following tables illustrate the capacities of the respective memory cards. Note
that these are only approximations. The durations are displayed in format
hours:minutes:seconds.
This
24
Advanced mode
Page 25

4 MB MEMORY CARD CAPACITY
10 Hz 20 Hz 30 Hz 40 Hz
64 ch.
128 ch.
256 ch.
512 ch.
1:46:40 0:53:20 0:35:33 0:26:40
0:53:20 0:26:40 0:17:46 0:13:20
0:26:40 0:13:20 0:08:53 0:06:40
0:13:20 0:06:40 0:04:26 0:03:20
8 MB MEMORY CARD CAPACITY
10 Hz 20 Hz 30 Hz 40 Hz
64 ch.
128 ch.
256 ch.
512 ch.
3:33:20 1:46:40 1:11:06 0:53:20
1:46:40 0:53:20 0:35:33 0:26:40
0:53:20 0:26:40 0:17:46 0:13:20
0:26:40 0:13:20 0:08:53 0:06:40
16 MB MEMORY CARD CAPACITY
10 Hz 20 Hz 30 Hz 40 Hz
64 ch.
128 ch.
256 ch.
512 ch.
7:06:40 3:33:20 2:22:13 1:46:40
3:33:20 1:46:40 1:11:06 0:53:20
1:46:40 0:53:20 0:35:33 0:26:40
0:53:20 0:26:40 0:17:46 0:13:20
32 MB MEMORY CARD CAPACITY
10 Hz 20 Hz 30 Hz 40 Hz
64 ch.
128 ch.
256 ch.
512 ch.
14:13:20 7:06:40 4:44:26 3:33:20
7:06:40 3:33:20 2:22:13 1:46:40
3:33:20 1:46:40 1:11:06 0:53:20
1:46:40 0:53:20 0:35:33 0:26:40
64 MB MEMORY CARD CAPACITY
10 Hz 20 Hz 30 Hz 40 Hz
64 ch.
128 ch.
256 ch.
512 ch.
28:26:40 14:13:20 9:28:50 7:06:40
14:13:20 7:06:40 4:44:26 3:33:20
7:06:40 3:33:20 2:22:13 1:46:40
3:33:20 1:46:40 1:11:06 0:53:20
Advanced mode
25
Page 26

Checking card information
You can check how much memory is available on the memory card. From the
Card Manager menu:
1 Select
2 The size of the card and the amount of free space left will appear.
Card info
.
Labelling a memory card
To apply a label to the memory card, from the Card Manager menu:
1 Select
2 Select
3 Create a text label by selecting alphanumeric characters using the
buttons, or the faders (fader 1 = UPPER CASE characters, fader 2 = lower case
characters, and fader 3 = numbers and special characters), to select characters.
Label card
Yes
.
A-Z
.
a-z
0-9/special characters
↑
and
↓
Use the
4 Once you have created a label, press
Next Character
button to move to the next position.
•
to save it and finish.
Formatting a memory card
NOTE! Formatting the memory card erases information that may be
required to make it compatible with digital cameras, MP3
players, and other devices. Do not format for the LightCorder if
the card is ever to be used with other devices.
From the
1 Select
2 Select
When formatting is complete ‘Process done - Card formatted’ will appear.
3 Select
Card Manager menu:
Format card
Yes
. A progress indicator will appear while the card is being formatted.
√
to finish.
.
26
Advanced mode
Page 27

P
LAYER MODE
Player mode is designed for users to simply select and play shows from those saved
on the memory card. No access to recording or configuration functions is available
in this mode.
STARTING PLAYER MODE
To start Player mode:
1 Connect the LightCorder to the DMX network that the lighting fixtures are
attached to.
4
2 From the
Mode
3 Select Go Player.
4 Select
PERFORMING A LAMP ON COMMAND
Options
.
Yes
menu in Advanced mode, select
to confirm.
Change System
This function can be used to issue DMX lamp on instructions from the LightCorder
provided that these have first been configured (see “Teaching lamp on commands”
on page 15).
To issue a lamp on command:
1 From the Menu select Do Lamp On.
2 The message ‘Doing lamp on...’ will appear.
SELECTING AND PLAYING A SHOW
To play back a recorded show:
1 From the menu select the file that you want to play.
2 The show will appear ready to play with the message ‘Stopped...’
Player mode
27
Page 28

3Press
break the show - press PAUSE again to continue playback. The show will loop
continuously until stopped.
Play
to start the show. During playback you can use the
PAUS E
button to
4Press
Note that during playback of a show that the assignable faders can be used to adjust
the intensity of fixtures. For information on configuring the faders to do this see
“Advanced mode” on page 11.
STOP
to end.
PERFORMING A LAMP OFF COMMAND
This function can be used to issue DMX lamp off instructions from the LightCorder
provided that these have first been configured (see “Teaching lamp off commands”
on page 15).
To issue a lamp on command:
1 From the Menu select Do Lamp Off.
2 The message ‘Doing lamp off...’ will appear.
EXITING PLAYER MODE
To return to Advanced mode, simultaneously press and hold the upper button to the
left, and the two upper buttons to the right of the display.
28
Player mode
Page 29

S
CHEDULING
Scheduling is performed via communication between the LightCorder and the
Scheduler program running on a PC.
SETTING UP THE SCHEDULE
The process is as follows:
1 Record shows using the LightCorder in Advanced mode. See “Recording” on
page 12.
2 Ensure that the time and date are set correctly on the LightCorder (see “Setting
the time” on page 19 and “Setting the date” on page 20).
3 Connect the LightCorder to a Windows PC via the RS-232 cable.
5
4 Start communication with the PC on the LightCorder. See “Communicating with
a PC” on page 19.
5 Start the LightCorder Scheduler application on the PC.
6 Select the appropriate port using the
Communication→Settings
menu.
Scheduling
29
Page 30

7 A list of shows that are stored on the memory card is uploaded to the PC using
Communication→Update Show List from LightCorder
the
menu.
8 Select the appropriate week using the calendar.
9 Drag-and-drop shows from the list onto time slots to develop a schedule. Note
Edit
that you can also copy and paste complete days or weeks using the
menu.
10 Right click on each scheduled show and define its properties.
Properties define how often the show is to be run and whether or not the lamp
on and lamp off commands should be issued.
Events that:
• Are the first scheduled event in a series will need to have the Do lamp on before
option checked. These events are marked with a yellow indicator. Ensure that the
LightCorder has learned the lamp on DMX instruction. See “Teaching lamp on
commands” on page 15.
30
Scheduling
Page 31

Warning If you have a relatively large number of fixtures on the data link
it is not a good idea to have them all strike at once as this may
result in fuses blowing. In this case a safer alternative is to
record a lamp-on show with a delay between the lamp strikes on
different channels.
• Are the last scheduled event in a series will need to have the Do lamp off after
option checked. These events are marked with a black indicator. Ensure that the
LightCorder has learned the lamp off DMX instruction. See “Teaching lamp off
commands” on page 15.
• Complete playing and do not have the Do lamp off after option checked will
result in all fixtures on the data link being dimmed until another event occurs. For
this to successfully occur the LightCorder must first “learn” the correct DMX
settings. See “Teaching dimmed scene commands” on page 16.
•Have the Loop until next event option checked will run continuously until the
next scheduled show which will start immediately at its scheduled time. Note that if
there is no other show in the schedule, or to schedule a lamp off, it may be
necessary for you to record an empty “show” lasting not more than a second or two,
and then schedule this with the Do lamp off after option checked.
11 When the schedule is finished it is downloaded to the LightCorder using the
Communication→Transfer Schedule to LightCorder
menu. This will replace
any existing schedule.
12 Disconnect the LightCorder from the PC and start Scheduler mode to run the
schedule. See “Running the Schedule” on page 32.
Scheduling
31
Page 32

Developing the schedule off-line
Schedules can be saved to a diskette or hard drive, and developed at a later time,
without the need to be connected to the LightCorder. Connection to the LightCorder
is only necessary to upload a list of the shows and to download schedules.
Schedule files have an .lcs suffix.
RUNNING THE SCHEDULE
In Scheduler mode the LightCorder will only play shows according to its schedule.
To start Scheduler mode:
1From the
Mode
2 Select Go Scheduler.
3 Select
and the name of any presently running show.
Note that during playback of a show that the assignable faders can be used to adjust
the intensity of fixtures. For information on configuring the faders to do this see
“Advanced mode” on page 11.
Options
.
Yes
to confirm. The LightCorder will display the current date and time,
menu in Advanced mode, select
Change System
32
Scheduling
Page 33

EXITING SCHEDULER MODE
To stop playing the schedule and to return to Advanced mode, simultaneously press
and hold the upper button to the left, and the two upper buttons to the right of the
display.
Scheduling
33
Page 34

P
URE
DMX
Pure DMX monitor mode restricts the LightCorder to display DMX information in
real time and is a useful test tool.
STARTING PURE DMX MONITOR MODE
MONITOR MODE
6
To start Pure DMX Monitor mode:
1From the
Mode
2 Select Go Pure DMX Mon.
3 Select
The second line of the display shows:
Id An identifier corresponding to the mode that the controller is using
Ch The number of channels being received
Re The frequency, in hertz, at which the controller is transmitting
The lower lines show the DMX channels from 0 to 512 in four columns (0-3. 4- 7,
8-11, and so on). Each row displays the DMX values of four DMX channels. The
column to the left indicates the ID of the first of the four DMX channels that are
displayed in the respective row.
You can use the ↑
For each channel the monitor displays its current DMX value from 0 to 255.
Options
.
Yes
to confirm.
menu in Advanced mode, select
and ↓ buttons to scroll to a specific channel.
Change System
34
Pure DMX monitor mode
Page 35

EXITING PURE DMX MONITOR MODE
To return to Advanced mode, simultaneously press and hold the upper button to the
left, and the two upper buttons to the right of the display.
Pure DMX monitor mode
35
Page 36

F
AIL
Note If you do not set a default show, the LightCorder will run the
-S
AFE MODE
Fail-safe mode enables the LightCorder to be used as a real-time back-up system if
your DMX controller fails. In this configuration the LightCorder is connected on
the data link and is idle until the DMX signal is not present. If this occurs the
LightCorder will start running its default show (see “Setting the default show” on
page 23) until DMX input form the controller is restored.
first show on the memory card when active.
STARTING FAIL-SAFE MODE
7
To start Fail-Safe mode:
1From the
Mode
2 Select Go Fail-Safe.
3 Select
will remain inactive. If there is no DMX signal the LightCorder will become active
and start playing the default show (or the first show on the card if no default
show has been set) in a loop.
EXITING FAIL-SAFE MODE
Options
.
Yes
to confirm. As long as the LightCorder can detect a DMX signal it
menu in Advanced mode, select
Change System
To return to Advanced mode, simultaneously press and hold the upper button to the
left, and the two upper buttons to the right of the display.
36
Fail-Safe mode
Page 37

RS-232
RS-232 command mode can be used to send operating instructions from a computer
or computer-based control system (such as the Martin ProScenium) to the
LightCorder.
Commands can also be sent from terminal applications, such as HyperTerminal
(supplied with Windows), that can be used to send commands to the
communications ports. Refer to your application documentation for information
about configuring communications.
Note that on the device that is communicating with the LightCorder that the
communications baud rate must be set to 57600 bits per second.
COMMAND MODE
COMMANDS
8
The commands available in RS-232 command mode as follows:
LON performs lamp on.
LOFF performs lamp off.
STOP stops the LightCorder playing.
PXX starts playing show with ID XX. The ID number of a show can be seen when
playing the show in Advanced mode.
All commands must end with a carriage return <CR>.
STARTING RS-232 COMMAND MODE
To start RS-232 Command mode:
1 From the
Mode
2 Select
Options
.
Go RS232 cmd mode.
menu in Advanced mode, select
Change System
3 Select
Yes
to confirm.
RS-232 command mode
37
Page 38

EXITING RS-232 COMMAND MODE
To return to Advanced mode, simultaneously press and hold the upper button to the
left, and the two upper buttons to the right of the display.
38
RS-232 command mode
Page 39

S
PECIFICATIONS
DIMENSIONS
Length . . . . . . . . . . . . . . . . . . . . . . . . . . . . . . . . . . . . . . . . . . . . . . . . . . . . . . 483 mm (19 in)
Width . . . . . . . . . . . . . . . . . . . . . . . . . . . . . . . . . . . . . . . . . . . . . . . . . . . . . . .133 mm (5.2 in)
Height . . . . . . . . . . . . . . . . . . . . . . . . . . . . . . . . . . . . . . . . . . . . . . . . . . . . . . .69 mm (2.7 in)
Weight . . . . . . . . . . . . . . . . . . . . . . . . . . . . . . . . . . . . . . . . . . . . . . . . . . . . . . . 1.7 kg (3.6 lb)
ELECTRICAL
AC supply . . . . . . . . . . . . . . . . . . . . . . . . . . . . . . . . . . . . . . . . . . . . . . . 90 - 250 V, 50/60 Hz
Maximum current and power . . . . . . . . . . 30 mA, 1.5 W @ 110 V; 20 mA, 1.6 W @230 V
CONSTRUCTION
Housing . . . . . . . . . . . . . . . . . . . . . . . . . . . . . . . . . . . . . . . . . . . . . . . . . . . . . sheet aluminum
Front panel finish. . . . . . . . . . . . . . . . . . . . . . . . . . . . . . . . anodized, natural aluminum color
A
REAR PANEL CONNECTIONS
Power. . . . . . . . . . . . . . . . . . . . . . . . . . . . . . . . . . . . . . . . . . . . . . . . . . . . . IEC 3-prong male
DMX input. . . . . . . . . . . . . . . . . . . . . . . . . . . . . . . . . . . . . . . . . . . . . . . . . . 3-pin XLR male
DMX output. . . . . . . . . . . . . . . . . . . . . . . . . . . . . . . . . . . . . . . . . . . . . . . . 3-pin XLR female
RS-232. . . . . . . . . . . . . . . . . . . . . . . . . . . . . . . . . . . . . . . . . . . . . . . . . . .9-pin DSUB female
MIDI (not used) . . . . . . . . . . . . . . . . . . . . . . . . . . . . . . . . . . . . . . . . . . . . . .5-pin DIN female
STORAGE MEDIA
Flash memory card (Martin, Samsung, or Toshiba brands only) . . . . . . . . . . . . . 4 - 64 MB
Specifications
39
 Loading...