

Martin Inground 200 Single Color, Inground 200 CMY User Manual
™
Inground 200
User Manual
Full Spectrum CMY
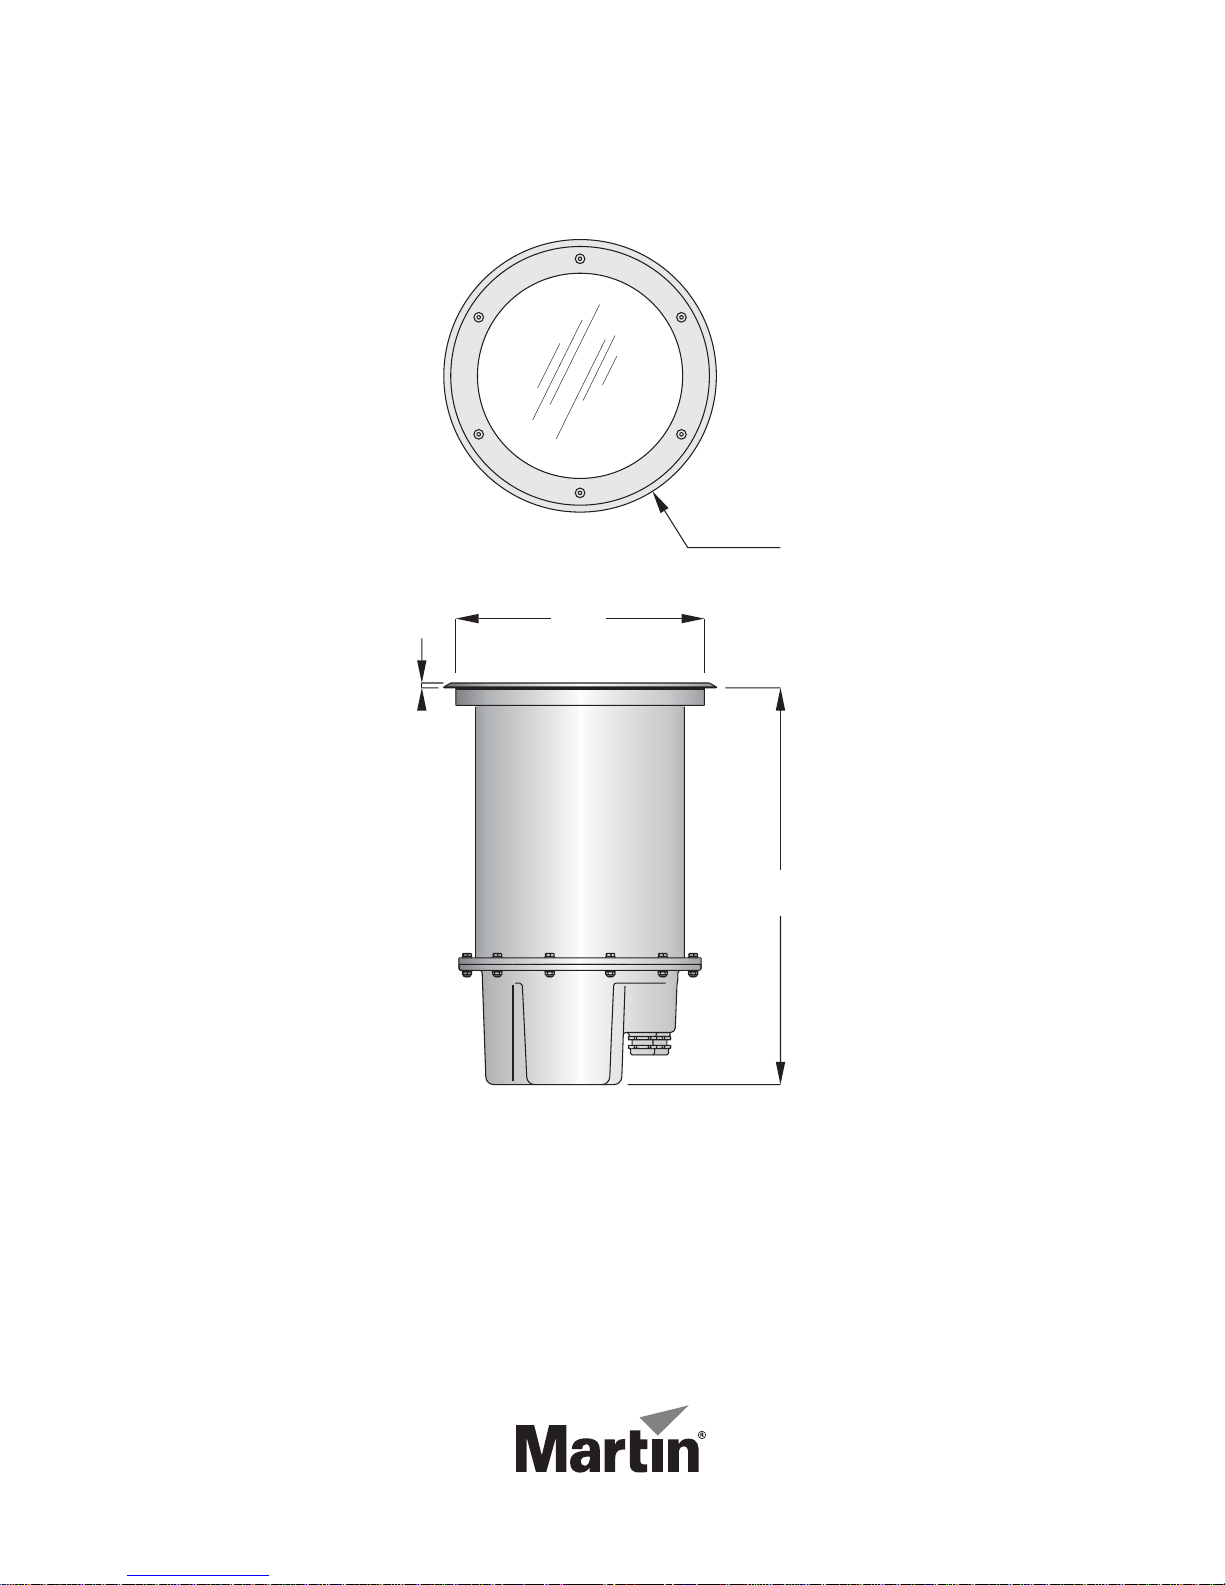
340
310
7
496
Dimensions
Measurements are in millimeters
© 2004-2008 Martin Professional A/S. Information subject to change without notice. Martin
Professional A/S and all affiliated companies disclaim liability for any injury, damage, direct or
indirect loss, consequential or economic loss or any other loss occasioned by the use of, inabil-
ity to use or reliance on the information contained in this manual. The Martin logo, the Martin
name and all other trademarks in this document pertaining to services or products by Martin
Professional A/S or its affiliates and subsidiaries are trademarks owned or licensed by Martin
Professional A/S or its affiliates or subsidiaries.
P/N 35000153, Rev C

Section 1. Getting started . . . . . . . . . . . . . . . . . . . . . . . . . . . . . . . . . . . . . . 7
Introduction. . . . . . . . . . . . . . . . . . . . . . . . . . . . . . . . . . . . . . . . . . . . . . . 7
Inground 200 model range. . . . . . . . . . . . . . . . . . . . . . . . . . . . . . . . . . 7
Optics and accessories . . . . . . . . . . . . . . . . . . . . . . . . . . . . . . . . . . . . 7
Mains power options . . . . . . . . . . . . . . . . . . . . . . . . . . . . . . . . . . . . . . 8
Included items . . . . . . . . . . . . . . . . . . . . . . . . . . . . . . . . . . . . . . . . . . . 8
Safety information . . . . . . . . . . . . . . . . . . . . . . . . . . . . . . . . . . . . . . . . . 8
General operation . . . . . . . . . . . . . . . . . . . . . . . . . . . . . . . . . . . . . . . . 10
General guidelines. . . . . . . . . . . . . . . . . . . . . . . . . . . . . . . . . . . . . . . 10
Understanding shows and scenes. . . . . . . . . . . . . . . . . . . . . . . . . . . 10
Powering on for the first time. . . . . . . . . . . . . . . . . . . . . . . . . . . . . . . 11
Control and programming options . . . . . . . . . . . . . . . . . . . . . . . . . . . 11
Initial configuration for use. . . . . . . . . . . . . . . . . . . . . . . . . . . . . . . . . 12
Defining fixture settings using MUM . . . . . . . . . . . . . . . . . . . . . . . . . 14
Defining fixture settings using an MP-2 . . . . . . . . . . . . . . . . . . . . . . . 17
Section 2. Stand-Alone operation . . . . . . . . . . . . . . . . . . . . . . . . . . . . . . 21
Stand-alone programming overview. . . . . . . . . . . . . . . . . . . . . . . . 21
About scene timing . . . . . . . . . . . . . . . . . . . . . . . . . . . . . . . . . . . . . . 22
Synchronizing scene changes for multiple fixtures . . . . . . . . . . . . . . 22
Programming methods. . . . . . . . . . . . . . . . . . . . . . . . . . . . . . . . . . . . 23
Programming from a PC using MUM . . . . . . . . . . . . . . . . . . . . . . . 23
Getting started with MUM . . . . . . . . . . . . . . . . . . . . . . . . . . . . . . . . . 24
Stand-Alone Settings. . . . . . . . . . . . . . . . . . . . . . . . . . . . . . . . . . . . . 24
Programming effects in scenes . . . . . . . . . . . . . . . . . . . . . . . . . . . . . 26
Programming the same stand-alone show on multiple fixtures. . . . . 28
Programming using an MP-2 Uploader . . . . . . . . . . . . . . . . . . . . . 29
Getting started . . . . . . . . . . . . . . . . . . . . . . . . . . . . . . . . . . . . . . . . . . 29
Selecting fixtures to program. . . . . . . . . . . . . . . . . . . . . . . . . . . . . . . 30
Enabling or disabling stand-alone mode . . . . . . . . . . . . . . . . . . . . . . 31
Synchronizing scene changes for multiple fixtures . . . . . . . . . . . . . . 31
Automatically triggering stand-alone operation . . . . . . . . . . . . . . . . . 33
Programming effects in scenes . . . . . . . . . . . . . . . . . . . . . . . . . . . . . 33
Disconnecting the MP-2 Uploader. . . . . . . . . . . . . . . . . . . . . . . . . . . 35
Stand-Alone show playback . . . . . . . . . . . . . . . . . . . . . . . . . . . . . . . 35
Starting show playback automatically at fixture power-on. . . . . . . . . 35
Scene execution using the optional MC-X. . . . . . . . . . . . . . . . . . . . . 35

DMX controller override during stand-alone show playback . . . . . . . 36
Synchronous triggering during Stand-Alone operation . . . . . . 37
Section 3. DMX control. . . . . . . . . . . . . . . . . . . . . . . . . . . . . . . . . . . . . . . . 39
DMX Controller operation . . . . . . . . . . . . . . . . . . . . . . . . . . . . . . . . . 39
Lamp control . . . . . . . . . . . . . . . . . . . . . . . . . . . . . . . . . . . . . . . . . . . 39
Effects . . . . . . . . . . . . . . . . . . . . . . . . . . . . . . . . . . . . . . . . . . . . . . . . 40
Section 4. Optics . . . . . . . . . . . . . . . . . . . . . . . . . . . . . . . . . . . . . . . . . . . . . 41
Color matching with other fixtures . . . . . . . . . . . . . . . . . . . . . . . . . 41
Section 5. Service and troubleshooting. . . . . . . . . . . . . . . . . . . . . . . . . 43
Service procedures . . . . . . . . . . . . . . . . . . . . . . . . . . . . . . . . . . . . . . . 43
Clearing excess humidity. . . . . . . . . . . . . . . . . . . . . . . . . . . . . . . . . . 44
Cleaning. . . . . . . . . . . . . . . . . . . . . . . . . . . . . . . . . . . . . . . . . . . . . . . 44
Seals . . . . . . . . . . . . . . . . . . . . . . . . . . . . . . . . . . . . . . . . . . . . . . . . . 45
Component removal & reinstallation . . . . . . . . . . . . . . . . . . . . . . . 46
Set-up and adjustment . . . . . . . . . . . . . . . . . . . . . . . . . . . . . . . . . . . . 55
Beam adjustment. . . . . . . . . . . . . . . . . . . . . . . . . . . . . . . . . . . . . . . . 55
Firmware updates . . . . . . . . . . . . . . . . . . . . . . . . . . . . . . . . . . . . . . . . 57
Printed circuit board layout. . . . . . . . . . . . . . . . . . . . . . . . . . . . . . . . 60
Troubleshooting. . . . . . . . . . . . . . . . . . . . . . . . . . . . . . . . . . . . . . . . . . 61
Section 6. Reference . . . . . . . . . . . . . . . . . . . . . . . . . . . . . . . . . . . . . . . . . . 63
MP-2 control menu structure . . . . . . . . . . . . . . . . . . . . . . . . . . . . . . 63
DMX protocol: Inground 200 CMY. . . . . . . . . . . . . . . . . . . . . . . . . . 66
Specifications: Inground 200 CMY . . . . . . . . . . . . . . . . . . . . . . . . . 67
Ordering information. . . . . . . . . . . . . . . . . . . . . . . . . . . . . . . . . . . . . . 70

S
ECTION
1. G
1. Introduction
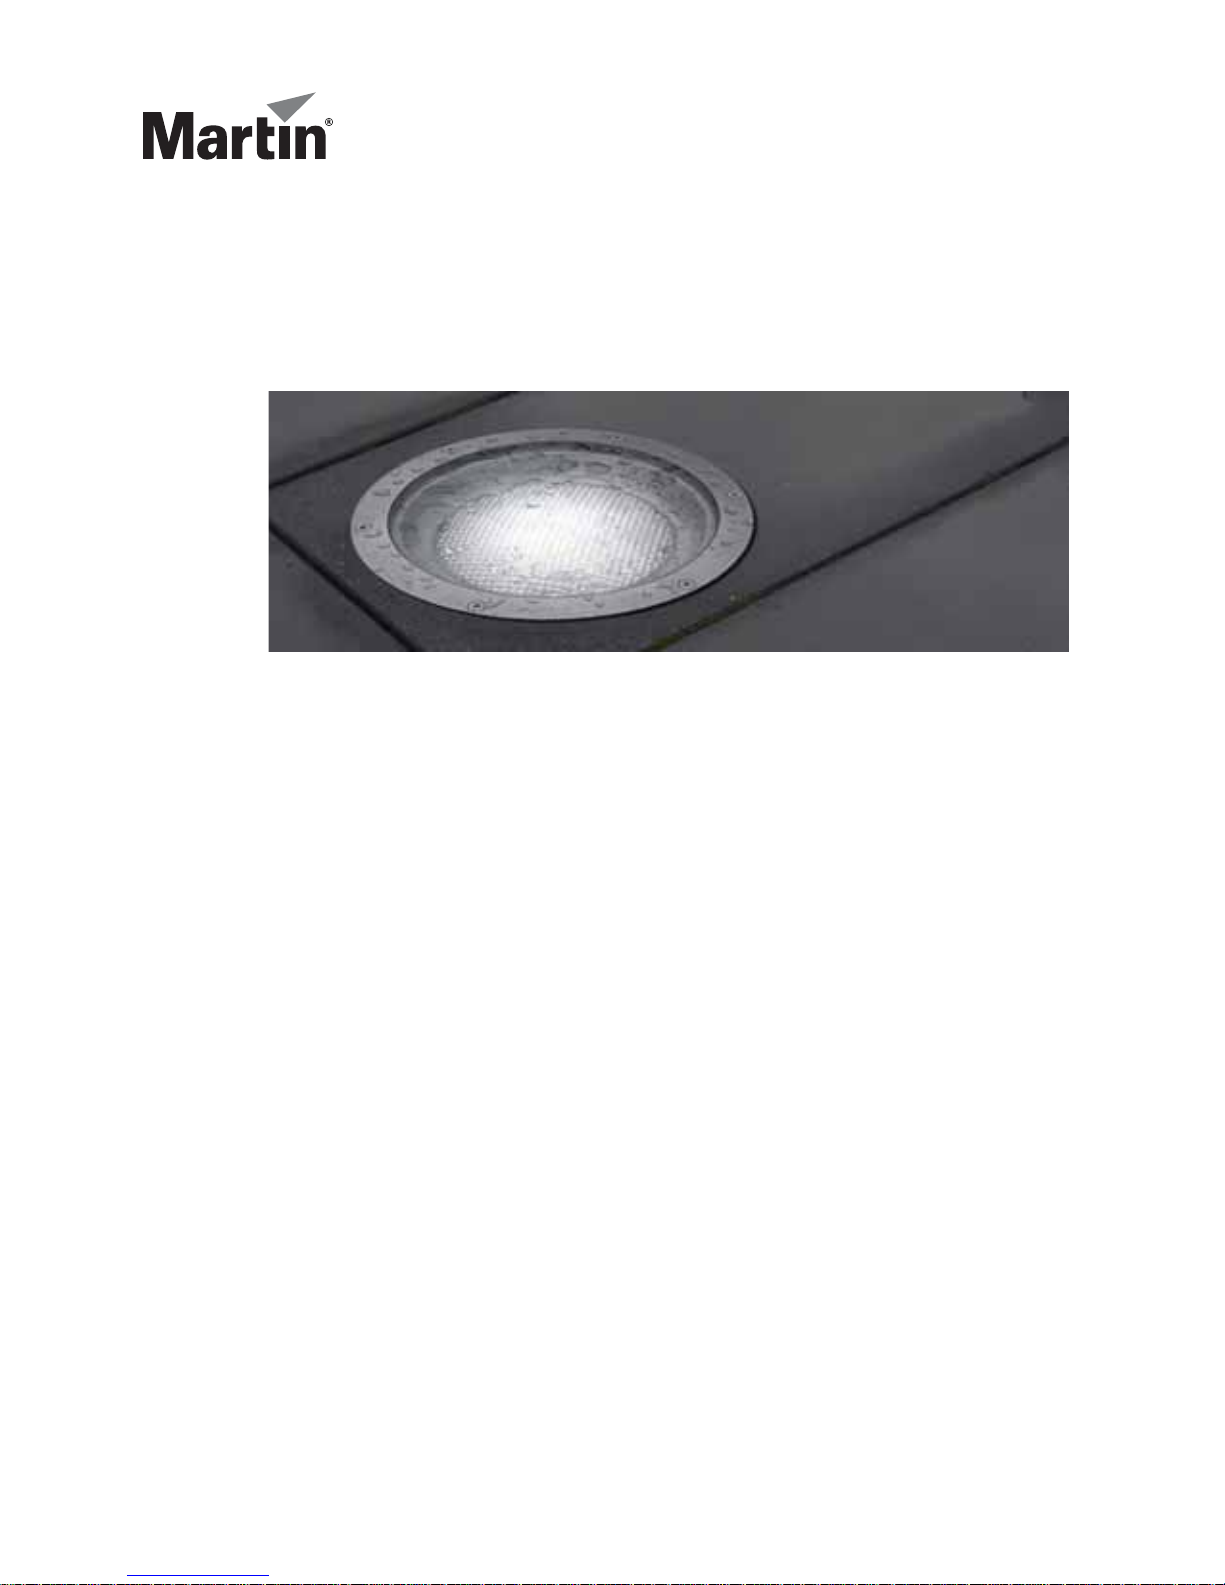
Thank you for selecting the Martin™ Inground 200™ Full Spectrum CMY,
an intelligent 150 watt uplight designed for permanent burial installation.
This User Manual contains details of how to operate and service this fixture.
For details of installing the Inground 200 CMY, please refer to the
Installation Guide shipped with the product. The most recent versions of the
Installation Guide and this User Manual are also available in the Product
Support area of the Martin website at http://www.martin.com
Inground 200 model range
ETTING STARTED
The Inground 200 is available in two models:
Inground 200 Single Color
The Inground 200 Single Color can be operated with or without a color filter
and can be manually dimmed, but it is not programmable and cannot be
controlled by DMX. A separate user manual, P/N 35000152, exists for this
product.
Inground 200 CMY
The Inground 200 Full Spectrum CMY offers seamless full spectrum colormixing, giving a virtually limitless color palette, and 0-100% intensity
control. It can be programmed to run synchronized stand-alone light shows
with pre-defined start/stop times using a Windows PC with Martin MUM™
software, or it can be operated using a DMX controller.
Optics and accessories
The following optional lenses are available for the Inground 200:
• Medium – 32° one-tenth peak angle
• Wide – 56° one-tenth peak angle
• Very wide – 98° one-tenth peak angle
•Wallwash
Introduction 5

A range of accessories is available for the Inground 200. See “Ordering
information” on page 68. See also www.martin.com for the most recent
information.
Mains power options
Inground 200 Single Color and CMY models are both available in three
configurations to match local AC mains power:
• 210 V, 60 Hz (US model)
• 277 V, 60 Hz (US model)
• 230 V, 50 Hz (EU model)
Included items
The Inground 200 CMY is supplied with the following items:
• Philips CDM-SA/T 150W/942 lamp
• Silica gel sachet inside fixture for shipping (must be removed and
disposed of)
• Silica gel sachet packed separately in sealed aluminum bag (must be
fastened inside fixture and fixture closed within 20 minutes of opening
aluminum bag)
• DMX termination resistor
• 3 m (9.8 ft.) hard-wired power cable tail
• 3 m (9.8 ft.) hard-wired control data in/out cable tail
• Installation guide
• User manual
2. Safety information
Warning! This product is not for household use.
This product presents risks of lethal or severe injury due to fire, heat,
electric shock and lamp explosion.
Read this guide before operating the fixture, follow the safety precautions
listed below and observe all warnings in this guide and on the fixture.
If you have questions about how to operate or service the fixture safely,
please contact your Martin supplier or call th e Martin 24-hour service
hotline on +45 8740 0000, or in the USA on 1-888-tech-180.
6Safety information

Guarding against electric shock
• Isolate the fixture from AC power before removing or installing the lamp,
fuses, or any part.
• Always ground (earth) the fixture electrically.
• Use only a source of AC power that complies with local building and
electrical codes and has both overload and ground-fault protection.
• Refer any service not described in this user manual to a Martin service
technician.
Lamp safety and eye protection
• Never operate the fixture with missing or damaged lenses and/or covers.
• Do not stare directly into the light. Never look at an exposed lamp while it
is lit.
• Wear safety glasses during beam adjustment.
• Use only approved lamp types (see “Source” on page 65).
• Replace the lamp if it becomes defective or worn out. The average life of
the Philips CDM-SA/T 150W/942 lamp supplied with the Inground 200
CMY is 9000 hours. If one of the approved alternative lamp types listed
under “Source” on page 65 is fitted, see the lamp supplier’s
documentation.
Guarding against burns and fire
• Allow the fixture to cool for at least 15 minutes after use before opening it
for service or adjustment.
• Wear heat-resistant safety gloves during beam adjustment.
• Never attempt to bypass the thermostatic switch or fuses. Always replace
defective fuses with ones o f the specifie d type and rating.
• Keep all combustib le materials (for e xample fabric, w ood, paper) at least 1
meter (39 inches) away fro m the fixture. Keep flammable materials well
away from the fixture.
• Ensure that litter, dry leaves or other combustible mater ials cannot
accumulate on or near the fixture.
• Prevent vehicles from being par ked over or near fixtures – including unlit
fixtures that may later be switched on.
• Do not illuminate surfaces within 0.5 meters (20 inches) of the fixture.
• Install the fixture outdoors or in a well ventilated area.
• The exterior of the fixture can become very hot, up to 80° C (176° F)
during normal operation. Ensure all local safety regulations and legal
requirements are observed, and take appropriate measures to warn or
restrict access.
• Do not modify the fixture or install other than genuine Mart in parts.
• Never place filters or other materials over the front glass.
Safety information 7

Guarding against injury
• The front glass can be slippery, especially when we t. Ensure that
pedestrians are warned and/or kept away from the fixture.
• Block public access during service.
3. General operation
General guidelines
To avoid voltage drops which may result if many lamps strike at the same
time, there is a short delay before the lamp strikes after power-on.
For optimum lamp life and performance, allow the lamp to warm up fully for
five minutes before turning it off. Turn off lamp power whenever illumination
is not required for periods of one hour or more. Fixture power may remain
on when not in use.
When the temperature is expected to fall below freezing, leave the fixture
powered on when not in use to keep the electronics warm. The lamp,
however, may be switched off.
Understanding shows and scenes
If you are not familiar with programmable lighting, it will help you follow the
rest of this manual if you understand the concept of scenes and shows.
A scene is an effect that consists of a certain color displayed at a certain
intensity. A show, or program, is a sequence of scenes which can be
repeated again and again, if desired.
8 General operation

Scenes consist of a Fade period
Wait
Wait
Wait
S
c
e
n
e
1
S
c
e
n
e
2
S
c
e
n
e
3
during which lighting fixtures
change to the desired effect, and
Fade
a Wait period, during which
fixtures continue to display the
desired effect.
The example on the right is a
3
e
n
e
c
S
lighting show consisting of 3
scenes. These 3 scenes could for
example be:
Fade
Fade
1. 30 seconds fade from blackout
e
n
to 40 seconds of 100%
e
2
intensity red light.
2. 30 seconds fade to 30 seconds
of 50% intensity blue light.
3. 20 seconds fade to 120 seconds of 80% intensity white light.
c
Fade
Fade
S
Fade
S
c
e
n
e
1
Powering on for the first time
When the Inground 200 CMY is connected to power for the first time, it will
start running a factory-set light show to test the fixture. It will continue to run
this test show until a new show is programmed into it, or until it receives
DMX commands.
Initial test show
The Inground 200 CMY is pre-programmed with 5 scenes to verify that the
CMY flags and the dimmer are working correctly.
1. White 100% intensity.
2. Cyan 100% intensity.
3. Magenta 100% intensity.
4. Yellow 100% intensity.
5. White 0% intensity (no light).
Control and programming options
The Inground 200 CMY can receive control and programming data via two
inputs:
• via the RJ45 service connector on the lamp modul e under the front glass
and lens
• via the DMX control data link.
General operation 9

The RJ45 service connector has priority. This means that while data is
being received via the service connector, the fixture ignores any data
received via the data link.
Control and programming methods
The Inground 200 CMY can be programmed and controlled using one of the
methods listed below.
Stand-Alone programming
Using a PC with MUM software or a Martin MP-2 Uploader you can
program and store stand-alone light shows in individual fixtures:
1. Any fixture can be programmed to run its own independent stand-alone
show.
2. One fixture can be programmed to run a show and also send scenechange signals to any number of other fixtures via the data link, so that all
fixtures run a synchronized stand-alone show. Fixtures in synchronized
stand-alone shows can show identical or different scenes, but all fixtures
will change scene at the same time.
Stand-Alone programming is described in “Section 2. Stand-Alone
operation” on page 19.
DMX control
Using a DMX device to control fixtures via a data link, fixtures can be
controlled independently or in groups.
DMX control is described in “Section 3. DMX control” on page 37.
Initial configuration for use
Before the Inground 200 CMY can be programmed or controlled, certain
fixture settings need to be configured. This section describes how to
10 General operation
configure these using either the Martin MUM™ (Multi-Utility Manager)
application or an MP-2 Uploader if available.
Martin MUM
application
Martin MP-2
Uploader
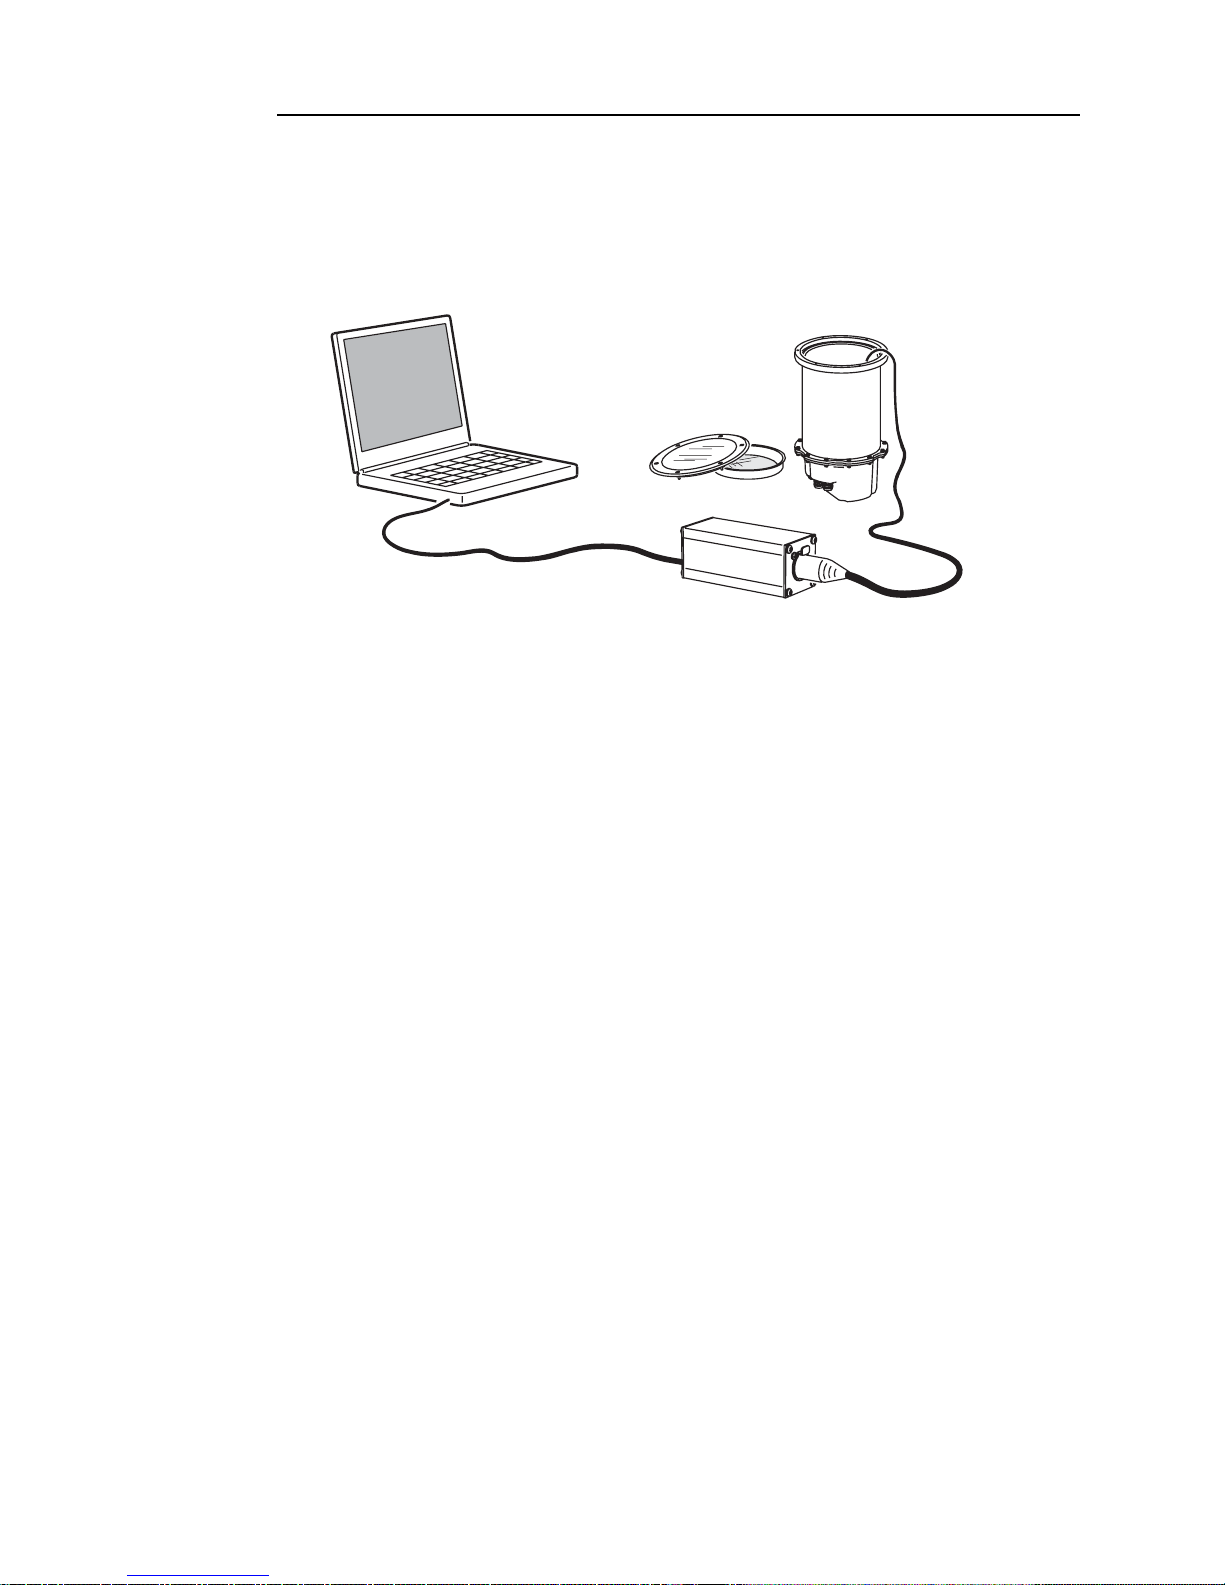
MUM is a Windows PC software application that must
be used in combination with a DABS1™ hardware
interface.
We recommend MUM because it provides an intuitive,
easy-to-use, graphic user interface.
MUM only allows you to connect to, and set up , one
fixture at a time.
For details of how to use MUM, see “Defining fixture
settings using MUM” on page 12.
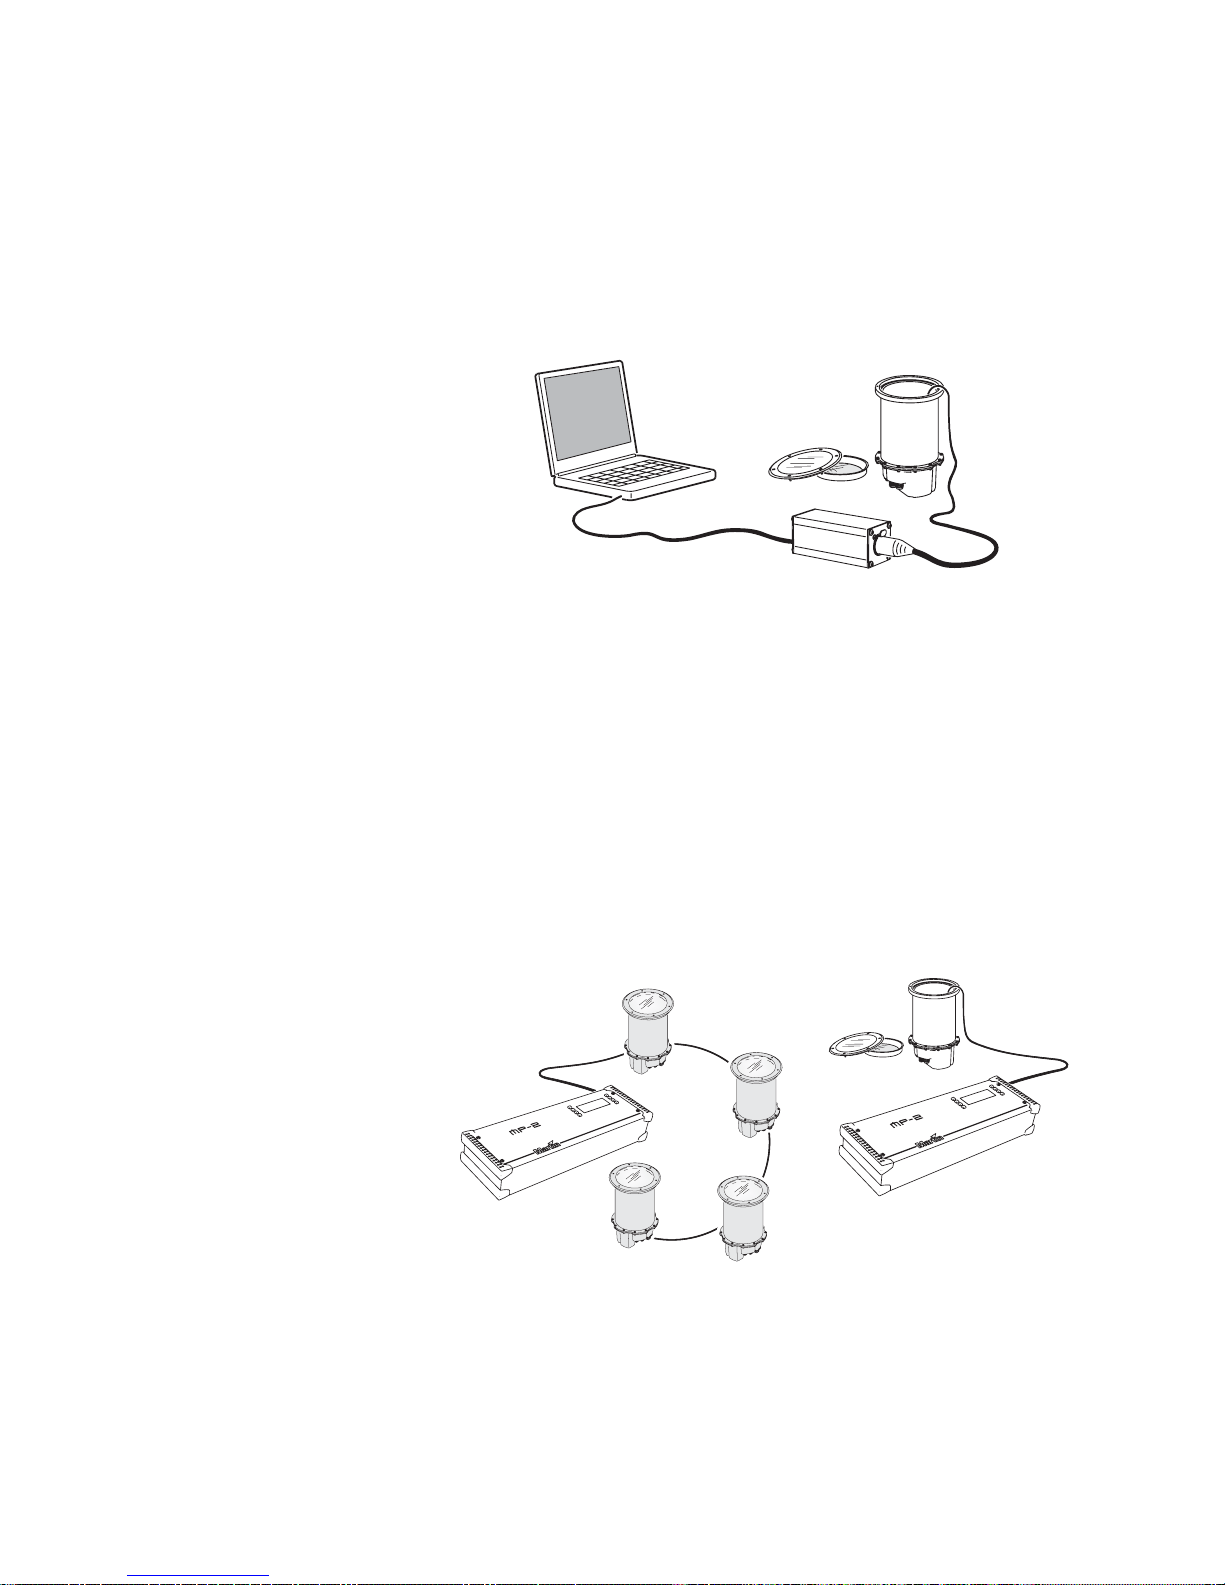
If you hav e an MP-2, it can be loaded with the Inground
200 CMY’s control software and connected to either a
data link or a single fixture, as illustrated below. The
MP-2 user manual contains full details of uploading
options and methods.
When working with multiple fixtures, an MP-2 allows
you to apply settings globally to multiple fixtures on a
data link.
The MP-2 provides a text-based interface an d the
fixtures do not provide feedback to th e uploader.
Therefore, the current settings of the fixture can only be
“read” by observing the behavior of the fixture.
For details of how to use the MP-2, see “Def ining fixture
settings using an MP-2” on page 15.
General operation 11
Defining fixture settings using MUM
Using MUM, you can connect to and set up one fixture at a time. Refer to
the MUM User Manual (available on the Martin website at
http://www.martin.com) for instructions on installing and starting the MUM
application.
PC
DABS1
MUM must be used with a DABS1 interface device. A complete package
containing MUM, the DABS1, documentation and all cables is available
from Martin dealers (P/N 90758090). The package includes an XLR-toRJ45 cable to connect the DABS1 to an Inground 200 CMY. This cable is
also available separately (P/N 11840087).
To get started:
Inground 200
1. Connect a PC to a DABS1 and connect the DABS1 to an Inground 200
CMY.
2. Power on the Inground 200 CMY and start the MUM application. MUM
will automatically detect an Inground 200 CMY if it is powered on and
connected. It will also retrieve the current settings from the fixture and
display them.
Setting the onboard clock
The Inground 200 CMY has a battery-operated 24-hour clock that can start
and stop stand-alone operation.
12 General operation
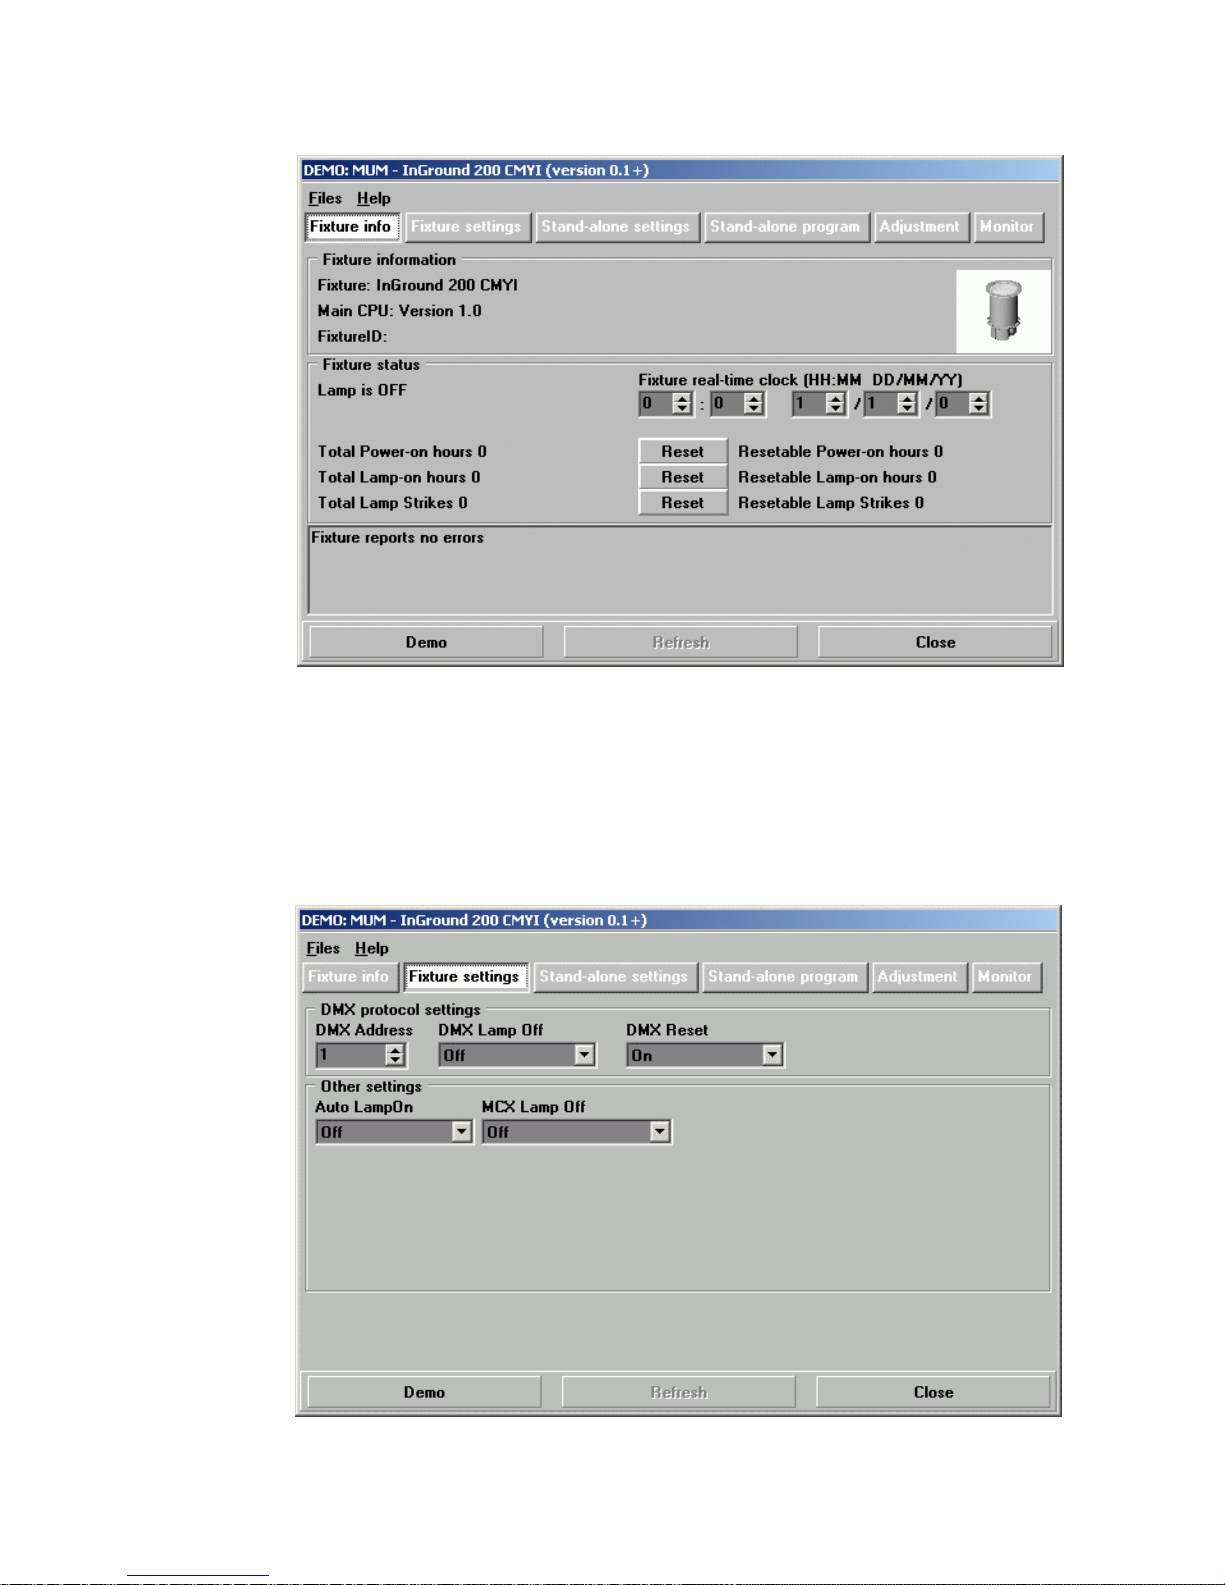
To set the clock:
1. in the main MUM window, click on the Fixture info button:
2. Using the two Fixture time spin buttons, set the fixture to the c urrent time
and date (expressed in the 24-hour clock in hours and minutes, then in
DD/MM/YY format). The time will be updated in the fixture in real-time.
Fixture settings
To set the additional fixture settings, click on the Fixture settings button:
General operation 13

DMX address
If you are not familiar with the DMX lighting control prot ocol, it will help if y ou
read through “DMX Controller operation” on page 37.
The DMX address (also known as the control address, or start channel) is
the first channel used to receive instructions from the DMX controller. Each
fixture needs its own DMX address set, and uses this address (and control
channels immediately above this address) to receive instructions.
The Inground 200 CMY reads the data on its start channel and the next five
channels. If the control address is set to 100, the fixture uses channels 100,
101, 102, 103, 104 and 105. Channel 106 can be used as the DMX address
for the next fixture.
If two or more fixtures are set up with the same address, they will receive
the same instructions and should behave identically. Setting up identical
fixtures with the same address is a good tool for troubleshooting
unexpected behavior and an easy way to achieve synchronized action.
To set the DMX address use the DMX Address spin button. The fixture
address is updated in real time.
DMX Lamp Off
When the DMX Lamp Off personality is on (the default setting), lamp power
can be turned off from the controller by setting channel 1 to a decimal value
from 248 to 255.
DMX Reset
When the DMX Reset personality is on (the default setting), the fixture can
be reset from the controller by setting channel 1 to a decimal value from
208 to 217.
Auto Lamp On
When the Auto Lamp On personality is on, the fixture turns on the lamp
within 90 seconds of power on. When set to off (the default setting), a lampon command is required to turn on the lamp.
MC-X Lamp Off
By choosing the option MCX Preset 7 key from the MCX Lamp Off field,
you enable button 7 on an MC-X controller to be used to control the lamp off
function.
14 General operation
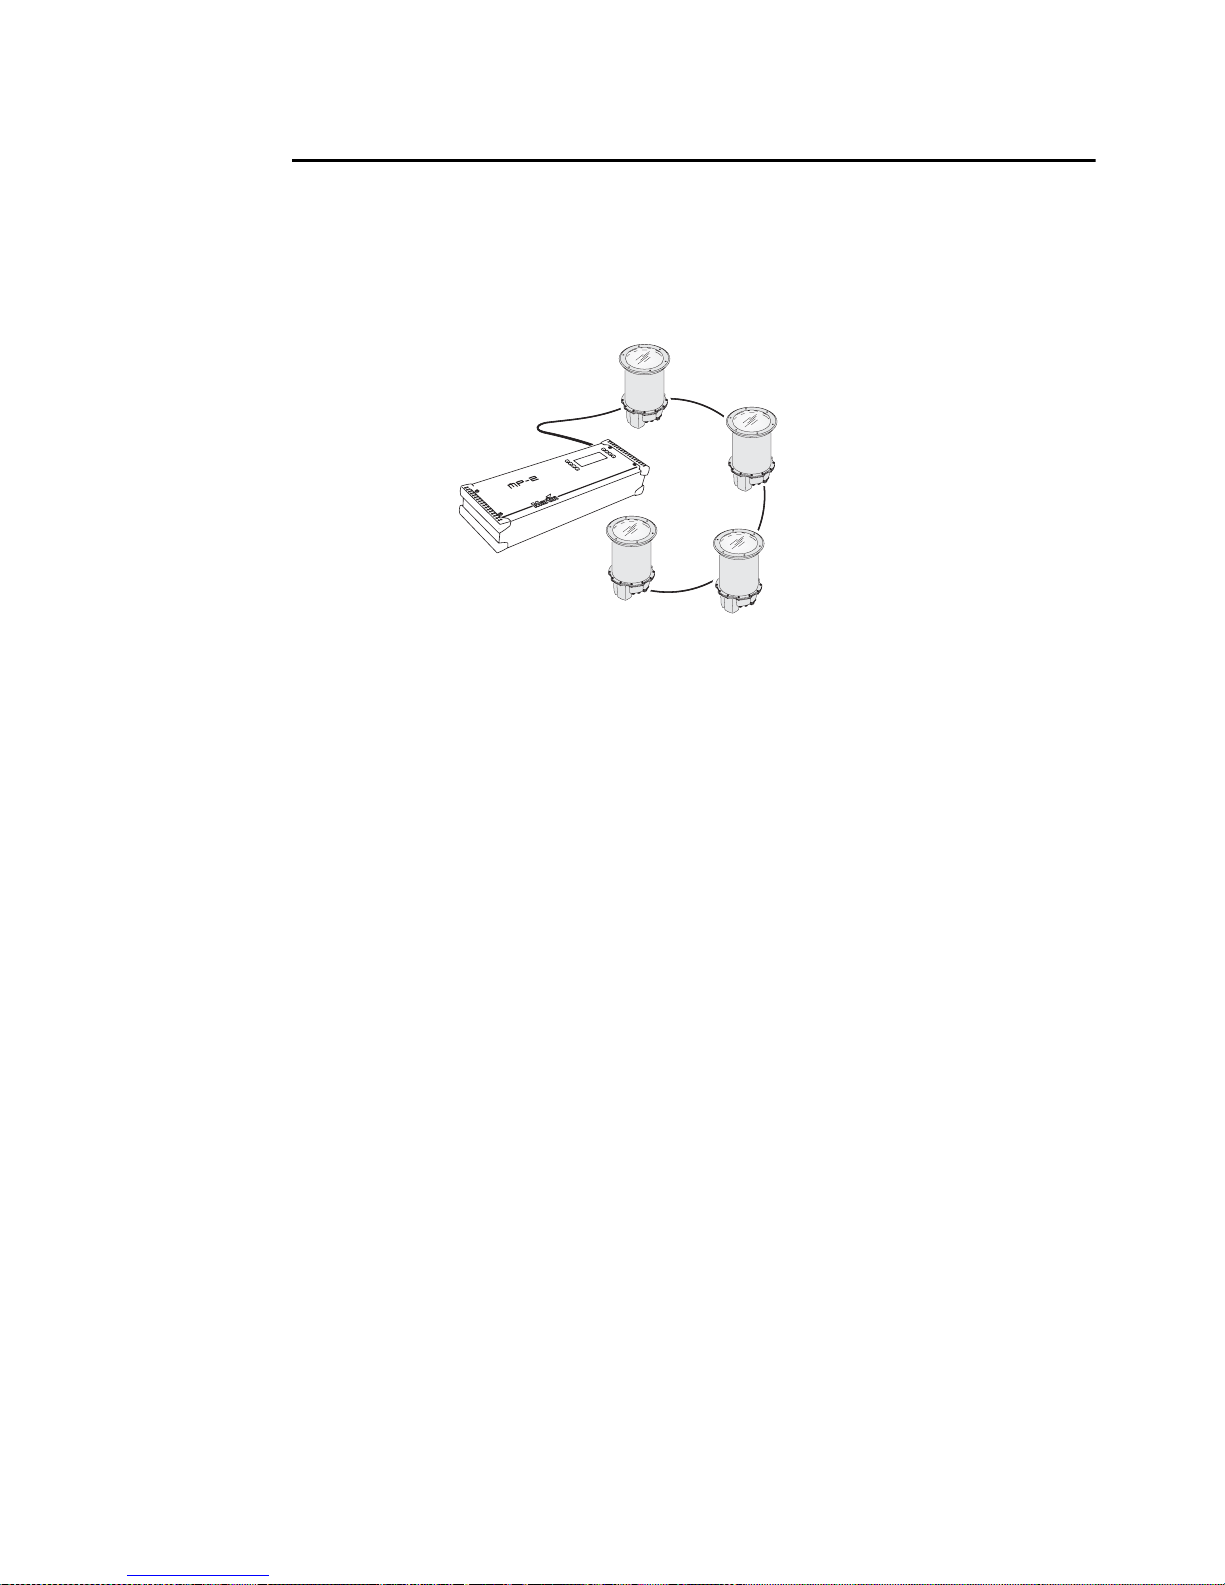
Defining fixture settings using an
MP-2
MP-2 Uploader users can apply settings globally to multiple fixtures on a
data link by loading the MP-2 with the Inground 200 CMY’s control software
and connecting it to a fixture or to the data link. The MP-2 Uploader user
manual contains instructions for this procedure.
Inground 200s
MP-2
The MP-2 has a text-based interface and does no t receive feedback from
fixtures. Therefore, the current settings of the fixture can only be “read” by
observing the behavior of the fixture.
Single-fixture and all-fixture modes
The MP-2 provides two ways to access fixtures: single-fixture mode and allfixtures mode. In single-fixture mode, the uploader communicates only with
the fixture at a designated address. In all-fixtures mode, the uploader
communicates with all fixtures of the same type to which it is connected.
Fixture-specific settings such as the control address should be made in
single-fixture mode. If no other fixtures are connected, however, then allfixtures mode may be used. Global settings are easiest to apply in allfixtures mode.
DMX address
The DMX address, also known as the control address, or start channel, is
the first channel used to receive instructions from an uploader. Each fixture
needs its own control address set, and uses this address and subsequent
control channels to receive instructions from an uploader or controller.
The Inground 200 CMY uses seven control channels. It re ads the data on
the start channel and the next six channels. If the control address is set to
100, the fixture uses channels 100, 101, 102, 103, 104, 105, and 106.
Channel 107 would be the control address for the next fixture.
If two or more fixtures are set up with the same address, they will receive
the same instructions and should behave identically. Setting up identical
General operation 15

fixtures with the same address is a good tool for troubleshooting
unexpected behavior and an easy way to achieve synchronized action.
Important! When setting the address, either use single-fixture mode or isolate all
other fixtures from the uploader .
To set the control address:
1. Prepare an MP-2 or similar upload device as described in the uploader
user manual. If you know the address to which the fixture is currently set,
(i.e. the address to change from), connect the uploader to the data link
and use single-fixture mode. Otherwise, use all-fixtures mode and isolate
all other fixtures from the uploader. Apply power to the fixture.
2. If using single-fixture mode, scroll to the fixture’s current address and
press OK (in all-fixtures mode this step is not necessary).
3. Select
4. Scroll to the desired control address and press OK.
5. Press OK again to confirm and sav e the setting.
Fixture address from the Fixture Menu.
Personality settings
The following settings are av ailable in the uploader’s Personality menu
to modify fixture behavior.
DMX lamp off: When the DMX lamp off personality is on (the default
setting), lamp power can be turned off from the controller by setting channel
1 to a decimal value from 248 to 255.
DMX reset: When the DMX Reset personality is on (the default setting), the
fixture can be reset from the controller by setting channel 1 to a decimal
value from 208 to 217.
Auto lamp on: When the Auto lamp on personality is on (the default
setting), the fixture turns on the lamp within 90 seconds of power on. When
set to off, a lamp-on command from a DMX controller or an onboard timer is
required to turn on the lamp.
MC-X lamp off: When the MC-X Lamp-off personality is on (the default
setting), the lamp can be doused with a command from an MC-X controller.
To set a personality setting:
1. Prepare and connect an MP2 or similar upload device as described in the
device’s user manual. Apply power to the fixture.
2. Select single fixture mode to change a setting on a single fixture, or allfixtures mode to make global changes.
3. If using single-fixture mode, enter the fixture’s address.
4. Select
5. Select the desired personality and setting. (See “MP-2 control menu
structure” on page 61.) Press OK.
16 General operation
Personality from the fixture menu.

Clock
The Inground 200 CMY has a battery operated 24-hour clock that can start
and stop stand-alone operation.
To set the clock:
1. Prepare and connect an upload device as described in the MP2 Uploader
manual. Apply power to the fixture.
2. Select all-fixtures mode.
3. Select
4. Select
5. Press OK.
6. Select
7. Press OK.
8. Press
Adjust -> Real time clock from the fixture menu.
Hour and scroll to the current hour.
Minute and scroll to the current minute.
Back to return to the main menu.
General operation 17

18 General operation

S
ECTION
2. S
TAND
-A
LONE
OPERATION
4. Stand-alone programming
overview
Stand-alone is a mode where the fixture executes color changes at set
intervals and speeds, at pre-defined periods during the day. The term
stand-alone is used to mean that the Inground 200 CMY is not connected to
a control device, but is pre-pro grammed with a series of up to 20 scenes
that play continuously in a loop.
‘Stand-alone operation’ involves:
• a single fixture running independently, or
• multiple fixtures running synchronously.
For multiple fixtures to run synchronously, one ‘master’ fixture must send
trigger signals to the other ‘slave’ fixtures via a DMX control data link. The
slave fixtures must all be programmed individu ally with shows, but each
scene in their shows is started by a trigger signal from the master fixture.
An Inground 200 CMY running a pre-programmed show can perform
synchronized scene changes with up to 31 other Martin Architectural
fixtures of the following types:
• Inground 200™ 6 Color
• Inground 200™ CMY
• Exterior 200™
• Exterior 600™
• Exterior 1200™ Wash
• Exterior 1200™ Image Projector
• Cyclo™ DMX models including Cyclo IP65 DMX
• FiberSource™ CMY150
• Imager™ series
• Alien 02™ series
• MiniMAC™ Maestro
• Exterior 200™ LED
More fixtures can be added to an installation by using one or more Martin
RS-485 Opto-Splitters. This small DMX amplifier will allow up to 4 additional
branches to be added to a data link, with 32 fixtures possible on each
Stand-alone programming overview 19

branch. Full product details are available in the Products area of the Martin
Wait
Wait
Wait
S
c
e
n
e
1
S
c
e
n
e
2
S
c
e
n
e
3
website at http://www.martin.com
About scene timing
Each scene in a show has two parts:
1. a dynamic part - the fade - during which effects move to the scene’s
programmed positions
2. a static part - the wait - where
effects do not change.
The duration of the fade and wait is
programmed individually for each
scene. The fade and w ait times can
be between 0 seconds - 18 hours.
The total time it takes a scene to
ex ecute is the fade time plus the
wait time.
When operating multiple fixtures
synchronously, the wait time is
determined by the master fixture.
Slave fixtures f ade at their own rate
and then remain in the “wait” state
until they receive a “start scene” or “start show” trigger from the master.
3
e
n
e
c
S
Fade
Fade
Fade
S
Fade
c
e
n
e
1
Fade
Fade
S
c
e
n
e
2
When programming in synchronous triggering situ ations, you can make life
much easier if you make sure that:
1. Every fixture has the same number of scen es.
2. Respective scene times are a few seconds longer on the master fixture
than on the slave fixtures.
The rules used in the master/slave algorithm are detailed in “Synchronous
triggering during Stand-Alone operation” on page 35.
Synchronizing scene changes for
multiple fixtures
If you are running multiple Inground 200 CMYs on a data link, it is possible
to synchronize scene changes.
Note: Each individual fixture must be programmed with a show. The only
commands that are transmitted by the master fixture are scene change
commands. No data about the look of the scene is transmitted between
fixtures.
20 Stand-alone programming overview

Programming methods
The Inground 200 CMY provides two stand-alone programming methods;
using:
1. the Martin MUM application on a Windows PC (recommended because it
provides an intuitive, easy-to-use, graphic user interface), or
2. an MP-2 Upload device, if available. See “Programming using an MP-2
Uploader” on page 27.
If you are programming a group of fixtures to perform the same scenes with
synchronized triggering then we recommend that you either:
1. Use MUM to program fixture settings and a show on a single fixture,
download and save the fixture memory to a file on your PC using MUM’s
Files menu, and then upload this file to each subsequent fixture that you
connect to, or
2. Use an MP-2 Uploader, if available, to program the same show on all the
fixtures on the network simultaneously (you can then assign their
individual DMX address afterwards).
5. Programming from a PC
using MUM
The programming of scenes, and setting up of master/slave relationships,
can be performed from a personal computer running the MUM application.
The PC must be connected to a fixture via a DABS1 adaptor. The PC is
used to program the stand-alone settings for that fixture, and then removed.
When this fixture is subsequently switched on, it can automatically run the
scenes in its show in a loop for two periods in each 24 hour period.
PC
DABS1
If you are not familiar with the use of MUM, it is recommended that you
familiarize yourself with it by reading the MUM user manual.
Inground 200
Programming from a PC using MUM 21
Getting started with MUM
To get started:
1. Connect a DABS1 adaptor to your PC and an Inground 200 CMY using
the cables supplied in the MUM/DABS1 package. Replacement cables
are available from your Martin dealer.
2. Power on the Inground 200 CMY and start the MUM application. The
application will automatically detect an Inground 200 CMY if it is
powered-on and connected to your computer via a DABS1 adaptor . It will
also retrieve the current settings on the fixture and display them.
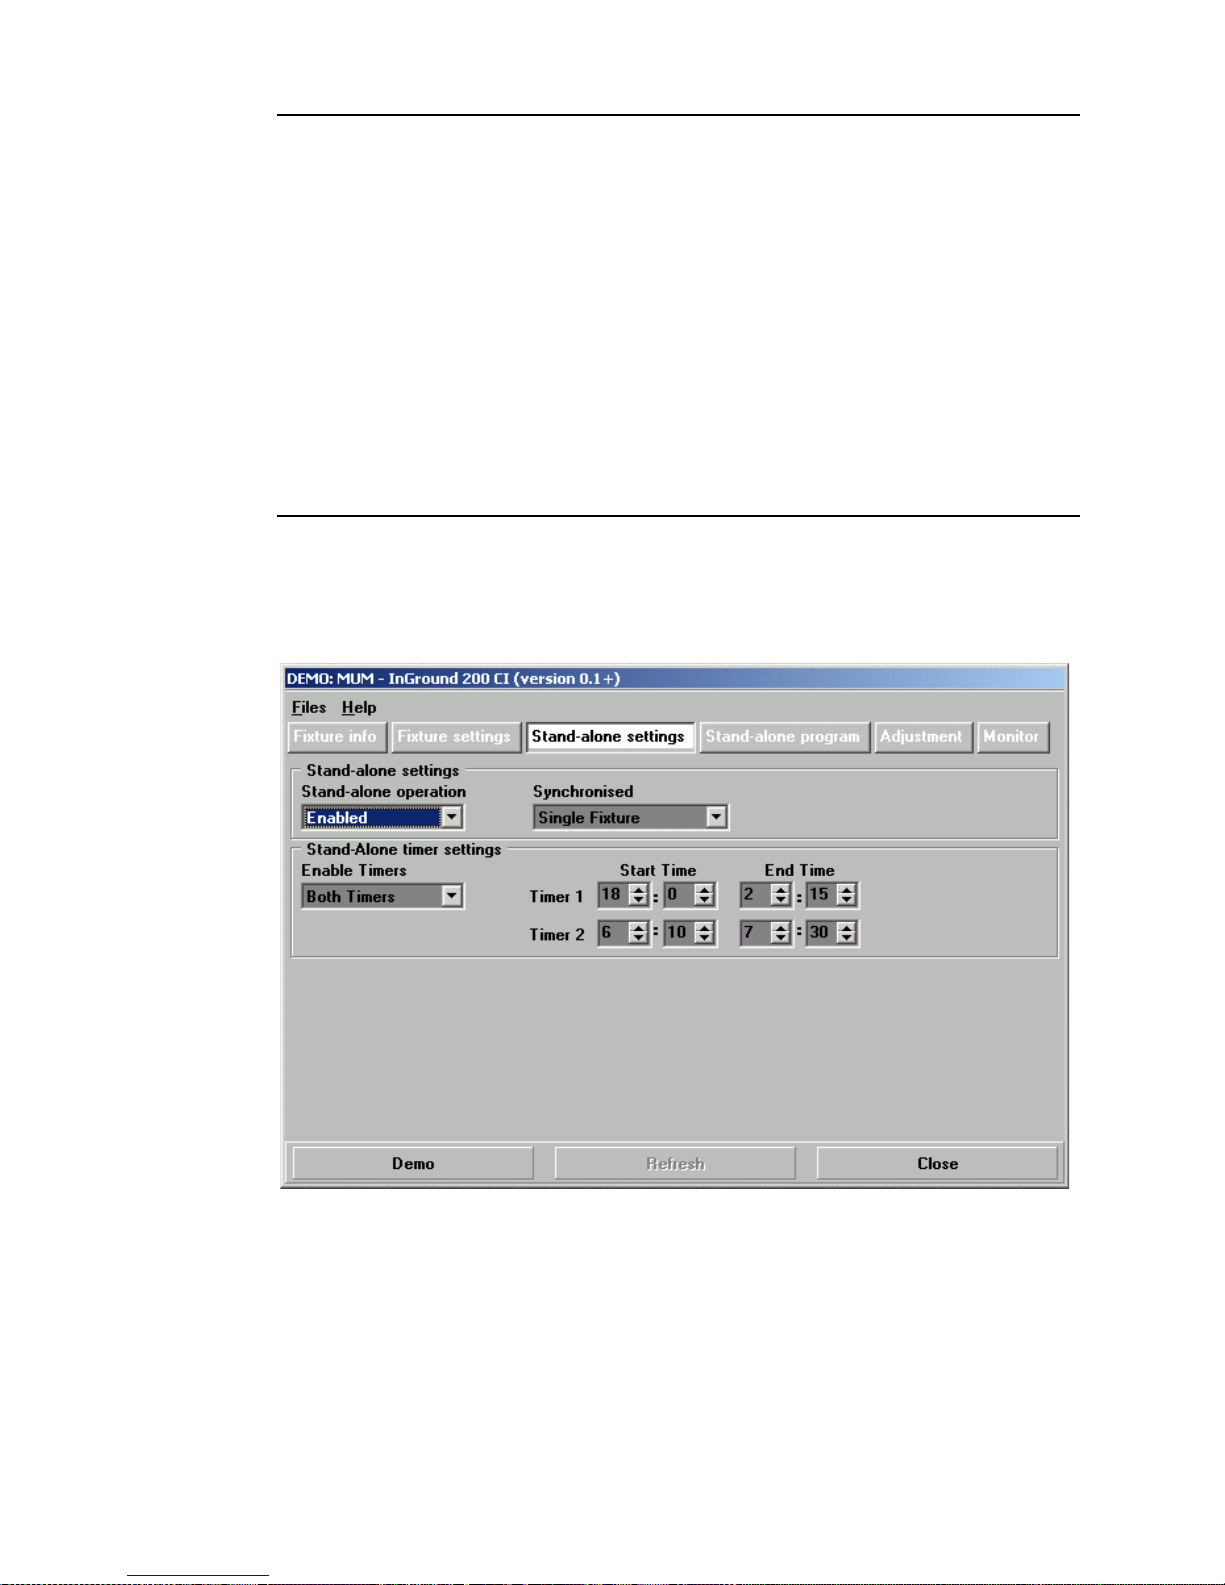
Stand-Alone Settings
The fixture needs to be configured to know if and when to activate a standalone show:
Click Stand-alone setting s to display the following window.
The following options are available:
Stand-alone
operation
22 Programming from a PC using MUM
Enables or disables stand-alone operation.
 Loading...