

Page 1
Martin® Air Cannon
Maintenance Instructions
Go to Martin® Air Cannon Maintenance Instructions web page
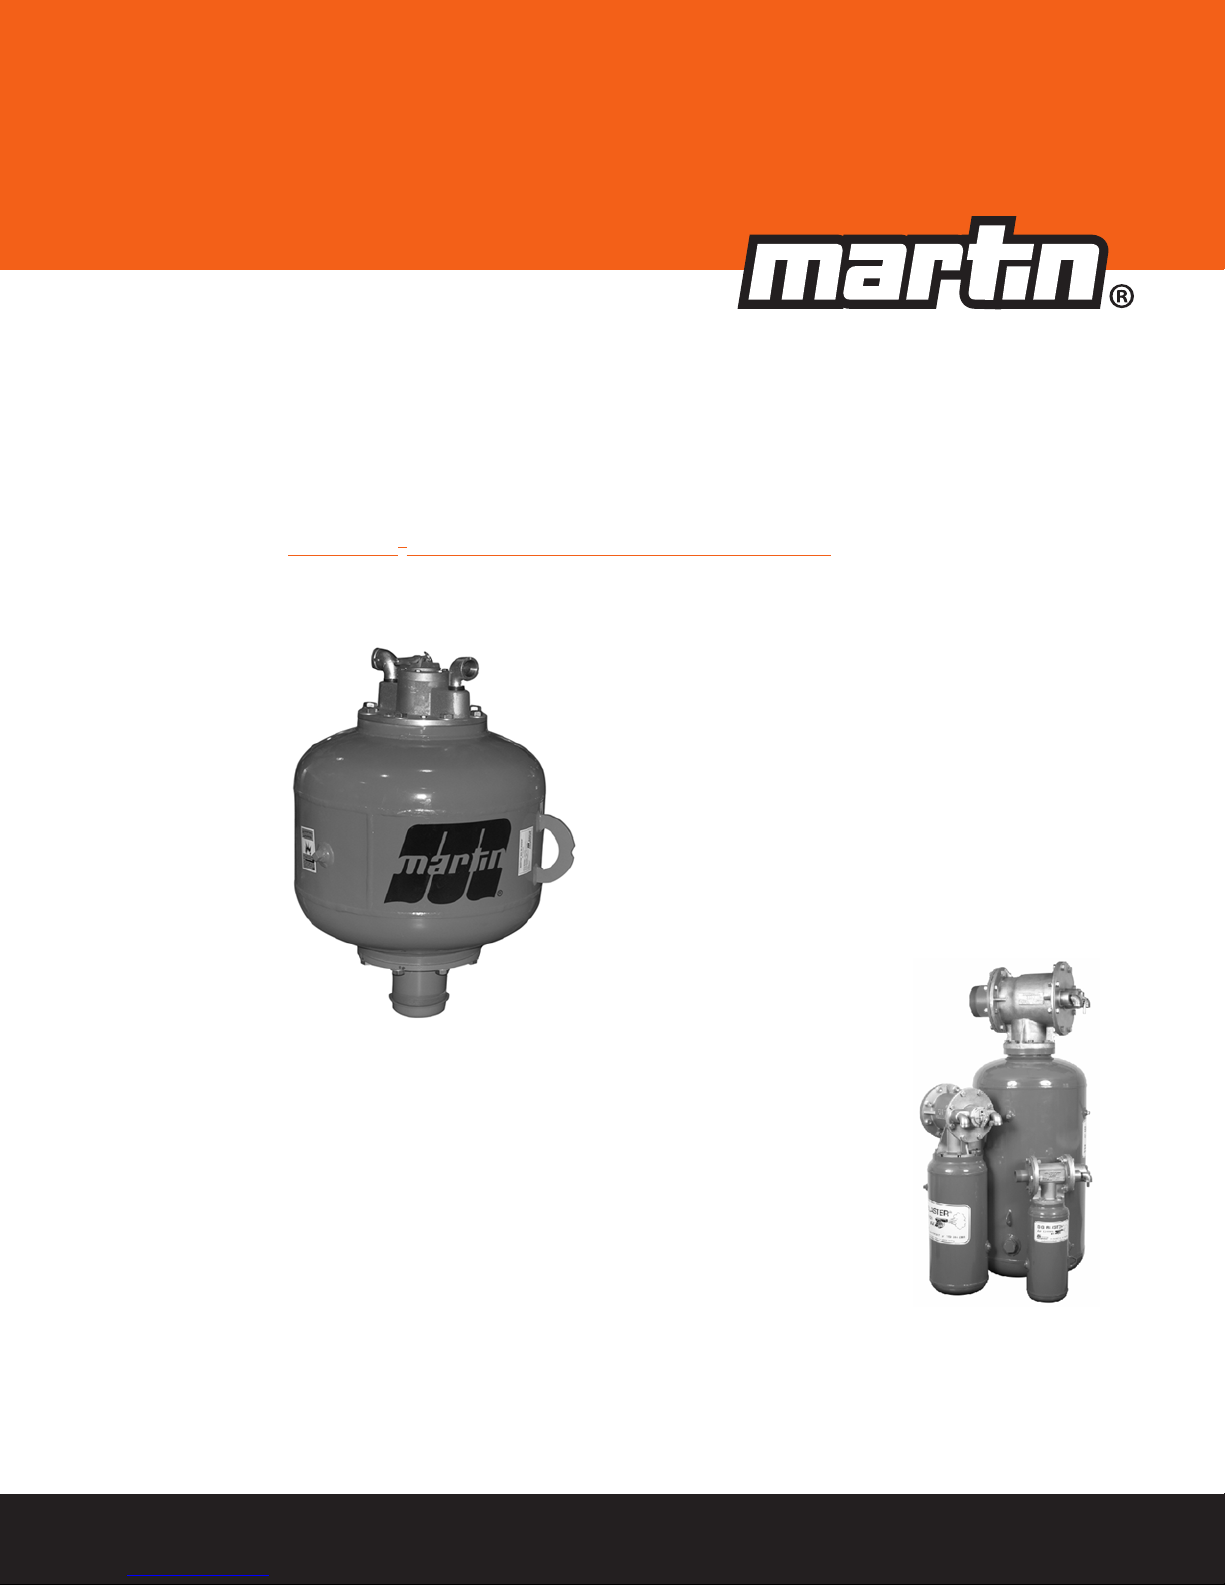
Martin® Hurricane
Air Cannon
Martin® Tornado
Air Cannon
Operator’s Manual
M3747
Page 2
Important
MARTIN ENGINEERING HEREBY DISCLAIMS ANY LIABILITY FOR: DAMAGE DUE TO
CONTAMINATION OF THE MATERIAL; USER’S FAILURE TO INSPECT, MAINTAIN AND TAKE
REASONABLE CARE OF THE EQUIPMENT; INJURIES OR DAMAGE RESULTING FROM USE OR
APPLICATION OF THIS PRODUCT CONTRARY TO INSTRUCTIONS AND SPECIFICATIONS
CONTAINED HEREIN. MARTIN ENGINEERING’S LIABILITY SHALL BE LIMITED TO REPAIR
OR REPLACEMENT OF EQUIPMENT SHOWN TO BE DEFECTIVE.
Observe all safety rules given herein along with owner and Government standards and regulations. Know
and understand lockout/tagout procedures as defined by American National Standards Institute (ANSI)
z244.1-1982, American National Standard for Personnel Protection - Lockout/Tagout of Energy Sources -
Minimum Safety Requirements and Occupational Safety and Health Administration (OSHA) Federal
Register, Part IV, 29 CFR Part 1910, Control of Hazardous Energy Source (Lockout/Tagout); Final Rule.
The following symbols may be used in this manual:
!
DANGER
Danger: Immediate hazards that will result in severe personal injury or death.
!
WARNING
Warning: Hazards or unsafe practices that could result in personal injury.
!
CAUTION
Caution: Hazards or unsafe practices that could result in product or property damages.
IMPORTANT
Important: Instructions that must be followed to ensure proper installation/operation of equipment.
NOTE
Note: General statements to assist the reader.
Page 3

Table of Contents
Section Page
Martin® Hurricane Air Cannon Main Piston Rebuild Instructions . . . . . . . . . . . . . . . . . . . . . . 1
®
Martin
Martin
Hurricane Air Cannon Exhaust Valve Rebuild Instructions . . . . . . . . . . . . . . . . . . . . 6
®
Tornado Air Cannon Exhaust Valve Rebuild Instruction . . . . . . . . . . . . . . . . . . . . . . 14
Martin Engineering M3747-05/12 i Martin® Air Cannon Maintenance Instructions
Page 4

Page 5
H
IMPORTANT
DANGER
!
1
1
2
3
4
5
Martin® Hurricane Air Cannon Main Piston Rebuild Instructions
Read entire section before beginning work. All safety
rules defined in your air cannon’s documentation, and
all owner/employer safety rules, must be strictly
followed when installing and servicing this equipment.
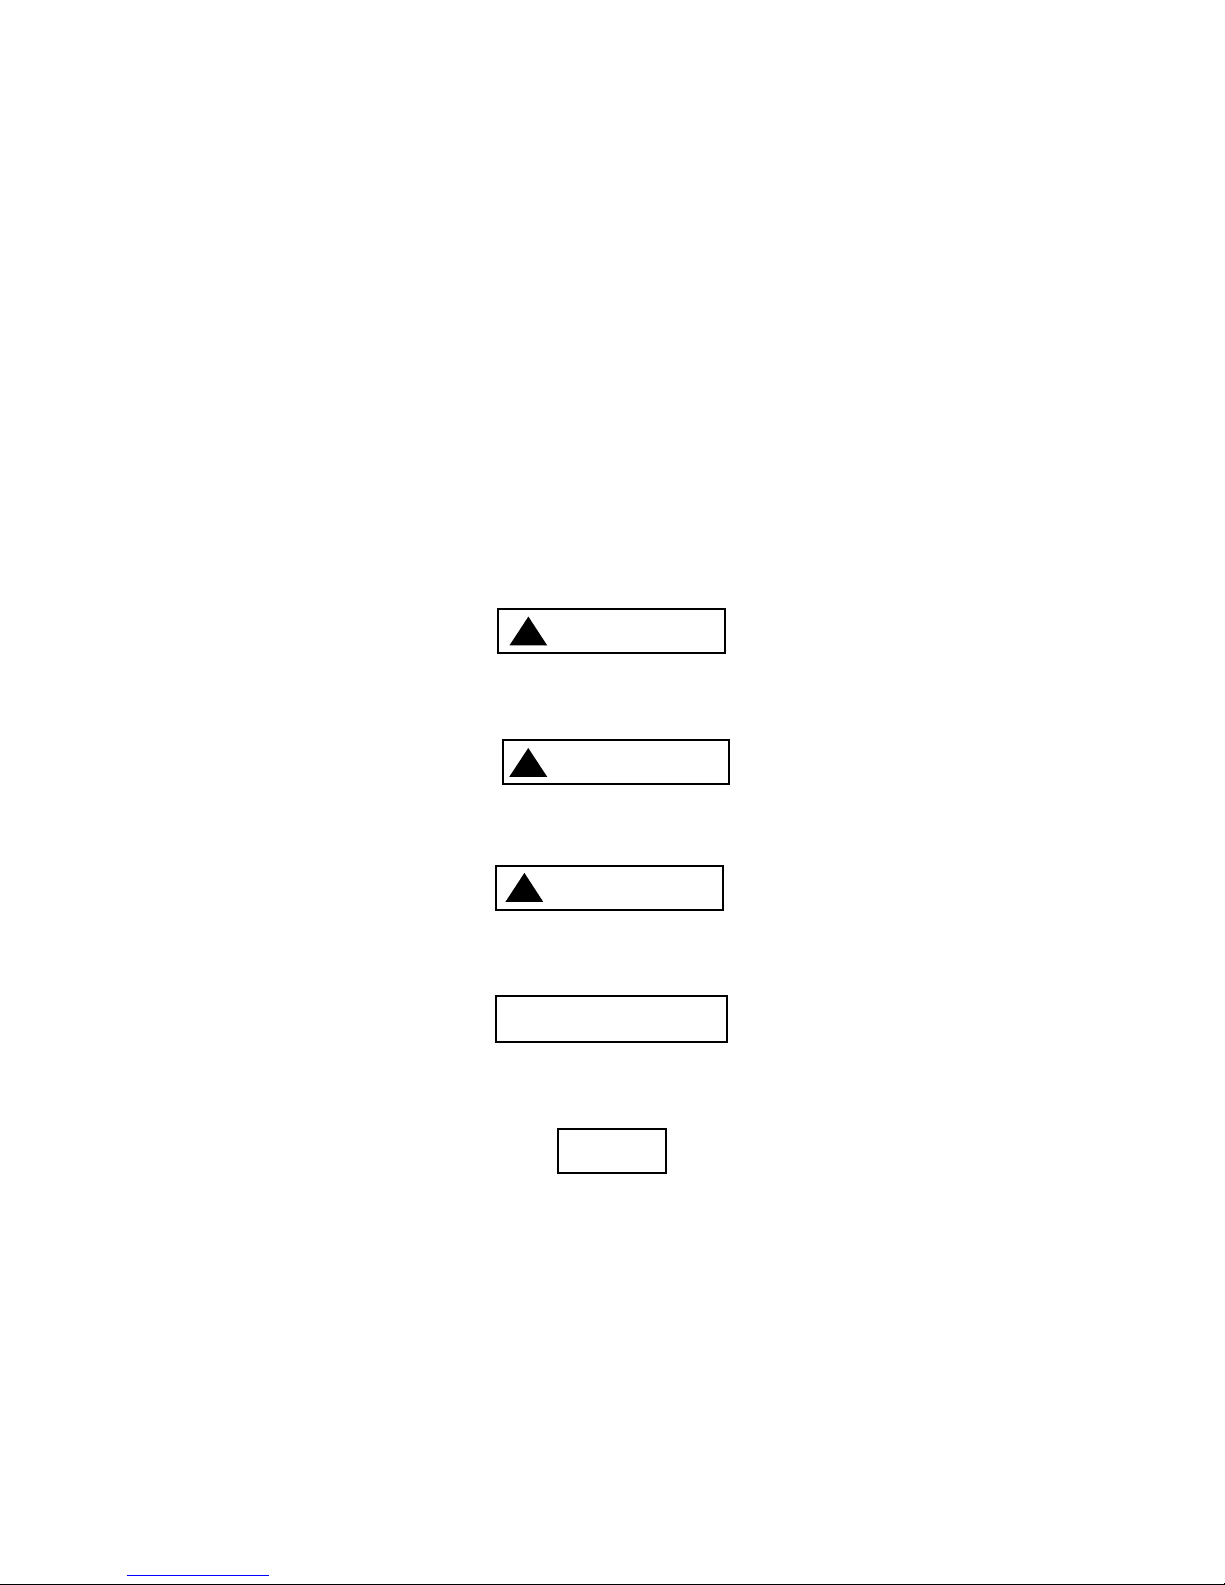
Turn off and lock out/tag out air supply and energy
source before blasting air cannon to prevent air
cannon from refilling.
Do not open door/port or enter structure before
turning off compressed air source, locking out
controls, purging line pressure, and venting air from
tank. Opening structure door while cannon is
operational can kill you.
1. Turn off and lock out/tag out energy source according to American National Standards Institute (ANSI)
z244.1-1982 and Federal Register, Volume 54, Number 169, Part IV, 29 CFR Part 1910.
2. Blast air cannon to remove air from tank. If tank has a relief valve, pull ring to make sure air stored in
cannon has been released.
3. Close safety slide gate if equipped with one. If air cannon has an open discharge port, make sure you
are safely isolated from free flowing material or hazards inside the discharge area.
4. Disconnect air lines.
5. Remove bolts from valve assembly.
Martin Engineering M3747-05/12 1 Martin
®
Air Cannon Maintenance Instructions
Page 6
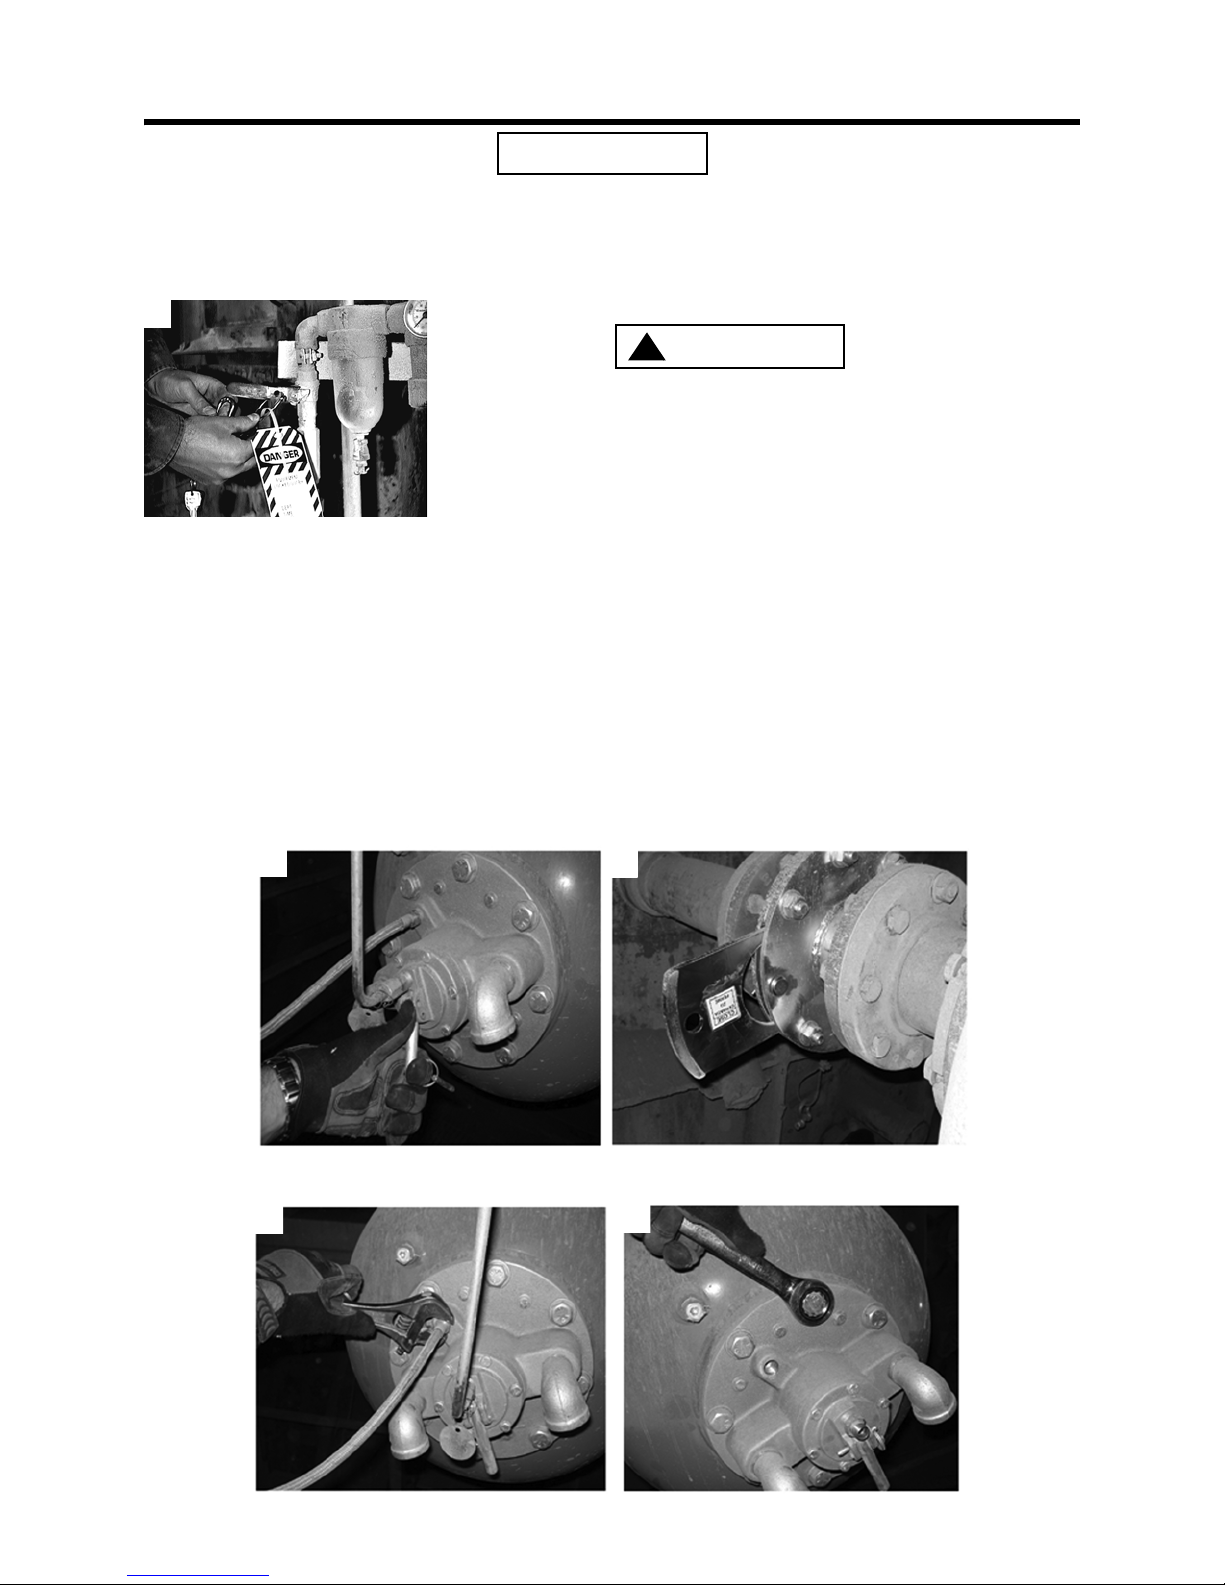
6. Remove the valve from tank.
IMPORTANT
6
7
8
Bearing Surface
9
10
#166 O-Ring
11
12
7. Remove 1/4-in. bolts that hold basket to exhaust valve.
8. Remove old piston and spring assembly.
9. Inspect bearing surface for excessive wear or stress fractures in the aluminum casting.
10. Remove o-rings and clean all mating surfaces.
All o-ring mating surfaces need to be clean and smooth
for an air tight seal. Apply a small amount of grease to
o-rings to ensure o-rings stay secure in the o-ring
groove during assembly. Make sure o-rings are not
pinched during reassembly.
11. Install new piston and spring into bearing basket.
12. Install o-ring on exhaust valve.
Martin Engineering M3747-05/12 2 Martin
®
Air Cannon Maintenance Instructions
Page 7
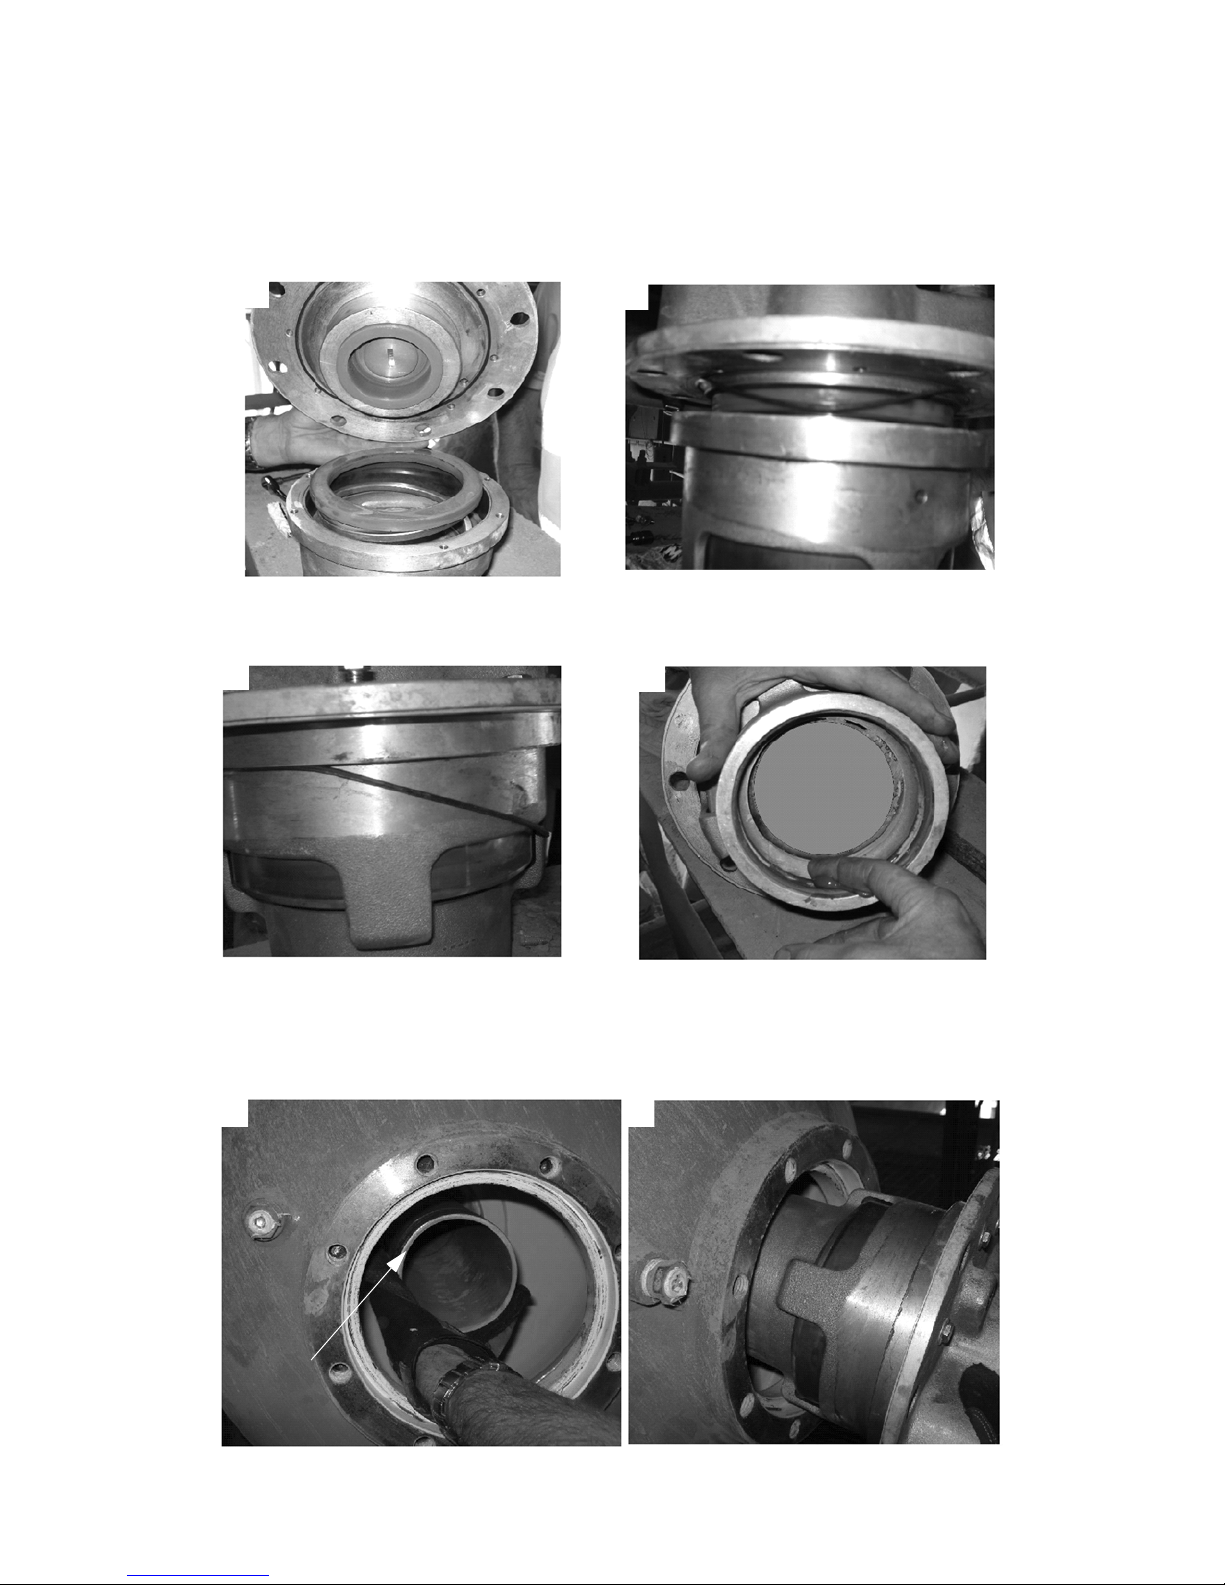
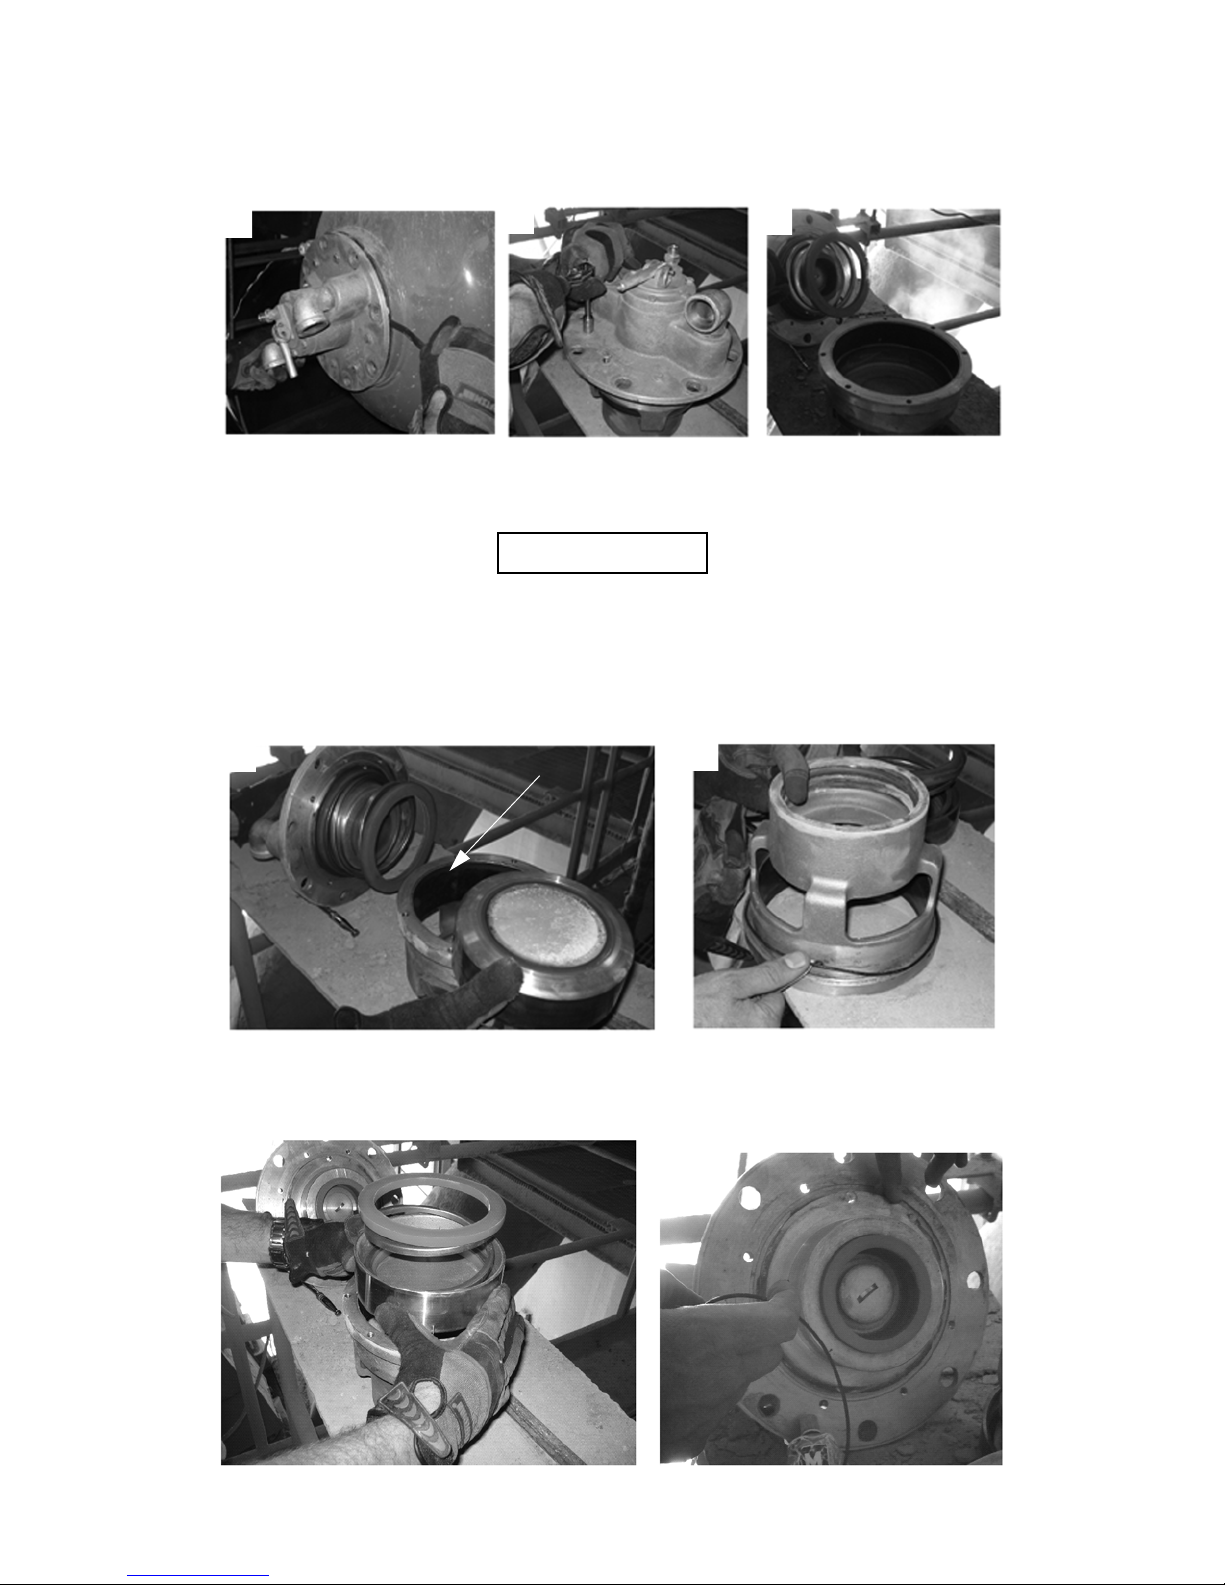
13. Align bolt holes and install 1/4-in. bolts.
#169 O-Ring
#425 O-Ring
13
13
14
15
Discharge
Tu be
16
17
14. Install bearing basket o-rings.
15. Apply high-temperature grease to discharge tube o-rings.
16. Inspect the interior of the air cannon.
17. Install valve assembly onto discharge tube.
Martin Engineering M3747-05/12 3 Martin
®
Air Cannon Maintenance Instructions
Page 8
18. Install compression washers and bolts.
Fill Line
Control Line
18
19
19. Connect air lines and check for leaks.
20. Move the safety slide gate to the open position and install pin.
21. Slowly pressurize the air cannon and check for leaks.
22. Pressurize the air cannon and test fire to make sure all connections are correct.
23. The Martin
®
Hurricane Air Cannon is now ready for operation. Watch air gauge when cannon is fired.
The needle should drop to “zero” instantly. The exhaust port elbows should be pointing down, so dirt
does not fall into the exhaust valve.
Martin Engineering M3747-05/12 4 Martin
®
Air Cannon Maintenance Instructions
Page 9
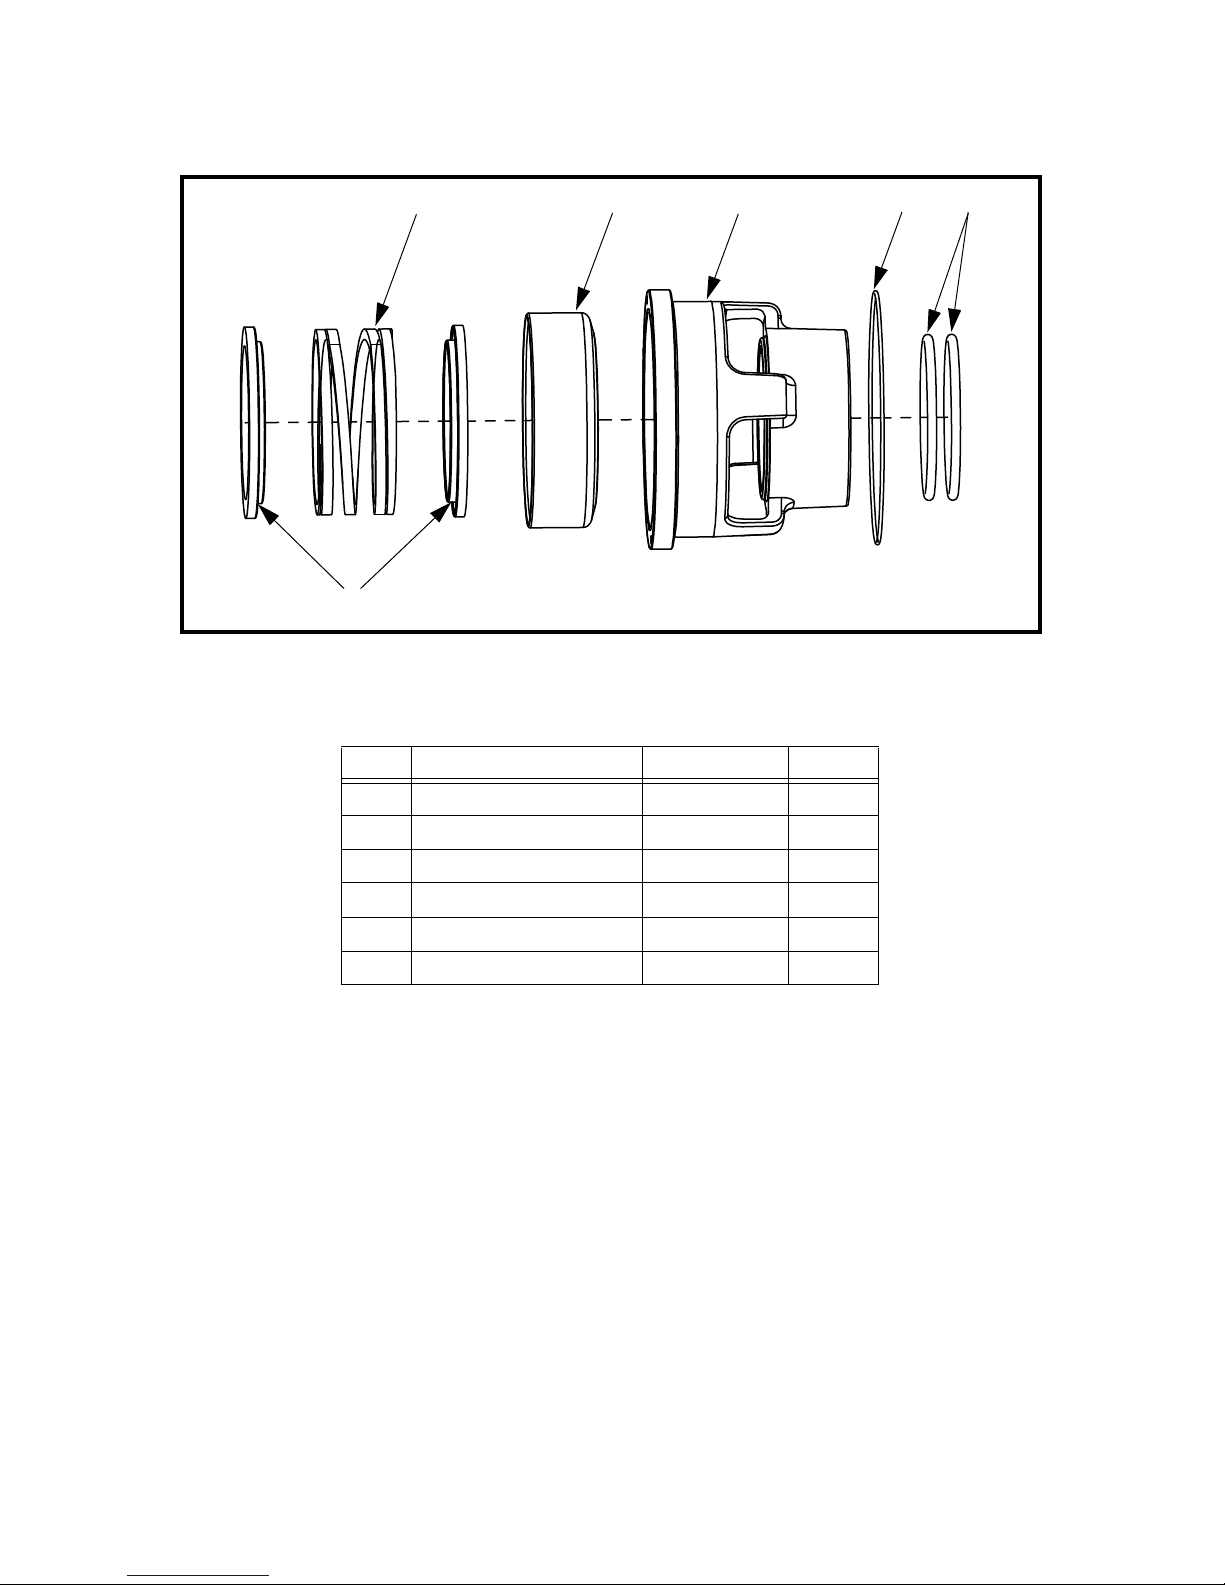
Martin® Hurricane Air Cannon Main Piston Rebuild Kit, P/N 38426
1
23456
Item Description Part No. Qty
1 Spring Bumper Pad 38064 2
2 Compression Spring 35077 1
3 Piston 38022 1
4 Basket 37897 1
5 O-Ring #169 38066 1
6 O-Ring #425 20771-5 2
Martin Engineering M3747-05/12 5 Martin
®
Air Cannon Maintenance Instructions
Page 10

Martin® Hurricane Air Cannon Exhaust Valve Rebuild Instructions
Pocket
Val ve
Stem Seat
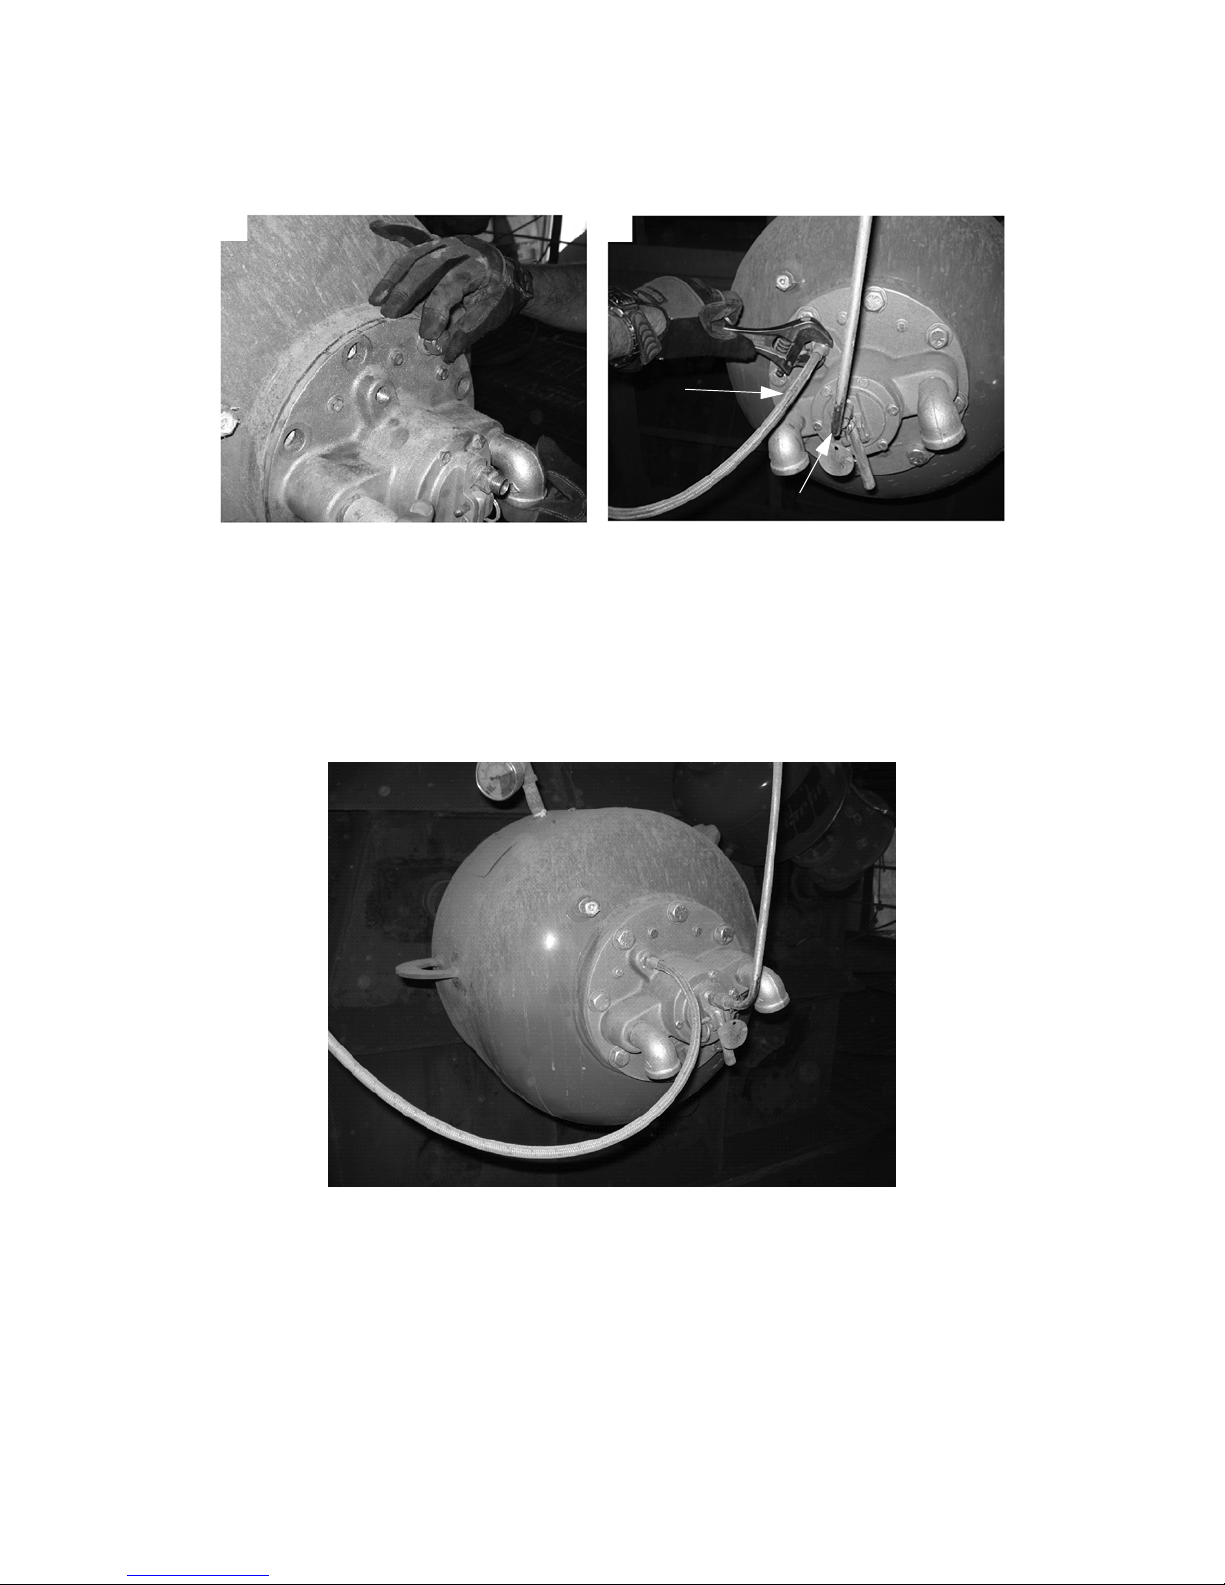
1. Remove lever cap and pipe elbows.
2. Hold woodruff key, supplied in the kit, in the valve stem slot using locking pliers. Remove the flat head
screw from the valve stem. Usually a quick hit with a dead blow hammer will break the threadlocker
adhesive free.
3. Disassemble the rest of the exhaust valve, and check for wear on the piston pocket and valve stem seat.
4. Clean all areas of the exhaust valve.
Martin Engineering M3747-05/12 6 Martin
®
Air Cannon Maintenance Instructions
Page 11

5. Drive out bearing sleeve using a standard (7/16”) deep well socket.
6. Press in new bearing sleeve using the next size socket (1/2”) on the bearing and lightly tapping with
the dead blow hammer.
7. To reassemble the valve, threadlocker and primer will be needed for the screw and blind hole.
Martin Engineering M3747-05/12 7 Martin
®
Air Cannon Maintenance Instructions
Page 12

8. Insert woodruff key into key way in valve stem. Tap the key with a hammer to press it into key way.
IMPORTANT
Cap Screw
Washer
Lip Seal
Piston
Compression Spring
Valve Body Cap
Air Inlet Valve
9. Insert air inlet valve into valve body cap.
10. Insert compression spring and piston into valve body cap.
11. Apply primer to blind hole and screw, and let dry 3–5 minutes. Apply three drops of medium-duty
threadlocker in the blind hole and two drops on the screw. Hold the key using locking pliers while
tightening the screw. Tighten the screw to 12 ft-lbs.
Allow 24 hours for the threadlocker to cure.
12. Insert lip seal into valve body cap. Make sure orientation of lip seal is correct.
Martin Engineering M3747-05/12 8 Martin
®
Air Cannon Maintenance Instructions
Page 13

13. Insert the urethane bumper into the hub using a dead blow hammer.
Remove Key
After Assembly
14. Remove the woodruff key. It is only to be used for assembly purposes.
15. Install elbows pointing down during service, so material will not collect in the exhaust valve. The
elbow connections should be snug, but still adjustable. Install manual lever cap and tighten the cap
screws to12 ft-lbs.
Martin Engineering M3747-05/12 9 Martin
®
Air Cannon Maintenance Instructions
Page 14

16. Operate the manual lever to ensure the valve stem has a full range of movement. There should be a tight
fit around the valve stem and seat. Apply a small amount of grease on the plunger for operating the
manual lever.
17. The Martin
®
Hurricane Air Cannon Exhaust Valve is now ready for service.
Martin Engineering M3747-05/12 10 Martin
®
Air Cannon Maintenance Instructions
Page 15

Page 16

15
14
13
16
11
12
9
8
5
7
23
3
2
24
1
8
7
21
6
17
18
19
20
22
26
25
4
10
Martin® Hurricane Air Cannon Exhaust Valve, P/N 38071
Martin Engineering M3747-05/12 12 Martin
®
Air Cannon Maintenance Instructions
Page 17

Item Description Part Number Qty
1 Valve Body Cap 37775-H 1
2 Bearing Sleeve 37287-1 1
3 Compression Spring 1.937 OD 34671 1
4 Piston 38635 1
5 Lip Seal Puck 38634 1
6 Air Inlet Valve with Brass Seat 37790-B 1
7 Washer Compression 1/4 11521 7
8 Screw HHC 1/4-20NC x 7/8 ZP 11891 7
9 Plunger 37791 1
10 O-Ring #150 2.862 ID x 1.03 CS 37794 1
11 Top Cap 37776 1
12 O-Ring #206 .484 ID x .139 CS 37795 1
13 Handle 37792 1
14 Slotted Spring Pin 1/4 x 1-1/4 SS 32403 1
15 Quick Release Pin 1/4 x 1.63 ZP 37796 1
16 Screw HHC 1/4-20NC x 1 ZP 12699 6
17 Urethane Bumper 37793 1
18 Spring Bumper Pad 38064 2
19 Compression Spring 35077 1
20 4.00” Piston Assembly 38022 1
21 O-Ring #166 6.737 ID x .094 CS 35078 1
22 Basket 37897 1
23 Street Elbow 1.00” 90 degree 36124 2
24 Hex Socket Plug 3/8 37987 1
25 O-Ring #425 4.500 ID x .275 CS 20771-S 2
26 O-Ring #169 7.487 ID x .103 CS 38066 1
Martin Engineering M3747-05/12 13 Martin
®
Air Cannon Maintenance Instructions
Page 18

Martin® Tornado Air Cannon Exhaust Valve Rebuild Instructions
Pocket
Val ve
Stem Seat
1. Remove lever cap and pipe elbows.
2. Hold woodruff key, supplied in the kit, in the valve stem slot using locking pliers. Remove the flat head
screw from the valve stem. Usually a quick hit with a dead blow hammer will break the threadlocker
adhesive free.
3. Disassemble the rest of the exhaust valve, and check for wear on the piston pocket and valve stem seat.
4. Clean all areas of the exhaust valve. The pocket must be smooth for the piston and o-ring to slide on.
Martin Engineering M3747-05/12 14 Martin
®
Air Cannon Maintenance Instructions
Page 19

5. Drive out bearing sleeve using a standard (7/16”) deep well socket.
6. Press in new bearing sleeve using the next size socket (1/2”) on the bearing and lightly tap with the
dead blow hammer.
7. To reassemble the valve, threadlocker and primer will be needed for the screw and blind hole.
Martin Engineering M3747-05/12 15 Martin
®
Air Cannon Maintenance Instructions
Page 20

8. Insert woodruff key into key way in valve stem. Tap the key with a hammer to press it into key way.
IMPORTANT
Cap Screw
Washer
Lip Seal
Piston
Compression Spring
Valve Body Cap
Air Inlet Valve
9. Insert air inlet valve into valve body cap.
10. Insert compression spring and piston into valve body cap.
11. Apply primer to blind hole and screw, and let dry 3–5 minutes. Apply three drops of medium-duty
threadlocker in the blind hole and two drops on the screw. Hold the key using locking pliers while
tightening the screw. Tighten the screw to 12 ft-lbs.
Allow 24 hours for the threadlocker to cure.
12. Insert lip seal into valve body cap. Make sure orientation of lip seal is correct.
Martin Engineering M3747-05/12 16 Martin
®
Air Cannon Maintenance Instructions
Page 21

13. Insert the urethane bumper into the hub using a dead blow hammer.
Remove Key
After Assembly
14. Remove the woodruff key. It is only to be used for assembly purposes.
15. Install elbows pointing down during service, so material will not collect in the exhaust valve. The
elbow connections should be snug, but still adjustable. Install manual lever cap and tighten the cap
screws to12 ft-lbs.
Martin Engineering M3747-05/12 17 Martin
®
Air Cannon Maintenance Instructions
Page 22

16. Operate the manual lever to ensure the valve stem has a full range of movement. There should be a tight
fit around the valve stem and seat. Apply a small amount of grease on the plunger for operating the
manual lever.
17. The Martin
®
Tornado Air Cannon Exhaust Valve is now ready for service.
Martin Engineering M3747-05/12 18 Martin
®
Air Cannon Maintenance Instructions
Page 23

Martin® Tornado Air Cannon BB2 Exhaust Valve, P/N 37984
13
12
10
15
11
8
9
7
5
4
2
3
16
1
19
6
18
17
14
Item Description Part Number Qty
1 Valve Body Cap 37847 1
2 Bearing Sleeve 37287 1
3 Compression Spring 1.50 OD 302 SS 37860 1
4 Piston 37858 1
5 O-Ring #225 1.86 ID x .139 M435 1
6 Air Inlet Valve 37857-U 1
7 Screw FHSHCS 1/4-20NC x .75 30453 1
8 Plunger 37791 1
9 O-Ring #229 2-3/8 ID x .139 CS 37859 1
10 Top Cap 37861 1
11 O-Ring #206 .484 ID x .139 CS 37795 1
12 Screw SHC 1/4-20NC x 1 12627 4
13 Handle 37792 1
14 Slotted Spring Pin 1/4 x 1-1/4 SS 32403 1
15 Quick Release Pin 1/4 x 1.63 ZP 37796 1
16 Street Elbow 3/4 NPT Galv 13052 2
17 O-Ring 3-3/4 ID Viton 35863 1
18 2.00 XHV Piston Bumper 37779 1
19 Hex Socket Plug 3/8 NPT 37987 1
Martin Engineering M3747-05/12 19 Martin
®
Air Cannon Maintenance Instructions
Page 24

Martin® Tornado Air Cannon BB4 Exhaust Valve, P/N 37985
16
14
13
12
10
9
7
5
4
2
3
17
1
18
6
20
19
15
8
11
Item Description Part Number Qty
1 Valve Body Cap 37775 1
2 Bearing Sleeve 37287-1 1
3 Compression Spring 1.937 OD 34671 1
4 Piston 38635 1
5 Lip Seal Puck 38634 1
6 Air Inlet Valve 37790-B 1
7 Screw HHC 1/4-20NC x 7/8 11891 1
8 Washer Compression 1/4 11521 1
9 O-Ring #150 2.862 ID x .103 CS 37794 1
10 Plunger 37791 1
11 O-Ring #206 .484 ID x .139 CS 37795 1
12 Top Cap 37776 1
13 Handle 37792 1
14 Screw SHC 1/4-20NC x 1 12699 6
15 Slotted Spring Pin 1/4 x 1-1/4 SS 32403 1
16 Quick Release Pin 1/4 x 1.63 ZP 37796 1
17 Street Elbow 1 NPT Galv 36124 2
18 Hex Socket Plug 3/8 NPT 37987 1
19 O-Ring #166 6.737 ID x .094 CS 35078 1
Martin Engineering M3747-05/12 20 Martin
20 Urethane Bumper 37793 1
®
Air Cannon Maintenance Instructions
Page 25

Martin® Tornado Air Cannon BB6 Exhaust Valve, P/N 37986
16
14
13
12
10
9
7
5
4
2
3
17
1
18
6
19
15
8
11
Item Description Part Number Qty
1 Valve Body Cap 37848 1
2 Bearing Sleeve 37287-1 1
3 Compression Spring 1.937 OD 34671 1
4 Piston 38635 1
5 Lip Seal Puck 38634 1
6 Air Inlet Valve 37790-B 1
7 Screw HHC 1/4-20NC x 7/8 11891 1
8 Washer Compression 1/4 11521 1
9 O-Ring #150 2.862 ID x .103 CS 37794 1
10 Plunger 37791 1
11 O-Ring #206 .484 ID x .139 CS 37795 1
12 Top Cap 37776 1
13 Handle 37792 1
14 Screw SHC 1/4-20NC x 1 12699 6
15 Slotted Spring Pin 1/4 x 1-1/4 SS 32403 1
16 Quick Release Pin 1/4 x 1.63 ZP 37796 1
17 Street Elbow 1 NPT Galv 36124 2
18 Hex Socket Plug 3/8 NPT 37987 1
19 O-Ring #275 10.484 ID x .139 CS 36169 1
Martin Engineering M3747-05/12 21 Martin
®
Air Cannon Maintenance Instructions
Page 26

Page 27

Any product, process, or technology described here may be the subject of intellectual property rights reserved by
Martin Engineering Company. Trademarks or service marks designated with the ® symbol are registered with the U.S.
Patent and Trademark Office and may be proprietary in one or more countries or regions. Other trademarks and
service marks belonging to Martin Engineering Company in the United States and/or other countries or regions may
be designated with the “TM” and “SM” symbols. Brands, trademarks, and names of other parties, who may or may
not be affiliated with, connected to, or endorsed by Martin Engineering Company, are identified wherever possible.
Additional information regarding Martin Engineering Company’s intellectual property can be obtained at
www.martin-eng.com/trademarks
.
Page 28

Martin Engineering USA
One Martin Place
Neponset, IL 61345-9766 USA
800 544 2947 or 309 852 2384
Fax 800 814 1553
www.martin-eng.com
Form No. M3747-05/12 © Martin Engineering Company 2008, 2012
Subject to change without prior notice.
Quality Management System Certied by DNV - ISO 9001
 Loading...