

Martin ExteriorWash 200 User Manual


© 2015-2017 Martin Professional™ ApS. Information subject to change without notice. Martin Professional™ and all
affiliated companies disclaim liability for any injury, damage, direct or indirect loss, consequential or economic loss or
any other loss occasioned by the use of, inability to use or reliance on the information contained in this manual.
Martin™, Harman™ and all other trademarks in this document pertaining to services or products by Martin
Professional™ or its affiliates and subsidiaries are registered as the property of Harman International Industries.
P/N 5068004, Rev. F

Table of contents
Safety information .................................................................................................... 5
Introduction .............................................................................................................. 9
Fixture overview ................................................................................................. 9
Before using the product for the first time ........................................................... 9
Physical installation ................................................................................................ 10
Fixture location ................................................................................................. 10
Mounting the fixture .......................................................................................... 10
Adjusting tilt ...................................................................................................... 11
Installing a diffuser ........................................................................................... 11
Installing a snoot .............................................................................................. 12
AC power ............................................................................................................... 13
Connecting to power ........................................................................................ 13
Control data link ..................................................................................................... 15
Connecting the data link ................................................................................... 15
Setup ...................................................................................................................... 16
Accessing and navigating the control menus ................................................... 16
DMX settings ................................................................ .................................... 16
Programming a standalone show ..................................................................... 17
Manual mode .................................................................................................... 17
Display setting .................................................................................................. 17
Automatic test ................................................................................................... 18
Fixture status .................................................................................................... 18
Fixture config .................................................................................................... 18
Setup via RDM ................................................................................................. 20
Maintenance .......................................................................................................... 21
Cleaning ........................................................................................................... 21
Pressure relief valve ......................................................................................... 21
DMX protocol ......................................................................................................... 22
Exterior Wash 200 and Exterior Wash 210 ....................................................... 22
Exterior Wash 220 ............................................................................................ 22
Control menus ........................................................................................................ 23
Troubleshooting ..................................................................................................... 25
Specifications ......................................................................................................... 26

Exterior WashTM 200 Series User Manual 5
Safety information
WARNING!
Read the safety precautions in this manual before installing, operating or servicing
this product.
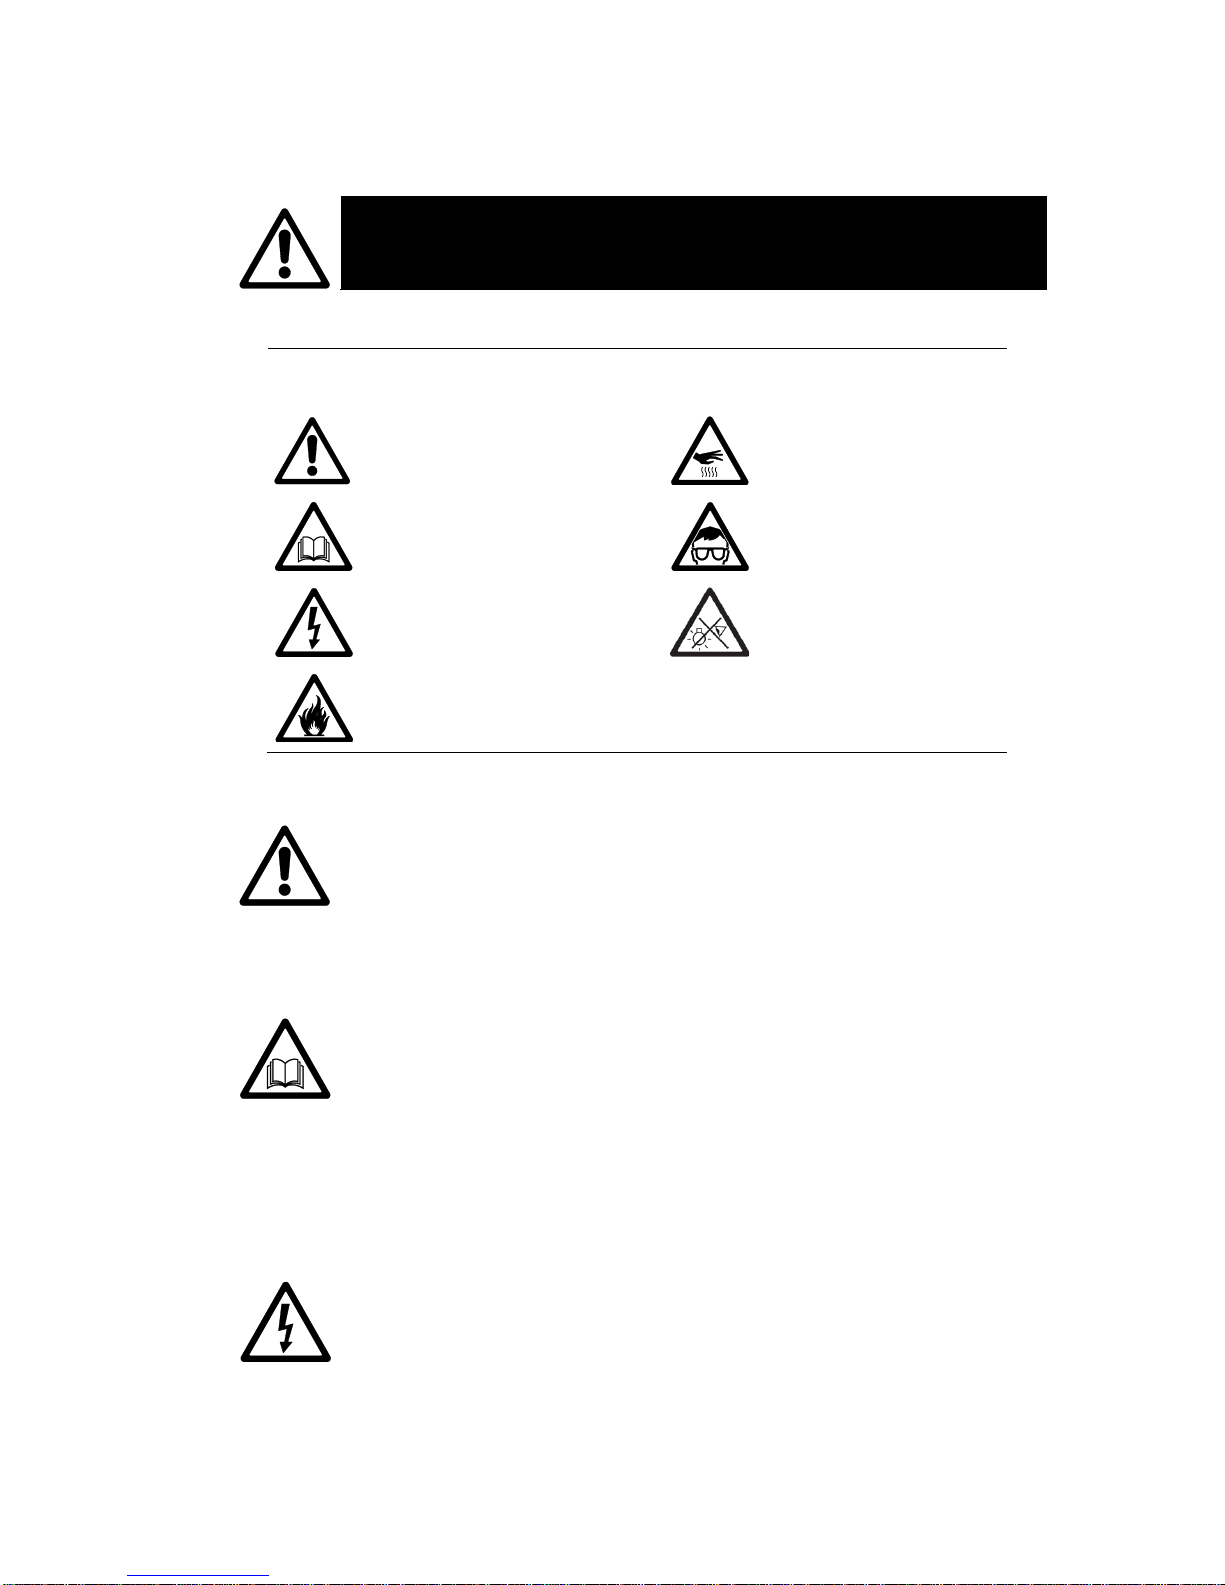
The following symbols are used to identify important safety information on the product and in this
manual:
Warning! Safety hazard. Risk
of severe injury or death.
Warning! Hot surface. Risk of
burns.
Warning! See user manual for
important safety information.
Warning! Risk of eye injury.
Wear protective eyewear.
Warning! Hazardous voltage.
Risk of lethal or severe
electric shock.
Warning! Do not look into
light output.
Warning! Fire hazard.
Warning! Risk Group 3 product according to EN 62471. Do not look directly into the beam.
Do not view the light output with optical instruments or any device that may concentrate the
beam.
This lighting fixture is for professional use only and must be installed by a qualified
technician. It is not for household use. It presents risks of severe injury or death due to fire
hazards, electric shock and falls. It produces a powerful, concentrated beam of light that
can create a fire hazard or a risk of eye injury if the safety precautions below are not
followed.
Install, operate and service Martin™ products only as directed in their user manuals, or
you may create a safety hazard or cause damage that is not covered by product
warranties. Follow the safety precautions listed below and observe all warnings in this
manual and printed on the product. Keep this user manual for future use.
For the latest user documentation and other information about this and all Martin™
products, please visit the Martin website at http://www.martin.com
If you have any questions about how to install, operate or service the fixture safely, please
contact your Martin™ distributor (see www.martin.com/distributors for details) or call the
Martin™ 24-hour service hotline on +45 8740 0000, or in the USA on 1-888-tech-180.
Respect all locally applicable laws, codes and regulations when installing, operating or
servicing the fixture.
Protection from electric shock
Ensure that the fixture is electrically connected to ground (earth).
Disconnect the fixture from AC power when not in use.
Supply the fixture with AC power only at the voltages specified in this user manual and on
the product’s serial number label.
Do not open the fixture or remove any cover. Refer any service operation not described in
this manual to an authorized Martin Service partner.
6 Exterior Wash
TM
200 Series User Manual
Shut down power to the entire installation at the main power distribution board and lock out
power before carrying out any installation or maintenance work.
Use only a source of AC power that complies with local building and electrical codes and
has both overload and ground-fault (earth-fault) protection.
Isolate the fixture from power immediately if any seal, cover, cable, or other component is
damaged, defective, deformed or showing signs of overheating. Do not reapply power until
repairs have been completed
Before using the fixture, check that all power distribution equipment and cables are in
perfect condition, are rated for the current requirements of all connected devices, are
protected to IP67 or higher and are of suitable type for the location (including water,
pollution, temperature and UV resistance).
Do not immerse the fixture in water or any other fluid, or install it in a location where
flooding may occur.
Protection from burns and fire
Do not operate the fixture if the ambient temperature (Ta) exceeds 45° C (113° F).
The surface of the product can reach up to 55° C (131° F) during operation. Avoid contact
by persons and materials. Allow the fixture to cool for at least 10 minutes before handling.
Keep flammable materials well away from the fixture. Keep all combustible materials (e.g.
fabric, wood, paper) at least 10 cm (4 in.) away from the fixture.
Ensure that there is free and unobstructed airflow around the fixture.
Do not illuminate surfaces within 20 cm (8 in.) of the fixture.
Do not attempt to bypass thermostatic switches or fuses.
Do not modify the fixture in any way not described in this manual or install other than
genuine Martin™ parts. Do not stick filters, masks or other materials onto any lens or other
optical component. Use only accessories approved by Martin™ to modify the light beam.
Protection from eye injury
The Exterior Wash 200, 210 and 220 are classed Risk Group 3 according to EN 62471.
Possibly hazardous radiation emitted from this product. Do not look at operating lamp. Eye
injury may result.
To minimize the risk of eye irritation or injury, disconnect the fixture from power at all times
when the fixture is not in use, and provide well-lit conditions to reduce the pupil diameter of
anyone working on or near the fixture.
Do not look at the light output with magnifiers, telescopes, binoculars or similar optical
instruments that may concentrate the output.
Ensure that persons are not looking directly into the fixture when it lights up suddenly. This
can happen when power is applied, when the fixture receives a DMX signal, or when
certain control menu items are selected.
Wear protective glasses and other PPE (personal protective equipment) when working on
or near the fixture.
The risk group distances given below apply to the light output from one fixture only. If
fixtures can be operated in combination, light intensity can increase and you should consult
a lighting professional for safety recommendations.
Exterior Wash 200
The Exterior Wash 200 falls into the following risk groups according to EN 62471 at the
distances indicated:
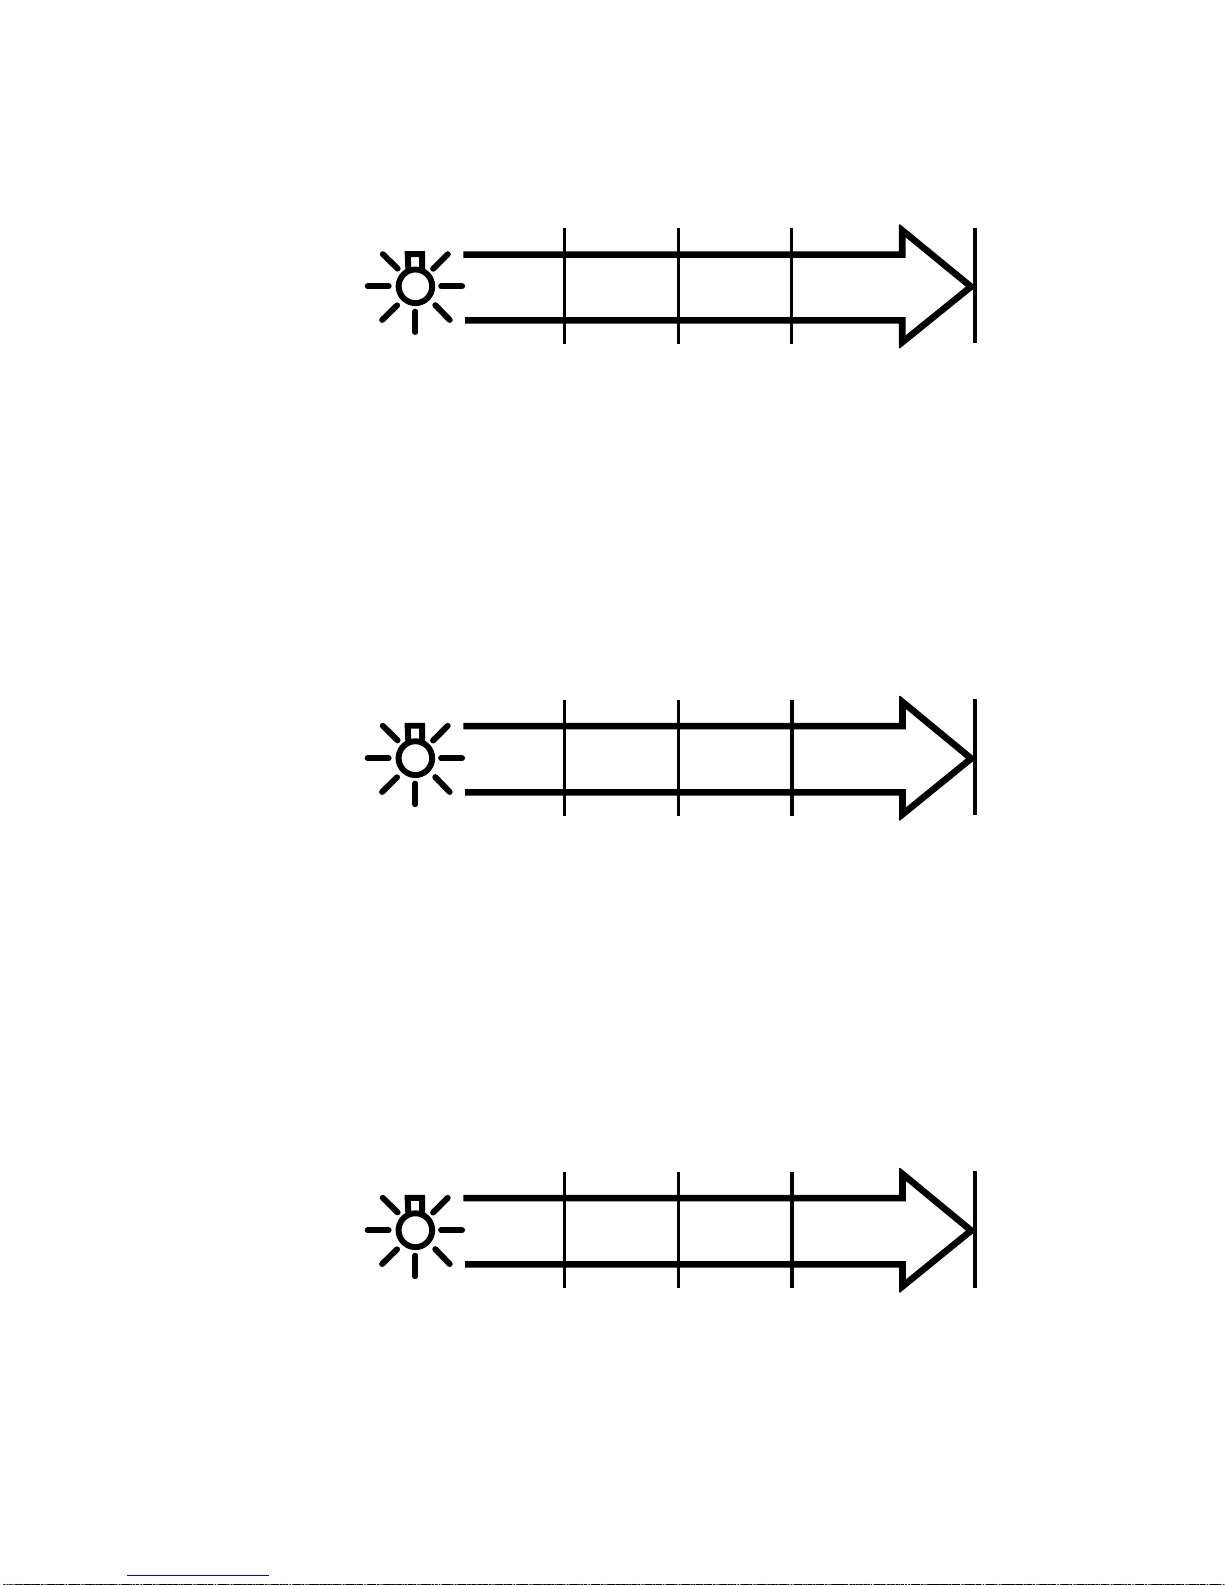
Exterior WashTM 200 Series User Manual 7
At a distance of less than 2.7 m (8.9 ft.) from the fixture, the light output can potentially
cause eye or skin injury before an exposed person’s natural aversion responses (blink
reflex and reaction to skin discomfort) can protect them. At distances greater than 2.7 m
(8.9 ft.), potential eye and skin injury hazards from the light output are normally prevented
by natural aversion reflexes.
Position the Exterior Wash 200 so that persons cannot be exposed to the fixture’s light
output at less than 2.7 m (8.9 ft.) from the fixture and so that prolonged staring into the light
output at less than 12 m (39.4 ft.) from the fixture is not expected.
Exterior Wash 210
The Exterior Wash 210 falls into the following risk groups according to EN 62471 at the
distances indicated:
DO NOT
EXPOSE
RISK GROUP 3RISK GROUP 2RISK GROUP
1
0.2 m
(8 ins.)
2.2 m
(7.3 ft.)
4.6 m
(15.1 ft.)
At a distance of less than 2.2 m (7.3 ft.) from the fixture, the light output can potentially
cause eye or skin injury before an exposed person’s natural aversion responses (blink
reflex and reaction to skin discomfort) can protect them. At distances greater than 2.2 m
(7.3 ft.), potential eye and skin injury hazards from the light output are normally prevented
by natural aversion reflexes.
Position the Exterior Wash 210 so that persons cannot be exposed to the fixture’s light
output at less than 2.2 m (7.3 ft.) from the fixture and so that prolonged staring into the light
output at less than 4.6 m (15.1 ft.) from the fixture is not expected.
Exterior Wash 220
The Exterior Wash 220 falls into the following risk groups according to EN 62471 at the
distances indicated:
DO NOT
EXPOSE
RISK GROUP 3RISK GROUP 2RISK GROUP
1
0.2 m
(8 ins.)
2 m
(6.6 ft.)
5.5 m
(18 ft.)
At a distance of less than 2 m (6.6 ft.) from the fixture, the light output can potentially cause
eye or skin injury before an exposed person’s natural aversion responses (blink reflex and
reaction to skin discomfort) can protect them. At distances greater than 2 m (6.6 ft.),
potential eye and skin injury hazards from the light output are normally prevented by
natural aversion reflexes.
Position the Exterior Wash 220 so that persons cannot be exposed to the fixture’s light
DO NOT
EXPOSE
RISK GROUP 3RISK GROUP 2RISK GROUP
1
0.2 m
(8 ins.)
2.7 m
(8.9 ft.)
12 m
(39.4 ft.)

8 Exterior Wash
TM
200 Series User Manual
output at less than 2 m (6.6 ft.) from the fixture and so that prolonged staring into the light
output at less than 5.5 m (18 ft.) from the fixture is not expected.
Protection from injury
Fasten the fixture securely to a fixed surface or structure when in use. The fixture is not
portable when installed.
Ensure that any supporting structure and/or hardware used can hold at least 10 times the
weight of all the devices they support.
If suspending from a rigging structure, fasten the fixture to a rigging clamp. Do not use
safety cables as the primary means of support. If the fixture is installed in a location where
it may cause injury or damage if it falls, provide a secondary attachment such as a safety
cable inserted through the secondary attachment point that will hold the fixture if a primary
attachment fails. The secondary attachment must be approved by an official body such as
TÜV as a safety attachment for the weight that it secures, must comply with EN 60598-217 Section 17.6.6 and must be capable of bearing a static suspended load that is ten times
the weight of the fixture and all installed accessories.
Verify that any optical accessory such as a snoot or diffuser lens is securely fastened.
Block access below the work area and work from a stable platform whenever installing,
setting, adjusting, or cleaning the fixture.
Do not operate the fixture with missing or damaged covers, shields or any optical
component.
In the event of an operating problem, stop using the fixture immediately and disconnect it
from power. Do not attempt to use a fixture that is obviously damaged.
Exterior WashTM 200 Series User Manual 9
Introduction
The Exterior Wash™ 200 Series is a powerful, compact and energy-efficient line of LED lighting fixtures
designed to illuminate mid-sized structures and building facades. All models have built-in displays for
ease-of-use, a wide selection of beam angles and sealed construction suited to permanent outdoor use. A
discreet, optional snoot integrates seamlessly with the fixtures’ sleek design to put the light right where
you want it.
This user manual covers all Exterior Wash™ 200 Series models: the Exterior Wash 200 with individual red,
green, blue, and white LEDs optimized for long-throw applications, the Exterior Wash 210 with premixed
quad-color LEDs optimized for superior color mixing, and the Exterior Wash 220 with mixable warm-white
and cold-white LEDs that can achieve white tones ranging in color temperature from 2800 K to 6500 K.
Each fixture is supplied with this user manual and an optional control panel cover plate to deter
unauthorized access. They are prepared for hard wiring with 1.8 m (5.9 ft.) cables for power and data
connection.
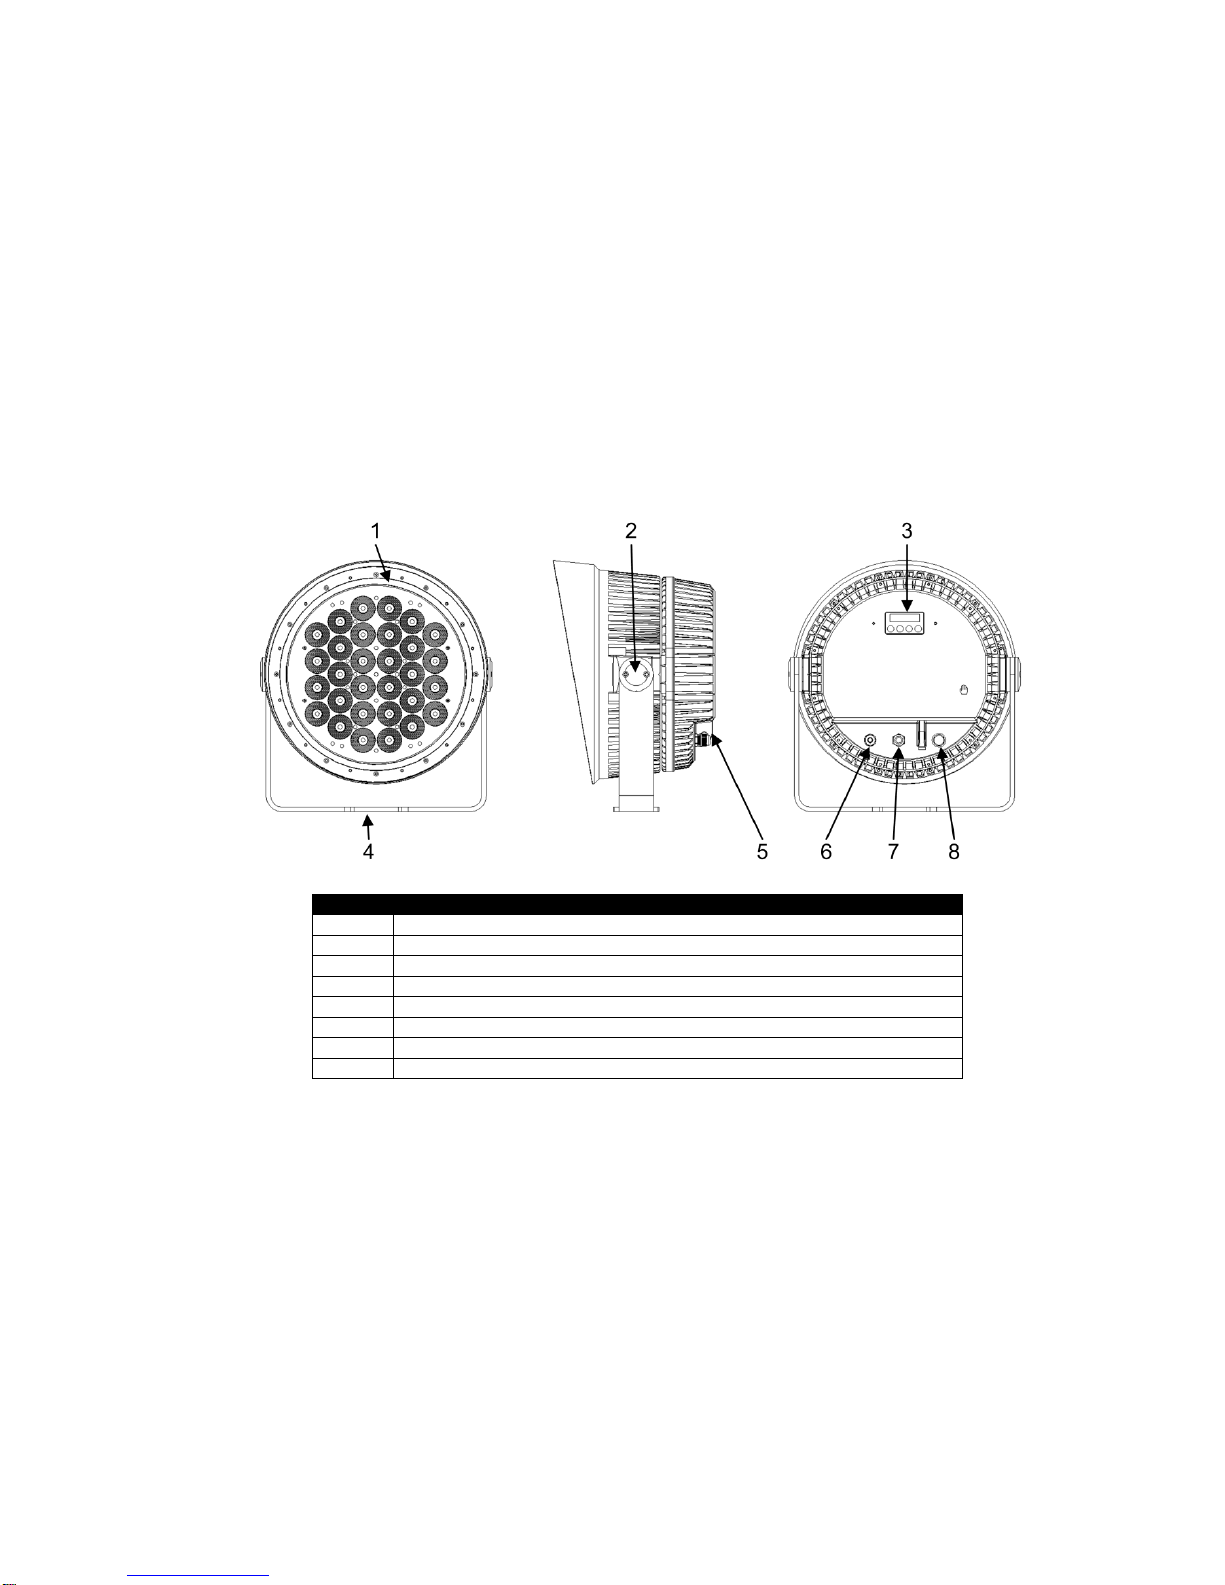
Fixture overview
Number
Description
1
Front ring with recessed channel for optional diffuser lenses
2
Tilt lock (one on each side)
3
Control panel
4
Mounting bracket
5
Secondary attachment point
6
DMX combined input/output cable
7
AC power cable
8
Pressure relief valve
Parts identification
Before using the product for the first time
1. Read ‘Safety information’ on page 5 before installing, operating or servicing the fixture.
2. Unpack and ensure that there is no transportation damage before using the fixture. Do not attempt to
operate a damaged fixture.
3. If testing and/or setting up the fixture before it is hard-wired to a mains supply, install a local power
plug (not supplied) to the end of the supplied power cable.
4. Before operating, ensure that the voltage and frequency of the power supply match the power
requirements of the fixture.
5. Check the support pages on the Martin Professional website at www.martin.com for the most recent
user documentation and technical information about the fixture. Martin™ user manual revisions are
identified by the revision letter at the bottom of the inside cover.
10 Exterior Wash
TM
200 Series User Manual
Physical installation
Warning! Read ‘Safety information’ on page 5 before installing the fixture.
Warning! The safety and suitability of lifting equipment, installation location, anchoring
method, mounting hardware and electrical installation are the responsibility of the installer.
All local safety regulations and legal requirements must be observed when installing and
connecting the Exterior Wash™ 200 Series. Installation must be carried out by qualified
professionals only.
Contact your Martin supplier for assistance if you have any questions about how to install this product
safely.
Fixture location
Exterior Wash™ 200 Series fixtures are intended for outdoor use. With an IP rating of 66, they are dust
tight and able to withstand powerful water jets, but they are not submersible.
Observe the following limitations in selecting a location:
Do not immerse the fixture in water or any other fluid.
Do not install fixtures in a location where flooding may occur.
Do not allow water to collect on or near the pressure relief valve. Do not install a fixture with the valve
membrane horizontal so that water can pool on it.
Ensure sufficient drainage to cope with the heaviest rainfall. Make sure that water can drain away from the
installation area at least as fast as it can enter it.
Fixtures require free and unobstructed airflow around them to ensure adequate cooling: do not bury or
locate in an unventilated space. Allow at least 0.1 m (4 in.) free space around the fixture.
Install the fixture at least 0.2 m (8 in.) away from the surface to be illuminated and at least 0.1 m (4 in.)
away from any combustible materials (wood, paper, etc.). Keep it well away from any flammable materials.
The fixture can become hot. Restrict public access or locate the fixture so that it cannot accidentally be
touched.
Mounting the fixture
Warning! All fasteners used to mount Exterior Wash™ 200 Series
fixtures must be corrosion resistant and strong enough to mount
the fixture safely.
A washer must be installed directly under the head of each fastener
when anchoring the yoke base to the installation surface.
The fixture and mounting bracket are manufactured in corrosion-resistant anodized aluminum. Avoid
mounting the fixture in direct contact with other types of metal, as this can cause galvanic corrosion. When
fastening to a dissimilar metal surface:
Use an electrically insulating material (such as rubber or plastic) or coating between the mounting bracket
and the other metal.
Use a non-conductive coating such as Delta Seal on fasteners (screws, bolts, washers, etc.) where they
come into contact with the mounting bracket.
The fixture’s mounting yoke base must be securely anchored to a wall, pedestal, structural beam or other
suitable support. The yoke allows the fixture to be manually panned and tilted for beam aiming adjustment.
The fixture and base can be mounted at any angle. The mounting surface must be hard, fixed and flat.
For temporary installations, the fixture is also suitable for truss hanging with a rigging clamp securely
fastened to the yoke base. When using a rigging clamp, secure the fixture with a safety cable (or other
secondary attachment) that is approved for the weight of the fixture so that the safety cable will hold the
fixture if a primary attachment fails. Loop the safety cable through the attachment point on the back of the
fixture. See ‘Fixture overview’ on page 9 for location.
Fasten the fixture securely with suitable mechanical fasteners. Do not stand it on a surface or leave it
where it can be moved or fall over. Ensure that the surface and all fasteners used can support at least 10
times the weight of all fixtures and equipment they will support.
Anchor the mounting yoke bracket to a flat surface. The number and type of fasteners used will depend on
the installation, but use at least three high-strength corrosion-resistant fasteners (recommended minimum
 Loading...