

Page 1
EvenLED
RGB LED Panel
User Manual
TM
Page 2
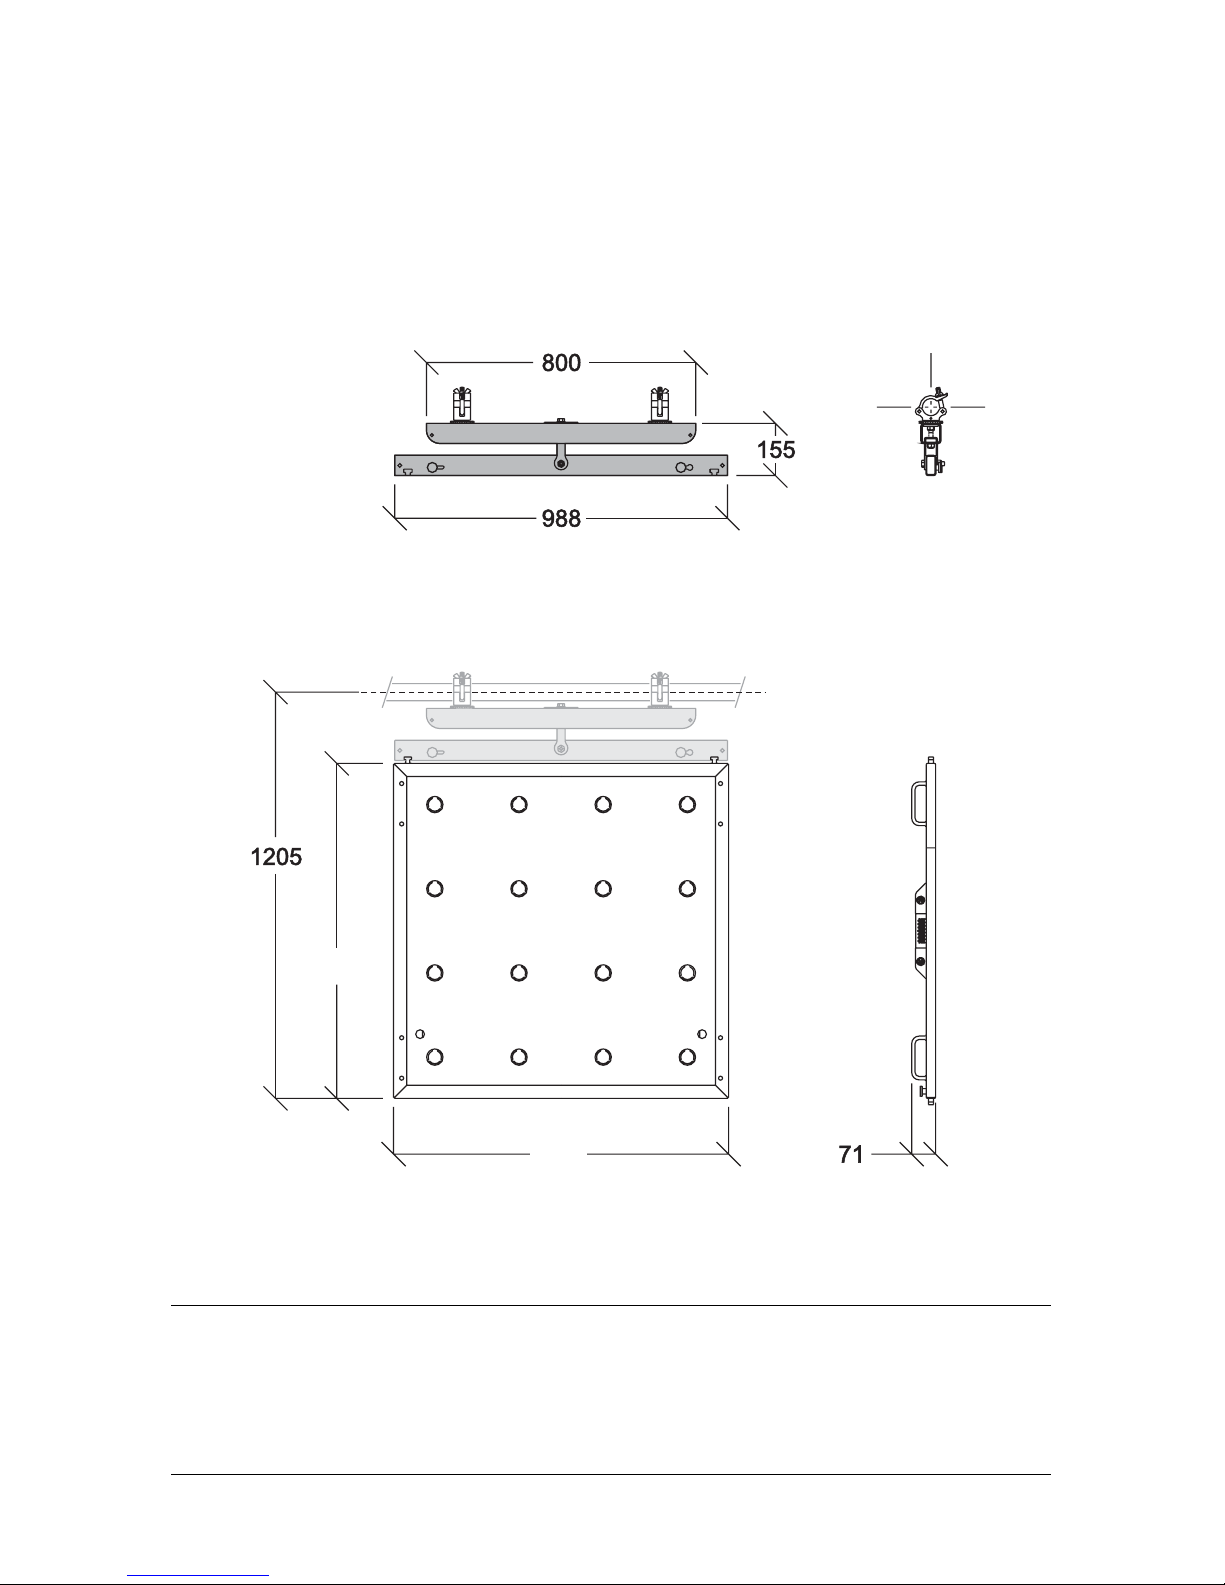
Dimensions
All dimensions are in millimeters
970
995
©2009 Martin Professional A/S. Information subject to change without notice. Martin Professional A/S and all affiliated companies
disclaim liability for any injury, damage, direct or indirect loss, consequential or economic loss or any other loss occasioned by the
use of, inability to use or reliance on the information contained in this manual. The Martin logo, the Martin name and all other
trademarks in this document pertaining to services or products by Martin Professional A/S or its affiliates and subsidiaries are
trademarks owned or licensed by Martin Professional A/S or its affiliates or subsidiaries.
P/N 35000222, Rev. C
Page 3
Safety Information 3
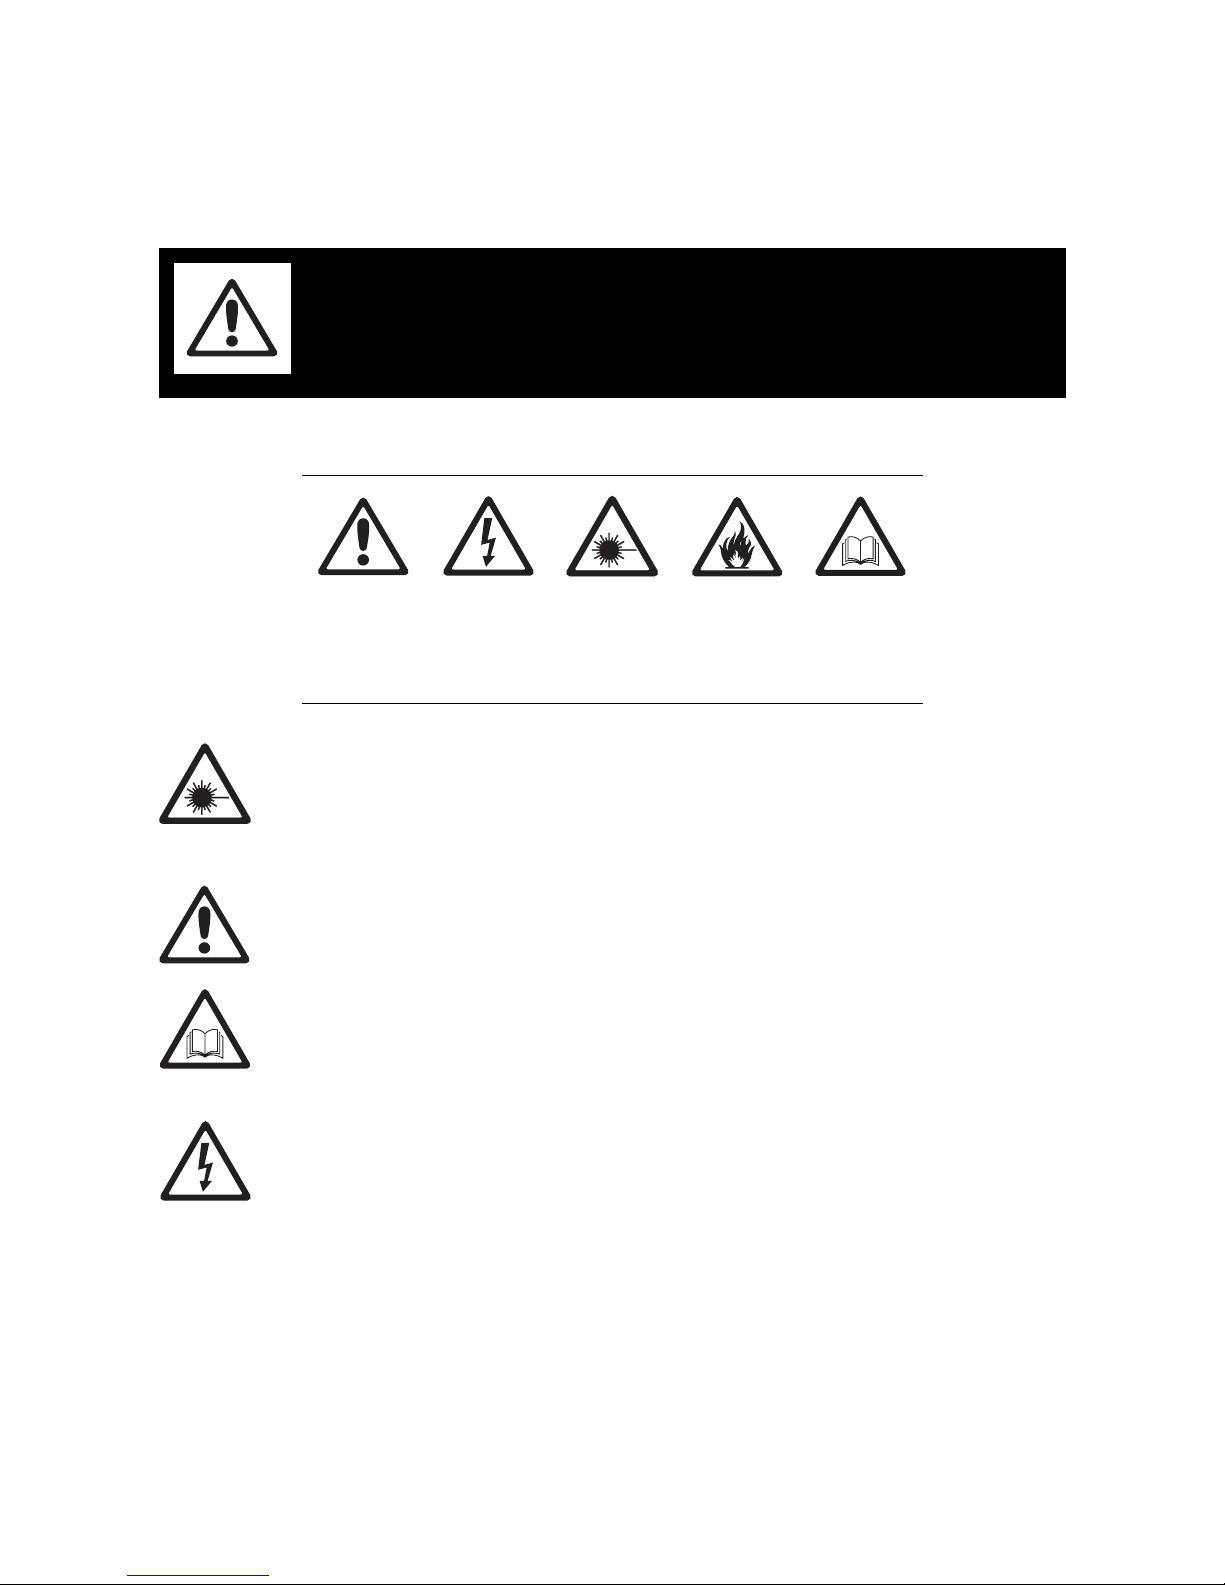
Safety Information
The following symbols are used to identify important safety information on the product and in this manual:
Warning! Class 3B LED product. Do not look at exposed LEDs from a
distance of less than 40 cm (16 inches) from the front surface of the
product. Do not view the light output with optical instruments or any
device that may concentrate the beam.
If the LED output is diffused (by a back projection screen, for example) to the extent that it is impossible to
identify individual LEDs, the output is harmless to the naked eye.
This product is for professional use only. It is not for household use.
This product presents risks of severe injury or death due to fire hazards, electric shock and falls.
Read this manual before installing, powering or servicing the EvenLED, follow the safety precautions listed
below and observe all warnings in this manual and printed on the EvenLED. Install and operate the
EvenLED only as described in this manual and in accordance with local laws and regulations. Refer any
operation not described in this manual to a qualified technician.
If you have questions about how to operate the EvenLED safely, please contact your Martin dealer or call
the Martin 24-hour service hotline on +45 8740 0000, or in the USA on 1-888-tech-180.
PROTECTION FROM ELECTRIC SHOCK
• Connect the product to AC mains power within the range 100 - 240 V nominal at 50 or 60 Hz only.
• Disconnect the entire installation from power and ensure that power cannot be reconnected accidentally,
before carrying out any installation or maintenance work.
• Disconnect the product from power before removing or installing any cover or part and when not in use.
• Ensure that the EvenLED is electrically connected to ground (earth).
• Use only a source of AC power that complies with local building and electrical codes and has both
overload and ground-fault (earth-fault) protection.
• Connect EvenLED panels to AC power and to each other using the 20 amp rated, UL-listed, 12 AWG
cables supplied by Martin as accessories for this product. Replacement power cables from other sources
can be used as an alternative, but they must be 3-conductor, approved for a current of 20 A and
temperature of 90° C (194° F) minimum. Replacement cables must also be minimum 12 AWG and
UL-listed in North America or have conductor size minimum 4 mm² in other regions. Cable jacket type
must be SJT or better.
WARNING!
Read the safety precautions in this section before
installing, powering, operating or servicing this
product.
DANGER!
Safety hazard.
Risk of severe
injury or death.
Warning!
Hazardous
voltage. Risk of
lethal or severe
electric shock.
Warning!
LED light
emission. Risk
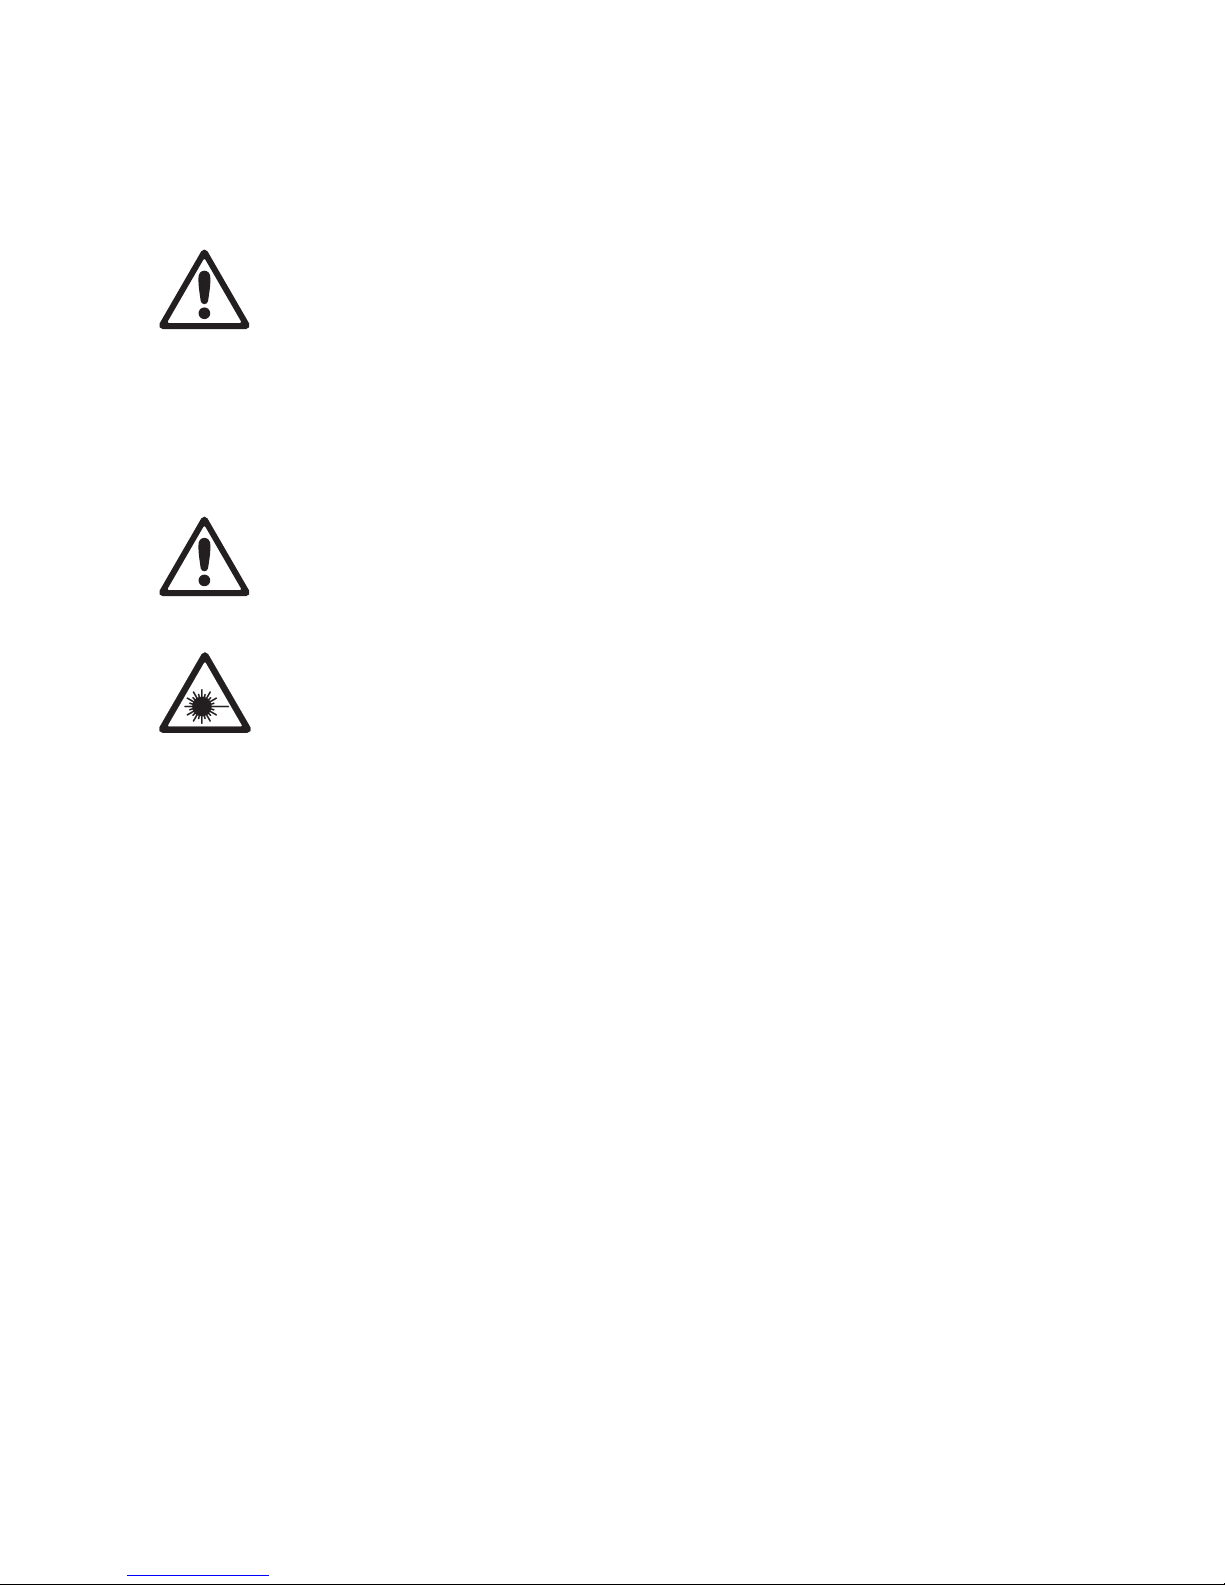
of eye injury.
Warning!
Fire hazard.
Warning!
Refer to user
manual.
Page 4
4 EvenLED user manual
• Before using the EvenLED, check that all power distribution equipment and cables are in perf ect condition
and are rated for the current requirements of all connected devices.
• Isolate the EvenLED from power immediately if any cable, cover or other component is damaged,
cracked, wet or deformed. Do not reapply power until all damaged items have been repaired by a qualified
professional.
• Do not expose the panel to rain or moisture.
• Refer any service operation not described in this manual to an authorized Martin Service partner.
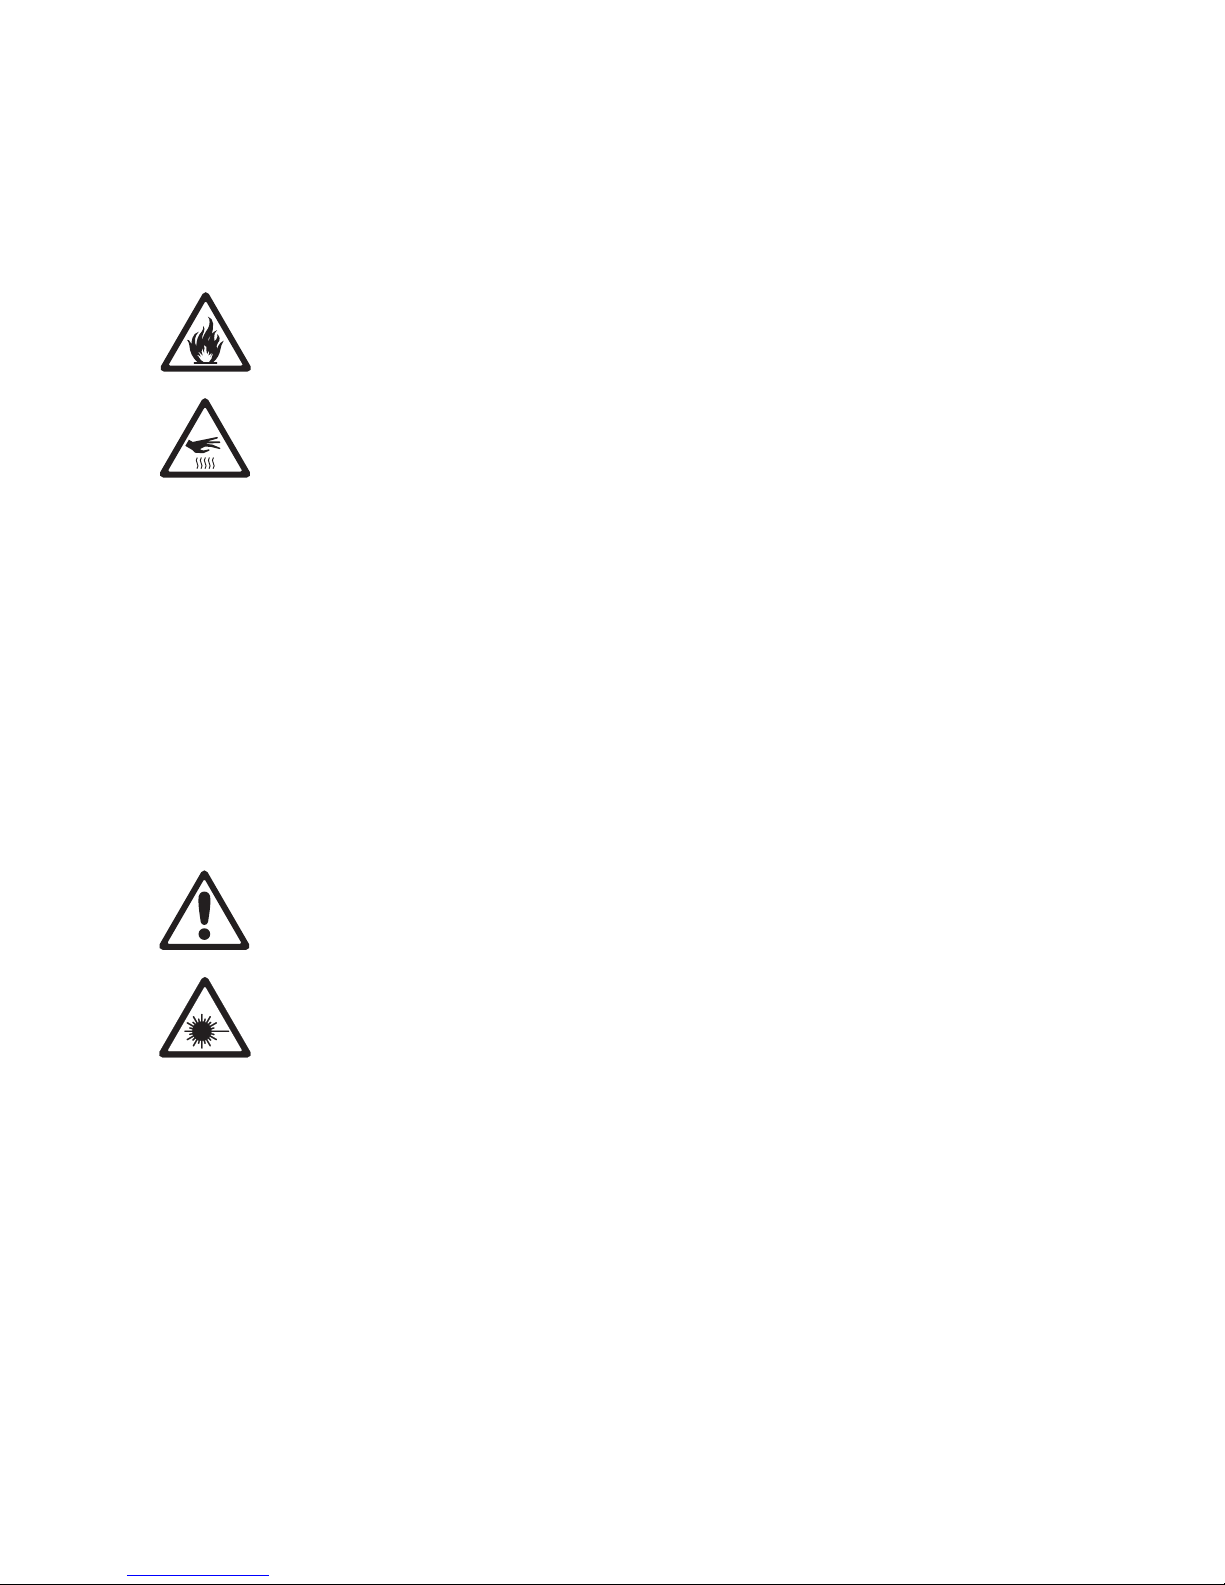
PROTECTION FROM BURNS AND FIRE
• The exterior of the EvenLED becomes hot, up to 80° C (176° F) during normal operation. Avoid contact by
persons and materials. Allow the EvenLED to cool for at least 20 minutes before handling.
• Install the EvenLED in a well-ventilated area only.
• Install the EvenLED in a vertical orientation the correct way up (i.e. with the arrow on the back of the panel
pointing up and the mounting T-hooks at the top of the frame as shown on the cover of this user manual)
only. Do not install horizontally or at any angle from the vertical.
• Provide a minimum clearance of 5 cm (2 inches) from adjacent surfaces and ensure unrestricted airflow
around the air vents in the rear panel.
• Do not illuminate surfaces less than 5 cm (2 inches) from the front surface of the EvenLED.
• Keep all combustible materials (e.g. fabric, wood, paper) at least 5 cm (2 inches) aw ay from the EvenLED.
• Keep flammable materials well away from the EvenLED.
• Do not operate the EvenLED if the ambient temperature (Ta) exceeds 40° C (104° F).
• Do not modify the EvenLED in any way not described in this manual or install other than genuine Martin
parts. Do not stick filters, masks or other materials directly onto LEDs. Use only Martin-approved
accessories to mask or modify the light beam.
• Do not attempt to bypass thermal or current overload protection systems or fuses. Replace defective
fuses with ones of the specified type and rating only.
• If you relay power from one panel to another using POWER THROUGH sockets, do not connect more
than 9 panels in total to each other in an interconnected chain if AC mains power is 100 - 120 V , 50/60 Hz.
Do not connect more than 16 panels in total to each other in an interconnected chain if AC mains power is
200 - 240 V, 50/60 Hz.
• Connect only EvenLED panels to POWER THROUGH sockets. Do not connect any other type of device
to these sockets.
PROTECTION FROM INJURY
• Do not look at exposed LEDs from a distance of less than 40 cm (16 inches) from the front surface of the
panel without suitable protective eyewear. At less than this distance, the LED emission can cause eye
injury or irritation. At distances of 40 cm (16 inches) and above, or if the LED output is diffused so that it is
impossible to identify the individual LEDs, the LED emission is harmless to the naked eye.
• Do not look at LEDs with magnifiers or similar optical instruments that may concentrate the light output.
• Ensure that all external covers, components and installation fittings are securely fastened.
• Install the EvenLED panel suspended vertically the correct way up from a truss or other supporti ng
structure as described in this manual only. Do not mount, stand or stack on a surface.
• Do not suspend more than ten EvenLED panels fastened to each other in a vertical chain.
• Block access below the work area and work from a stable platform whenever installing, servicing or
moving an EvenLED panel.
• Use two clamps installed as described in this manual to suspend the EvenLED from rigging structures. Do
not use only one clamp.
• Ensure that all supporting structures, surfaces, fasteners and lifting equipment can bear ten times the
weight of all the devices they are intended to support, and that they conform to local building and safety
regulations.
• Install as described in this manual a secondary attachment (e.g. a safety cable) that is approved by an
official body such as TÜV as a safety attachment for the weight of all the fixtures it secures. The safety
cable must comply with EN 60598-2-17 Section 17.6.6 and be capable of bearing a static suspended load
ten times the weight of the fixture.
Page 5

Contents
Dimensions . . . . . . . . . . . . . . . . . . . . . . . . . . . . . . . . . . . . . . . . . . . . . . . . . . . . . . . . . . . . . . . . . . . . . . . . 2
Safety Information. . . . . . . . . . . . . . . . . . . . . . . . . . . . . . . . . . . . . . . . . . . . . . . . . . . . . . . . . . . . . . . . . . 3
Introduction . . . . . . . . . . . . . . . . . . . . . . . . . . . . . . . . . . . . . . . . . . . . . . . . . . . . . . . . . . . . . . . . . . . . . . . . 6
Unpacking . . . . . . . . . . . . . . . . . . . . . . . . . . . . . . . . . . . . . . . . . . . . . . . . . . . . . . . . . . . . . . . . . . . . . . . . 6
Using for the first time . . . . . . . . . . . . . . . . . . . . . . . . . . . . . . . . . . . . . . . . . . . . . . . . . . . . . . . . . . . . . . . 6
Physical installation . . . . . . . . . . . . . . . . . . . . . . . . . . . . . . . . . . . . . . . . . . . . . . . . . . . . . . . . . . . . . . . . 7
Location and orientation . . . . . . . . . . . . . . . . . . . . . . . . . . . . . . . . . . . . . . . . . . . . . . . . . . . . . . . . . . . . . 7
Assembly and mounting . . . . . . . . . . . . . . . . . . . . . . . . . . . . . . . . . . . . . . . . . . . . . . . . . . . . . . . . . . . . . 8
Assembling the panel and frame . . . . . . . . . . . . . . . . . . . . . . . . . . . . . . . . . . . . . . . . . . . . . . . . . . . . 8
Mounting the EvenLED . . . . . . . . . . . . . . . . . . . . . . . . . . . . . . . . . . . . . . . . . . . . . . . . . . . . . . . . . . . 8
Planning the DMX control system . . . . . . . . . . . . . . . . . . . . . . . . . . . . . . . . . . . . . . . . . . . . . . . . . . . . . 11
Grouped and independent panel control . . . . . . . . . . . . . . . . . . . . . . . . . . . . . . . . . . . . . . . . . . . . . 11
Cable and link layout details . . . . . . . . . . . . . . . . . . . . . . . . . . . . . . . . . . . . . . . . . . . . . . . . . . . . . . 12
Mixing EvenLED panels and other types of fixture on a DMX link . . . . . . . . . . . . . . . . . . . . . . . . . 12
System layouts . . . . . . . . . . . . . . . . . . . . . . . . . . . . . . . . . . . . . . . . . . . . . . . . . . . . . . . . . . . . . . . . 13
Connecting the system . . . . . . . . . . . . . . . . . . . . . . . . . . . . . . . . . . . . . . . . . . . . . . . . . . . . . . . . . . . . 14
Connectors – overview . . . . . . . . . . . . . . . . . . . . . . . . . . . . . . . . . . . . . . . . . . . . . . . . . . . . . . . . . . . . . 14
AC power. . . . . . . . . . . . . . . . . . . . . . . . . . . . . . . . . . . . . . . . . . . . . . . . . . . . . . . . . . . . . . . . . . . . . . . . 15
Connecting to power . . . . . . . . . . . . . . . . . . . . . . . . . . . . . . . . . . . . . . . . . . . . . . . . . . . . . . . . . . . . 16
Relaying power between panels . . . . . . . . . . . . . . . . . . . . . . . . . . . . . . . . . . . . . . . . . . . . . . . . . . . 16
Current overload safety . . . . . . . . . . . . . . . . . . . . . . . . . . . . . . . . . . . . . . . . . . . . . . . . . . . . . . . . . . 17
Connecting the DMX control data link . . . . . . . . . . . . . . . . . . . . . . . . . . . . . . . . . . . . . . . . . . . . . . . . . . 17
Connection pinouts . . . . . . . . . . . . . . . . . . . . . . . . . . . . . . . . . . . . . . . . . . . . . . . . . . . . . . . . . . . . . 17
Making data connections . . . . . . . . . . . . . . . . . . . . . . . . . . . . . . . . . . . . . . . . . . . . . . . . . . . . . . . . 18
Operation. . . . . . . . . . . . . . . . . . . . . . . . . . . . . . . . . . . . . . . . . . . . . . . . . . . . . . . . . . . . . . . . . . . . . . . . . 19
Powering on and startup . . . . . . . . . . . . . . . . . . . . . . . . . . . . . . . . . . . . . . . . . . . . . . . . . . . . . . . . . . . . 19
DMX control. . . . . . . . . . . . . . . . . . . . . . . . . . . . . . . . . . . . . . . . . . . . . . . . . . . . . . . . . . . . . . . . . . . . . . 19
16- and 8-bit DMX control modes . . . . . . . . . . . . . . . . . . . . . . . . . . . . . . . . . . . . . . . . . . . . . . . . . . 19
LED map . . . . . . . . . . . . . . . . . . . . . . . . . . . . . . . . . . . . . . . . . . . . . . . . . . . . . . . . . . . . . . . . . . . . . 19
DMX protocols . . . . . . . . . . . . . . . . . . . . . . . . . . . . . . . . . . . . . . . . . . . . . . . . . . . . . . . . . . . . . . . . . 20
Software version and mode settings display . . . . . . . . . . . . . . . . . . . . . . . . . . . . . . . . . . . . . . . . . . . . . 20
Configuring panels using a DMX controller . . . . . . . . . . . . . . . . . . . . . . . . . . . . . . . . . . . . . . . . . . . . . . 21
Mode-setting procedure . . . . . . . . . . . . . . . . . . . . . . . . . . . . . . . . . . . . . . . . . . . . . . . . . . . . . . . . . 22
Mode-setting DMX sequence . . . . . . . . . . . . . . . . . . . . . . . . . . . . . . . . . . . . . . . . . . . . . . . . . . . . . 23
Using back projection screens. . . . . . . . . . . . . . . . . . . . . . . . . . . . . . . . . . . . . . . . . . . . . . . . . . . . . . . . 23
Using DMX Thief™ . . . . . . . . . . . . . . . . . . . . . . . . . . . . . . . . . . . . . . . . . . . . . . . . . . . . . . . . . . . . . . . . 23
Service and maintenance. . . . . . . . . . . . . . . . . . . . . . . . . . . . . . . . . . . . . . . . . . . . . . . . . . . . . . . . . . 24
Cleaning. . . . . . . . . . . . . . . . . . . . . . . . . . . . . . . . . . . . . . . . . . . . . . . . . . . . . . . . . . . . . . . . . . . . . . . . . 24
Software installation. . . . . . . . . . . . . . . . . . . . . . . . . . . . . . . . . . . . . . . . . . . . . . . . . . . . . . . . . . . . . . . . 24
Troubleshooting . . . . . . . . . . . . . . . . . . . . . . . . . . . . . . . . . . . . . . . . . . . . . . . . . . . . . . . . . . . . . . . . . . 25
Specifications. . . . . . . . . . . . . . . . . . . . . . . . . . . . . . . . . . . . . . . . . . . . . . . . . . . . . . . . . . . . . . . . . . . . . 26
Page 6

6 EvenLED user manual
Introduction
Thank you for selecting the EvenLED™, an LED-based color-changing panel luminaire from Martin
Professional™. This product features:
• Proprietary 6 W LEDs
• RGB (red, green, blue) color mixing
• DMX 512 control
• Auto-sensing power supply unit with 100 - 240 VAC nominal, 50/60 Hz operating range
• Product interlocking in vertical suspended columns
• Even illumination of back projection screens or other diffusers using fine 16-bit or 8-bit control RGB color
mixing
• Various options for grouped LED control
For the latest software updates, documentation, product specifications and other information about this and
all Martin Professional™ products, please visit the Martin website at http://www.martin.com
Comments or suggestions regarding this document may be e-mailed to service@martin.dk or posted to:
Service Department
Martin Professional A/S
Olof Palmes Allé 18
DK-8200 Aarhus N
Denmark
Unpacking
The EvenLED is supplied with this user manual. This manual is also available for download from the Martin
website at www.martin.com.
As soon as you remove the product from its packaging, remove the foam inserts from the corners of the
product and remove the cardboard strips that are wedged between the mounting frame and panel for
protection during shipment. Keep these items if you intend to pack the product again in its original
packaging material.
Using for the first time
Before applying power to the panel:
• Carefully review “Safety Information” on page 3.
• Check that your local AC mains power voltage is within the range listed on the panel’s serial number label.
• Install the panel as described in this manual.
Page 7
Physical installation 7
Physical installation
Warning! Read "Safety Information" on page 3 before installing the EvenLED.
Warning! The saf et y an d su itab ility of lifting equipment, installation location, anchoring method,
mounting hardware and electrical installation is the responsibility of the installer. All applicable
safety regulations and legal requirements must be observed when installing and connecting the
EvenLED. Installation must be carried out by qualified professionals only.
Contact your Martin supplier for assistance if you have any questions about how to install this
product safely.
Location and orientation
Warning! The EvenLED must be securely anchored to a suitable supporting structure such as a
truss. Do not mount, stand or stack on a surface. Suspend in a vertical column only. Do not install at
any angle from the vertical. Ensure that all rigging equip ment and th e supp orting structure can bea r
ten times the weight of all installed devices. Do not hang more than ten EvenLED panels in a vertical
chain. Install as described in this user manual safety attachments that can hold a static load at least
ten times heavier than the total weight they must secure and are approved for this weight by a
technical standards organization such as TÜV.
Warning! Maintain a distance of minimum 5 cm (2 inches) from adjacent surfaces. Make sure that
there is unrestricted airflow around the air vents in the rear surface of the panel.
Warning! Make sure that it is impossible for LEDs to be viewed from a distance of less than 40 cm
(16 inches) unless a diffuser or back projection screen is installed in front of them.
If a diffuser front or back proj e cti on screen is installed in front of the LEDs such that it is impossible to
distinguish individual LEDs, there is no eye hazard at any distance.
The EvenLED is rated IP20 and is for indoor use only. Do not expose it to water or moisture.
The EvenLED requires free and unobstructed airflow around it to ensure adequate cooling:
• Do not use the panel in a confined or unventilated space
• Allow 5 cm (2 inches) free space around the panel
Install the panel at least 5 cm (2 inches)away from any combustible materials (wood, paper, etc.) and well
away from any flammable materials.
Panels reach temperatures up to 80° C (176° F). Restrict public access or locate panels so that they cannot
accidentally be touched.
Page 8
8 EvenLED user manual
Assembly and mounting
Assembling the panel and frame
To assemble the EvenLED panel and frame:
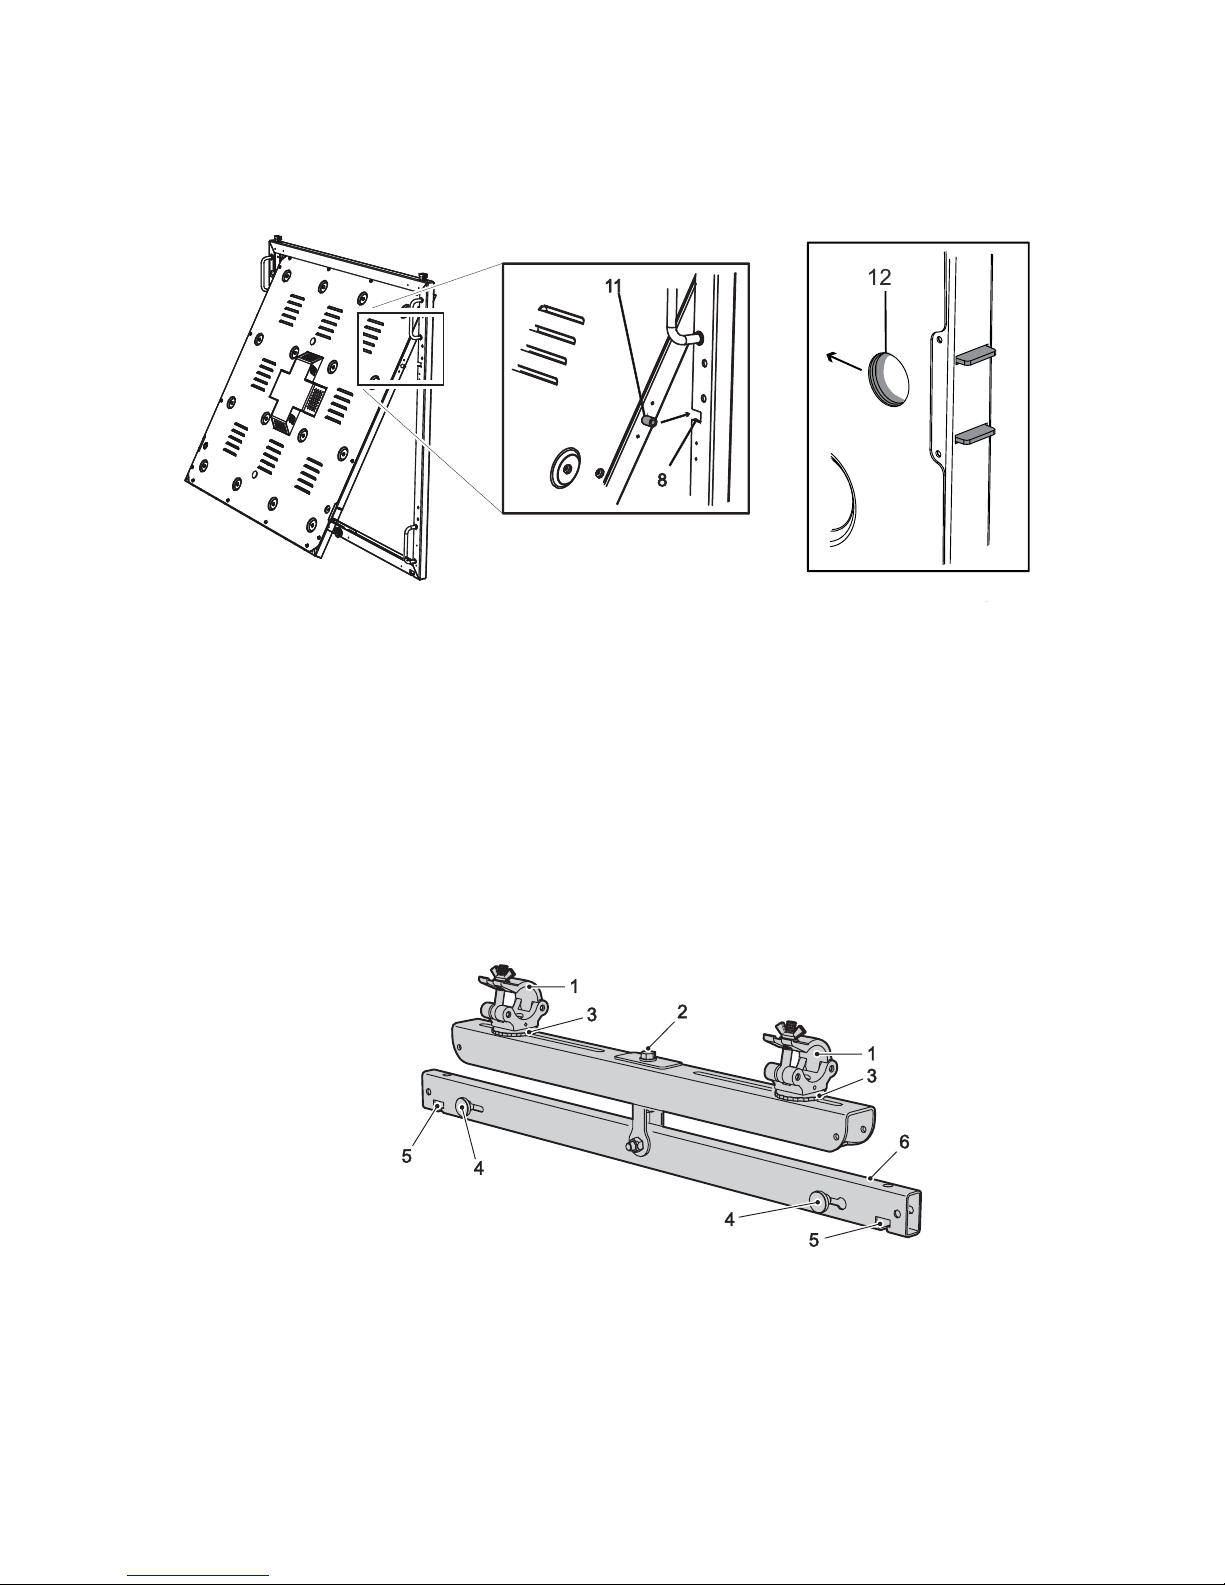
1. See Figure 1. Slide the panel mounts (11) into the panel mounting slits (8).
2. Retract the panel locks (12) by pushing them towards the centre of the panel.
3. Align the panel with the frame and release the panel locks (12) to lock the panel into the frame.
Mounting the EvenLED
One frame mounting bar and two rigging clamps approved for the total weight to be suspended are required
for each suspended vertical column of EvenLED panels.
To mount the EvenLED system:
1. Check that the pipe or truss onto which you are mounting the EvenLED system is horizontal.
2. See Figure 2. Loosen the clamp position locking rings (3) and slide the clamps (1) as wide apart as
possible but making sure they will still match up with the supporting truss or other structure.
3. Lock the clamp position locking rings (3) to secure the clamps in position.
4. Adjust the height of the frame mounting bar so that it can move freely by turning the height adjustment
bolt (2) counter-clockwise to lower the frame mounting bar, clockwise to raise it.
5. Loosen the frame mount locking knobs (4) and slide them towards centre of the frame mounting bar (6)
to open the locks in the frame mount holes (5).
Figure 1: Panel mounts
Panel locks
Figure 2: Mounting hardware
Page 9
Physical installation 9
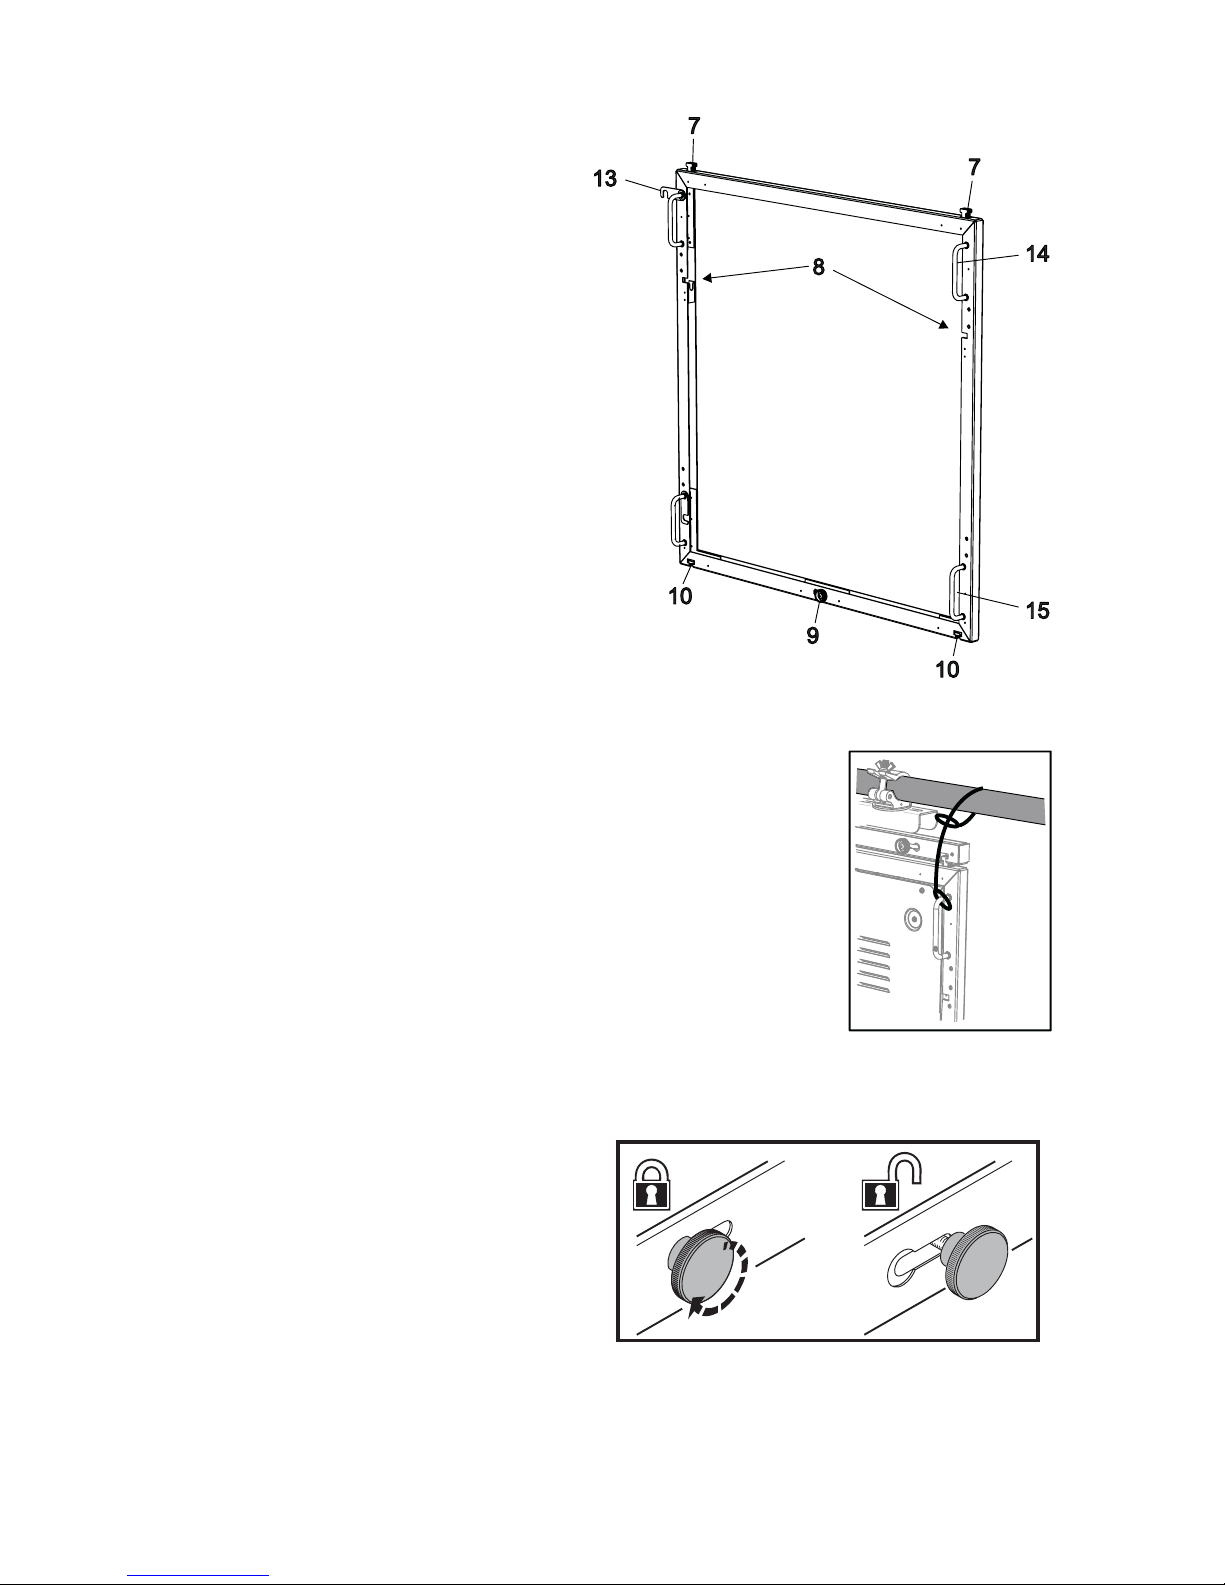
6. Insert the frame mount T-hooks (7
in Figure 3) into the frame lock
holes (5 in Figure 2).
7. Slide the frame mount locking
knobs (4 in Figure 2) fully out from
the center towards the ends of the
hanging bracket and tighten them.
Make sure that they are locked as
shown in Figure 5 on page 9. The
frame is now secure.
8. See Figure 4. Attach one end of a
safety wire around the truss/pipe and the other end through the top
handle (14) of the frame.
9. Connect DMX and power cables.
Adding panels vertically
To add panels underneath the first panel:
1. See Figure 3 on page 9. Loosen the panel-to-panel locking knob (9) and
slide it to your right to open the latches in the panel-to-panel mounting
holes (10).
2. Insert the frame mount T-hooks (7 in Figure 3) of the second panel into
the frame mounting holes (5 in Figure 2) of the first panel.
3. See Figure 5. Slide the panel-to-panel
locking knob (9 in Figure 3) fully to the
left and tighten it. The panel is now
secure.
Figure 3: Frame
Figure 4: Safety wire
attachment
Figure 5: Securing frame lock knobs
Page 10

10 EvenLED user manual
4. See Figure 6. Attach one end of the safety wire through both the top
handle (14 in Figure 3) on the first frame and the already mounted
safety wire. Attach the other end of the safety wire through the top
handle (14 in Figure 3) of the second frame to secure it below the first
frame.
Warning! Do not suspend more than 10 panels in a vertical chain.
5. If desired, continue suspending panels beneath each other following the
instructions given in points 1. to 4. above. Check that all safety wires are
attached exactly as shown in Figure 6 and described above.
Adding panels horizontally
To add a panel beside a panel that is already installed:
1. Suspend the additional panel as described under
“Adding panels vertically” on page 9.
2. See Figure 7. Rotate the side-to-side locking latch (13)
into place to fasten panels together.
Warning! The side-to-side locking latch (13 in Figure 7) is not
designed to support weight. All panels installed beside
existing panels must be suspended as described under
"Mounting the EvenLED" on page 8 and "Adding panels
vertically" on page 9.
Figure 6: Additional safety
wire
Figure 7: Side-to-side locking
Page 11

Physical installation 11
Planning the DMX control system
EvenLED panels can be controlled using any standard DMX-512 control device via a DMX link. This section
explains the control options available and how to plan the DMX link accordingly.
Grouped and independent panel control
In the following explanations, we will assume that all the EvenLED panels in an installation are 1 x 1 m and
set to 16-bit mode, in which each of the 16 LEDs in a panel is controlled using 6 DMX channels. This means
that each panel uses 16 x 6 = 96 DMX channels.
EvenLED panels will only respond to commands they receive on DMX channel 1 and the channels
immediately above it. For the purposes of this explanation, this means that a panel will respond to
commands it receives on DMX channels 1 - 96 only.
We will also assume that commands from the DMX controller to the first EvenLED panel on the DMX link
are sent on channels 1 - 96 (other channels can be used if a Martin DMX Thief™ is connected on the
control data link).
Grouped control using DMX THROUGH
All EvenLED panels connected using DMX THROUGH outputs respond to the same DMX commands and
behave identically. The DMX THROUGH output relays the DMX signal exactly as it is received by the panel
without any processing. This lets you relay identical DMX commands from one panel to the next so that all
connected panels can be controlled as a group using DMX channels 1 - 96.
Independent control using DMX OUT
EvenLED panels connected using DMX OUT outputs respond to DMX commands on different channels and
behave differently.
To explain how this works, let us assume that you have two EvenLED panels on the DMX link. To send
separate commands to the second panel so that you can control this panel independently of the first,
connect the second panel to the first panel’s DMX OUT output. The controller can then send commands to
the first panel on channels 1 - 96 and to the second panel on channels 97 - 192. Because the second panel
– like all EvenLED panels – will only respond to commands it receives on channels starting at channel 1, the
DMX signal at the first panel’s DMX OUT output is processed by ‘subtracting’ 96 channels and
re-addressing the commands sent from the controller on channels 97 - 192 so that they are relayed to the
second panel on channels 1 - 96.
To sum up, the DMX OUT output relays the DMX signal after subtracting the number of channels used by
the panel and address-shifting the remaining DMX channels so that they start at channel 1. This lets you
relay different DMX commands from one panel to the next so that panels can be controlled independently.
Maximum number of panels on the DMX link
Identical grouped control
In identical grouped control using DMX THROUGH outputs, up to 32 panels can be connected in one chain
on the DMX link. The limit of 32 panels is a function of the electrical characteristics of DMX512. If more than
32 panels are to be used in a single DMX512 universe, the chain can be extended using an amplifier-splitter
such as the Martin Opto-Splitter.
Independent control
In independent control using DMX OUT outputs, the maximum number of panels possible in each chain
depends on the number of DMX channels they use out of the 512 available in one DMX universe:
• The EvenLED 1 x 1 m panel uses 96 channels in 16-bit mode. This means that a maximum of five 1 x 1 m
panels can be controlled independently in 16-bit mode in one DMX universe. In 8-bit mode, the 1 x 1 m
panel uses 48 channels, so ten 1 x 1 m panels can be controlled independently in 8-bit mode in one DMX
universe.
• The EvenLED 1 x 0.5 m panel uses 48 DMX channels in 16-bit mode and 24 channels in 8-bit mode. Ten
panels can be controlled independently in 16-bit mode and twenty panels in 8-bit mode in one DMX
universe.
Each time you reach the limit of 512 DMX channels, you can add more independently-controlled panels to
the installation by adding a DMX universe. For example, using a PC with the Martin LightJockey 2™
Windows application and Martin Universal USB/DMX Interface Box package (available from Martin, P/N
90702055) you can control two DMX universes. With an additional Martin Universal USB/DMX Interface Box
(P/N 90702045) you can control 4 DMX universes.
Page 12

12 EvenLED user manual
Cable and link layout details
EvenLED panels are controlled via the lighting industry standard DMX512 serial data protocol. Installations
must follow the standard recommended practices for DMX512. The key points to respect are:
• Use DMX512-compliant cable. Such cables have one or more twisted pairs with nominal characteristic
impedance 120 ohms and low capacitance. Single-pair DMX512 cable is suitable for EvenLED panels
because they do not use pins 4 and 5 of the DMX connection. The minimum recommended wire size is
0.25 mm
2
(24 AWG) for runs up to 300 meters (1000 ft.) and 0.32 mm2 (22 AWG) for runs up 500 meters
(1640 ft).
• Do not use microphone cable. It does not have the correct characteristics and may cause erratic behavior
of the system.
• Shielded (STP) or unshielded (UTP) CAT 5 network cable can be used in fixed installations. F or further
information see: http://www.esta.org/tsp/working_groups/CP/DMXoverCat5.htm
• Panels must be ‘daisy-chained’ (i.e. the control data cable must be connected in one single chain of
panels). It is possible to split a link into two branches by using the DMX THROUGH and DMX OUT
outputs from one panel at the same time, but note that these outputs relay the DMX signal differently (see
“Grouped and independent panel control” on page 11 and see examples in Figure 8).
• Do not connect more than 32 devices in one chain on a DMX512 link without using a splitter-amplifier.
• Do not split a DMX link with a passive “Y” connector. Branching the link with a “Y” will create multiple data
reflections that can block or degrade signal transmission.
• Use a dedicated DMX512 splitter-amplifier such as the Martin RS-485 Opto-Splitter™ (P/N 90758060) to
extend the chain beyond 32 devices or split it into two or more branches.
• Terminate each chain on the link with a 120 ohm resistor (available from Martin, P/N 04150308) across
the data hot (+) and cold (-) conductors (pins 2 and 3 on a 5-pin XLR connector) at the output of the last
panel on the chain.
• Avoid long parallel runs of AC power and control data cables, as these may cause interference on the
data link.
Mixing EvenLED panels and other types of fixture on a DMX link
Mixing EvenLED panels and other types of lighting fixture on one DMX link is possible but if you add the
lighting fixture in the middle of the link, address-setting is complex and is therefore not covered in detail in
this manual.
If you need to add a different type of lighting fixture to a link with EvenLED panels, it is easiest to add it at
the end of the link using the last EvenLED panel’s DMX OUT connector. The fixture must be set to DMX
address 001, and the controller must send commands to the fixture at the next available address after the
DMX channels used by the last panel on the link.
Page 13

Physical installation 13
System layouts
Figure 8 gives examples of how systems can be laid out depending on the type of control required. Note the
different results of connecting to DMX THROUGH or to DMX OUT. Panels are set to 16-bit mode in all the
examples.
Warning! The above diagram and the text in the section that precedes it cover the DMX data link and
describe the limitations imposed by the DMX system only. Do not confuse them with power
connections, which are subject to maxim um current l imitations. Ref er to “ AC power” on page 15 f or
details of establishing power circuits.
Figure 8: System layouts
A. Individual control
Panels respond to different commands sent to different DMX addresses and can be controlled independently. Max.
512 DMX channels per chain using DMX OUT.
B. Grouped control, one group
Panels have same DMX address and behave identically. Max. 32 panels per chain using DMX THROUGH before a
splitter-amplifier is required.
C. Grouped control, three groups (6 panels controlled in 3 pairs)
Pairs of panels with same DMX address behave identically. Each pair has a different DMX address and can be
controlled independently as a pair. Max. 512 DMX channels per chain using DMX OUT.
Page 14

14 EvenLED user manual
Connecting the system
Connectors – overview
See Figure 9. The EvenLED panel must be connected to power and to a DMX control data link using the
following connectors:
DMX connectors (5-pin XLR)
• DMX IN accepts a DMX 512 control signal. It reads DMX commands sent to the first incoming DMX
address and assigns that as the starting address for the EvenLED panel.
• DMX OUT can be used to continue the DMX link to another EvenLED panel. Use this output for
independent control of different panels.
• DMX THROUGH can also be used to continue the DMX link to another EvenLED panel, but use this
output for grouped DMX control of panels, in which panels share the same DMX address, respond to the
same DMX commands and behave identically.
Power connectors
• The blue Neutrik PowerCon POWER IN socket is used to apply power to the EvenLED panel via a
suitable cable with a blue PowerCon power input connector. It accepts mains power at 100 - 240 VAC
nominal, 50/60 Hz.
• The grey Neutrik PowerCon POWER THROUGH socket can be used to relay pow e r to th e POWER IN
connector of another EvenLED panel via a suitable cable with a grey PowerCon output connector. It
supplies power at the same voltage and frequency as that applied to the POWER IN connector.
Warning! Important safety precautions apply when using the POWER THROUGH socket (see “AC
power” on page 15).
Figure 9: Connections
Page 15

Connecting the system 15
AC power
Warning! Electrical installation must be carried out by qualified professionals only.
Warning! Read “Safety Information” on page 3 before attempting to install this product. Isolat e the
entire installation from power and ensure that power cannot be reconnected accidentally before
working on cables and connections.
Warning! Connect Even LED panels to A C po wer and to each other usin g the 20 A rated, UL-listed, 12
AWG cables supplied by Martin as accessories for this product. Replacement power cables from
other sources can be used as an alternative, but they must be 3-conductor SJT or better jac ket-type,
approved for a current of 20 A and temperature of 90° C (194° F) minimum. Replacement cables must
also be minimum 12 AWG and UL-listed in North America or have conductor size minimum 4 mm² in
other regions.
Warning! See Figure 10 below. When linking POWER THROUGH to POWER IN connectors so that
EvenLED panels draw power in a daisy-chain from a single source:
• Do not connect more than 9 panels in total to each other when supplying them with AC mains
power at 100 - 120 V.
• Do not connect more than 16 panels in total to each other when supplying them with AC mains
power at 200 - 240 V.
If you do not respect these limits you will overload cables and components and create a serious
safety hazard. Each time you reach the maximum permitted n umber of in ter connected panel s in one
daisy-chain and want to supply more panels with power, you must create a new daisy-chain that
draws power from a separate power outlet.
Warning! For protection from dangerous electric shock, the panel must be grounded (earthed). The
AC mains power distribution system must be fitted with current overload and ground-fault
(earth-fault) circuit breakers. It must also provide a means to isolate panels from power and prevent
accidental reconnection during service, and each power distribution circuit m ust be dimensioned to
safely handle a current of 20 A for each chain of EvenLED panels connected to it.
Important! Do not connect the EvenLED to an electrical dimmer system – even if the system is only
used to supply 0% and 100% power – as doing so can damage the EvenLE D.
The EvenLED accepts AC power at 100 - 240 VAC nominal, 50/60 Hz. Do not connect to power at an y other
voltage or frequency.
There is no power on/off switch. Power is applied to the EvenLED as soon as it is connected to power.
See Figure 10 for a diagram of power cable la y out. If you require help in planning or dimensioning the power
distribution system, please contact your Martin supplier for assistance.
Each EvenLED panel “leaks” a maximum total current of 1 mA to ground (earth). Panels must be correctly
connected to ground so that this “leakage” current can be absorbed. You must also allow for the “leakage”
current when supplying panels with power from a circuit that has an RCD (residual current device) for
ground fault protection, as is normally required for safety reasons. If you supply too man y panels with power
via one RCD, the panels’ combined earth leakage may cause the RCD to trip. RCDs are normally rated at
their maximum trip current +0% - 50%, so an RCD rated 30 mA can therefore trip when leakage to ground is
as low as 15 mA. If you have created a chain of 16 interconnected panels at 200 - 240 V and the 30 mA
RCD trips, you may have a particularly sensitive RCD, and simply replacing it with another RCD with the
same rating may solve the problem. If replacing the RCD does not help, or if the installation contains more
than 16 panels, distribute power on additional circuits, each protected by its own RCD, or use 3 phases on
circuits protected by 3-phase RCDs.
Mains power
(allow min. 20
A per chain)
Warning! Maximum 9 panels in chain connected to AC mains power at 100 - 120 V,
maximum 16 panels in chain connected to AC mains power at 200 - 240 V
Figure 10: Interconnecting panels
Page 16

16 EvenLED user manual
Connecting to power
3 m (9.8 ft.) power input cables for the EvenLED can be ordered separately from your Martin supplier.
Cables have a Neutrik PowerCon power input connector installed on one end and are ready for either
hard-wiring or installation of a power plug on the other end. Loose PowerCon connectors and daisy-chain
power cables with PowerCon connectors for relaying power from one panel to another can also be ordered
from Martin (see “Accessories” on page 27).
All Martin cables for the EvenLED are EU color-coded (see Table 1).
If you choose not to use the EvenLED power cab les a v ailab le from Martin, you must use power cab le that is
rated 20 A minimum and suitable for the installation environment, SJT or better jacket type, and rated to
90° C (194° F) minimum. In North America power cable must be UL-listed, minimum AWG 12. In other
regions it must be minimum 4 mm² conductor cross-section.
To connect to a single-phase 3-wire (live, neutral, ground/earth) power system:
1. Isolate all power distribution circuits from power and ensure that power cannot be reapplied accidentally.
2. Insert the PowerCon connector on a suitable power input cable into the EvenLED’s POWER IN socket.
3. Connect the conductors in the power cable to the power distribution circuit as follows:
- Connect the yellow/green wire to ground (earth)
- Connect the blue wire to neutral
- Connect the brown wire to live.
4. Check that all installation work is completed and carry out appropriate tests and safety checks before
applying power.
If using two phases of a three-phase system to obtain 200 - 240 V between two phases, follow the
procedure given above, but connect the blue wire to one phase and the brown wire to the other phase.
Pow er pl ug
If you want to install a plug that is suitable for y our AC mains power outlets on the power cable, install a
grounding-type (earthed) plug with integral cord grip/cable clamp that is rated 20 A minimum, following the
plug manufacturer’s instructions. Table 1 shows some possible pin/conductor identification schemes. If
conductors are not clearly identified, or if you have any doubts about proper installation, consult a qualified
electrician.
Relaying power between panels
To ease installation and reduce the number of AC mains power input cables and outlets required, pow er can
be relayed from one EvenLED panel to another, subject to the strict safety limits listed below. Suitable
cables for relaying power can be ordered from Martin Professional (see "Accessories" on page 27) and must
meet the same specifications as power input cables (see details above).
Wire color
(EU color code)
Wire color
(US color code) Conductor Symbol Screw (US)
brown black live L yellow or bras s
blue white neutral N silver
yellow/green green ground (earth) green
Table 1: Conductor identification
Page 17

Connecting the system 17
Warning!See Figure 10 on page 15:
• When connecting to AC mains power at 100 - 120 V, a maximum of 9 EvenLED panels in total may
be interconnected in one chain that draws power via the first panel’s power input cable.
• When connecting to AC mains power at 200 - 240 V, a maximum of 16 EvenLED panels in total
may be interconnected in one chain that draws power via the first panel’s power input cable.
To relay power from one panel to another:
1. Connect the grey PowerCon power output/throughput connector on one end of the power relay cable to
the grey PowerCon POWER THROUGH socket on the first panel.
2. Connect the blue Pow erCon pow er input connector on the other end of the power rela y cab le to the ne xt
panel’s blue PowerCon POWER IN socket.
3. Continue connecting power relay cables from POWER TH ROUGH to POWER IN sockets.
4. When you reach the maximum permitted number of interconnected panels (see Figure 9 on page 12),
stop. Do not connect any more panels to this chain. If you need to connect more panels to power, start a
new chain connected to a separate power outlet.
Current overload safety
Warning! The POWER THROUGH circuit is not protected against current overload. Follo w the saf ety
precautions and instructions in this user manual carefully and do not overload this circuit.
EvenLED panels are protected by a current overload protection circuit in the internal PSU (power supply
unit) that shuts down the panel if the panel’s current draw exceeds safe limits. If a panel shuts down
although it is correctly connected to power, this circuit may ha ve been activated by a fault. Disconnect the
panel from power and contact your Martin supplier for assistance.
If the current overload protection circuit fails, a 6.3 amp fast-blow fuse in the PSU provides a final total
protection. This fuse is not user-replaceable. If you suspect that it has blown, disconnect the panel from
power and contact your Martin supplier for assistance.
Connecting the DMX control data link
Connection pinouts
XLR connections
XLR connectors are suitable if DMX cable is used for the DMX link. XLR pin numbers are normally identified
with markings on connectors.
The 5-pin XLR connectors required to connect the DMX data cable to an EvenLED must be wired using the
standard XLR DMX pin-out:
• Pin 1: Cable shield
• Pin 2: DMX Data 1 - (cold)
• Pin 3: DMX Data 1 + (hot)
Pins 2 and 3 carry the DMX 512 signal. Pins 4 and 5 are available for Data 2 connections in DMX 512-A or
similar systems. They must be wired as follows:
• Pin 4: DMX Data 2 - (cold)
• Pin 5: DMX Data 2 + (hot)
Do not connect the shield conductor to ground (earth) or allow it to come into contact with a connector shell,
as this may cause interference.
RJ-45 connections
RJ-45 connectors are suitable if CAT 5 cable is used for the data link. XLR-to-RJ-45 adapters will be
required for connection to the EvenLED’s 5-pin XLR DMX connectors.
RJ-45 cable connector pins are numbered from the left looking at the face of the connector with the locking
clip on top (see Figure 11). Connectors must be wired according to the 568-B system using the standard
RJ-45 pin-out for DMX applications:
• Pin 1 (White/orange): DMX data hot (+)
• Pin 2 (Orange): DMX data cold (-)
Page 18

18 EvenLED user manual
• Pins 7 (White/brown) and 8 (Brown): Common
Pins 3 and 6 are available for Data 2 connections in DMX 512-A or
similar systems. They must be wired as follows:
• Pin 3 (White/green): Available for Data 2 hot (+)
• Pin 6 (Green): Available for Data 2 co ld ( -)
Pins 4 and 5 are not used in currently available lighting control
systems but can be wired as follows:
• Pin 4 (Blue)
• Pin 5 (White/blue)
Making data connections
Warning! Disconnect the entire installation from power and ensure that power cannot be reapplied,
even accidentally, before working on cables and connections.
See “System layouts” on page 13 for diagrams of possible installations.
To connect a panel to the data link:
1. Connect the DMX data output from the controller to the EvenLED’s DMX IN (male XLR) socket.
2. Run the data link from the EvenLED’s DMX OUT or DMX THROUGH (female XLR) socket to the data
input of the next panel (if you are not sure about the different functions of these two sockets, see
“Grouped and independent panel control” on page 11).
3. Terminate the data link by connecting a 120 Ohm, 0.25 Watt resistor between the data 1 hot (+) and cold
(-) conductors at the data output of the last fixture on the link. If the link is branched (i.e. split into
separate links) with an amplifier-splitter, terminate each branch of the link.
Pin 1 Pin 8
Figure 11: RJ-45 cable
connector pins
Page 19

Operation 19
Operation
Warning! Class 3B LED product. Do not look at exposed LEDs from a distance of less than 40 cm (16
inches) from the front surface of the panel without suitable protective eyewear. At less than this
distance, the LED emission can cause eye injury or irritation. Do not look at LEDs with magnifiers or
similar optical instruments that may concentrate the light output.
At distances of 40 cm (16 inches) and above, or if the LED output is diffused so that it is impossible to
identify the individual LEDs, the LED emission is harmless to the naked eye.
Powering on and startup
When power is applied to an EvenLED panel, by default it will first reset, then automatically flash its software
(firmware) version (see “Software version display” on page 20) and mode settings (see “Mode settings
display” on page 21) twice each, then start to calibrate the individual LEDs. When calibration is complete, it
will flash all LEDs once. The process normally takes less than one minute.
Software version/mode settings display and automatic calibration at power on can be disabled by sending a
sequence of DMX values from a DMX controller (see “Configuring panels using a DMX controller” on
page 21).
DMX control
The EvenLED can be controlled using a standard DMX-512 controller.
16- and 8-bit DMX control modes
The EvenLED panel is designed to be used with 16-bit control per color. This ensure smooth and step-free
operation and requires 96 DMX channels.
For applications where absolute smooth and step-free operation is not required and/or control channel
capacity is limited, EvenLED panels can be set to 8-bit control mode. In 8-bit mode, panels only use 48
channels.
DMX channel requirements in 16-bit and 8-bit modes
The 1 x 1 m EvenLED panel contains 16 individually controllable RGB LEDs:
• 16 LEDs x 6 DMX channels in 16-bit mode = 96 DMX channels required by a 1 x 1 m panel in 16-bit
mode.
• 16 LEDs x 3 DMX channels in 8-bit mode = 48 DMX channels required by a 1 x 1 m panel in 8-bit mode.
LED map
By default, the individual LEDs in the EvenLED are mapped for
DMX control as shown in Figure 12, seen from the front (light
output side) of the panel.
Depending on whether the panel is set to 8-bit or 16-bit control,
each LED is controlled using 3 or 6 DMX channels. For
example, in 16-bit mode, LED 1 at the bottom left of the panel is
controlled on DMX channels 1 - 6, LED 2 is controlled on DMX
channels 7 - 12 and so on.
Each LED is controlled as shown in "DMX protocols" on page
20.
LED mapping can be reconfigured – and LEDs can be
controlled in groups – using the Martin DMX Thief accessory
(see “Using DMX Thief™” on page 23).
1234
5678
9101112
13 14 15 16
Figure 12: LED mapping
Page 20

20 EvenLED user manual
DMX protocols
The tables below give control details for each individual LED in the EvenLED panel.
16-bit control
8-bit control*
*The EvenLED is supplied set up for 16-bit control by default. If you want to reconfigure panels for 8-bit
control, see “Configuring panels using a DMX controller” on page 21.
Software version and mode settings display
EvenLED panels show their software versions and mode settings when powered on if they are configured to
do so as described under “Configuring panels using a DMX control ler” on page 21.
Software version display
EvenLED panels display their software as a binary
number on their LEDs. See Figure 13. The top row of
LEDs shows the tens and the second row down shows the
units (ones) in the version number. The bottom two rows
simply repeat the number displayed on the top two rows.
Software version display: example
See Figure 14. If a panel is running software version 29:
• 20 (LED 15) lights in the top row
• 1 and 8 (LEDs 9 and 12) light in the second row down
• 20 + (1 + 8) = 29
• The bottom two rows repeat the number displayed on
the top two rows.
Start code = 0
Channel Value Percent Function
1
0 - 255 0 - 100%
Red
Intensity 0
→100%
2
0 - 255 0 - 100%
Red (fine)
Fine adjustment
3
0 - 255 0 - 100%
Green
Intensity 0
→100%
4
0 - 255 0 - 100%
Green (fine)
Fine adjustment
5
0 - 255 0 - 100%
Blue
Intensity 0
→100%
6
0 - 255 0 - 100%
Blue (fine)
Fine adjustment
Start code = 0
Channel Value Percent Function
1
0 - 255 0 - 100%
Red
Intensity 0 →100%
2
0 - 255 0 - 100%
Green
Intensity 0 →100%
3
0 - 255 0 - 100%
Blue
Intensity 0
→100%
80 40 20 10
8421
80 40 20 10
8421
10s
1s
10s
1s
}
Repeat of first
two rows
Figure 13: Software version display
80 40 20 10
8
4 21
80 40 20 10
8
4 21
10s
1s
10s
1s
}
Repeat of first
two rows
Figure 14: Software version 29
Page 21

Operation 21
Mode settings display
See Figure 15. Mode settings are
shown on the first three LEDs from
the left in row 1 and repeated on the
first three LEDs from the left in row
3. The other LEDs are not used.
Mode settings display: example
For example, if a panel is set to:
• operate in 16-bit mode
• not display its software ve rsion at
power on
• calibrate at power on,
the LEDs will display the panel’s
mode settings as follows:
• LEDs 13 (the top-left hand LED)
and 5 (two rows down on the left)
will light green
• LEDs 14 and 6 will light red
• LEDs 15 and 7 will light green.
Configuring panels using a DMX controller
The EvenLED can be set to the following modes by sending values from a DMX controller:
• 8- or 16-bit control mode
• Software version and mode settings displayed at power on
• Calibration at power on
Sequences of DMX values sent from the controller will set modes in all the EvenLED panels that are
connected to the controller on the DMX link and interconnected using DMX THROUGH connectors. Precise
timing of the sequences is important, so we recommend that you pre-program a sequence that you can
execute once panels are ready to receive mode-setting values.
Pre-programmed sequences that can be imported into the Martin LightJockey™ Windows PC application
and sent to EvenLED panels are availab le free of charge from the Ev enLED’s Product Support page on the
Martin website at www.martin.com
Note that:
• You must hold steps 1 and 9 constant while panels power on (Step 1) and while you check panel mode
settings (Step 9), but steps 2 to 8 must change to the next step at 1 second intervals.
• You only change DMX values for the red LEDs in each step. The green and blue LEDs must be held at a
value within the range 122 - 132 (50%) throughout the entire procedure.
• The DMX values you send in each step must not contain fades: the controller must ‘snap’ immediately
from one value to the next.
• You must execute all the 9 steps in the sequence.
• Steps 1 to 5 and Step 9 do not change mode settings. You change modes by sending specific DMX
values to the red LEDs in steps 6 to 8. If a mode does not need to be changed in steps 6 to 8, send the
‘Ignore’ value 0 (zero) in the step concerned.
• Regardless of whether panels are set to 8- or 16-bit mode, you must send the DMX values to the LEDs for
the specified colors on the following channels:
- Send the values for red LEDs on channels 1, 7, 19 and 43.
- Send the values for blue and green LEDs on channels 3, 5, 9, 11, 45 and 47.
• EvenLED panels must be interconnected using DMX THROUGH connectors. The DMX OUT connectors
do not relay mode-setting data.
• Any Martin DMX Thief™ devices on the DMX link must be bypassed temporarily by disconnecting the
DMX cable connectors from their DMX IN and DMX OUT sockets and connecting the DMX cable
connectors directly together.
1234
5678
9 101112
13 14 15 16
8-/16-bit mode
Green = 16-bit
Red = 8-bit
Show version
and mode
settings at
power on
Green = Yes
Red = No
Calibrate at
power on
Green = Yes
Red = No
8-/16-bit mode
Green = 16-bit
Red = 8-bit
Show version
and mode
settings at
power on
Green = Yes
Red = No
Calibrate at
power on
Green = Yes
Red = No
Figure 15: Mode settings display
Page 22

22 EvenLED user manual
Mode-setting procedure
To set the modes in EvenLED panels:
1. Power all panels off.
2. See Table 2. Set the controller to send the ‘panel configuration enable’ DMX values in Step 1.
3. Power panels on. When panels receive the ‘panel configuration enable’ values at power on, they will
display their software versions and their mode settings in an alternating sequence until they receive the
DMX values for Step 2 from the DMX controller.
4. Wait minimum 2 seconds, then send the DMX values for Steps 2 to 9. Steps 2 to 8 must last exactly one
second before changing to the next step.
5. During steps 6 to 8, panels indicate which mode settings they are acquiring by lighting LEDs red or
green as shown in Figure 15 on page 21. If you send an ‘Ignore’ value for a mode setting that you do not
want to change, the LED concerned will light blue.
6. When the sequence reaches Step 9, panels will update their settings – which takes a few seconds – and
then again display their software versions and their mode settings in an alternating sequence. Check
that the panels’ mode settings are correct with reference to “Mode settings display” on page 21. If you
are satisfied with the settings, cut power to the panels.
7. Stop sending the DMX values in Step 9 from the DMX controller.
8. Power panels on again. They should now reset and be av ailable f or operation in the modes you hav e set
them to.
Page 23

Operation 23
Mode-setting DMX sequence
Using back projection screens
Installing a back projection screen in front of EvenLED panels gives a uniform panel of light. The ideal
distance between screen and EvenLED differs with screen design but is generally within 250 - 500 mm
(10 - 20 inches). A distance of approx. 300 mm (12 inches) often gives best results.
Using DMX Thief™
The Martin EvenLED DMX Thief™ (available from Martin, P/N 90758096) is an accessory that gives the
following options:
• Complete control of DMX address setting in an EvenLED installation.
• Grouping of LEDs so that they can be controlled in two or four horizontal or vertical strips, four quadrants
or one single group in which all LEDs behave identically.
• Panel control Y-axis inversion so that LEDs are numbered from the top of the panel.
• 8- or 16-bit mode DMX output and input configurations
See the user manual supplied with the DMX Thief and available for download from www.martin.com for full
details.
Function Step % value Hex value Setting
Panel
configuration
enable
Step 1
Reds
1
: 20% 46 - 56 Hold this value at power on
Greens and
blues
2
: 50%
122 - 132
Hold this value at power on and
throughout the rest of the
procedure
Start code
Step 2 Reds: 40% 97 - 107
Step 3 Reds: 60% 148 - 158
Step 4 Reds: 80% 199 - 209
Step 5 Reds: 20% 46 - 56
8- or 16-bit Step 6
Reds: 100% 250 - 255 16-bit mode
or reds: 50% or 122 - 132 8-bit mode
or reds: 0% or 0 Ignore (keep existing setting)
Show software
version and
mode settings at
power on
Step 7
Reds: 100% 250 - 255 Show version and settings
or reds: 50% or 122 - 132
Do not show version and
settings
or reds: 0% or 0 Ignore (keep existing setting)
Calibrate at
power on
Step 8
Reds: 100% 250 - 255 Calibrate
or reds: 50% or 122 - 132 Do not calibrate
or reds: 0% or 0 Ignore (keep existing setting)
Repeat ‘panel
configuration
enable’ values
from Step 1
Step 9 Reds: 20% 46 - 56
Hold value for minimum 10
seconds while panels update.
Panels then show settings and
software version in an
alternating sequence.
1
The values for reds must be sent to red LEDs on channels 1, 7, 19 and 43.
2
The values for greens and blues must be sent to green and blue LEDs on channels 3, 5, 9, 11, 45 and 47.
Table 2: Mode-setting DMX sequence
Page 24

24 EvenLED user manual
Service and maintenance
DANGER! Read “Safety Information” on page 3 before carrying out service or maintenance work on
the EvenLED. Disconnect the panel from power before cleaning.
Important! The EvenLED requires periodic cleaning to maintain reliable operation and protect the
investment it represents. Excessive dirt and particle buildup degrades performance, causes
overheating and may cause damage that is not covered by the product warranty.
The user will need to carry out periodic cleaning, and it is also possible for the user to update the EvenLED
software using the Martin EvenLED Software Uploader device. All other service operations must be carried
out by Martin Professional or its approved service agents.
Installation, on-site service and maintenance can be provided worldwide by the Martin Professional Global
Service organization and its approved agents, giving owners access to Martin’s expertise and product
knowledge in a partnership that will ensure the highest level of performance throughout the product’s
lifetime. Please contact your Martin supplier for details.
It is Martin policy to apply the strictest possible calibration procedures and use the best quality materials
available to ensure optimum performance and the longest possible component lifetimes. Howe v er , LEDs are
subject to wear and tear over the life of the product, resulting in gradual changes in color and overall
brightness over many thousands of hours of use. The extent of wear and tear depends heavily on operating
conditions and environment, so it is impossible to specify precisely whether and to what extent LED
performance will be affected. Howev er, you may eventually need to ask Martin Professional to replace LEDs
if their characteristics are affected by wear and tear after an extended period of use and if you require
panels to perform within very precise optical and color parameters.
Cleaning
Regular cleaning is essential for product life and performance. Buildup of dust and dirt degrades the panel’s
light output and cooling ability.
Cleaning schedules will vary greatly depending on the operating environment. It is therefore impossible to
specify precise cleaning intervals for the EvenLED. Inspect panels within their first few weeks of operation to
see whether cleaning is necessary. Check again at frequent intervals. This procedure will allow you to
assess cleaning requirements in your particular situation. If in doubt, consult your Martin dealer about a
suitable maintenance schedule.
Warning! Disconnect from power before cleaning. Do not allow the product to become wet. Take
care not to damage wiring.
Important! Do not use abrasives, solvents or caustic cleaning products for cleaning.
The EvenLED’s aluminum housing can be cleaned with a cloth that is slightly dampened – but not wet – with
a solution of water and a mild detergent such as car shampoo. To clean the housing:
1. Isolate the panel from AC power and allow it to cool for 20 minutes.
2. Gently wipe away dirt and dust with the damp cloth.
3. Allow any moisture to dry before reconnecting to power.
Software installation
It may be necessary to upload new software (firmware) to the EvenLED if you believe that the product has a
software-related fault or if you want to update to a newer version. Software updates are available from the
Martin website (http://www.martin.com) and can be installed via the DMX data link with the EvenLED
Software Uploader, available from Martin (P/N 90758097). See the separate EvenLED Software Uploader
user manual for details.
Page 25

Troubleshooting 25
Troubleshooting
Problem Probable cause(s) Remedy
Panel is completely dead.
No power to panel. Check power and connections.
Current overload protection circuit activated.
Isolate panel from power. Contact Martin for
assistance.
Fuse blown.
Fuse is not user-replaceable. Isolate panel from
power. Contact Martin for assistance.
One or more panels responds
incorrectly to control or does not
respond at all.
Fault or interference on DMX link.
Inspect connections and cables. Correct poor
connections. Repair or replace damaged cables.
Trace and eliminate cause of interference.
Incorrect panel addressing.
Check for correct use of DMX OUT and DMX
THROUGH connectors.
Check number of channels required by panels in
one chain does not exceed 512 if individual control
is required.
Incorrect mode setting.
Check panels are correctly set to 8-bit or 16-bit
mode.
Panel defective.
Bypass panels on DMX link until the faulty device
has been identified. Have faulty panel tested and
serviced by Martin service technician.
Other device on DMX link defective.
Bypass devices on DMX link until the faulty device
has been identified. Have faulty device tested and
serviced by Martin service technician or device
supplier.
LEDs cut out intermittently. Panel is too hot.
Ensure free airflow around panel.
Clean panel.
Check that ambient temperature does not exceed
maximum permitted level.
If problem persists, contact Martin for service.
Table 3: Troubleshooting
Page 26

26 EvenLED user manual
Specifications
Physical
Length . . . . . . . . . . . . . . . . . . . . . . . . . . . . . . . . . . . . . . . . . . . . . . . . . . . . . . . . . . . . . . . .995 mm (39.2 in.)
Width . . . . . . . . . . . . . . . . . . . . . . . . . . . . . . . . . . . . . . . . . . . . . . . . . . . . . . . . . . . . . . . . . . .71 mm (2.8 in.)
Height . . . . . . . . . . . . . . . . . . . . . . . . . . . . . . . . . . . . . . . . . . . . . . . . . . . . . . . . . . . . . . .1014 mm (39.9 in.)
Weight . . . . . . . . . . . . . . . . . . . . . . . . . . . . . . . . . . . . . . . . . . . . . . . . . . . . . . . . . . . . . . . . .10 kg (22.0 lbs.)
Dynamic Effects
Color mixing. . . . . . . . . . . . . . . . . . . . . . . . . . . . . . . . . . . . . . . . . . . . . . . . . . . . . . . . . . . . . . . . . . . . . .RGB
Red . . . . . . . . . . . . . . . . . . . . . . . . . . . . . . . . . . . . . . . . . . . . . . . . . . . . . . . . . . . . . . . . . . . . . . . . .0 - 100%
Green. . . . . . . . . . . . . . . . . . . . . . . . . . . . . . . . . . . . . . . . . . . . . . . . . . . . . . . . . . . . . . . . . . . . . . . .0 - 100%
Blue . . . . . . . . . . . . . . . . . . . . . . . . . . . . . . . . . . . . . . . . . . . . . . . . . . . . . . . . . . . . . . . . . . . . . . . . .0 - 100%
Control and Programming
Control. . . . . . . . . . . . . . . . . . . . . . . . . . . . . . . . . . . . . . . . . . . . . . . . . . . . . . . . . . . . . . . . . . . . . . . . . .DMX
DMX channels . . . . . . . . . . . . . . . . . . . . .96 per independently controlle d 1 x 1 m panel (48 in 8-bit mode)
Control resolution. . . . . . . . . . . . . . . . . . . . . . . . . . . . . . . . . . . . . . . . . . . . .16-bit RGB control of each LED
Protocol . . . . . . . . . . . . . . . . . . . . . . . . . . . . . . . . . . . . . . . . . . . . . . . . . . . . . . . . . . . .USITT DMX512/1990
Photometric Data
Light source. . . . . . . . . . . . . . . . . . . . . . . . . . . . . . . . . . . . . . . . . . . . . . . . Proprietary 6 W RGB LED array
Resolution, one panel . . . . . . . . . . . . . . . . . . . . . . . . . . . . . . . . . . . . . . . . . . . . . . . . . . . . . . . . .4 x 4 pixels
Pixel pitch (LED center-to-center distance) . . . . . . . . . . . . . . . . . . . . . . . . . . . . . . . . . . . . .250 mm (9.8 in.)
Pixels per m
2
. . . . . . . . . . . . . . . . . . . . . . . . . . . . . . . . . . . . . . . . . . . . . . . . . . . . . . . . . . . . . . . . . . . . . . .16
Color resolution . . . . . . . . . . . . . . . . . . . . . . . . . . . . . . . . . . . . . . . . . . . . . . . . . . . . . . . . . .16 bits per color
Viewing angle. . . . . . . . . . . . . . . . . . . . . . . . . . . . . . . . . . . . . . . . . . . . . . . . . . . . . . . . . . . 112° (+56°, -56°)
Minimum LED source lifetime (to 70% of initial output level) . . . . . . . . . . . . . . 40 000 hours at full intensity
Construction
Panels . . . . . . . . . . . . . . . . . . . . . . . . . . . . . . . . . . . . . . . . . . . . . . . . . . . . . . . . . . . . . . . . . . . . . .Aluminum
Color . . . . . . . . . . . . . . . . . . . . . . . . . . . . . . . . . . . . . . . . . . . . . . . . . . . . . . . . . . . . . . . . . . . . . . . . . . White
Protection rating. . . . . . . . . . . . . . . . . . . . . . . . . . . . . . . . . . . . . . . . . . . . . . . . . . . . . . . . . . . . . . . . . . . IP20
Installation
Orientation. . . . . . . . . . . . . . . . . . . . . . . . . . . . . . . . . . . . . . . . . . . . . . . . . . . . . . . . . . . . . . . . . . . . .Vertical
Mounting . . . . . .Suspended using mounting rail and clamps only; max. 10 panels per suspended column
Connections
Power in/out. . . . . . . . . . . . . . . . . . . . . . . . . . . . . . . . . . . . . . . . . . . . . . . . . . . . . . . . . . . Neutrik PowerCon
DMX data in. . . . . . . . . . . . . . . . . . . . . . . . . . . . . . . . . . . . . . . . . . . . . . . . . . . . . . . . . . . .5-pin locking XLR
DMX data out. . . . . . . . . . . . . . . . . . . . . . . . . . . . . . . . . . . . . . . . . . . . . . . . . . . . . . . . . . .5-pin locking XLR
DMX data through . . . . . . . . . . . . . . . . . . . . . . . . . . . . . . . . . . . . . . . . . . . . . . . . . . . . . . .5-pin locking XLR
Electrical
AC power. . . . . . . . . . . . . . . . . . . . . . . . . . . . . . . . . . . . . . . . . . . . . . . . . 100 - 240 VAC nominal, 50/60 Hz
Power supply unit. . . . . . . .Integrated, auto-sensing multi-voltage with integral current overload protection
Standby power. . . . . . . . . . . . . . . . . . . . . . . . . . . . . . . . . . . . . . . . . . . . . . . . . . . . . . . . . . . . . . . . . . . .24 W
Earth leakage current . . . . . . . . . . . . . . . . . . . . . . . . . . . . . . . . . . . . . . . . . . . . . . . . . . . . . . . . . . . . <1 mA
Main fuse (not user-replaceable). . . . . . . . . . . . . . . . . . . . . . . . . . . . . . . . . . . . . . . . . . . . . . . . . . . .F 6.3 A
Page 27

Specifications 27
Typical power and current
Maximum total power consumption. . . . . . . . . . . . . . . . . . . . . . . . . . . . . . . . . . . . . . . . . . . . . . . . . . .155 W
100 V, 50 Hz. . . . . . . . . . . . . . . . . . . . . . . . . . . . . . . . . . . . . . . . . . . . . . . . . . . . . .151 W, 1.6 A, PF = 0.978
100 V, 60 Hz. . . . . . . . . . . . . . . . . . . . . . . . . . . . . . . . . . . . . . . . . . . . . . . . . . . . . .151 W, 1.6 A, PF = 0.988
110 V, 60 Hz. . . . . . . . . . . . . . . . . . . . . . . . . . . . . . . . . . . . . . . . . . . . . . . . . . . . . .151 W, 1.4 A, PF = 0.985
120 V, 60 Hz. . . . . . . . . . . . . . . . . . . . . . . . . . . . . . . . . . . . . . . . . . . . . . . . . . . . . .151 W, 1.3 A, PF = 0.981
208 V, 60 Hz. . . . . . . . . . . . . . . . . . . . . . . . . . . . . . . . . . . . . . . . . . . . . . . . . . . . . .151 W, 0.8 A, PF = 0.915
230 V, 50 Hz. . . . . . . . . . . . . . . . . . . . . . . . . . . . . . . . . . . . . . . . . . . . . . . . . . . . . .152 W, 0.8 A, PF = 0.892
240 V, 50 Hz. . . . . . . . . . . . . . . . . . . . . . . . . . . . . . . . . . . . . . . . . . . . . . . . . . . . . .152 W, 0.7 A, PF = 0.887
Measurements per panel, made at nominal voltage with all LEDs at full intensity. Allow for a deviation of
+/- 10%.
Thermal
Cooling. . . . . . . . . . . . . . . . . . . . . . . . . . . . . . . . . . . . . . . . . . . . . . . . . . . . . . . . . . . . . . . . . . . . .Convection
Maximum ambient temperature (Ta max.). . . . . . . . . . . . . . . . . . . . . . . . . . . . . . . . . . . . . . . 40° C (104°F)
Minimum ambient temperature (Ta min.). . . . . . . . . . . . . . . . . . . . . . . . . . . . . . . . . . . . . . . . . . 5° C (41° F)
Maximum surface temperature, steady state, Ta=40° C . . . . . . . . . . . . . . . . . . . . . . . . . . . . . . . . . . . 80° C
Total heat dissipation (calculated, +/- 10%) . . . . . . . . . . . . . . . . . . . . . . . . . . . . . . . . . . . . . . . . 530 BTU/hr.
Approvals
EU safety. . . . . . . . . . . . EN 60598-1, EN 60598-2-17, IEC/EN 60825-1
EU EMC. . . . . . . . . . . . . . . . . . . . EN 55015, EN 55103-1, EN 55103-2,
. . . . . . . . . . . . . . . . . . . . . . . . EN 61000-3-2, EN 61000-3-3
US safety. . . . . . . . . . . . . . . . . . . . . . . . . . . . . . . . . . . . . . . . . .UL 1573
Canadian safety. . . . . . . . . . . . . . . . . . . . . . . . CAN/CSA E 60598-2-17
Included Items
Panel
Mounting frame
3 m UL-listed, 12 AWG, SJT, 20 A power input cable with PowerCon input connector. . . . . P/N 11541503
User manual . . . . . . . . . . . . . . . . . . . . . . . . . . . . . . . . . . . . . . . . . . . . . . . . . . . . . . . . . . . . . P/N 35000222
Accessories
Neutrik PowerCon NAC3FCA power input connector, cable mount, blue . . . . . . . . . . . . . . . P/N 05342804
Neutrik PowerCon NAC3FCB power output connector, cable mount, light grey . . . . . . . . . . P/N 05342805
1.4 m UL-listed, 12 AWG, SJT, 20 A daisy-chain power cable with PowerCon connectors. . P/N 11850099
2.25 m UL-listed, 12 AWG, SJT, 20 A daisy-chain power cable with PowerCon connectors. P/N 11850100
3.25 m UL-listed, 12 AWG, SJT, 20 A daisy-chain power cable with PowerCon connectors. P/N 11850101
Six-unit flightcase for 6 x EvenLED, 1 x 1 m . . . . . . . . . . . . . . . . . . . . . . . . . . . . . . . . . . . . . P/N 91515005
Related Items
Martin RS-485 Opto-Splitter™ optically isolated 4-way RS485/DMX splitter-amplifier . . . . . P/N 90758060
Martin LightJockey 2™ Windows Application (incl. Universal USB/DMX Interface Box). . . . P/N 90 702055
Ordering Information
EvenLED™ Hanging Bracket, 1 m wide, with width-adjustable rigging clamps. . . . . . . . . . . P/N 90602000
EvenLED™ DMX Thief™ Addressing/Configuration Tool . . . . . . . . . . . . . . . . . . . . . . . . . . . P/N 90758096
EvenLED™ Software Uploader Tool . . . . . . . . . . . . . . . . . . . . . . . . . . . . . . . . . . . . . . . . . . . P/N 90758097
EvenLED™ panel, 1 x 1 m. . . . . . . . . . . . . . . . . . . . . . . . . . . . . . . . . . . . . . . . . . . . . . . . . . . P/N 90354500
Specifications subject to change without notice.
Page 28

28 EvenLED user manual
Notes
Disposing of this product
Martin™ products are supplied in compliance with Directive 2002/96/EC of the European
Parliament and of the Council of the European Union on WEEE (Waste Electrical and Electronic
Equipment), as amended by Directive 2003/108/EC, where applicable.
Help preserve the environment! Ensure that this product is recycled at the end of its life. Your
supplier can give details of local arrangements for the disposal of Martin products.
Page 29

Page 30

Page 31

Page 32

www.martin.com • Olof Palmes Allé 18 • 8200 Aarhus N • Denmark
Tel: +45 8740 0000 • Fax +45 8740 0010
 Loading...