

Page 1
PORTABLE ASPHALT MELTER/APPLICATOR - ASSEMBLY & OPERATION
ASSEMBLY
AT10MA
EDI 27223
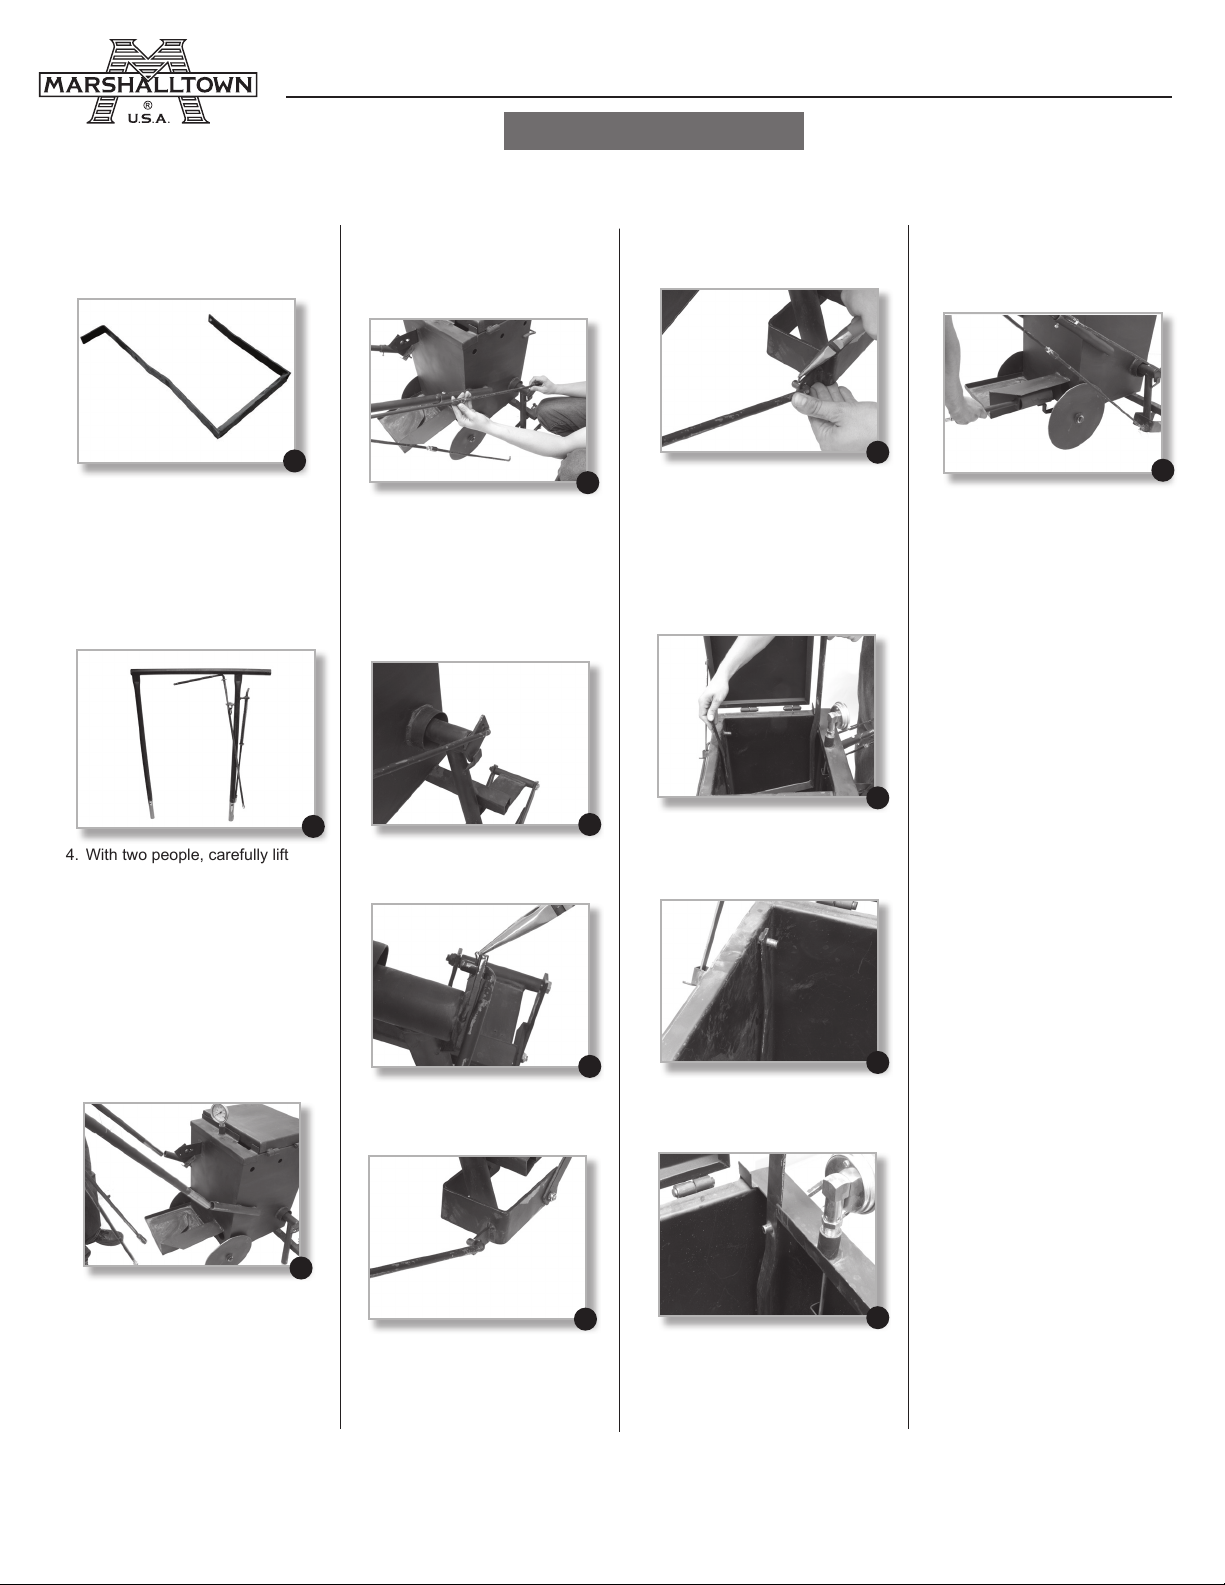
1. Remove the agitator which is
packaged upright next to the
melter.
2. Remove the large outer box.
3. Remove the handle which is
positioned upright next to the
melter by pulling the handle
away from the melter and
lifting.
4. With two people, carefully lift
the melter body out of and
away from the base of the box.
6. Connect two rods that were
shipped inside of the melter
to the levers on the melter
handle.
1
7. Connect the material release
lever (large lever on inside of
handle) to the rectangular plate
above the shoe. This plate
must face the front of the
melter when it is connected
and the rod should be inserted
into the lowest hole.
3
8. Insert cotter pin to secure
the rod.
10. Insert cotter pin to secure
the rod.
6
11. CAUTION: Do Not Pinch
Fingers between agitator and
melter. Lift lid of the melter
andthenangleagitatortot
into the melter with the long
end of agitator on the same
side as the shoe and
thermometer.
7
12. Place short end of agitator on
the peg on the inside of
the melter.
14. Connect torch to propane
bottle and place torch into slot
under melter.
10
14
11
5. Take handle (with rods on
right) and insert it into the steel
sleeves on the outside of the
melter and line up the holes in
the handle and the holes in the
sleeves on the melter and
secure with the bolts and nuts
provided.
Marshalltown, IA USA • Phone 800-888-0127 • 641-753-0127 • www.MARSHALLTOWN.com
4.2018
8
9. Connect the shoe height lever
(large lever on the inside of the
handle) to the shoe.
5
9
13. Apply pressure on long end of
agitator and place on the
other peg in the melter.
Printed in U.S.A. • Impreso en E.U.A. • Imprimé aux États-Unis.
12
13
WS962
Page 2
PORTABLE ASPHALT MELTER/APPLICATOR - ASSEMBLY & OPERATION
OPERATION
10 Gallon Melter/Applicator
MARSHALLTOWN's Portable Asphalt Melter/Applicator is the
fastest and most efficient method for the application of hot applied crack
sealants. The RED704987 will also apply materials from stationary
kettles or any large melter. It can be used without heat for cold pour
materials. Equipped with steel wheels, and a spring loaded hand
controlled release valve. It has a steel shoe for striking off the sealant
with a uniform width. Comes with burner assembly, hose, regulator,
temperature gauge and platform for propane bottles (propane bottle
not included). Various shoe widths are available. This unit is easy to
maneuver for following cracks. No heavy dragging like other wheeled
applicators. Many times faster than hand held pour pots.
CAUTION! Safety precautions must be observed while using all MARSHALLTOWN equipment. Failure to
follow instructions can result in personal injury or damage to the equipment. Caution must be used at all times.
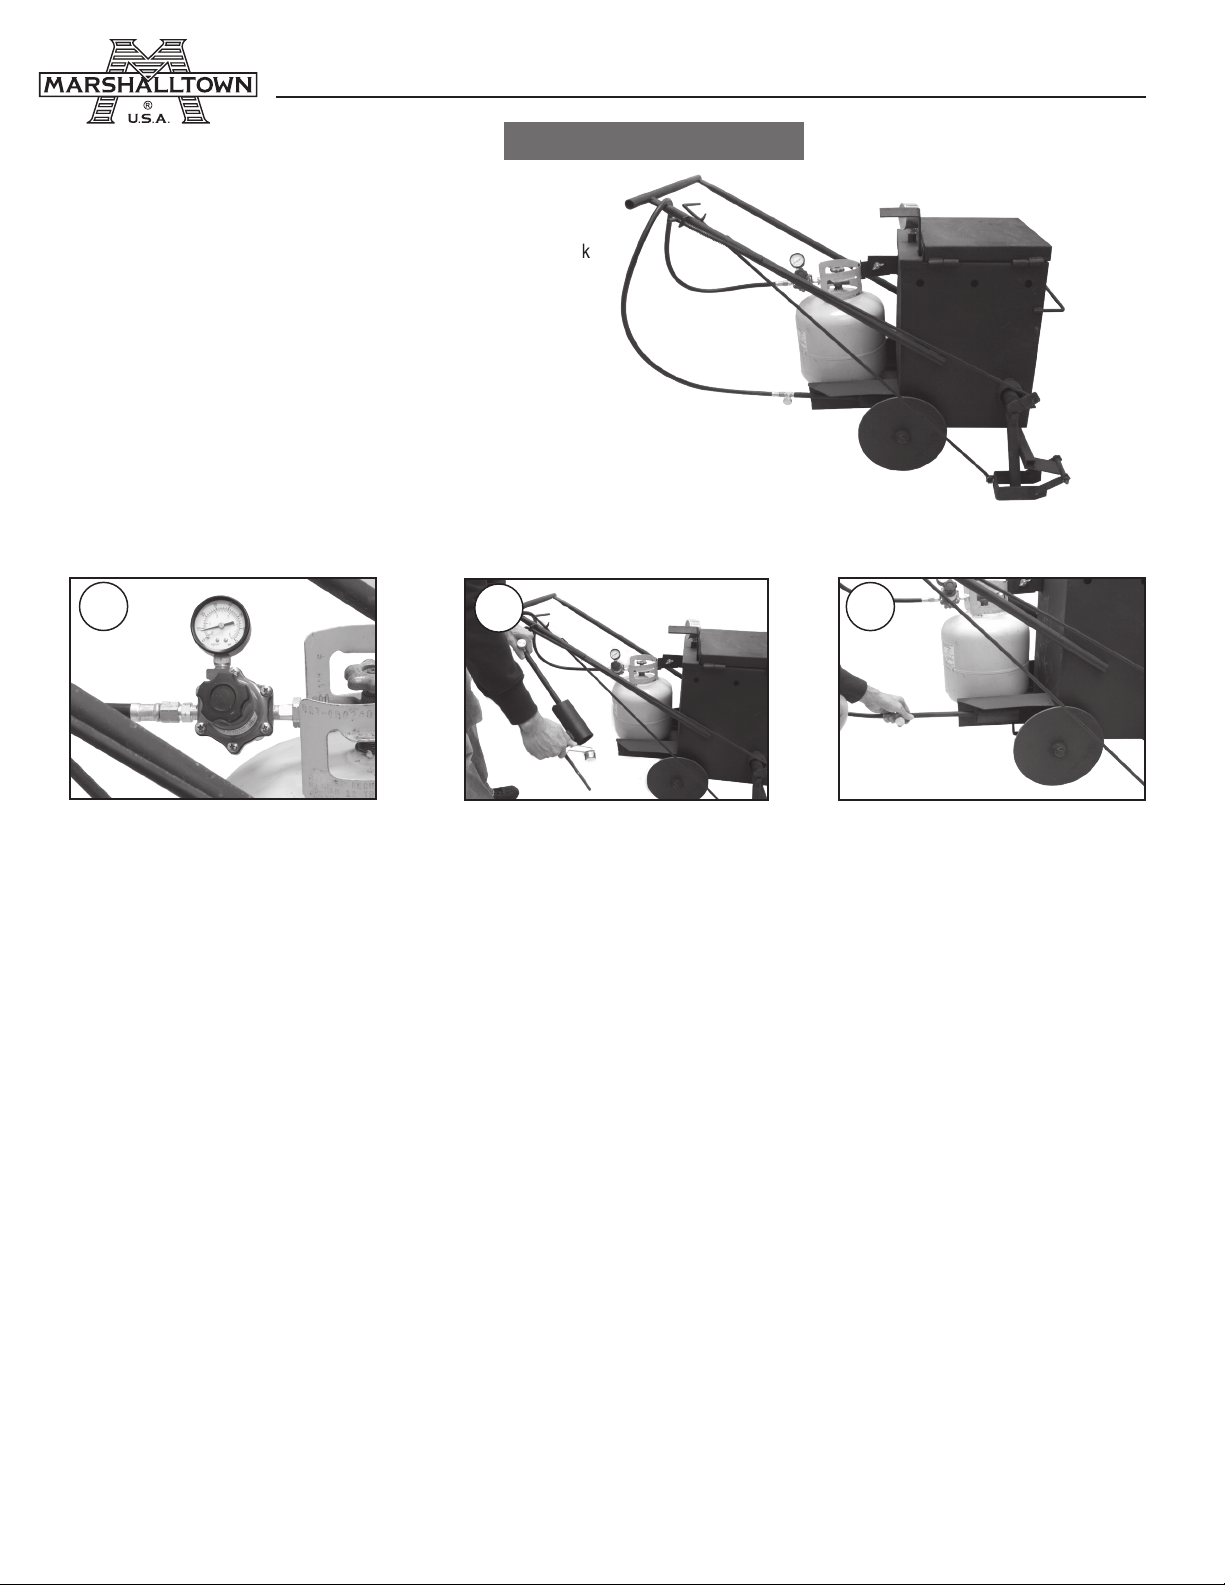
PROPANE TANK
NOT INCLUDED
AT10MA
EDI 27223
1
Keep applicator at least six feet away from combustible material. Remove product to be applied from the box and load it into kettle. If product has a
plastic bag it will melt into heated product when stirred.
Remove torch from kettle before lighting. Turn regulator to 8 PSI (Figure 1) to light torch. Open valve on torch and light using supplied torch flint
spark lighter (Figure 2). Never put lit torch into empty kettle. After lighting torch, insert it into the kettle heating chamber (Figure 3) on low pressure
without smothering the flame. Inserting torch when flame is running full pressure will likely smother flame before updraft begins. If that happens turn
off regulator and remove torch from chamber. Wait five minutes before re-lighting. This will allow for any unburned gas to vent, making it safe to reignite the torch.
Position the torch in the center of the burner chamber making sure to remove any obstacles or obstructions. As the torch starts to heat the chamber
the updraft will allow you to increase the flames intensity to the desired level.
Always follow block manufacturer's melting instructions. While heating, remember that heat penetrates the block of material slowly. The
Melter/Applicator is designed to draw off liquid for use as soon as the pouring temperatures are reached. (See manufacturer's recommendations for
material you are using). Waiting for the material blocks to completely melt is inefficient and time consuming. For best results material should be used
as it liquefies. Frequent stirring will speed melting rate. High flame or extended heating of some materials over 400 degrees can adversely affect the
elastomeric polymers.
Never allow material to exceed 400 degrees Fahrenheit. Flashing can occur when temperature exceeds 400 degrees. Regular operation
temperature can be achieved with the half of full flame. If material becomes too hot, remove the torch immediately and allow cooling to safe
operating temperature.
2
3
If flashing does occur, close cover, turn off gas and remove torch from chamber. Never use water on a hot applicator fire. Only use an approved
fire extinguisher rated for oil fires. It is important to have a proper extinguisher available at all times when using the applicator.
There is no need to drain the kettle after use. However, it is easier to start the next day with minimal leftover material. WARNING! Never allow torch
to fire in an empty kettle.
If the vent holes are covered while the torch is operating the torch will extinguish itself. Cover the applicator when not in use to prevent water from
collecting in the pan.
After each use inspect hose, regulator and torch for unusual wear, cracks and or blockages. Repair and or replace as needed.
Marshalltown, IA USA • Phone 800-888-0127 • 641-753-0127 • www.MARSHALLTOWN.com
Printed in U.S.A. • Impreso en E.U.A. • Imprimé aux États-Unis.
4.2018
WS962
 Loading...