

Page 1
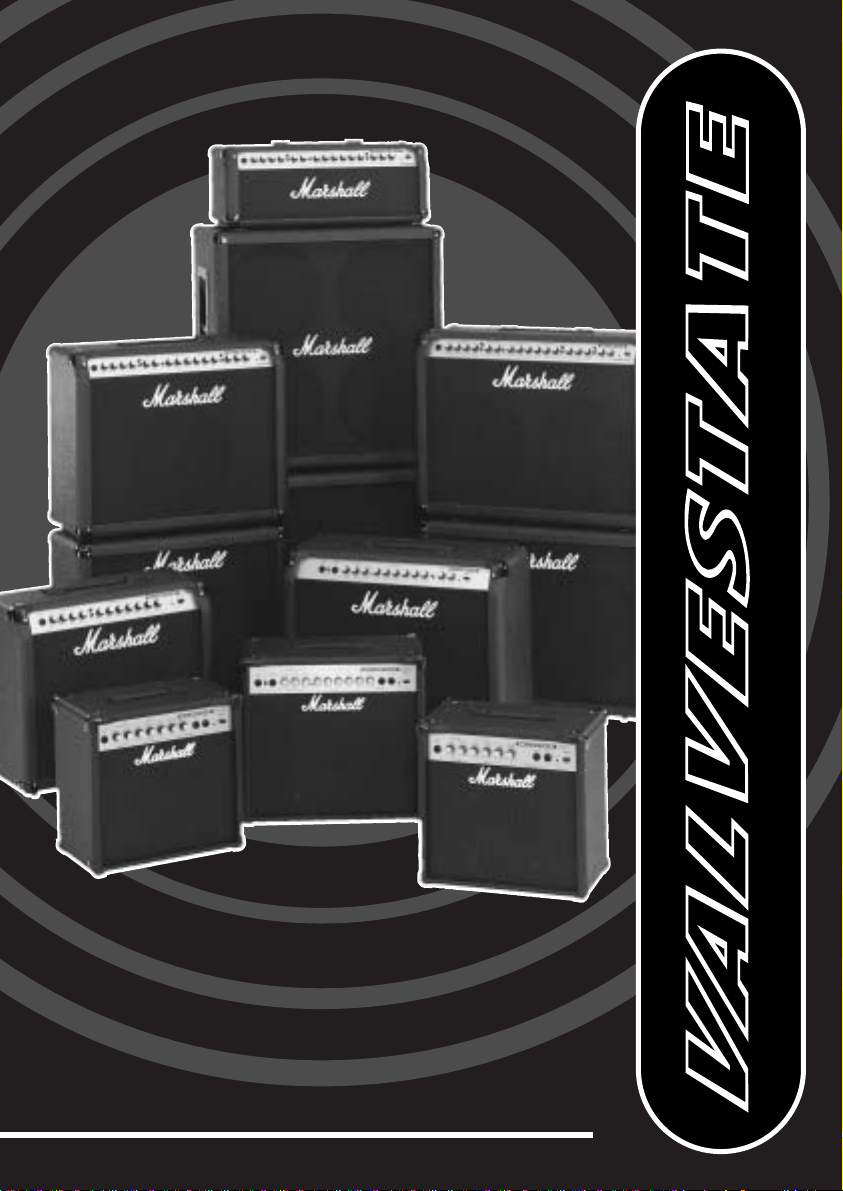
VS15, VS15R, VS30R, VS65R,
VS100 & VS102R Combos &
VS100
Head
Page 2

From Jim Marshall
I would like to personally thank you for selecting
one of our new generation of Valvestate™ amps. From
my early teens, right up to the present day, I have spent
the vast majority of my time working alongside many
great guitarists of all styles. Due to this constant
exposure, I am well aware of what every guitarist wants
to find in an amp; a versatile, durable, high quality unit
that will deliver great tone in every playing situation be it gigging, jamming, recording, rehearsing, warming
up backstage or just practicing at home.
Realising this need, we have invested a great deal
of money and time in researching and developing new
and improved guitar amplification concepts. As a result
of this, our critically acclaimed Valvestate™ technology
was born. This breakthrough technology successfully
emulates the warmth, feel and sheer musicality of an all
valve Marshall power stage without the weight and
expense of valves.
The Valvestate combo that you have just purchased
features the very latest advances in Valvestate™
circuitry. It also has a superb range of features and, I
am proud to say, all of the classic Marshall tone that you
could wish for.
In order to get the most out of your new amp I
would suggest that you read this handbook carefully and
then experiment to your hearts content. Do not be afraid
of using radical settings either - Valvestate™ is radical
technology designed for radical players!
I would like to wish you every success with all of
your musical endeavours and also your new Marshall
amp. I am sure that you will find it a pleasure to play
for many years to come.
Yours Sincerely,
ENGLISH
1
Page 3

2
VS15: 15 Watt Combo
VS15R: 15 Watt Combo with Reverb
Front Panel Features
1. Input
Plug your guitar in here. We recommend that
you always use a high quality screened cable to
help prevent noise, interference and unwanted
feedback.
2. Gain Control 1
This controls the amount of input from the
guitar and the amount of input level from the preamp to the power amp. Turning this up to around
half way, i.e. around five, can result in great clean
sounds, either shimmering and contemporary or
reminiscent of a vintage Marshall, depending on
volume and tone settings. Turning this past half
way will result in your guitar sound crunching up
nicely.
WARNING!
PLEASE READ THE FOLLOWING LIST CAREFULLY
A. ALWAYS ensure that a good quality mains plug is fitted to your Valvestate™ conforming
to the latest B.S.I. standards (UK only) lead supplied.
B. ALWAYS ensure that the plug is wired in accordance with the regulations of your country.
C. DO NOT attempt to remove the chassis. There are no user serviceable parts inside your
Valvestate™.
D. ALWAYS have your Valvestate™ serviced or repaired by competent, qualified service
technicians.
E. NEVER use your Valvestate™ in damp or wet conditions.
F. WARNING This apparatus must be earthed.
The concept behind Marshalls’ revolutionary Valvestate™ technology is to simulate the
performance of a Marshall valve power stage without actually using power valves. By providing the
warmth, feel, responsiveness and sheer musicality of a valve amp without involving the cost and
weight, Valvestate™ has placed the classic Marshall sound in the hands of thousands of waiting
guitarists the world over.
With the release of our VS15, VS15R , VS30R, VS65R, VS100R & VS102R combos and
VS100H amplifier head, we have produced a range of amplification ideal for a host of different
playing environments. The VS15, VS15R and VS30R are perfectly suited to home practice with clean
and overdrive options, headphone sockets and on the VS15R and VS30R reverb. You will also find
that with any of these models backstage warm-ups have never been so much fun or as inspiring, and in
the case of the VS30R neither has jamming with your friends.
The VS65R, VS100R, VS102R and VS100H will easily handle any of the above applications but
also boast many additional features plus a single ECC83 valve in the pre-amp to add greater sparkle to
clean and extra grind and dynamics to crunch and overdrive settings. This flexibility in addition to
their increased power ratings make these amps ideal for rehearsal and full live performance.
This handbook is designed to help you to get the most from your Valvestate™ amplifier.
However, we would stress that the simplest way of getting the best from your Valvestate™ is by
experimenting. Don’t be afraid of using radical settings if that is what is required to create the sound
that you want as Valvestate™ is radical technology designed to handle the most gruelling punishment
of any playing situation with ease.
VS15/15R
ENGLISH
Page 4

3. Gain Control 2
This Gain control takes off where Gain 1
finishes. Having both Gains off will result in no
sound. Turning up Gain 2 will result in a distorted
sound straight away. Turning this control up even
further will result in high gain sounds, ideal for
contemporary styles. Cranking up both Gain 1 and
2 will result in monster distortion.
4. Treble
By adjusting the Treble control you can add or
take away the higher frequencies in your guitar
tone. By turning up the Treble control and
increasing those high frequencies you will make
your guitar sound more cutting.
5. Contour
The Contour control basically shifts the midrange frequencies in your guitar tone. By turning
the Contour fully clockwise you will scoop out of
your sound most of the middle frequencies. If you
combine this setting with heavy distortion and high
Treble and Bass settings you can get a killer
‘thrash’ tone, perfect for brutal rhythms and nasty
leads. By turning the Contour fully anti-clockwise
you can get some great fusion type tones.
We would suggest that you spend some time
experimenting with this control to find the
optimum setting for your style, if you’re not sure
simply leave the control set to 12 o’clock.
6. Bass
Turning the Bass control will effect the
amount of low frequencies or bottom end in your
guitar tone. Rotating this control clockwise will
increase the lower tones and, depending on other
settings, will generally make your tone warmer and
heavier if combined with distortion. By turning the
Bass control anti-clockwise you will reduce the
bass frequencies in your tone which will make your
sound sharper, thinner and more cutting.
It should be remembered that your guitar will
probably be the main influence in your overall
sound and a naturally bassy guitar for example will
probably need less bass on the amplifier than a
naturally trebly guitar.
7. Master Volume
This controls the overall volume of the combo.
Bear in mind when setting this, that to some extent
your settings on Gain 1 and Gain 2 will also effect
your volume.
8. Reverb (On VS15R Only)
Adding Reverb to your guitar tone will add
ambience and size, giving the effect of playing in a
large empty room or hall.
9. Headphone Jack
For use when silent practice is the order of the
day. Connection of headphones will automatically
shut down the internal speaker.
10. Line Out Jack
The Line Out Jack can be used for direct
connection to recording equipment or for
connection to a P.A. system.
11. Power Switch
Switches the mains power to the combo.
VS30R: 30 Watt Combo with Reverb
Front Panel Features
1. Footswitch Jack
Channels on the VS30R can be switched via
either the front panel or via a footswitch. This jack
is for connection of the footswitch (model P801).
2. Channel Select Push Switch
For changing channels via the front panel.
3. Input
Plug your guitar in here. We recommend that
you always use a high quality screened cable to
help prevent noise, interference and unwanted
feedback.
4. Volume
This controls the volume of the Clean Channel
and is useful for balancing the level of the
Overdrive and Clean Channels. Once turned past
half way this channel will start to crunch up your
guitar sound for semi-distorted chords and bluesy
leads.
5. Bass
Turning this Bass control will affect the
amount of low frequencies or bottom end in your
guitar tone when on the Clean Channel. Rotating
this control clockwise will increase the lower tones
and, depending on other settings, will generally
make your tone warmer. By turning the Bass
control anti-clockwise you will reduce the amount
of bass in your tone making your sound sharper,
thinner and more cutting.
It should be remembered that your guitar will
probably be the main influence in your overall
sound and a naturally bassy guitar, for example,
will probably need less bass on the amplifier than a
naturally bright sounding guitar.
3
VS30R
ENGLISH
Page 5

6. Treble
By adjusting this Treble control you can add or
take away the higher frequencies in your guitar
tone when on the Clean Channel. By turning up
the Treble control and increasing those high
frequencies you will make your guitar sound
brighter and more cutting.
7. Ch.2 On LED
When illuminated this LED indicates that the
Overdrive Channel has been selected.
8. Gain
This effectively controls the amount of
distortion on the Overdrive Channel. Keeping this
control low will result in crunchy vintage type
tones. Turning this dial up will increase the
amount of distortion, fully clockwise giving
maximum distortion providing a gain drenched
tone ideal for heavy chords, wailing solos and
ripping harmonics.
9. Bass
This controls the amount of bottom end or low
frequencies in your guitar tone when on the
Overdrive Channel. When using a heavily
distorted tone, increasing the bass will generally
make the tone darker and heavier.
10. Contour
The Contour control basically shifts the midrange frequencies in your guitar tone. By turning
the Contour fully clockwise you will scoop out of
your sound most of the middle frequencies. If you
combine this setting with heavy distortion and high
Treble and Bass settings you can get a killer thrash
tone, perfect for brutal rhythms or solos.
By turning this control fully anti-clockwise
you can get some great fusion type tones. We
would suggest that you spend some time
experimenting with this control to find the
optimum setting for your style, if you’re not sure
simply leave the control set to 12 o’clock.
11. Treble
By adjusting the Treble control you can add or
take away the higher frequencies in your
Overdriven guitar tone. By turning up the Treble
control and increasing those high frequencies you
will give your guitar sound greater cut and more
bite.
12. Volume
This adjusts the overall volume of the
Overdrive Channel, making it possible to balance
levels between the Clean and Overdrive Channels.
13. Reverb
Adding Reverb to your guitar tone will add
ambience and size, giving the effect of playing in a
large empty room or hall.
14. Line Out Jack
The Line Out Jack can be used for direct
connection to recording equipment or for
connection to a P.A. system.
15. Headphone Jack
For use when silent practice is the order of the
day. Connection of headphones will automatically
shut down the internal speaker.
16. Power Switch
Switches the mains power to the combo.
4
Suggested Settings
Before we look at some suggested settings there are a few points that you should remember;
1- Taste in sound is a very personal thing. What might sound great to one guitar player might not appeal to
another guitarist. Therefore these suggested settings may well need some fine tuning to suit your own
individual tastes.
2- One of the main influences on your sound will be your guitar. Each guitar displays certain
characteristics e.g. solid heavyweight guitars with humbuckers tend to be very warm sounding and generally
speaking exhibit a strong bass response, while lighter weight guitars with single coil type pick-ups tend to have
a much brighter sound.
3- There are a whole range of factors that can influence background noise. You will notice, particularly
when using a heavily overdriven tone, that standing too close to the combo when playing can induce feedback
and hum, as can facing the combo, so select your positioning carefully. There may be occasions where you
actually require feedback, here again your positioning will be important and you will need to experiment to find
the most suitable. Other factors that can create unwanted noise include poor quality guitar leads and certain
types of pick-ups (single coil types particularly).
Overleaf there follows three simple settings, for both guitars fitted with single-coil pick-ups and those
fitted with humbuckers. Though you may find these settings suit your taste perfectly they should be
viewed as a starting point from which to develop your own settings.
ENGLISH
Page 6

Humbuckers.
CRUNCH
Channel 2 selected.
LEAD
Channel 2 selected.
Pre-amp
VS30R
Single Coil Pick-ups.
Humbuckers.
Single Coil Pick-ups.
Humbuckers.
Single Coil
Pick-ups.
Humbuckers.
Single Coil
Pick-ups.
Humbuckers.
Single Coil
Pick-ups.
Humbuckers.
Single Coil Pick-ups.
CLEAN
Channel 1 selected.
CRUNCHLEAD CLEAN
*N.B. Reverb settings relate only to model VS15R.
VS15/VS15R
ENGLISH
GAIN 1
0 10
GAIN 1
0 10
Pre-amp
Pre-amp
Pre-amp
GAIN 2
0 10
GAIN 2
0 10
Input
Input
EQ
TREBLE
CONTOUR
0 10
0 10
EQ
TREBLE
CONTOUR
0 10
0 10
MASTER
VOLUME
BASS
0 10
0 10
EQ
EQ
0 10
MASTER
VOLUME
BASS
0 10
HEAD
REVERB
PHONES
0 10
Master
HEAD
REVERB
PHONES
0 10
Master
VS15R
LINE
Power
OUT
POWER
ON
VS15R
LINE
OUT
POWER
ON
Power
Pre-amp
GAIN 1
Input
Input
Input
Input
FOOT
SWITCH
FOOT
SWITCH
FOOT
SWITCH
FOOT
SWITCH
GAIN 2
0 10
0 10
Pre-amp
Pre-amp
GAIN 1
GAIN 2
0 10
0 10
Pre-amp
Pre-amp
GAIN 1
GAIN 2
0 10
0 10
Pre-amp
Pre-amp
GAIN 1
GAIN 2
0 10
0 10
Pre-amp
VOLUME
Input
CHANNEL
SELECT
0 10 0 10 0 10 0 10 0 10 0 10 0 10 0 10 0 10
VOLUME
Input
CHANNEL
SELECT
0 10 0 10 0 10 0 10 0 10 0 10 0 10 0 10 0 10
VOLUME
Input
CHANNEL
SELECT
0 10 0 10 0 10 0 10 0 10 0 10 0 10 0 10 0 10
VOLUME
Input
CHANNEL
SELECT
0 10 0 10 0 10 0 10 0 10 0 10 0 10 0 10 0 10
EQ
TREBLE
CONTOUR
0 10
0 10
EQ
TREBLE
CONTOUR
0 10
0 10
EQ
EQ
TREBLE
CONTOUR
0 10
0 10
EQ
TREBLE
CONTOUR
0 10
0 10
EQ
Channel 1 Clean
BASS
TREBLE GAIN BASS CONTOUR TREBLE VOLUME REVERB
Channel 1 Clean
Channel 1 Clean
BASS
TREBLE GAIN BASS CONTOUR TREBLE VOLUME REVERB
Channel 1 Clean
Channel 1 Clean
BASS
TREBLE GAIN BASS CONTOUR TREBLE VOLUME REVERB
Channel 1 Clean
Channel 1 Clean
BASS
TREBLE GAIN BASS CONTOUR TREBLE VOLUME REVERB
Channel 1 Clean
MASTER
VOLUME
BASS
0 10
EQ
EQ
0 10
MASTER
VOLUME
BASS
0 10
0 10
MASTER
VOLUME
BASS
0 10
0 10
MASTER
VOLUME
BASS
0 10
0 10
Channel 2 Overdrive
CH 2
ON
Channel 2 Overdrive
Channel 2 Overdrive
CH 2
ON
Channel 2 Overdrive
Channel 2 Overdrive
CH 2
ON
Channel 2 Overdrive
Channel 2 Overdrive
CH 2
ON
Channel 2 Overdrive
HEAD
REVERB
PHONES
0 10
Master
HEAD
REVERB
PHONES
0 10
Master
HEAD
REVERB
PHONES
0 10
Master
HEAD
REVERB
PHONES
0 10
Master
VS15R
LINE
Power
OUT
POWER
ON
VS15R
LINE
OUT
POWER
ON
VS15R
LINE
OUT
POWER
ON
VS15R
LINE
OUT
POWER
ON
Power
Power
Power
VS30R
HEAD
LINE
OUT
Master
LINE
OUT
Master
LINE
OUT
Master
LINE
OUT
Master
Power
PHONES
POWER
ON
VS30R
HEAD
PHONES
POWER
ON
VS30R
HEAD
PHONES
POWER
ON
VS30R
HEAD
PHONES
POWER
ON
Power
Power
Power
FOOT
SWITCH
FOOT
SWITCH
Channel 1 Clean
BASS
VOLUME
Input
CHANNEL
SELECT
0 10 0 10 0 10 0 10 0 10 0 10 0 10 0 10 0 10
VOLUME
Input
CHANNEL
SELECT
0 10 0 10 0 10 0 10 0 10 0 10 0 10 0 10 0 10
TREBLE GAIN BASS CONTOUR TREBLE VOLUME REVERB
Channel 1 Clean
Channel 1 Clean
BASS
TREBLE GAIN BASS CONTOUR TREBLE VOLUME REVERB
Channel 1 Clean
Channel 2 Overdrive
CH 2
ON
Channel 2 Overdrive
Channel 2 Overdrive
CH 2
ON
Channel 2 Overdrive
VS30R
HEAD
LINE
OUT
Master
LINE
OUT
Master
Power
PHONES
POWER
ON
VS30R
HEAD
PHONES
POWER
ON
Power
Page 7

6
VS65R: 65 Watt Combo with Reverb
The quality and flexibility of the twin channel
65 Watt VS65R make it ideally suited to a host of
playing situations such as warm-ups, rehearsals,
recording sessions and gigs. The inclusion of a
single ECC 83 valve in the pre-amp section which
operates on both the clean and overdrive channels
helps the VS65R to deliver a truly professional
tone.
Front Panel Features
1. Input
Plug your guitar in here. We recommend that
you always use a high quality screened cable to
help prevent noise, interference and unwanted
feedback.
2. Volume
This controls the volume of the Clean Channel
and is useful for balancing the level of the
Overdrive and Clean Channels. Once turned past
half way this channel will start to add crunch to
your guitar sound for semi-distorted chords and
bluesy leads.
3. Ch1/2 LED
Indicates whether Channel 1 (Clean) or
Channel 2 (Overdrive) has been selected. Red
indicates Channel 2.
4. Bass
Turning the Bass control will affect the
amount of low frequencies or bottom end in your
guitar tone. Rotating this control clockwise will
increase the lower tones and, depending on other
settings, will generally make your tone warmer and
heavier if combined with distortion. By turning the
Bass control anti-clockwise you will reduce the
bass frequencies in your tone which will make your
sound sharper, thinner and more cutting.
It should be remembered that your guitar will
probably be the main influence in your overall
sound and a naturally bassy guitar for example will
probably need less bass on the amplifier than a
naturally trebly guitar.
5. Middle
The middle frequencies are those which
generally affect the size of your sound. By
increasing the amount of middle in your tone your
guitar will sound fatter, conversely reducing the
middle frequencies will make your guitar sound
thinner.
6. Treble
By adjusting this Treble control you can add or
take away the higher frequencies in your guitar
tone when on the Clean Channel. By turning up
the Treble control and increasing those high
frequencies you will make your guitar sound
brighter and more cutting.
7. Ch1/2 Switch
Allows for switching between Channel 1 and
Channel 2 via the front panel.
8. Tone Shift Switch
Re-configures the channel voicing of the Clean
Channel giving the option of a boost in mid-range
frequencies combined with a cut in bass
frequencies.
9. Gain
Controls the input signal from the guitar and
the amount of gain within the pre-amp when on
Channel 2. Increasing the amount of gain will
increase the amount of distortion in your guitar
sound and to some extent will increase the volume.
Having the gain level fairly low will result in
vintage style blues crunch. Increasing this will
result in high gain sounds ideal for more
contemporary distortion tones.
10. Bass
This controls the amount of bottom end or low
frequencies in your guitar tone when on the
Overdrive Channel. When using a heavily
distorted tone, increasing the bass will generally
make the tone darker and heavier.
11. Contour
The Contour control basically shifts the midrange frequencies in your guitar tone. By turning
the Contour fully clockwise you will scoop out of
your sound most of the middle frequencies. If you
combine this setting with heavy distortion and high
Treble and Bass settings you can get a killer
‘thrash’ tone, perfect for brutal rhythms and
aggressive leads. By turning the Contour fully
anti-clockwise you can get some great fusion type
tones.
We would suggest that you spend some time
experimenting with this control to find the
optimum setting for your style, if you’re not sure,
simply leave the control set to 12 o’clock.
VS65R
ENGLISH
Page 8

7
12. Treble
By adjusting the Treble control you can add or
take away the higher frequencies in your guitar tone.
By turning up the Treble control and increasing
those high frequencies you will make your guitar
sound more cutting.
13. Volume
This controls the volume of Channel 2 and
allows you to balance the volumes of Channel 1 and
Channel 2.
14. FX Mix
When using the FX Loop on the rear panel the
FX Mix allows you to dial in the desired amount of
effected signal into your overall sound. Turning the
control fully clockwise will result in a fully effected
sound, (i.e. no dry signal and turning the control
fully anti-clockwise will result in a fully dry sound).
15. Reverb
Adding Reverb to your guitar tone will add
ambience and size, giving the effect of playing in a
large empty room or hall.
16. Power LED
This will light up when the combo is on.
17. Power Switch
Switches the mains power to the combo.
Rear Panel Features
1. Mains Input
For connection to mains supply. Always ensure
that your plug is wired correctly and fitted with the
correctly rated fuse.
2. Headphones Jack
For connection of headphones. Connecting
headphones will automatically shut off the internal
speaker.
3. Footswitch Jack
It is possible to change channels on the VS65R
by either the front panel switch or via the optional
one way footswitch. This jack is for connection of
the one way footswitch. The optional footswitch,
model PED 801 features an LED to show when
Channel 2 is selected.
- Effects Loop -
The effects loop is used for connecting an
external effects processor or floor pedal. The effects
loop on the Marshall VS65R is sensitive enough to
suit the level of either type (processor or floor pedal)
to ensure that a perfect match is made.
Generally it is advisable to connect time based
effects such as Chorus or Delay through the loop
only and any external distortion type effects directly
between the guitar and the combo.
4. FX Return
For connection to the output of an external
effects processor or floor pedal.
5. FX Send
For connection to the input of an external
effects processor or floor pedal.
6. Line Out Jack
The Line Out Jack can be used for connection
to recording equipment for direct recording or for
connection to a P.A. system.
Suggested Settings
Before we look at some suggested settings there are a few points that you should remember;
1- Taste in sound is a very personal thing. What might sound great to one guitar player might not appeal to another
guitarist. Therefore these suggested settings may well need some fine tuning to suit your own individual tastes.
2- One of the main influences on your sound will be your guitar. Each guitar displays certain characteristics e.g. solid
heavyweight guitars with humbuckers tend to be very warm sounding and generally speaking exhibit a strong bass response,
while lighter weight guitars with single coil type pick-ups tend to have a much brighter sound.
3- There are a whole range of factors that can influence background noise. You will notice, particularly when using a
heavily overdriven tone, that standing too close to the combo when playing can induce feedback and hum, as can facing the
combo, so select your positioning carefully. There may be occasions where you actually require feedback, here again your
positioning will be important and you will need to experiment to find the most suitable. Other factors that can create unwanted
noise include poor quality guitar leads and certain types of pick-ups (single coil types particularly).
Below there follows four simple settings, for both guitars fitted with single-coil pick-ups and those fitted with humbuckers.
Though you may find these settings suit your taste perfectly they should be viewed as a starting point from which to develop your
own settings.
ENGLISH
Page 9

Channel 2 Overdrive
Channel 1 Clean
VS65R
0 10
0 10
0 10
0 10
0 10
0 10 0 10
0 10
0 10
0 10
0 10
BASS
MIDDLE
VOLUME
Ch1/2
Ch1/2
Tone
Shift
GAIN
BASS
CONTOUR
TREBLE
VOLUME
FX MIX
REVERB
POWER
ON
Power
TREBLE
Input
Channel 2 Overdrive
Channel 1 Clean
VS65R
0 10
0 10
0 10
0 10
0 10
0 10 0 10
0 10
0 10
0 10
0 10
BASS
MIDDLE
VOLUME
Ch1/2
Ch1/2
Tone
Shift
GAIN
BASS
CONTOUR
TREBLE
VOLUME
FX MIX
REVERB
POWER
ON
Power
TREBLE
Input
CRUNCH
Channel 2 selected
BLUES / ROCK
Channel 2 selected
THRASH
Channel 2 selected
Single Coil
Pick-ups.
Humbuckers.
BRIGHT CLEAN
Channel 1 selected.
Tone switch pushed IN.
Tone switch pushed IN.
VS65R
Channel 2 Overdrive
Channel 1 Clean
VS65R
0 10
0 10
0 10
0 10
0 10
0 10 0 10
0 10
0 10
0 10
0 10
BASS
MIDDLE
VOLUME
Ch1/2
Ch1/2
Tone
Shift
GAIN
BASS
CONTOUR
TREBLE
VOLUME
FX MIX
REVERB
POWER
ON
Power
TREBLE
Input
Channel 2 Overdrive
Channel 1 Clean
VS65R
0 10
0 10
0 10
0 10
0 10
0 10 0 10
0 10
0 10
0 10
0 10
BASS
MIDDLE
VOLUME
Ch1/2
Ch1/2
Tone
Shift
GAIN
BASS
CONTOUR
TREBLE
VOLUME
FX MIX
REVERB
POWER
ON
Power
TREBLE
Input
Channel 2 Overdrive
Channel 1 Clean
VS65R
0 10
0 10
0 10
0 10
0 10
0 10 0 10
0 10
0 10
0 10
0 10
BASS
MIDDLE
VOLUME
Ch1/2
Ch1/2
Tone
Shift
GAIN
BASS
CONTOUR
TREBLE
VOLUME
FX MIX
REVERB
POWER
ON
Power
TREBLE
Input
Channel 2 Overdrive
Channel 1 Clean
VS65R
0 10
0 10
0 10
0 10
0 10
0 10 0 10
0 10
0 10
0 10
0 10
BASS
MIDDLE
VOLUME
Ch1/2
Ch1/2
Tone
Shift
GAIN
BASS
CONTOUR
TREBLE
VOLUME
FX MIX
REVERB
POWER
ON
Power
TREBLE
Input
Channel 2 Overdrive
Channel 1 Clean
VS65R
0 10
0 10
0 10
0 10
0 10
0 10 0 10
0 10
0 10
0 10
0 10
BASS
MIDDLE
VOLUME
Ch1/2
Ch1/2
Tone
Shift
GAIN
BASS
CONTOUR
TREBLE
VOLUME
FX MIX
REVERB
POWER
ON
Power
TREBLE
Input
Channel 2 Overdrive
Channel 1 Clean
VS65R
0 10
0 10
0 10
0 10
0 10
0 10 0 10
0 10
0 10
0 10
0 10
BASS
MIDDLE
VOLUME
Ch1/2
Ch1/2
Tone
Shift
GAIN
BASS
CONTOUR
TREBLE
VOLUME
FX MIX
REVERB
POWER
ON
Power
TREBLE
Input
Single Coil
Pick-ups.
Humbuckers.
Single Coil
Pick-ups.
Humbuckers.
Single Coil
Pick-ups.
Humbuckers.
Please Note :
Volume and Reverb should be adjusted to taste.
ENGLISH
Page 10

9
VS100R/VS102R: 100 Watt Combo with
Reverb
VS100H: 100 Watt Head with Reverb
By taking full advantage of the advances made by
our Research and Development Department since the
release of our first Valvestate range we have produced
the VS100R & VS102R (combos) and VS100H
(head). Sharing exactly the same facilities these 100
Watt models both feature an ECC 83 valve driven preamp and include a number of brand new functions
such as switching between Clean, Overdrive 1 and
Overdrive 2 channels, making them ideal for the
gigging guitarist. In addition separate reverb controls
for Clean and Overdrive channels and lastly a Power
Dimension Switch specially designed to emulate, at
lower volume levels, the extra saturation found when
playing through a transformer and valve power stage
pushed to the limit, make this amp a real force to be
reckoned with.
Front Panel Features
1. Input
Plug your guitar in here. We recommend that
you always use a high quality screened cable to help
prevent noise, interference and unwanted feedback.
2. Volume
This controls the volume of the Clean Channel
and is useful for balancing the level of the Overdrive
and Clean Channels. Once turned past half way this
channel will start to crunch up your guitar sound for
semi-distorted chords and bluesy leads.
3. CLN/OD LED
Indicates whether Clean or Overdrive has been
selected. Red indicates Overdrive.
4. Bass
Turning the Bass control will effect the amount
of low frequencies or bottom end in your guitar tone.
Rotating this control clockwise will increase the lower
tones and, depending on other settings, will generally
make your tone warmer and heavier if combined with
distortion. By turning the Bass control anti-clockwise
you will reduce the bass frequencies in your tone
which will make your sound sharper, thinner and
more cutting.
It should be remembered that your guitar will
probably be the main influence in your overall sound
and a naturally bassy guitar for example will probably
need less bass on the amplifier than a naturally trebly
guitar.
5. Middle
The middle frequencies are those which generally
affect the size of your sound. By increasing the
amount of middle in your tone your guitar will sound
fatter, conversly reducing the middle frequencies will
make your guitar sound thinner.
6. Treble
By adjusting this Treble control you can add or
take away the higher frequencies in your guitar tone
when on the Clean Channel. By turning up the Treble
control and increasing those high frequencies you will
make your guitar sound brighter and more cutting.
7. Clean / Overdrive Switch
Allows for switching between Clean and
Overdrive via the front panel.
8. Tone Shift Switch
Re-configures the channel voicing of the clean
Channel giving the option of a boost in mid-range
frequencies combined with a cut in bass frequencies.
9. Gain
Controls the input signal from the guitar and the
amount of gain within the pre-amp when on
Overdrive 1 channel. Increasing the amount of gain
will increase the amount of distortion in your guitar
sound and to some extent increase the volume.
Having the gain level fairly low will result in vintage
style blues crunch. Increasing this will result in
higher gain sounds ideal for classic rock tones.
10. Volume
Controls the volume of Overdrive 1 channel.
11. OD 1/2 Switch
Switches between Overdrive 1 channel and
Overdrive 2 channel. Overdrive 1 can be looked at as
the traditional overdrive or distortion channel giving
excellent crunchy blues rock tones, whereas
Overdrive 2 takes off where Overdrive 1 finishes
delivering searing high gain sounds.
12. Gain
This Gain control operates in the same way as the
previous Gain control (item 9). Increasing this Gain
control will increase the amount of distortion on
Overdrive 2.
13. L.E.D.
Indicates selection of Overdrive 1 or Overdrive 2.
14. Contour
The Contour control basically shifts the mid-range
frequencies in your guitar tone when on Overdrive 2. By
turning the Contour fully clockwise you will scoop out of
your sound most of the middle frequencies. If you
VS100R
VS102R
VS100H
ENGLISH
Page 11

10
combine this setting with heavy distortion and high Treble
and Bass settings you can get a killer ‘thrash’ tone, perfect
for brutal rhythms and vicious leads. By turning the
Contour fully anti-clockwise you can get some great
fusion type tones. We would suggest that you spend some
time experimenting with this control to find the optimum
setting for your style, if you’re not sure, simply leave the
control set to 12 o’clock.
15. Volume
Controls the volume of Overdrive 2 channel.
-Overdrive Equalisation-
The following Bass, Middle and Treble controls
are used for both Overdrive channels.
16. Bass
This controls the amount of bottom end or low
frequencies in your guitar tone. When using a heavily
distorted tone, increasing the bass will generally make
the tone darker and heavier.
17. Middle
The middle frequencies are those which generally
affect the size of your sound. By increasing the
amount of middle in your tone your guitar will sound
fatter, conversly reducing the middle frequencies will
make your guitar sound thinner.
18. Treble
By adjusting the Treble control you can add or
take away the higher frequencies in your guitar tone.
By turning up the Treble control and increasing those
high frequencies you will make your guitar sound
more cutting.
19. Power Dimension Switch
The Power Dimension Switch is designed for use
in situations where you have set your amp to get your
sound but it is simply too loud for the given situation.
Its function is to emulate, at lower volume levels the
extra saturation found when playing through a
transformer and valve power stage pushed to the limit.
20. FX Loop Level
It is possible to adjust the FX Loop Level 10dB
to ensure that the FX Loop is perfectly suited to the
type of effects unit that you are using, i.e. rack
mounted or floor pedal.
21. FX Mix
When using the FX Loop on the rear panel the FX
Mix allows you to dial in the desired amount of effected
signal into your overall sound. Turning the control fully
clockwise will result in a fully effected sound, i.e. no dry
signal and turning the control fully anti-clockwise will
result in a fully dry sound.
-Reverb-
Adding reverb to your guitar tone will add ambience
and size, giving the effect of playing in a large empty
room or hall. The VS100R, VS100H & VS102R feature
separate reverb levels for the Clean and Overdrive
channels giving you greater control over your sound.
22. Clean Reverb
Dictates the amount of reverb on the Clean
Channel.
23. Overdrive Reverb
Controls the amount of reverb on the Overdrive
Channel.
24. Power Switch
Switches the mains power to the amplifier.
Rear Panel Features
1. Mains Input
For connection to mains. Always ensure that a good
quality lead and plug are used and wired in accordance
with your country’s regulations.
2. Head Phone Jack
For connection of headphones. Connection of
headphones will automatically cut off internal speaker.
3. & 4. Loudspeaker Jacks
For connection to external loudspeakers. The
minimum operating impedance for the VS100R, VS100H
& VS102R is 4 Ohms. The internal speaker on the
VS100R/VS102R is rated at 8 Ohms, therefore if using an
external speaker in conjunction with the internal speaker,
the external speaker should be rated at 8 Ohms.
5. Footswitch Jack
For connection of footswitch. Both the
VS100R/VS102R and VS100H are three channel
amplifiers and it is possible to switch between the Clean
Channel and Overdrive 1 and Overdrive 2 Channels via
the footswitch which also features LED’s to indicate
status.
6. Effects Return Jack
For connection from the output of an external
effects processor.
7. Effects Send Jack
For connection to the input of an external effects
processor.
8. D.I. Jack
For connection to recording or P.A. equipment,
featuring Marshall’s acclaimed Speaker Emulation
circuitry as featured on the JTM60 range.
ENGLISH
Page 12

CRUNCH
Overdrive 1 Channel selected
BLUES / ROCK
Overdrive 2 Channel selected
THRASH
Overdrive 2 Channel selected
OVERDRIVE
REVERB
Overdrive 2Overdrive 1 Overdrive EQ
Power
Clean
Input
3 Channel Amplifier
POWER
ON
CLN / OD
Tone
Shift
OD
1/2
ON
Power
Dimension
VOLUME
0 10 0 10 0 10 0 10 0 10 0 10 0 10 0 10 0 10 0 10 0 10 0 10 0 10 0 10 0 10
BASS
CLN
/OD
MIDDLE TREBLE GAIN VOLUME GAIN CONTOUR VOLUME BASS MIDDLE TREBLE FX MIX CLEAN
REVERB
FX Loop
Level
VS100R
BRIGHT CLEAN
Clean Channel selected
Tone switch pushed IN, P.D. Switch OUT
P.D. Switch OUT
P.D. Switch OUT
P.D. Switch IN
OVERDRIVE
REVERB
Overdrive 2Overdrive 1 Overdrive EQ
Power
Clean
Input
3 Channel Amplifier
POWER
ON
CLN / OD
Tone
Shift
OD
1/2
ON
Power
Dimension
VOLUME
0 10 0 10 0 10 0 10 0 10 0 10 0 10 0 10 0 10 0 10 0 10 0 10 0 10 0 10 0 10
BASS
CLN
/OD
MIDDLE TREBLE GAIN VOLUME GAIN CONTOUR VOLUME BASS MIDDLE TREBLE FX MIX CLEAN
REVERB
FX Loop
Level
VS100R
Single Coil
Pick-ups.
Single Coil
Pick-ups.
Single Coil
Pick-ups.
Single Coil
Pick-ups.
Humbuckers.
Humbuckers.
Humbuckers.
Humbuckers.
VS100R/H & VS102R
Suggested Settings
Before we look at some suggested settings there are a few points
that you should remember;
1- Taste in sound is a very personal thing. What might sound
great to one guitar player might not appeal to another guitarist.
Therefore these suggested settings may well need some fine tuning to
suit your own individual tastes.
2- One of the main influences on your sound will be your guitar.
Each guitar displays certain characteristics e.g. solid heavyweight
guitars with humbuckers tend to be very warm sounding and generally
speaking exhibit a strong bass response, while lighter weight guitars
with single coil type pick-ups tend to have a much brighter sound.
3- There are a whole range of factors that can influence
background noise. You will notice, particularly when using a heavily
overdriven tone, that standing too close to the combo when playing can
induce feedback and hum, as can facing the combo, so select your
positioning carefully. There may be occasions where you actually
require feedback, here again your positioning will be important and you
will need to experiment to find the most suitable. Other factors that can
create unwanted noise include poor quality guitar leads and certain
types of pick-ups (single coil types particularly).
Below there follows four simple settings, for both guitars fitted
with single-coil pick-ups and those fitted with humbuckers. Though
you may find these settings suit your taste perfectly they should be
viewed as a starting point from which to develop your own settings.
Please Note :
Volume and Reverb should be adjusted to taste.
ENGLISH
 Loading...