

Page 1
CV-RCP-V2 Touchscreen RCP Camera Control Quick Start Guide
Initial Startup & Connection Instructions for Marshall CV-RCP-V2
Package contents
1 x CV-RCP-V2 Camera Control RCP Touchscreen unit
1 x Universal 12V Power Supply (2.1mm connector) unit
Required for hookup
3-pin XLR cable to desired lengths (male into RCP) and 3-pin XLR splits for
multiple camera setups
Connection instructions
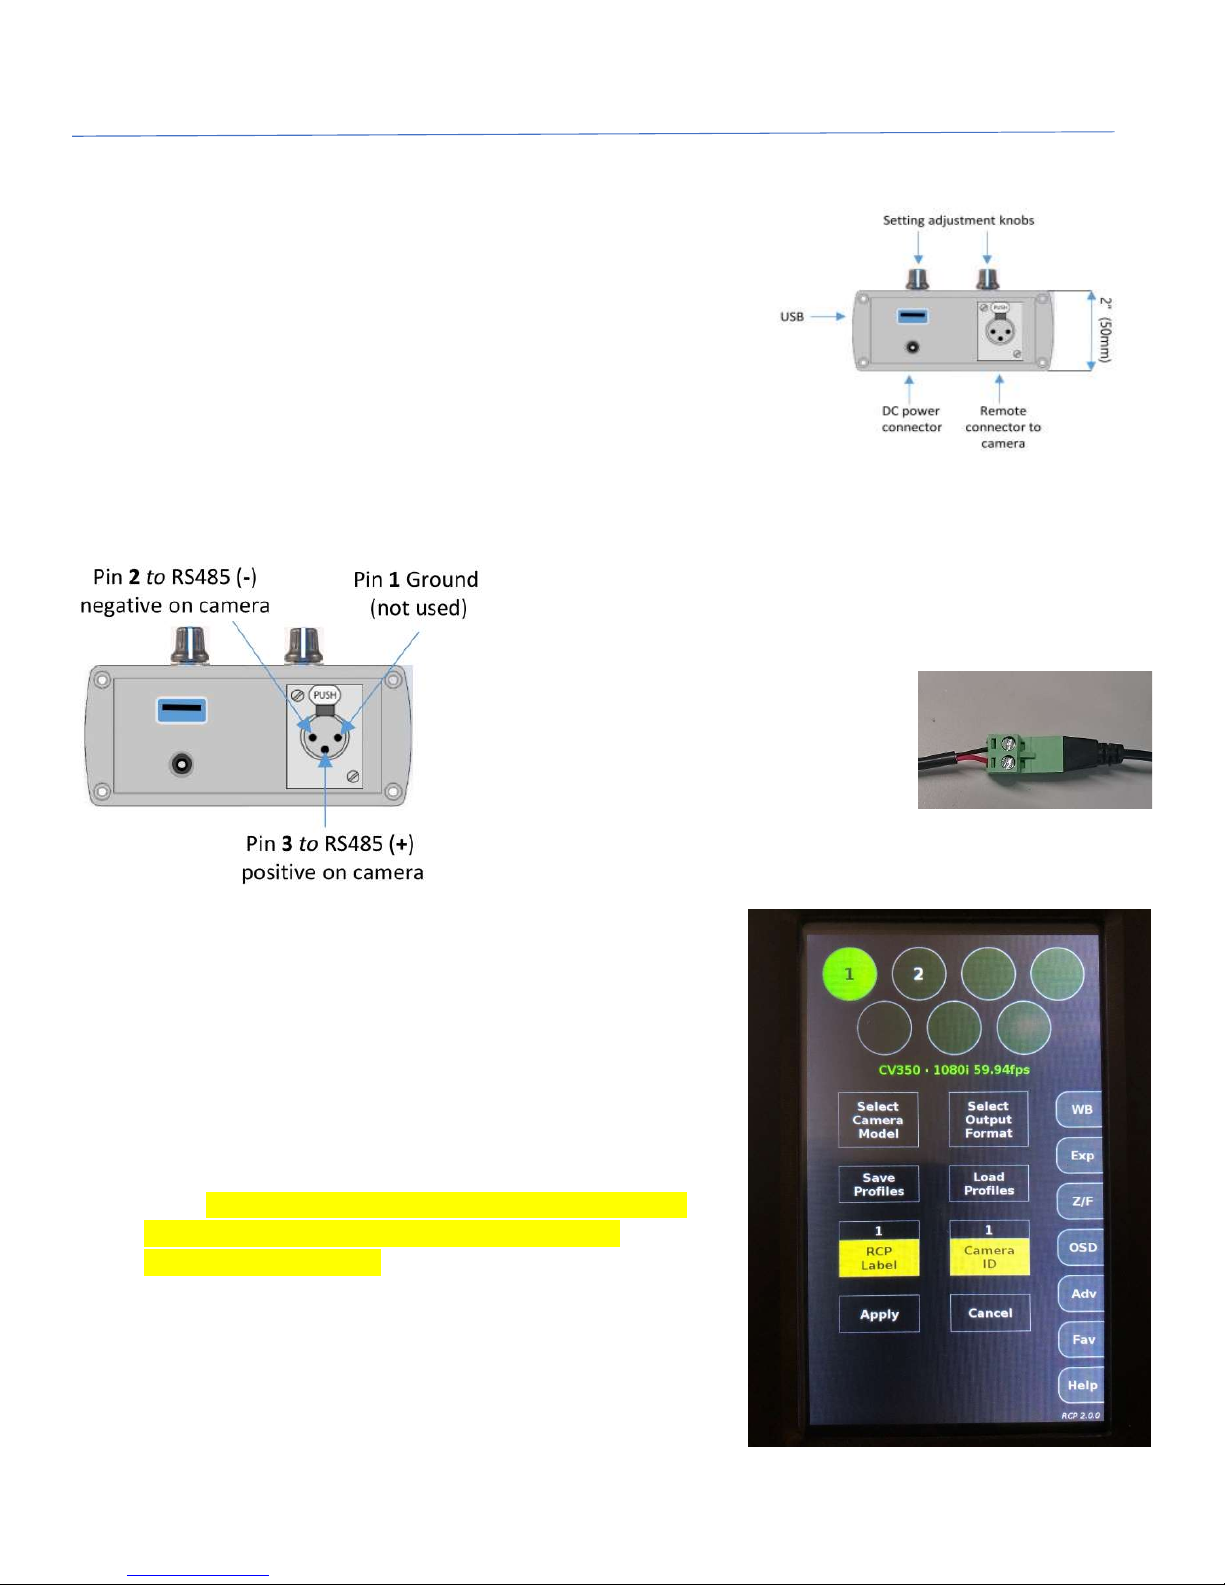
1) Connect the 12V Power Supply to the DC power connector on
RCP and plug into a wall outlet to power up and initialize software (first
boot up might take up to 25 seconds).
2) Source and connect the male end of a 3-pin XLR cable to the
TOP of the RCP unit (see pic to left) and push into place.
3) Splice raw XLR wires on cameraside and insert into RS485 phoenix
connector (on breakout cable) when using
camera models CV505/565/345/365 (see pic
to the right) or directly into RS485 port on
rear panel of CV502/343/350 camera models.
4) Hold down first camera assignment (circle) on upper screen of
RCP unit (4-5 seconds), then Select Camera Model, Select Output
Format, assign RCP Label ID, and Camera ID# to 1 (one) and
match in OSD Menu of Camera under DISPLAY CONTROL > CAM
ID > 1. Assign Camera Model on RCP to correspond to Camera
being used and push “Apply” (see pic to right)…use 2, 3, 4, 5, 6,
and 7 on multiple cameras being setup.
5) Repeat up to 7 (seven) cameras on RCP and OSD Menu of
Camera to match control position on RCP, use Y-cable splitters at
each camera.
6) Once setup, try to open OSD (under OSD tab) or make
adjustments to WB, Exp, or other to see if control is operational.
7) NOTE: If control doesn’t work initially, swap the wires on the
phoenix connector of camera (will not damage either
component) and try again.
8) For multi-camera setup use 3-pin XLR (Y-SPLITS) at each camera
or a multi-splitter.
Help Tab
CV-RCP-V2 is setup with a Help tab feature to explain certain buttons in
RCP. The “Help” tab will flash while in the help mode and different
buttons can be pressed for further explanation.
 Loading...