

Page 1
File #E21609
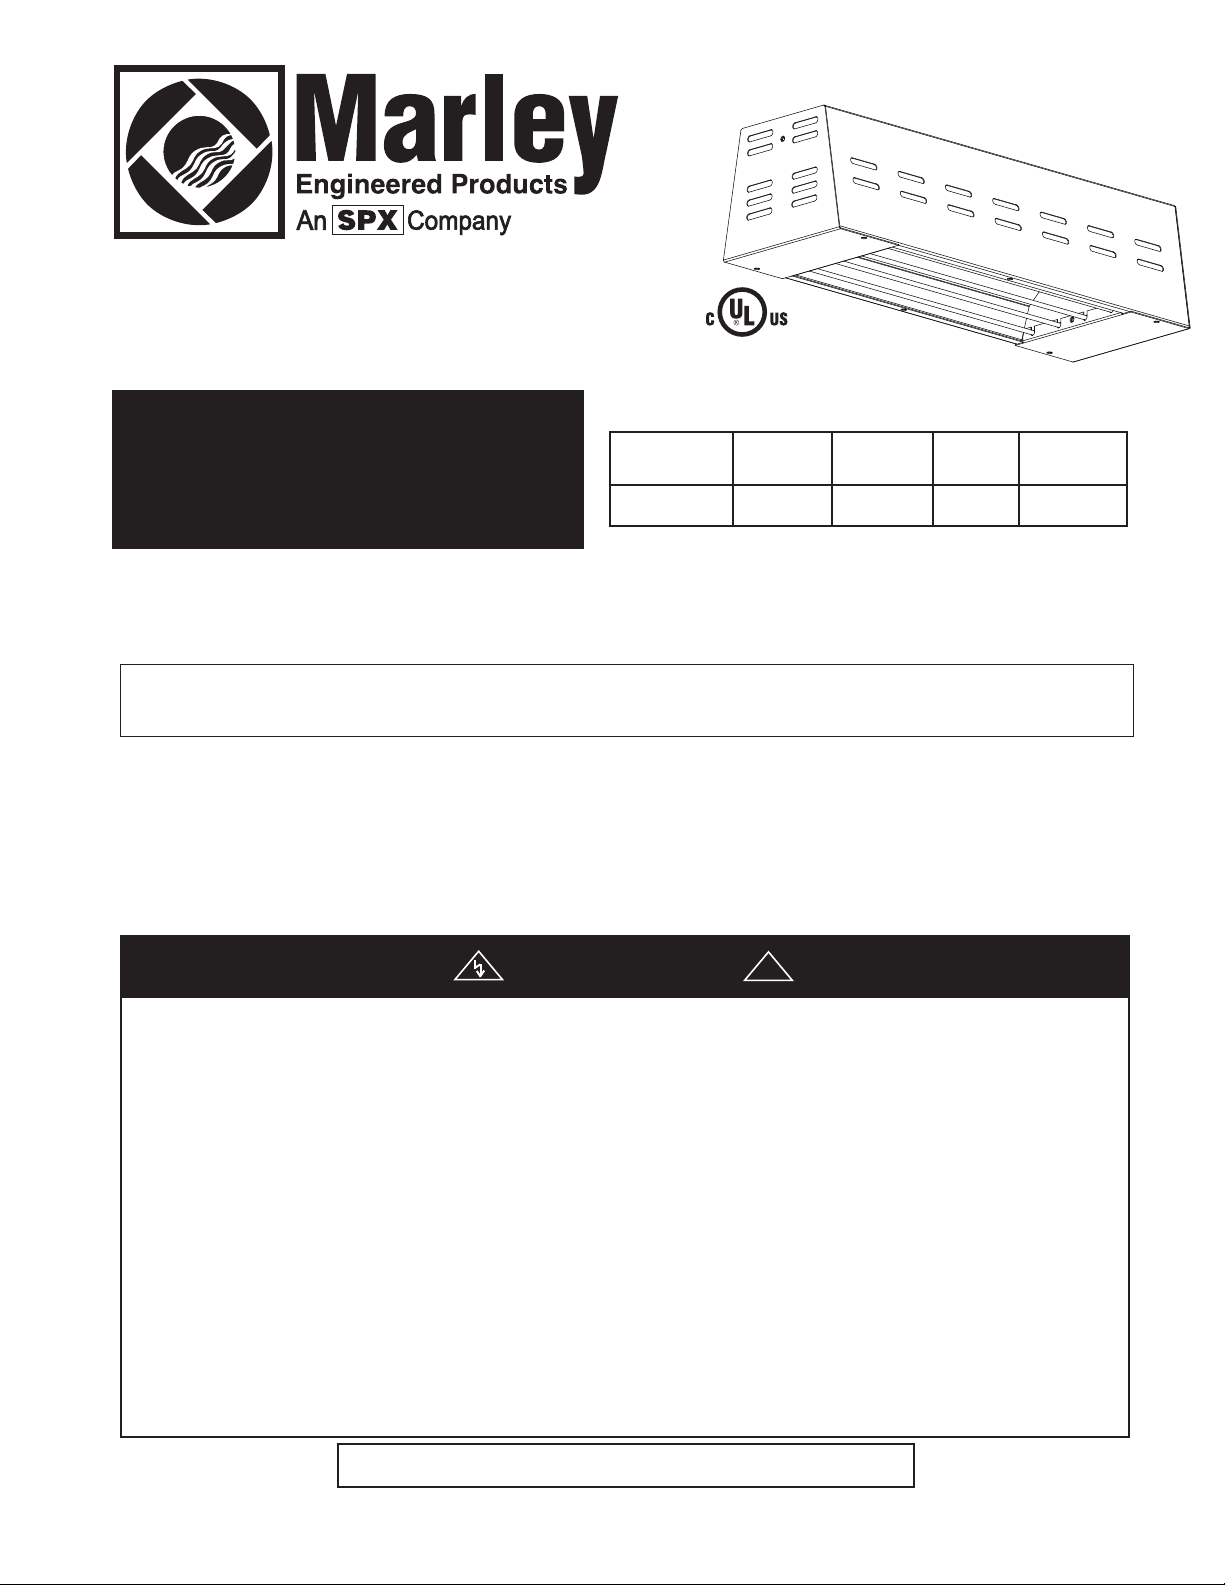
RADIANT
MODEL
NO. VOLTS WATTS AMPS BTU/HR
PLUG-IN HEATERS
FRR10512B 120 500 4.2 1706
Installation & Maintenance Instructions
Dear Owner,
Congratulations! Thank you for purchasing this new heater manufactured by Marley Engineered Products. You have made
a wise investment selecting the highest quality product in the heating industry. Please carefully read the installation and
maintenance instructions shown in this manual. You should enjoy years of efficient heating comfort with this product from
Marley Engineered Products... the industry’s leader in design, manufacturing, quality and service.
... TheEmployees of Marley Engineered Products
WARNING
Read Carefully - This instruction sheet contains vital infor-
mation for the proper installation, use, and efficient operation
of the heater described. Carefully read this manual before
installation, cleaning, or operation of the heater. Failure to
adhere to the instructions could result in fire, electrical shock,
death, serious personal injury, or property damage. Save
these instructions and review frequently for continuing safe
operation and instructing future users.
CAUTION - TO REDUCE RISK OF FIRE AND ELECTRIC
SHOCK:
1. Disconnect all power coming to heater at main service panel
before wiring, installing elements, servicing, or disassembling
heater.
2. The outlet to which the heater is connected must be a 120 volt
AC circuit. The AC circuit must be protected by a 15 or 20 amp
fuse or circuit breaker, and in accordance with the National
Electrical Code and any Local Codes.
3. This heater is provided with a grounded-type plug and cord as
shown in Fig. 1. An adapter is available for connecting three
blade grounding-type plugs to two-slot receptacles. The green
grounding lug extending from the adapter must be connected to
a permanent ground such as a properly grounded outlet box.
The adapter should not be used if a three-slot grounded receptacle is available.
4. Plug heater power cord directly into the electrical outlet.
Never use an extension cord with this heater.
5. Minimum clearances, as specified, must be maintained. Keep
combustible material, such as boxes, crates, clothing etc., away
from heater.
6. This heater is not suitable for use in hazardous locations as
described by the National Fire Protection Association (NFPA).
Do not use in areas where paint, gasoline, or other flammable
liquids are used or stored.
7. This heater is not suitable for use in corrosive, wet or high
humidity areas such as swimming pools areas, etc. For indoor
use only.
8. This heater is intended for ceiling mounting using chains provided. Do not recess heater. Elements must be horizontal.
!
SAVE THESE INSTRUCTIONS
Page 2
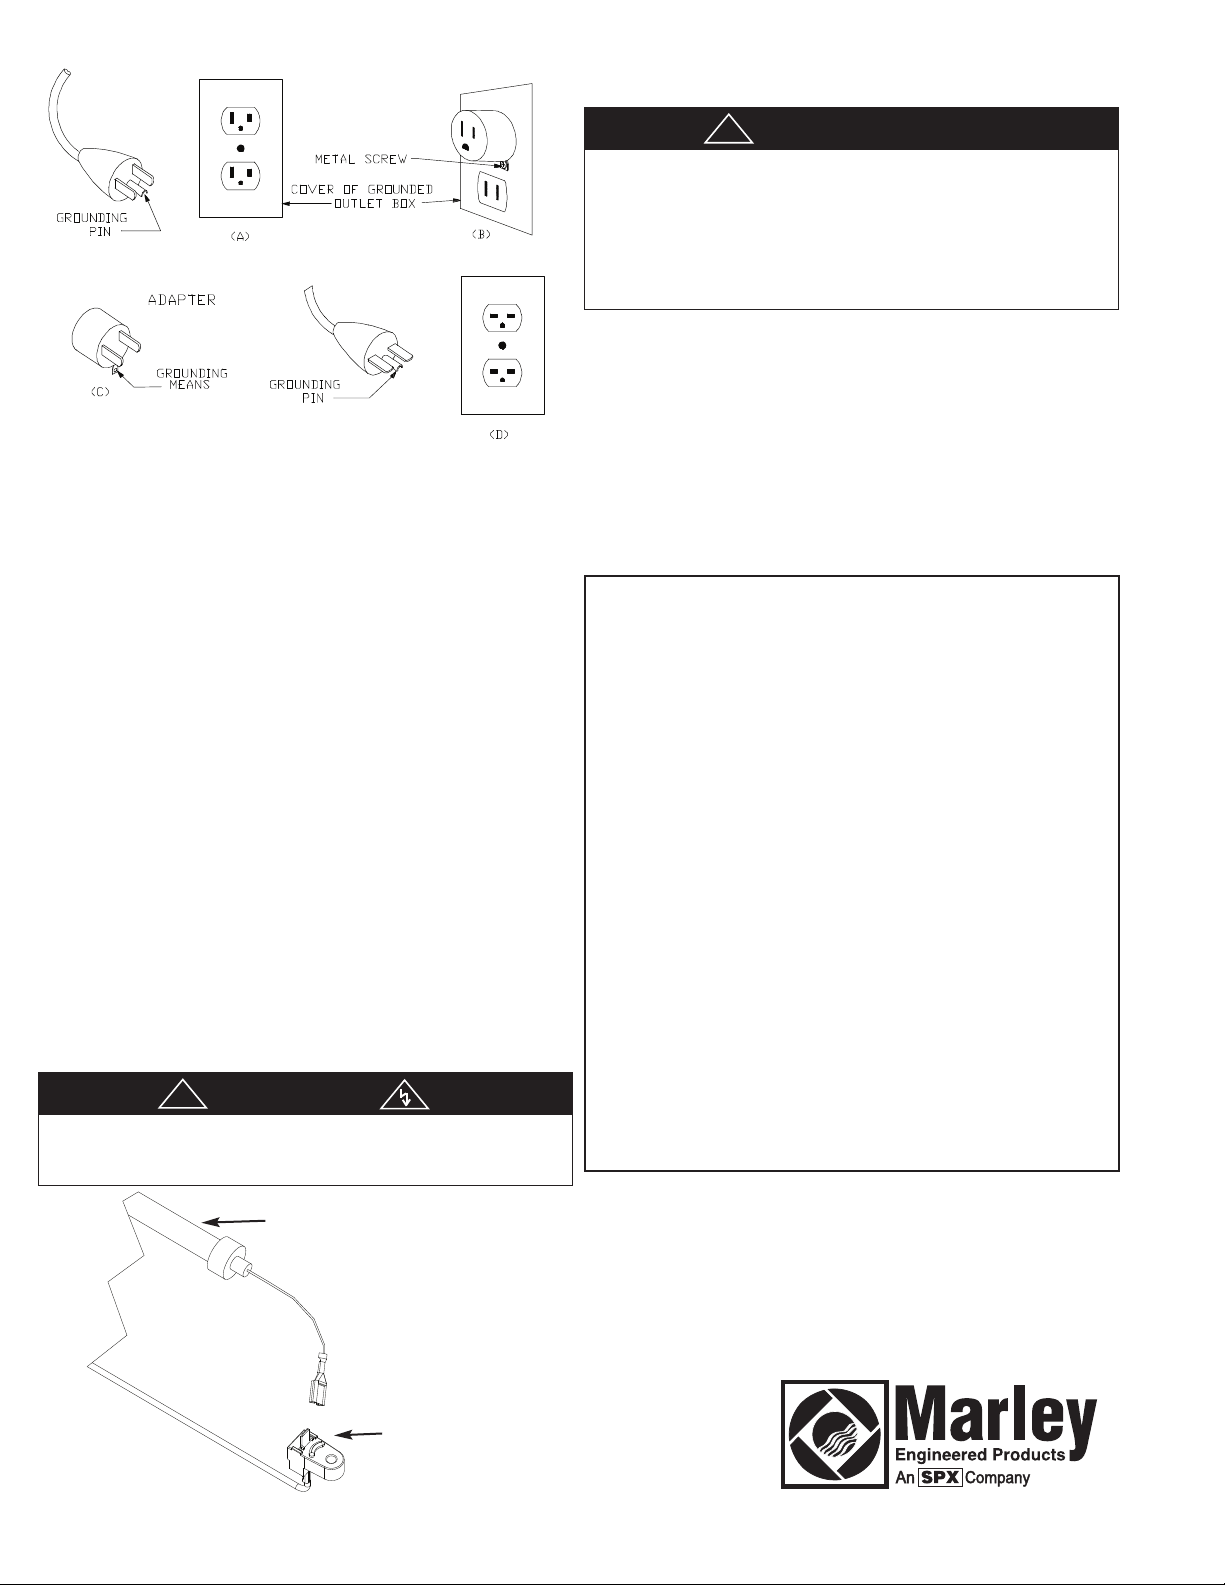
Figure 1
General
These heaters are designed for indoor chain mounting. Not for
recess installation. Elements may be installed prior to mounting
unit. DO NOT USE IN OUTDOOR LOCATIONS
Mounting Limitation– Observe all minimum dimensions from
ceiling, walls, floor and combustible material.
Maintain minimum clearances of:
– 12" (305 mm) to vertical wall surface parallel to heater
– 6" (152 mm) from ends of heater to vertical wall surfaces
– 6" (152 mm) to ceiling
– 72" (1829 mm) to floorWhen heater is mounted the minimum
distance to the wall, do not angle the heater toward the wall.
Installation of Quartz
Tube Elements
1. Remove two end caps (4 screws) and wire guard to gain
access to terminal blocks.
2. Remove element from wrapping.
NOTE: Do not handle quartz element with bare hands, or with
gloves or rags that may have grease on them.
3. Feed the element wire through element support bracket,
install fiberglass sleeving, and plug female quick connect
from element to male quick connect from terminal block.
4. Replace end caps and wire guard.
WARNING
!
Excess element lead wires could come in contact with the
heater enclosure and create an electrical shock or fire hazard.
Leads must be covered by fiberglass sleeve.
ELEMENT
Chain Mounting (Indoor Only)
IMPORTANT
!
The UL listing for this ceiling mounted heater requres that it be
positively mounted to the ceiling structure so that it cannot be
removed without the use of a tool. Attach support chains provided
with heater to ceiling structure using bolts or other hardware so
that heater cannot be removed without a tool. If the "S" hooks are
sed for mounting, they must be closed to assure the heater is
u
permanently mounted.
1.. Attach chain links to ceiling accordingly, to achieve desired
mounting height (see Mounting Limitation).
2. Attach “S” hook to top of heater enclosure to complete
mounting.
3. Plug heater power supply cord into 120 volt 3 wire outlet. The
power cord is equipped with a 3 wire grounded plug and must
be inserted into a matching receptacle. (see warnings
1,2,3,&4)
All products manufactured by Marley Engineered Products are warranted against
efects in workmanship and materials for one year from date of installation.Thiswar-
d
ranty does not apply to damage from accident, misuse, or alteration; nor where the
onnected voltage is more than 5% above the nameplate voltage; nor to equipment
c
improperly installed or wired or maintained in violation of the product’s installation
instructions. All claims for warranty work must be accompanied by proof of the date
of installation.
The customer shall be responsible for all costs incurred in the removal or reinstallation of products, including labor costs, and shipping costs incurred to return products
to Marley Engineered Products Service Center. Within the limitations of this warranty, inoperative units should be returned to the nearest Marley authorized service
center or the Marley Engineered Products Service Center, and we will repair or
replace, at our option, at no charge to you with return freight paid by Marley. It is
agreed that such repair or replacement is the exclusive remedy available from
Marley Engineered Products.
THE ABOVE WARRANTIES ARE IN LIEU OF ALL OTHER WARRANTIES
EXPRESSED OR IMPLIED, AND ALL IMPLIED WARRANTIES OF MERCHANTABILITYAND FITNESS FOR A PARTICULAR PURPOSE WHICH EXCEED
THE AFORESAID EXPRESSED WARRANTIESARE HEREBY DISCLAIMED AND
EXCLUDED FROM THIS AGREEMENT. MARLEY ENGINEERED PRODUCTS
SHALL NOT BE LIABLE FOR CONSEQUENTIAL DAMAGES ARISING WITH
RESPECT TO THE PRODUCT, WHETHER BASED UPON NEGLIGENCE, TORT,
STRICT LIABILITY, OR CONTRACT.
Some states do not allow the exclusion or limitation of incidental or consequential
damages, so the above exclusion or limitation may not apply to you. This warranty
gives you specific legal rights, and you may also have other rights which vary from
state to state.
a
For the address of your nearest authorized service center, contact Marley
Engineered Products in Bennettsville, SC, at 1-800-642-4328. Merchandise returned
to the factory must be accompanied by a return authorization and service identification tag, both available from Marley Engineered Products. When requesting return
authorization, include all catalog numbers shown on the products.
HOW TO OBTAIN WARRANTY SERVICE AND
WARRANTY PARTS PLUS GENERAL INFORMATION
1. Warranty Service or Parts 1-800-642-4328
2. Purchase Replacement Parts 1-800-654-3545
3. General Product Information www.marleymep.com
Note: When obtaining service always have the following:
1. Model number of the product
2. Date of manufacture
3. Part number or description
LIMITED WARRANTY
a
Figure 2
TERMINAL BLOCK
Part No. 5200-2437-004
ECR 37239
470 Beauty Spot Rd. East
Bennettsville, SC 29512 USA
5/07
Page 3

Notes / Notas / Notes
Page 4

Expediente No. E21609
CALENTADORES
RADIANTES
NO. DE
MODELO VOLTIOS VATIOS AMPERIOS BTU/HR
FRR10512B 120 500 4.2 1706
PARA ENCHUFAR
Instrucciones de instalación y mantenimiento
Estimado propietario:
¡Felicitaciones! Gracias por comprar este nuevo calentador fabricado por Marley Engineered Products. Usted ha efectuado una
sabia decisión al seleccionar el producto de la más alta calidad en la industria de la calefacción. Por favor lea cuidadosamente
lasinstruccionesdeinstalacióny mantenimientoindicadas en este manual. Ud.debegozar años de comodidadde calefacciónefi-
ciente con este producto de Marley Engineered Products....el líder de la industria en diseño, fabricación,calidad y servicio.
... Los empleados de Marley Engineered Products
ADVERTENCIA
Leer cuidadosamente - Esta hoja de instrucciones contiene información
vitalparalainstalación, usoyeficienteoperacióndelcalentador. Leercuidadosamente el manual antes de la instalación, operación o limpieza del
calentador. El no adherirse a las instrucciones puede resultar en incendio,
choque eléctrico, muerte, lesiones personales graves o daños a la
propiedad. Guardar estas instrucciones y repasarlas frecuentemente para
una operación segura continuada y parainstrucción de usuarios futuros.
PRECAUCION -PARAREDUCIREL RIESGODE INCENDIOY CHOQUE
ELECTRICO:
1. Desconectar toda la electricidad entrante al calentador por el panel
maestro de servicio antes de cablear, instalar elementos, prestar servicioo desensamblar.
2. El enchufeal cual estáconectado el calentador debeser un circuitode
120voltios de CA.ElcircuitodeCA debeestar protegido por un fusible
de 15-20 amperios o por un interruptor de circuito, de acuerdo con el
CódigoEléctrico Nacional y los códigos locales.
3. Este calentador está provisto con un enchufe de tipo de conexión a
tierra, según ilustrado en la Fig.1. Está disponible un adaptador para
conectar enchufesde tipo de conexión a tierradetres puntas,a receptáculos de dos ranuras. La aleta verde de conexión a tierra, que se
GUARDAR ESTAS INSTRUCCIONES
!
extiende desde el adaptador, debeconectarse a una conexiónpermanente a tierra tal como una caja de salida bien conectada a tierra. Si
estádisponibleunreceptáculodeconexión a tierrade tres ranuras,no
debe usarse el adaptador.
4. Enchufar el cordón de potencia del calentador directamente en el
enchufe eléctrico.Nunca usar un cordónde extensiónconeste calentador.
5. Deben mantenerse las separaciones mínimas, según especificadas.
Mantener alejado del calentador materiales combustibles tales como
cajas,cajones, ropas, etc.
6. Este calentador no es apropiado para usar en ubicaciones riesgosas
según descriptas por la Asociación Nacional de Protección Contra
Incendios (NFPA). No usar en áreasdonde se usano almacenan pintura,gasolina u otros líquidos inflamables.
7. Este calentador no es apropiado para usar en áreas corrosivas, o de
humedad elevada tales como áreas de piscinas, etc. Para uso bajo
techosolamente.
8. Este calentador está diseñado para montaje de cieloraso usando las
cadenas provistas. No empotrar el calentador. Los elementos deben
estarhorizontales.
Page 5

CLAVIJADE
CONEXION A
IERRA
T
ADAPTADOR
TORNILLO DE
METAL
CUBIERTADE
LA CAJA DE
SALIDA, CONECTADA
TIERRA
A
Montaje de cadena (Interior solamente)
IMPORTANTE
!
La certificación UL de este calefactor para montaje en el cielorraso requiere que esté instalado firmemente en la estructura del
cielorraso, de modo que no se lo pueda retirar sin la utilización de
una herramienta. Fije a la estructura del cielorraso las cadenas de
soporte provistas con el calefactor, mediante pernos u otros elementos de sujeción, de modo que no pueda retirarse el calefactor
sin una herramienta. Si se utilizan para el montaje los ganchos
‘S’, se los debe cerrar para asegurar que el calefactor esté montado en forma permanente.
a
EDIO DE
Figura 1
M
CONEXION A
TIERRA
LAVIJADE
C
CONEXION A
TIERRA
General
Estos calentadores están diseñados para montaje interior de
cadena y no para montar empotrado. Los elementos pueden
instalarse previo al montaje de la unidad. No se debe instalar en
locales exteriores.
Limitación de montaje - Observar todas las dimensiones míni-
mas desde los cielorasos, piso y material combustible.
Mantener separaciones mínimas de:
- 305 mm (12”) a la superficie de la pared vertical paralela al
calefactor
- 152 mm (6”) de los extremos del calefactor a las superficies de
paredes verticales
- 152 mm (6”) al cielorraso
- 1829 mm (72”) al piso
Cuando el calentador está montado a la distancia mínima a la
pared, no colocar en ángulo hacia la pared.
Instalación de cuarzo
Elementos del tubo
1. Para ganar acceso a los bloques terminales, extraer la cubier-
ta terminal a cada extremo del artefacto y guarda del cable.
2. Eliminar el elemento de su envoltura.
NOTA: No manejar el elemento de cuarzo con las manos
expuestas, o con guantes o trapos que puedan tener
grasa.
3. Pase el conductor del elemento a través de la escuadra de
soporte del elemento, instale el casquillo de fibra de vidrio y
enchufe la hembra de conexión rápida del elemento en el
macho de conexión rápida de la bornera.
4. Reemplazar las cubiertas terminales y la guarda del cable.
a
ADVERTENCIA
!
El exceso de cables de guía del elemento pueden tocar el
armazón del calentador y crear un riesgo de choque eléctrico o incendio. Los conductores de conexión deben
estar cubiertos por el casquillo de fibra de vidrio.
ELEMENTO
1. Fijar los eslabones de la cadena al cieloraso, de manera de
lograr la altura deseada de montaje (ver Limtación de montaje)
2. Fijar el gancho “S” al tope del armazón de calentador para
completar el montaje.
3. Enchufar el cordón de alimentación de electricidad a un
enchufe de 120 voltios 3 vías, conectado a tierra y debe insertarse en un receptáculo adecuado. (ver las advertencias 1, 2,
3 y 4).
odos los productos fabricados por Marley Engineered Products se garantizan contra
T
defectos en mano de obra y materiales por un año a partir de la fecha de instalación.
sta garantía no se aplica a daños causados por accidente, mal uso o alteración; ni tam-
E
poco donde el voltaje conectado es mayor de 5% del voltaje de la placa de nombre; ni
al equipo instalado o cableado o mantenido impropiamente en violación de las instrucciones de instalación del producto. Todos los reclamos por trabajo de garantía deben
estar acompañados por prueba de la fecha de instalación.
El cliente será responsable por todos los costos incurridos en la extracción o reinstalación de los productos, incluyendo costos de mano de obra y costos de transporte incurridos en devolver los productos al Centro de Servicio de Marley Engineered Products,
y repararemos o reemplazaremos, a nuestra opción, sin cargo para Ud., con el flete de
retorno pagado por Marley. Se acuerda en que tal reparación o reemplazo es el remedio exclusivo disponible de Marley Engineered Products.
LAS GARANTIAS DE ARRIBA SON A CAMBIO DE TODAS LAS OTRAS GARANTIAS
EXPRESAS O IMPLICITAS Y TODAS LAS GARANTIAS EXPRESAS DE COMERCIALIZACION Y APTITUD PARA UN PROPOSITO PARTICULAR QUE EXCEDAN LAS
GARANTIAS EXPRESAS MENCIONADAS PREVIAMENTE SON RECHAZADAS Y
EXCLUIDAS DEL PRESENTE ACUERDO. MARLEY ENGINEERED PRODUCTS NO
SERA RESPONSABLE POR PERJUICIOS CONSECUENTES ORIGINADOS CON
RESPECTO AL PRODUCTO, YA SEA BASADO EN NEGLIGENCIA, LEY, RESPONSABILIDAD ESTRICTA O CONTRATO.
Algunos Estados no permiten la exclusión o limitación de perjuicios incidentales o consecuentes, de manera que la exclusión o limitación de arriba puede no aplicarse a Ud.
Esta garantía le otorga derechos legales específicos, y Ud. también puede tener otros
derechos que varían de Estado a Estado.
Consulte con Marley Engineered Products en Bennettsville, SC, al 1-800-642-4328, para
la dirección de su centro autorizado de servicio más cercano. La mercadería devuelta a
la fábrica debe estar acompañada por una autorización de devolución y una etiqueta de
identificación de servicio, ambos disponibles de Marley Engineered Products. Incluya
todos los números de catálogo mostrados en los productos, al requerir autorización de
devolución.
COMO OBTENER SERVICIO EN GARANTIA,
PIEZAS DE REPUESTO E INFORMACION GENERAL
1. Servicio o repuestos, en garantía: 1-800-642-4328
2. Compra de piezas de repuesto: 1-800-654-3545
3. Información general sobre productos: www.marleymep.com
Nota: Cuando solicite servicio, siempre dé la información que sigue:
1. Número de modelo del producto
2. Fecha de fabricación
3. Número de parte o descripción
GARANTIA LIMITADA
Figura 2
BLOQUE TERMINALES
Pieza No. 5200-2437-004
ECR 37239
5/07
470 Beauty Spot Rd. East
Bennettsville, SC 29512 USA
Page 6

RADIATEURS
Fichier n° E21609
BRANCHABLES
RADIANTS
MODÈLE
N° VOLTS WATTS AMPÈRES BTU/HR
FRR10512B 120 500 4.2 1706
Instructions d'installation et de maintenance
Cher propriétaire,
Félicitations ! Nous vous remercions d’avoir acheté ce nouveau radiateur fabriqué par une division de Marley Engineered
Products. Vous avez fait un sage investissement en choisissant le produit de la plus haute qualité de l’industrie du chauffage.
Veuillez lire les instructions d’installation et d’entretien de ce manuel attentivement. Vous devriez pouvoir profiter d’années de
chauffage confortable et efficace avec ce produit de Marley Engineered Products... le leader de l’industrie dans les domaines de
la conception, de la fabrication, de la qualité et du service.
... Les employés de Marley EngineeredProducts
AVERTISSEMENT
Lisez attentivement. Cette fiche d’instructions contient des infor-
mations vitales sur l’installation, l’utilisation et le fonctionnement efficace de ces radiateurs. Lisez ce manuel attentivement avant d’installer, de nettoyer, ou de faire fonctionner ce radiateur. Si vous ne
respectez pas ces instructions, vous risquez un incendie, une électrocution, la mort, des blessures graves et des dégâts matériels.
Conservez ces instructions et revoyez-les fréquemment pour continuer à utiliser ce radiateur de manière sûre et à l’attention des utilisateurs futurs.
ATTENTION : POUR RÉDUIRE LES RISQUES D’INCENDIE ET
D’ÉLECTROCUTION :
1. Déconnectez l’alimentation électrique du radiateur au niveau du
panneau électrique avant de câbler, d’installer des éléments, de
réparer ou de démonter le radiateur.
2. La prise sur laquelle le radiateur doit être connecté doit être sur
un circuit 120 V alternatif.Ce circuit secteur doit être protégé par
un fusible ou un disjoncteur de 15 ou 20 ampères, en conformité
avec les normes électriques en vigueur, nationales et locales.
3. Le radiateur est livré avec une prise électrique avec terre et un
câble secteur 3 fils, comme illustré sur le Schéma 1. Un adaptateur est fourni pour le branchement du radiateur sur une prise
secteur à deux broches. Dans ce cas la cosse verte sortant de
l'adaptateur doit être reliée à une terre permanente telle que
celle d'une boîte de raccordement reliée correctement à la terre.
Cet adaptateur ne doitpas être utilisé si une prise secteur à trois
broches est disponible.
4. Branchez le fil d’alimentation du radiateur directement dans la
prise murale. N’utilisez jamais de rallonge avec un radiateur.
5. Les distances minimales telles que spécifiées doivent être
respectées. Gardez les matériaux combustibles, comme les
boîtes, cageots, vêtements, etc., éloignés du radiateur.
6. Le radiateur ne convient pas pour une utilisation dans des
emplacements dangereux comme ceux décrits par l'association
nationale de protection contre l'incendie (NFPA). N’utilisez pas
le radiateur dans un endroit ou sont utilisées ou entreposées
des peintures, de l’essence et autre liquides inflammables.
7. Ce radiateur ne convient pas pour une utilisation dans des
zones corrosives, détrempées ou à fort taux d'humidité, telles
par exemple que les piscines. Il ne doit être utilisé qu'à l'intérieur
de locaux.
8. Ce radiateur est prévu pour un montage sur le plafond en utilisant les chaînes fournies. N'encastrez pas ce radiateur. Ses
éléments doivent rester horizontaux.
!
CONSERVEZ CES INSTRUCTIONS
Page 7

BROCHE DE
TERRE
ADAPTATEUR
VIS MÉTALLIQUE
OUVERCLE
C
DE BOÎTE DE RAC-
ORDEMENT MISE À LA
C
ERRE
T
Montage sur chaîne (à l’intérieur seulement)
IMPORTANT
!
Pour être listé UL, ce chauffage monté au plafond nécessite qu'il
soit solidement fixé à la structure du plafond, de telle sorte qu'il
ne puisse pas être démonté sans utiliser un outil. Reliez les
chaînes de soutien livrées avec le chauffage à la structure du
plafond ou à un autre point fixe de façon à ce que le chauffage
ne soit pas démontable sans outil. Si des crochets en S sont utilisés pour le montage, il doivent être fermés de façon à assurer
un montage permanent du chauffage.
a
OYEN DE
M
ISE À LA
M
TERRE
BROCHE DE
ERRE
T
Figure 1
Généralités
Ces radiateurs sont conçus pour être montés à l’intérieur sur
chaîne. Ne pas installer dans un mur. Les éléments peuvent être
installés avant de monter l’unité. Ne utiliser les radiateurs a
l’exterieur.
Limitations de montage : Respectez les distances minimum par
rapport au plafond, aux murs, au sol, et aux matériaux combustibles.
Maintenez des distances minimum de :
– 30,5 cm (12") jusqu'à la surface verticale de cloison parallèle au
chauffage
– 15,2 cm (6") des extrémités du chauffage jusqu'aux surfaces
verticales de cloisons
– 15,2 cm (6") jusqu'au plafond
– 182,9 cm (72") jusqu'au plancher
Lorsque le radiateur est monté à la distance minimum par rapport
au mur, ne penchez pas le radiateur vers le mur.
Installation de l’élément de tube à quartz
1. Retirez le cache du terminal de chaque côté du radiateur
pour accéder aux blocs de terminaux.
2. Retirez l’élément de son emballage.
REMARQUE:Nemanipulezpasl’élément à quartz avecles
mains nuesouavec des gants ouunchiffonquipuisseavoir
des tachesdegras.
3. Passez le câblage de l'élément au travers du support de fixa-
tion de l'élément, installez un manchon de fibre de verre et
branchez la fiche femelle à connexion rapide de l'élément sur
la prise correspondante du bornier.
4. Replacez les caches du terminal.
a
AVERTISSEMENT
!
Tout excès de fil pourrait rentrer en contact avec le corps
du radiateur et créer un court-circuit, ou un risque d’incendie. Les liaisons doivent être recouvertes par le manchon en fibre de verre.
ÉLÉMENT
CHAUFFANT
1. Attachez les chaînes au plafond à la hauteur désirée audessus du sol (voir Limitations de montage).
. Attachez les crochets en "S" en haut du radiateur pour finir le
2
montage.
3. Branchez le fil d’alimentation du radiateur dans une prise 120
V avec terre. Le fil d’alimentation est équipé d’une prise avec
terre qui doit être insérée dans une prise murale compatible
(voir les avertissements 1, 2, 3 & 4).
4. Pour les modèles RR11012B, placez l’interupteur ON/OFF
dans la position ON et l’autre interrupteur dans la position OFF
pour une puissance de 500 Watts. Pour une puissance de
1000 Watts, placez les deux interrupteurs dans la position ON.
GARANTIE LIMITÉE
ous les produits fabriqués par Marley Engineered Products sont garantis contre les défauts de
T
a-brication et de matériau pendant un an à compter de la date d’installation. Cette garantie ne
f
s’applique pas aux détériorations consécutives à un accident, à une mauvaise utilisation ou à
une modification; ni si la tension d’alimentation est supérieure de plus de 5% à la tension de la
plaque signalétique; ni à un équipement incorrectement installé ou câblé ou entretenu en vio-
ation des instructions d’installation du produit. Toutes les réclamations pour du travail sous
l
arantie doivent être accompagnées par une preuve de la date d’installation.
g
Le client sera responsable de tousles frais causés par l’enlèvement ou la réinstallation des pro-
duits, y compris les frais de main-d’oeuvre et les frais d’expédition pour renvoyer les produits
au centre d’entretien Marley Engineered Products. Dans le cadre des limites de cette garantie,
les appareils défaillants doivent être renvoyés au centre de service après-vente agréé Marley
le plus proche ou au centre Marley Engineered Products et nous les réparerons ou remplacerons, à notre choix, gratuitementpourvous avec les frais de retour payés par Marley.Il est
entendu qu’une telle réparation ou un tel remplacement sont les seuls recours pouvant être
obtenus de Marley Engineered Products.
LES GARANTIES CI-DESSUS REMPLACENT TOUTES LES AUTRES GARANTIES
EXPLICITES OU IMPLICITES ET TOUTES LES GARANTIES IMPLICITES DE
COMMERCIABILITÉ ET D’ADAPTATION À UN USAGE PARTICULIER QUI DÉPASSENTLES
GARANTIES EXPLICITES DÉCRITES CI-DESSUS SONT RÉFUTÉES PAR LA PRÉSENTE
ET EXCLUES DE CET ACCORD. MARLEY ENGINEERED PRODUCTS NE SERA PAS
RESPON-SABLE DES DOMMAGES CIRCONSTANCIELS CAUSÉS PAR LE PRODUIT, QUE
CE SOIT PAR NÉGLIGENCE, DÉLIT, RESPONSABILITÉ STRICTE, OU CONTRAT.
Certaines provinces n’autorisent pas l’exclusion ou la limitation des dommages circonstanciels
ou fortuits, l’exclusion ou la limitation ci-dessus peuvent donc ne pas vous concerner. Cette
garantie vous donnedes droits légaux spécifiques et vous pouvez aussiavoir d’autres droits qui
varient d’une province à l’autre.
Pour l’adresse de notre centre d’entretien autorisé le plus proche, contacter Marley Engineered
Products à Bennettsville, Caroline du Sud, États-Unis d’Amérique au 1-800-642-4328. La
marchandise renvoyée en usine doit être accompagnée d’étiquettes d’identification d’autorisation de renvoi et de service, disponibles chez Marley Engineered Products. Lors delademande
d’autorisation de renvoi, inclure tous les numéros de catalogue apparaissant sur les produits.
COMMENT OBTENIR DES INFORMATIONS GÉNÉRALES ET
DEMANDER UNE RÉPARATION OU DES PICE S SOUS GARANTIE
1. Réparations et piéces sous garantie 1-800-642-4328
2. Achat de piéces de rechange 1-800-654-3545
3. Informations générales sur les produits www.marleymep.com
Remarque : Lorsque vous demandez de l'assistance, ayez toujours en main
1. Le numéro de modéle du produit
2. La date de fabrication
3. Numéro ou description de la piéce
Figure 2
BLOC DE
TERMINAUX
Pièce n° 5200-2437-004
ECR 37239
5/07
SPX Corporation
470 Beauty Spot Rd. East
Bennettsville, SC 29512 USA
Page 8

Notes / Notas / Notes
^
 Loading...