

Page 1
Einfüllstutzen
Heiz
öl
Löschanlage
Gew
ok
GewBr
79 t
97 t
74 t
58 t
S
P
G
Einfüllstutzen
Kraftstoff
Feuerlöschschlauch
und Anschl
ußstutzen
Einfüllstutzen
Kühlwasser
BD Hamb
urg
BW Hamb
urg-Altona
AW
Nürnberg
Un
t 27.8.56
Kssb
r. m. Z.
le
tzte Br Unt. 27. 8.57
11,
50
m
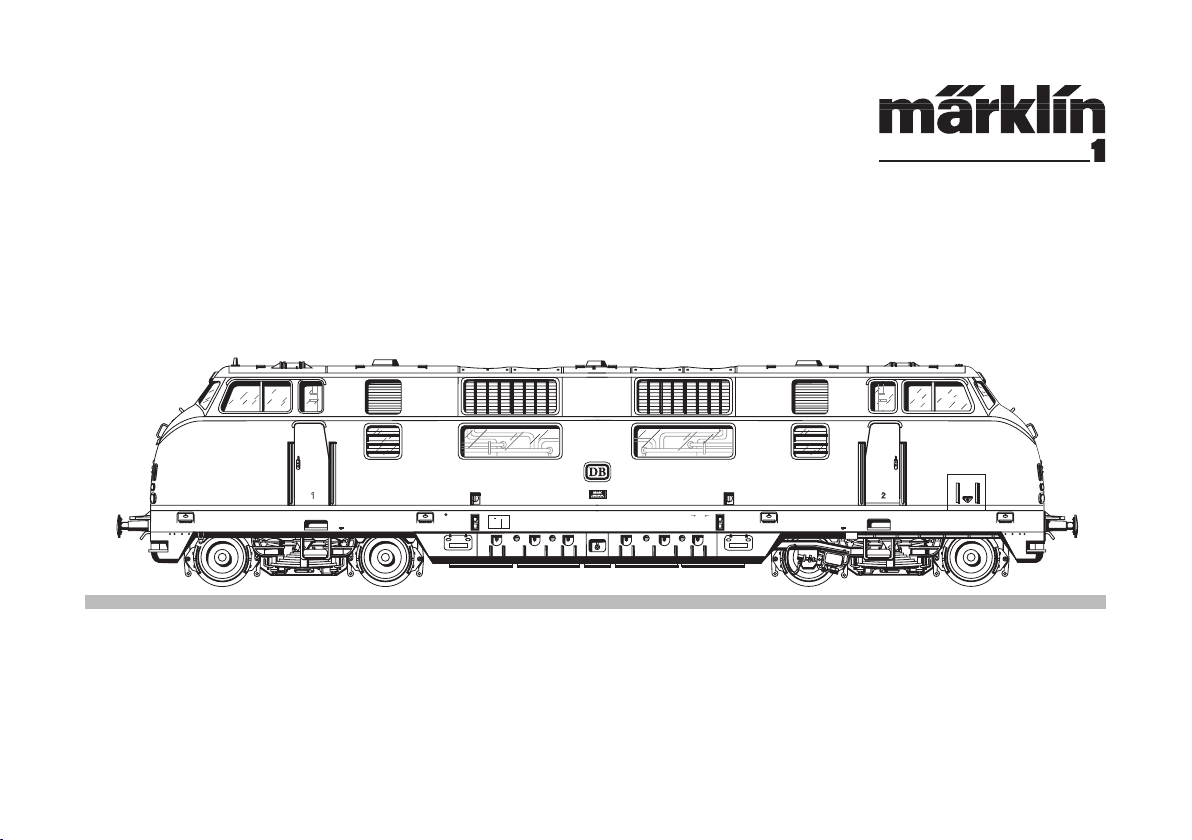
220 022-8
Modell der Baureihe 220
55803
Page 2
Vorbild • Prototype • Exploitation dans le réel • Grootbedrijf
2
Page 3
Informationen zum Vorbild
Schon kurze Zeit nach der Gründung
der Deutschen Bundesbahn wurden
die Weichen für die zukünftige Entwicklung gestellt. Stand früher die
Dampflokomotive im Mittelpunkt der
Lokplanung, so wurde nun der Elektro- und Dieselantrieb bevorzugt.
Schon 1953 wurde der Öffentlichkeit
der erste Prototyp der neuen
V
200
vorgestellt, eine Maschine für
den schweren Streckendienst. Die
Serienversionen wurden ab 1956
geliefert. Zusammen mit dem TEETriebzug war diese Lok damals eine
der Vorzeige-Fahrzeuge der DB.
Die V 200 bewährte sich nicht
nur vor F- und D-Zügen sondern
verrichtete genauso erfolgreich vor
Güterzügen ihren Dienst.
Die Baureihe V 200 besaß 2 Motoren, die einzeln oder zusammen
je nach Leistungsanforderung
eingeschaltet wurden.
Information about the
prototype
A short time after the founding
of the German Federal Railroad
the path was chosen for future
development. In the past steam
locomotives had been the center of
locomotive planning; now electric
and diesel motive power would be
given preference.
The first prototype of the new V 200,
a locomotive for heavy main line
service, was presented to the public
as early as 1953. Regular production
versions were delivered starting in
1956. Together with the TEE railcar
train, this locomotive was one of
the DB’s pieces of motive power
that showed the way of the future at
that time.
The V 200 proved itself in service
on the point of freight trains as well
as with long distance and regular
express trains.
The class V 200 had 2 motors that
could be switched on individually or
together, depending on the power
requirements.
Information sur le modèle réel
Après la fondation des Chemins
de fer de la Deutsche Bundesbahn, il ne fallut pas attendre très
longtemps pour que les grandes
lignes du développement futur
soient tracées. Autant la locomotive
à vapeur se trouvait jadis au centre
de la planification des locomotives,
autant on privilégia désormais la
motorisation électrique et Diesel.
En 1953 déjà eut lieu la presentation
publique du premier prototype de
la nouvelle V 200, une machine
destinée au difficile service de ligne.
Les versions de série furent livrées
à partir de 1956. A l’époque, comme
la rame automotrice TEE, cette
locomotive était l’un des véhicules
de prestige de la DB.
Non seulement la V 200 fit ses
preuves à la tête des trains de
grands parcours et les express mais
elle s’acquitta de sa tâche avec
autant de succès en tractant des
trains de marchandises.
La série V 200 est équipée de deux
moteurs qui sont mis en marche
séparément ou ensemble selon la
demande en puissance désirée
Informatie over het voorbeeld
Korte tijd na het oprichten van de
Deutschen Bundesbahn (Duitse
spoorwegen) werd een nieuwe weg
ingeslagen voor de toekomstige
ontwikkeling. Stond vroeger de
stoomloc in het middelpunt van de
locplanning, nu hadden elektrische
en diesellocomotieven de voorkeur.
Reeds in 1953 werd het eerste
prototype aan het publiek gepresenteerd, de V 200, een machine voor
het zware werk. De versie uit de
serieproduktie werd vanaf 1956 uitgeleverd. Samen met het TEE-treinstel was deze loc destijds een van de
“voorbeeld-treinen” van de DB.
De V 200 bewees zich niet alleen
voor de zgn F- en D-treinen doch
verrichtte ook in de goederendienst
uitstekende prestaties.
De serie V 200 had 2 motoren die,
afhankelijk van het benodigde vermogen afzonderlijk of gezamenlijk,
ingeschakeld werden.
Vorbild • Prototype • Exploitation dans le réel • Grootbedrijf
3
Page 4

Funktion
!
Diese Lokomotive mit eingebauter mfx-Mehrzug-Elektronik bietet:
• Wahlweise Betrieb mit Gleichstrom (max ± 18 V=), Wechselstrom
(Märklin Transformer 32 VA), Märklin Delta (nur Delta Station 6607),
Märklin Digital (nur Control Unit) oder Märklin Systems. Ein Betrieb mit
anderen Betriebssystemen (Impulsbreitensteuerung, Central Control 1
etc.) ist nicht möglich.
• Die Betriebsart wird automatisch erkannt.
• 80 Mehrzugadressen (Control Unit) einstellbar. Eingestellte Adresse ab
Werk:
22
• Mfx-Technologie für Mobile Station / Central Station.
Name ab Werk:
BR 220
• Veränderbare Anfahrverzögerung (ABV).
• Veränderbare Bremsverzögerung (ABV).
• Veränderbare Höchstgeschwindigkeit.
• Einstellen der Lokparameter elektronisch über Control Unit,
Mobile Station oder Central Station.
• Eingebaute Geräuschelektronik, nur im Betrieb mit Control Unit oder
Märklin Systems nutzbar.
Zusätzliche schaltbare Geräusche.
• Veränderbare Lautstärke der Geräusche.
• Das Modell ist für den Betrieb auf Märklin 1 – Gleisen entwickelt. Ein
Betrieb auf anderen Gleissystemen geschieht auf eigenes Risiko.
• Befahrbarer Mindestradius: 1020 mm
Die bei normalem Betrieb anfallenden Wartungsarbeiten sind nachfolgend
beschrieben. Für Reparaturen oder Ersatzteile wenden Sie sich bitte an Ihren
Märklin-Fachhändler.
Sicherheitshinweise
• Die Lok darf nur mit einem dafür bestimmten Betriebssystem (Märklin
Wechselstrom-Transformator 6647, Märklin Delta, Märklin Digital oder
Märklin Systems) eingesetzt werden.
Nur Transformatoren verwenden, die Ihrer örtlichen Netzspannung
entsprechen.
Keinesfalls Transformatoren für eine Netzspannung von 220 V bzw. 110 V
einsetzen.
• Die Lok darf nur aus einer Leistungsquelle gleichzeitig versorgt werden.
• Beachten Sie unbedingt die Sicherheitshinweise in der Gebrauchsanlei
-
tung zu Ihrem Betriebssystem.
• Für den konventionellen Betrieb der Lok muss das Anschlussgleis entstört
werden. Dazu ist das Entstörset 74046 zu verwenden. Für Digitalbetrieb ist
das Entstörset nicht geeignet.
Hinweis:
Änderungen der Lokparameter im Decoder dürfen nur wie beschrieben
ausgeführt werden (Seite 16). Für darüber hinaus gehende Änderungen, die
zu Fehlverhalten oder Beschädigungen des Decoders führen, haftet Märklin
nicht; eventuelle nötige Reparaturen werden kostenpflichtig ausgeführt.
Jegliche Garantie-, Gewährleistungs- und Schadensersatzansprüche sind ausgeschlossen, wenn in Märklin-Produkten nicht von Märklin freigegebene Fremdteile eingebaut
werden und / oder Märklin-Produkte umgebaut werden und die eingebauten Fremdteile
bzw. der Umbau für sodann aufgetretene Mängel und/ oder Schäden ursächlich war. Die
Darlegungs- und Beweislast dafür, dass der Einbau von Fremdteilen oder der Umbau in
bzw. von Märklin-Produkten für aufgetretene Mängel und / oder Schäden nicht ursäch
lich war, trägt die für den Ein- und / oder Umbau verantwortliche Person und / oder Firma
bzw. der Kunde.
-
Betrieb • Operation • Fonctionnement • Exploitatie
4
Page 5
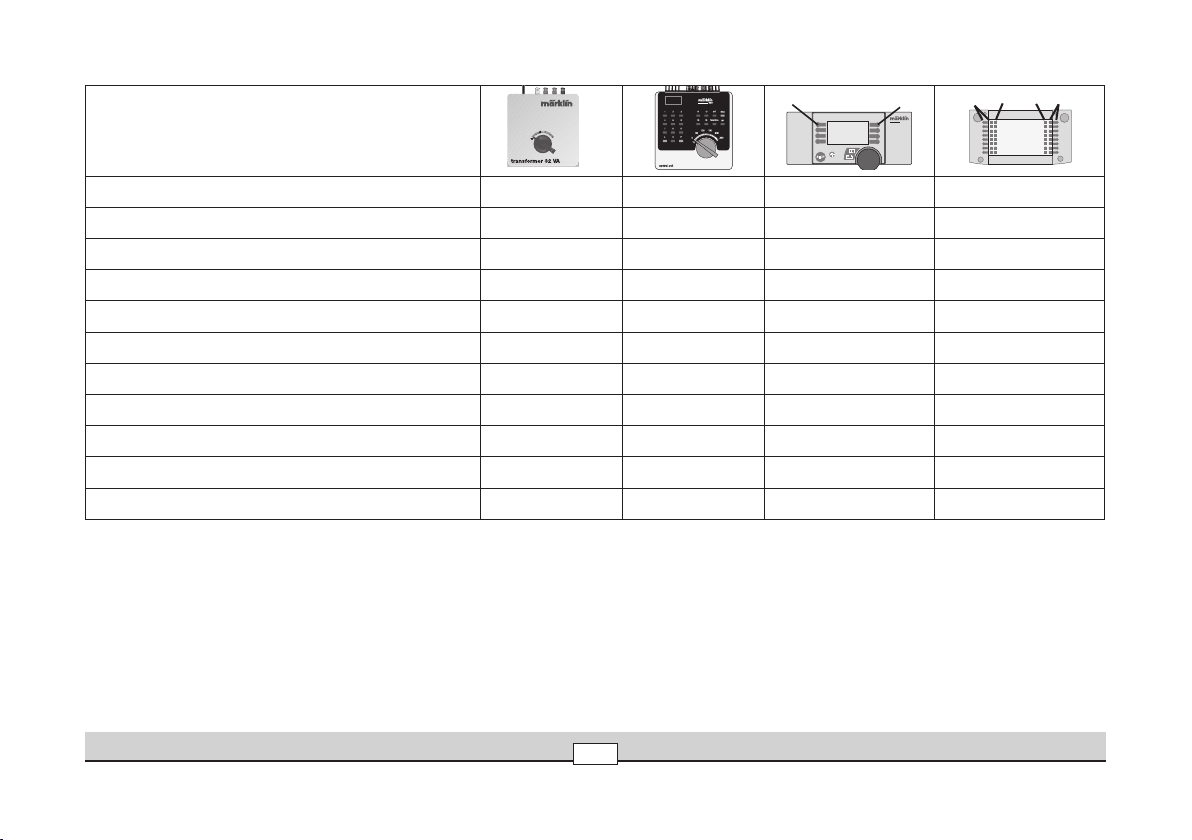
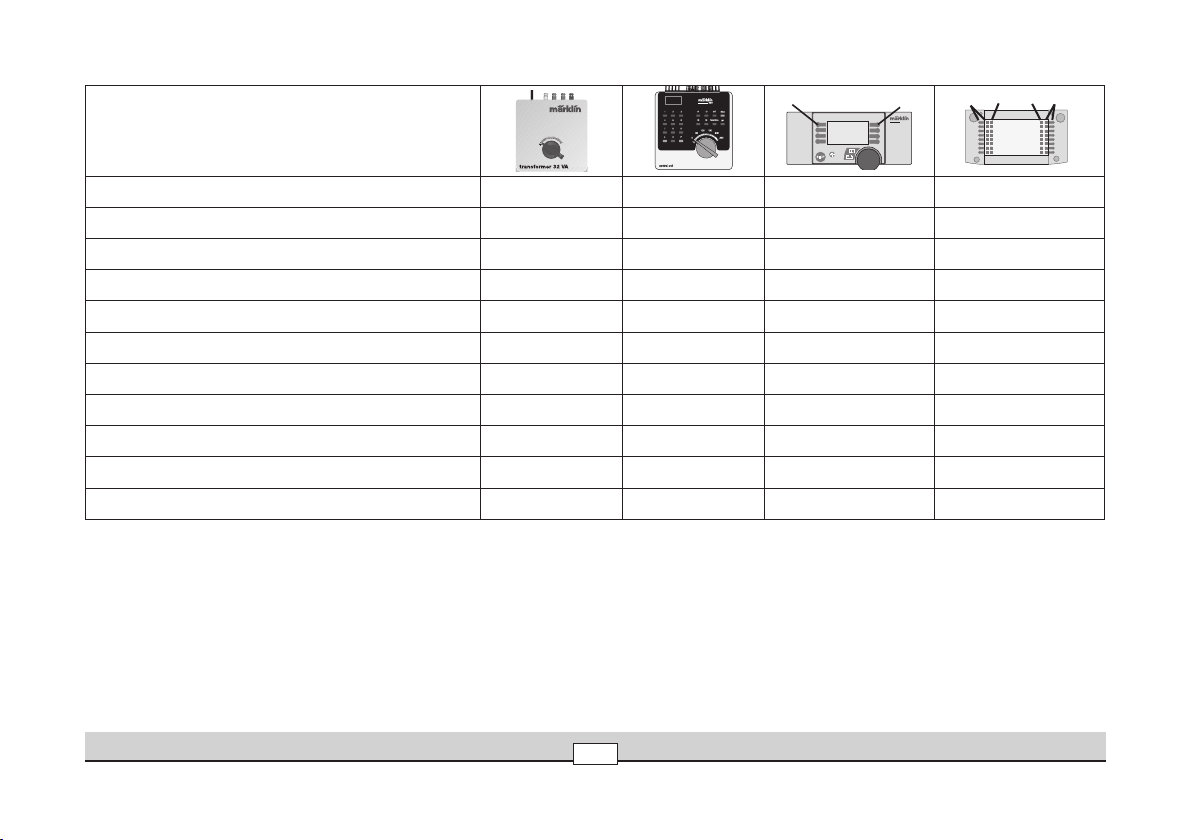
Schaltbare Funktionen
central
station
60212
STOP
mobile station
systems
1
5
Stirnbeleuchtung an function + off Lichttaste Taste f0
Geräusch: Betriebsgeräusch — f2 Taste 2 Taste f2
Horn — f3 Taste 6 Taste f3
ABV — f4 Taste 4 Taste f4
Führerstandsbeleuchtung — — Taste 1 Taste f5
Rücklicht Führerstand 2 aus/ein — — Taste 8 Taste f6
Schaffnerpfiff — — Taste 5 Taste f7
Rücklicht Führerstand 1 aus/ein — — Taste 3 Symbol 8
Bremsenquietschen aus/ein — — Taste 7 Symbol 9
Druckluft — — — Symbol 10
Schmierpumpe — — — Symbol 11
Betrieb • Operation • Fonctionnement • Exploitatie
5
Page 6
Function
!
This locomotive has a built-in mfx-multi-train electronic circuit and offers
these features:
• Optional operation with DC power (max. ± 18 volts DC),
AC power (with Märklin 32 VA transformer), with Märklin Delta (only
with the 6607 Delta Station), Märklin Digital (only with the Control Unit),
or Märklin Systems. This locomotive is not designed for operation with
locomotive controllers for other systems (example: pulse width control,
operation with the Central Control 1 or similarsystems).
• The mode of operation is automatically recognized.
• 80 multi-train addresses (Control Unit) can be set.
Address that set at the factory: 22
• Mfx technology for the Mobile Station / Central Station.
Name set at the factory:
BR 220
• Adjustable acceleration (ABV).
• Adjustable Braking delay (ABV)
• Adjustable maximum speed.
• Setting the locomotive parameters electronically with the Control Unit,
Mobile Station or Central Station.
• Built-in sound effects circuit, can only be used in operation with the
Control Unit or Märklin Systems.
Additional sound effects that can be controlled.
• Volume can be changed for the sound effects.
• The model is designed for operation on Märklin 1 Gauge track. As the
consumer you assume the risk for operating on other makes of track.
• Minimum radius for operation: 1020 mm / 40-5/32“.
Maintenance procedures that become necessary with normal operation of
the locomotive are described below. Please see your authorized Märklin
dealer for repairs or spare parts.
Safety Warnings
• This locomotive is to be used only with an operating system designed
for it (Märklin 6646/6647 AC transformer, Märklin Delta, Märklin Digital or
Märklin Systems).
Use only transformers rated for your local hosehold power.
Do not under any circumstances use transformers rated for
220 volts or 110 volts
• This locomotive must never be supplied with power from more than one
transformer.
• Pay close attention to the safety warnings in the
instructions for your operating system.
• The feeder track must be equipped to prevent interference with radio and
television reception, when the locomotive is to be run in conventional
operation. The 74046 interference suppression set is to be used for this
purpose.
Note:
Changes to the locomotive parameters in the decoder may only be carried
out as described (page 16). Märklin is not liable for changes beyond this that
cause malfunctions or damages to the decoder; the cost for any necessary
repairs must be borne by the consumer.
No warranty or damage claims shall be accepted in those cases where parts neither
manufactured nor approved by Märklin have been installed in Märklin products or
where Märklin products have been converted in such a way that the non-Märklin parts
or the conversion were causal to the defects and / or damage arising. The burden of
presenting evidence and the burden of proof thereof, that the installation of non-Märklin
parts or the conversion in or of Märklin products was not causal to the defects and / or
damage arising, is borne by the person and / or company responsible for the installation
and / or conversion, or by the customer.
Betrieb • Operation • Fonctionnement • Exploitatie
6
Page 7
Controllable Functions
central
station
60212
STOP
mobile station
systems
1
5
Headlights on function + off Headlight button Button f0
Sound effect: Operating sounds — f2 Button 2 Button f2
Sound effect: Horn — f3 Button 6 Button f3
ABV — f4 Button 4 Button f4
Engineer‘s cab lighting — — Button 1 Button f5
engineer‘s cab 2 turning off the marker light — — Button 8 Button f6
Sound effect: Conductor whistle — — Button 5 Button f7
engineer‘s cab 1 turning off the marker light — — Button 3 symbol 8
Sound effect: Squealing brakes off/on — — Button 7 symbol 9
Sound effect: Letting off air — — — symbol 10
Sound effect: Lubrication pump — — — symbol 11
Betrieb • Operation • Fonctionnement • Exploitatie
7
Page 8
Fonctionnement
!
Cette locomotive possède un équipement électronique mfx pour conduite
multitrain:
• Au choix, exploitation conventionnelle avec courant continu
(max ± 18 volts =), courant alternatif (Transformer 32 VA), exploitation
avec Märklin Delta (uniquement Delta Station 6607), Märklin Digital (uniquement Control Unit) ou Märklin Systems. Une exploitation avec d’autres
systèmes d’exploitation (courant à largeur d’impulsion variable,
Central Control 1, etc.) n’est pas possible.
• Le mode d’exploitation est automatiquement détecté.
• 80 adresses pour conduite multitrain (Control Unit) sont disponibles.
Adresse réglée en usine: 22
• Technologie mfx pour Mobile Station / Central Station.
Nom en codee en usine:
BR 220
• Temporisation d’accélération réglable (ABV).
• Temporisation de freinage réglable (ABV).
• Vitesse maximale réglable.
• Réglage des paramètres de la loco électroniquement à l’aide de la
Control Unit, de la Mobile Station ou de la Central Station.
• Bruiteur électronique intégré, utilisable uniquement lors d’exploitation
avec la Control Unit ou Märklin Systems.
Bruitages complémentaires commutables.
• Volume des bruitages réglable.
• Le modèle réduit est conçu pour rouler sur des voies Märklin 1. Le faire
rouler sur des voies d’autres systèmes comporte des risques.
• Rayon minimal d’inscription en courbe: 1020 mm.
Les travaux d‘entretien occasionnels à effectuer en exploitation normale sont
décrits plus loin. Pour toute réparation ou remplacement de pièces, adressez-vous à votre détaillant-spécialiste Märklin.
Remarques importantes sur la sécurité
• La locomotive ne peut être mise en service qu’avec un système
d’exploitation adéquat (Märklin courant alternatif - transformateur 6647,
Märklin Delta, Märklin Digital ou Märklin Systems).
Utilisez uniquement des transformateurs correspondant à la tension
secteur locale.
Bon courage en aucun cas des transformateurs pour une tension secteur de 220 V, respectivement 110 V.
• La locomotive ne peut être alimentée en courant que par une seule sour
ce de courant.
• Veuillez impérativement respecter les remarques sur la sécurité décrites
dans le mode d’emploi en ce qui concerne le système d’exploitation.
• Pour l’exploitation de la locomotive en mode conventionnel, la voie
de raccordement doit être déparasitée. A cet effet, utiliser le set de
déparasitage réf. 74046. Le set de déparasitage ne convient pas pour
l’exploitation en mode numérique.
Remarque :
Pour modifier les paramètres de la locomotive dans le décodeur, procédez
impérativement de la manière décrite (page 16). La garantie Märklin ne couvre pas les modifications ne respectant pas scrupuleusement les instructions
et pouvant être à l’origine d’un dysfonctionnement ou d’une détérioration du
décodeur ; d’éventuelles réparations seront facturées.
Tout recours à une garantie commerciale ou contractuelle ou à une demande de dommages-intérêt est exclu si des pièces non autorisées par Märklin sont intégrées dans
les produits Märklin et / ou si les produits Märklin sont transformés et que les pièces
d’autres fabricants montées ou la transformation constituent la cause des défauts et /
ou dommages apparus. C’est à la personne et / ou la société responsable du montage /
de la transformation ou au client qu’incombe la charge de prouver que le montage des
pièces d’autres fabricants sur des produits Märklin ou la transformation des produits
Märklin n’est pas à l’origine des défauts et ou dommages apparus.
-
Betrieb • Operation • Fonctionnement • Exploitatie
8
Page 9

Fonctions commutables
central
station
60212
STOP
mobile station
systems
1
5
Fanal marche function + off Touche éclairage Touche f0
Bruitage : Bruit d’exploitation — f2 Touche 2 Touche f2
Bruitage : Trompe
— f3 Touche 6 Touche f3
ABV — f4 Touche 4 Touche f4
Eclairage de la cabine de conduite — — Touche 1 Touche f5
Cabine de conduite 2 eteindre le feu arrière — — Touche 8 Touche f6
Bruitage : Sifflet Contrôleur
— — Touche 5 Touche f7
Cabine de conduite 1 eteindre le feu arrière — — Touche 3 symbole 8
Bruitage : Grincement de freins arrêt/marche — — Touche 7 symbole 9
Bruitage : Échappement de l‘air comprimé — — — symbole 10
Bruitage : Distributeur d‘huile — — — symbole 11
Betrieb • Operation • Fonctionnement • Exploitatie
9
Page 10

Werking
!
Deze loc met ingebouwde mfx-elektronica biedt u:
•
Naar keuze conventioneel bedrijf (wisselstroom met de Transformer 32 VA
of gelijkstroom [max +/– 18 Volt=] ), bedrijf met Märklin Delta (alleen het
Delta Station 6607), Märklin Digital (Control Unit) of het Märklin Systems. Het
bedrijf met rijregelaars van andere systemen (bijv. impulsbreedte sturing,
gebruik van de Central-Control 1 of een dergelijk systeem) is niet mogelijk.
• Het bedrijfssysteem wordt automatisch herkend.
• 80 meertreinen-adressen (4 daarvan voor het Delta-systeem) instelbaar.
Ingesteld adres vanaf de fabriek: 22
• Mfx-technologie voor het Mobile Station / Central Station.
Naam af de fabriek:
BR 220
• Instelbare optrekvertraging.
• Instelbare afremvertraging.
• Instelbare maximumsnelheid.
• Elektronische instelling van de locomotiefparameters via de Control Unit,
Mobile Station of Central Station.
• Ingebouwde geluidselektronica, alleen bruikbaar in het bedrijf met de
Control Unit of Märklin Systems.
Extra schakelbare geluiden.
• Volume van de geluiden instelbaar.
• Het model is ontwikkeld voor het gebruik op het Märklin Spoor 1 railsys
teem. Het gebruik op een ander railsysteem geschied op eigen risico.
• Berijdbare minimumradius: 1020 mm.
De in het normale bedrijf voorkomende onderhoudswerkzaamheden zijn verderop beschreven. Voor reparatie of onderdelen kunt u zich tot uw Märklin
winkelier wenden.
Veiligheidsvoorschriften
• De loc mag alleen met een daarvoor bestemd bedrjfssysteem (Märklin
wisselstroom transformator 6647, Märklin Delta, Märklin digitaal of
Märklin Systems) gebruikt worden.
Alleen transformatoren gebruiken die geschikt zijn voor de bij u geldende netspanning.
In geen geval transformatoren voor een netspanning van 220 V dan wel
110 V gebruiken.
• De loc mag niet vanuit meer dan één stroomvoorziening gelijktijdig gevo
ed worden.
• Voor het conventionele bedrijf met de loc dient de aansluitrail te worden
ontstoort. Hiervoor dient men de ontstoor-set 74046 te gebruiken. Voor het
digitale bedrijf is deze ontstoor-set niet geschikt.
• Lees ook aandachtig de veiligheidsvoorschriften in de gebruiksaanwijzing
van uw bedrijfssysteem.
Opmerking:
Het wijzigingen van de loc-parameters in de decoder mag enkel en alleen op
de beschreven wijze worden uitgevoerd (pagina 16). Elke op andere wijze uitgevoerde wijziging, die tot storing of beschadiging van de decoder leidt, valt
buiten de garantie van Märklin; eventuele noodzakelijke reparaties worden
met berekening van de kosten uitgevoerd.
-
Elke aanspraak op garantie en schadevergoeding is uitgesloten, wanneer in Märklinproducten niet door Märklin vrijgegeven vreemde onderdelen ingebouwd en / of
Märklin-producten omgebouwd worden en de ingebouwde vreemde onderdelen
resp. de ombouw oorzaak van nadien opgetreden defecten en / of schade was. De
aantoonplicht en de bewijslijst daaromtrent, dat de inbouw van vreemde onderdelen
in Märklin-producten of de ombouw van Märklin-producten niet de oorzaak van opgetreden defecten en / of schade is geweest, berust bij de voor de inbouw en/of ombouw
verantwoordelijke persoon en / of firma danwel bij de klant.
-
Betrieb • Operation • Fonctionnement • Exploitatie
10
Page 11

Schakelbare functies
central
station
60212
STOP
mobile station
systems
1
5
Frontverlichting aan function + off Verlichtingstoets Toets f0
Geluid: bedrijfsgeluiden — f2 Toets 2 Toets f2
Geluid: signaalhoorn — f3 Toets 6 Toets f3
ABV — f4 Toets 4 Toets f4
Cabineverlichting — — Toets 1 Toets f5
cabine 2 sluitlicht uitschakelen — — Toets 8 Toets f6
Geluid: conducteurfluit — — Toets 5 Toets f7
cabine 1 sluitlicht uitschakelen — — Toets 3 symbool 8
Geluid: piepende remmen uit/aan — — Toets 7 symbool 9
Geluid: perslucht afblazen — — — symbool 10
Geluid: smeerpomp — — — symbool 11
Betrieb • Operation • Fonctionnement • Exploitatie
11
Page 12

Betrieb mit Mobile Station / Central Station
!
!
!
!
• Lok aufgleisen. Die Lok meldet sich selbsttätig in der Lokliste an.
• Beim Betrieb:
Geschwindigkeitsanzeige blinkt => keine Verbindung zur Lok.
• Lok abmelden:
1. Lok vom Gleis entfernen.
2. Lokeintrag löschen.
• Eine Adressänderung ist nicht notwendig.
• Lokparameter mit der Mobile Station verändern: Beachten Sie die
Hinweise in der Anleitung zur Mobile Station / Central Station.
Hinweis Mobile Station:
Ist der Leistungsbedarf dauerhaft zu hoch, so schaltet wie bei einem
Kurzschluss die Mobile Station komplett ab. Verringern Sie in diesem
Fall die Anzahl der Funktionen und schalten Sie anschließend durch
Drücken auf die STOP-Taste das System wieder ein.
Operation with the Mobile Station/Central Station
• Set the locomotive on the track. The locomotive automatically registers
itself in the locomotive list.
• During operation:
Speed indicator blinks => no connection to the locomotive.
• Taking the locomotive out of the locomotive list:
1. Remove the locomotive from the track.
2. Delete the locomotive entry.
• It is not necessary to change the address.
• Changing Locomotive Parameters with the Mobile Station: Please note
the information in the instructions for the Mobile Station / Central Station.
Note Mobile Station:
If the demand for power output remains excessively high, the Mobile
Station completely shuts down (as is the case with a permanent short
circuit). In this case, reduce the number of mobile functions and press
the STOP button to reactivate the system.
Betrieb • Operation • Fonctionnement • Exploitatie
Exploitation avec Mobile Station / Central Station
• Enrailler la locomotive. La locomotive signale automatiquement sa pré
sence dans la liste des locos.
• Lors de l’exploitation:
L’indicateur de vitesse clignote => aucune liaison avec la loco.
• Appeler loco:
1. Enlever loco de la voie.
2. Effacer entrée loco.
• Une modification de l’adresse n’est pas nécessaire.
• Modification des paramètres de la loco avec la Mobile Station:Respectez
les remarques mentionnées dans l’instruction accompagnant la
Mobile Station /Central Station.
Remarque Mobile Station:
Si le besoin en puissance est trop important en permanence, la Mobile
Station se désactive complètement comme lors d’un courtcircuit
permanent. Dans ce cas, réduisez le nombre de fonctions et ré-activez
ensuite le système en appuyant sur la touche STOP.
Bedrijf met Mobile Station / Central Station
• Loc op de rails plaatsen. De loc meldt zichzelf aan in de loclijst.
• Bij het bedrijf:
snelheidsweergave (balk) knippert => geen verbinding met de loc.
• Loc afmelden:
1. loc van de rails nemen
2. loc invoer wissen.
• Het wijzigen van het adres is niet nodig.
• Locparameter wijzigen met het Mobile Station: Lees ook de opmerkingen
in de gebruiksaanwijzing van het Mobile Station / Central Station.
N.B. Mobile Station:
Is het vermogensverbruik blijvend te hoog, schakelt de mobile station
net als bij een kortsluiting compleet uit. Reduceer in dat geval het aantal
rijdende functies en schakel het systeem vervolgens via indrukken van de
STOP-toets opnieuw in.
12
-
Page 13

Lokparameter einstellen mit
der Control Unit
1. Voraussetzung: Aufbau wie Grafik
S. 14. Nur die zu verändernde Lok
ist auf dem Gleis.
2. „Stop“- und „Go“-Taste gleichzeitig
drücken, bis „99“ in der Anzeige
aufblinkt.
3. „Stop“-Taste drücken.
4. Lokadresse „80“ eingeben.
5. Umschaltbefehl am Fahrregler
halten. Während des Haltens die
„Go“-Taste drücken.
6. Licht der Lok blinkt langsam. Wenn
nicht, ab Schritt 2 wiederholen.
7. Registernummer für den zu ändern
den Parameter eingeben
(=> Liste auf Seite 16).
8. Fahrtrichtungswechsel betätigen.
9. Licht blinkt schnell
10. Neuen Wert eingeben
(=> Liste auf Seite 16).
11. Fahrtrichtungswechsel betätigen.
12. Licht blinkt langsam (Ausnahme
Werkreset)
13. Nächste Parametereinstellung ab 6.
oder beenden mit 14.
14. Vorgang beenden mit Drücken
der „Stop“-Taste. Anschließend
Drücken der „Go“-Taste.
Setting Locomotive Parameters with the Control Unit
1.
Requirement: Setup as in diagram on
page 14. Only the locomotive to be
changed can be on the track.
2. Press the “Stop” and “Go” at the same
time until “99” blinks in the display.
3. Press the “Stop” button.
4.
Enter the locomotive address „80“
5. Hold the control knob in the reverse
direction area. While holding the
control knob here, press the „Go“
button.
6. The headlights on the locomotive
will blink slowly. If they don‘t, repeat
Step 2.
-
7. Enter the register number for the
parameter to be changed
(=> List on page 16).
8.
Active the change of direction
9.
The headlights will blink rapidly.
10. Enter the new value
(=>List on page 16).
11.
Active the change of direction.
12.
The headlights will blink slowly (exception:
factory reset)
13. Enter the next parameter setting from 6 or
end with 14.
14. End the process by pressing the
„Stop“ button. Then press the „Go“
button.
Réglage des paramètres de la
loco avec la Control Unit
1. Condition: Montage comme sur
illustration en page 14. Seule la loco à
modifier peut se trouver sur la voie.
2. Pressez simultanément les touches
„Stop“ et „Go“ jusqu’à ce que le
nombre „99“ clignote sur l’écran.
.
.
3. Pressez la touche „Stop“.
4. Introduisez l’adresse de loco „80“.
5. Maintenir l’ordre de commutation sur
le régulateur de marche. Durant le
maintien, appuyer sur la touche „Go“.
6. Les feux de la locomotive clignotent
lentement. Dans le cas contraire,
renouveler l’opération à partir
de l’étape 2.
7. Indiquer le numéro ’enregistrement
pour le paramètre à modifier
(=> liste page 16).
8. Activer l’inversion du sens de marche.
9. Les feux clignotent rapidement.
10. Entrer la nouvelle valeur
(=> liste page 16).
11. Activer l’inversion du sens de marche.
12. Les feux clignotent lentement (exception : réinitialisation aux valeurs d’usine)
13. Définition de paramètres suivante à
partir du point 6 ou terminer par le
point 14.
14. Terminez le processus en pressant
la touche „Stop“. Ensuite, pressez la
touche „Go“.
Locparameters instellen met
de Control Unit
1. Voorwaarde: opbouw zoals tekening
op pagina 14. Alleen de loc die
gewijzigd moet worden op de rails.
2. ”Stop”- en ”Go”-toets gelijktijdig
indrukken tot ”99” in het display
oplicht.
3. ”Stop”-toets indrukken.
4. Het adres „80“ invoeren.
5. Omschakelcommando met de
rijregelaar vasthouden. Tijdens het
vasthouden de toets “Go” indrukken.
6. De verlichting van de loc knippert
langzaam. Indien dit niet het geval
is, vanaf stap 2 opnieuw beginnen.
7. Het registernummer van de te
wijzigen parameter invoeren
(=> lijst op pagina 16).
8. Omschakelcommando geven.
9. Verlichting gaat snel knipperen.
10. Nieuwe waarde invoeren
(=> lijst op pagina 16).
11. Omschakelcommando geven.
12. Verlichting knippert langzaam
(uitgezonderd bij decoder reset)
13. Volgende parameterinstelling of
beëindigen met 14.
14. Sessie beëindigen door het indruk
ken van de toets “Stop”. Aansluitend de toets “Go” indrukken.
-
Betrieb • Operation • Fonctionnement • Exploitatie
13
Page 14

Lokparameter mit Control Unit ändern.
Changing Locomotive Parameters with the Control Unit.
Modification des paramètres avec la Control Unit.
Locparameter met de Control Unit.
Betrieb • Operation • Fonctionnement • Exploitatie
„Änderungen der Lokparameter im Decoder dürfen nur wie beschrieben ausgeführt werden. Für darüber hinaus gehende Änderungen, die zu Fehlverhalten oder Beschädigung des Decoders führen, haftet Märklin nicht; eventuelle
nötige Reparaturen werden kostenpflichtig ausgeführt.“
„Changes to the locomotive parameters in the decoder may only be carried
out as described. Märklin is not liable for changes beyond this that cause
malfunctions or damages to the decoder; the cost for any necessary repairs
must be borne by the consumer.“
« Pour modifier les paramètres de la locomotive dans le décodeur, procédez
impérativement de la manière décrite. La garantie Märklin ne couvre pas les
modifications ne respectant pas scrupuleusement les instructions et pouvant
être à l’origine d’un dysfonctionnement ou d’une détérioration du décodeur ;
d’éventuelles réparations seront facturées. »
„Het wijzigingen van de loc- parameters in de decoder mag enkel en alleen
op de beschreven wijze worden uitgevoerd. Elke op andere wijze uitgevoerde
wijziging, die tot storing of beschadiging van de decoder leidt, valt buiten de
garantie van Märklin; eventuele noodzakelijke reparaties worden met berekening van de kosten uitgevoerd.“
14
Page 15

1
80
1
Lokparameter ändern mit der Control Unit 6021.
1
1
99
1
2
80
2
1
01
01
1
1
2
10
10
1
11
14
12
Changing Locomotive Parameters with the 6021 Control Unit.
Modification des paramètres de la locomotive avec la Control Unit 6021.
Locparameter wijzigen met de Control Unit 6021.
Betrieb • Operation • Fonctionnement • Exploitatie
15
Page 16

Parameter • Parameter • Paramètre • Parameter •
Adresse • Address • Adresse • Adres 01 01 - 80
Register • Register •
Registre • Register •
Wert • Value • Valeur • Waarde
Anfahrverzögerung • Acceleration delay • Temoprisation accélération •
Optrekvertraging
Bremsverzögerung • Braking delay • Temporisation de freinage • Afrem
vertraging
Höchstgeschwindigkeit • Maximum speed •
Vitesse maximale • Maximumsneilheid
Rückstellen auf Serienwerte • Reset to series value • Remettre aux valeurs
de série • Terugzetten naar serie-instellingen
Lautstärke • Volume • Volume haut-parleur • Volume
Betrieb • Operation • Fonctionnement • Exploitatie
03 01 - 63
-
16
04 01 - 63
05 01 - 63
08 08
63 01 - 63
Page 17

Anschluss der Gleisanlage
Um Spannungsverluste auf der
Anlage zu vermeiden ist immer auf
gutes Zusammenpassen der Schienenverbindungslaschen zu achten.
Alle 3 bis 5 m ist eine neue Stromeinspeisung über die Anschlussklemmen 5654 empfehlenswert.
Befahren von Steigungen
Im Gegensatz zum Vorbild können
mit einer Modellbahn auch größere
Steigungen befahren werden. Im
Normalfall sollte eine Steigung
bei maximal 3 Prozent liegen. Im
Extremfall sind bei entsprechend
eingeschränkter Zugleistung
maximal 5 Prozent möglich. Der
Anfang und das Ende der Steigung
sind auf jeden Fall auszurunden.
Der Unterschied in der Steigung
zwischen zwei mindestens 300 mm
langen Gleisstücken darf maximal 1
bis 1,5 Prozent betragen.
Befahren von gebogenen
Gleisen
Diese Lok läuft auf Gleisbögen mit
einem Radius von mindestens
1020 mm. Die der Lok beiliegenden
Zurüstteile (2 Leitungen, Bremsschläuche, Schraubenkupplungen)
können beim Betrieb auf Gleisbögen
mit einem Radius von 1020 mm oder
1176 mm nicht verwendet werden.
Connections between the track
layout and the transformer
Rail joiners must fit well on the rails
of the track to which they are joined
to avoid voltage drop on the layout.
We recommend that you install feeder wires every 3 to 5 meters (10 to
16 feet) using the 5654 feeder clips.
Operating the locomotive on
grades
In contrast to the prototype a
locomotive on a model railroad
can operate up steeper grades.
As a general rule a grade should
be no steeper than 3%. In extreme
situations a maximum grade of 5%
is permissible, keeping in mind that
the locomo-tive’s tractive effort
will be less. The beginning and the
end of the grade must always work
gradually up to maximum grade for
the route. The maximum allowable
difference in grade between two
track sections, each with a minimum
length of 300 mm (11-3/4“) is 1 to
1.5 percent.
Operating the locomotive on
curved track
This locomotive can be operated on
curves with a minimum radius op
1,020 mm (40-5/32“). The detail parts
included with the locomotive
(2 ladders, brake lines, reproduction
prototype couplers) cannot be used
if the locomotive is to be operated
on curves with a radius of 1,020 mm
(40-5/32“) or 1,176 mm (46-1/4“).
Betrieb auf der Anlage • Operation on a layout • Exploitation sur réseau • Bedrijf op een modelbaan
17
Page 18

Connexion des voies ferrées
Pour éviter des pertes de potentiel
sur l’installation, il faut veiller à
ce que les éclisses de liaison des
rails soient tou-jours parfaitement
adaptées. Une nou-velle alimentation électrique est conseillée tous
les 3 à 5 m au moyen des griffes
d’alimentation 5654.
Franchissement des côtes
Contrairement à l’original, la maquette est également en mesure de
franchir des côtes assez importantes. En temps normal, une côte
devrait étre de l’ordre de 3% maximum. A l’extrême limite, 5% sont
envisageables avec une puis-sance
du train réduite en conséquence. Le
début et la fin de la côte doivent en
tous cas étre arrondis. La différence
de pente entre deux éléments de
voie d’au moins 300 mm de longueur
doit étre de 1 à 1,5% maximum.
Circulation sur des voies
courbes
Cette locomotive fonctionne sur
des voies courbes d‘un rayon d‘au
moins 1020 mm. Les accessoires
joints à la locomotive (2 échelles,
boyaux de frein, attelages à vis)
ne peuvent être utilisés lors d‘une
exploitation sur des voies courbes
d‘un rayon de 1020 mm ou de 1176
mm.
Aansluiting van de sporen
Om spanningsverlies op de
modelbaan te voorkomen moeten
de raillassen altijd goed op elkaar
aansluiten. Om de 3 à 5 meter moet
de voeding opnieuw op de rails
gezet worden. Daarbij zijn de aansluitklemmen 5654 aan te raden.
Berijden van hellingen
In tegenstelling tot het grote voorbeeld kunnen met een modelbaan ook
grotere hellingen bereden worden.
Normaal moet een helling maximaal
3 procent zijn. In extreme gevallen is
maximaal 5 procent mogelijk, maar
dan moet reke-ning gehouden worden met een even-redig verlies aan
vermogen. Het begin en het einde
van de helling moeten altijd gerond
worden. Het verschil in de helling
tussen twee tenminste 300 mm lange
railstukken mag maximaal 1 à 1,5
procent bedragen.
Berijden van gebogen rails
Deze loc rijdt in bogen met een straal
van tenminste 1020 mm. De onderdelen die bij de lok meegeleverd zijn
(2 ladders, remslangen, schroefkoppelingen), kunnen bij het rijden in
bogen van 1020 mm of 1176 mm niet
gebruikt worden.
Betrieb • Operation • Fonctionnement • Exploitatie
18
Page 19

Gehäuse abnehmen
Um die hervorstehenden Teile auf dem Dach der Lok vor
Beschädigung zu schützen, wird die Lok mit der Dachseite
nach unten in das Oberteil der Verpackung gelegt.
• 1.Entfernen Sie die Kupplungen vorne und hinten.
• 2.Entfernen Sie die vier Befestigungsschrauben an der
Unterseite des Modelles.
Removing the body
To protect the projecting parts on the roof of the locomotive
from damage, the locomotive is to be laid in the upper part
of its packaging with the roof upside down.
• 1.Remove the couplers both front and rear.
• 2.Remove the four mounting screws on the underside of
the model.
Enlever le carter
Afin de protéger les pièces en saillie sur le toit de la loco
motive contre
les détério rations, la locomotive est disposée toit en bas
dans la partie supérieure de l’emballage.
• 1.Enlever les attelages à l’avant et à l’arrière.
• 2.Enlevez les quatre vis de fixation situées sur la face
inférieure du modèle.
Huis afnemen
Om te voorkomen dat de uitstekende delen op het dak van
de lok beschadigen, wordt de lok met de dakkant naar beneden in het bovenste gedeelte van de verpakking gelegd.
• 1.Verwijder de koppelingen voor en achter.
• 2.Verwijder de vier bevestigingsschroeven aan de onderzi
jde van het model.
-
-
Wartung • Maintenance • Entretien • Onderhoud
19
Page 20

Schleifer wechseln
Die Schleifer sind zusätzlich angelötet.
Changing pick-up shoes
The pickup shoes are also soldered in place
on the locomotive.
Remplacement des frotteurs
Les frotteurs sont joints en plus par brasage.
Nieuwe sleepcontacten aanbrengen
De sleper is apart gesoldeerd.
Wartung • Maintenance • Entretien • Onderhoud
20
Page 21

Haftreifen wechseln
Changing traction tires
Changer les bandages d‘adhérence
Antislip band vervangen
Wartung • Maintenance • Entretien • Onderhoud
21
Page 22

Schmierung nach 40 Betriebsstunden
Nur die Kardangelenke an den eingezeichneten Stellen nach
ca. 40 Betriebsstunden ölen. Nur Märklin Schmieröl (Nr. 7149)
verwenden! Die anderen Getriebeteile sind wartungsfrei.
Lubrication after 40 hours of operation
Only the universal joint is to be oiled at the places indicated after
approximately 40 hours of operation. Use only Märklin lubrication oil (no. 7149)!
The remaining mechanism parts are maintenance-free.
Graissage après 40 heures d’exploitation
Ne graisser que les joints de cardan aux endroits répertoriés après environ 40 heures d’exploitation. N’utiiser
que de l’huile de graissage Märklin (n° 7149).
Les autres éléments d’engrenages ne demandent aucune maintenance.
Smeren na 40 bedrijfsuren
Alleen de geledingen van de kardanas op de aangegeven plaatsen na ca. 40 bedrijfsuren oliën. Alleen
Märklin-smeerolie (nr. 7149) gebruiken!
De andere onderdelen van de aandrijving zijn vrij van
onderhoud.
Wartung • Maintenance • Entretien • Onderhoud
22
Page 23

Kupplung austauschen
Beim Aufstellen der Lokomotive
als Vitrinenmodell können die automatischen
Kupplungen gegen die beiliegenden Schraubenkupplungen getauscht werden.
Changing couplers
If the locomotive is to be on static display, then
automatic couplers can be replaced by the
reproduction prototype coupler included with
the unit.
Remplacer l’attelage
Les attelages automatiques peuvent être
remplacés par les attelages à vis joints
lorsque la locomotive doit servir de maquette
d’exposition.
Koppeling vervangen
Wanneer de locomotief als vitrinemodel
opgesteld wordt, junnen de automatische
koppelingen door meegeleverde schroefkoppelingen vervangen worden.
Wartung • Maintenance • Entretien • Onderhoud
23
Page 24

Pflegehinweis
Diese Lok kann auch im Aussenbereich eingesetzt werden. Ein Betrieb
bei schlechten Witterungsbedingungen (Schnee oder Regen) wird nicht
empfohlen.
Antrieb und Elektronik sind gegen
Spritzwasser geschützt. Wasserdurchfahrten sind nicht möglich. Es
wird empfohlen, das Modell nach
dem Betrieb im Außenbereich auf
Verschmutzung zu prüfen und gegebenenfalls trocken mit Staubtuch
oder Pinsel zu reinigen. Nie die Lok
unter fließendem Wasser reinigen.
Hinweis: Reinigungsmittel können
die Farbgebung oder die Beschriftung der Lok angreifen und
beschädigen
Tips For The Care
This locomotive can also be used
outdoors. We do not recommend
running the locomotive in bad weather (snow or rain).
The mechanism and the electronic circuit are protected against
spraying water. The locomotive
cannot be run through water. We
recommend that you check the
locomotive over after running in
outdoors and that you dry it with a
cloth or clean in with a brush if necessary. Never clean the locomotive
with running water.
Important: Cleaning fluids can
attack the finish and lettering for the
locomotive and damage them.
Remarque sur l’entretien
Cette locomotive peut également
être mise en service à l’air libre. Une
utilisation par mauvais temps (neige
ou pluie) n’est pas recommandée.
Le moteur et l’électronique sont
protégés contre les projections
d’eau. Des trajets dans l’eau ne sont
pas possibles. Il est recommandé de
vérifier l’encrassement du modèle
après une utilisation à l’extérieur
et, le cas échéant, de nettoyer le
modèle à l’aide d’un chiffon doux ou
un pinceau. Ne jamais nettoyer le
modèle au jet d’eau.
Attention: Certains solvants et produits d’entretien peuvent altérer le
marquage et la peinture du modèle.
Opmerkingen voor het
onderhoud
Deze loc kan ook buiten gebruikt
worden. Het gebruik bij slecht weer
(sneeuw of regen) is niet aan te raden.
Aandrijving en elektronica zijnweliswaar afgeschermd tegen spatwater
maar rijden door het water is niet
mogelijk. Het is aan te bevelen het
model na het gebruik buiten te controleren op vuil en dit eventueel droog
te verwijderen met een stofdoek of
een zachte kwast. Nooit de loc onder
stromend water reinigen.
Opmerking: Reinigingsmiddelen
kunnen de lak en de opschriften op
de loc aantasten en beschadigen.
Wartung • Maintenance • Entretien • Onderhoud
24
Page 25

Wartung • Maintenance • Entretien • Onderhoud
25
Page 26

2
1
3
4
21
20
19
16
17
5
6
8
9
7
11
10
15
6
11
5
10
8
7
9
14
13
12
13
14
12
18
15
52
51
50
49
25
29
53
50
48
47
46
45
23
54
31
22
22
22
22
31
54
41
32
33
24
26
34
30
30
32
33
43
38
38
40
37
35
36
39
44
39
40
42
43
36
35
27
28
Details der Darstellung können von dem
Modell abweichen
Wartung • Maintenance • Entretien • Onderhoud
26
Page 27

1 Lokomotiv-Aufbau (komplett) 123 268
2 Fenster (Führerstand) 540 215
3 Fenster, klein 540 216
4 Fenster, groß 540 217
5 Lichtkörper, oben 540 123
6 Lichtleiterkabel 540 351
7 Lichtkörper, rot 540 125
8 Lichtkörper 540 124
9 Lichtkörper, links —
10 Beleuchtungsplatine 540 338
11 Linsenschraube 588 250
12 Trennwand-Führerstand 540 036
13 Leuchtdiode 540 342
14 Kabel 540 346
15 Führerstand 540 037
16 Steuerkabelanschluss 123 286
17 Lokführer 540 239
18 Linsenschraube 588 250
19 Druckfeder 765 660
20 Puffer, flach 123 287
21 Puffer, gewölbt 123 288
22 Linsenschraube 587 110
23 Boden 123 260
24 Leiter 123 264
Getriebe (komplett) 540 065
mit
25 Motor 540 064
26 Zahnrad 537 660
27 Getriebeabdeckung 536 560
28 Schraube 545 620
29 Linsenschraube 593 040
30 Kardanwelle 123 296
31 Kupplungsdeichsel 123 263
32 Unterlegscheibe 721 300
33 Linsenschraube 588 230
34 Drehgestell vorne (komplett) 123 261
mit
35 Radsatz 123 470
36 Mitnehmer (Kardanwelle) 123 293
37 Radsatz mit Haftreifen 123 467
38 Haftreifen 471 000
39 Schleifer 544 840
40 Kardan 123 289
41 Drehgestell hinten (komplett) 123 262
mit
42 Radsatz 123 472
43 Sicherungsscheibe 608 130
44 Tank 123 283
45 Lautsprecher 100 019
46 Isolierscheibe 721 710
47 Linsenschraube 587 070
48 Filzauflage 540 591
49 Platine 122 783
50 Linsenschraube 593 040
51 Leiterplatte Geräusch 602 023
52 Linsenschraube 588 230
53 Decoder 123 267
54 Kupplung 540 221
Beipack 123 438
Wartung • Maintenance • Entretien • Onderhoud
27
Page 28

This device complies with Part 15 of the FCC Rules.
Operation is subject to the following two conditions:
(1) This device may not cause harmful interference, and
(2) this device must accept any interference received, including
interference that may cause undesired operation.
Gebr. Märklin & Cie. GmbH
Postfach 8 60
D-73008 Göppingen
www.maerklin.com
123459/0208/HaEf
Änderungen vorbehalten
© by Gebr. Märklin & Cie GmbH
 Loading...