

Mark Levinson No 380-S Owners manual

Owner’s Manual
Nº380S
Preamplifier
Madrigal Audio Laboratories
R
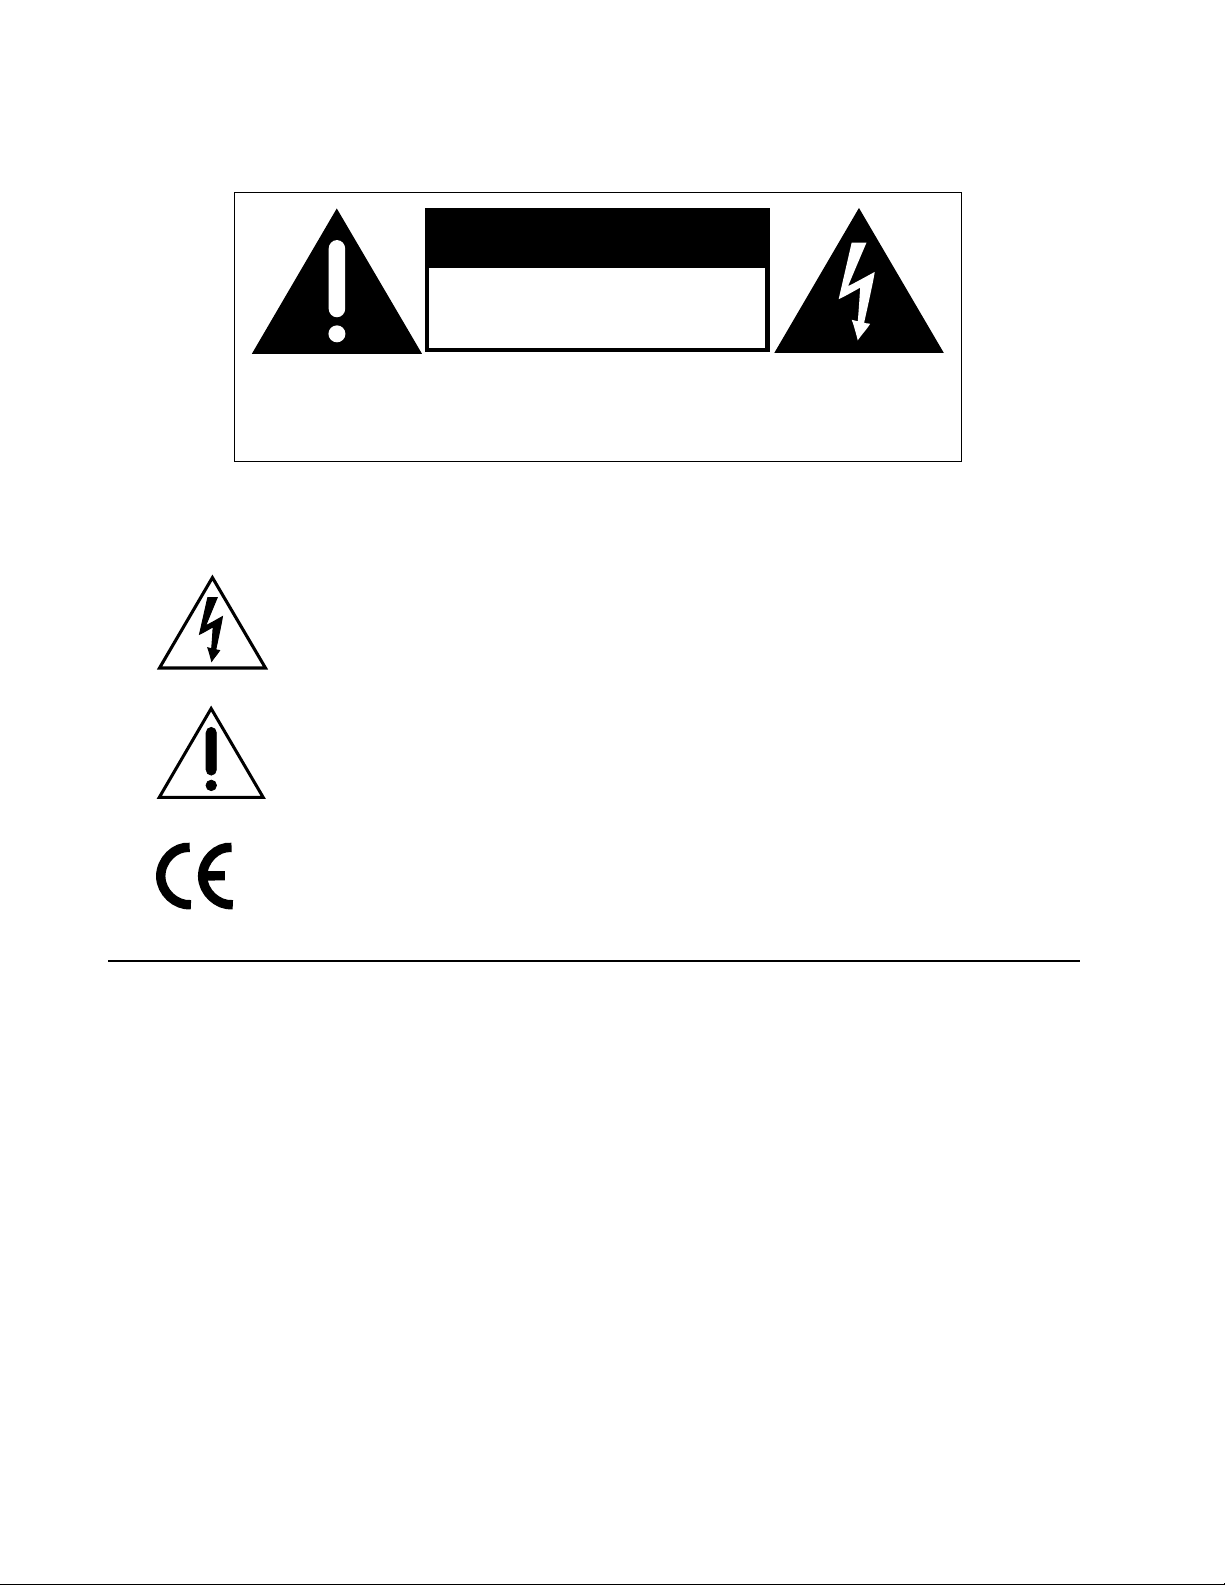
WARNING: TO REDUCE THE RISK OF FIRE OR ELECTRIC SHOCK, DO
NOT EXPOSE THIS APPLIANCE TO RAIN OR MOISTURE.
CAUTION
RISK OF ELECTRIC SHOCK
DO NOT OPEN
CAUTION: TO REDUCE THE RISK OF ELECTRICAL SHOCK, DO
NOT REMOVE COVER. NO USER-SERVICEABLE PARTS INSIDE.
REFER SERVICING TO QUALIFIED PERSONNEL.
The lightning flash with arrowhead symbol, within an equilateral triangle, is intended to
alert the user to the presence of uninsulated “dangerous voltage” within the product’s enclosure that may be of sufficient magnitude to constitute a risk of electric shock to persons.
The exclamation point within an equilateral triangle is intended to alert the user to the
presence of important operating and maintenance (servicing) instructions in the literature
accompanying the appliance.
Marking by the “CE” symbol (shown left) indicates compliance of this device with the EMC
(Electromagnetic Compatibility) and LVD (Low Voltage Directive) standards of the
European Community.
NOTICE
This equipment has been tested and found to comply with the limits for a Class B digital device, pursuant to Part 15 of the
FCC Rules. These limits are designed to provide reasonable protection against harmful interference in a residential
installation. This equipment generates, uses and can radiate radio frequency energy and, if not installed and used in
accordance with the instructions, may cause harmful interference to radio communications. However, there is no guarantee
that interference will not occur in a particular installation. If this equipment does cause interference to radio or television
reception, which can be determined by turning the equipment on and off, the user is encouraged to try to correct the
interference by one or more of the following measures:
• Reorient or relocate the receiving antenna;
• Increase the separation between the equipment and the receiver;
• Connect the equipment into an outlet on a circuit different from that to which the receiver is connected;
• Consult the dealer or an experienced radio/TV technician for help.
CAUTION: Changes or modifications to this equipment not expressly approved by the manufacturer could void the user’s
authority to operate the equipment.
The information contained in the manual is subject to change without notice. The most current version of this manual will
be posted on our web site at http://www.madrigal.com.

Important Safety Instructions
Please read all instructions and precautions carefully and completely before operating your Mark Levinson
power amplifier.
1. ALWAYS disconnect your entire system from the AC mains before connecting or disconnecting
any cables, or when cleaning any component.
2. This product must be terminated with a three-conductor AC mains power cord which includes
an earth ground connection. To prevent shock hazard, all three connections must ALWAYS be
used.
3. AC extension cords are not recommended for use with this product.
4. NEVER use flammable or combustible chemicals for cleaning audio components.
5. NEVER operate this product with any covers removed.
6. NEVER wet the inside of this product with any liquid.
7. NEVER pour or spill liquids directly onto this unit.
8. NEVER block air flow through ventilation slots or heatsinks.
9. NEVER bypass any fuse.
®
10. NEVER replace any fuse with a value or type other than those specified.
11. NEVER attempt to repair this product. If a problem occurs, contact your Mark Levinson
tailer.
12. NEVER expose this product to extremely high or low temperatures.
13. NEVER operate this product in an explosive atmosphere.
14. ALWAYS keep electrical equipment out of the reach of children.
15. ALWAYS unplug sensitive electronic equipment during lightning storms.
®
re-

From all of us at Madrigal Audio Laboratories, thank you for choosing the
Mark Levinson Nº380S Preamplifier.
A great deal of effort went into the design and construction of this precision
device. Used properly, it will give you many years of enjoyment.
4

Table of Contents
Unpacking and Placement ........................................................................ 6
unpacking........................................................................................................... 6
installing the batteries in the remote control .................................................... 6
placement .......................................................................................................... 6
ventilation............................................................................................................ 6
Operating Voltage ...................................................................................... 7
A Quick Start… ............................................................................................ 8
Front Panel ................................................................................................... 9
Rear Panel ..................................................................................................12
building a link cable ................................................................................. 14
using a turntable ............................................................................................... 15
tip polarity for external IR input ................................................................ 15
Remote Control ..........................................................................................16
Setup and Installation ................................................................................18
connections and cables ................................................................................. 18
setup overview ................................................................................................. 19
available input names ..................................................................................... 19
naming an input “EQ” ...................................................................................... 20
programming input names ............................................................................. 20
assigning record outputs .................................................................................. 21
results of unrealistic tests ................................................................................... 22
programming input offsets .............................................................................. 22
programming an automatic output (volume) level ...................................... 23
programming the mute function .................................................................... 25
volume lock ...................................................................................................... 26
standby timer .................................................................................................... 27
Operational Modes ................................................................................... 28
the monitor mode ............................................................................................ 28
the record select mode ................................................................................... 28
the balance mode .......................................................................................... 29
balance control tip .......................................................................................... 30
Using Surround Sound Processors ............................................................. 31
the SSP must not come after the preamp ...................................................... 31
the SSP must not come before the preamp ................................................... 31
the SSP must not be in a tape loop ................................................................ 32
the SSP & the Nº380S ....................................................................................... 32
wiring diagram using an SSP ........................................................................... 33
noise in a/v systems.......................................................................................... 33
Linked Functions ........................................................................................ 34
display intensity................................................................................................. 34
standby link ....................................................................................................... 34
play link ............................................................................................................. 34
record link ......................................................................................................... 34
Care and Maintenance ............................................................................ 35
U.S. and Canadian Warranty .................................................................... 36
90-day limited warranty ................................................................................... 36
five year extended warranty ........................................................................... 36
Obtaining Service ..................................................................................... 37
Specifications ............................................................................................ 38
Dimensions ................................................................................................ 39
5

Unpacking and Placement
unpacking Unpack your Nº380S Preamplifier and keep all packing materials for future trans-
port. Locate and remove all accessory items from the cartons. Accessories include:
installing the batteries
in the remote control
placement The Nº380S should be placed close to your source equipment, thus keeping in-
190° shielded AC power cord 1
1 Nº380S remote control 11⁄8" Allen key
2 alkaline batteries
Included with your new Mark Levinson preamplifier is a pair of knit, white
gloves designed to assist you in the initial unpacking and placement of your new
purchase. Please accept them as a token of our appreciation for having purchased
one of our products.
Using the supplied 5⁄64" Allen key, remove the two screws in the bottom end cap
of the remote control (i.e., the end opposite the IR transmitter lens). Insert the
two alkaline batteries found in the Accessories box, being careful to follow the
polarity indications given on the inside of the battery compartment. Replace the
end cap and the screws, using the Allen key.
If at some point you notice that your remote control seems not to be performing
as well as it once did, its batteries are probably running low. Check the batteries
periodically, and replace batteries before they are “dead.” (Fully discharged batter-
ies are prone to leaking corrosive chemicals—the greenish “gunk” you may have
seen around battery terminals of other remote controls.)
terconnect cabling short. We strongly recommend shelf mounting to allow for
proper ventilation.
5
⁄64" Allen key
The Nº380S is designed for continuous operation, which is why it features a
standby mode rather than a full “off” mode—it is designed to be connected to
the AC mains at all times for the best performance.
ventilation Be sure to allow 3 to 4 inches of clearance above the Nº380S to allow heat dissi-
pation through air circulation.
Drawings are included in this manual to facilitate special installations and custom
cabinetry (see “Dimensions”).
Caution! It is extremely important that all components in your system
be properly grounded. Under no circumstances should you
defeat a three-prong AC cord with a “ground-lifter” or
“cheater” adaptor, as doing so may allow dangerous
voltages to build up between components. The presence of
these voltages would pose a threat to both your person and
your equipment.
6

Operating Voltage
The Nº380S Preamplifier is set at the factory (internally) for 100V, 120V, 200V,
230V, 220V, or 240V AC mains operation @ 50 or 60Hz. (230V/50Hz only in Euro-
pean Union countries, in compliance with CE regulations.) This voltage setting
cannot be changed by the user.
Make sure that the label on the bottom panel of the Nº380S (adjacent to the AC
cord) indicates the correct AC operating voltage for your location.
If the voltage indicated on your Nº380S is incorrect, or if you wish to change the
AC operating voltage of your Nº380S as the result of moving to a different country than the one in which you purchased your digital audio processor, see your
Mark Levinson dealer.
The Nº380S is easily powered by a normal 15-ampere AC mains line. If other devices are also powered from the same AC line, their additional power consumption should be taken into account.
7

A Quick Start…
We recognize that many people are understandably eager to begin listening to
their new components, and that reading the manual is often done (if at all) at a
later time—perhaps while listening to music through the new product itself. We
strongly recommend that you read this manual thoroughly, as the Nº380S Preamplifier incorporates many unusual features which enhance its operation.
Fortunately, we can help you get some music up and running on your system
quickly, so that you may begin enjoying your new preamplifier while reading
more about it. The goal here is simply to make some music quickly. (The follow-
ing procedure assumes that the rest of your system is already connected; e.g.,
power amplifier to speakers, etc.)
1 TURN OFF YOUR ASSOCIATED COMPONENTS
This minimizes the opportunity for a momentary electrical surge to disturb
your system while making connections. If you have a large power amplifier,
allow its power supply to fully discharge before proceeding.
2 CONNECT A SOURCE TO INPUT 1 (
Connect the output of your CD player to the Left and Right Input 1 XLR
jacks on the rear panel of your Nº380S preamplifier. (Use the Input 3 RCA
jacks if your source is single-ended. If used, press the Input 3 button on the
face of the Nº380S to select this input.) High quality interconnecting cables
such as Madrigal CZ Gel will yield superior results, and are strongly recommended.
3 CONNECT THE Nº380S OUTPUTS TO YOUR POWER AMP
The Left and Right Main Out jacks on the rear panel of the Nº380S should
be connected to the corresponding inputs of your power amplifier. If your
power amplifier has balanced inputs and you have appropriate high-quality
cables (with XLR plugs at both ends), we recommend using the Balanced
Main Outs. Otherwise, use the (single-ended) Main Outs from the preamplifier to your power amplifier. Once again, high quality interconnecting cables
such as Madrigal CZ Gel will yield superior results, and are strongly recommended.
4 PLUG THE Nº380S INTO THE WALL OUTLET
Connect the AC cord to the male IEC connector on the center of the bottom panel of the Nº380S, then connect the AC cord to the AC mains. When
power is first applied, the Nº380S will initialize (showing all current input
names), automatically select the first available input (CD1), and set its output level to OFF. (If you used input 3, select it now.)
INPUT 3 IF SINGLE-ENDED
)
5 TURN ON YOUR SOURCE COMPONENT; TURN ON YOUR POWER AMPLI-
FIER; SLOWLY RAISE THE VOLUME ON THE Nº380S TO A COMFORTABLE
LEVEL
Congratulations! You should now be able to enjoy your favorite music while
reading the rest of this manual.
8
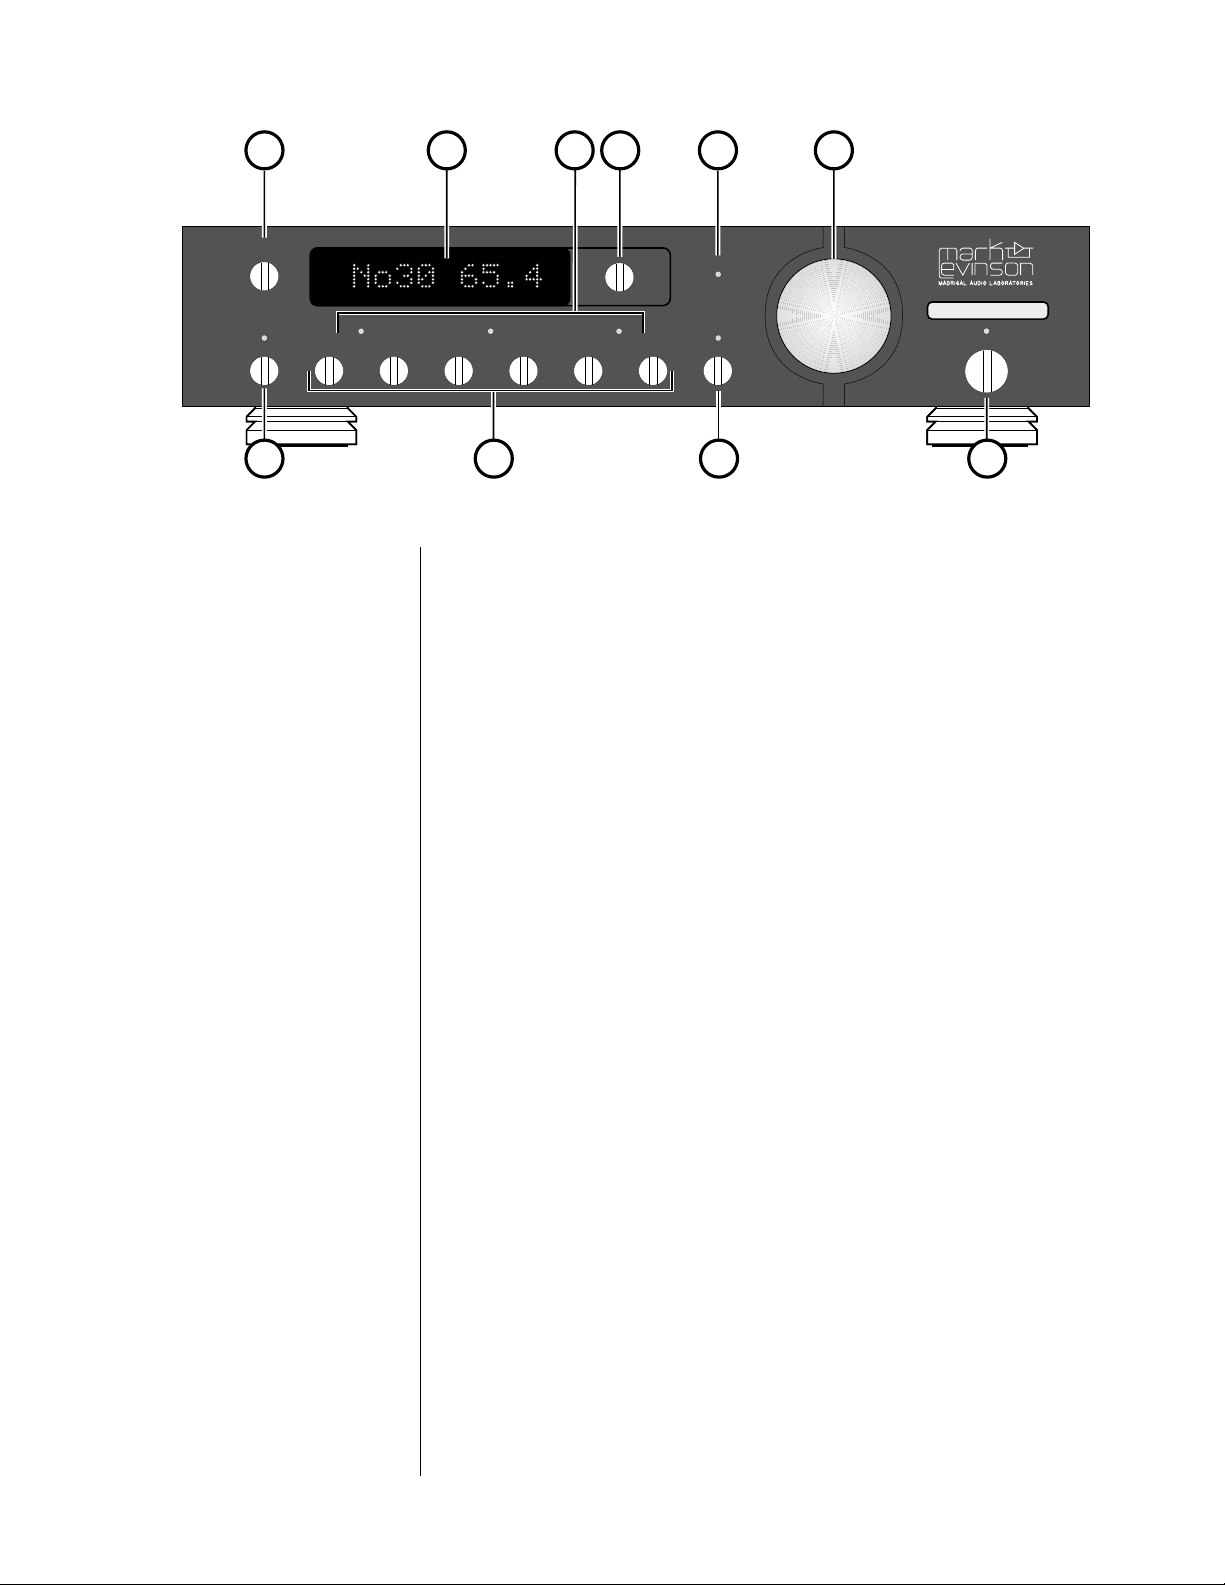
display
intensity
mono
321 5
mode
monitor record select balance
123456
inverted
polarity
mute
64
PREAMPLIFIER Nº 380S
standby
987
10
Front Panel
1 DISPLAY INTENSITY BUTTON
Cycles among four levels of brightness (including “off”) for the display, allowing adjustment for various ambient lighting conditions. When “off,” the
display will turn on for a few seconds whenever a setting is changed. When
used in conjunction with certain compatible Mark Levinson components,
this button will control the display intensity of all linked components. (For
more information, see “Linked Functions.”)
2 ALPHANUMERIC DISPLAY
Provides a wide range of information concerning the operational status of
the Nº380S. The information displayed depends on the operating mode the
Nº380S is in (determined by the mode button). The information displayed
is summarized below:
monitor Selected (audible) Source and Volume
record Select “RECD” and Source to be recorded
balance Direction and Magnitude of Offset
In addition, when used with Mark Levinson power amplifiers that incorporate our communications link circuitry, this display is used to indicate the
presence of a fault condition (if any) in the amplifier. Please refer to the
owner’s manual of your amplifier for more information. For more detailed
information on the preamplifier’s use of this display, see “Operational
Modes.”
9

3 MODE INDICATORS
Three LEDs give visual confirmation of the operational mode the Nº380S is
in at any moment. When the balance control of the Nº380S is “off-center,”
the balance LED remains lit as a reminder, in addition to other mode indi-
cators
that might be on to indicate either monitor or record select.
4 MODE BUTTON
Cycles among the three primary operational
modes of the Nº380S: monitor
(the source being listened to); record select (the source being provided to
the Record Outputs); and balance (the relative volumes of the Left and
Right channels). Confirmation of these operating modes is given by the
mode indicators below the alphanumeric display. (See 3, above.)
5 INVERTED POLARITY INDICATOR
The polarity (sometimes inaccurately called “absolute phase”) of the output
of the Nº380S may be inverted via the Nº380S remote control, in which
case this LED will light as confirmation. A second press of the polarity button on the remote control will restore the polarity of the output to its original, non-inverted state.
6 VOLUME KNOB
This control is normally used to adjust the listening volume, and does not
effect the level of the signal being sent to the Record Outputs. When in
balance mode, this knob is used to vary the relative output of the Left and
Right channels. It is also used during setup for various adjustments; see
“Setup and Installation.”
7MONO BUTTON
This button toggles between stereo and mono operation. When in mono, it
activates circuitry which combines left and right input signals, and sends the
resulting monophonic signal to both left and right outputs. This circuit is
particularly useful when listening to older, monophonic source material,
since significant noise reduction is often realized by listening to mono recordings in mono.
8 SOURCE SELECTOR BUTTONS
Inputs 1–6 are selected by pressing their respective buttons. When in the
monitor mode, pressing one of these buttons will select the source to be
heard (i. e. , sent to the main outputs); when in record select mode, pressing
one of these buttons will select the source to be recorded (i. e., sent to the
record outputs).
9 MUTE BUTTON
Pressing the mute button will reduce the main output level of the preamplifier by a user-modifiable amount, ranging from 1 to 60 decibels. Pressing
the Mute button a second time without adjusting the volume will return it
to its previous setting.
10

If you adjust the volume with either the volume knob or the remote control
while mute is engaged, the preamplifier will adjust its volume from the
muted volume and disengage the mute function. (This to prevent an unpleasant surprise when, having increased the volume while muted, someone un-mutes the system.)
The factory default setting of the Mute circuit is -20 dB. (See “Setup and
Installation” for information on changing the factory default setting.)
10 STANDBY BUTTON
Toggles the Nº380S between normal operation and
standby, wherein the
display is turned off, the outputs are disconnected, and all controls are inoperable. All critical circuitry remains powered-up during standby to en-
sure immediate, optimal performance when you are ready to listen to music.
The LED above the standby button will blink slowly when the Nº380S is in
standby, indicating that power is still being provided to the unit. (If the
Nº380S is Linked to other Mark Levinson components which are also in
standby, they will blink in unison.)
11
1 3 4 4
2
5
right balanced
main out
right
rec out 1
rec out 2
right balanced
right main out left main out
right balanced
input 1
PUSH PUSH PUSH PUSH
input 2
right
input 3
input 4
communication ports
right
right
slave external master
right
right
input 5
input 6
7
6
7
left
input 6
left
rec out 2
left
left
input 5
input 4
6 3
left
rec out 1
left
input 3
PREAMPLIFIER Nº380S
PREAMPLIFIER Nº38
designed and manufactured in U.S.A.
by
MADRIGAL S/N
left balanced
input 2
left balanced
input 1
2
Rear Panel
Note: All left-channel inputs and outputs are on the left of the rear panel as seen
from the front, and all right-channel inputs and outputs are on the right of the
rear panel as seen from the front. This design minimizes any possible confusion
when changing connections once the unit is installed, while also maximizing
channel separation in this dual monaural preamplifier.
left balanced
main out
1
1 BALANCED MAIN OUTPUTS
If your power amplifier is equipped with balanced (sometimes called “differential”) inputs, it is best to use these balanced outputs on your Nº380S. A
balanced signal from preamplifier to power amplifier will offer the highest
possible performance with the best immunity from common-mode noise,
such as radio frequency interference (RFI). The balanced output signal is
made available by way of precision male XLR connectors (requiring female
XLRs on the preamplifier end of the interconnecting cable).
The pin assignments of these XLR-type male outputs are:
Pin 1: Signal ground
12
3
Pin 2: Signal + (non-inverting)
Pin 3: Signal – (inverting)
Connector ground lug: chassis ground
Refer to your power amplifier’s operating manual to verify that the pin assignments of its input connectors correspond to the Nº380S. If not, wire the
cable so that the appropriate output pin connects to the equivalent input
pin.
Connect the right-channel and left-channel balanced main outputs of the
Nº380S to the appropriate balanced inputs of the power amplifier.
12
 Loading...