

Page 1
LED CHRISTMAS WREATH INSTRUCTIONS
PLEASE READ THE INSTRUCTIONS BELOW
BATTERY INSTALLATION
1. Remove battery compartment from wire cage on back of product.
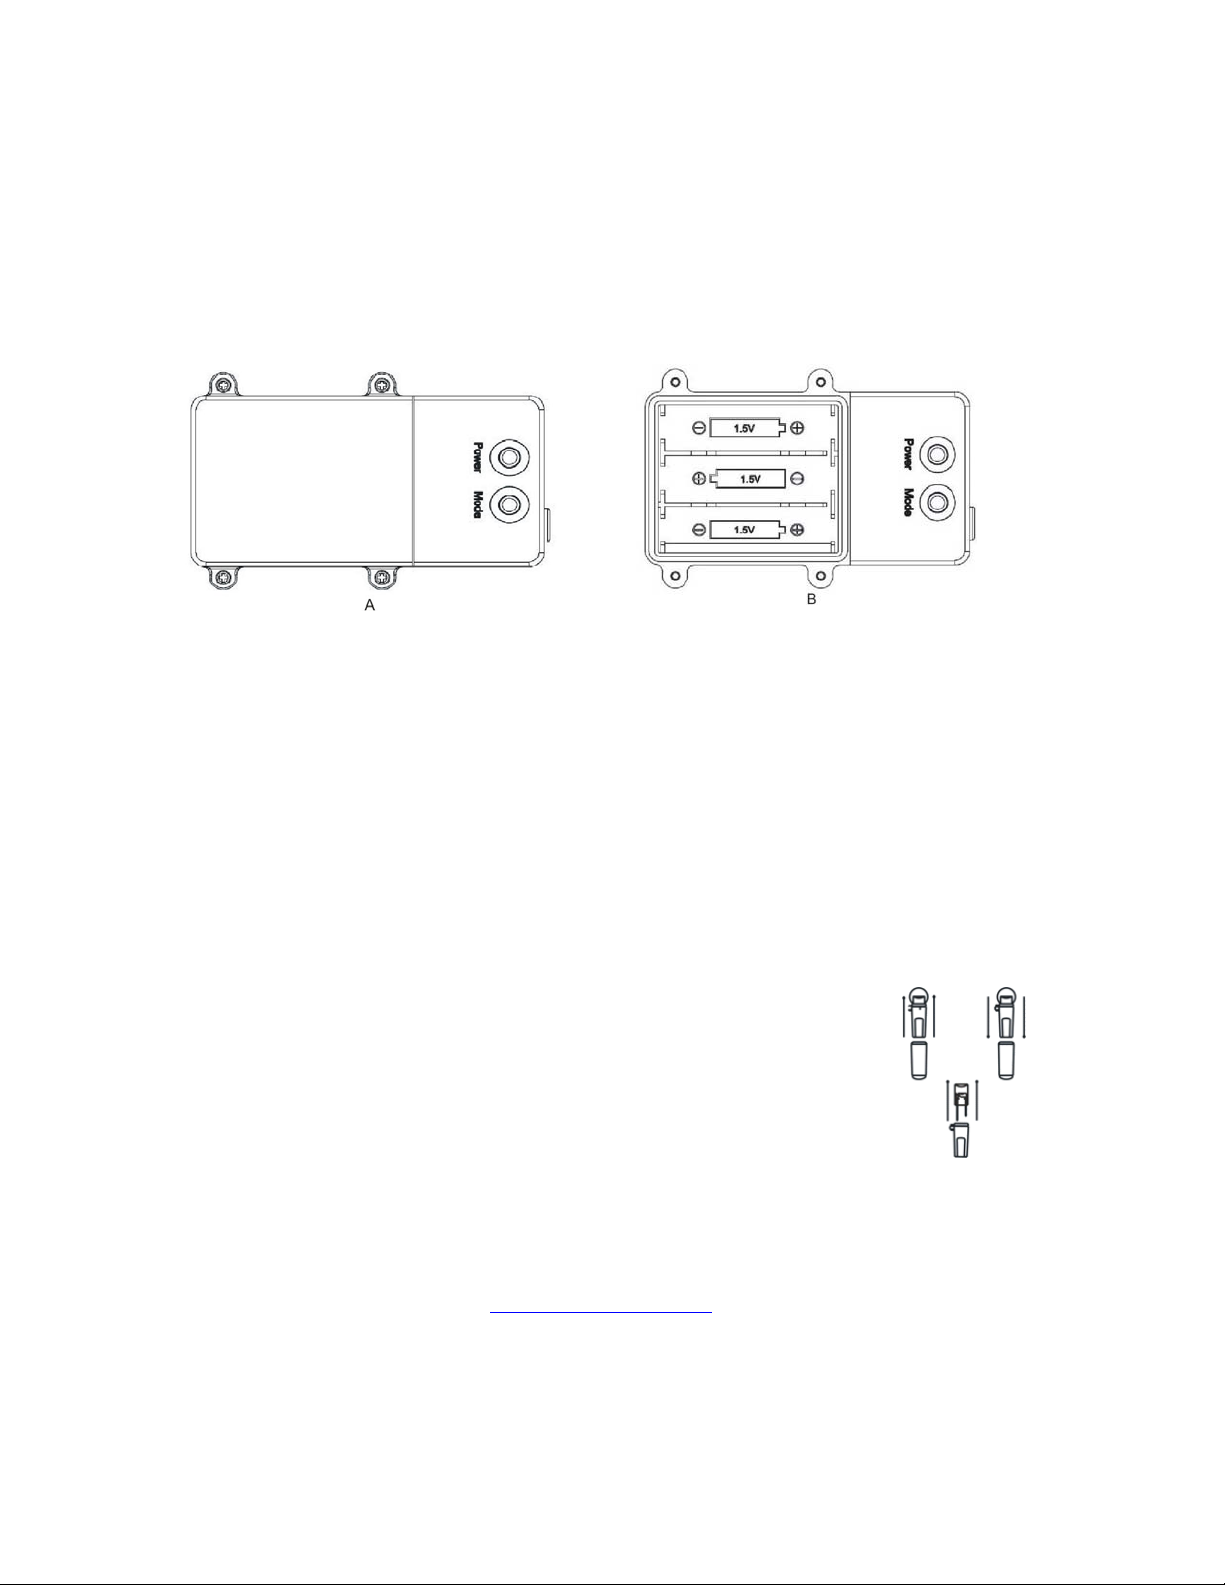
2. Remove the 4 screws and slide the battery cover from battery compartment (see picture A).
3. Insert 3 “AA” batteries (see picture B). Be sure the batteries (not included) are installed with the correct
polarity (+/-).
4. Replace the battery cover and tighten the screws.
5. Press the "POWER" button to operate the product.
OPERATION
1. This wreath includes an Automatic Timer. Power will be cut off automatically after six hours of
operation, and turn on again after eighteen hours. This mechanism will keep working in cycle unless you
press the POWER button to completely switch off the wreath.
2. “MODE” button on the battery box has the following functions: TWINKLE; STEADY ON
3. To switch off the wreath, just simply press the POWER button.
CAUTION
1. Do not mix old and new batteries.
2. Do not mix Alkaline Standard (Carbon-Zinc) or rechargeable (Nickel Cadmium) batteries.
3. To avoid leakage or explosion, do not put batteries in fire.
4. Replace the batteries if the LED lights do not come on, as this may be an indication that batteries are
becoming worn out.
5. Remove the batteries if wreath is to be left unused for a long time.
6. Clean the battery contacts prior to battery installation.
REPLACE LED BULBS
Step 1) Turn the wreath to off.
Step 2) Pull bulb and plastic base straight out of bulb holder.
Step 3) Replace failed bulb with a bulb of the same voltage
and wattage. (2 extra bulbs included with product).
Mark Feldstein & Associates, inc.
www.markfeldstein.com
 Loading...