

Page 1
OWNER’S MANUAL
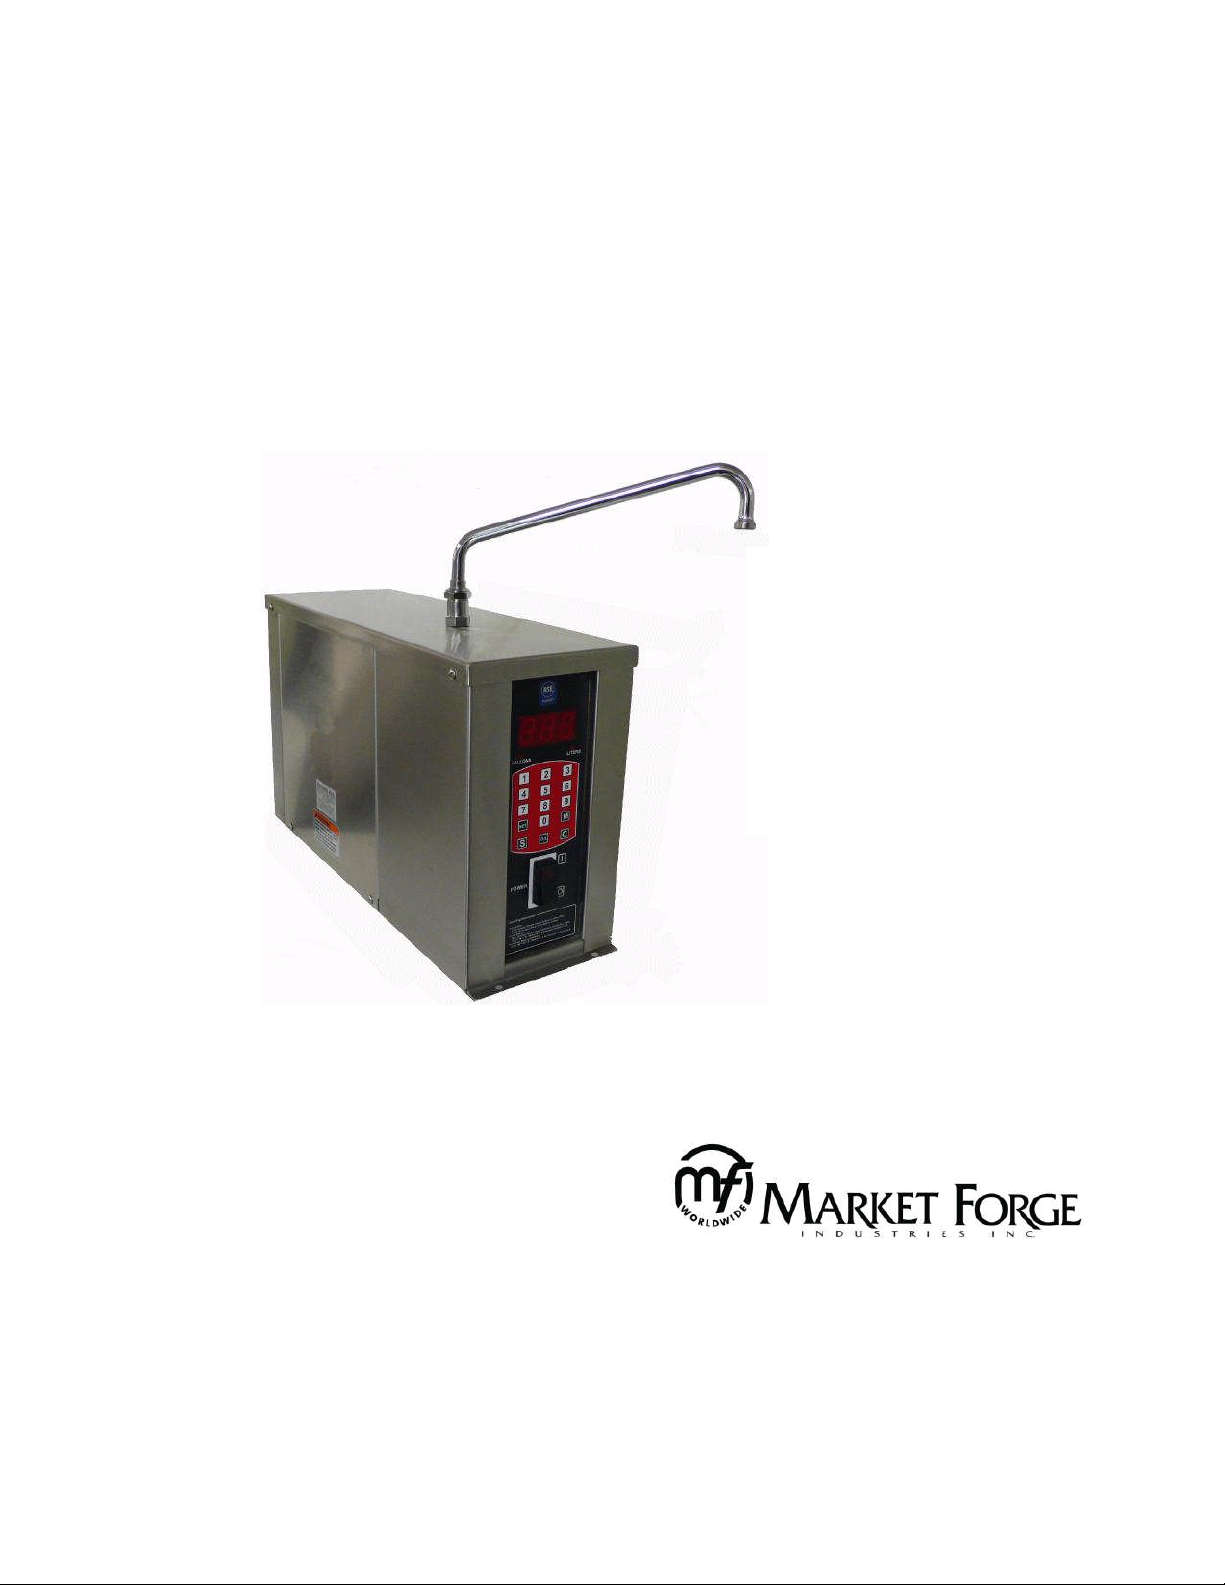
AUTOMATIC WATER METER
MODELS:
AWM-1
AWM-2
INSTALLATION
OPERATION
WIRING
35 Garvey Street l Everett l MA l 02149
Tel: (617) 387-4100 l Toll Free: (866) 698-3188
Fax: (617) 387-4456 l Fax Outside MA: (800)227-2659
custserv@mfii.com l www.mfii.com
Form No.: S-6008 Rev: B 02/12
1
Page 2
IMPORTANT NOTESFOR INSTALLATION ANDOPERATION
This is the safety alert symbol. It is used to alert you to potential personal injury hazards.Obeyall safety messagesthatfollowthis symbol to avoid possible injury or death.
WARNING:Improper installation,operation, adjustment, alteration,
serviceormaintenancecancausepropertydamage,injuryordeath.
Read the installation, operating and maintenance instructions
thoroughlybefore installing, operating or servicing this equipment.
NOTICE:
It is recommended that this manual be read thoroughly and that all instructions be followed carefully.
Contact the factory,the factoryrepresentative or local servicecompany toperformmaintenanceand repairs.
Do not attempt to operate this unit in theevent of a power failure.
This manualshould be retained for future reference.
2
Page 3

TABLE OF CONTENTS
DESCRIPTION PAGE
Important Notes for Installation and Operation ............................................ 2
Service Connections ..........................................................................4
Installation Instructions ............................................................................4
Wiring....................................................................................................5
Operation Instructions ...........................................................................6
3
Page 4

SERVICE CONNECTIONS
E Electrical Connection – 3-Prong Plug, 125V. CW Cold Water – Brass Pipe, 3/4" MPT.
Specifications are subject to change without notice.
WATER CONNECTION: 3/4" MPT at base of unit.
ELECTRICAL CONNECTION: NEMA 5-15P cord and plug 6' (2 m) long.
INSTALLATION INSTRUCTIONS
Place Water Meter in position on level counter top or table. Mark the four corners and location of mounting holes. Drill 5/16 holes and fasten in position. Seal around the bottom edge of unit with a bead of RTV or equivalent sealant.
Unit may also be mounted on wall with factory fitted mounting brackets.
4
Page 5

5
Page 6

OPERATING INSTRUCTIONS
Normal use:
1. Set the [POWER] switch to ON [ I ].
2. Select gallons or liters using the [G/L] key.
3. Enter the number of units to be dispensed using the keypad.
4. Press [S] to start. Water will begin to be dispensed as remaining units displayed. The water will stop and an audible signal sounds once the total amount has been dispensed.
NOTE:
TosetMemory:
1. Enter the desired volume.
2. Select gallons or liters.
3. Press the [SET] key followed by the [M] key and the memory location 0 to 9.
To retrieve memory and start:
1. Press [M] followed by the memory location 0 to 9.
2. Press [S] to start the dispensing cycle.
To pause or stop the dispensing cycle, press [C] once. To resume the cycle press [S]. Pressing [C] twice will cancel and clear the display.
6
 Loading...