

Page 1

TM
UNITY 2
CIA 8 Installation Manual
Version 1.1
July 2008
(Changes: Section 2.4)
1. Introduction ........................................................................................................... 2
2. Installing the CIA 8 onto UNITY 2 ............................................................................. 2
2.1. Sample line connection ..................................................................................... 2
2.2. Connecting UNITY 2 to CIA 8 when no dryer is fitted ............................................ 3
2.3. Connecting the MFC in CIA 8 to UNITY 2 ............................................................. 3
2.4. Downloading the operating software to UNITY 2 – CIA 8 ....................................... 4
2.5. Detecting and setting the external MFC............................................................... 5
CIA 8 Installation Manual
1
Page 2
1. Introduction
The CIA 8 is an extension of the Air Server for work that requires up to 8 channels with
internal standard addition.
2. Installing the CIA 8 onto UNITY 2
See the Air Server installation manual. Below are the deviations from the Air Server
instructions.
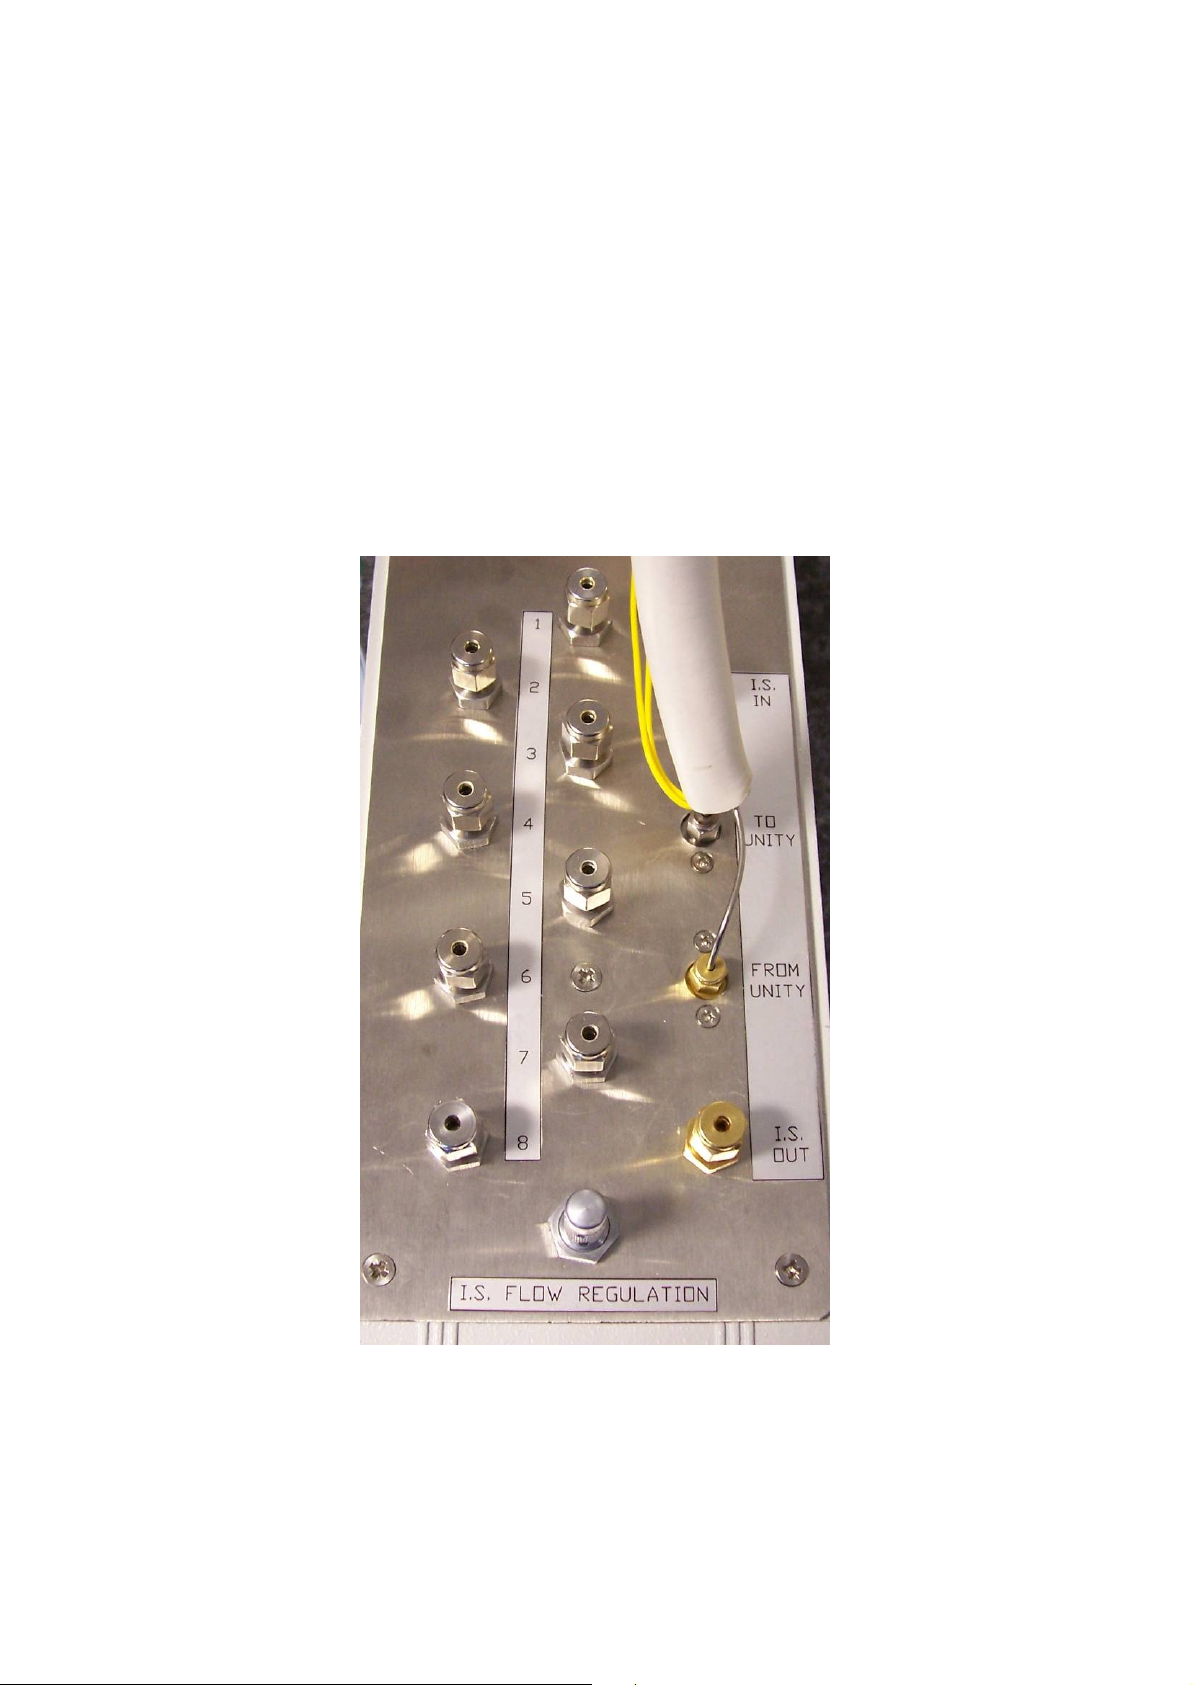
2.1. Sample line connection
Sample lines are connected to the fittings on the top plate of the CIA 8 labeled 1 – 8. Internal
standard gas is connected to the 'IS In' fitting.
CIA 8 Installation Manual
2
Page 3

2.2. Connecting UNITY 2 to CIA 8 when no dryer is fitted
Connect the two 1/16” nuts on the heated transfer line as shown above with the brass
connector in the 'From UNITY' position and the stainless steel connector in the 'To UNITY'
position.
Next connect the heater connector as highlighted.
2.3. Connecting the MFC in CIA 8 to UNITY 2
Using 1/16” PEEK and 1/8” T pieces connect the outlet lines from the split and desorb needle
valves together and connect to the ‘flow in’ union on the back panel of CIA 8.
CIA 8 Installation Manual
3
Page 4

2.4. Downloading the operating software to UNITY 2 – CIA 8
Once the firmware has been downloaded click on the 'View' menu of the software, click on
'Options' and then select the 'Configurations' tab.
Ensure the 'Number Of Channels' is set to 8 and the 'Air Server Internal Std.' check box is
ticked as shown. Do not tick ‘Series 2 Airserver’.
A “Change of System Configuration” warning message will be displayed – click ‘OK’ a
“Configurations Options” dialogue box then appears - click ‘OK’.
Click ‘OK’ on the Options page - a “Software is shutting down” message will be displayed
telling you that the software is closing in order to effect the changes just made.
Recycle the power on the CIA 8 and then restart the UNITY 2 software by double clicking on
the UNITY icon on the desktop. Wait as the software is downloaded to the CIA 8.
CIA 8 Installation Manual
4
Page 5

2.5. Detecting and setting the external MFC
CIA 8 contains a MFC which is external to UNITY 2. Once the CIA 8 is correctly configured (see
above) go to ‘View – Options – Flow Control’
Click ‘Scan for Flow Controllers’ (password is Davinci) to automatically detect all MFCs
present.
Designate the external MFC to control the ‘UNITY Split & Trap’ flow by using the drop down
dialogue box.
Enter the maximum flow of the MFC into the ‘Full range ml/min’ box.
Ensure the Split and desorb needle valves on the UNITY 2 are open enough to allow the
desired flow.
CIA 8 Installation Manual
5
 Loading...