

Marbletrend Madeira Bath/Basin Mixer with Spout, Madeira Shower Mixer, Sardina Shower Mixer, Madeira Shower Mixer with Diverter, Sardina Bath/Basin Mixer with Spout Installation Instructions Manual
...
INSTALLATION INSTRUCTIONS
Wall Mounted Bath/Basin/Shower Mixers
Model
Code
Madeira Bath/Basin Mixer with Spout
MTM505
Madeira Shower Mixer
MTM705
Madeira Shower Mixer with Diverter
MTM605
Sardina Bath/Basin Mixer with Spout
MTS505
Sardina Shower Mixer
MTS705
Sardina Shower Mixer with Diverter
MTS605
Congratulations on your purchase of Marbletrend tapware, we are confident that this
quality product will serve you reliably for many years.
These instructions apply to the following products:
107
180
102
25-55
200
180
110
110
130
103
42-70
110
110
28-55
102
44
Bath Mixer with Spout
Shower Mixer with Diverter
Shower Mixer
Care and maintenance
Occasional cleaning with a soft cloth and warm soapy water is all that is needed to keep your tapware in
good condition. Do not use harsh or abrasive cleaning agents.
Depending upon local water quality the aerator may need occasional cleaning. Simply unscrew the aerator
using a broad-bladed screwdriver and clean by rinsing in fresh water.
Should it become necessary to change the ceramic cartridge this can be done by first removing the chrome
cover-button and then inserting a 2.5mm allen key to loosen the internal grub screw - the actuation lever
can then be removed giving access to the cartridge assembly. Both the hot and cold water supplies must be
turned off before doing this.
Operating conditions:
Pressure 0.05-1.0 Mpa
Temperature 4 - 90°C
INSTALLATION INSTRUCTIONS
Wall Mounted Bath/Basin/Shower Mixers
Installation procedure
1. Check proposed installation position prior to starting.
2. First-fix the mixer body to the wall and to the hot and cold supply pipes. Ensure that the finished wall face
will be within the thickness range shown on the diagram.
3. Fit the plastic cover(s) over the exposed parts of the mixer body to provide protection during the wall
finishing process. A pressure test plug is included with the Bath Mixer this can be left in while the wall
finishing is carried out.
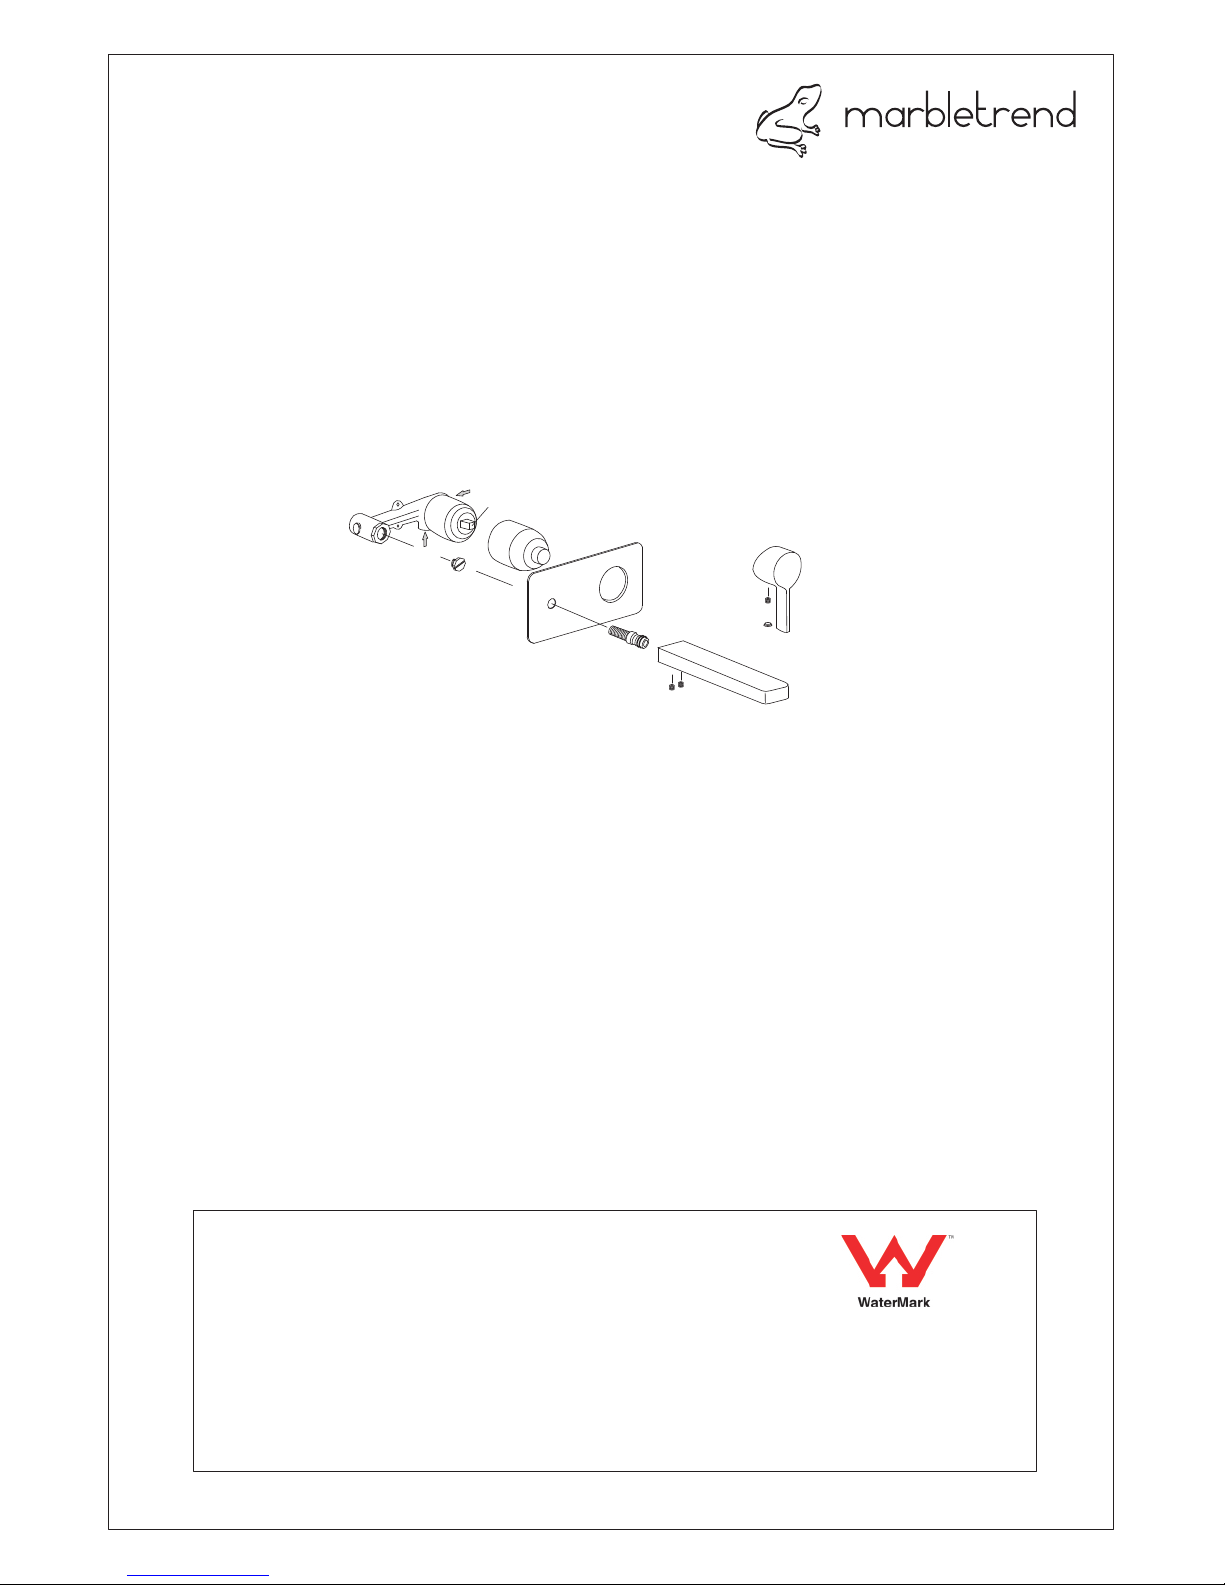
4. When wall finishing is complete remove the plastic cover(s) and fit the faceplate over the protruding body.
In the case of the Bath Mixer screw the spout connector into the mixer body (use thread tape). The
spout can then be fitted and locked in place using the two grub screws located on the underside.
5. Fit the lever handle assembly to the cartridge lever and tighten the grubscrew through the access
hole(2.5mm allen key). Fit the cover button to conceal the access hole.
6. Turn the water supplies on and check for leaks and tap operation.
Lever
handle
Faceplate
Mixer body
assembly
Spout
Spout connector
Grub
screws
Cover
button
Grub
screw
Test plug
Plastic cover
Cold
Hot
Cartridge lever
WARRANTY
This tapware carries a Product Replacement warranty against defects that
appear within a period of 5 years and a Parts and Labour warranty for a 2
year period. The Warranty commences from the date of purchase.
In Australia, consumers are protected from the consequences of faulty or
defective products by the Australia Competition and Consumer Act.
Products must be fit for purpose and free from material and manufacturing
defects.
Please go to www.marbletrend.com.au for full warranty terms and conditions.
CONTACT
Tel 1300 717 717
warranty@johnsonsuisse.com.au
www.marbletrend.com.au
LIC.WM-022191
R1.1
 Loading...