

Page 1
1
© 2016 Maka Tec
hnologies Group
. A
ll Rights Reserved.
HD D
IGITAL RECO
RDER
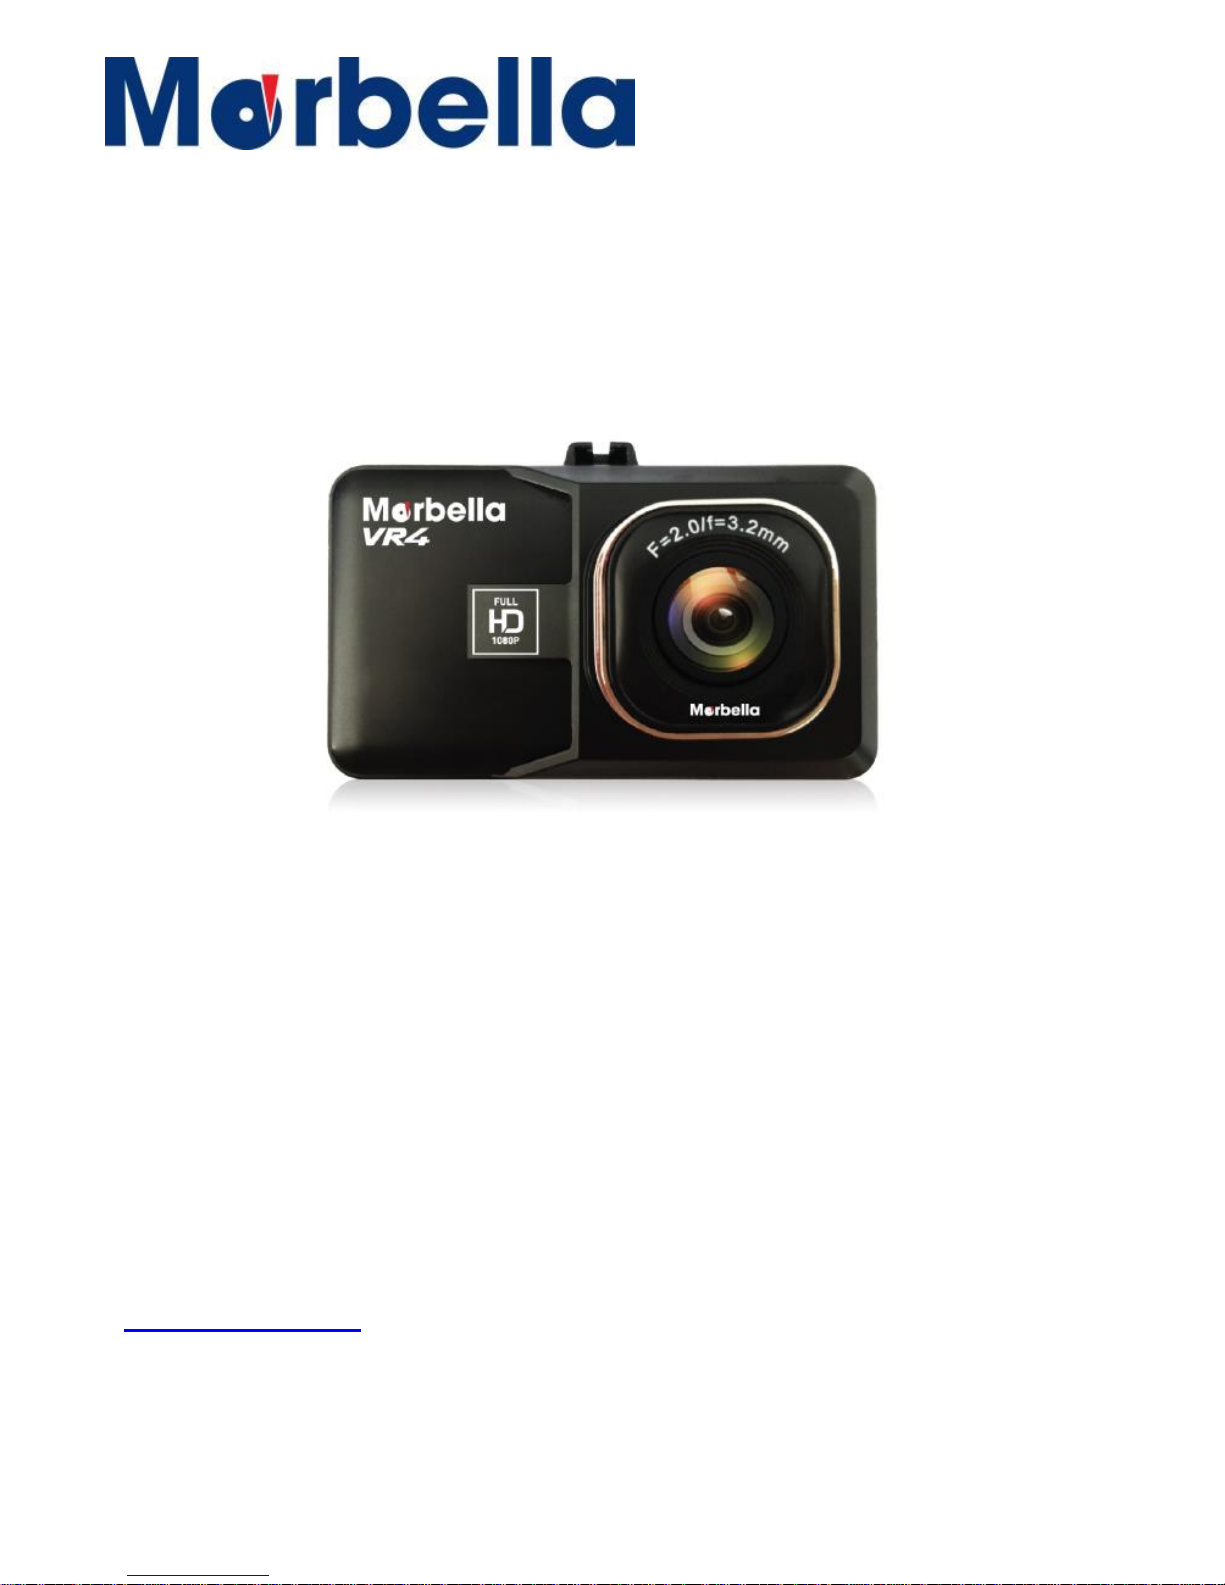
USER MANUAL
Trademarks
All brand and product names are trademarks or registered trademarks of
Maka GPS Technologies Group. In association with Maka GPS
Technologies Private Limited (Singapore), Maka GPS Technologies
Sdn. Bhd. (Malaysia), Maka Technologies Group (H.K.) Limited.
The information in this manual is subject to change without notice
.
www.makagps.c
om
12/2016
. R
1.0
Page 2

2
© 2016 Maka Tec
hnologies Group
. A
ll Rights Reserved.
Safety information
To prevent injury to yourself and others or damage to your device, read the
safety information about your device before using the device.
Warning
Failure to comply with safety warnings and regulations can cause serious
injury or death.
Do not use damaged power cords or plugs, or loose electrical sockets
Unsecured connections can cause electric shock or fire.
Do not touch the car charger with wet hands or disconnect the charger by
pulling the cord
Doing so may result in electrocution.
Do not bend or damage the car charger
Doing so may cause electric shock or fire.
Do not use your device while it is charging or touch your device with wet
hands
Doing so may cause electric shock.
Do not short-circuit the charger or the device
Doing so may cause electric shock or fire, or the battery may malfunction or
explode.
.
Page 3

3
© 2016 Maka Tec
hnologies Group
. A
ll Rights Reserved.
Use manufacturer-approved batteries, chargers, accessories, and
supplies
Using generic batteries or chargers may shorten the life of your device or
cause the device to malfunction. They may also cause a fire or cause the
battery to explode.
Use only Maka GPS Technologies Group-approved battery and charger
specifically desi gned for your device. Incompatible battery and charger can
cause serious injuries or damage to your device.
Maka GPS Technologies Group cannot be responsible for the user’s safety
when using accessories or supplies that are not approved by Maka GPS
Technologies Group.
Do not drop or cause an impact to the charger or the device.
Handle and dispose of the device and charger with care
Never dispose of the battery or device in a fire. Never place the battery or
device on or in heating devices, such as microwave ovens, stoves, or
radiators. The device may explode when overheated. Follow all local
regulations when disposing of used battery or device.
Never crush or puncture the device.
Avoid exposing the device to high external pressure, which can lead to an
internal short circuit and overheating.
Protect the device, battery and charger from damage
Avoid exposing your device and battery to very cold or very hot
temperatures.
.
Page 4

4
© 2016 Maka Tec
hnologies Group
. A
ll Rights Reserved.
Extreme temperatures can damage the device and reduce the charging
capacity and life of your device and battery.
Prevent the battery from coming into contact with metal objects, as this can
create a connection between the + and
–
terminals of your battery and lead
to temporary or permanent battery damage.
Never use a damaged charger or battery.
Do not bite or suck the device or the battery
Doing so may damage the device or result in an explosion or fire.
•
Children
or animals can choke on small parts.
If children use the device, make sure that they use the device properly.
Do not handle a damaged or leaking Lithium Ion (Li-Ion) battery
For safe disposal of your Li-Ion battery, contact your nearest authorised service
centre
Page 5

5
© 2016 Maka Tec
hnologies Group
. A
ll Rights Reserved.
Caution
Failure to comply with safety cautions and regulations can cause injury or
property damage
Do not use your device near other electronic devices
Most electronic devices use radio frequency signals. Your device may interfere
with other electronic devices.
Do not expose the device to heavy smoke or fumes
Doing so may damage the outside of the device or cause it to malfunction.
Do not use your device near devices or apparatuses that emit radio
frequencies, such as sound systems or radio towers
Radio frequencies may cause your device to malfunction.
If you notice strange smells or sounds coming from your device or the
battery, or if you see smoke or liquids leaking from the device or battery,
stop using the device immediately and take it to a Maka Service Centre
Failure to do so may result in fire or explosion.
For your own safety, do not operate the controls of the product while
driving.
Two window mounts are needed when using the recorder in a car. Make sure
that you place the recorder in an appropriate place, so as not to obstruct the
driver’s view.
Make sure that no object is blocking the camera lens and no reflective
material appears near the lens.
Please keep the lens clean. If the
car’s
windscreen is tinted with a dark solar
film coating, it may affect the recording quality.
Page 6

6
© 2016 Maka Tec
hnologies Group
. A
ll Rights Reserved.
Do not store your device in very hot or very cold areas. It is
recommended to use your device at temperatures from 0 °C
to60 °C
and
humidity from 10% to 80%
Doing so may cause the screen to malfunction, result in damage to the device,
or cause the battery to explode.
Do not use your device or applications for a while if the device is
overheated
Prolonged exposure of your skin to an overheated device may cause low
temperature burn symptoms, such as red spots and pigmentation.
Install mobile devices and equipment with caution
Ensure that any mobile devices or related equipment installed in your
vehicle are securely mounted.
Avoid placing your device and accessories near or in an airbag deployment
area. Improperly installed wired equipment can cause serious injury when
airbags inflate rapidly.
Do not drop your device or cause impacts to your device
Your device may be damaged or may malfunction.
If bent or deformed, your device may be damaged or parts may malfunction.
Ensure maximum battery and charger life
Avoid charging your device for more than a week, as overcharging may
shorten battery life.
Over time, unused device will discharge and must be recharged before use.
Disconnect the charger from power sources when not in use.
Page 7

7
© 2016 Maka Tec
hnologies Group
. A
ll Rights Reserved.
Leaving batteries unused over time may reduce their lifespan and
performance. It may also cause the batteries to malfunction or explode, or
cause a fire.
Your device may wear out over time. Some parts and repairs are covered
by the warranty within the validity period, but damages or deterioration
caused by using unapproved accessories are not.
Do not disassemble, modify, or repair your device
Any changes or modifications to your device can void your manufacturer’s
warranty. If your device needs servicing, take your device to a Maka
Service Centre.
Do not disassemble or puncture the battery, as this can cause explosion or
fire.
Turn off the device before removing the battery. If you remove the battery
with the device turned on, it may cause the device to malfunction.
When cleaning your device, mind the following
Wipe your device or charger with a towel or an eraser.
Do not use chemicals or detergents. Doing so may discolour or corrode the
outside the device or may result in electric shock or fire.
Do not distribute copyright-protected material
Do not distribute copyright-protected material without the permission of the
content owners. Doing this may violate copyright laws. The manufacturer is not
liable for any legal issues caused by the
user’s
illegal use of copyrighted
material.
Page 8

8
© 2016 Maka Tec
hnologies Group
. A
ll Rights Reserved.
Correct disposal of this product
(Waste Electrical & Electronic Equipment)
(Applicable in countries with separate collection systems)
This marking on the product, accessories or literature indicates that the product
and its electronic accessories (e.g. charger, headset, USB cable) should not be
disposed of with other household waste.
To prevent possible harm to the environment or human health from
uncontrolled waste disposal, please separate these items from other types of
waste and recycle them responsibly to promote the sustainable reuse of
material resources.
Household users should contact either the retailer where they purchased this
product, or their local government office, for details of where and how they can
take these items for environmentally safe recycling.
Business users should contact their supplier and check the terms and
conditions of the purchase contract. This product and its electronic accessories
should not be mixed with other commercial wastes for disposal.
Page 9

9
© 2016 Maka Tec
hnologies Group
. A
ll Rights Reserved.
Disclaimer
Some content and services accessible through this device belong to third
parties and are protected by copyright, patent, trademark and/o r other
intellectual property laws. Such content and services are provided solely for
your personal non-commercial use.
You may not use any content or services in a manner that has not been
authorised by the content owner or service provider. Without limiting the
foregoing, unless expressly authorised by the applicable con tent owner or
service provider, you may not modify, copy, republish, upload, post, transmit,
translate, sell, create derivative works, exploit, or distribute in any manner or
medium any content or services displayed through this device
.
“THIRD PARTY CONTENT AND SERVICES ARE PROVIDED “AS IS.” MAKA GPS
TECHNOLOGIES GROUP DOES NOT WARRANT CONTENT OR SERVICES SO
PROVIDED, EITHER EXPRESSLY OR IMPLIEDLY, FOR ANY PURPOSE. MAKA
EXPRESSLY DISCLAIMS ANY IMPLIED WARRANTIES, INCLUDING BUT NOT
LIMITED TO, WARRANTIES OF MERCHANTABILITY OR FITNESS FOR A
PARTICULAR PURPOSE. MAKA GPS TECHNOLOGIES GROUP DOES NOT
GUARANTEE THE ACCURACY, VALIDITY, TIMELINESS, LEGA LITY, OR
COMPLETENESS OF ANY CONTENT OR SERVICE MADE AVAILAB LE THROUGH
THIS DEVICE AND UNDER NO CIRCUMSTANCES, INCLUDING NEGLIGENCE,
SHALL MAKA GPS TE CHNOLOGIES GROUP BE LIABLE, WHET HER IN CONTRACT
OR TO RT, FO R ANY DIRE CT, INDIRECT, INCIDENTAL, SPECIAL OR
CONSEQUENTIAL DAMAGES, ATTO RNEY FEES, EXPENSES, OR ANY OTHER
DAMAGES ARISING OUT OF, OR IN CONNECTION WITH, ANY INFORMATION
CONTAINED IN, OR AS A RESULT OF THE USE OF ANY CONTENT OR SERVICE
BY YOU OR ANY THIRD PARTY, EVEN IF ADVISED OF THE POSSIBILITY OF
SUCH DAMAGES.”
Third party services may be terminated or interrupted at any time, and Maka
GPS Technologies Group makes no representatio n or warranty that any
Page 10

10
© 2016 Maka Tec
hnologies Group
. A
ll Rights Reserved.
content or service will remain available for any period of time. Content and
services are transmitted by third parties by means of networks and
transmission facilities over which Maka GPS Technologies Group has no
control. Without limiting the generality of this disclaimer, Maka GPS
Technologies Group expressly disclaims any responsibility or liability for any
interruption or suspension of any content or service made available through
this device.
Maka GPS Technologies Group is neither responsible nor liable for customer
service related to the content and services. Any question or request for service
relating to the content or services should be made directly to the respective
content and service providers.
Page 11

11
© 2016 Maka Tec
hnologies Group
. A
ll Rights Reserved.
About this manual
This device provides high quality digital recording device using Maka’s high
standards and technological expertise. This user manual is specially designed
to detail the
device’s
functions and features.
Please read this manual before using the device to ensure safe and
proper use. Descriptions are based on the
device’s
default settings.
Images and screenshots may differ in appearance from the actual product.
Content may differ from the final product, or from software provided by
service providers and is subject to change without prior notice.
For the latest version of the manual, refer to the Maka website at
www.makagps.com.
Available features and additional services may vary by device, software.
Applications and their functions may vary by country, region, or hardware
specifications.
Maka is not liable for performance issues caused by applications from any
provider other than Maka.
Maka is not liable for performance issues or incompatibilities caused by
not installing the device as stated in this manual. Attempting to customise
the installation may cause the device or applications to work improperly.
This may result in device malfunctions and data corruption or loss. These
actions are violations of your Maka agreement and will void your warranty.
Default applications that come with the device are subject to updates and
may no longer be supported without prior notice. If you have questions
about an application provided with the device, contact Maka Service
Centre.
Page 12

12
© 2016 Maka Tec
hnologies Group
. A
ll Rights Reserved.
Table of Contents
Product Specifications
14
Getting Started
Overview of your
VR4 F
HD Digital Roadcorder
TM
Device Layout
15
Understanding of your VR4 FHD Digital Roadcorder
TM
Buttons
16
Status Icons
17
Standard Packaging of your VR4 FHD Digital Roadcorder
TM
Package Contents
18
Installation of your VR4 FHD Digital Roadcorder
TM
Installation
19
Charging the Battery
20
Inserting Memory Card
21
Removing Memory Card
22
Formatting Memory Card
22-23
Operation of your VR4 FHD Digital Roadcorder
TM
Turning the device on and off
24
Video Setting
Recording Mode (Resolution)
25
Loop Recording
25-26
Exposure
26
Motion Detector
26-27
Record Audio
27-28
Page 13

13
© 2016 Maka Tec
hnologies Group
. A
ll Rights Reserved.
Table of Contents
Operation of your VR4 FHD Digital Roadcorder
TM
Date and Time Stamp
28
Gravity Sensing
28
System Setting
Date/ Time Setup
29
Auto Power Off
29
Screen Saver
30
Beep Sound
30
Language
31
TV Mode
31
Frequency
32
Default Setting
32
Format
22-23
Photo Setting
Photo Mode (Resolution)
33
Sequence
33
Quality
34
Sharpness
34
White Balance
35
ISO
35
Exposure
36
Anti-Shake
36
Quick Review
37
Date-Stamp
37
General
Playback Mode (Video)
38
Delete Files
38
Playback mode (photo)
39
Delete file (photo)
39
Page 14

14
© 2016 Maka Tec
hnologies Group
. A
ll Rights Reserved.
General Troubleshooting 40-41
Product Specifications
Light sensor
1MP CMOS sensors (GC1043)
Lens
High resolution ultra wide angle lens (120°) F=2.2, f=3.2
LCD
3.19 inch 16:9 TFT LCD
Audio
Built-in high sensitivity microphone/speaker
External Memory
Class 10 or above TF card( SDHC specification up to 32G)
Gravity sensor
Sensitivity low/medium/high/OFF
Motion detect
ON/OFF Shutter
Electronic shutter
White balance
Auto
Exposure
Auto ISO
TV interface
HDMI
Battery (optional)
150mAh 3.7V rechargeable lithium battery
Video format
AVI
Video resolution
1920x1080P30, 1440x1080P30, 1280x720P30, 848x480P30, 640x480P30
Photo resolution
VGA, 1.3M, 2M, 3M, 5M, 8M, 10M, 12M
Language
English,
Traditional
Chinese, France, Spanish, Portuguese, Deutsch,
Italian, Russian Japan, Korea, Turkish
USB
USB 2.0
Loop recording
OFF/1/min/2 min/3 min/5min
Auto screen off
OFF/3 min/5 min/10min
AutoShut down
OFF/1min/3min
Microphone mute
ON/OFF
Page 15
15
© 2016 Maka Tec
hnologies Group
. A
ll Rights Reserved.
Getting Started
Overview of your VR4 FHD Digital Roadcorder
TM
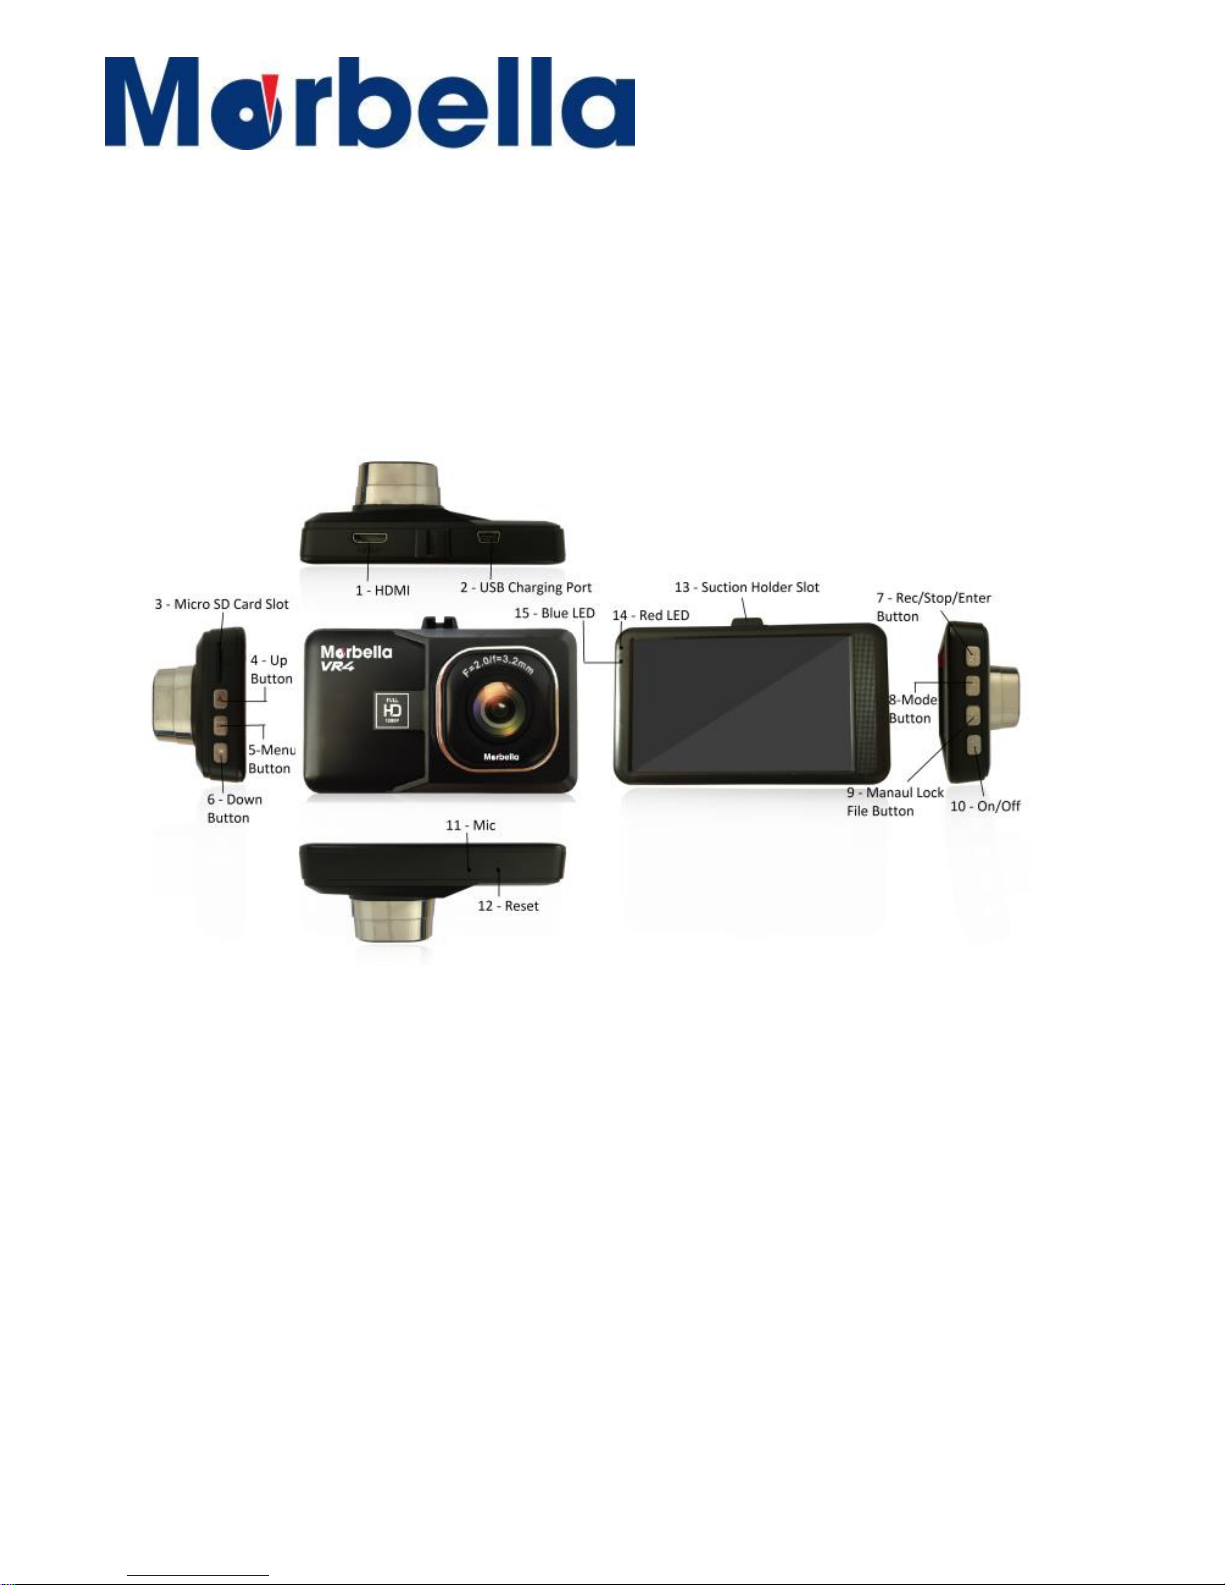
Device Layout
1. HDMI 09. Manual Lock File Button
2. USB Charging Port 10. On/Off Button
3. Micro Sd Card Slot 11. Mic
4. Up Button 12. Reset
5. Menu Button 13. Suction Holder Slot
6. Down Button 14. Red LED (when charging)
7. Rec/Stop/Enter Button 15. Blue LED (Device on)
8. Mode Button
Page 16

16
© 2016 Maka Tec
hnologies Group
. A
ll Rights Reserved.
Page 17
17
© 2016 Maka Tec
hnologies Group
. A
ll Rights Reserved.
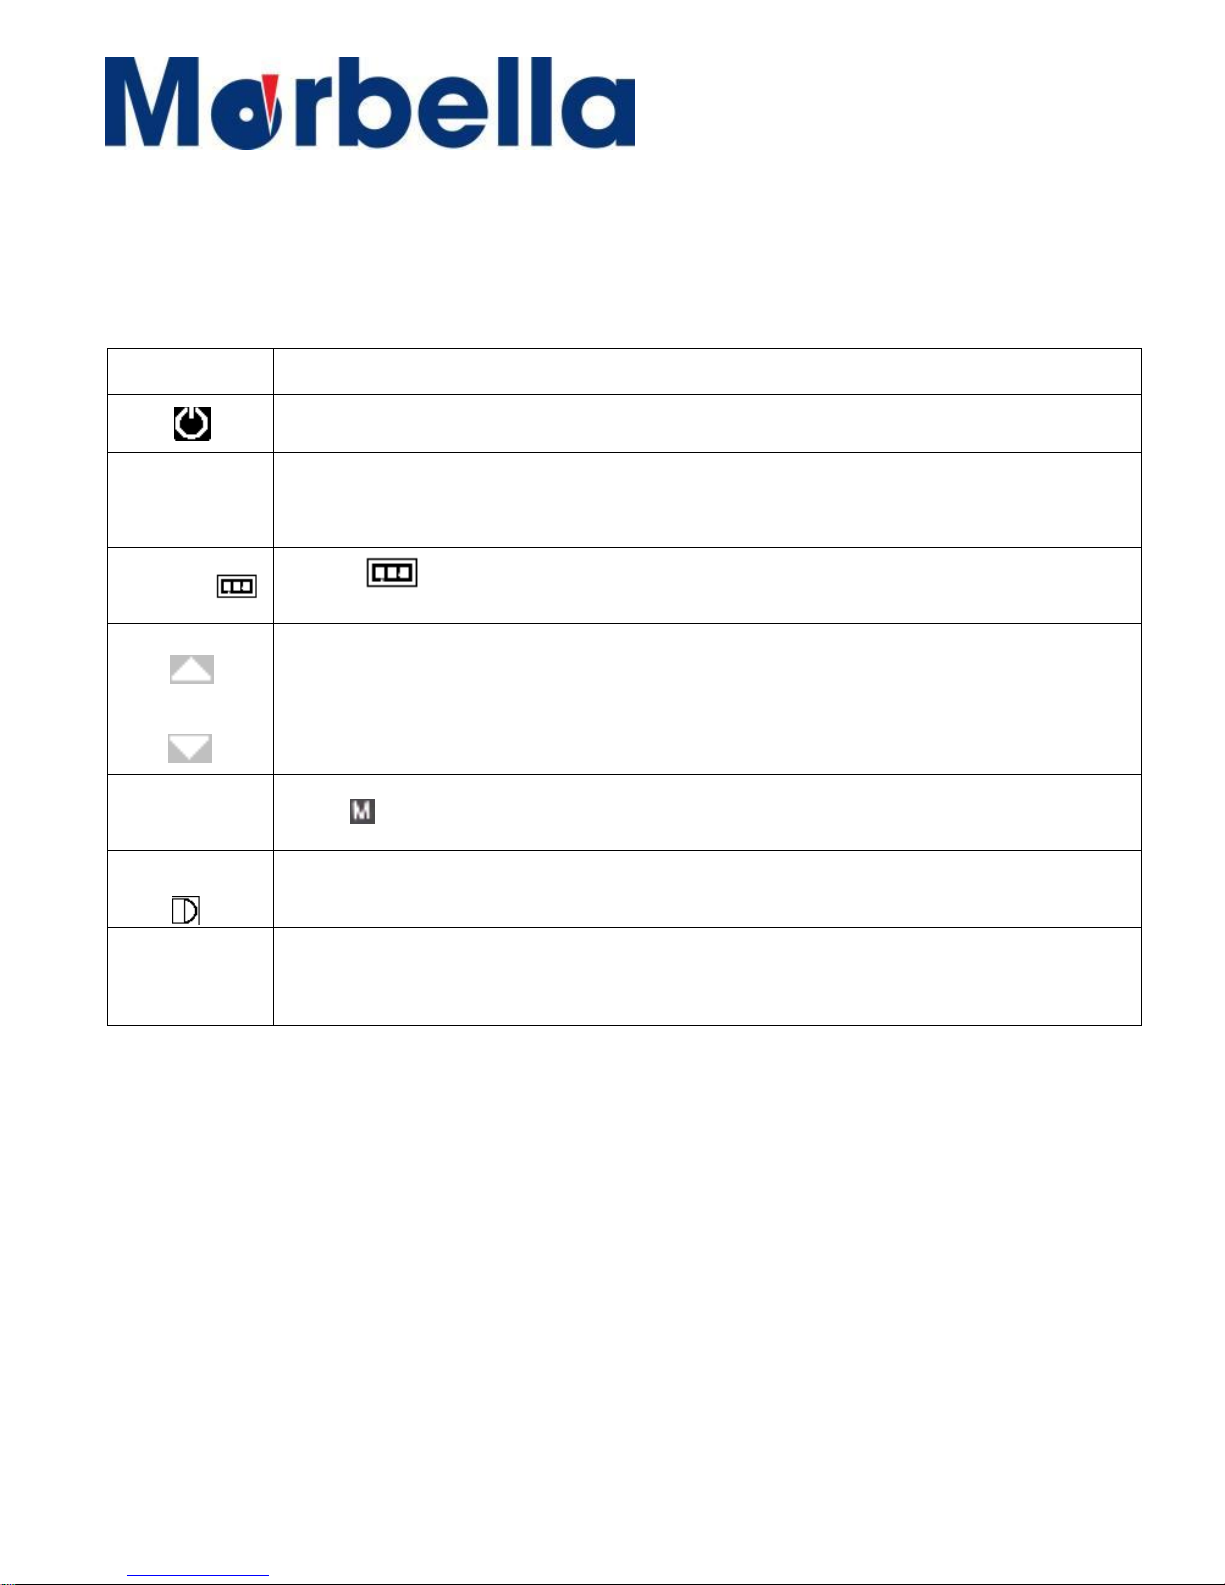
Button
Functions
Press and hold to turn the device on or off.
OK
Press to Start/Stop recording and also acts as a button to confirm your
selection in menu setting mode.
MENU
Press
to
enter and exit Setting mode
UP / Down
Press to navigate to the preferred functions required during Menu Setting.
Hot Keys during recording mode:
• Press UP button once to turn off/on microphone during recording
MODE
Press to toggle between Recording/Photo/Playback mode
The button acts as a manual lock file during recording.
RESET
Press and hold for more than 3 seconds to reset the device if it has
fatal errors or hang-ups, or freezes.
Getting Started
Understanding your VR4 FHD Digital Roadcorder
TM
and Buttons
Buttons
Lock
Page 18
18
© 2016 Maka Tec
hnologies Group
. A
ll Rights Reserved.
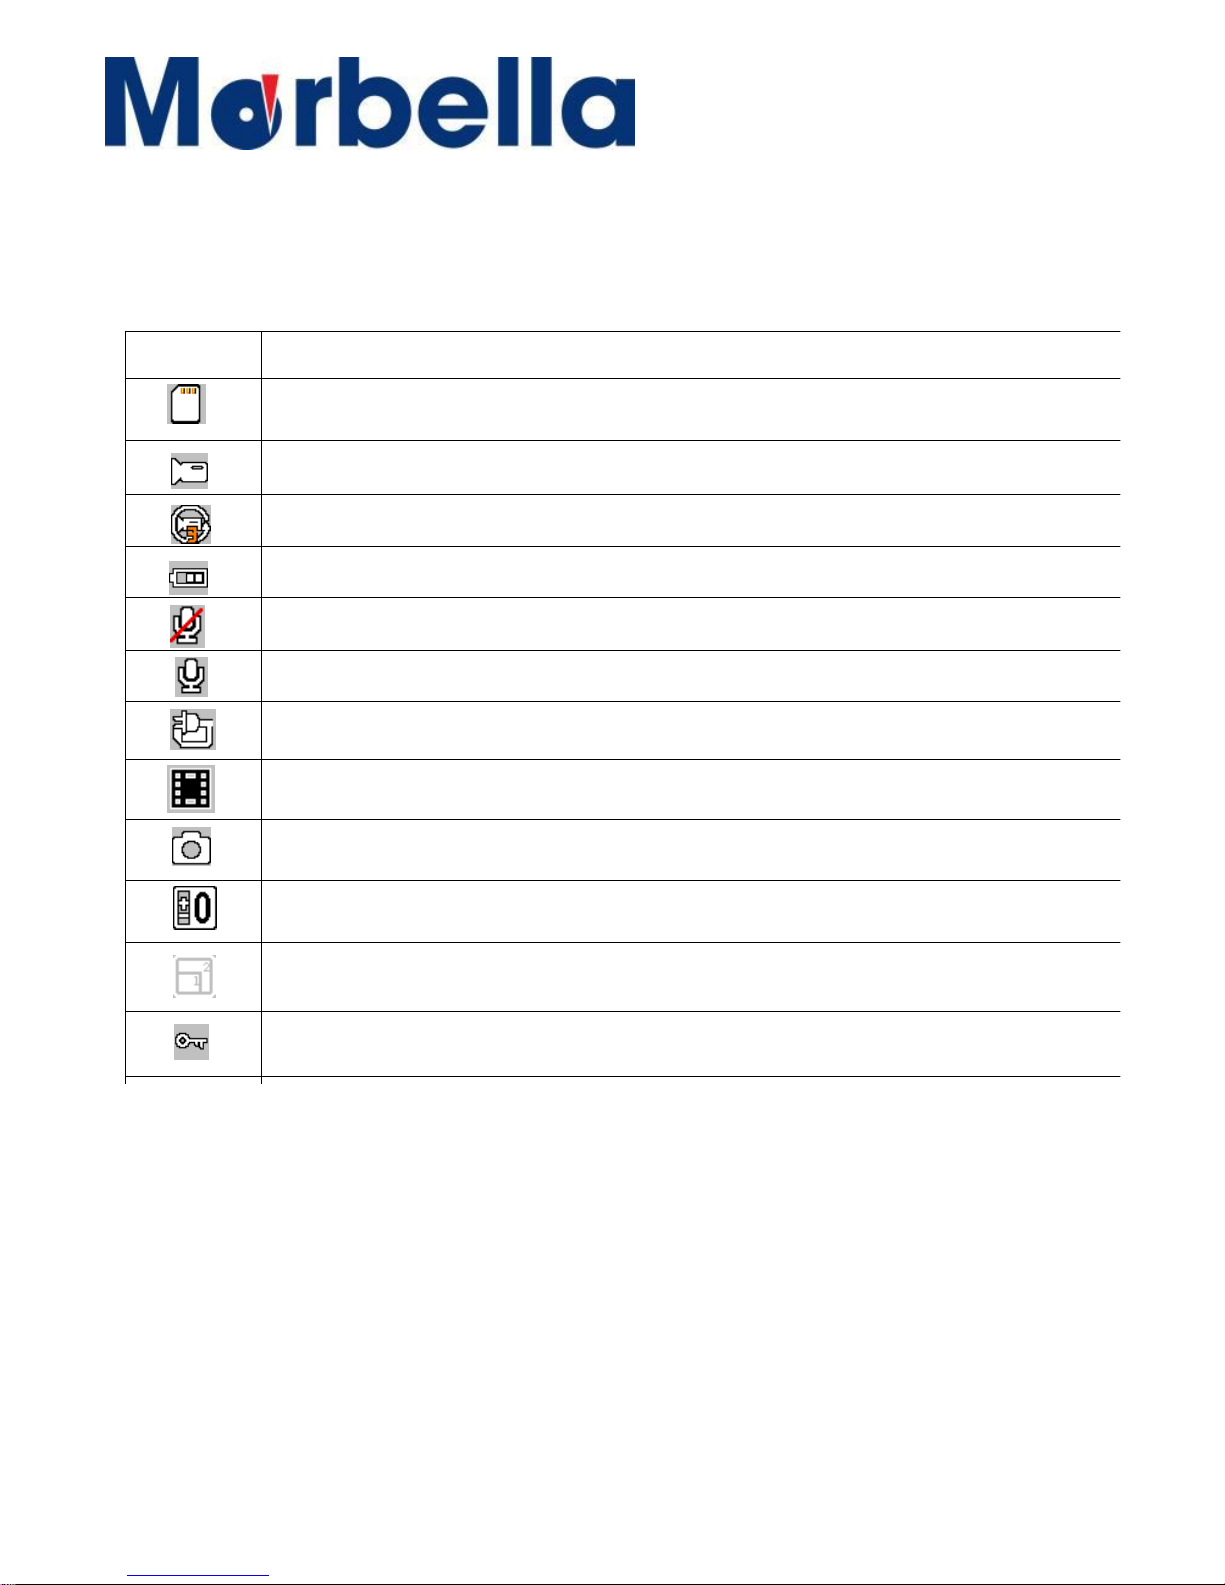
Icon
Meaning
Memory Card Inserted
Video Recording Mode
Loop Recording
Battery Power Level
Microphone Mute
Microphone On
Charging via USB Charger
Video Playback Mode
Photo Mode
White Balance Status
Sequence on (5 photo taken per shot)
Lock File
Getting Started
Understanding your VR4 FHD Digital Roadcorder
TM
and Buttons
Status Icons
Page 19

19
© 2016 Maka Tec
hnologies Group
. A
ll Rights Reserved.
Getting Started
Standard Packaging of your VR4 FHD Digital Roadcorder
TM
Package contents
Check the product box for the following items:
VR4 Front Camera
Operating Manual
Mounting holder for camera (Suction Mount Type –
Optional Accessory
)
Mounting holder for camera (3M Mount Type)
USB Cable
Car Charger
The items supplied with the device and any available accessories may vary
depending on the region. The supplied items are designed only for this device
and may not be compatible with other devices.
Appearances and specifications are subject to change without prior notice.
Malfunctions caused by using unapproved accessories are not covered by the
warranty service. Availability of all accessories is subject to change depending
entirely on manufacturing companies. For more information about available
accessories, refer to the Maka GPS Technologies Group website.
.
Page 20

20
© 2016 Maka Tec
hnologies Group
. A
ll Rights Reserved.
Getting Started
Installation of your VR4 FHD Digital Roadcorder
TM
Installation
1 Fixing the camera to the window mount
It is compulsory for window mount to be fixed up before using the
device in a car. Make sure that you place the recorder in an
appropriate place, so as not to obstruct the driver’s view.
2 Connecting charger to the cigarette lighter
Connect only the manufacturer-approved charger supplied with
your device. Use only Maka GPS Technologies Group-approved
charger specifically designed for your device. Incompatible
charger can cause serious injuries or damage to your device.
3 Inserting a memory card
You have to insert a memory card before you can start recording.
The recorder supports Micro SD cards with up to 32GB capacity.
You are advised to use a Class 10 memory card with at least
8GB capacity. DO NOT insert or remove the memory card when
operating the device.
Page 21

21
© 2016 Maka Tec
hnologies Group
. A
ll Rights Reserved.
Getting Started
Installation of your VR4 FHD Digital Roadcorder
TM
Charging the battery
Use the charger to charge the battery before using it for the first time. Charge
the device by connecting front camera via the USB car charger. Use only
Maka-approved chargers, batteries, and cables. Unapproved chargers or
cables can cause the battery to explode or damage the device.
Connect the USB car
charger’s
jack to the USB charging port and then
plug the charger into the car cigarette lighter socket.
When device detects no power supply, it will automatically switch off in 5
seconds time. To turn on the device again, you will need to press on the
on/ off button to manually switch it on.
If the battery is completely discharged, the device cannot be turned on
immediately when the charger is connected. Allow a depleted battery to
charge for a few minutes before turning on the device.
Connecting the charger improperly may cause serious damage to the
device. Any damage caused by misuse is not covered by the warranty.
The device can be used while it is charging, but it may take longer to fully
charge the battery.
If the device receives an unstable power supply while charging, the
screen may not function. If this happens, unplug the charger from the
device.
While charging, the device may heat up. This is normal and should not
affect the
device’s
lifespan or performance.
If the device is not charging properly, take the device and the charger to a
Maka Service Centre.
.
Page 22
22
© 2016 Maka Tec
hnologies Group
. A
ll Rights Reserved.
Getting Started
Installation of your VR4 FHD Digital Roadcorder
TM
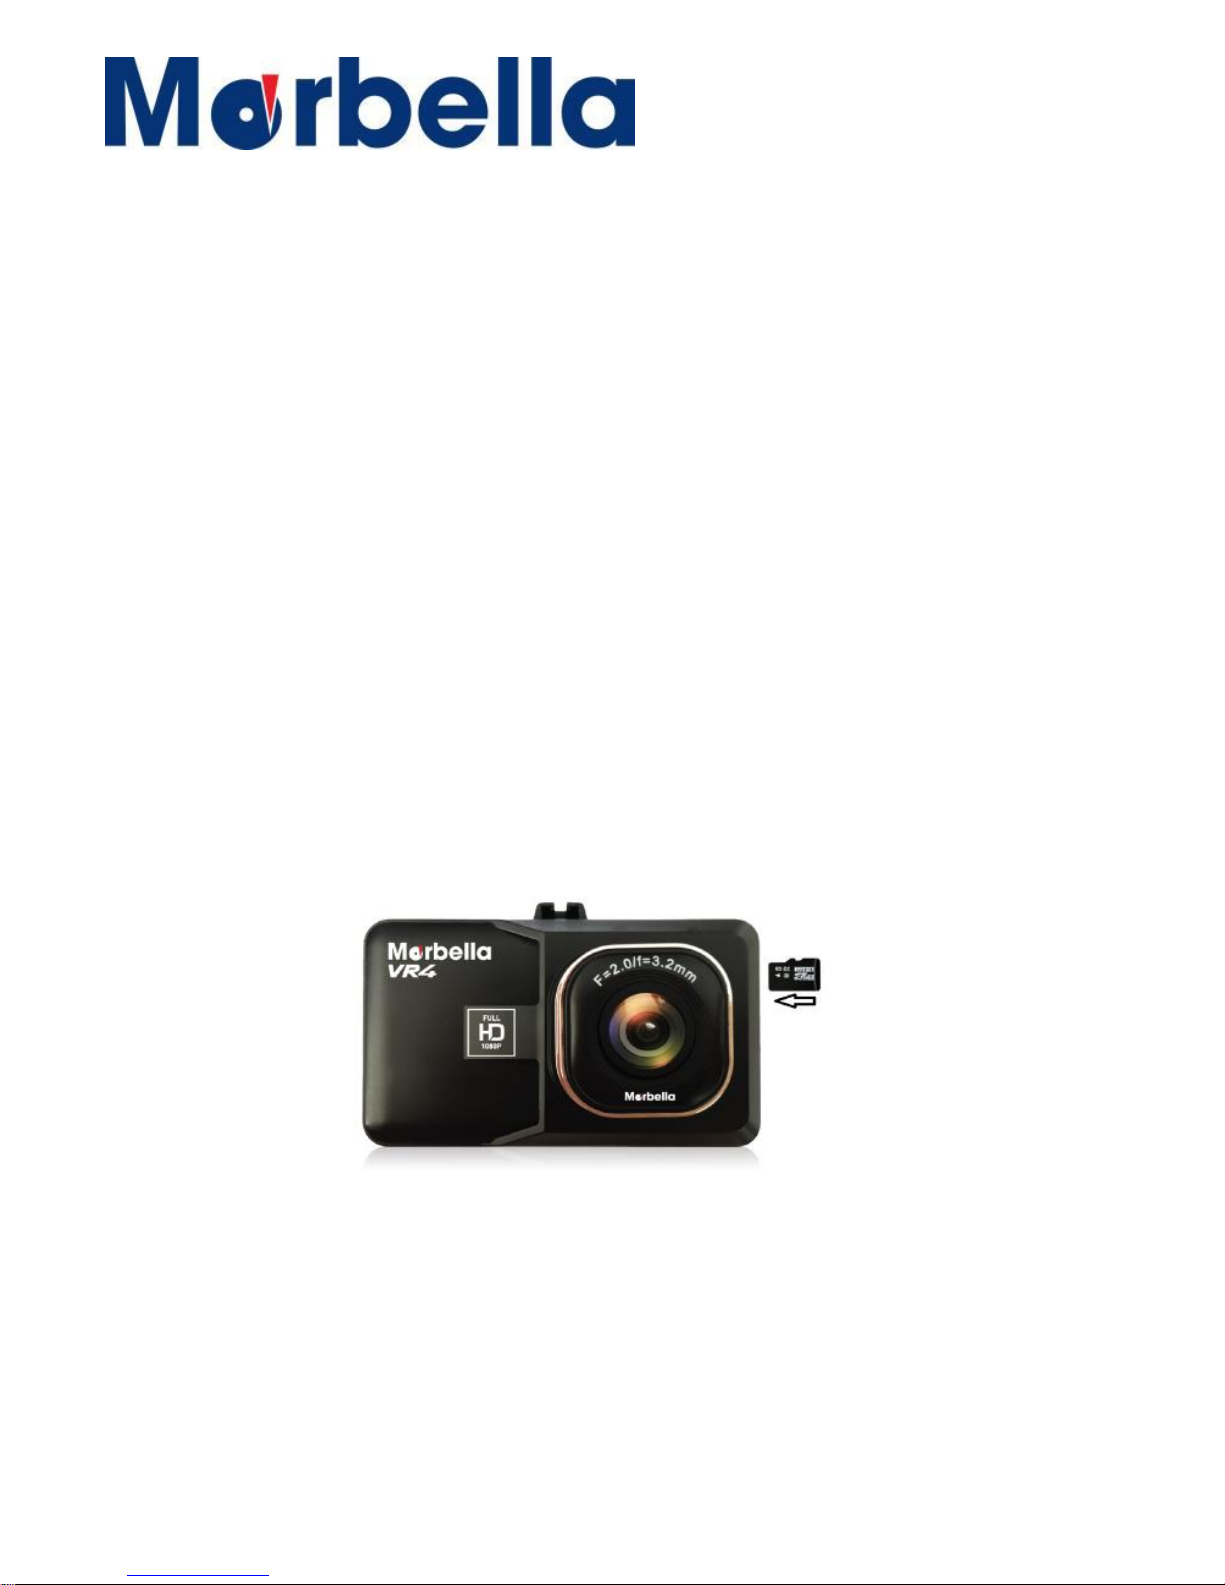
Inserting a memory card
Your device accepts memory cards with maximum capacities of 32 GB.
Depending on the memory card manufacturer and type, some memory cards
may not be compatible with your device.
Some memory cards may not be fully compatible with the device. Using an
incompatible card may damage the device or the memory card, or corrupt the
data stored in it.
Use caution to insert the memory card right-side up as shown in the image
below.
Insert a memory card with the gold-coloured contacts facing downwards.
Push the memory card into the slot until it locks in place.
It is recommended to reformat a memory card every time images are
transferred from it to a computer, or at least once or twice a month.
Page 23

23
© 2016 Maka Tec
hnologies Group
. A
ll Rights Reserved.
Getting Started
Installation of your VR4 FHD Digital Roadcorder
TM
Reformatting a memory card keeps data and the structure of files stored on it
clean, helping to prevent error messages and missing images. Reformatting
also restores the memory card, which can prevent it from becoming corrupted.
Removing the memory card
Before removing the memory card, first unmounts it for safe removal.
On the device
1 Press on the OK button to stop the device from recording
2 Press on the
ON/OFF button to switch off the device
3 Pull out the memory card.
Do not remove the memory card while the device is transferring or accessing
information. Doing so can cause data to be lost or corrupted or damage to the
memory card or device. Maka GPS Technologies Group is not responsible for
losses that result from the misuse of damaged memory cards, including the loss
of data.
Formatting the memory card
You may choose to format your memory card on a computer or on the device.
On the device
1 Press on OK button to stop the device from recording
2 Press on the MENU
button twice to enter System Setting
Page 24

24
© 2016 Maka Tec
hnologies Group
. A
ll Rights Reserved.
Getting Started
Installation of your VR4 FHD Digital Roadcorder
TM
3 Press on DOWN
button to
navigate to the function that shows Format
4 Press on OK to confirm your selection
5 Press on UP/DOWN button to select (Cancel/OK)
6 Press on OK once to confirm selection and exit our from the selection
setting.
Before formatting the memory card, remember to make backup copies of all
important data stored on the device. The manufacturer’s warranty does not
cover loss of data resulting from user actions.
Page 25

25
© 2016 Maka Tec
hnologies Group
. A
ll Rights Reserved.
Getting Started
Operation of your VR4 FHD Digital Roadcorder
TM
Turning the device on and off
Press and hold the Power button for a few seconds to turn on the device. A
welcome message will be displayed on screen as shown in the image below.
To turn off the device, press and hold the Power button for a few seconds again
to turn off the device. A goodbye message will be displayed on screen as
shown in the image below.
VR4 FHD Digital Roadcorder
TM
will be switch on and off automatically if you
have permanently connected it to the car charger.
Page 26

26
© 2016 Maka Tec
hnologies Group
. A
ll Rights Reserved.
Getting Started
Operation of your VR4 FHD Digital Roadcorder
TM
VIDEO SETTNG
Resolution
1 Press on MENU
once into video setting
2 Press on UP or DOWN
button to navigate to the function that
shows Resolution
3 Press on OK to enter showing 1920x1080 30P or 1280x720 30P etc
4 Press on the UP
or
DOWN
button to make your selection
5 Press on OK to confirm your entry and exit selection
6 Press on MENU
twice to exit Setting
7 Start recording by pressing OK button
8 Stop recording by pressing OK button again
Loop Recording
The device will continue to record by erasing the previously recorded videos.
All old videos will be replaced with the new ones.
It is recommended to reformat a memory card every time images are
transferred from it to a computer, or at least once a month to keep data and the
structure of files stored on it clean, helping to prevent error messages and
missing images.
It is important to make backup copies of all important data stored on the device.
The manufacturer’s warranty does not cover loss of data resulting from user
actions.
Page 27

27
© 2016 Maka Tec
hnologies Group
. A
ll Rights Reserved.
Getting Started
Operation of your VR4 FHD Digital Roadcorder
TM
1 Press on MENU
once to enter video setting
2 Press on UP
or
DOWN
button to navigate to the function that
shows Loop Recording
3 Press on OK to enter for next selection : off /1min/ 2min/ 3min/ 5min
4 Press on the UP
or
DOWN
button make your selection
5 Press on OK to confirm your entry and exit selection
6 Press on MENU
twice to exit Setting
Exposure
Adjust exposure according to your preference. From light brightness to neutral to
dimmest. Always recommended to set as +0.0 instead.
1 Press on MENU
once to enter Video Setting
2 Press on UP
or
DOWN
button navigate to the function that shows
Exposure
3 Press on OK to enter and show
: +0.0/ +1/3 or -1/3 etc
4 Press on the UP
or
DOWN
button to make your selection
5 Press on OK to confirm your entry and exit selection
6 Press on MENU
twice to exit Setting
Motion Detector
This function enables you to use your device as a remote surveillance camera
with motion detection functionality. It uses the built-in camera to detect
movements in the surrounding area using an advanced motion detection
algorithm. Camera will auto record If it detects any movement.
1 Press on MENU
once to enter video setting
2 Press on UP
or
DOWN
button to navigate to the function that
shows Motion Detection
Page 28

28
© 2016 Maka Tec
hnologies Group
. A
ll Rights Reserved.
Getting Started
Operation of your VR4 FHD Digital Roadc order
TM
3 Press on OK to enter and show : OFF/ ON
4 Press on the UP
or
DOWN
button to make your selection
5 Press on OK to confirm your entry and exit selection
6 Press on MENU
twice to exit Setting
Record Audio
You may choose to turn off the microphone so that all the recorded videos will
be muted.
1 Press on MENU
once to enter video setting
2 Press on UP
or
DOWN
button to navigate to the function that shows
Record Audio
3 Press on OK to enter and show : On/Off
4 Press on the UP
or
DOWN
button to make your selection
5 Press on OK to confirm your entry and exit selection
6 Press on MENU
twice to exit Setting
Alternatively, you can choose using the hot keys for shortcuts
Hot Keys during recording mode:
Press on UP button
–
Press to mute/ unmute the microphone during
recording or non recording.
Page 29

29
© 2016 Maka Tec
hnologies Group
. A
ll Rights Reserved.
Getting Started
Operation of your VR4 FHD Digital Roadcorder
TM
Date and Time Stamp
You have an option to display your time and date in your videos. Date and
Time stamp will not be able to remove once you have activated this feature.
1 Press on MENU
once to enter video setting
2 Press on UP
or DOWN
button to navigate to the function that shows
Date Stamp
3 Press on OK to enter and see : ON/OFF
4 Press on the UP
or
DOWN button to make your selection
5 Press on OK to confirm your entry and exit selection
6 Press on MENU
twice to exit Setting
Gravity Sensing
Thisfunction acts like an accelerometer. It measures the acceleration and
gravity forces detected on the camera. At such case during recording, the
device will auto do a file lock. We recommend you to set [low]
1 Press on MENU
once to enter Video Setting
2 Press on UP
or DOWN
button to navigate to the function that
shows Gsensor
3 Press on OK to enter and show : OFF/ LOW/ MEDIUM/ HIGH
4 Press on the UP
or
DOWN
button to make your selection
5 Press on OK to confirm your entry and exit selection
6 Press on MENU
twice to exit Setting
Page 30

30
© 2016 Maka Tec
hnologies Group
. A
ll Rights Reserved.
Getting Started
Operation of your VR4 FHD Digital Roadcorder
TM
SYSTEM SETTNG
Date/ Time Setup
Access the following settings to change the
device’s
time and date.
If the battery remains fully discharged or removed from the device, the
time and date is reset.
1 Press on MENU
twice to enter system setting
2 Press on UP or DOWN
button to navigate to the function that
shows the Date/Time
3 Press on OK
to enter and in : YYYY/MM/DD HRS:MM:SS
4 Press on the UP or DOWN
button to change the date and time
accordingly.
5 Press on OK button to shift your entry to the next segment
6 Press on MENU
once entry complete made to exit selection
7 Press on MENU
once to exit setting
Auto Power Off
This function enable you to select the auto shut down of the device if the unit is
not in the recording mode which help to alert driver.
1 Press on MENU
twice to enter System Setting
2 Press on UP
or
DOWN
button to navigate to the function that shows
Auto Power Off
3 Press on OK to enter and show : OFF/ 1min/ 3min
4 Press on the UP
or
DOWN
button to make your selection
5 Press on OK to confirm your entry and exit selection
6 Press on MENU
once exit Setting
Page 31

31
© 2016 Maka Tec
hnologies Group
. A
ll Rights Reserved.
Getting Started
Operation of your VR4 FHD Digital Roadcorder
TM
Screen Saver
Select timer duration for the LCD to turn off after recording starts.
1 Press on MENU
twice to enter System Setting
2 Press on UP or DOWN
button to navigate to the function that shows
Screen Saver
3 Press on OK to enter and show : OFF/ 3min/ 5min/ 10min
4 Press on the UP or DOWN
button to make your selection
5 Press on OK to confirm your entry and exit selection
6 Press on MENU
once to exit Setting
Beep Sound
This function is to turn on/off of the the button sound.
1 Press on MENU
twice to enter system setting
2 Press on UP
or
DOWN
button to navigate to the function that
shows Beep Sound
3 Press on OK to enter and show : ON/OFF
4 Press on the UP
or
DOWN
button to make your selection
5 Press on OK to confirm your entry and exit selection
6 Press on MENU
once to exit Setting
Page 32

32
© 2016 Maka Tec
hnologies Group
. A
ll Rights Reserved.
Getting Started
Operation of your VR4 FHD Digital Roadcorder
TM
Language
The available language may vary depending on the region.
1 Press on MENU
twice to enter system setting
2 Press on DOWN button to navigate to the function that shows language
3 Press OK
and enter showing
English etc.
4 Press on the UP
or
DOWN button to make your selection
5 Press on OK to confirm your entry and back to system setting
6 Press on MENU
once to exit Setting
TV Mode
Please set accordingly to match the local TV visual quality of content.
1 Press on MENU
twice to enter System Setting
2 Press on UP or DOWN button to navigate to the function that shows
TV Mode.
3 Press on OK to enter and show : NTSC/ PAL
4 Press on the UP or DOWN button to make your selection
5 Press on OK to confirm your entry and exit selection
6 Press on MENU
once to exit Setting
Note : Recommened to set the mode : PAL (Common usage in Asia)
Page 33

33
© 2016 Maka Tec
hnologies Group
. A
ll Rights Reserved.
Getting Started
Operation of your VR4 FHD Digital Roadcorder
TM
Frequency
Please set accordingly to the local power supply respectively; 50Hz or 60Hz.
1 Press on MENU
twice to enter System Setting
2 Press on UP
or
DOWN
button to navigate to the function that shows
FREQUENCY.
3 Press on OK to enter and show : 50Hz/ 60Hz
4 Press on the UP
or
DOWN
button to make your selection
5 Press on OK to confirm your entry and exit selection
6 Press on MENU
once exit Setting
Default Setting
Set the system parameters to the default value.
1 Press on MENU
twice to enter into System Setting
2 Press on UP
or
DOWN
button to navigate to the function that
shows DEFAULT SETTING
3 Press on OK
4 Press on the UP
or
DOWN
button to make your selection
5 Press on OK to confirm your entry and exit selection
6 Press on MENU
once to exit Setting
Page 34

34
© 2016 Maka Tec
hnologies Group
. A
ll Rights Reserved.
Getting Started
Operation of your VR4 FHD Digital Roadcorder
TM
PHOTO SETTNG
Resolution
1 Press on M (Mode) button
once into Photo Mode
2 Press on
MENU
once to enter Photo Setting
3 Press on UP
or
DOWN
button to navigate to the function that
shows
Resolution
4 Press on OK to enter showing 12M 4032x3024 or 10M 3648x2736 etc
5 Press on the UP
or
DOWN
button to make your selection
6 Press on OK to confirm your entry and exit selection
7 Press on MENU
once to exit Setting
8 Press OK button for shooting
Sequence
This function enable shooting of 3 photo in one single shot.
1 Press on M (Mode) button
once into Photo Mode
2 Press on
MENU
once to enter Photo Setting
3 Press on UP
or
DOWN
button to navigate to the function that
shows
Sequence
4 Press on OK to enter showing ON/OFF
5 Press on the UP
or
DOWN
button to make your selection
6 Press on OK to confirm your entry and exit selection
7 Press on MENU
once to exit Setting
8 Press OK button for 5 photo shooting in 1 single shot
Page 35

35
© 2016 Maka Tec
hnologies Group
. A
ll Rights Reserved.
Getting Started
Operation of your VR4 FHD Digital Roadcorder
TM
Quality
This function enable to set the quality of the photo to be taken.
The lower the quality, the memory taken will be lesser.
1 Press on M (Mode) button
once into Photo Mode
2 Press on
MENU
once to enter Photo Setting
3 Press on UP or DOWN
button to navigate to the function that
shows
Quality
4 Press on OK to enter showing FINE/NORMAL/ECOMONY
5 Press on the UP or DOWN
button to make your selection
6 Press on OK to confirm your entry and exit selection
7 Press on MENU
once to exit Setting
8 Press OK button for shooting
Sharpness
This function enable to select the photo taking to be more distinctive or clearer
picture during photo shooting.
1 Press on M (Mode) button
once into Photo Mode
2 Press on
MENU
once to enter Photo Setting
3 Press on UP
or
DOWN
button to navigate to the function that
shows
Sharpness
4 Press on OK to enter showing STRONG/NORMAL/SOFT
5 Press on the UP
or
DOWN
button to make your selection
6 Press on OK to confirm your entry and exit selection
7 Press on MENU
once to exit Setting
8 Press OK button for shooting
Page 36

36
© 2016 Maka Tec
hnologies Group
. A
ll Rights Reserved.
Getting Started
Operation of your VR4 FHD Digital Roadcorder
TM
White Balance
This function enable to select the balancing of the lighting effect on different
environment. Recommended to be set as
(AUTO)
1 Press on M (Mode) button
once into Photo Mode
2 Press on
MENU
once to enter Photo Setting
3 Press on UP
or
DOWN
button to navigate to the function that
shows
White Balance
4 Press on OK to enter showing
AUTO/DAYLIGHT/CLOUDY/TUNGSTEN/FLUORESCENT
5 Press on the UP
or
DOWN
button to make your selection
6 Press on OK to confirm your entry and exit selection
7 Press on MENU
once to exit Setting
8 Press OK button for shooting
ISO
This function enable to set the light sensitivity of the photo to be
taken. The higher the number, the more sensitive to light the
photo will be taken. Recommended to use as
(AUTO)
1 Press on M (Mode) button
once into Photo Mode
2 Press on
MENU
once to enter Photo Setting
3 Press on UP or DOWN button to navigate to the function that
shows
ISO
4 Press on OK to enter showing 100/200/400/AUTO
5 Press on the UP
or
DOWN button to make your selection
6 Press on OK to confirm your entry and exit selection
7 Press on MENU
once to exit Setting
8 Press OK button for shooting
Page 37

37
© 2016 Maka Tec
hnologies Group
. A
ll Rights Reserved.
Getting Started
Operation of your VR4 FHD Digital Roadcorder
TM
Exposure
This function enable to set the function of the brightness the
photo to be taken or darker. Recommended
(+0.0)
1 Press on M (Mode) button
once into Photo Mode
2 Press on
MENU
once to enter Photo Setting
3 Press on UP
or
DOWN button to navigate to the function that
shows
Exposure
4 Press on OK to enter showing +0.0/+1/3 or -1/3 etc
5 Press on the UP or DOWN
button to make your selection
6 Press on OK to confirm your entry and exit selection
7 Press on MENU
once to exit Setting
8 Press OK button for shooting
Anti-Shaking
1 Press on M (Mode) button
once into Photo Mode
2 Press on
MENU
once to enter Photo Setting
3 Press on UP or DOWN button to navigate to the function that
shows
Anti-Shaking
4 Press on OK to enter showing ON/OFF
5 Press on the UP
or
DOWN
button to make your selection
6 Press on OK to confirm your entry and exit selection
7 Press on MENU
once to exit Setting
8 Press OK button for shooting
Page 38

38
© 2016 Maka Tec
hnologies Group
. A
ll Rights Reserved.
Getting Started
Operation of your VR4 FHD Digital Roadcorder
TM
Quick Review
This function meant for photo was review after each shot was
taken before it save into the memory and proceed with next photo
shot
1 Press on M (Mode) button
once into Photo Mode
2 Press on
MENU
once to enter Photo Setting
3 Press on UP
or
DOWN
button to navigate to the function that
shows
Quick Review
4 Press on OK to enter showing : OFF/2SEC/5SEC
5 Press on the UP or DOWN
button to make your selection
6 Press on OK to confirm your entry and exit selection
7 Press on MENU
once to exit Setting
8 Press OK button for shooting
Date Stamp
1 Press on M (Mode) button
once into Photo Mode
2 Press on
MENU
once to enter Photo Setting
3 Press on UP or DOWN
button to navigate to the function that
shows
Date Stamp
4 Press on OK to enter showing : OFF/Date/Date & Time
5 Press on the UP
or
DOWN
button to make your selection
6 Press on OK to confirm your entry and exit selection
7 Press on MENU
once to exit Setting
8 Press OK button for shooting
Page 39

39
© 2016 Maka Tec
hnologies Group
. A
ll Rights Reserved.
Getting Started
Operation of your VR4 FHD Digital Roadcorder
TM
GENERAL
Playback Mode (Video)
1 Stop recording by pressing on the OK button
2 Press 2x M (Mode)
button
to switch from recording to playback mode
3 Press and hold UP
or
DOWN
button to navigate thru the video files
4 Press on OK to START playing
5 Press on OK again to STOP playing
Delete Files
To delete one particular file or all the file in one time.
1 Press on UP or DOWN button to navigate thru the video files
2 Press on MENU
to
select Delete/Protect this file
3 Press on DOWN
button once to select Delete
4 Press on OK once show delete current AVI
Page 40

40
© 2016 Maka Tec
hnologies Group
. A
ll Rights Reserved.
Getting Started
Operation of your VR4 FHD Digital Roadcorder
TM
Playback Mode (Photo)
1 Press 2x M (Mode) button to switch from recording to photo view mode
2 Press UP
or
DOWN button to navigate thru the
photo files
taken
3 Press on OK once you have found the file you wish to view
Delete Files
To delete one particular file or all the file in one time.
1 Press on UP
or
DOWN button to navigate thru the photo files
2 Press on MENU
to
select Delete/Protect this file
3 Press on DOWN
button once to select Delete
4 Press on OK once show delete current file
Page 41

41
© 2016 Maka Tec
hnologies Group
. A
ll Rights Reserved.
General Troubleshooting
Question
Reason
Solution
The captured image
is not stored
1 MicroSD card might be
full or maulfunction.
2 Image is not saved before
the power outage.
Reformat the card or
replace a new MicroSD
Make sure to stop recording
before shutting down.
All buttons are invalid
1
Procedural error or faulty
Operation
2
MicroSD Card might be
error or faulty
Press RESET button to restart
the DVR.
Change a new Sd card or
reformat the card
Device cannot be turn on
Device might be low in
battery.
Charge the Battery.
Screen Auto power-off
1 Screen Saver function is
enabled.
2 Low Battery.
1 Press on UP button disable
the screen saver mode.
2 Charge the battery
Unable to record videos
1 Memory card might be full.
2 If lo op recording has been
enabled, memory card
might be corrupted.
1 Chec k your memory card’s
space. Delete files if
required.
2 Reformat your Memory
card , if issue still
persists, replace a new
memory Card
Auto stop recording in
video mode
Use a compatible SDHC
microSD card for HD video
recording.
Get a microSD card that has
minimum 8GB Class 10
speed.
Encounter “file
error” when trying to
playback pictures
or videos
MicroSD card might be
corrupted. There bad sectors in
the card.
Reformat the memory card.
Page 42

42
© 2016 Maka Tec
hnologies Group
. A
ll Rights Reserved.
General Troubleshooting
Question
Reason
Solution
No image is displayed on a
high-definition TV screen
1 Cable plug might not be
plugged in properly.
2 Wrong TV Input mode
1 Ensure AV/HDMI cable is plug into
the TV properly.
2 Refer to the back panel of your TV
to Track the correct TV input. Make
sure you have selected the correct
input.
Hazy Images
Lens might be dirty.
Check if there are fingerprints or
dust on the lens. Clean it with a
micro fabric cloth if necessary.
There are horizontal
stripes interferenc e on
the image
This could be due to
wrong light frequency
setting
Please set according to the local
power supply respectively;50H z
or 60Hz. For SG/MY:50hz
No image is displayed on
a high-definition TV
screen
1 Cable plug might not be
plugged in properly.
2 Wrong TV Input mode
1 Ensure AV/HDMI cable is plug
into the TV properly.
2 Refer to the back panel of your
TV to track the correct TV
input. Make sure you have
selected the correct input.
 Loading...