

Page 1

MCF140W | MCF183W
Page 2
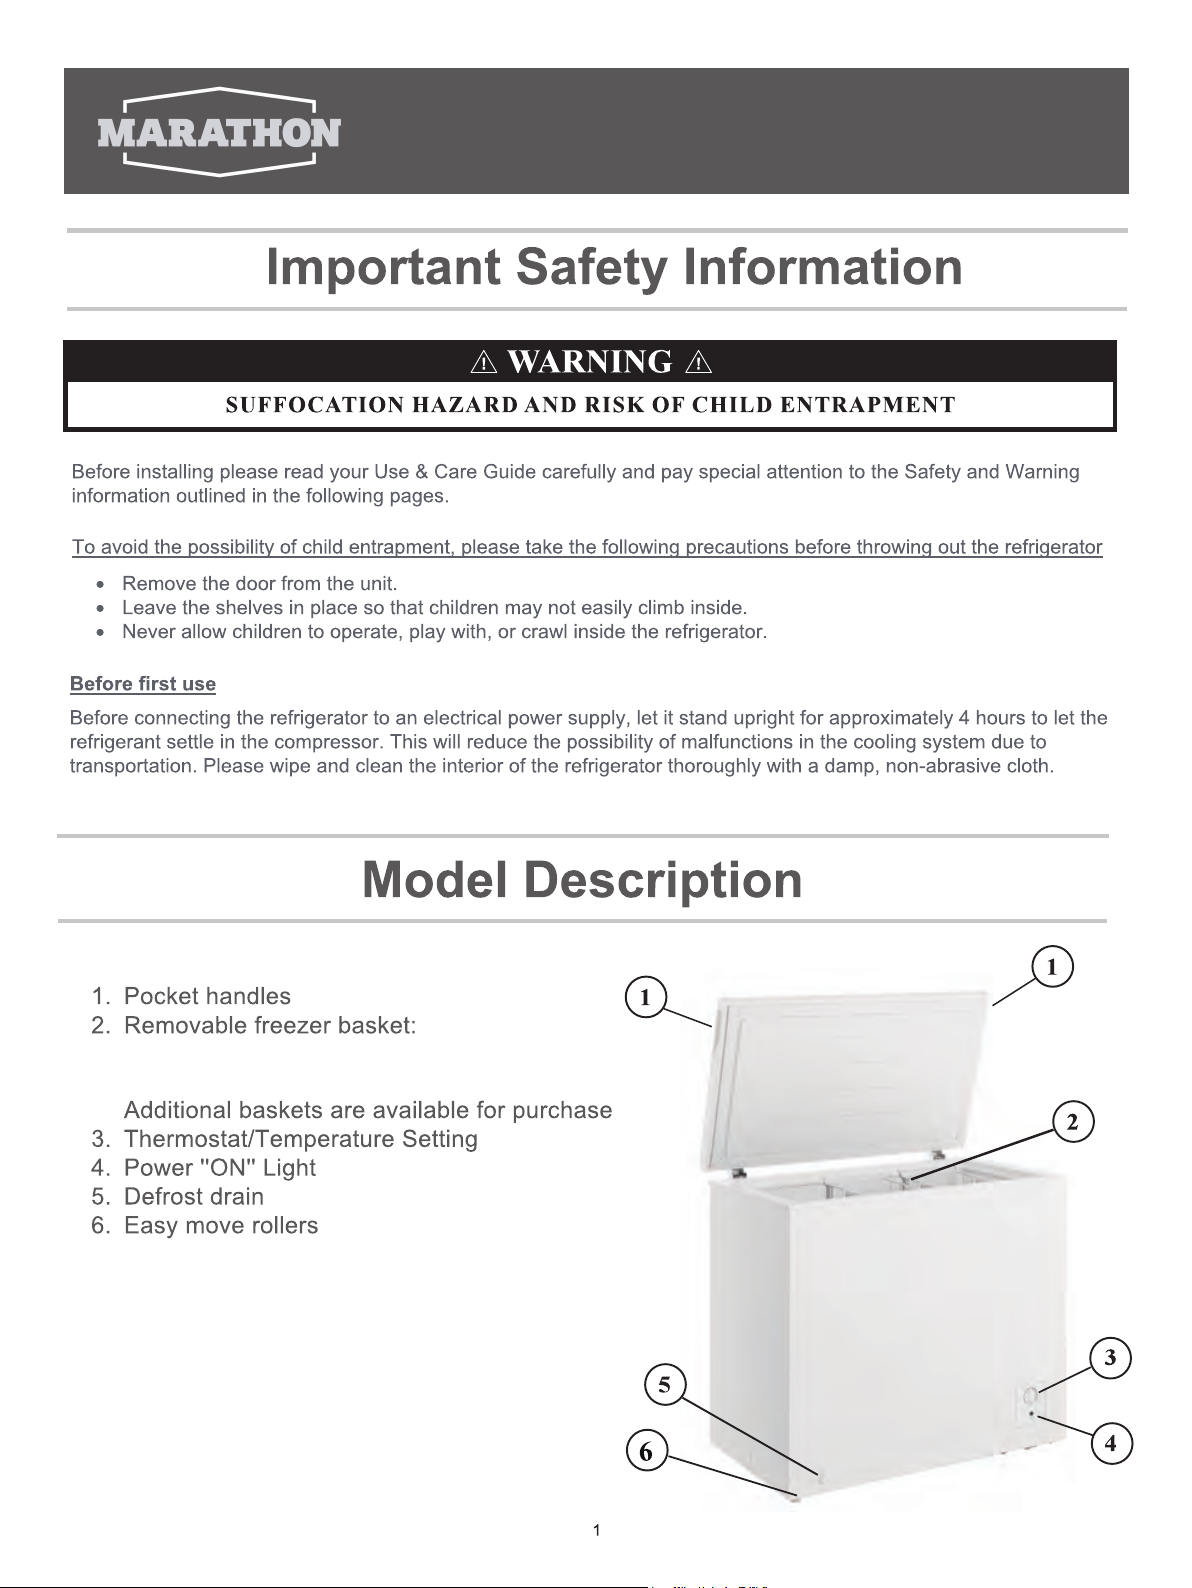
MCF140W include 4 basket
MCF183W include 6 basket
Page 3
Page 4
3
Page 5
4
Page 6
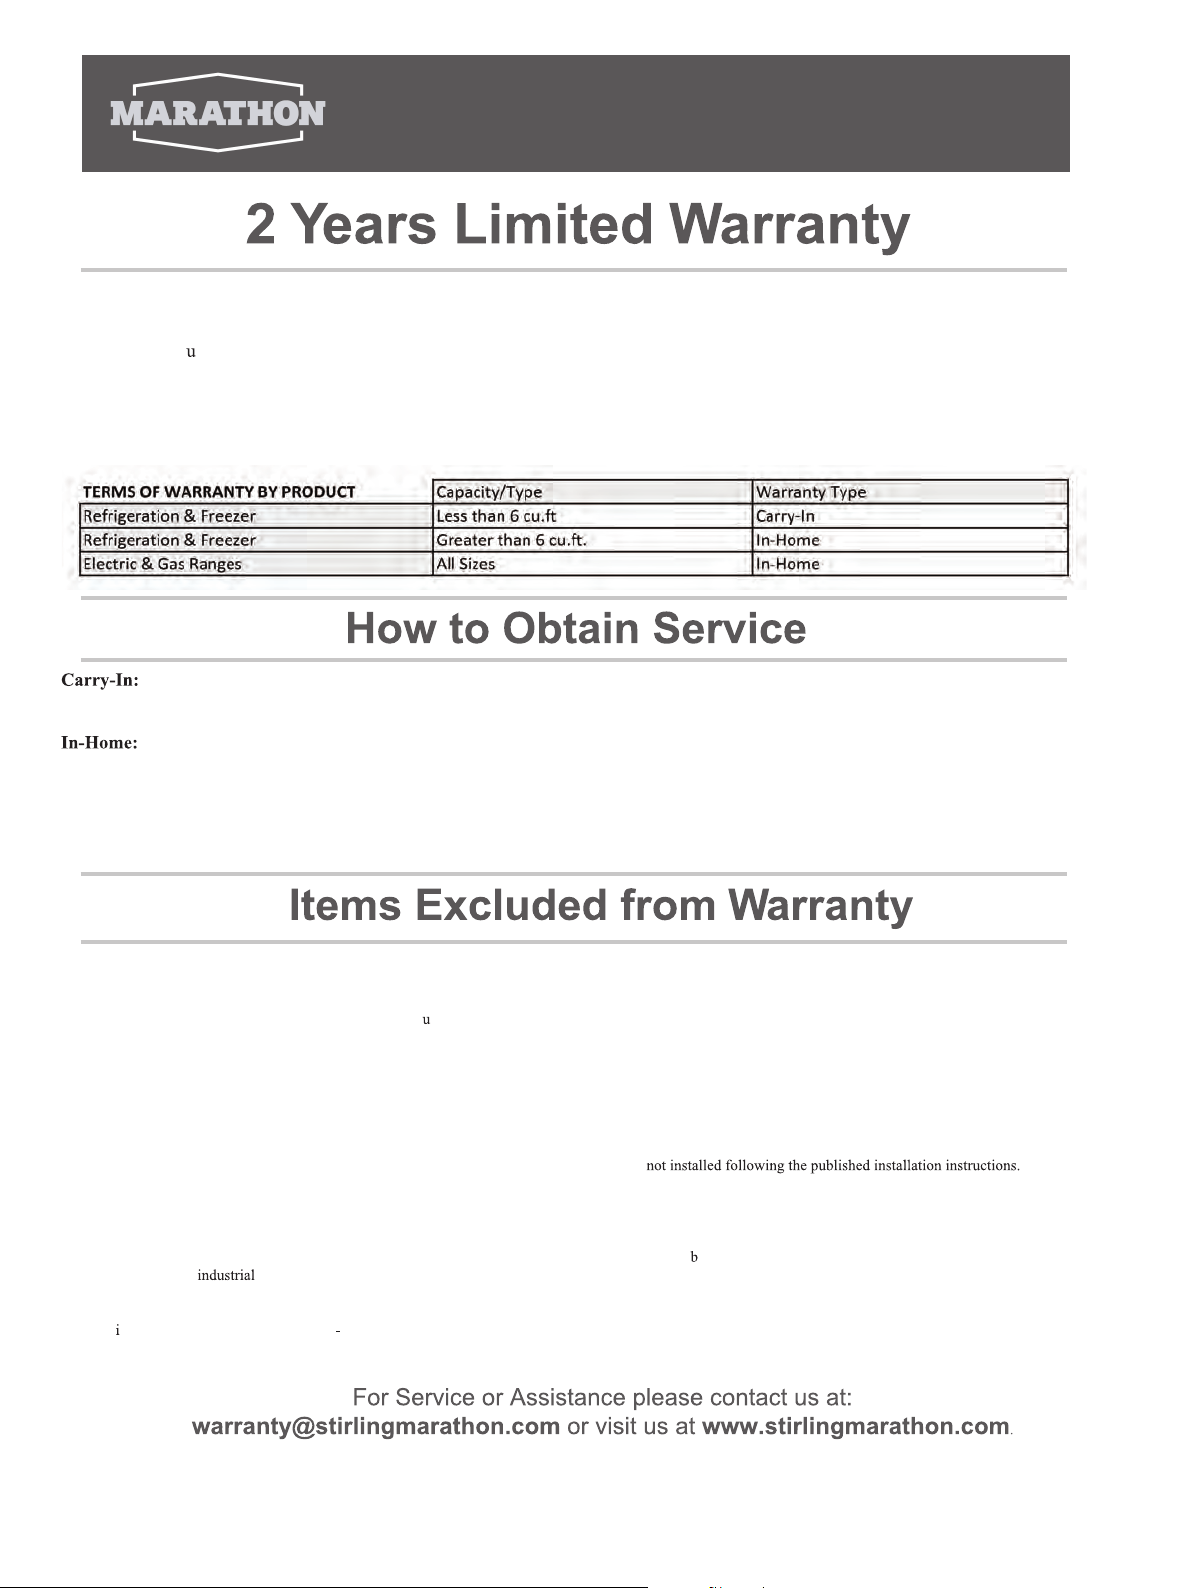
When operated and maintained according to the instructions in the Use & Care Guide, Marathon, a registered trademark of Stirling
Marathon Limited agrees to repair or replace this product for 2 years from the date of original purchase and/or agrees to pay for parts
and service/labo
r required to correct defects in materials or workmanship. Any Service must be approved and provided by an
Authorized Stirling Marathon Service provider. YOUR EXCLUSIVE REMEDY UNDER THIS LIMITED WARRANTY SHALL BE
PRODUCT REPAIR OR REPLACEMENT AT THE SOLE DISCRETION OF STIRLING MARATHON LIMITED AS PROVIDED
HEREIN. This limited warranty is valid only in Canada and the Continental United States with proof of original purchase and
confirmed warranty registration.
The original purchaser must deliver or ship the defective product to an authorized Stirling Marathon Service present a copy of
the original bill of sale or Warranty Registration Confirmation.
Contact Authorized Service Center and provide a copy of the Original bill of sale or Warranty Registration Card. If you are in a
remote area or the closest Authorized Service Center is further than 100 km (60 miles), you will be required to deliver the appliance to the
closest Service Center at your expense.
Stirling Marathon is not responsible or liable for any spoilage or damage to food or other contents of this appliance, whether due to any
defect of the appliance, or its use, whether proper or improper.
• Damages due to shipping or improper installation.
• Damages due to misuse or abuse.
• Content losses due to failure of the unit.
• Commercial or Rental Use Limited to 90 days Parts & Labo
• Plastic parts such as door bins, panels, door shelves, racks, light bulbs, etc.
• Punctures to the evaporator system due to improper defrosting of the unit.
• Service or Repair by unauthorized service technicians.
• Service calls that do not involve defects in material and workmanship such as instruction on proper use of the product, door reversal or improper installation.
• Replacement or resetting of house fuses or circuit breakers.
• Delivery costs incurred as the result of a unit that fails.
• Expenses for travel and transportation for product service if your appliance is located in a remote area where service by an unauthorized service technician is not available.
• The removal and reinstallation of your appliance if it is installed in an inaccessible location or is
• Liability under this warranty is limited to repair, replacement or refund. If a replacement unit is not available or the unit cannot be repaired, liability is limited to the actual.
• Purchase price paid by the consumer.
• This warranty applies only to the original purchaser and does not extend to any subsequent owner(s) and is non-transferable.
• No warranty or insurance herein contained or set out shall apply when damage or repair is caused by any of the following:
Accident, alteration, abuse or misuse of the appliance such as inadequate air circulation in the room or a
• Use for commercial or
hurricanes, floods etc.
• Service calls resulting in customer education.
• lmproper
nstallation (ie. Building-in of a free standing appliance or using an appliance outdoors that is not approved for outdoor application).
purposes (i.e. If the appliance is not installed in a domestic residence). Fire, water damage, theft, war, riot, hostility, acts of God such as
r.
.
normal operating conditions (extremely high or low room temperature).
5
V.06/2022
Page 7
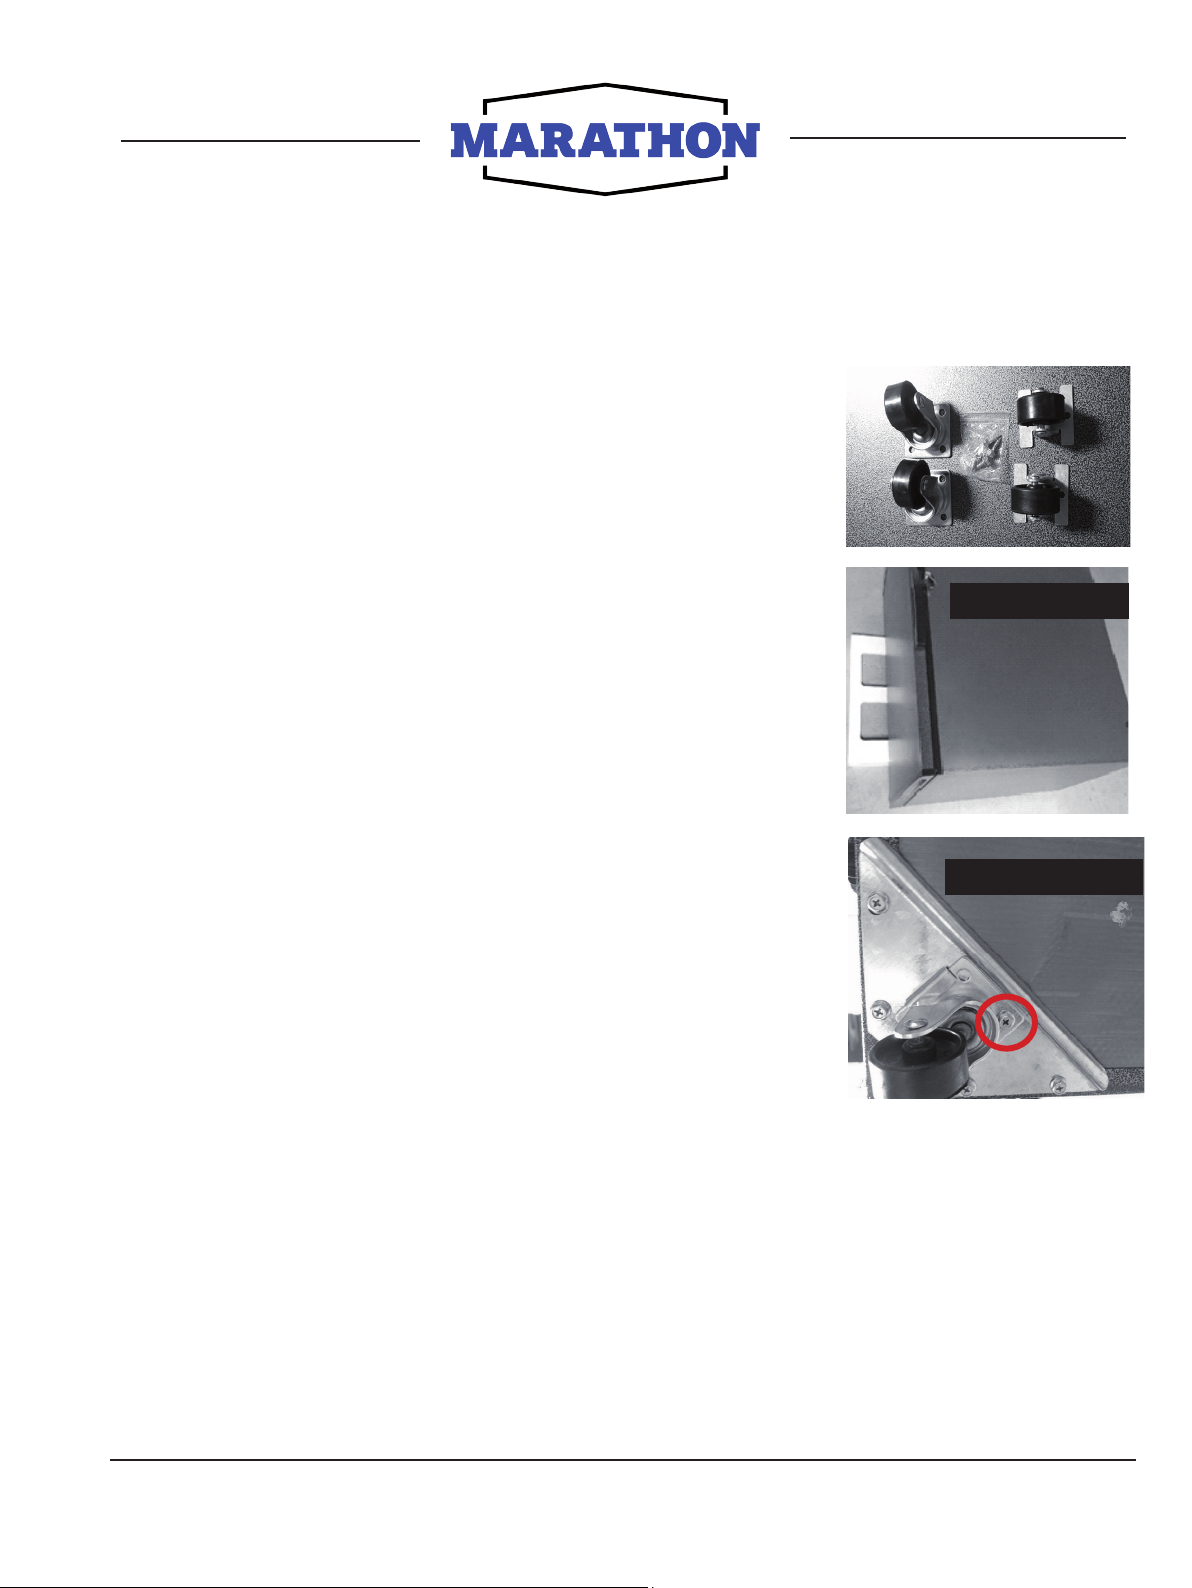
Installing the castors on your
Marathon Chest Freezer
Recommended: 2 person task
Tools Required: #8 metric (5/16”) wrench or socket set,
or Philips Screwdriver
Contents: 4 swivel & with 8 x #8 screws
1) With another person, carefully lay your Marathon
Freezer on its back, supported by a large piece of
Styrofoam from the packaging or other soft object.
(figure 1.)
2) Slide the swivel castor into the angled bracket
at both the top and bottom LH side making sure the
hole lines up for the screw. Only 2 screw is required
per castor. Tighten using the #8 socket or wrench.
3) With another person, carefully lift your Marathon
Freezer back upright onto the castors.
You are good to go!
Figure 1
Swivel Castors
Stirling Marathon 33 Park Road Elora, Ontario Canada N0B 1S0
Page 8
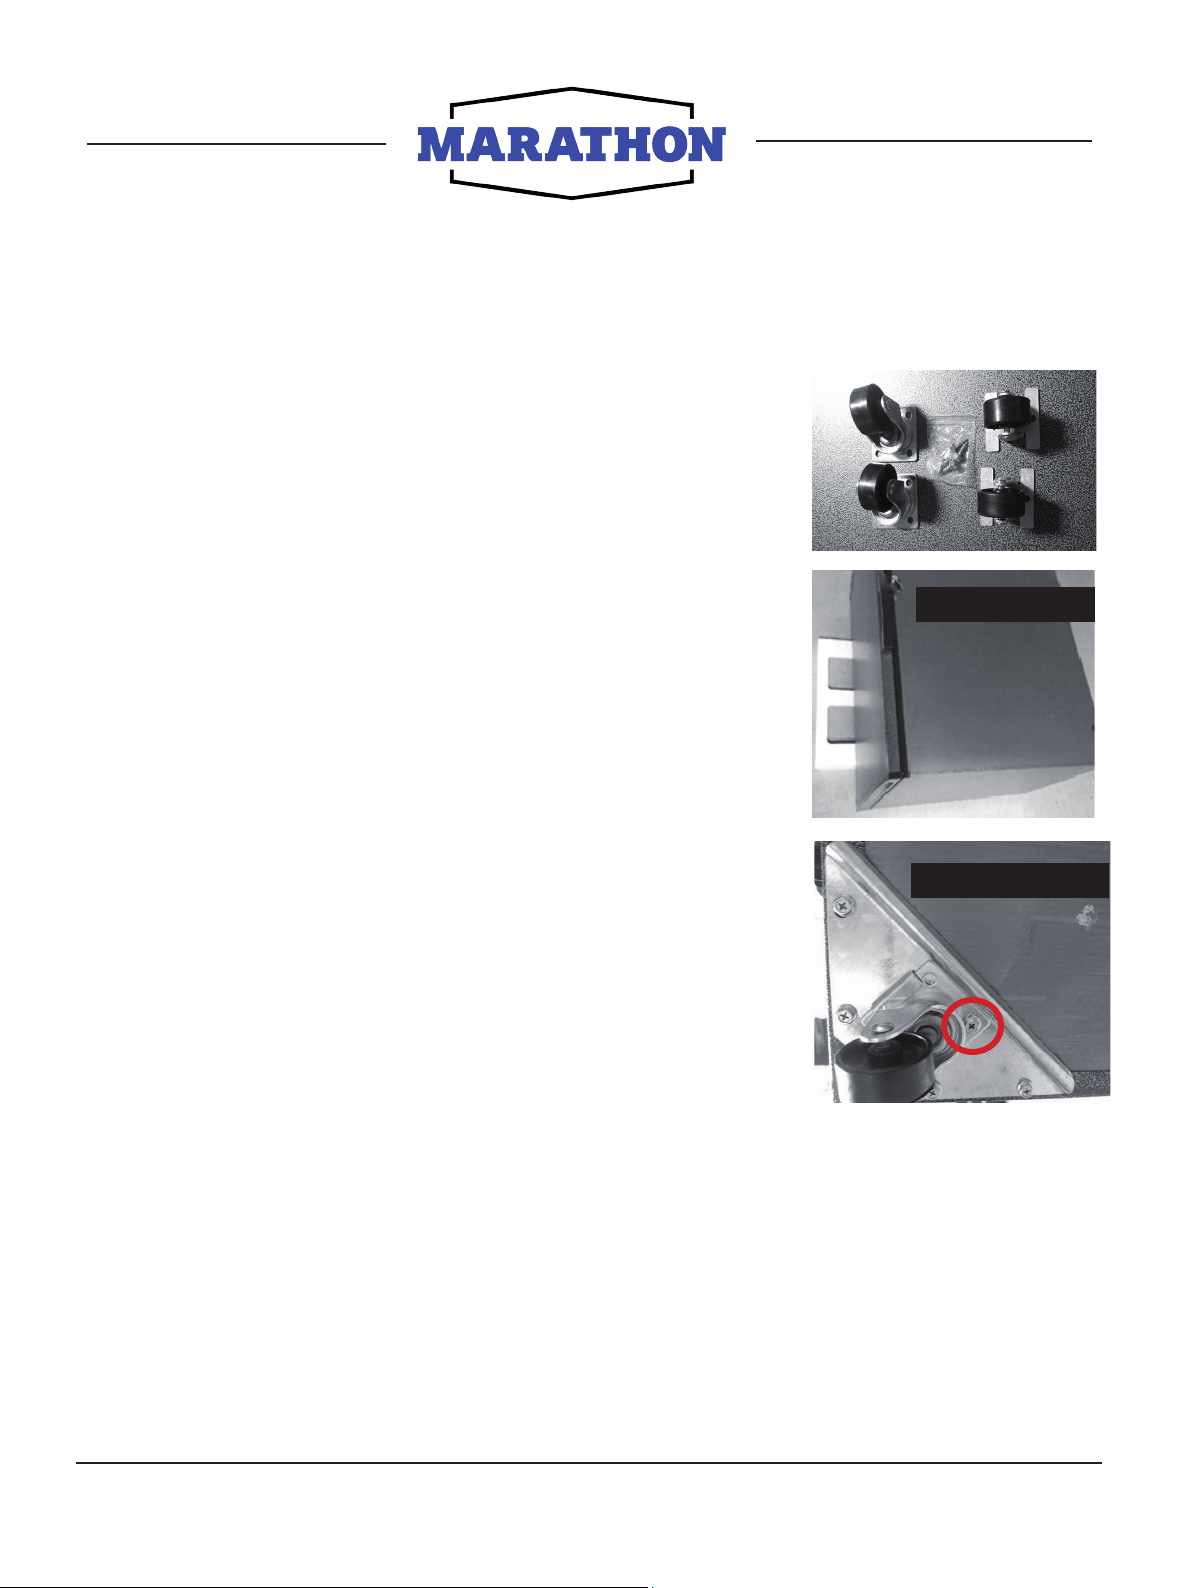
Guide d’instruction pour l’installation
des roulettes sur votre congélateur
Marathon
Recommendation: 2 personnes sont requises pour faciliter la
manipulation de l’appareil.
Outils requis : Clé anglaise ou douille métrique #8 metric (5/16”)
ainsi qu’un tournevis de type Philips.
Pièces incluses: 4 roulettes pivotantes, ainsi que 8 Vis #8
1) Avec l’aide d’une personne, coucher délicatement
le congélateur Marathon sur son dos en ayant pris soin de
le déposer sur un morceau de styromousse ou tout autre
objet non rigide. (figure 1.)
2) Glisser les roulettes pivotantes à l’intérieur des
supports à angle situé au coin supérieur et inférieur
gauche. Assurez-vous que le trou soit bien aligné avant
d’y insérer la vis. Veuillez noter qu’deux seule vis est
requise pour chaque roulette. Serrez la vis en utilisant
une clé anglaise ou une douille #8.
Swivel Castors
Figure 1
3) Avec l’aide d’une autre personne, redressez le
congélateur Marathon sur ses roulettes.
L’appareil est maintenant prêt à être mis en marche !
Stirling Marathon 33 Park Road Elora, Ontario Canada N0B 1S0
 Loading...