

Page 1

PREMIUM WINE COOLER
Owners
use and care guide
MBWC24 | MBWC24-2D | MWC24-D1 | MWC24-DBLS
Congratulations on the purchase of your new Premium Wine cooler!
To activate your Warranty, please register your appliance at www.stirlingmarathon.com
or by completing and mailing the enclosed Warranty Registration Card. We are confident you will have years of hassle free enjoyment and ask that you please retain the Use
& Care Guide for future reference and your safety.
Before installing please, read your Use & Care guide carefully and pay special attention
to the Safety & Warning information outlined in the following pages
For immediate assistance: 1-844-309-9777
www.stirlingmarathon.com
Page 2

Table of Contents
Important Safety information ..........................................................................................................
Parts description.....................................................................................................................................
Installation location................................................................................................................................
Installation requirements (MBWC24-2D)....................................................................................
Installation requirements (MBWC24, MWC24-D1 & MWC24-DBLS).............................
Ventilation Grill Assembly..................................................................................................................
Reversing door instruction ...............................................................................................................
Switching the appliances ‘‘On’’........................................................................................................
Loading your wine and beverage cooler.....................................................................................
Control description (MBWC24-2D) ..............................................................................................
Control description (MBWC24).......................................................................................................
Control description (MWC24-D1 & MWC24-DBLS)...............................................................
Temperature chart ................................................................................................................................
Adjusting shelves....................................................................................................................................
Troubleshooting......................................................................................................................................
Warranty.....................................................................................................................................................
3
4
5
6
7
8
9
10
10
12
13
14
15
16
17
18
Page 3

Important Safety Information
SUFFOCATION HAZARD AND RISK OF CHILD ENTRAPMENT
Before installing please read your Use & Care guide carefully and
pay special attention to the Safety and Warning Information outlined in the following pages. To avoid the possibility of child entrapment, please take the following precautions before throwing out the
refrigerator.
Remove all doors from the unit. Leave the shelves in place so that
children may not easily climb inside Never allow children to operate,
play with, or crawl inside the refrigerator.
3
Page 4
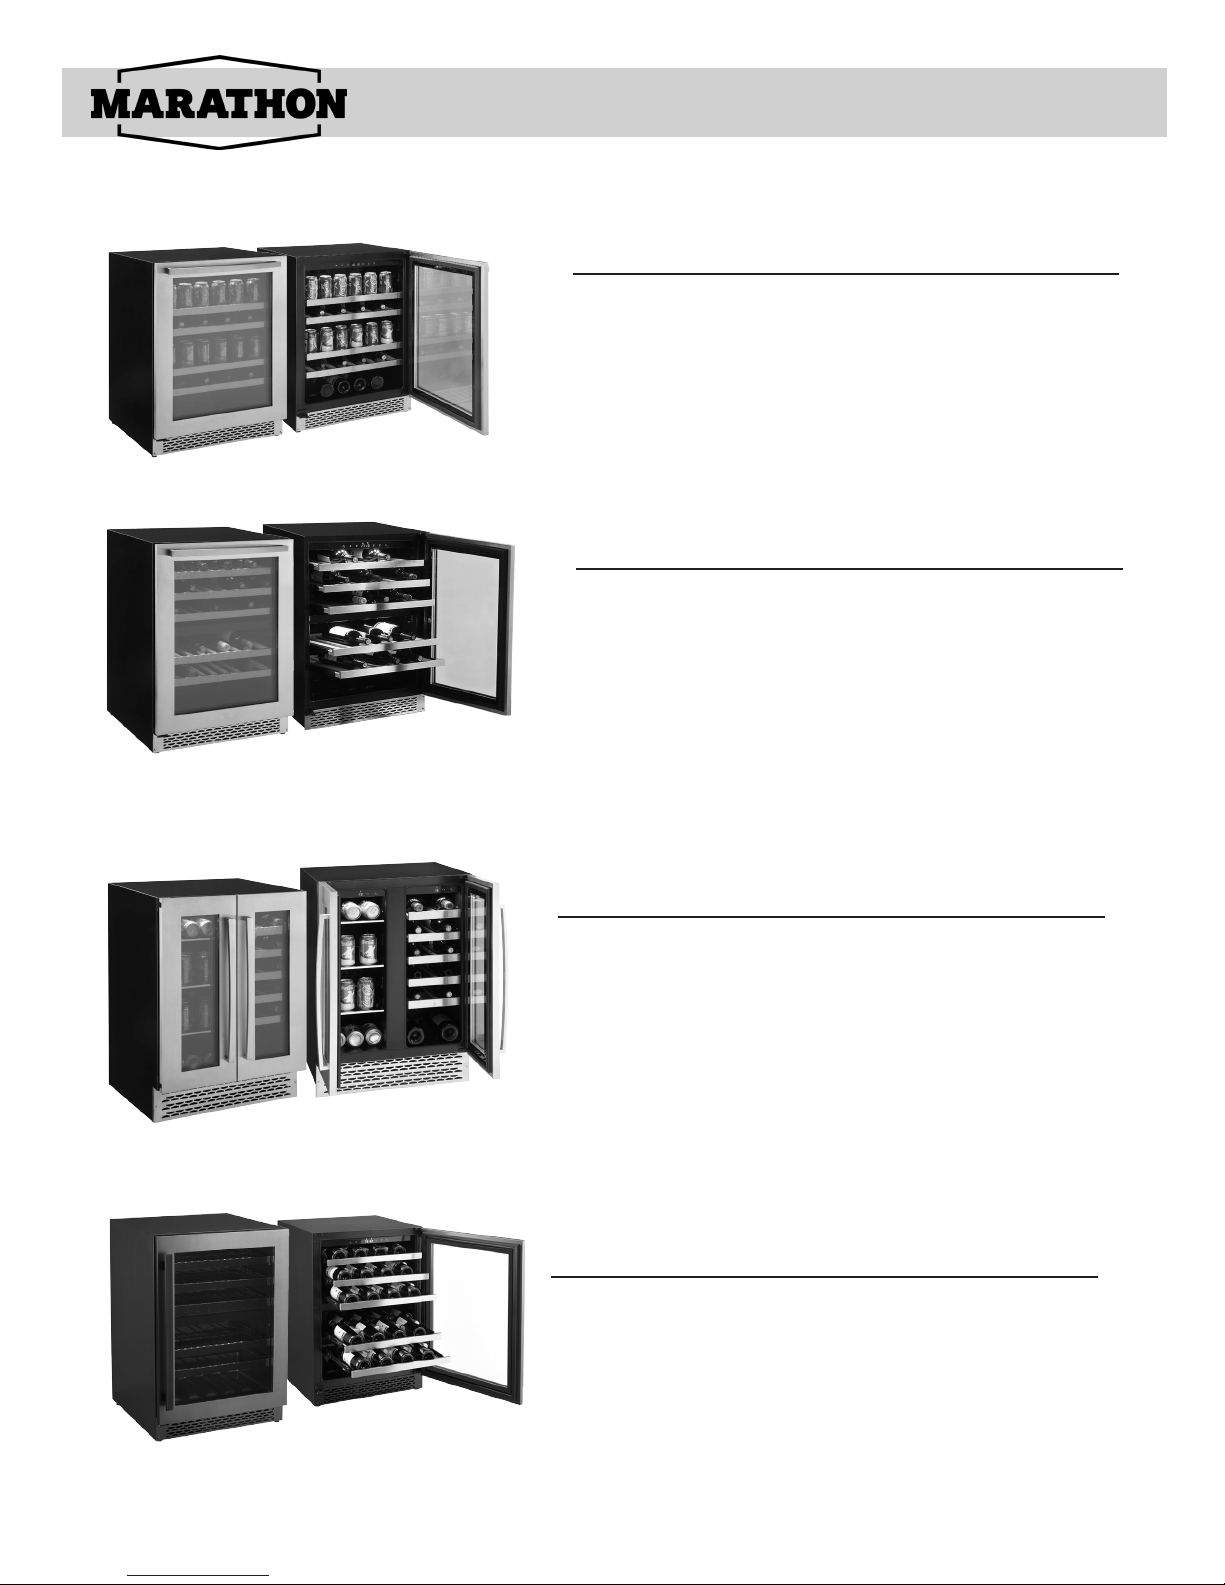
MBWC24
Removable shelves (4)1.
Stainless steel handle2.
Ventilation grill3.
Removable tempered glass insert4.
MWC24-D1
Pull-out shelves (5)1.
Stainless steel handle2.
Ventilation grill3.
Parts Description
MBWC24-2D
Adjustable glass shelves (3)1.
Stainless steel handles2.
Ventilation grills (3.25’’ & 5’’)3.
Adjustable wooden shelves (5) 4.
MBWC24-DBLS
Pull-out shelves (5)1.
Black steel handle2.
Ventilation grill3.
4
Page 5

Installation location
Installing your Marathon Wine and/or Beverage Cooler
Before using your new Wine and/or Beverage Cooler, we recommend leaving Cooler
door open and unplugged for 24 hours prior to installation or use. This will allow time to
clear any residual odors from the interior liner and hardwood shelves.
Your Premium Marathon Wine and/or Beverage cooler is engineered for built-in or free
standing installation. The front bottom vent is the ventilation grill and must not be covered.
Your Marathon Wine and/or beverage cooler is also equipped with 4 adjustable feet to
facilitate easy leveling. We recommend that you tighten the back feet first and then adjust the front feet to level the wine cooler.
Installation location
Choosing the right location for your Marathon Wine and/or Beverage Cooler is important.
We highly recommend the following location criteria:
• The appliance must be positioned such that the plug and power outlet are
accessible. Release the power cord and move the appliance to its final location.
The appliance should be installed in a suitable place where the compressor will not
be subject to physical contact, unencumbered and well ventilated
• Dry area, not too damp or humid – ideally at maximum 65% relative humidity for
peak performance and reduced sweating on the interior door when opening. If the
temperature is above or below this range, it may affect the performance of
the Wine and/or beverage cooler. Placing in cold, hot or humid temperature condi tions may cause temperature fluctuations and increased running operation costs.
• Flat, level oor
• Approved electrical outlet (preferably with surge protector) within 3 feet of the
Wine and/or beverage cooler.
• Minimum 1 meter from any microwave oven. Certain microwave ovens do not have
a wave interference shield. When placed too close to the wine or beverage cooler ,
the performance may be affected.
• Marathon Wine and/or Beverage Coolers are NOT CERTIFIED for outdoor use.
Outdoor use will void your warranty and possibly cause a safety hazard and
result in fire or personal injury.
CAUTION! Your Marathon wine and/or Beverage Cooler is equipped with a three
prong power cord which has a ground wire. The plug should never be altered or used
with an extension cord or power bar. Improper use of the grounding plug can result in
the risk of electric shock. Consult a qualified electrician or service person if the
grounding instructions are not completely understood. If the supply cord is damaged,
it must be replaced by a qualified person in order to avoid electrical hazard.
5
Page 6
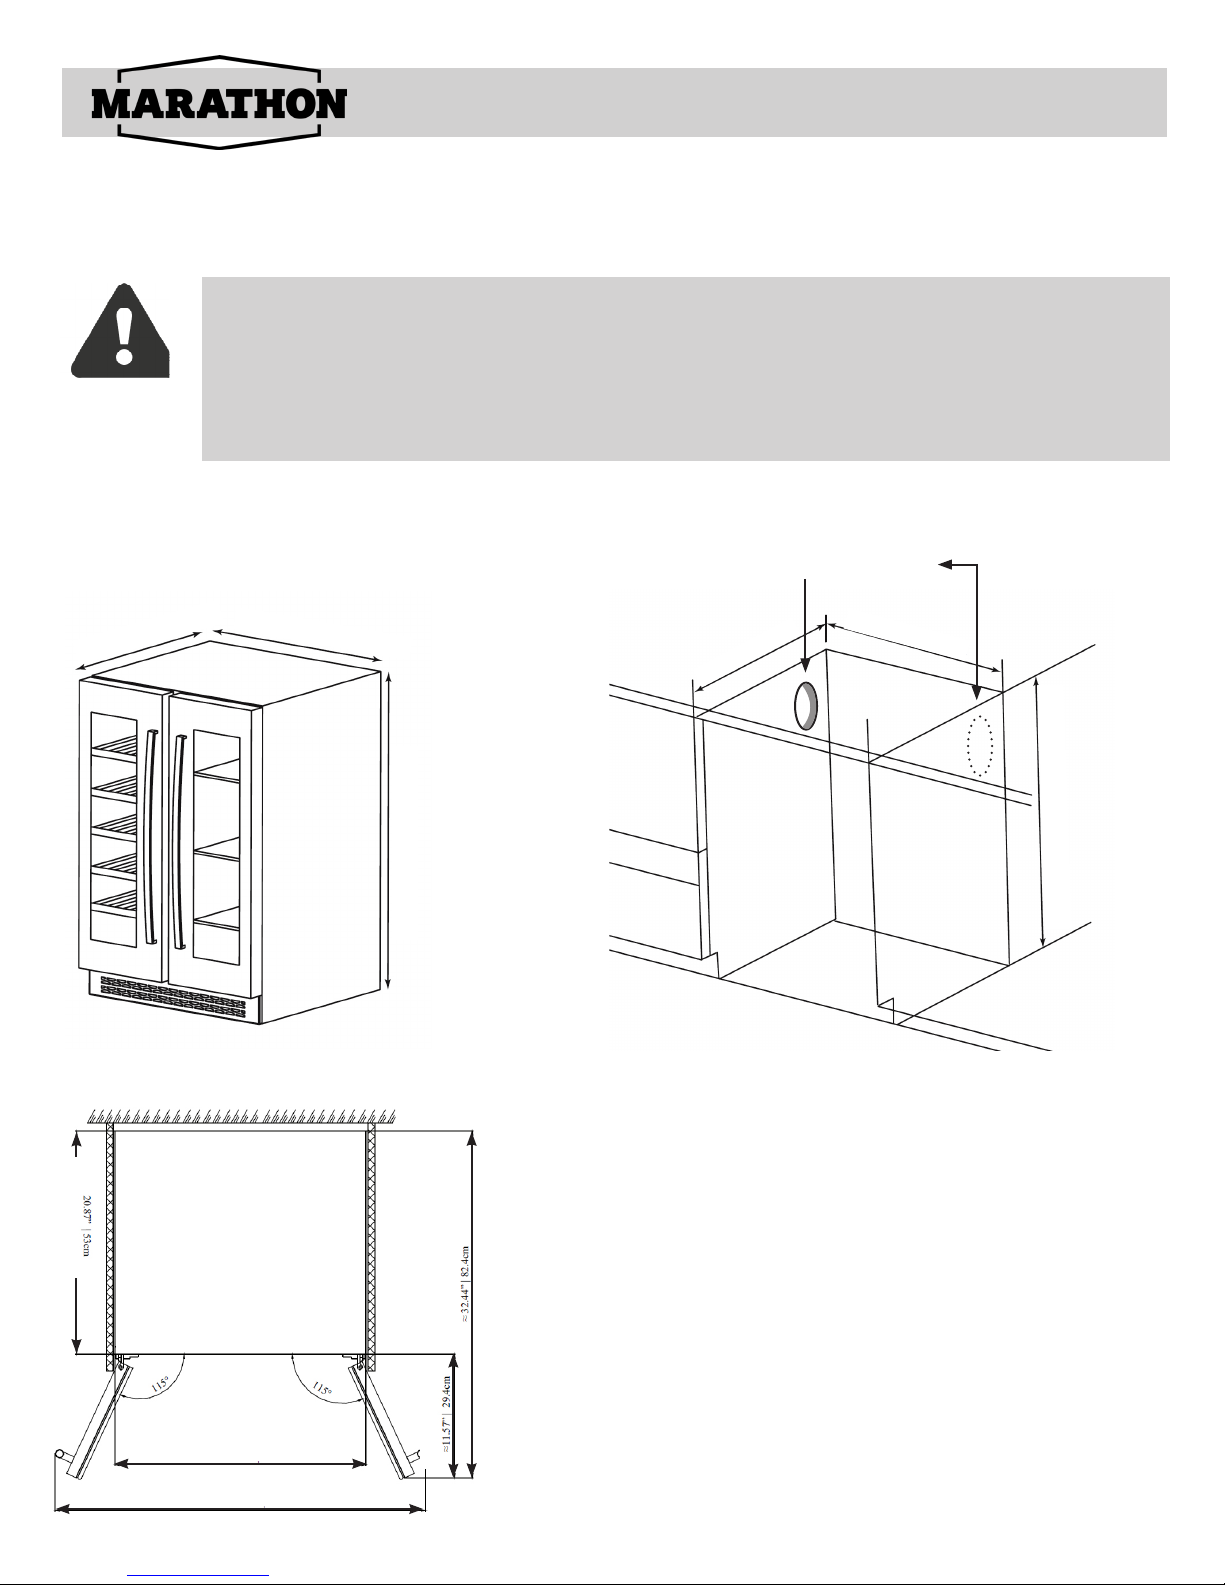
MBWC24-2D
Cutout & Dimensions
In “Hot and Humid locations”, an air vent with a minimum ventilation size of 200mm x 40mm
MUST be cut out at the rear top OR 2 circular shapes with a diameter of 65mm at the top of
either side of the partitioning, allowing cool air to flow into the rear of the cabinet.
This air vent must not be opened on the same side as other appliances, such as ovens, or an area
that is sealed and without access to fresh cool air. Failing to comply with the above specifica-
tions could result in WARRANTY becoming void.
DIMENSIONS
Installation Requirements
Make up air
(recommended)
Ø Min. 2.½ ’’
23
22
7/16
’’ | 57 cm
DOOR CLEARANCE
20 ⅞’’ | 53 cm
23 ½’’ | 59.6 cm
34 ⅝’’ | 88 cm
½
’’ | 59.6cm
32 ¼’’-35’’ | 82-89 cm
32 7/16’’ | 82.4 cm
11 9/16’’ | 29.4 cm
23
CUTOUT
¼
22
’’ | 59 cm
⅞
’’ | 60.5 cm
32 11/16’’ - 35
¼
’’ | 82-89 cm
1. Please follow the installation diagram when installing built-in wine
cellars. Use no less than the minimum installation dimension, or it
will affect the venting of cellar .
2. Built-in wine cellars draw air from right of ventilation frame and
expel through left of ventilation frame under the front door.
3. Built in wine cellars have a power switch located on the control
panel so power point location is not critical.
4.The wine cellar requires a standard 120 volt/15 amp dedicated
power supply.
5. The power cord is approx. 6 ft./2M in length and is xed on the
right side at the back when looking from front of cabinet.
6. As with most appliances of today, your Marathon appliance has
sensitive electronic components which are susceptible to damage
through lightning and electricity supply surges. It is therefore advised to use a surge protected power outlet to avoid power interruptions or damage to the appliance.
6
Page 7

Installation Requirements
MBWC24 | MWC24-D1 | MWC24-DBLS
Cutout & Dimensions
In “Hot and Humid locations”, an air vent with a minimum ventilation size of 200mm x 40mm
MUST be cut out at the rear top OR 2 circular shapes with a diameter of 65mm at the top of
either side of the partitioning, allowing cool air to flow into the rear of the cabinet.
This air vent must not be opened on the same side as other appliances, such as ovens, or an area
that is sealed and without access to fresh cool air. Failing to comply with the above specifica-
tions could result in WARRANTY becoming void.
DIMENSIONS
23
’’ | 60 cm
⅝
23
DOOR CLEARANCE
13/16
’’ | 60.5 cm
3 ⅜’’ | 8.5 cm
34 ¼- 35’’ | 87 cm - 89 cm
CUTOUT
24
’’ | 62 cm
⅜
Make up air
(recommended)
Ø Min. 2.½ ’’
24
3/16
’’ | 61.5 cm
34
⅝
- 35
¼
’’ | 88 cm - 89 cm
22 1/16’’ | 56 cm
23 13/16’’ | 60.5 cm
44 11/16’’ | 113.5 cm
22 ⅝’’ | 57.5 cm
1. Please follow the installation diagram when installing built-in wine
cellars. No less than the minimum installation dimension, or it will
affect the venting of cellar .
2.Built-in wine cellars draw air from right of ventilation frame and
expel through left of ventilation frame under the front door.
3.“Built in” wine cellars have a power switch located on the control
panel so power point location is not critical.
4.The wine cellar requires a standard 120 volt/15 amp dedicated
power supply.
5. The power cord is approx. 6 ft./2M in length and is xed on the
right side at the back when looking from
front of cabinet.
6. As with most appliances of today, your Marathon appliance has
sensitive electronic components which are susceptible to damage
through lightning and electricity supply surges. It is therefore advised to use a surge protected power outlet to avoid power interruptions or damage to the appliance.
7
Page 8

Ventilation Grill Assembly
MBWC24-2D
Ventilation Grill Assembly
To protect your wine and/or beverage cooler while transit, We have
carefully packed and protected the ventlation grills in the styrofoam
packaging. DO NOT DISCARD PACKAGING without removing the
stainless steel ventilation grill.
Please note that for model MBWC24-2D, the legs are adjustable to 2 inches to assist with
varied counterheights. A minimum of 34.5” height is required for the front ventilation
plate to be properly secured once installed. The stainless front ventilation grill is packaged
separately in the wine cooler. Once the wine and beverage cooler is leveled and placed
into the location, the front ventilation grill is easily installed and secured by the 4 stainless
screws included.
MBWC24-2D is designed for standard counter high installations which requires adjusting
the legs to 34.5” in order to fit the standard 5” ventilation grill. If you have a custom installation between 32.5”-34.5”, a smaller 3.25” ventilation grill also comes with the unit.
MBWC24 | MWC24-D1 | MWC24-DBLS
Ventilation Grill Assembly
To protect your wine and/or beverage cooler while transit, We have
carefully packed and protected the ventlation grill in the styrofoam
packaging. DO NOT DISCARD PACKAGING without removing the
stainless steel ventilation grill.
Please note that for model MBWC24, MWC24-D1, MWC24-DBLS, the legs are adjustable to
2 inches to assist with varied counterheights. A minimum of 34.5” height is required for the
front ventilation plate to be properly secured once installed. The stainless front ventilation
grill is packaged separately in the wine cooler. Once the wine and beverage cooler is leveled
and placed into the location, the front ventilation grill is easily installed and secured by the 2
stainless screws included.
8
Page 9

Reversing door instruction
Reversing the Door Swing
For models MBWC24, MWC24-D1:
Due to the handle location, your Marathon wine and/or beverage cooler is factory set for
Right Hand Hinge only and is not reversible. Please contact www.stirlingmarathon.com for
door exchange options if a Left Hand Hinge door is required.
For model MWC24-DBLS:
Please follow the directions below:
Step 1 Place the wine cooler in an open area allowing the door to be opened to the
maximum angle and free from obstruction.
Step 2 Use a thin knife or
screwdriver (2) to remove the 3 plastic hole cover caps (1). Keep these
caps for Step 7.
Step 3 Use a hex key to
remove the screws of the
door support. Remove
the door support.
Step 5 Remove the upper and lower hinges
using the hex key. Re-
position the upper and
lower hinges on the
other side of the cabinet
and install them using
the hex key.
Step 6 To install the door
on the other side, simply
flip the door 180 degrees
and position in the door
hinges using the door
shaft and screws in step 4.
A
C
Step 4 While holding the
door, use a hex key to
remove the door shaft
from the top and bottom
of the door. Gently remove the door and set
aside in a safe place.
D
Step 7 Install the hole co-
ver caps removed in step
2 to cover the 3 holes on
the side where the door
was removed. Using the
hex key, reinstall the door
support on the opposite
side of the wine cooler.
Adjust accordingly to
provide good support so
the door can freely open
and close.
B
9
Page 10

Use and care
Switching The Appliance On
Before connecting the refrigerator to an electrical power supply, let it stand upright for approximately 4 hours to let the refrigerant settle in the compressor. This will reduce the possibility of malfunctions in the cooling system due to transportation. Please wipe and clean the
interior of the refrigerator thoroughly with a damp, non-abrasive cloth.
Once positioned, plug the wine & beverage cooler into the power outlet and turn “ON” by
pressing the “Power Button” for 3 seconds.
When you use your Marathon wine & beverage cooler for the first time (or restart the appliance after having it shut off for a long time) there will be a few degrees variance between
the temperature you have selected and the one indicated on the LED readout. This is normal and will adjust to the desired temperature once the compressor and cooling system has
been running for several hours.
IMPORTANT: If the unit is unplugged, power is lost, or is turned off, wait 3 to 5 minutes before restarting the unit. The compressor will not re-start immediately and requires this time
to automatically re-start.
Frost Free Fan Cooled Operation
Your Marathon is engineered with a high efficiency compressor cooling system that uses
a fan to cool and regulate your desired temperature setting. This means you never have to
worry about defrosting your wine & beverage cooler and it will provide years of hassle free
enjoyment. Like all Frost Free and compressor appliances, you will hear the fan operating
and the compressor cycling on and off while it defrosts itself. The following sounds will
most likely occur during normal operation:
Gurgling sound - caused by the refrigerant flowing through the appliance’s coils•
Crackling/popping sounds - resulting from the contraction and expansion of the •
refrigerant gas to produce cold.
Fan operating sound - to circulate the air within the wine cellar.•
Loading your Wine & Beverage Cooler
Depending on the bottle size, you can load your wine bottles in single or double rows provided the bottles are evenly distributed throughout the wine and/or beverage cooler with
small gaps between bottles to ensure peak chilling and energy efficiency.
Model MBWC24 (Single Zone Wine and Beverage Cooler)
For your convenience, the MBWC24 is convertible from a single zone wine cooler to a full
or combination beverage cooler with the tempered glass shelf inserts. For ease of refrige-
rating cans, the tempered glass shelves should be used so that the cans fit flat on the shelf
to maximize the capacity. For chilling wine bottles, simply remove the tempered glass shelf
inserts and place the bottles on the beechwood shelves for optimum chilling. The shelves
also pull out and are adjustable.
10
Page 11

Use and care
Model MWC24-D1 (Dual Zone Wine Cooler)
• Do not remove adjustable wooden shelves to accommodate larger type of bottles or increase the capacity of the cellar by stacking the bottles up when necessary.
(See removing shelves)
• Do not overload your wine cellar as this will affect air circulation.
• Do not stack more than 1.5 rows of standard 750ML bottles per shelves to facilitate air
circulation.
• Avoid obstructing the fan cooled system located inside the wine and beverage cooler at
the back panel.
• Do not slide the shelves outwards beyond the xed position top revent the bottles from
falling.
• Do not pull out more than one loaded shelf at a time as this may cause the wine cellar to
tilt forward.
• Do not cover the wooden shelves with aluminum foil or other materials, as it will obstruct
air circulation.
• Do not move your wine and beverage cooler when it is loaded with cans or bottles.
11
Page 12

Control description
LED Temperature Control
Important: The LED temperature displays the actual internal air temperature of your Marathon Wine and/or Beverage cooler. The temperature settings are preset at the factory and in
the event of a power interruption, all previous temperature settings are automatically erased
and it will revert back to the factory preset temperature settings.
Once you program your desired temperature setting, it is strongly recommended not to adjust frequently. The thermostat is accurate and will maintain the
temperature in side the wine cellar +/- 2.5º C. Please note that the depending
on the thickness of the wine bottle, and loading, the actual temperature of the
wine may differ from the wine and beverage cooler setting by +/- 1ºC.
MBWC24-2D Control
1
2
3
Temperature Display
Displays the current temperature.
Temperature adjustment °C or °F Temperature Conversion
Press once and each time afterwards the inside temperature will reduce by 1°C.
To set, simply stop when you have reached your desired temperature setting.
The temperature display will then revert back to the current temperature and
start cooling to your desired temperature. If pressed several times, the temperature setting will reach its lowest setting (5°C - wine cooler, 2°C - Beverage coo-
ler), then start again at the maximum temperature setting (20°C - wine cooler,
10°C - Beverage cooler). To change the temperature display to Celsius or Fa-
hrenheit simply press and hold the button for 3 seconds.
Interior light & Power “ON/OFF”
Press the Interior light button to turn ON or OFF the interior LED light.
Press and hold the button for 3 seconds to turn the power ON or OFF.
12
Page 13

MBWC24 Control
Control description
2
3
4
5
1
Energy Saving Mode
Press and hold the button for 3 seconds and the digital countdown will start
on display screen starting…3, 2, 1, then automatically adjusts the tempera-
4
ture setting to a preset temperature. To exit the energy saving mode simply
press the Temp +/- button or to exit and set your desired temperature.
6
7
ON/OFF the power button
Press the button for 3 seconds to power off digital countdown displays 3,
5
2, 1. Remark: All other functions will turn off except the light switch when the
power turns off. Press again (without delay), the power turns on.
Interior light
Press the Interior light button to turn ON or OFF the interior LED light.
Temperature Display setting
Displays your desired or energy saving temperature setting.
Temperature Display
Displays the current temperature.
6
Temperature Adjustment Up
Press once and each time afterwards the inside temperature will increase by
1°C (as displayed in window ). To set, simply stop when you have reached
your desired temperature setting. If pressed several times, the
temperature setting will reach its highest setting (10°C).
7
Temperature Adjustment down
Press once and each time afterwards the inside temperature will decrease by
1°C (as displayed in window ). To set, simply stop when you have reached
your desired temperature setting. If pressed several times, the temperature
setting will reach its highest setting (2°C).
8
°C/°F Temperature Conversion
To change the temperature between °C/°F, press and hold the Temperature
Adjustment for 3 seconds.
8
4
4
13
Page 14

MWC24-D1 & MWC24-DBLS Control
Control description
2
3
4
5
1
ON/OFF the power button
Press the button for 3 seconds to power off digital countdown displays 3,
5
2, 1. Remark: All other functions will turn off except the light switch when the
power turns off. Press again (without delay), the power turns on.
Upper Zone - Temperature Adjustment Up
Press once and each time afterwards the inside temperature will increase by
1°C (as displayed in window ). To set, simply stop when you have reached
4
your desired temperature setting. If pressed several times, the temperature
setting will reach its highest setting (20°C).
Upper Zone - Temperature Adjustment down
Press once and each time afterwards the inside temperature will decrease by
1°C (as displayed in window ). To set, simply stop when you have reached
4
your desired temperature setting. If pressed several times, the temperature
setting will reach its highest setting (12°C).
Temperature Display
Displays your desired and actual temperature in the Upper Zone.
Temperature Display
Displays your desired and actual temperature in the Lower Zone.
6
Press once and each time afterwards the inside temperature will increase
by 1°C (as displayed in window ). To set, simply stop when you have
reached your desired temperature setting. If pressed several times, the
temperature setting will reach its highest setting (12°C).
Lower Zone - Temperature Adjustment Up
7
Lower Zone - Temperature Adjustment Down
Press once and each time afterwards the inside temperature will increase
by 1°C (as displayed in window ). To set, simply stop when you have
reached your desired temperature setting. If pressed several times, the
temperature setting will reach its highest setting (5°C).
8
Interior Light and °C/°F Temperature Conversion
Press the Interior light button to turn ON or OFF the interior LED light
To change the temperature display to Celsius or Fahrenheit simply press and
hold the button for 3 seconds.
5
5
14
Page 15

Temperature chart
Recommended Wine Serving Temperature Chart
The chart below is a guide to recommended temperatures for wines. This is a guide only as personal
preferences vary…enjoy!
Important information about storing your wine
Your Marathon wine and/or beverage cooler has been “engineered to perform” and provide the perfect conditions
for storing and/or serving your wine. Fine wines require long and gentle development and need specic conditions in which to reach their full potential. Ideally, for long term storage, we suggest keeping your wine cooler at a
constant temperature between 12ºC and 14ºC.
Please note that not all wines will improve over the years, and some must be consumed within the first few years of
bottling, while other ne wines are capable of ageing over 50 years. For questions regarding the maturity of your
wines, we suggest you consult your local wine retailer for information on the wine of your choice
Auto Defrost Cooling System
For convenience and performance, your Marathon wine and/or beverage cooler is designed with an “Auto
Defrost” fan forced air cooling system. There is no need to ever defrost your wine /beverage cooler. One of the
benefits of the Marathon Auto Defrost system is that during “Off-cycle” of the cooling system, the refrigerated
surface of the wine and/or beverage cooler defrost automatically and out of sight. The Defrost water is collec-
ted and drains automatically into a container located at the back of the wine cellar next to the compressor. The
heat from the compressor then evaporates the defrost water and circulates humidity back into the wine cooler
to create the perfect humidity level required by the natural corks to maintain a long lasting seal.
All wine and/or beverage coolers are equipped with a double glazed glass door that has a third internal acrylic
layer to minimize condensation on the glass door. However, depending on the room temperature and humidity
vs. the wine cooler - when the door is opened, and closed, condensation or fogging on the glass may appear,
but once the temperature is stabilizes again in the wine and/or beverage cooler, the condensation/fogging on
the glass will gradually disappear. This is normal.
15
Page 16

Adjusting shelves
Adjusting the Removable Shelves
MBWC24 and MBWC24-2D
For easy access to the storage content, you must pull the shelves approximately 1/3 of its
depth out of the rail compartment. The shelves designed with a notch on each side of the shelf
tracks to prevent bottles from falling.
When removing any of these shelves out of the rail compartment, tilt the shelf as per the diagram and simply pull out, or push in the shelf until it sits on the support brackets securely.
Then simply press the shelf limit pin “A” on both sides and then lift slightly and pull gently to
remove .
Left side
Right side
”A” is shelf limit pin
MWC24-D1 & MWC24-DBLS
To remove the pull out the shelf to support bracket , press the two clips of the roller
bracket in and up, and pull out the shelf following the arrows . To reinstall push in the
shelf alignment with two sides of sliding roller following the arrows .
1
2
3
2
1
3
2
1
16
Page 17

Troubleshooting
IMPORTANT In the event of a power interruption, all previous temperature settings are automatically
saved and will revert to a preset temperature setting.
Most power failures are connected within a short period of time. An hours or two’s loss of power will
not affect wine cooler’s temperatures. To keep the temperature maintained during a short power
outage, avoid opening the door. For longer periods of power failure, please take alternative steps to
protect your wine.
17
Page 18

2 Year Limited Warranty
Warranty
For immediate assistance: 1-844-309-9777
www.stirlingmarathon.com
18
 Loading...