

Mapmyindia Aura Quick Start Manual

QUICK
START GUIDE
AURA

Table Of Content
1. GETTING STARTED
2. PLANNING THE ROUTE
3. ALTERING THE ROUTE
4. CITY GUIDES AND TRAVEL BOOK
5. SETTINGS
1.1 Entering an Address
1.2 Turn by Turn Navigation
1.3 Acquiring GPS Position
2.1 Action Menu
2.2 Navigating to a Point of Interest
2.3 Searching POI by Name
2.4 Searching POI by Categories
2.5 Navigating Home
2.6 Navigating to Recent Destinations
2.7 Navigating to Favourite Destinations
2.8 Defining a new Favourite Destination.
3.1 Route Summary
3.2 Route Options
3.3 Modifying the Route
3.4 Sharp Curve Warning Alerts
3.5 Map Browsing Mode
3.6 Avoid Toll Roads, Highways or Ferries
4.1 City Guides
4.2 Travel Book
5.1 Notifications & Sounds
5.2 Map View
5.3 Route Planning
5.4 Regional
5.5 Hardware
5.6 Travel Book
5.7 Autoclose Dialog
5.8 About
PAGE 0 1-08
PAGE 0 9-15
PAGE 1 6-25
PAGE 2 6-29
PAGE 3 0-32
www.mapmyindia.com
QUICK START GUIDE
QUICK START GUIDEQUICK START GUIDE
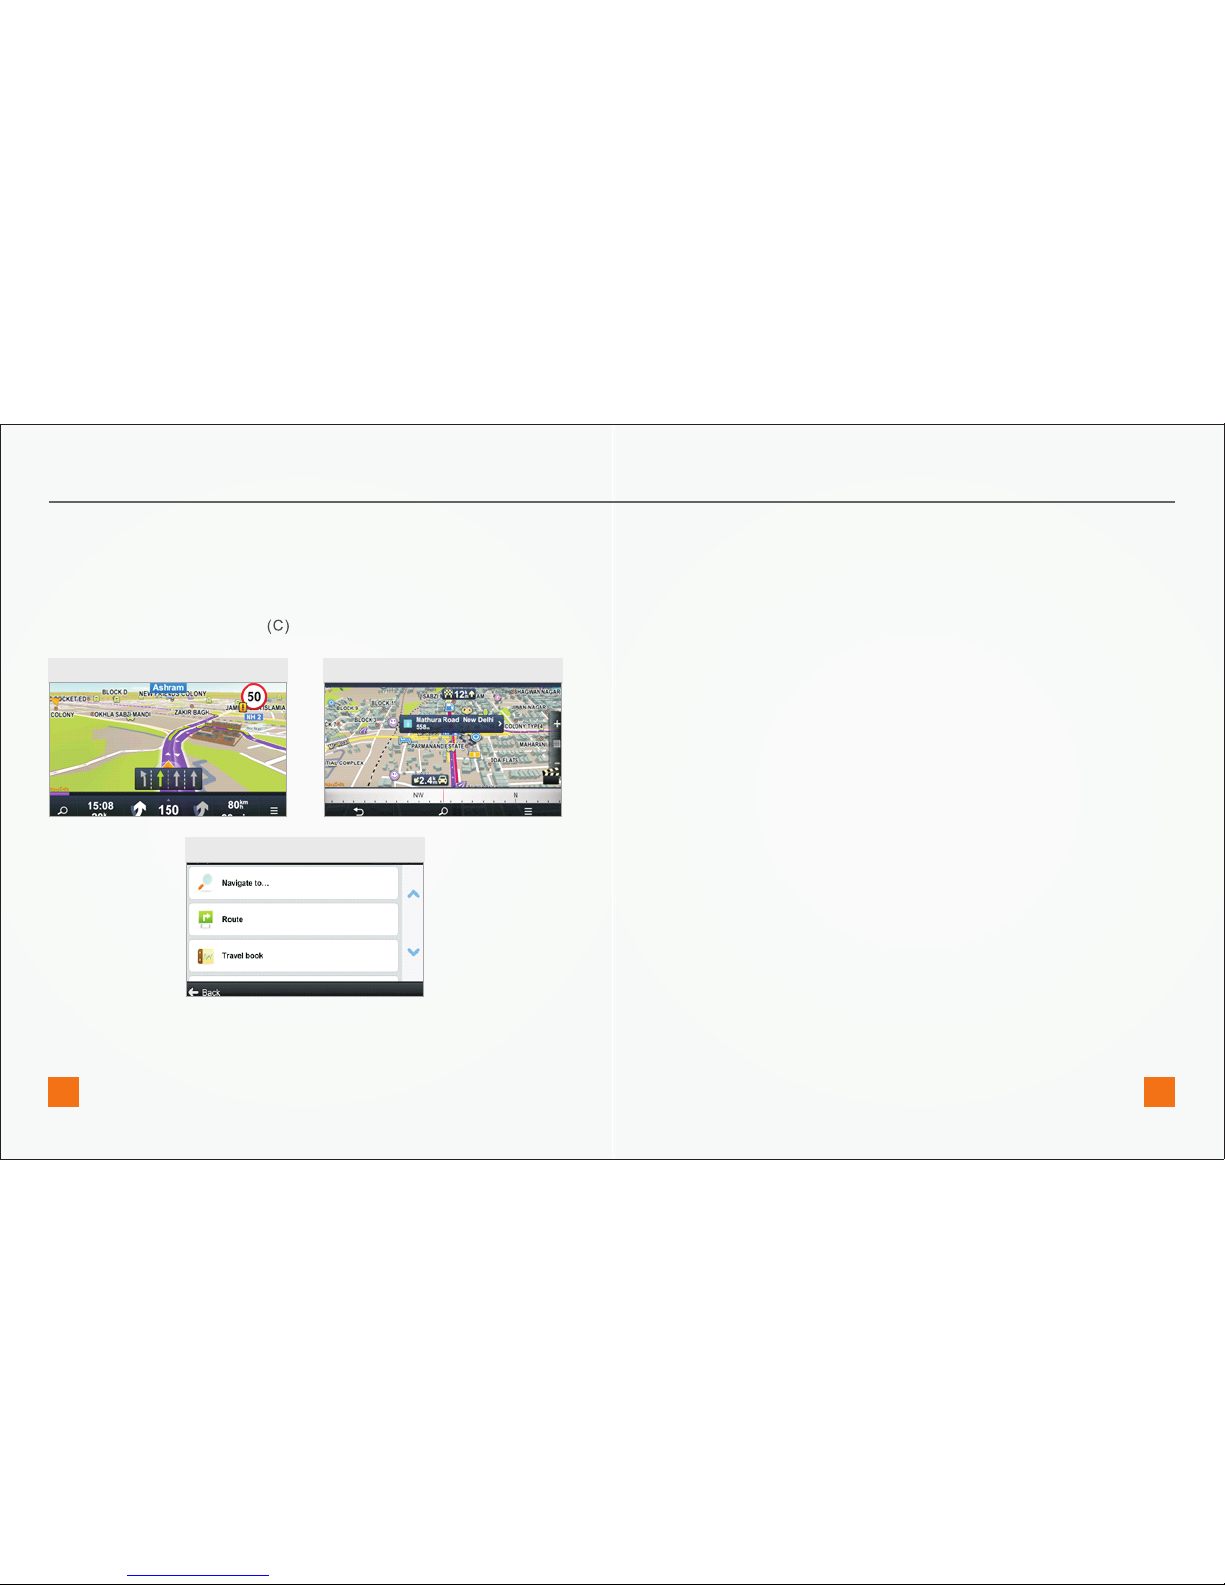
1. Menu
2. Map Browsing Mode
3. Back
4. Map Action Items
5. Zoom
6. 2D/3D view
7. Compass
Enter the Menu by tapping the arrow on the right side of the
information bar. You can scroll between the menu pages by sliding a
finger across the screen, or by using the scroll bar on the right side on
Personal Navigation Devices (PNDs).
Drag the map with your fingers to enter the Map Browsing Mode (B).
Return to the previous screen.
Tap any place on map for more actions related to the position on it. For
more information see the chapter Action menu.
Tap (+) button to zoom-in to more detailed view, (-) button to zoom
out.
Switch between 2D a 3D view by taping on the grid between the + and
– symbols on the right side of the navigation screen
Use compass at the bottom of the screen to turn around and change
direction of the view. Tap on the compass to return
the map to the north-up position.
In Navigation Mode (A), the software tracks your position for visual
reference of route and map around you. If you want to explore other
locations, drag the map with your fingers to switch to Map Browsing
Mode (B). To select destinations, review information about your route
and alter settings, go to Menu
C
B
A
Getting Started
www.mapmyindia.com www.mapmyindia.com
01 02
City
Locality
Sublocality/ Village/House Number
Street
Street crossing
Middle of street
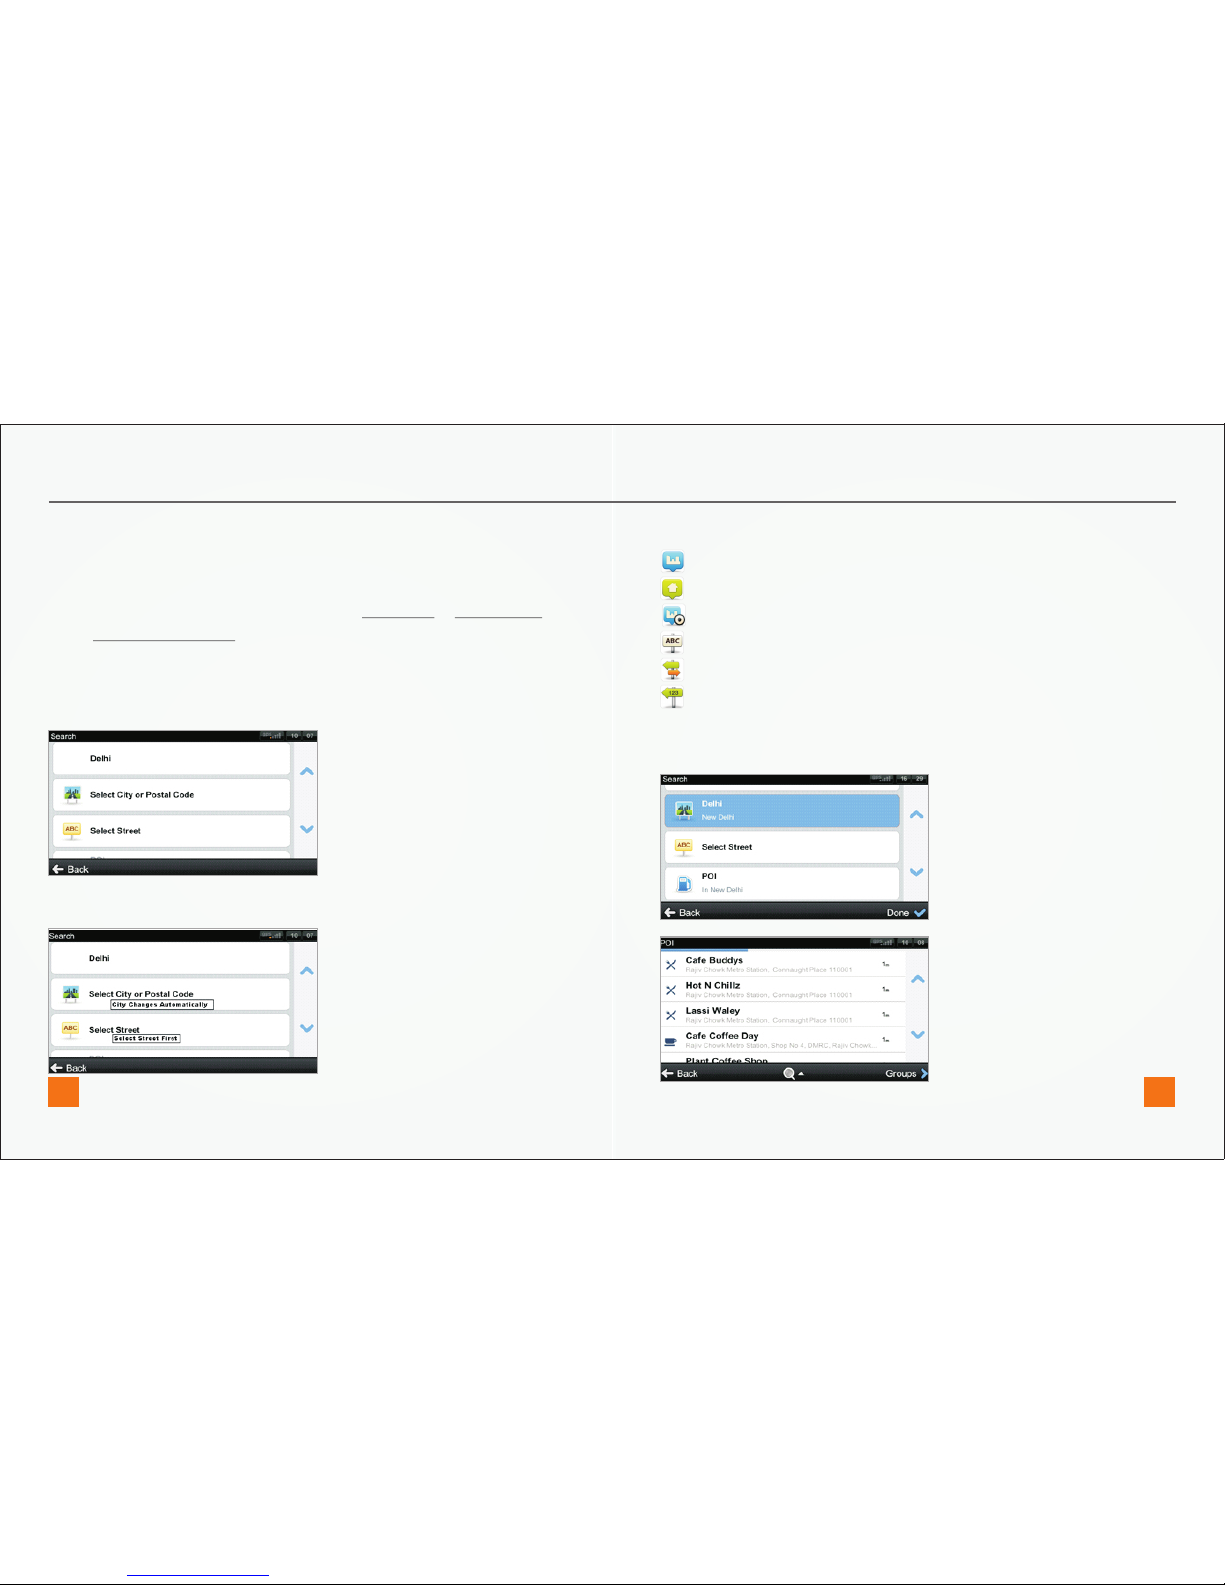
The list also features explanatory icons left to the city/street name:
1.1 ENTERING AN ADDRESS
To set your destination by entering its address select
After you select the option, you can enter Select City or Postal Code or
enter Select Street directly. Enter the first few letters of the City/Street
name to see a list of similar names.
Application supports City-first and Street-first address entry.
Menu > Navigate to… > Address or POI
City-first address search
QUICK START GUIDE
Select the desired city/street from the list.
Tap on POI to see a list of all points of interest near selected address.
Street-first address search
www.mapmyindia.com www.mapmyindia.com
03 04
Tap on Options to access route summary. From route summary you
can:
Cancel route
Access Route options
Avoid: toll roads, Avoid highways, Avoid ferries; Avoid special area, Avoid
unpaved roads, Avoid restricted area,
Manage traffic incidents on route (Availability of the traffic service
depends on your product configuration.)
See list of Important places
Show all instructions
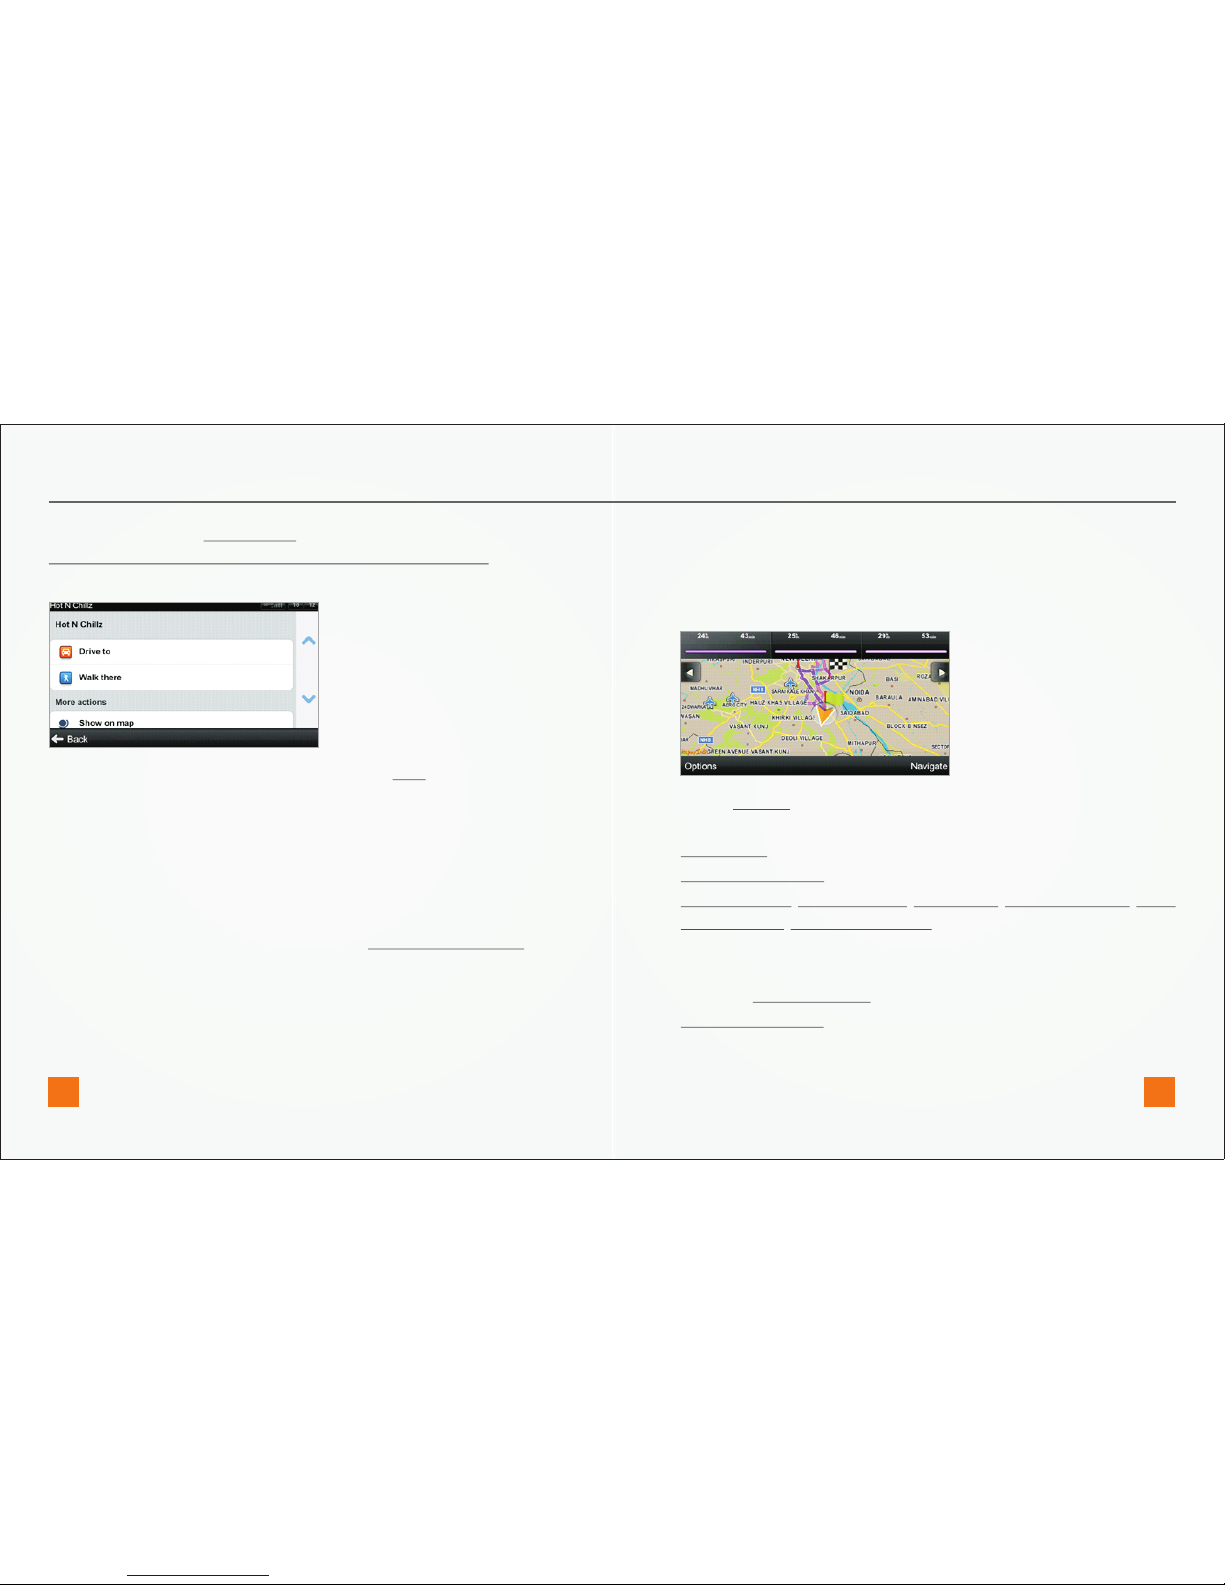
To accept the route and start turn by turn navigation, tap Done. If
you wish to return to planned route go to Menu > Route
Tap Done button and Action Menu with following options will appear:
Drive to, Walk there, Travel via, Show on map, Add to favorites. For more
information about Action Menu, see the chapter Action menu.
QUICK START GUIDE
To select a different address altogether, tap the Back button.
Note: Walk there mode is available only on PND’s
If your device can determine your current position, your route will be
calculated immediately from that positon. If your current position
cannot be determined, you will be offered the following options:
Wait for valid position (Recommended)
Your route will be calculated from your current position as soon as a
valid GPS signal is available (see the chapter Acquiring GPS Position).
Last valid position
Your route will be calculated from your last known position (i.e. where
you were just before the device lost GPS signal).
Select from map
Allows you to select any starting point for the route calculation.
When route calculation is complete, the preferred route is displayed
on map along with two other routes.
www.mapmyindia.com www.mapmyindia.com
05 06
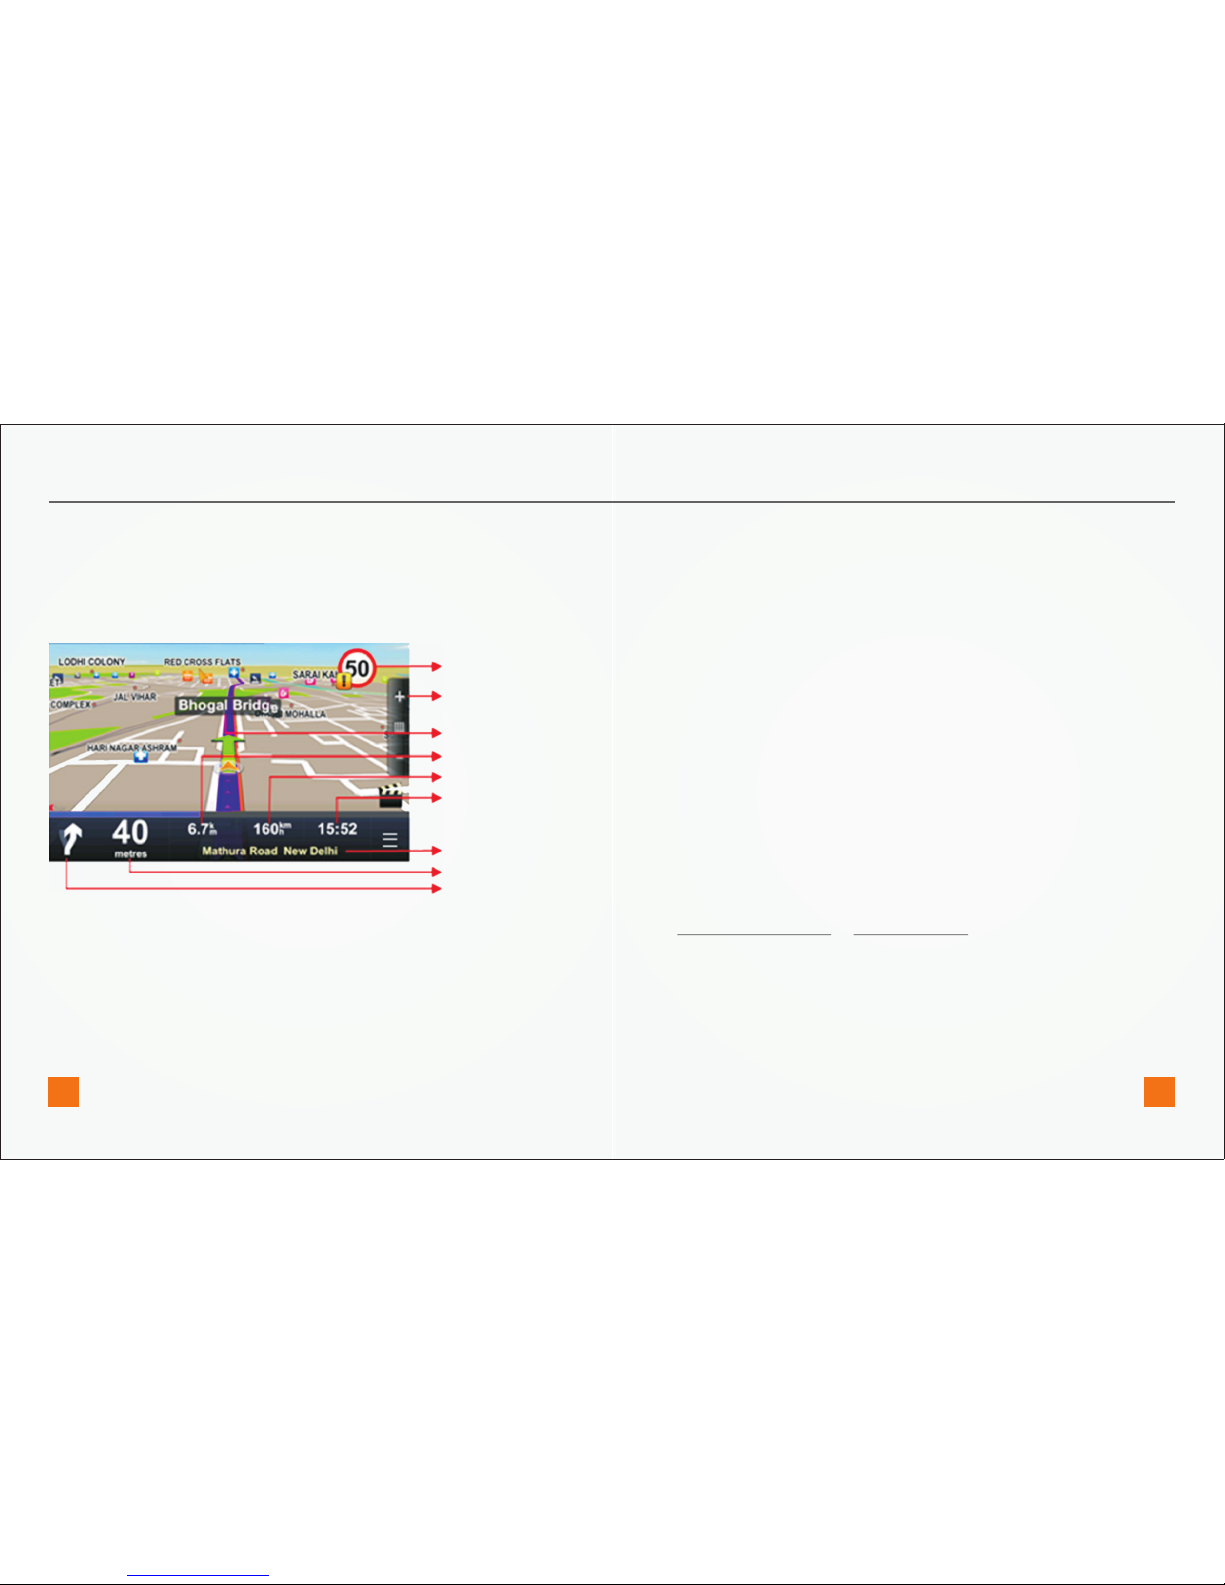
3 Current road/street
4 Estimated time of arrival at destination
5 Current speed
6 Distance to destination
7 Next road/street to take
8 zoom in/out
9 Current speed limit
If there is no GPS signal, the GPS signal indicator on the right side of the
screen will show empty bars. This can happen under any of the
following conditions:
1. The device is in a tunnel or at a location where signals from the
GPS satellites are obstructed by buildings, trees, electric cables or
other objects
2. Device system settings or Product settings are set incorrectly
You can check and configure GPS settings in:
1.3 ACQUIRING GPS POSITION
Menu > Settings > Hardware
9
8
7
6
5
4
3
2
1
QUICK START GUIDE
1.2 TURN BY TURN NAVIGATION
The Navigation Screen will show the map of your surrounding area with
the calculated route highlighted in blue.
As you approach a junction, further directions are displayed to indicate
which road to take.
In addition to turn by turn directions, the Navigation Screen also
provides a range of further useful information:
1 Next maneuver
2 Distance to next change of direction
www.mapmyindia.com www.mapmyindia.com
07 08
 Loading...