


Wireless N300 Cable Route
r
WEEE Directive & Product Disposal
At the end of its serviceable life,
this product should not be treated as household or genera l
waste.
It should be handed over to the applicable collection point for
the recycling of electrical and electronics equipment,
or returned to the supplier for disposal.

Wireless N300 Cable Router
System Requirements
1. Pentium 200MHZ processor or above
2. Windows 98SE, Windows Me, Windows 2000, Window s XP, Win dows
Vista and Windows 7.
3. 64MB of RAM or above.
4. 25MB free disk space
Package Contents
1. 802.11n WLAN Router
2. CD-ROM (Software & Manual)
3. Quick Installation Guide
4. Ethernet Cable (RJ-45)
5. Power Adaptor
Wireless N300 Cable Route
r
Installation & Setup
Follow each STEP carefully and only go to the next step
once you have completed the previ ous STEP.
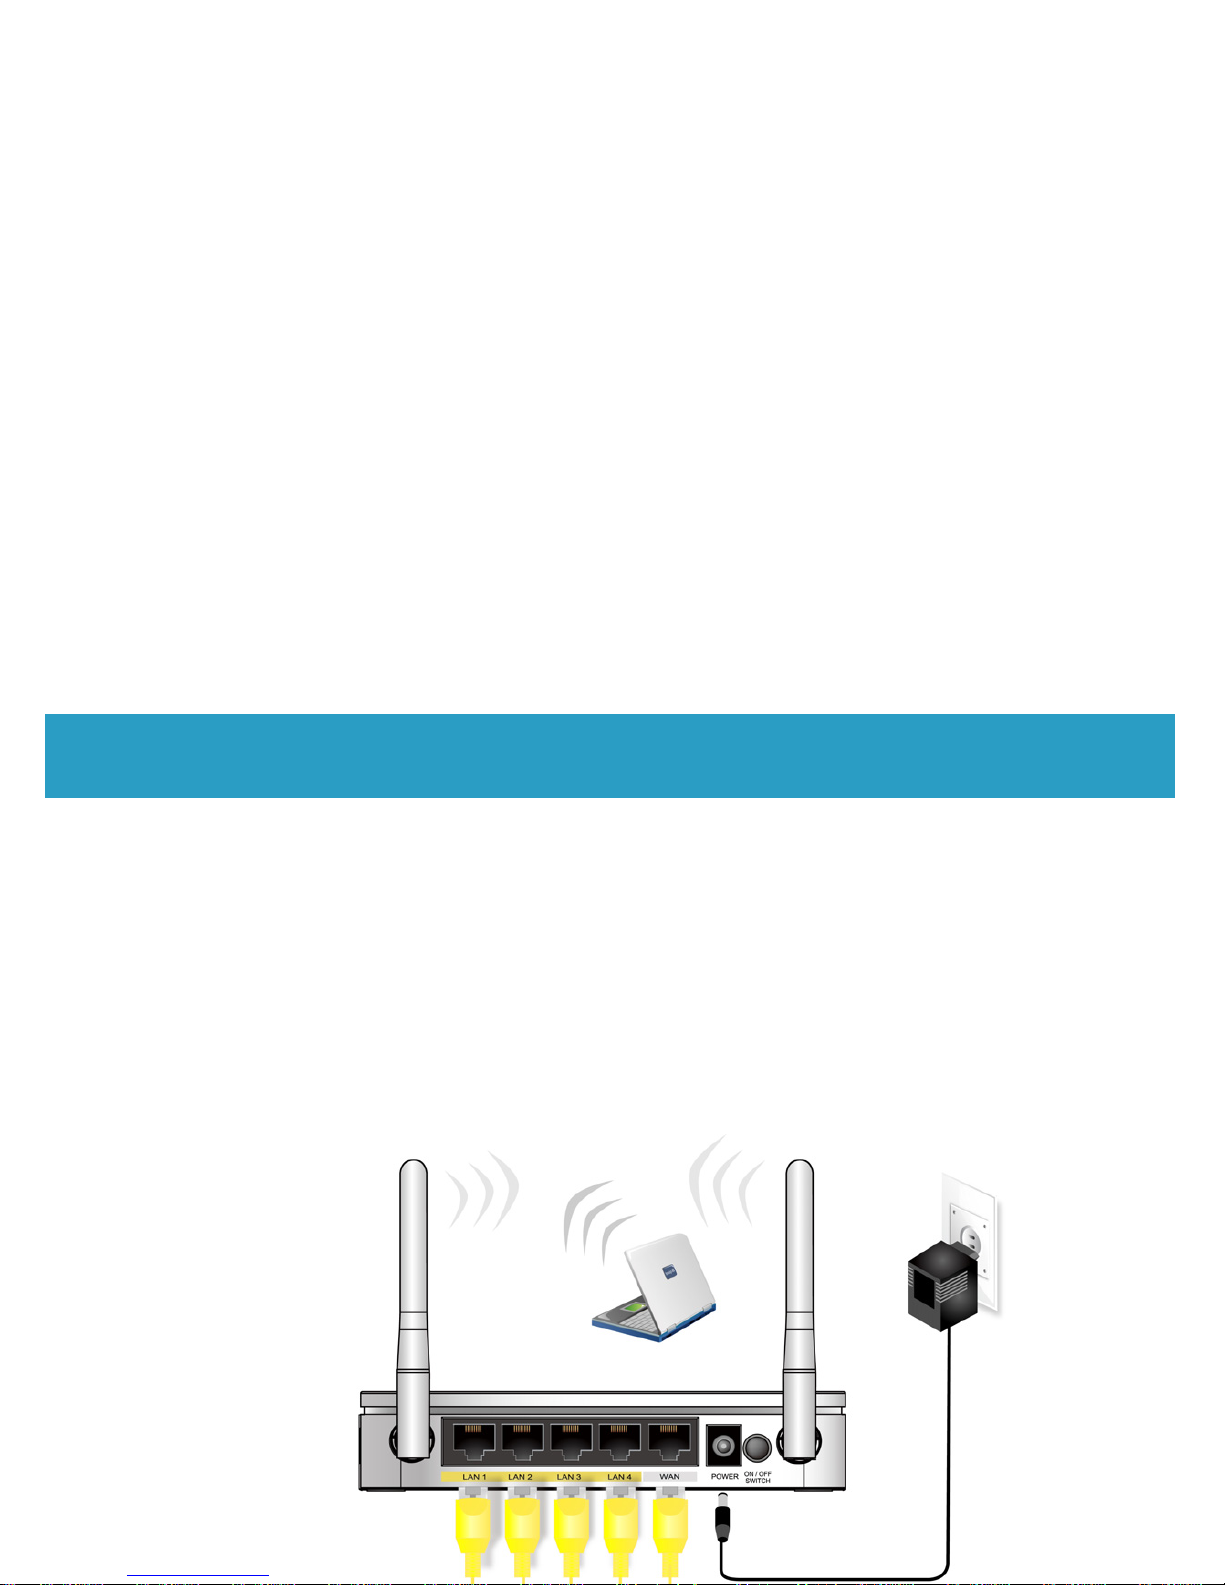
STEP 1
Connection of 802.11n WLAN Router
Wireless N300 Cable Router
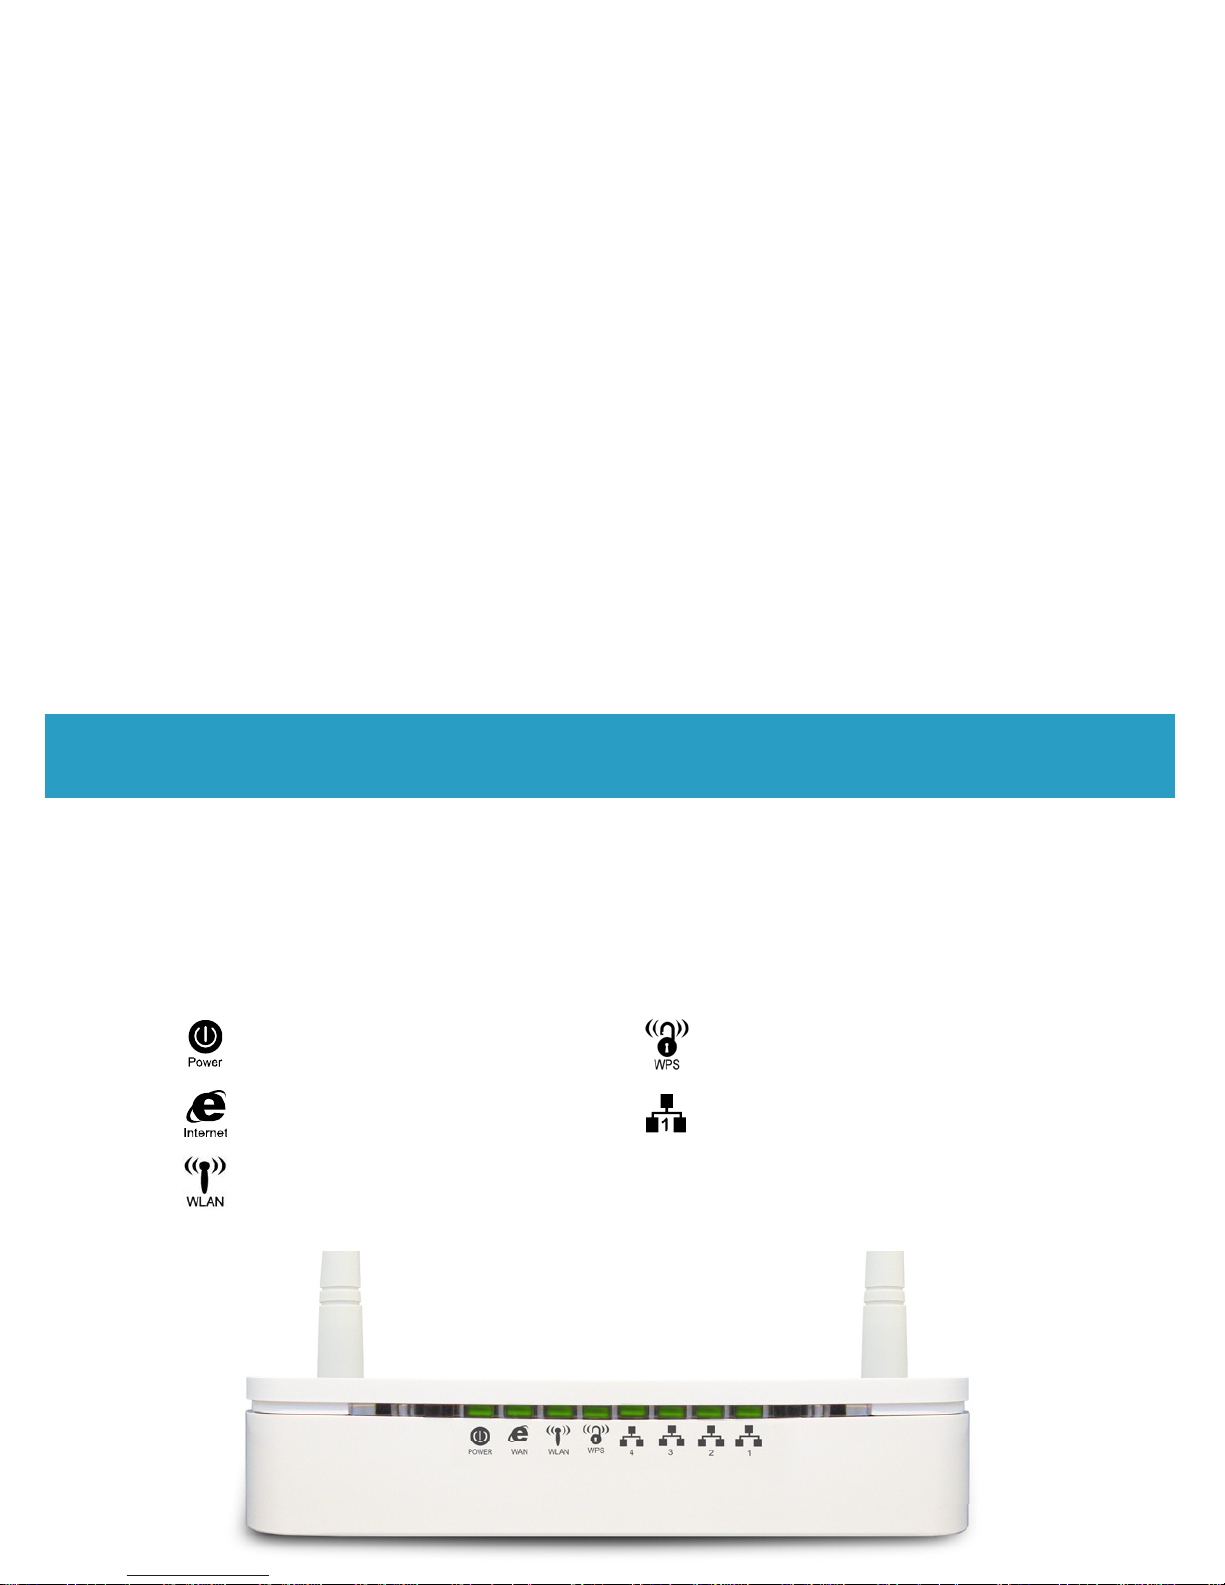
LED Meanings
Your 802.11n WLAN Router has indicator lights on the front side. Please see
below for an explanation of the function of each indicator light.
Power indicator WPS Active indicator
WAN Active indicator Ethernet Active indicator
Wireless Active indicator

Wireless N300 Cable Route
r
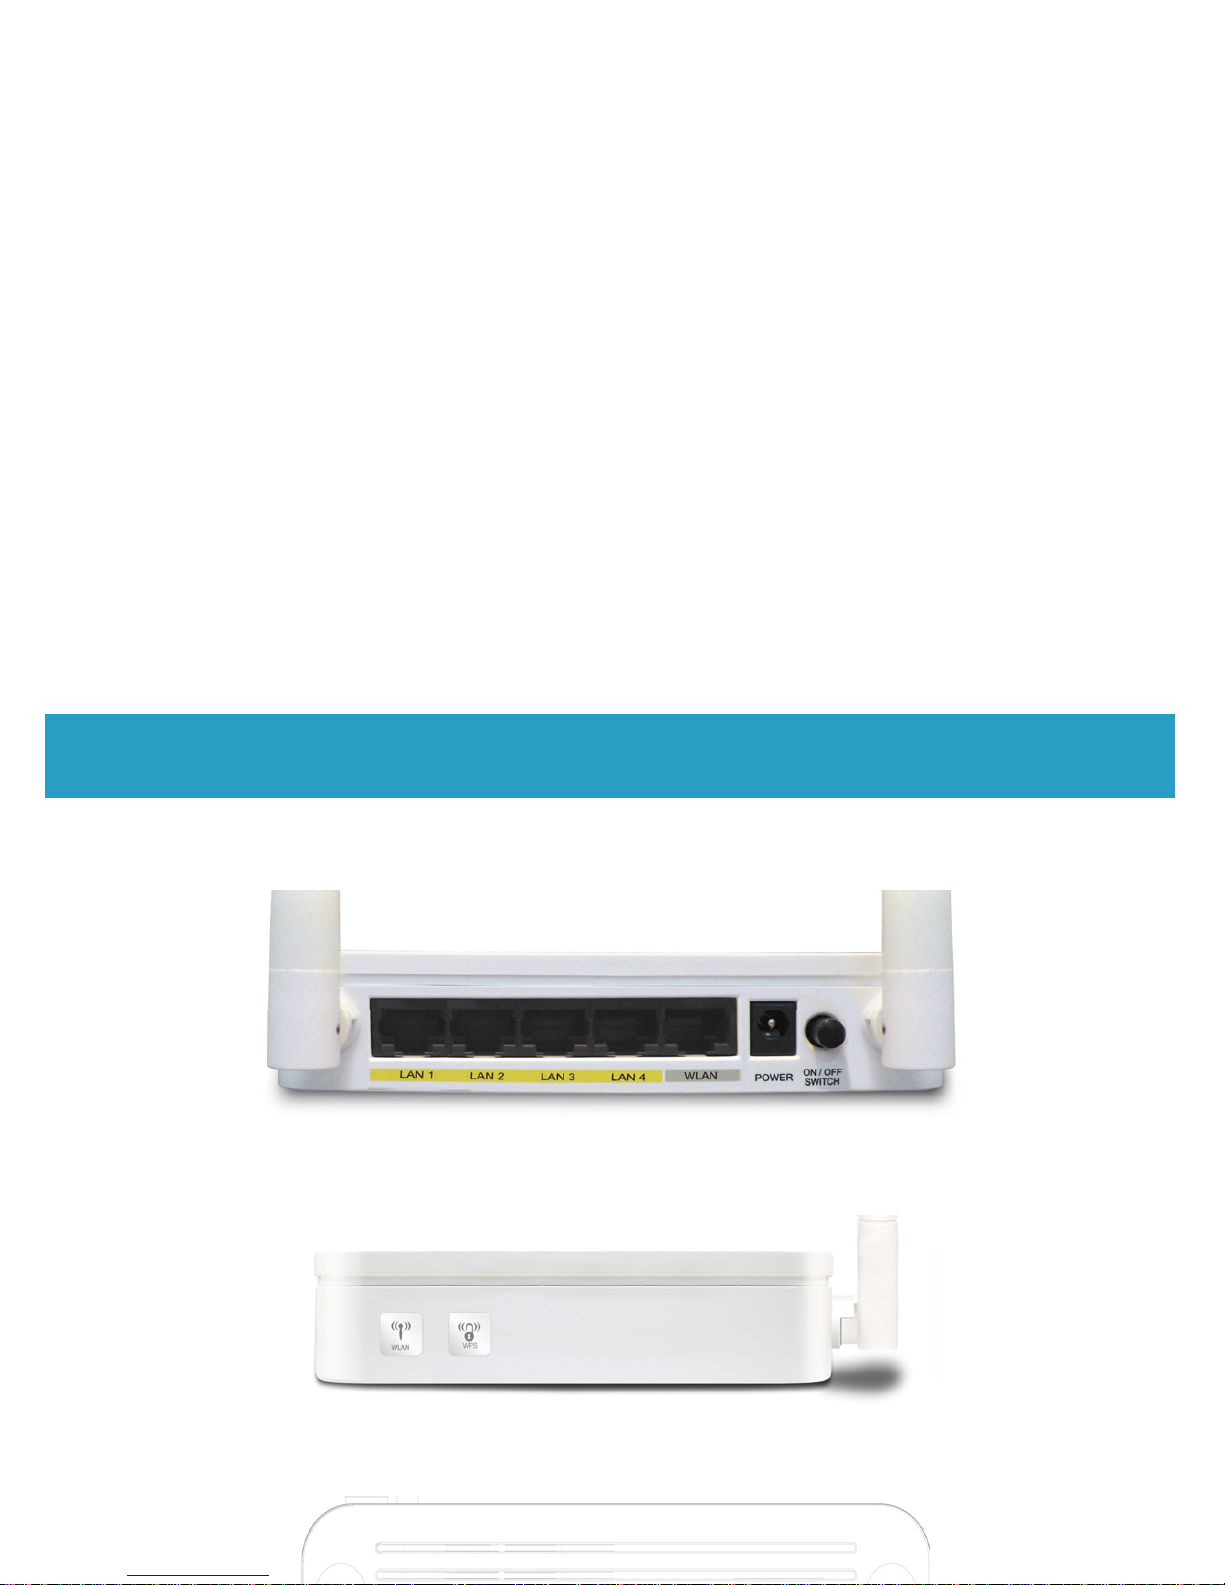
Connectors
Table 2 shows the function of each connector and switch of the dev ice.
Table 2. Function / Description of Connectors
Connector Description
ON/OFF
SWITCH
Power on/off the device
POWER Connects to the supplied power cable
LAN 4/3/2/1
Connects the device via Ethernet to up to four PCs on
your LAN
WAN Connects the device via Ethernet to xDSL / Cable Modem
WLAN
Press this button for at least two full second to turn off/on
wireless signals
WPS
Press this button for at least three full seconds and the
WPS LED will flash to start WPS.
Now go to the wireless adaptor or device and press its
WPS button. Make sure to press the button within 120
seconds (2 minutes) after pressing the router's WPS
Wireless N300 Cable Router
Figure1. Rear View of the 802.11n WLAN Router
Figure2. WPS and WLAN button
Figure3. RESET button

Wireless N300 Cable Route
r
STEP 2
Configuration Procedures
Before starting the 802.11n WLAN Router configuration, please kindly
configure the PC computer as below, to have automatic IP address / DNS
Server.
For Windows 98SE/ME/2000/XP
1. Click on "Start" -> "Control Panel" (in Classic View). In the Control
Panel, double click on "Network Connections" to cont inue.

Wireless N300 Cable Router
3. Double click on "Internet Protocol (TCP/IP)".
4. Check "Obtain an IP address automatically" and "Obtain DNS server
address automatically" then click on "OK" to continue.

Wireless N300 Cable Route
r
For Windows Vista-32/64
1. Click on "Start" -> " Control Panel" -> " View network status and tasks".
2. In the Manage network connections, click on "Manage network
connections" to continue.

Wireless N300 Cable Router
3. Single RIGHT click on "Local A rea connection", then click "Properties".
4. The screen will display the information "User A ccount Control" and click
"Continue" to continue.
5. Double click on "Internet Protocol Version 4 (TCP/IPv4)".

Wireless N300 Cable Route
r
6. Check "Obtain an IP address automatically" and "Obtain DNS ser ver
address automatically" then click on "OK" to continue.
For Windows 7-32/64

Wireless N300 Cable Router
2. In the Control Panel Home, click on "Change adaptor settings" to
continue.
3. Single RIGHT click on "Local A rea connection", then click "Properties".

Wireless N300 Cable Route
r
4. Double click on "Internet Protocol Version 4 (TCP/IPv4)".
5. Check "Obtain an IP address automatically" and "Obtain DNS ser ver
address automatically" then click on "OK" to continue.

Wireless N300 Cable Router
STEP 3
802.11n W LAN Router Configuration
1. Please insert the supplied CD into your CD-ROM drive.
2. The CD should auto-start, displaying the window shown in 3. below. If
your CD does not start au tomatically, go to Windows Ex plorer, Select your
CD drive and double click "autorun.exe".
3. To configure the device, please click the "Easy Configuration".

Wireless N300 Cable Route
r
5. The Easy Configuration program is reading the wireless configuration.
6. Select the Protocol mode Fixed IP, DHCP client or PPPoE Mode and
enter related parameters that your ISP (Internet Services Provider) or
Network Administrator prov ided and th en clic k “W ireless Configuration“.

Wireless N300 Cable Router
7. Please enter the “ESSID” and i f you w ant to change (the default se ttings
Network= Enable, ESSID = 11n_AP_Router).
8. Choose the Encryption type if necessary, as Off – No Encryptio n
(Default) / 64 Bit Encryption / 128 Bit Encryption / Wi-F i Protected Acce ss
(TKIP) / Wi-Fi Protected Access2 (AES-CCMP) and WPA Mixed Mode.
For example, you choose the WPA Mixed Mode type and configure
Passphrase.
9. Please click "Submit" button to continue.

Wireless N300 Cable Route
r
10. Please click “Setup” button, when the procedure is completed, it will start
to configure the device for a while.

Wireless N300 Cable Router
12. Easy setup configuration completed. Click on " Close " to exit this
program.
13. Click on " Exit " to exit this program.

Wireless N300 Cable Route
r
STEP 4
Connect Wirelessly
For easy installation it is saved to keep the settings. You can later change the
wireless settings via the wireless configuration menu. (se e user manual on the
CD – Chapter 7 and other)
1. Double click on the wireless icon on your computer and search for the
wireless network that you enter ESSID name.
2. Click on the wireless network that you enter ESSID name to connect.

Wireless N300 Cable Router
3. If the wireless network isn’t encrypted, click on " Connect Anywa y " to
connect.
4. If the wireless network is encrypted, enter the network key that belongs to
your Encryption type and Passpharse. You can later change this network
key via the wireless configuration menu. (see user manual on the CD –
Chapter 7 and other).

 Loading...