

1
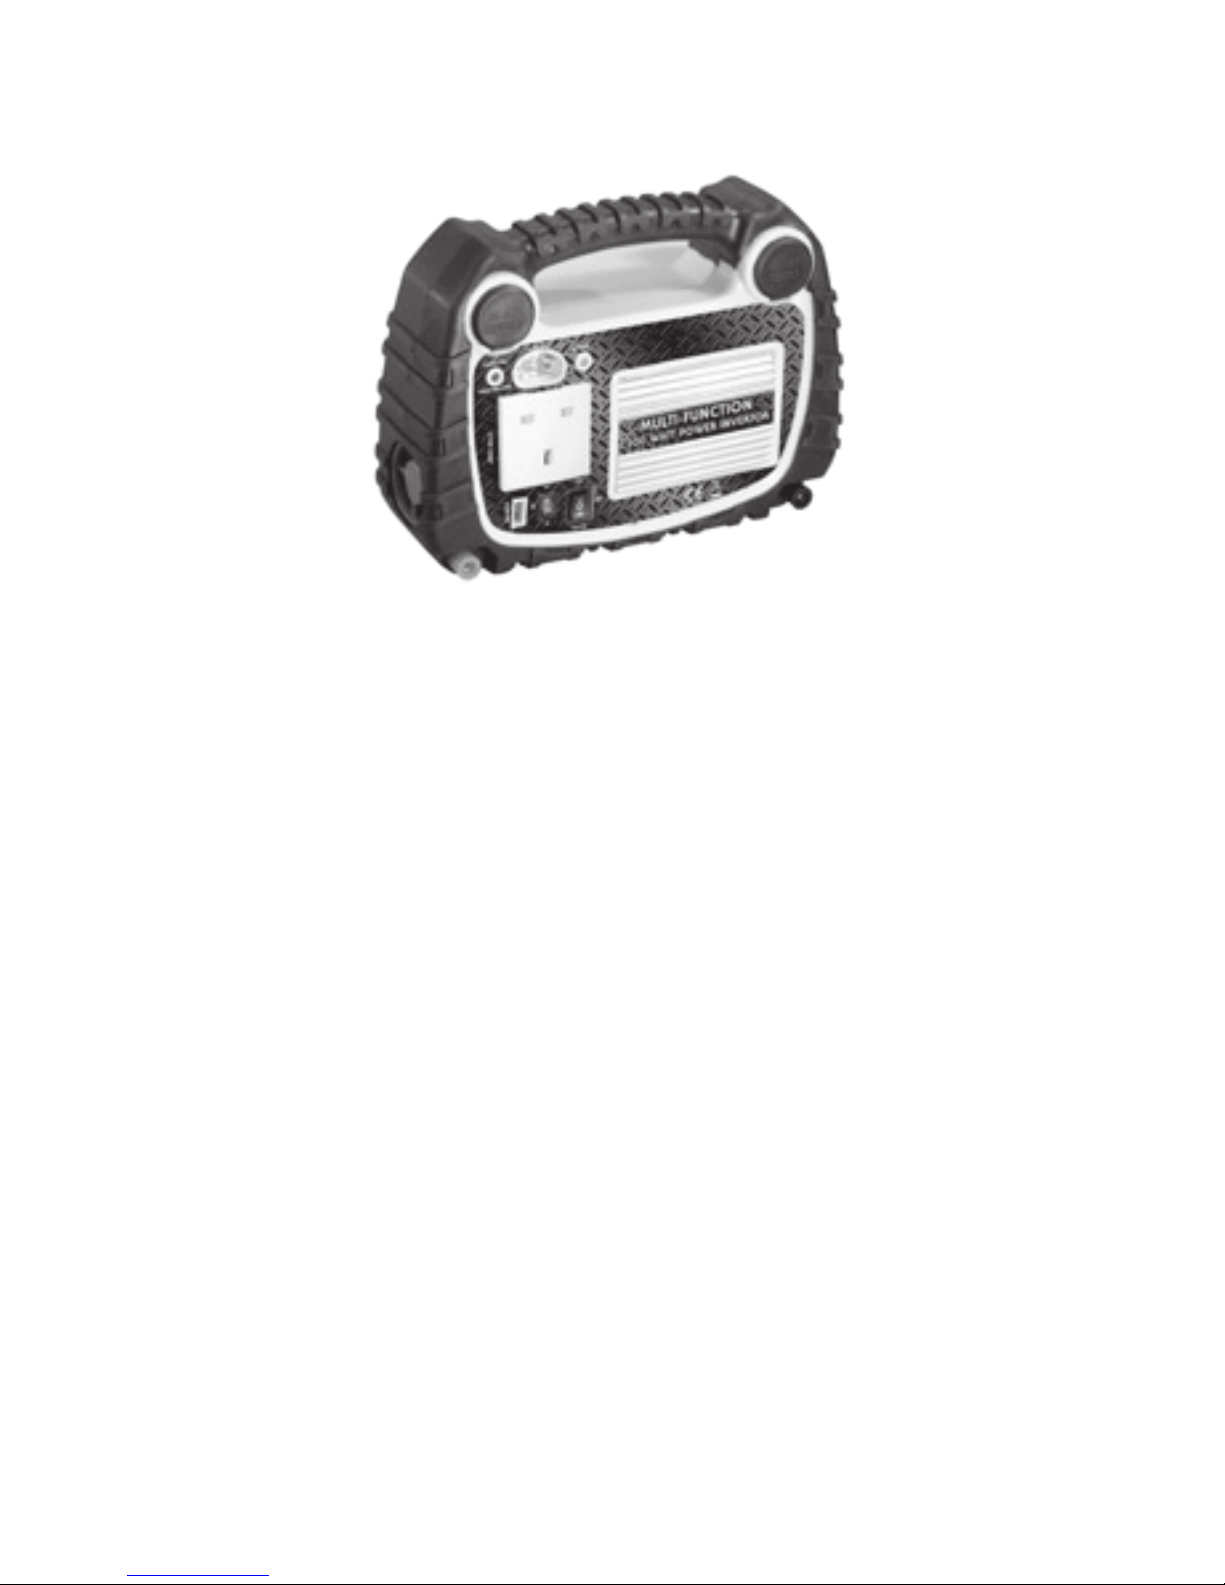
HEAVY DUTY / RECHARGEABLE/PORTABLE
MULIT-FUNCTION POWER CENTRE
MODEL: A10HZ
WARNINGS:
• Read, understanding and follow all instructions, cautions and warnings listed in
this instruction manual, before operating this product.
• SHOCK HAZARD! When operating the unit in a potentially wet environment,
ENSURE the home AC receptacle is protected with a ground fault circuitry
interrupting device.
CAUTIONS:
• Do not expose this unit to heavy moisture or submerge unit in water.
• When using the AC charger, always pull on the plug and never pull on the cord
when disconnecting.
• Do not place anything into the AC power port except the provided plug from the
AC power adaptor.
• Recharge battery after every use.
• The Power Center should never be kept in a total discharged state for an
extended period of time. Damage could be permanent with poor performance
as a result. When not in use, recharge the unit every three (3) months with the
provided charger.
• This device contains sealed, non-spillable lead acid battery and must be disposed
properly when the device is discarded. Contact your local government recycling
authority for proper disposal methods. Failure to follow instruction may cause
damage or explosion hazard.
FEATURES:
A. HIGH IMPACT RUBBERIZED CARRY CASE: Durable and portable for easy carrying.
B. BUILT-IN BATTERY FOR CORDLESS OPERATION: Built-in 2 x 6V rechargeable sealed
lead acid battery for cordless operation.
C. 230 VOLT AC POWER OUTLETS: Provides max. 200 watt power for your AC
appliance.
D. DUAL 12 VOLT DC POWER OUTLETS: Provides power to most 12 volt DC accessories
(max. 10 AMP).
E. USB POWER OUTLET: Provides 5 Volt power for accessories with USB plug.
F. LED Map Light: Twin LED reading map light
OPERATION INSTRUCTIONS - CORDLESS
CAUTION: Ensure that the unit is disconnected and that the multi-function mode
selector switch is in the OFF position.

2
230 VOLT AC POWER OUTLET OPERATION:
1. Prior to connecting the inverter, make sure the Power Inverter Switch is in OFF
position.
2. Prior to plugging in any device, make sure the device is OFF and ensure the
current drawn of the device is in max. 200 watts.
3. Connect the deviceís electrical plug into the inverterís receptacle outlet.
4. Press the inverter to ON position. If the inverter is working properly, a green LED
indicator will illuminate. Now turn ON the device. If the LED light turns RED, turn
off the device then turn off the inverter immediately. See the trouble-shooting
guide. The inverter may have been over loaded or the input voltage may be too
low.
CAUTION: Some rechargeable devices are equipped with a separate charger, which
can be connected into this inverterís AC receptacle. However, certain rechargeable
devices are manufactured with built-in chargers (see device ownerís manual). This
category of devices may cause internal damage to inverters and should not be used
with this inverter. The temperature of the device must be monitored for the first
15 minutes of operation. An abnormally elevated temperature of any device is an
indication that it should not be used with this inverter.
TROUBLESHOOTING
Trouble Cause Remedy
Lack of power output 1. Power center voltage below 12 volt. 1. Recharge the Power Center immediately.
2. Excessive current drawn by appliance 2. Reduce load to maximum total 200 watts.
being operated.
3. Inverter not completely warmed up. 3. Turn OFF the device and inverter.
Disconnect device. Turn the inverter ON
and leave running for a minimum of
2 minutes. Turn OFF inverter, quickly plug
in device to inverter making sure device is
OFF prior to connection. Turn ON the
inverter and the device.
4. Inverter fuse blown. 4. Replace a new 25 AMP rated fuse. To
replace fuse: REMOVE fuse with a needle
nose pliers and replace with a new 25 AMP
fuse.
LED light turns RED 1. Inadequate power or excessive 1. Check power center and recharge when
voltage drop. voltage drops below 12 volt.
2. Inverter is overloaded. 2. Replace load to maximum of total 200 watts.
12 VOLT DC POWER OUTLET OPERATION:
1. Remove the protective DC 12V Socket Power Port rubber cover.
2. Plug in the 12 volt accessories for operation.
3. The unit provides max. 10A power for your device.
USB POWER OUTLET OPERATION:
1. Plug in the computer accessory equipped with USB plug for operation
(e.g. MP3, MP4).
2. Press ON the USB switch for operation.
3. The unit provides 500mA for your device.

3
LED MAP LIGHT
1. Press ON the LED switch for operation.
OPERATION INSTRUCTIONS - 12 VOLT DC
The unit is designed for 12 Volt operation while the battery is low.
Connecting to 12V DC Power Source
1. Prior to connecting inverter, make sure all the power switches are in the OFF
position.
2. Connect and insert the cables to the power input terminals on the Power
Centre.
3. Connect the BLACK NEGATIVE (-) terminal of the cable to the NEGATIVE (-)
output of the power centre and the RED POSITIVE (+) terminal of the cable to
the POSITIVE (+) output of the power center. Make sure the polarity is correct
and tighten the screw securely.
CAUTION: Loose connections will result in excess voltage drops and may cause
over-heated wires and melted insulation.
Reverse polarity connection will blow the fuse of the inverter and may cause
permanent damage.
WARNING: Spark may be observed when you make this connection as current
may flow to charge capacitors in the power inverter. Do NOT make this connection
in the presence of flammable fumes, otherwise explosion or fire may result.
4. Insert the inverter accessory plug into the vehicle cigarette lighter socket or 12V
accessory socket. Push it firmly to ensure a proper connection has been made.
5. Press ON the power inverter, the Power Indicator will turn to Green when proper
connection has been made.
WARNING: For 12V operation, ensure to keep running of car engine to prevent over
drainage of car battery.
CHARGING THE UNIT
Caution: Make sure the unitís functions are all in OFF position. Even though the
product is being charged from manufacturer, it is necessary to completely charge
the unit before using for the 1st time.
AC Charging at home:
1. Ensure the source is correct voltage. (i.e. 230 volts AC)
2. Use only the chargers provided with this unit.
3. Keep all the power switches on the unit are in OFF position.
4. Plug the AC charger into any standard wall outlet and the other end into the AC
charging jack located on the side of the unit.
5. The Charging Indicator will illuminate for charging.
6. Full charge takes approximately 25 hours.
SPECIFICATIONS
Battery................................................... 2 x 6V 5AH Rechargeable Sealed
Lead Acid Battery
Power Inverter........................................ 230 volt AC 200 watt
(Peak 400 watt/0.3 second)
Fuse........................................................ 25 Amp
12V Power Port...................................... 12V DC (max. 10A)
with auto-reset protector
Charging Time by AC home adaptor....... 25 hours
 Loading...