

Page 1
QUICK ASSEMBLY SHEET
Models:7920, 7921, 7924, 7925, 7940
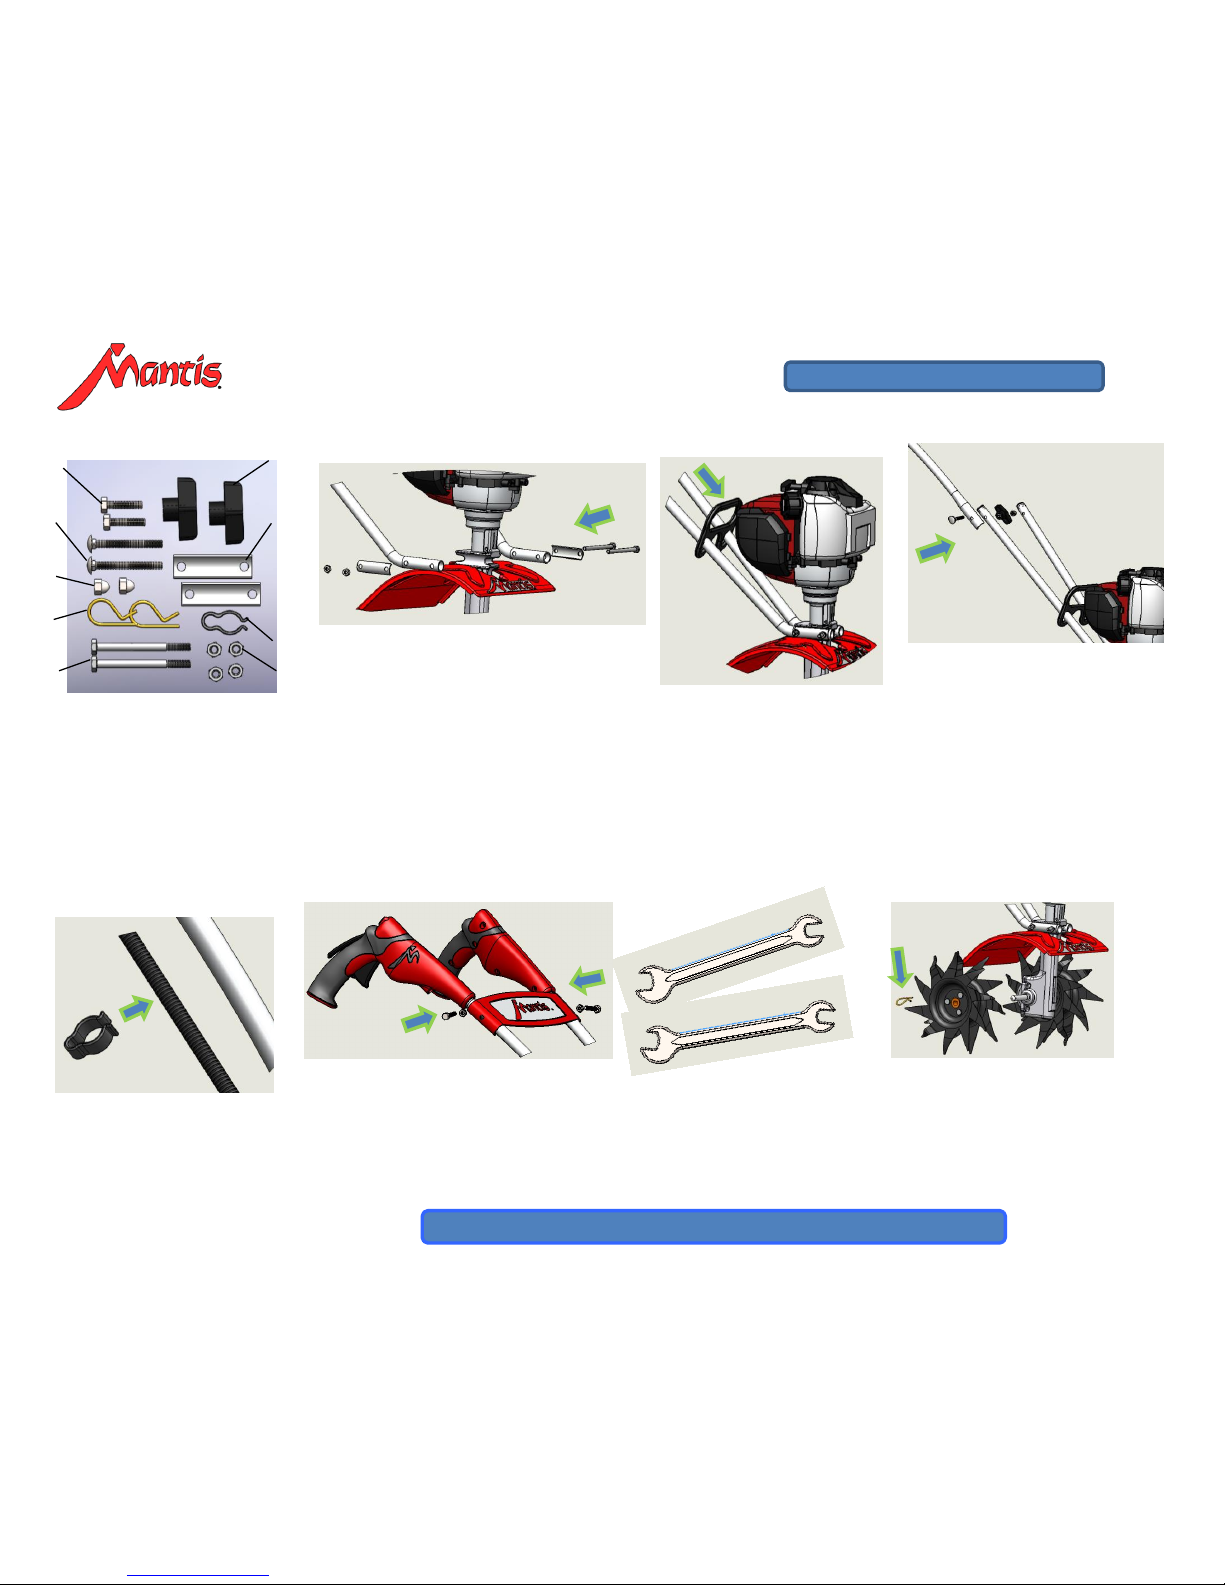
Tools Needed: Two 7/16” wrenches
P/N 430094, Rev A ©2014 Schiller Grounds Care, Inc.
Tighten Hardware
Tine Installation
Honda engine shown. Engine type depends on the model of the tiller.
Attach the Upper Throttle
Handle onto the Right Lower
Handle. Fasten together using
the Knob T12 and carriage bolt
T42. Place an acorn nut T13 on
the end of the carriage bolt.
Repeat this process for the Left
Upper Handle.
Upper Handles
Step 3
Slide the tines onto the
axle shafts. The “Dshaped” hole goes on the
outside. Secure each tine
to the axle by inserting a
tine retaining pin T41.
Step 7
Tighten all lock nuts, cap
screws, and bolts firmly and
securely using two 7/16”
wrenches.
Note: Do not over-tighten the
acorn nuts.
Step 6
Throttle Clip
Use the clip T9 to secure
the throttle cable and
wire in place on the Right
Lower Handle.
Step 4
Lower Handles
Slide two (2) T11 bolts through the holes
of one Handle Clamp and then through
the holes of the Left Lower Handle.
Position the bolts so that one bolt is in
front and one bolt is behind the
recessed channels of the transmission
housing. Slide the Right Lower Handle
and the second Handle Clamp onto the
bolts. Finger tighten the nuts T14.
Step 1
Slide the Carrying Handle
over both Lower Handles.
Slide it down towards the
engine. It will rest about
four to six inches above the
engine.
Step 2
Carry Handle
Hardware
T9
T15
T42
T13
T12
T7
T14
T41
T11
T15 - ¼-20 x 1.125” cap screws
T42 - ¼-20 x 2.25” carriage bolts
T13 - Acorn Nut
T41 - Tine Retaining pins
T11 - ¼-20 x 3” hex bolt
T14- ¼-20 two-way lock nut
T9- Throttle clip
T7- Clamp
T12- Knob
Line up the Handle Brace with
the holes on the Upper Handles.
Insert cap screws T15 through
the holes in the Handle Brace and
through the holes on the Upper
Handles. Secure with a lock nut
T14.
Handle Brace
Step 5
Page 2
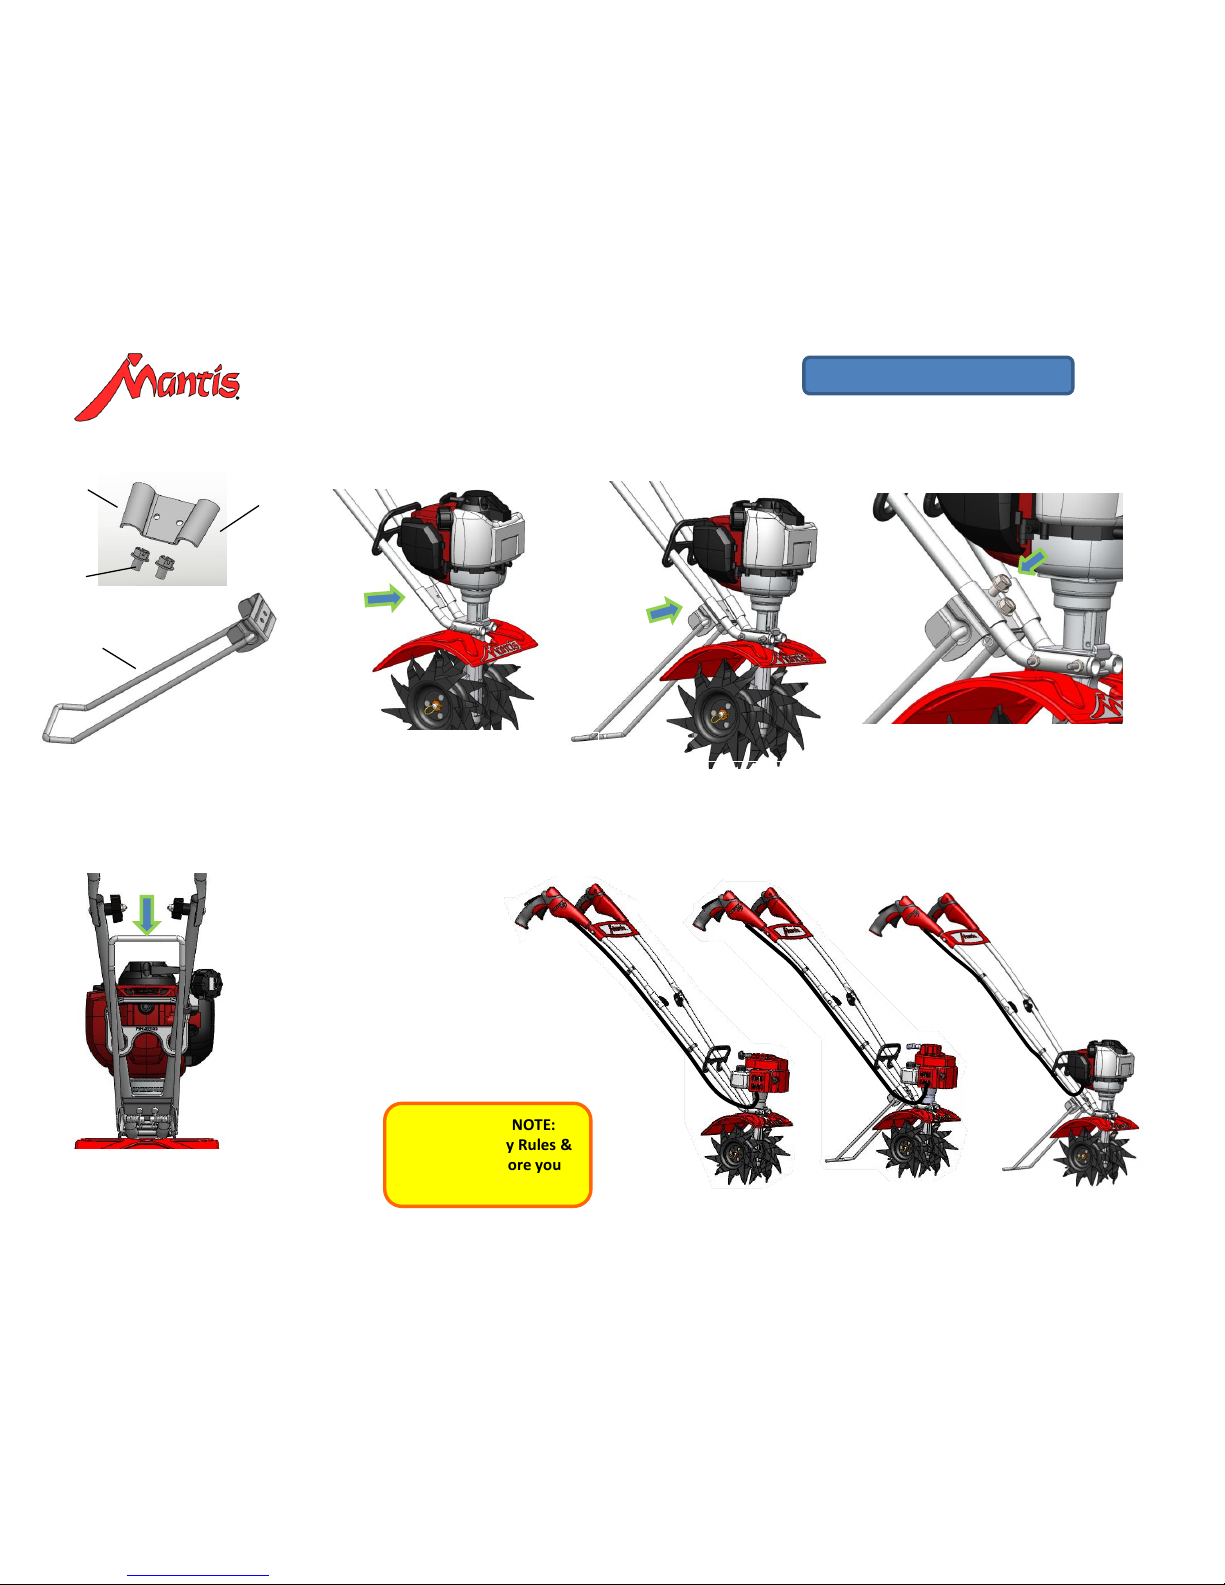
QUICK ASSEMBLY SHEET
Kickstand Assembly for Models 7924, 7925, 7940
Tools Needed: 3/8” wrench.
P/N 430094 , Rev A
IMPORTANT NOTE:
Read the Safety Rules &
Warnings before you
use your Mantis tiller
Place the Bottom Bracket of
the Kickstand Stand
Assembly T49 under the
Lower Handles and line up
the holes in both brackets.
Step 9
Insert two screws through the
holes in the Top Bracket and into
the threaded inserts of the Lower
Bracket. Tighten with the 3/8”
wrench.
Step 10
©2014 Schiller Grounds Care, Inc.
Lean the Tiller Handles against a sturdy
surface, so the tiller is supported in the
upright position. Place the Top Bracket
over the Lower Handles and below the
Carry Handle.
Step 8
Top Bracket
Tighten Hardware
Bottom Bracket
Place the Kickstand in the
folded position. The
Kickstand should be centered
between the Lower Handles.
If not, loosen the screws
slightly, adjust as necessary
and retighten the screws.
Step 11
Kickstand Position
Hardware
T50- Kickstand bracket
and hardware bag
T49- Kickstand
Stand Assembly
T49
T50
Top
Bracket
¼-20 x 0.5”
Flange
Screw
Models
7920,7921
Models
7924,7925
Model
7940
 Loading...