

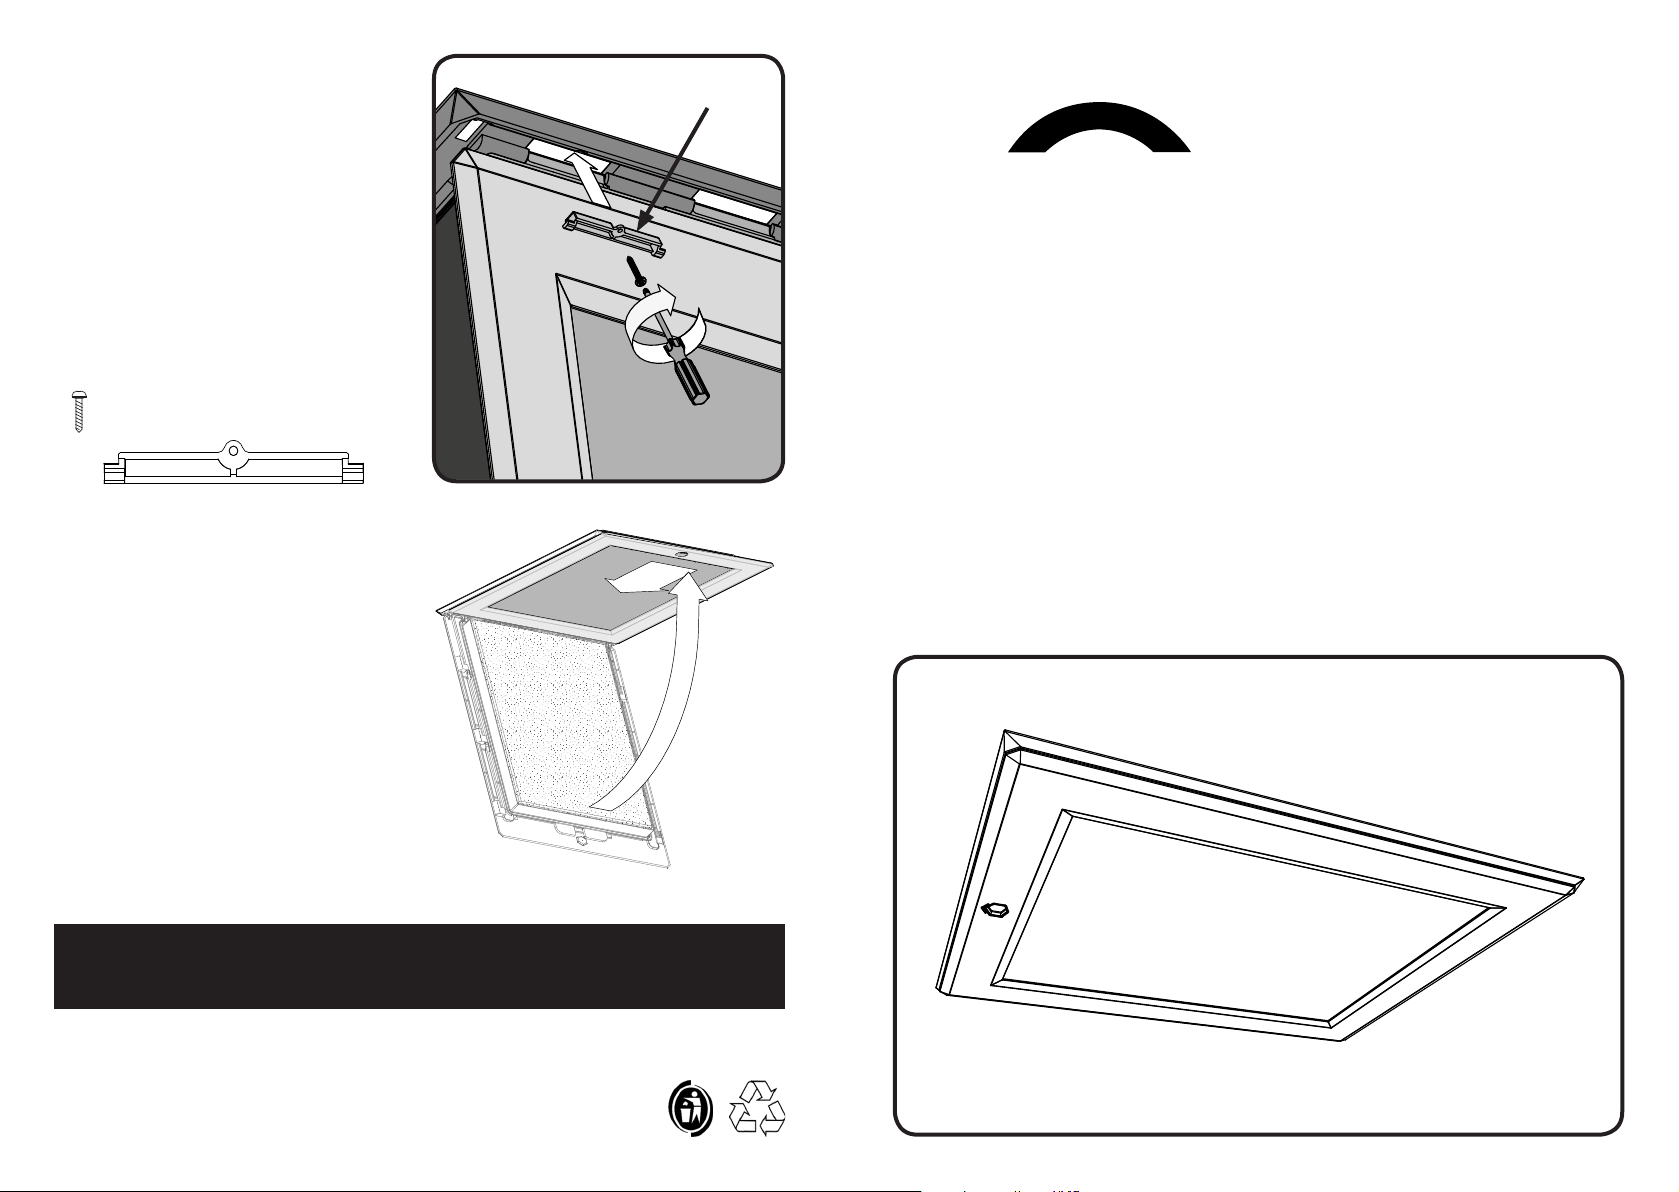
6. Secure the hinge
Insert the two green hinge blockers into
the outer two hinge slots.
Hinge blockers should be used to
prevent the removal of the door.
x2
manthorpe
Fix in place with the 2.9 x 9.5mm selftapping screws provided (Screw B).
The door should now swing freely.
Screw B
x2
7. Close the door
To close the door, place a nger within
the catch recess and push the door back
into a horizontal position, ush against
the frame.
Then slide catch recess back into the
closed position to lock the door, until the
cover aligns with the frame.
building products
GL250 Drop Down
Loft Access Door
Fitting Instructions
MBP-1137-00-C
THIS IS NOT A STRUCTURAL PRODUCT AND
MUST NOT BE STEPPED OR WALKED ON.
Manthorpe Building Products Limited
Manthorpe House, Brittain Drive, Codnor Gate Business Park, Ripley, Derbyshire DE5 3ND
T: (01773) 514200 F: (01773) 514262 E: bpsales@manthorpe.co.uk
W: www.manthorpe.co.uk
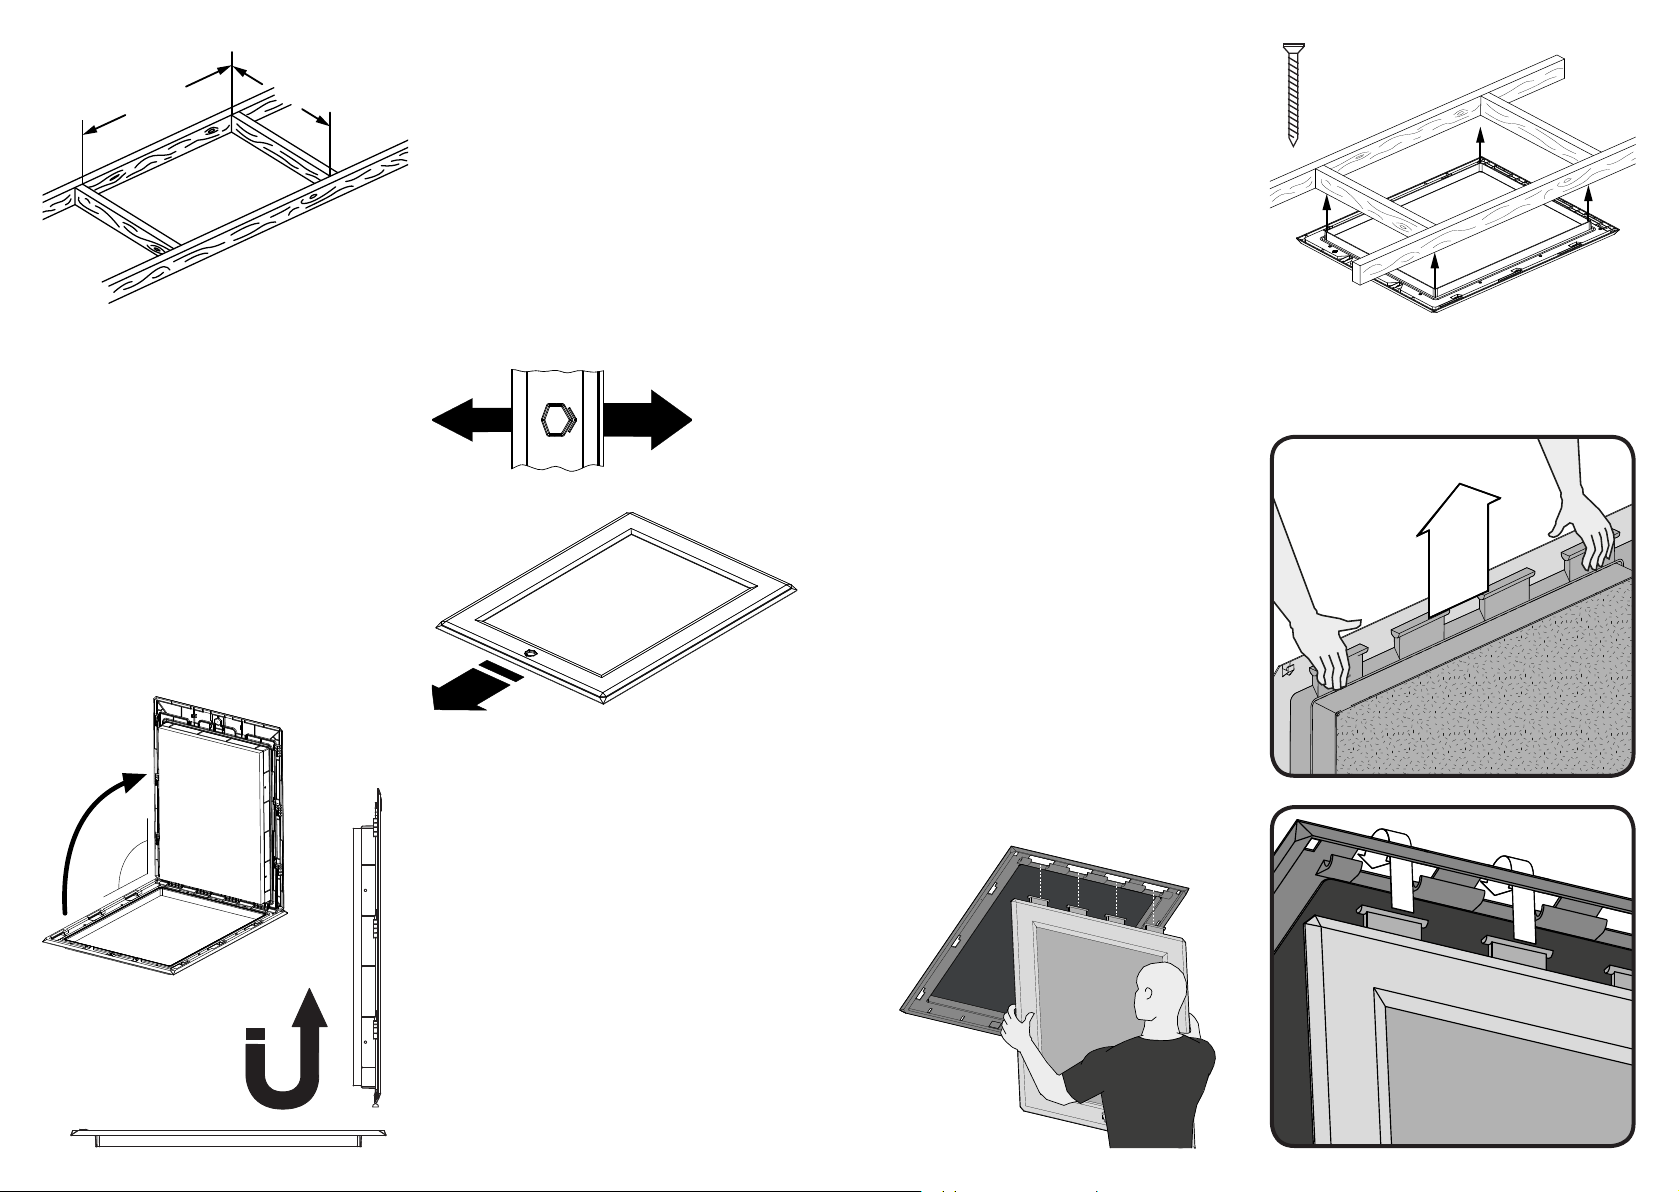
553mm (min)
726mm
562mm (max)
2. Unlock the door
The door should be removed from the
frame prior to installation.
To unlock the door, hold the frame securely
whilst using the catch recess to slide the
cover into the open position. Once the
cover is slid into the open position, the
door will be unlocked and can then be
hinged open.
1. Preparation
Before installation of the door, rst prepare
a suitable opening in the ceiling to the
dimensions as shown, ensuring there is
at least 100mm between the edge of the
opening and any wall or obstruction. The
GL250 is intended to suit trusses spaced
at 600mm centres and can accommodate
both 38mm and 47mm truss widths.
CLOSE
OPEN
4. Fitting the frame
Locate the frame into the prepared opening,
pushing it tightly against the ceiling to form
an airtight seal.
Ensuring that it is located squarely within
the opening, x the frame in place through
the plasterboard and into the timber using
the 12 supplied 3.5mm x 42mm dry lining
screws. (Screw A).
Screw A
x 12
WARNING:
Do not over tighten the xing screws as this can distort the frame and may cause the
door to become stiff to operate. If this occurs, undo the xings screws by 1 - 2 turns.
5. Replace the door
Once the frame is installed into the ceiling
opening, the door can be retted.
To replace the door, rst ensure the cover is
slid into the open position so the hinge lugs
are exposed.
Keeping the hinge lugs exposed, align the
door panel with the slots in the frame. Then
hook them into the frame as shown.
90˚
3. Remove the door
To fully remove the door from the frame;
rst hinge the door open by 90°, at this
point the hinge detail can be disengaged.
Guide the hinge lugs squarely downward,
clear of the frame channels, then slide
them across and upward, lifting them
through the gaps in the frame.
Once removed place the door safely to
one side whilst the frame is tted.
Ensure all of the hinges are correctly
located and the door swings freely before
proceeding.
 Loading...