

Page 1

Installation Instructions
Don’t forget to tag us! We would love to see your new mantel.
#mantelsdirect
Follow these 3 easy steps and you will be ready to enjoy your new shelf.
You will need the following tools and materials to hang your mantel shelf:
Bubble Level / Tape Measure / Drill / Pencil / Wall Anchors
Step 1: Determine location and measure.
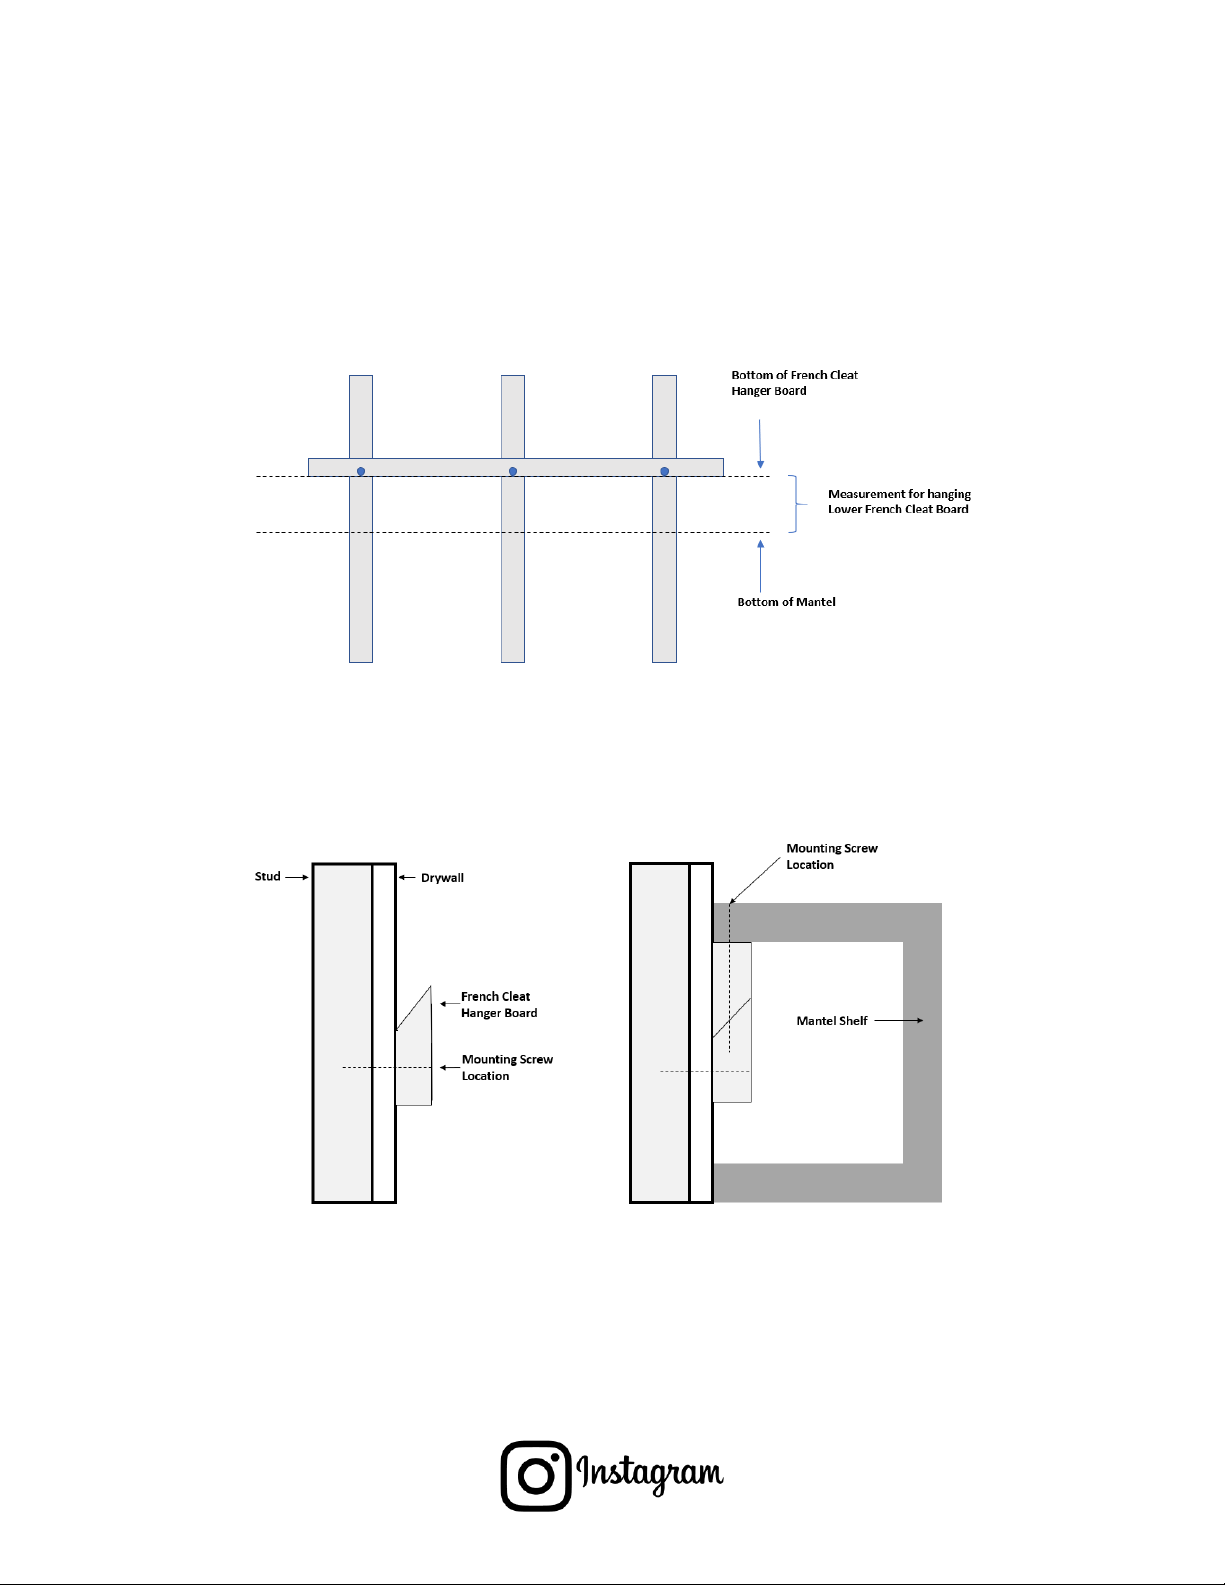
With the shelf upside down on a soft surface, hold the mounting board in position on the mantel
shelf. Measure from the bottom of the shelf to the bottom of the mounting board - make note of
this measurement, as you will use it in one moment.
Place the shelf on the wall above your fireplace or on the wall at the desired height. Level the
shelf and draw a line on the wall along the bottom of the shelf. Remove the shelf and measure
up the distance between the bottom of the shelf and mounting board that you noted earlier.
Mark the line at several points to ensure a level mount.
Locate and mark the location of the center of 3 studs (2x4 boards) inside the wall you intend to
mount your mantel shelf.
Step 2: Attach the French Cleat hanger board to the wall.
Place the included French cleat mounting board on the wall and line up the bottom of the
French cleat mounting board with the upper line. Attach the mounting board to the wall with
appropriate fasteners for your application. (See Drawing B)
If you are mounting on a standard drywall over stud construction, make sure you screw the
mounting board into the wood studs for strength. When attaching the shelf to a brick surface,
you must use a masonry lag bolt.
Step 3: Mounting the Mantel Shelf
Lift and place the shelf over the mounting board and slide down until the shelf is tight against
the wall. Push the shelf tight against the wall and then push down firmly on the shelf to ensure
the French cleat is properly connected.
Page 2
Installation Instructions
Don’t forget to tag us! We would love to see your new mantel.
#mantelsdirect
Note: The edge of the shelf against the wall may not be tight against the wall across the
whole length of the shelf. The wall may not be uniform and flat. If not, use caulk to fill the
gap.
Drawing A
Drawing B
 Loading...