

Page 1
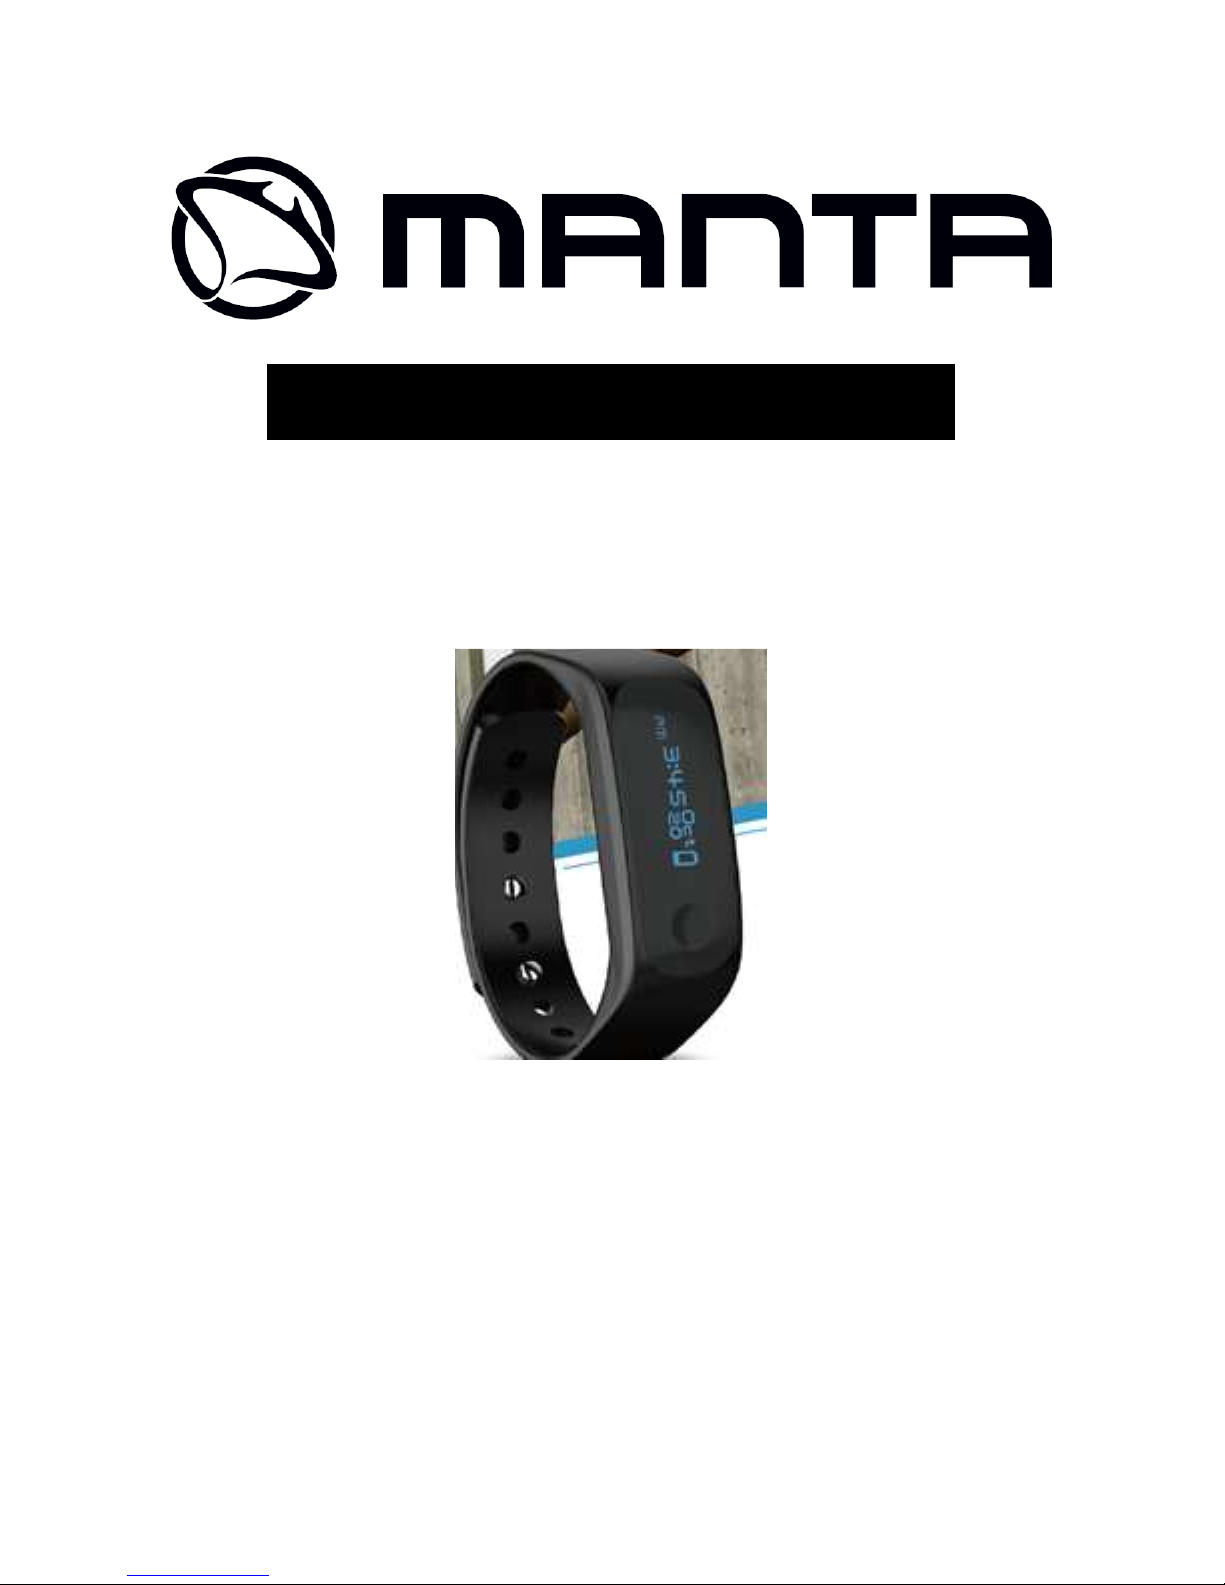
SPORT BAND
Model:
SWT302
Instrukcja obsługi
User’s Manual
Page 2

Instrukcja Obsługi PL
;
2
Instrukcja obsługi
Przeczytaj przed rozpoczęciem użytkowania tego sprzętu.
INFORMACJE FCC
Niniejsze urządzenie zostało przetestowane i stwierdzono jego
zgodność z limitami dla urządzeń cyfrowych klasy B, zgodnie z
częścią 15 przepisów FCC.
Urządzenie to generuje, używa i może emitować energię o
częstotliwości radiowej i jeśli nie jest używane zgodnie z
instrukcjami, może powodować zakłócenia komunikacji radiowej.
Nie ma jednak gwarancji, że poprawne używanie urządzenia nie
spowoduje zakłóceń w działaniu konkretnej instalacji.
Jeśli urządzenie powoduje szkodliwe zakłócenia radiowe lub
telewizyjne, co można sprawdzić przez włączenie urządzenia,
użytkownik może spróbować skorygować zakłócenia, poprzez:
zmianę orientacji lub położenia anteny odbiorczej,
zwiększenie odległości między urządzeniem a odbiornikiem,
podłączenie urządzenia do gniazdka z obwodu innego niż ten, do
którego podłączony jest odbiornik.
zasięgnięcie porady osób mających doświadczenie w rozwiązywaniu
problemów dotyczących urządzeń RTV.
Page 3
Instrukcja Obsługi PL
;
3
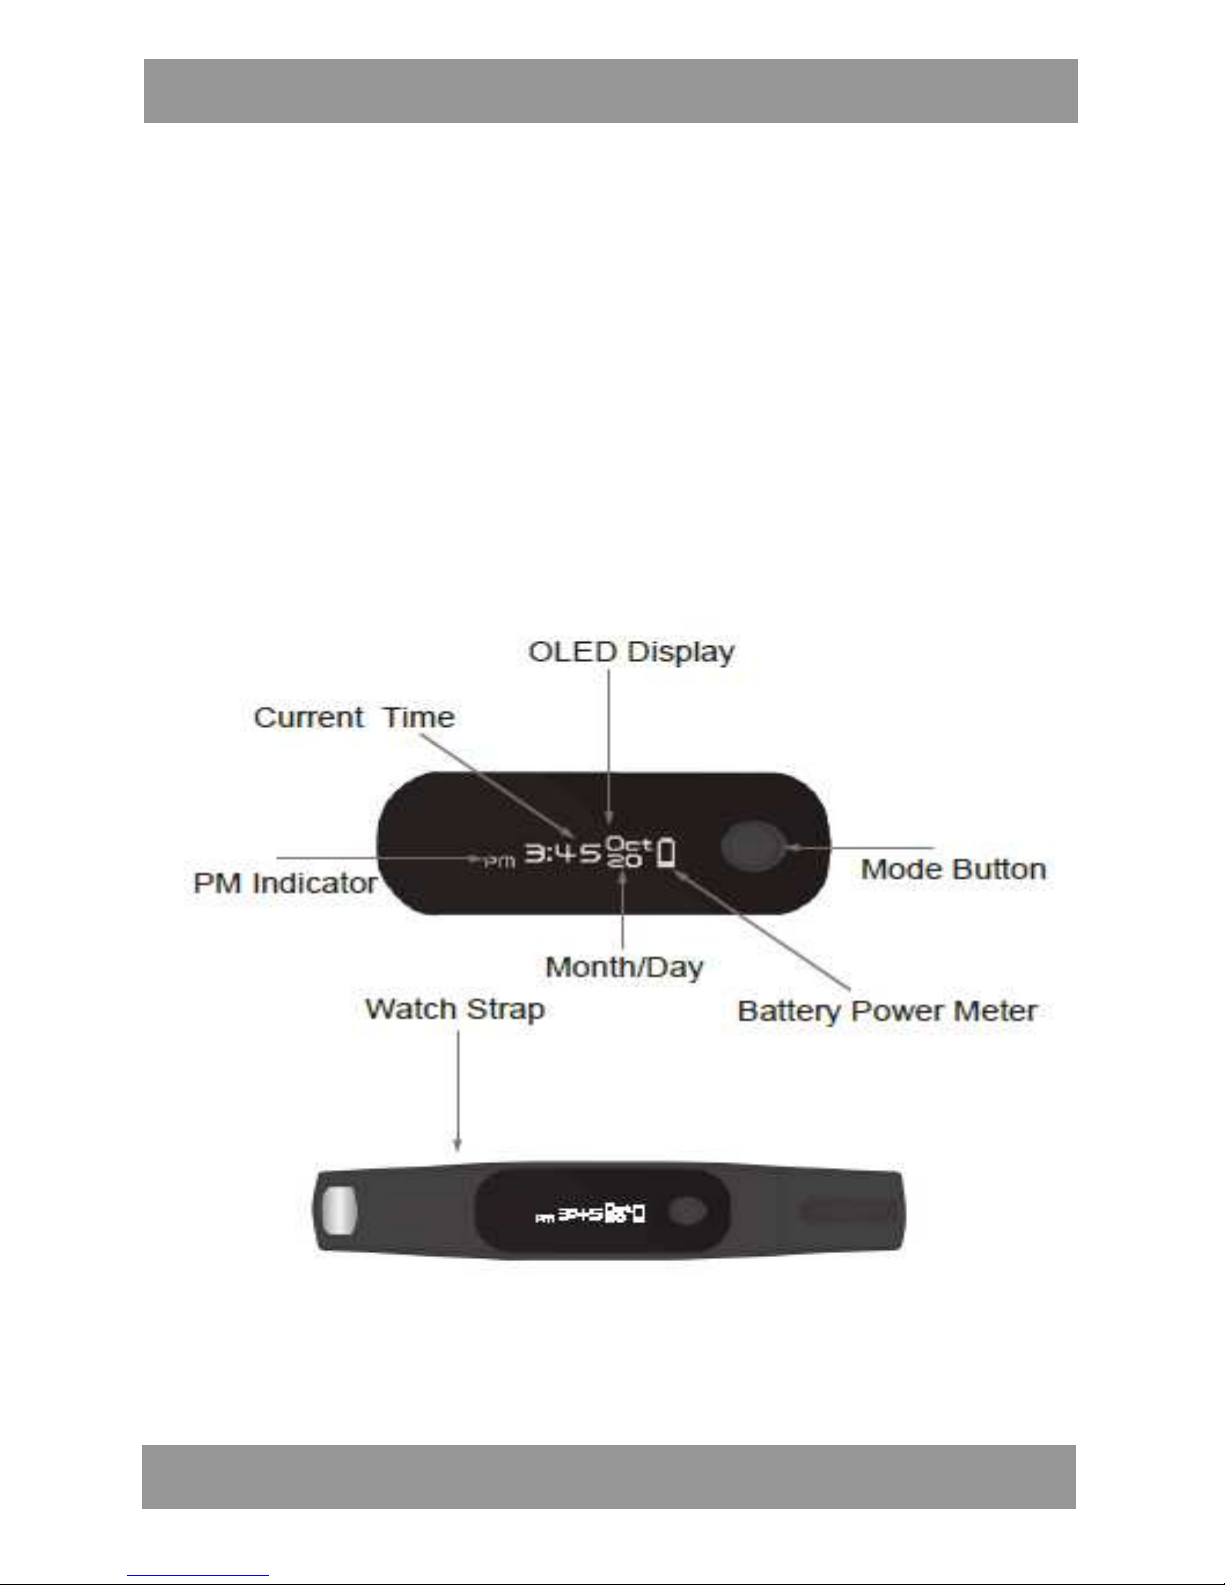
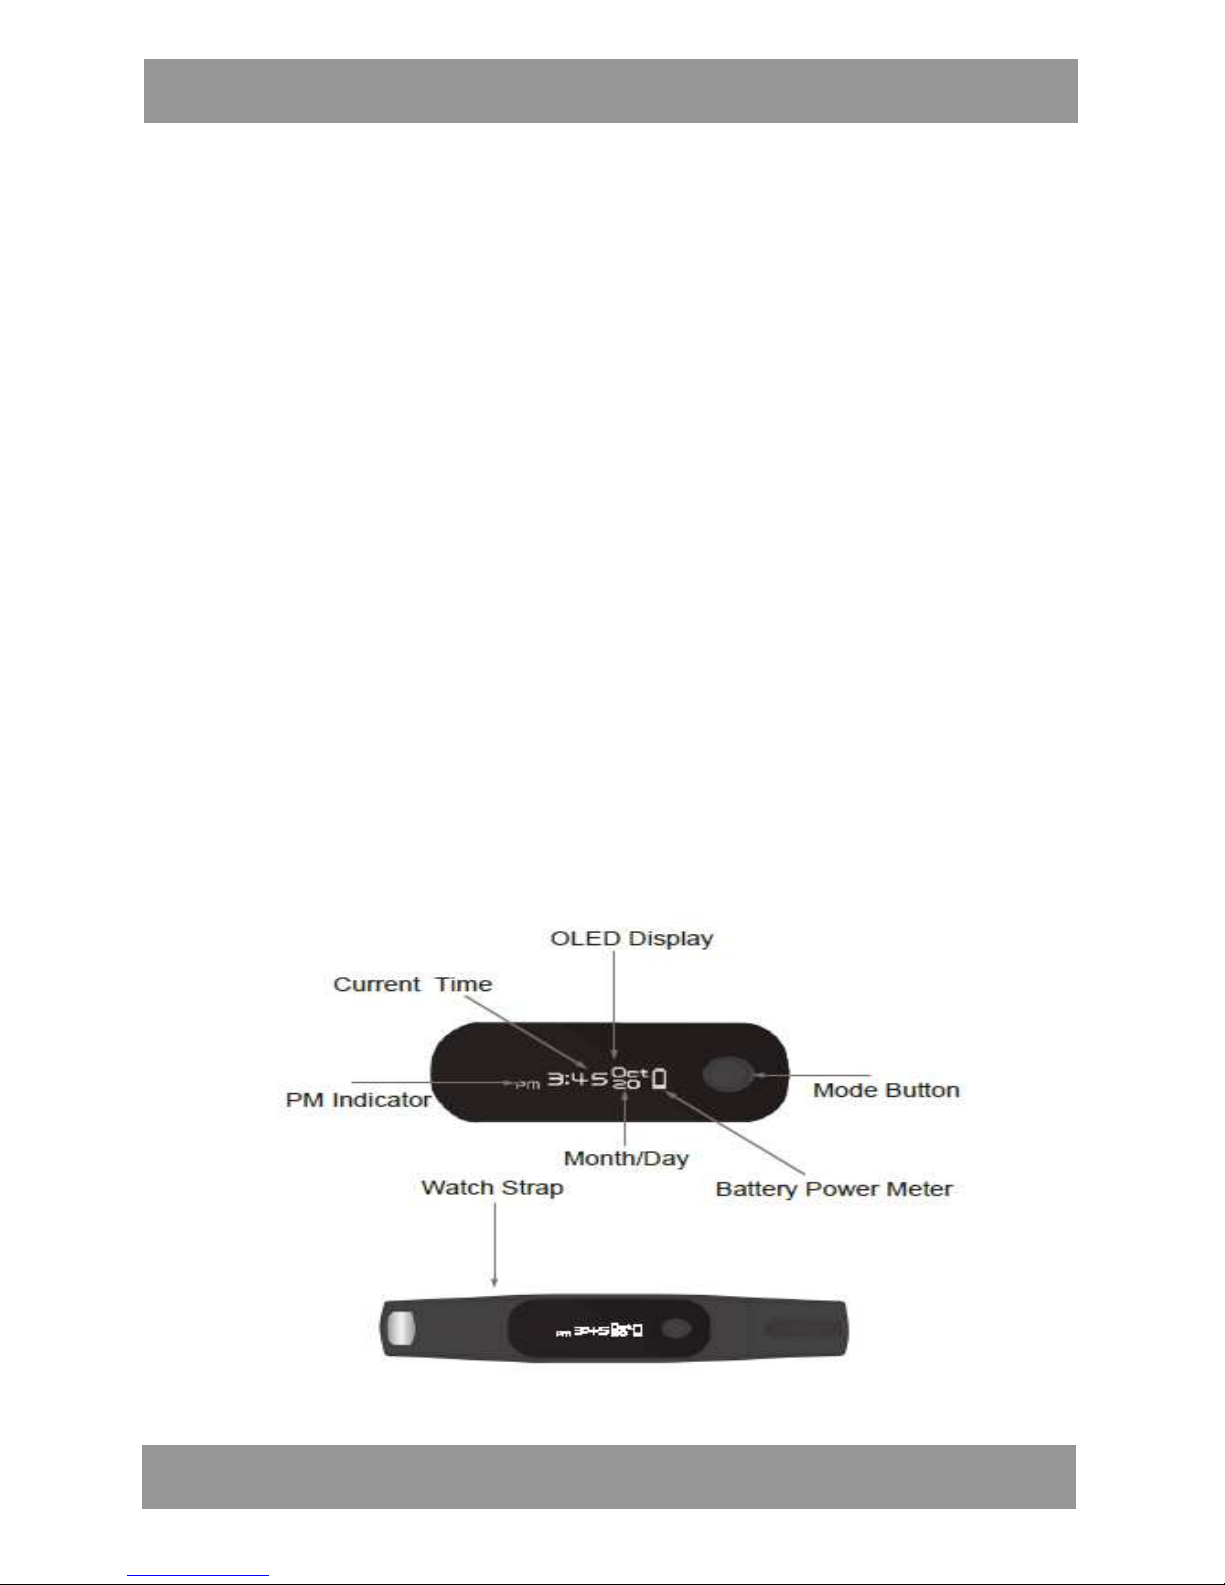
LOKALIZACJA KONTROLEK
OLED display --> Wyświetlacz OLED
Current Time --> Aktualny czas
PM Indicator --> Wskaźnik PM
Month/Day --> Miesiąc/dzień
Battery Power Meter -> Miernik mocy baterii
Mode Button --> Przycisk zmiany trybu
Watch Strap --> Pasek
Page 4
Instrukcja Obsługi PL
;
4
UWAGA:
Aby włączyć urządzenie po raz pierwszy, naciśnij i przytrzymaj przycisk zmiany
trybu, aż wyświetlacz zostanie włączony.
ŹRÓDŁO ZASILANIA
Urządzenie posiada wbudowany akumulator Li-poly o napięciu 3,7 V DC. Przed
pierwszym użyciem oraz gdy się wyczerpie (o czym informuje ikona ), naładuj
go w następujący sposób:
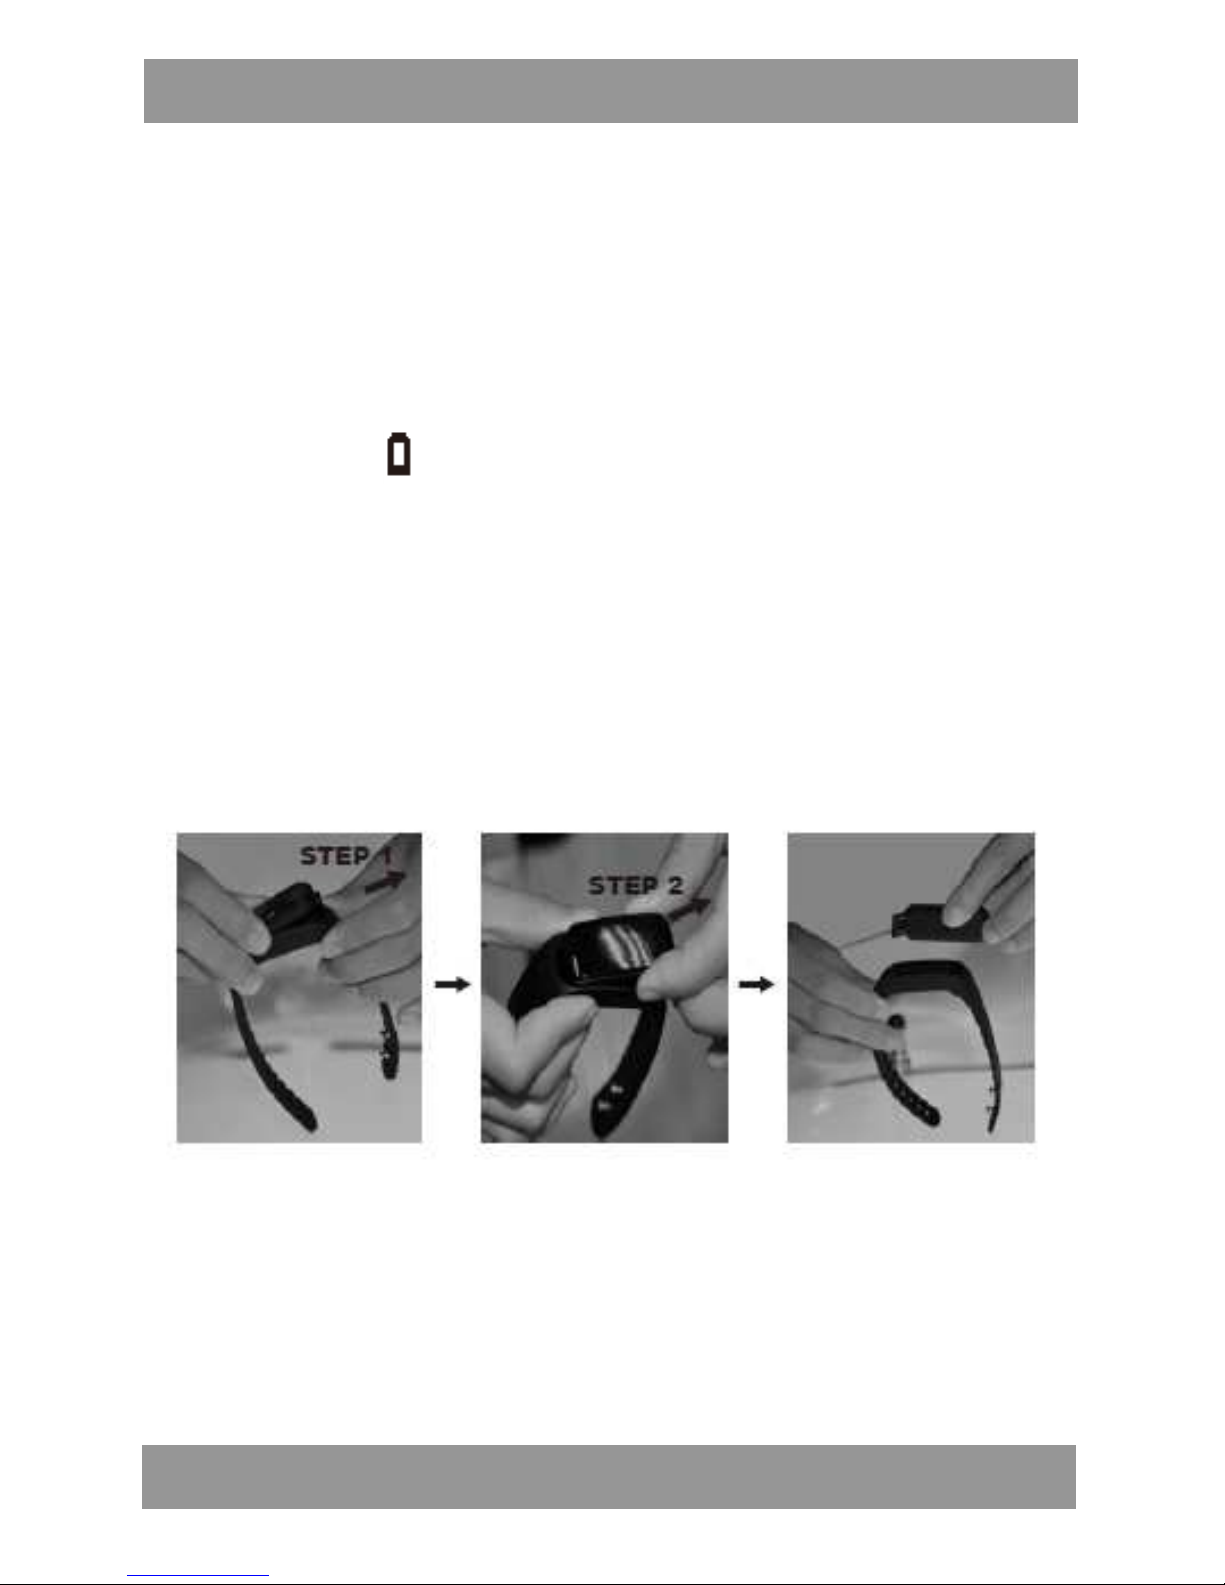
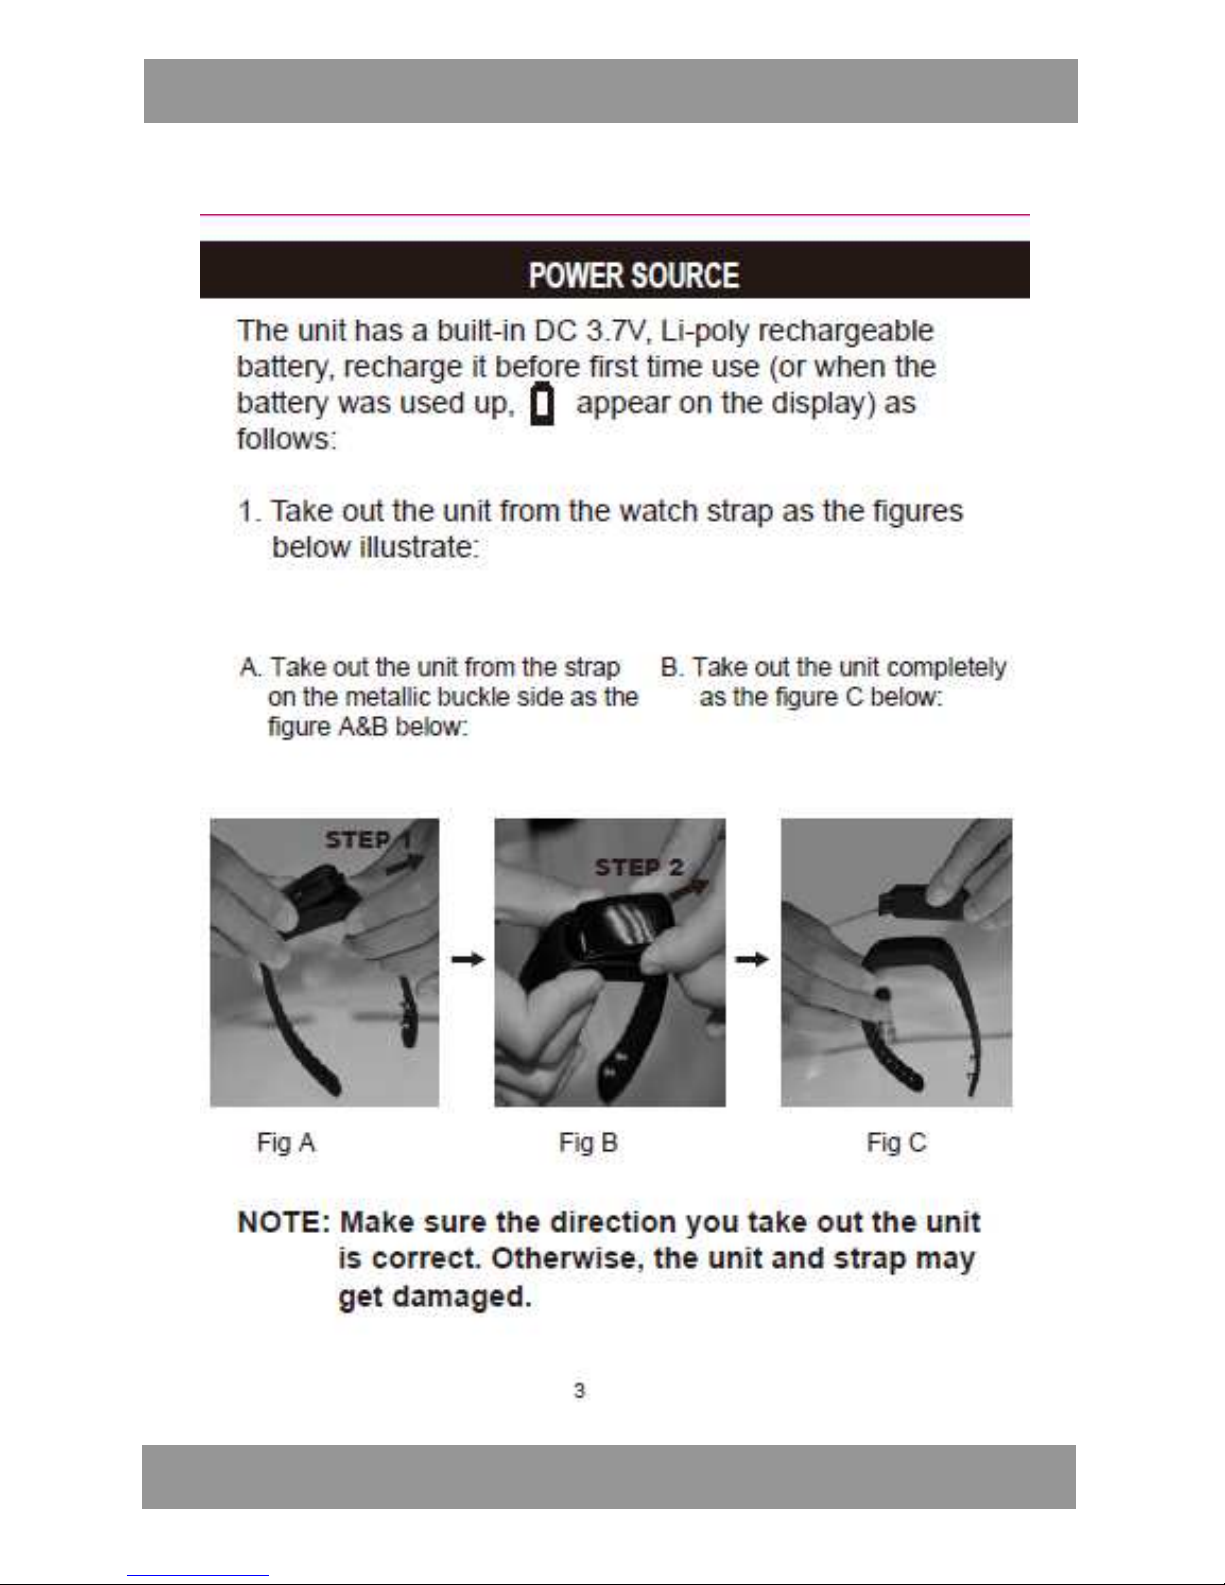
1. Wyjmij urządzenie z paska, tak jak przedstawiają to poniższe ilustracje:
A. Wyciągnij urządzenie z paska ze strony klamer metalowych, tak jak ilustrują to
rysunki A i B poniżej:
B. Wyjmij urządzenie całkowicie, jak ilustruje to rysunek C poniżej:
UWAGA:
Upewnij się, że wyciągasz urządzenie w odpowiednim kierunku. W przeciwnym
razie zarówno urządzenie jak i pasek mogą ulec uszkodzeniu.
Page 5

Instrukcja Obsługi PL
;
5
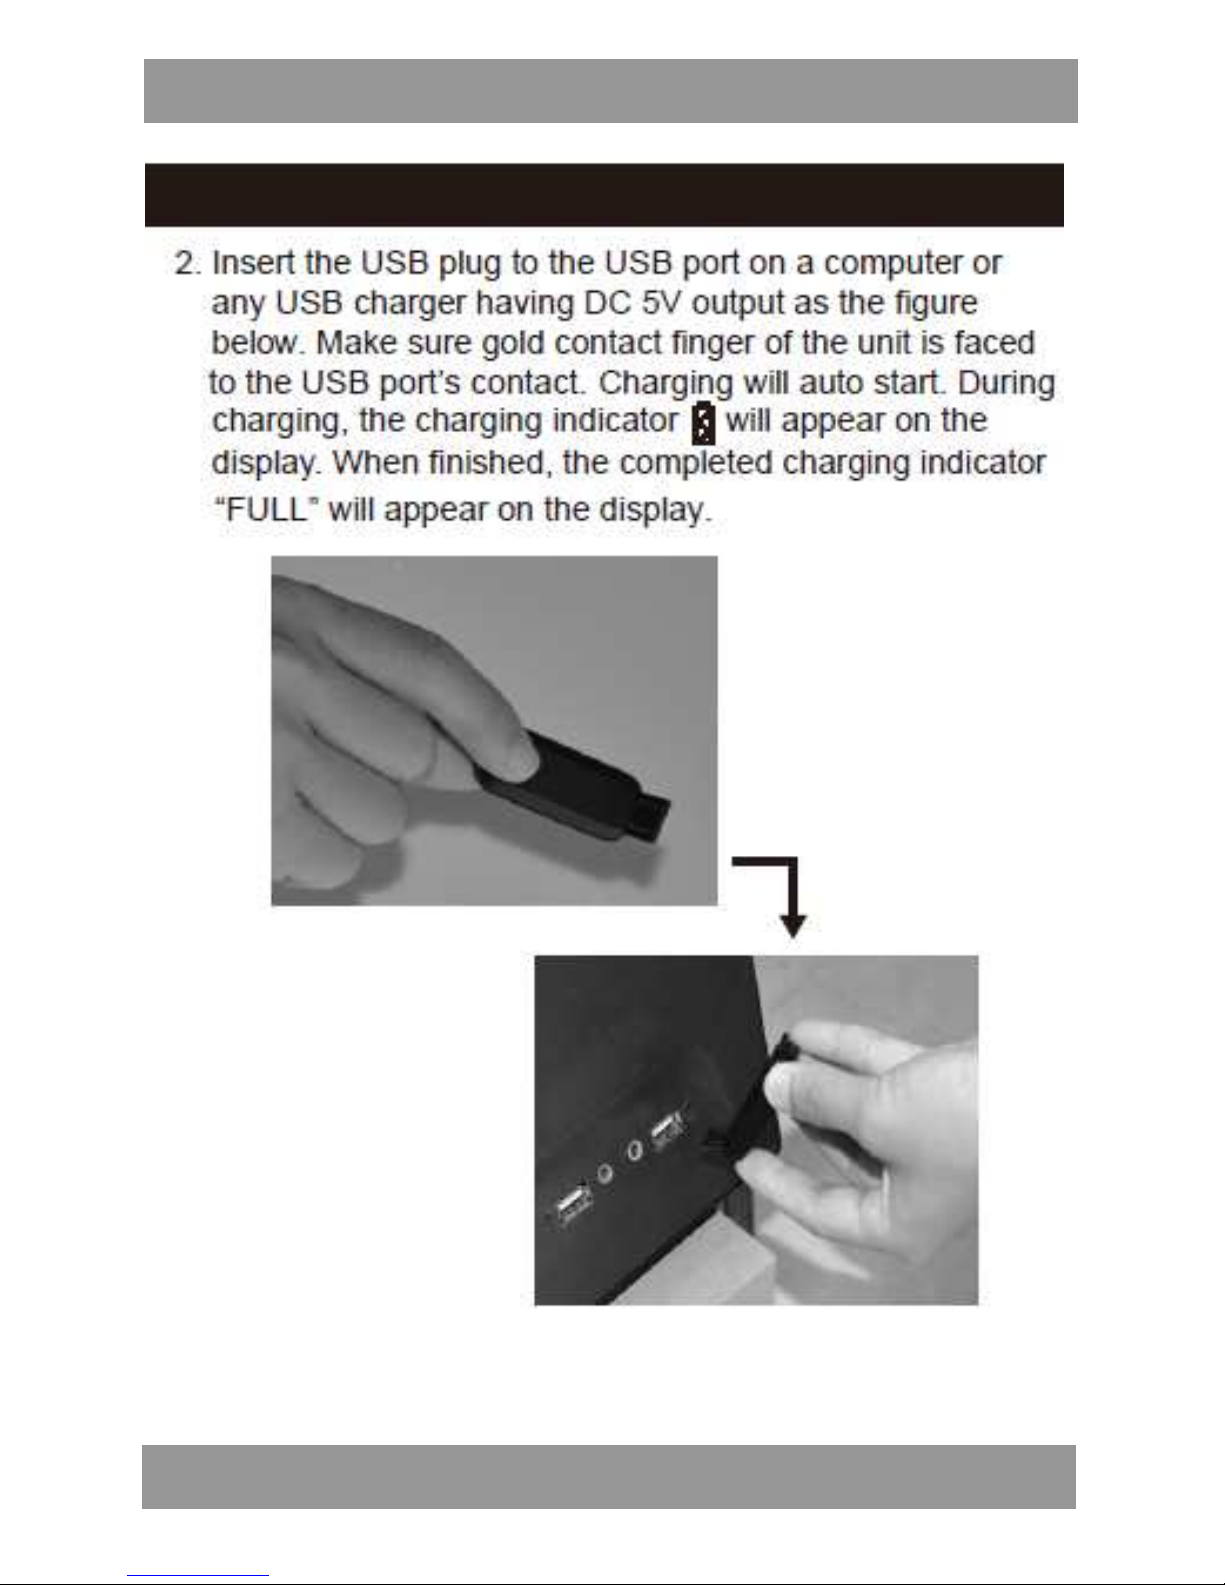
2. Włóż wtyk USB do portu USB komputera lub ładowarki USB o wyjściu 5V DC,
jak ilustruje to rysunek
poniżej. Upewnij się, że urządzenie umieszczone jest w odpowiednią stronę
(złoconymi wtykami w stronę aktywną złącza USB). Ładowanie rozpocznie się
automatycznie. Podczas ładowania wskaźnik ładowania pojawi się na
wyświetlaczu. Po zakończeniu ładowania, na wyświetlaczu wyświetlony
zostanie napis „FULL”, informujący o pełnym naładowaniu baterii.
Uwagi:
Zapewnisz akumulatorowi dłuższą żywotność, jeśli będziesz stosować poniższe
proste zasady ładowania i przechowywania:
A. Ładuj i przechowuj go w zakresie temperaturowym między 5°C a 35°C (od 40°F
do 95°F).
B. Nie ładuj go zbyt długo (dłużej niż 24 godziny). Nadmierne ładowanie i
rozładowywanie akumulatora może skrócić jego żywotność.
C. Pojemność akumulatora ulega z czasem naturalnemu skróceniu.
D. Samodzielne wymienianie przez użytkownika akumulatora w tym urządzeniu
nie jest zalecane
.
Page 6

Instrukcja Obsługi PL
;
6
INSTALACJA APLIKACJI
Przed pierwszym użyciem, pobierz i zainstaluj odpowiednie aplikacje.
iPhone:
Jeśli używasz Apple iPhone, pobierz i zainstaluj w telefonie aplikację „Isport
Tracker” z iPhone APP Store, do którego link znajdziesz w sekcji APP Twojego
iPhona.
Telefony z systemem Android:
Jeśli używasz telefonu działającego pod kontrolą systemu Android, pobierz i
zainstaluj w telefonie aplikację „Isport Tracker” ze sklepu Google Play.
Lista kompatybilnych telefonów
iPhone (iOS 7.0.0 i nowsze)
iPhone 4S/5/5S/6/6 plus
iPod Touch 5
oraz nowsze wersje iPhone i iPod
Telefony z systemem Android (Android 4.3 i nowsze):
Samsung: Galaxy S4/S5, Note III/IV
LG: Nexus4/5/7
Sony: Xperia C3/E3/T2/ZR/SP/Z/Z1
Moto: E/G/X
oraz nowsze wersje telefonów innych marek obsługiwanych przez systemem
Android;
szczegółowe informacje uzyskasz w każdym sklepie z telefonami komórkowymi.
Page 7
Instrukcja Obsługi PL
;
7
CZYNNOŚCI
TELEFON Z SYSTEMEM ANDROID:
PAROWANIE BT (BLUETOOTH):
Przy pierwszym włączeniu funkcji Bluetooth, urządzenie i telefon
komórkowy należy sparować w następujący sposób:
1. Po zakończeniu instalacji aplikacji „Isport Tracker”, znajdź ją w telefonie.
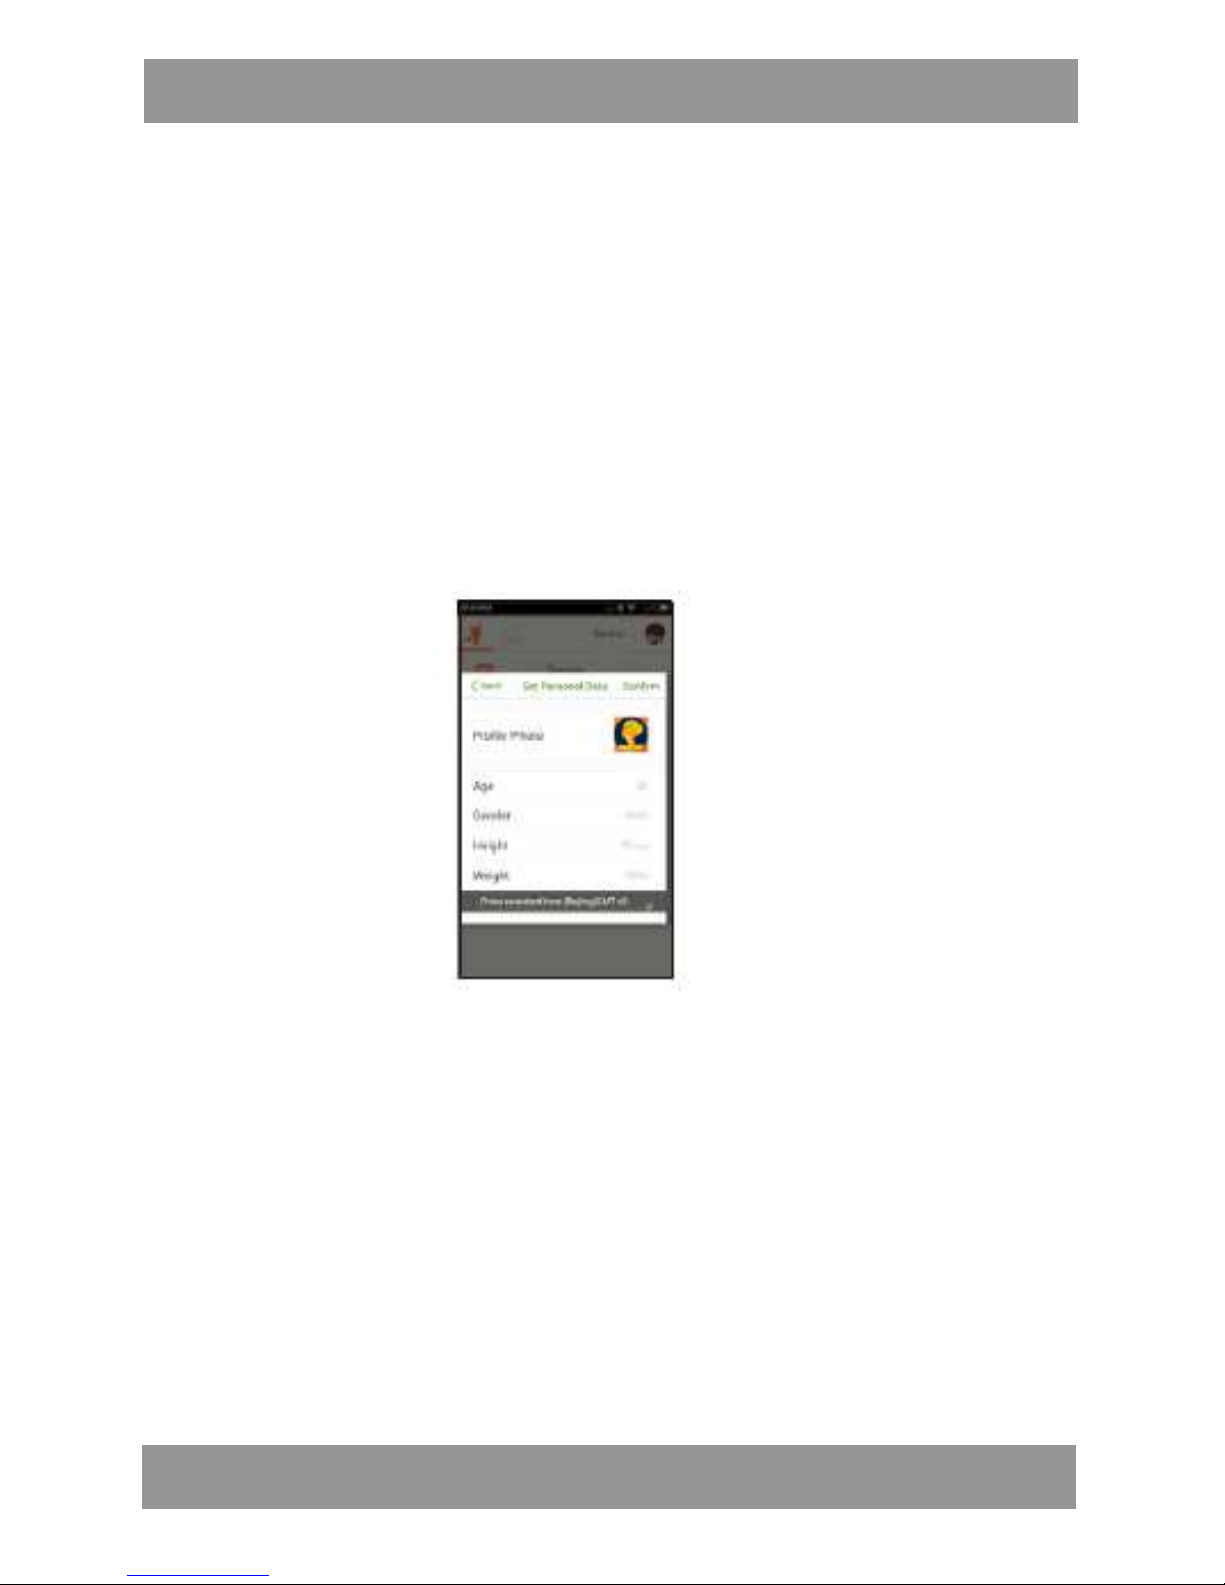
Otwórz ją. Na ekranie wyświetlona zostanie następujące okno:
2. Aby ustawić swoje dane osobowe naciśnij na odpowiednią pozycję i podaj
odpowiednią wartość:
Profile (zdjęcie): Tu możesz wprowadzić zdjęcie
użytkownika.
Age (wiek): Ustaw lub zmień wiek użytkownika.
Gender (płeć): Ustaw lub zmień płeć użytkownika.
Height (wzrost): Ustaw lub zmień wzrost użytkownika
Weight (waga): Ustaw lub zmień wagę użytkownika
Page 8
Instrukcja Obsługi PL
;
8
Time zone (strefa czasowa): Ustaw strefę czasową, w której
przebywasz
UWAGA:
Po zapisaniu strefy czasowej, wszystkie dane zapisywane będą w tej strefie nawet,
jeśli zapisywane były w innych strefach. Zmienić strefę czasową można wyłącznie
poprzez odinstalowanie aplikacji z telefonu, a następnie ponowną jej instalację.
3. Po zakończeniu wprowadzania danych, naciśnij przycisk „Confirm” (Zatwierdź)
znajdujący się w prawym górnym rogu ekranu, aby zapisać wprowadzone
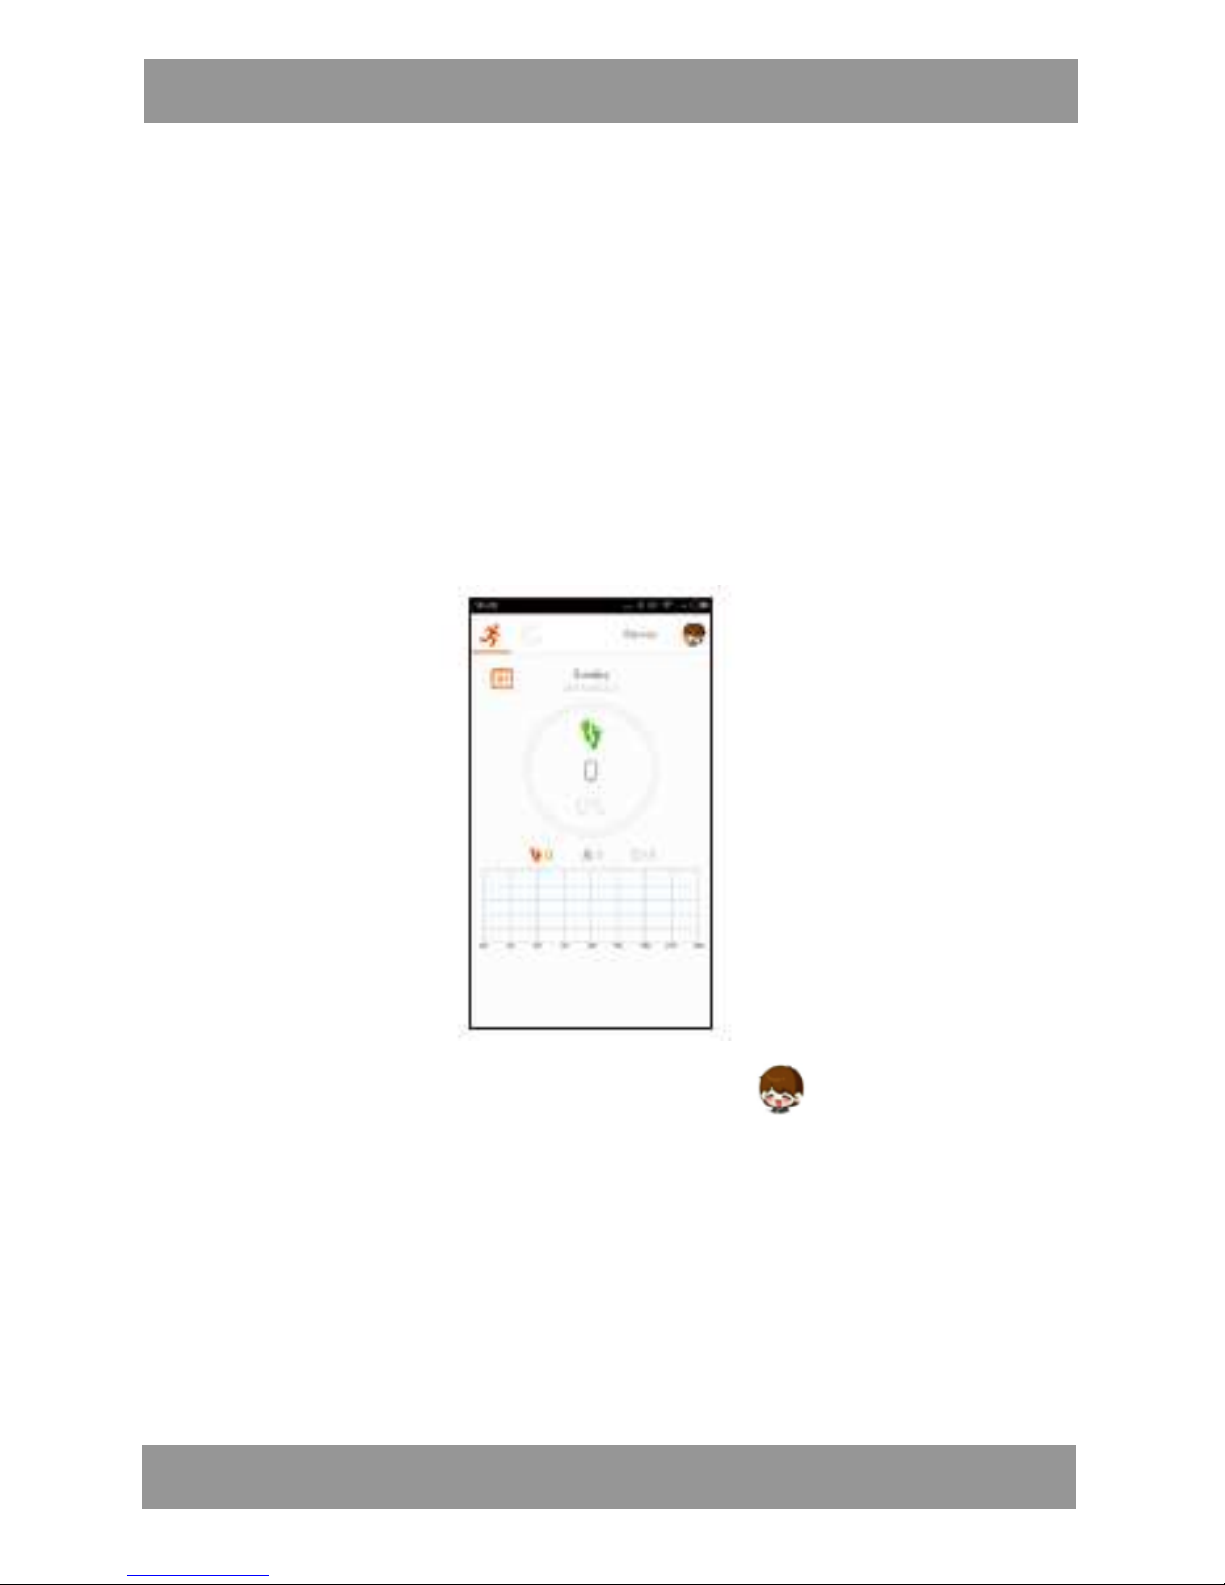
ustawienia. Spowoduje to wyświetlenie następującego ekranu:
4. Aby wejść do menu ustawień, naciśnij ikonę (lub swoje
własne zdjęcie/grafikę – jeśli zostały one uprzednio zapisane w
ustawieniach). Wyświetlony zostanie następujący ekran:
Page 9

Instrukcja Obsługi PL
;
9
5.
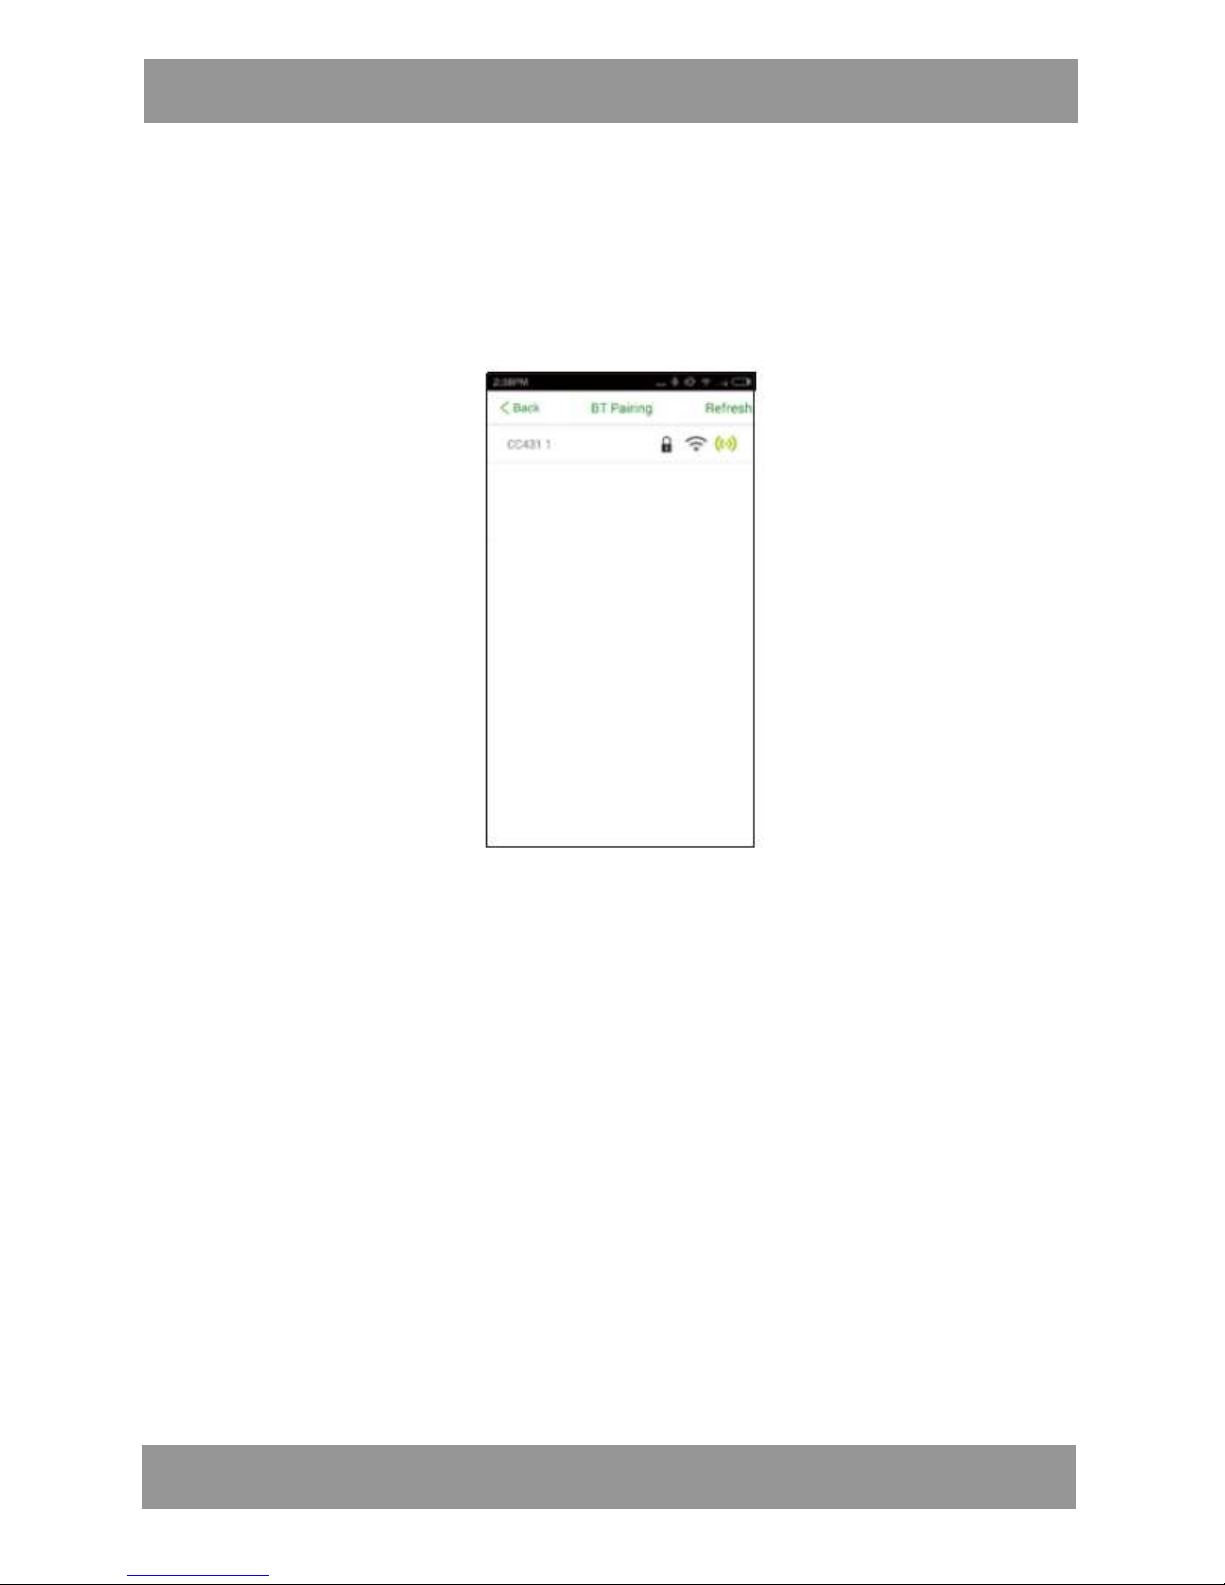
Dotknij przycisku parowania Bluetooth BT Pairing” , aby wyświetlić
wszystkie dostępne urządzenia. Spowoduje to wyświetlenie następującego
ekranu:
Page 10
Instrukcja Obsługi PL
;
10
6. Na głównym ekranie aplikacji przesuń ekran w dół, aby rozpocząć parowanie
urządzeń.
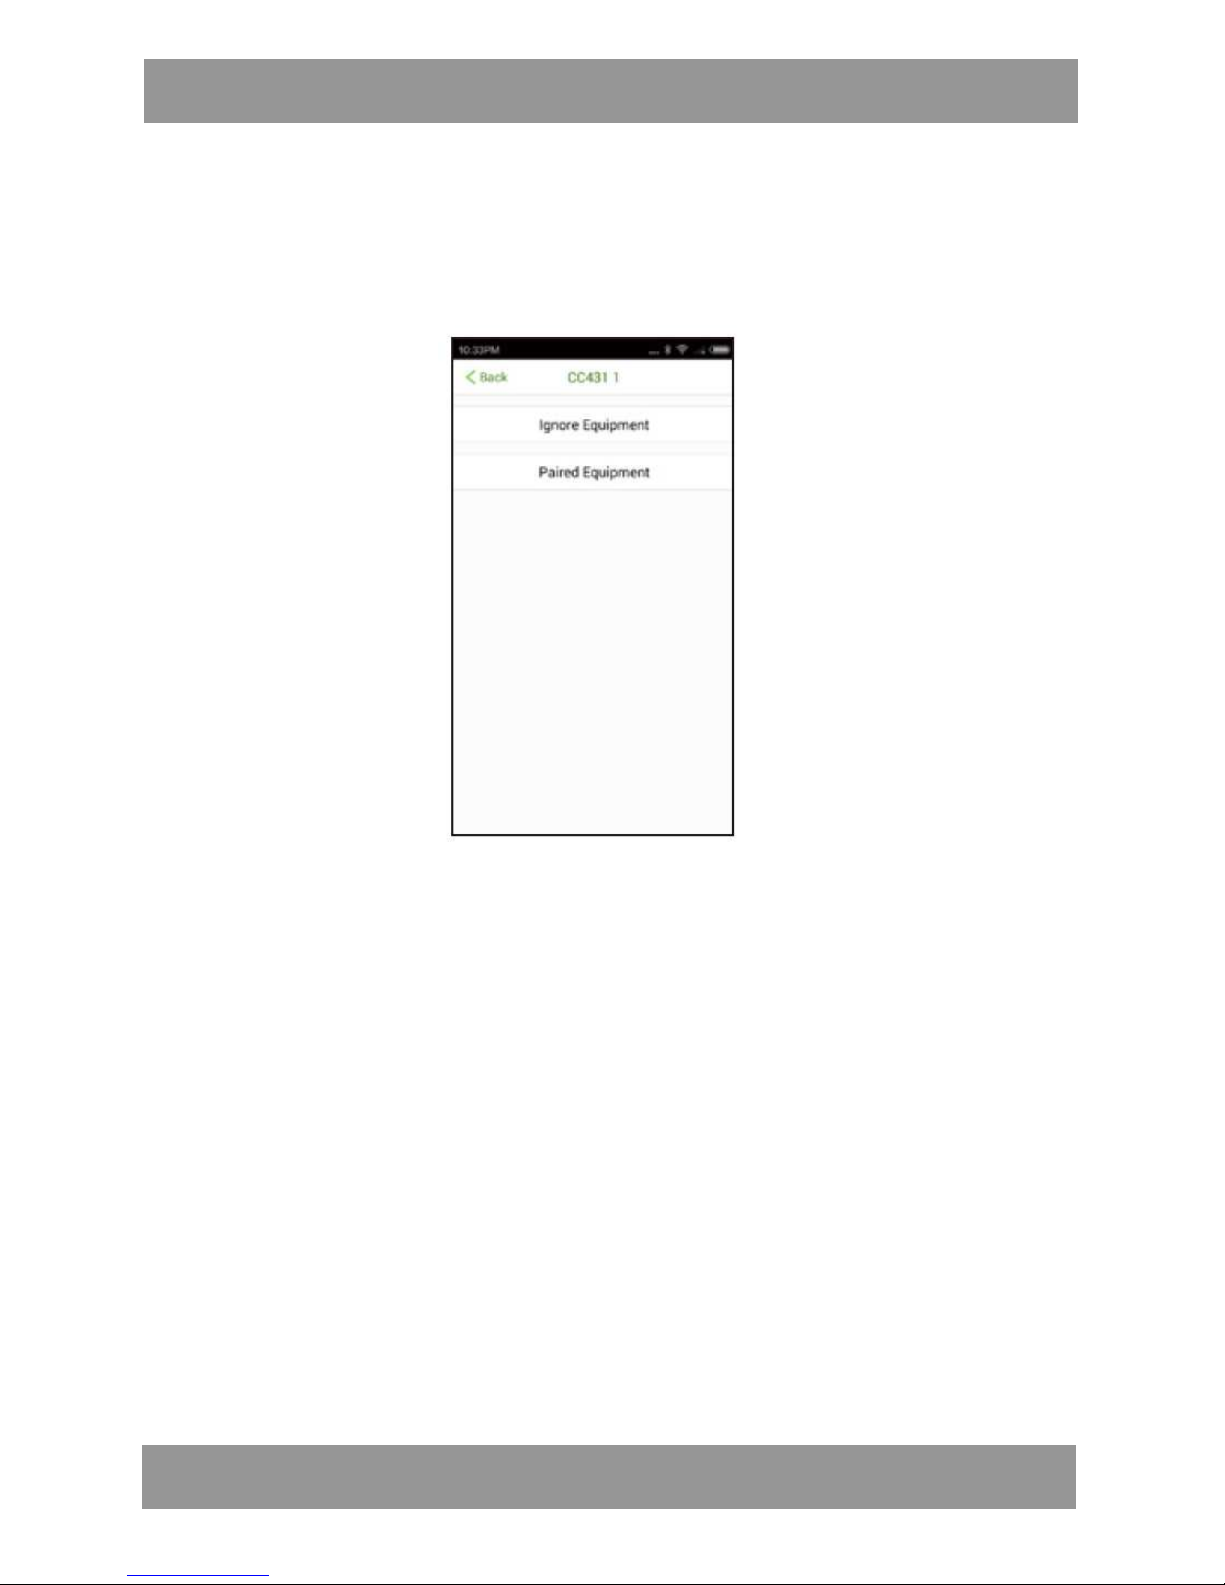
Po zakończeniu parowania, dotknij przycisk „<back”. Spowoduje to wyświetlenie
następującego ekranu
.
Uwaga: Jeśli telefon znajdzie więcej niż jedno urządzenie, kolejnym urządzeniom
nadaje automatycznie kolejny numer w nazwie. Czyli pierwsze z urządzeń zostanie
oznaczone jako „SWT302 1”, drugie jako „SWT302 2” itd.
Wybierz na ekranie to z urządzeń, które chcesz z telefonem sparować.
Page 11
Instrukcja Obsługi PL
;
11
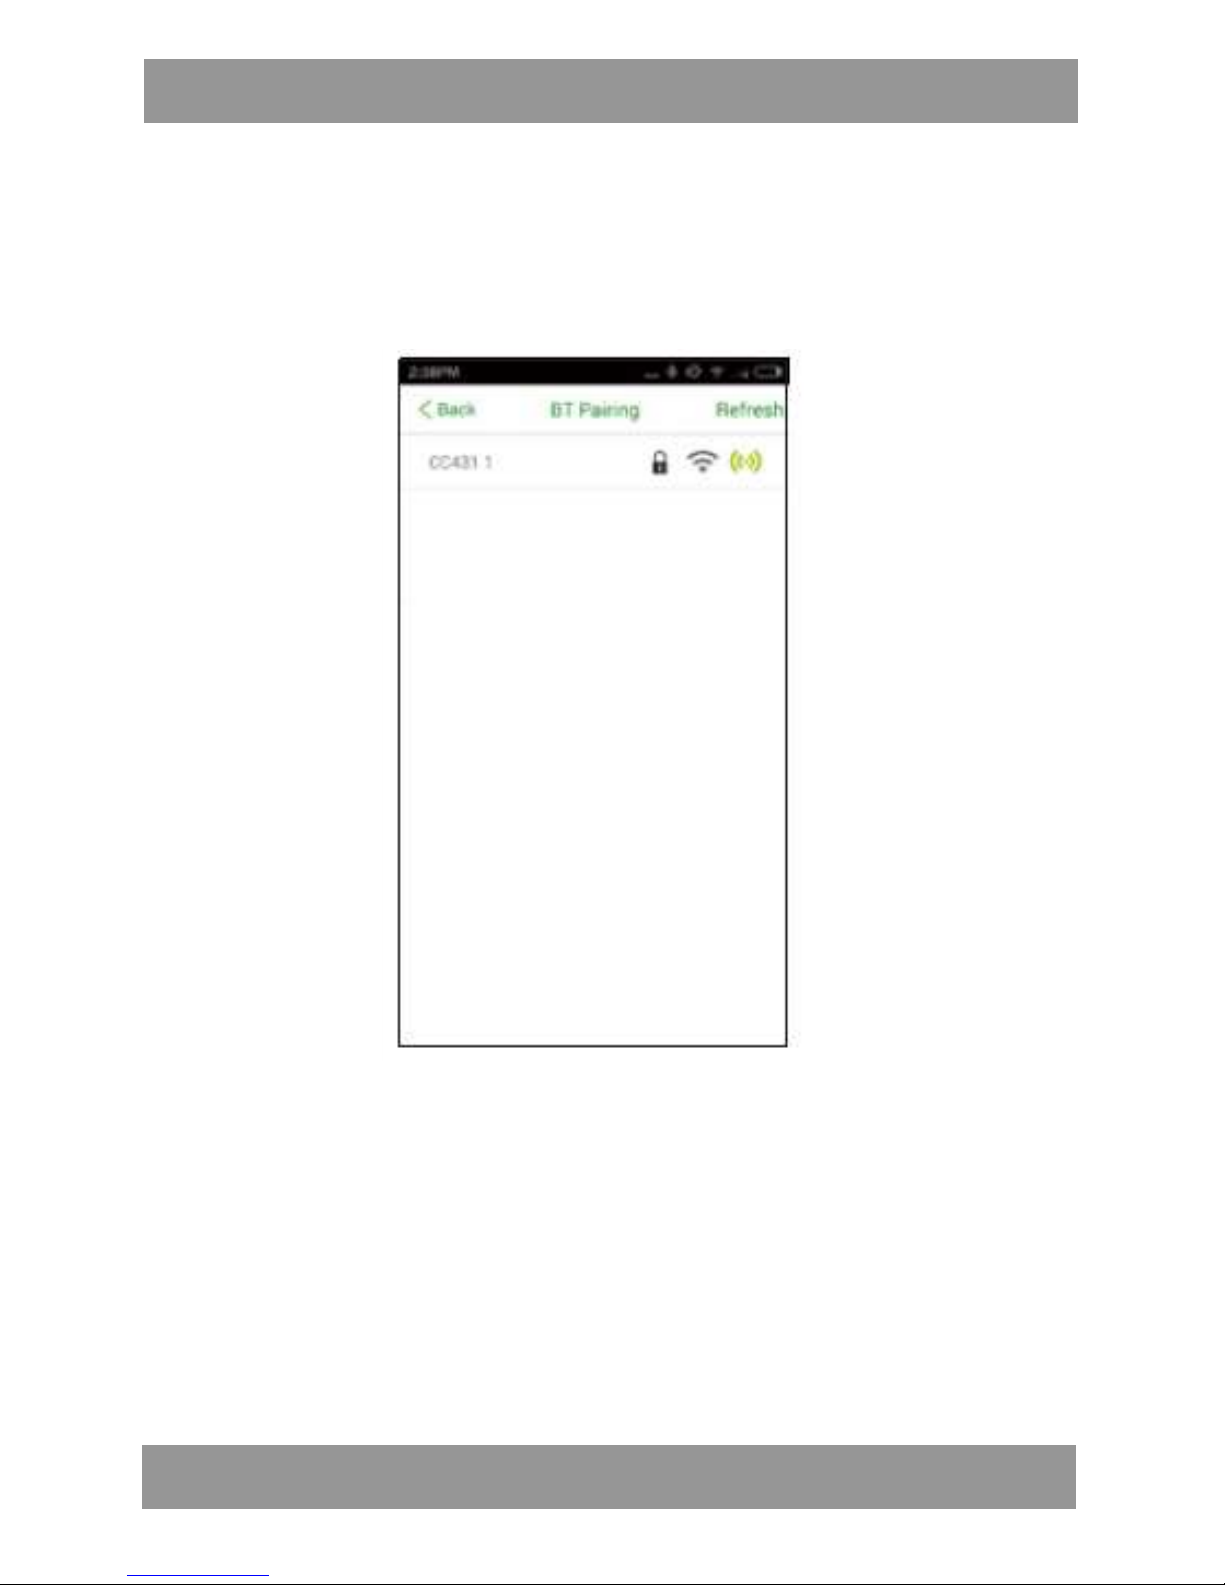
7. Na ekranie telefonu dotknij przycisk “Paired Equipment” lub swoje własne
zdjęcie/grafikę – jeśli zostały one uprzednio zapisane w ustawieniach), a
następnie przycisk „Activity tracker” (monitor aktywności), wyświetlony
wówczas zostanie następujący ekran.
WAŻNE:
Podczas synchronizacji upewnij się, że wyświetlacz opaski monitorującej jest
podświetlony.
Jeśli nie jest, kliknij przycisk zmiany trybu (Mode), aby włączyć go ponownie.
Page 12
Instrukcja Obsługi PL
;
12
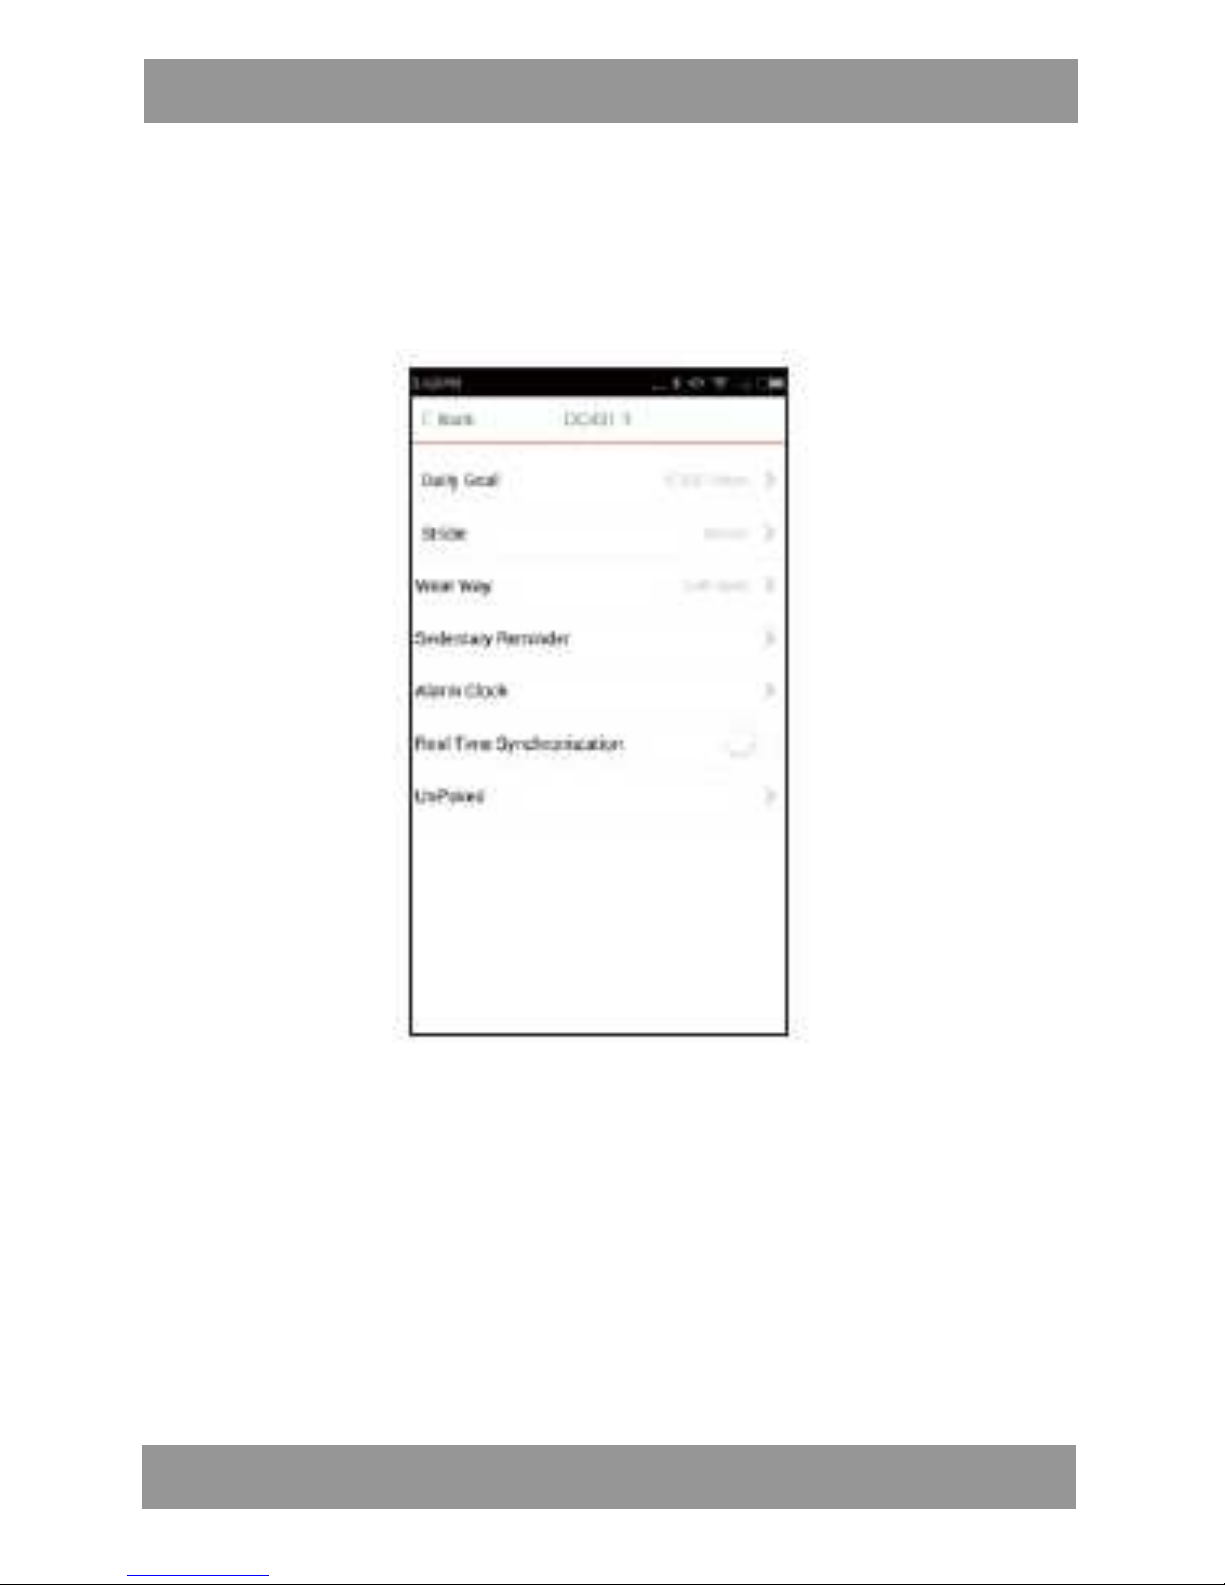
8. Na ekranie telefonu wybierz urządzenie SWT302. Wyświetlony zostanie
następujący ekran.
Aby nadać ustawieniom odpowiednie wartości, dotknij właściwy przycisk na
ekranie i wprowadź swoje dane. Funkcje poszczególnych ustawień przedstawione
są na liście poniżej:
9. Po wprowadzeniu ustawień, dwukrotnie dotknij przycisk „
<Back”
, aby powrócić
do strony głównej.
10. Na stronie głównej przesuń obraz w dół, aby rozpocząć synchronizację.
Po zakończeniu synchronizacji, bieżący czas telefonu będzie automatycznie
przesyłany do opaski monitorującej.
Page 13

Instrukcja Obsługi PL
;
13
SPRAWDZANIE I ODCZYT DANYCH
Po wykonaniu ćwiczeń, możesz sprawdzać odczytywać dane w następujący
sposób:
Urządzenie monitorujące:
1. Naciskaj przycisk zmiany trybu Mode urządzenia, aby odczytać kolejne dane:
Time Czas
Number of steps Liczba kroków
Burned calorie Liczba spalonych kalorii
Distance Odległość
Exercise Time Czas treningu
Goal completed meter Poziom realizacji celu
Goal completed meter in % Poziom realizacji celu w procentach
Alarm Alarm
Reminder for no motions Przypomnienie o zasiedzeniu
Name and Phone number for incoming call (Operation in Android phones only)
Nazwa i numer telefonu dla połączeń przychodzących (tylko dla telefonów z
systemem Android)
Numbers of missing calls (Operation in Android phones only) Liczba
nieodebranych połączeń telefonicznych (tylko dla telefonów z systemem Android)
Unread messages (Operation in Android phones only) Liczba nieprzeczytanych
wiadomości (tylko dla telefonów z systemem Android)
Telefon:
1. Naciśnij przycisk zmiany Trybu na urządzeniu, aby włączyć wyświetlacz. Sparuj
urządzenie z telefonem, jak w procedurze poprzedniej.
2. Po sparowaniu urządzenia z telefonem otwórz stronę główną aplikacji. Na
ekranie telefonu wyświetlone zostanie następujące okno.
3. Przesuń obraz w dół telefonu, aby rozpocząć synchronizację.
WAŻNE:
Podczas synchronizacji upewnij się, że wyświetlacz opaski monitorującej jest
podświetlony.
Jeśli nie jest, kliknij przycisk zmiany trybu (Mode), aby włączyć go ponownie.
Page 14
Instrukcja Obsługi PL
;
14
4. Po zsynchronizowaniu urządzeń naciśnij przycisk korespondencji na ekranie
telefonu lub przesuń obraz w lewo, prawo lub w dół, aby odczytać zapisane
przez opaskę dane.
MONITOROWANIE SNU
Aby zliczać i monitorować czas snu:
1. Idąc spać naciśnij przycisk zmiany trybu na opasce monitorującej, aby włączyć
wyświetlacz.
2. Naciśnij przycisk zmiany trybu ponownie, aby wyjść z ekranu godziny.
(Uwaga: aby uniknąć przypadkowego włączenia monitora snu, nie może on
być ustawiony w podstawowym trybie wyświetlania czasu)
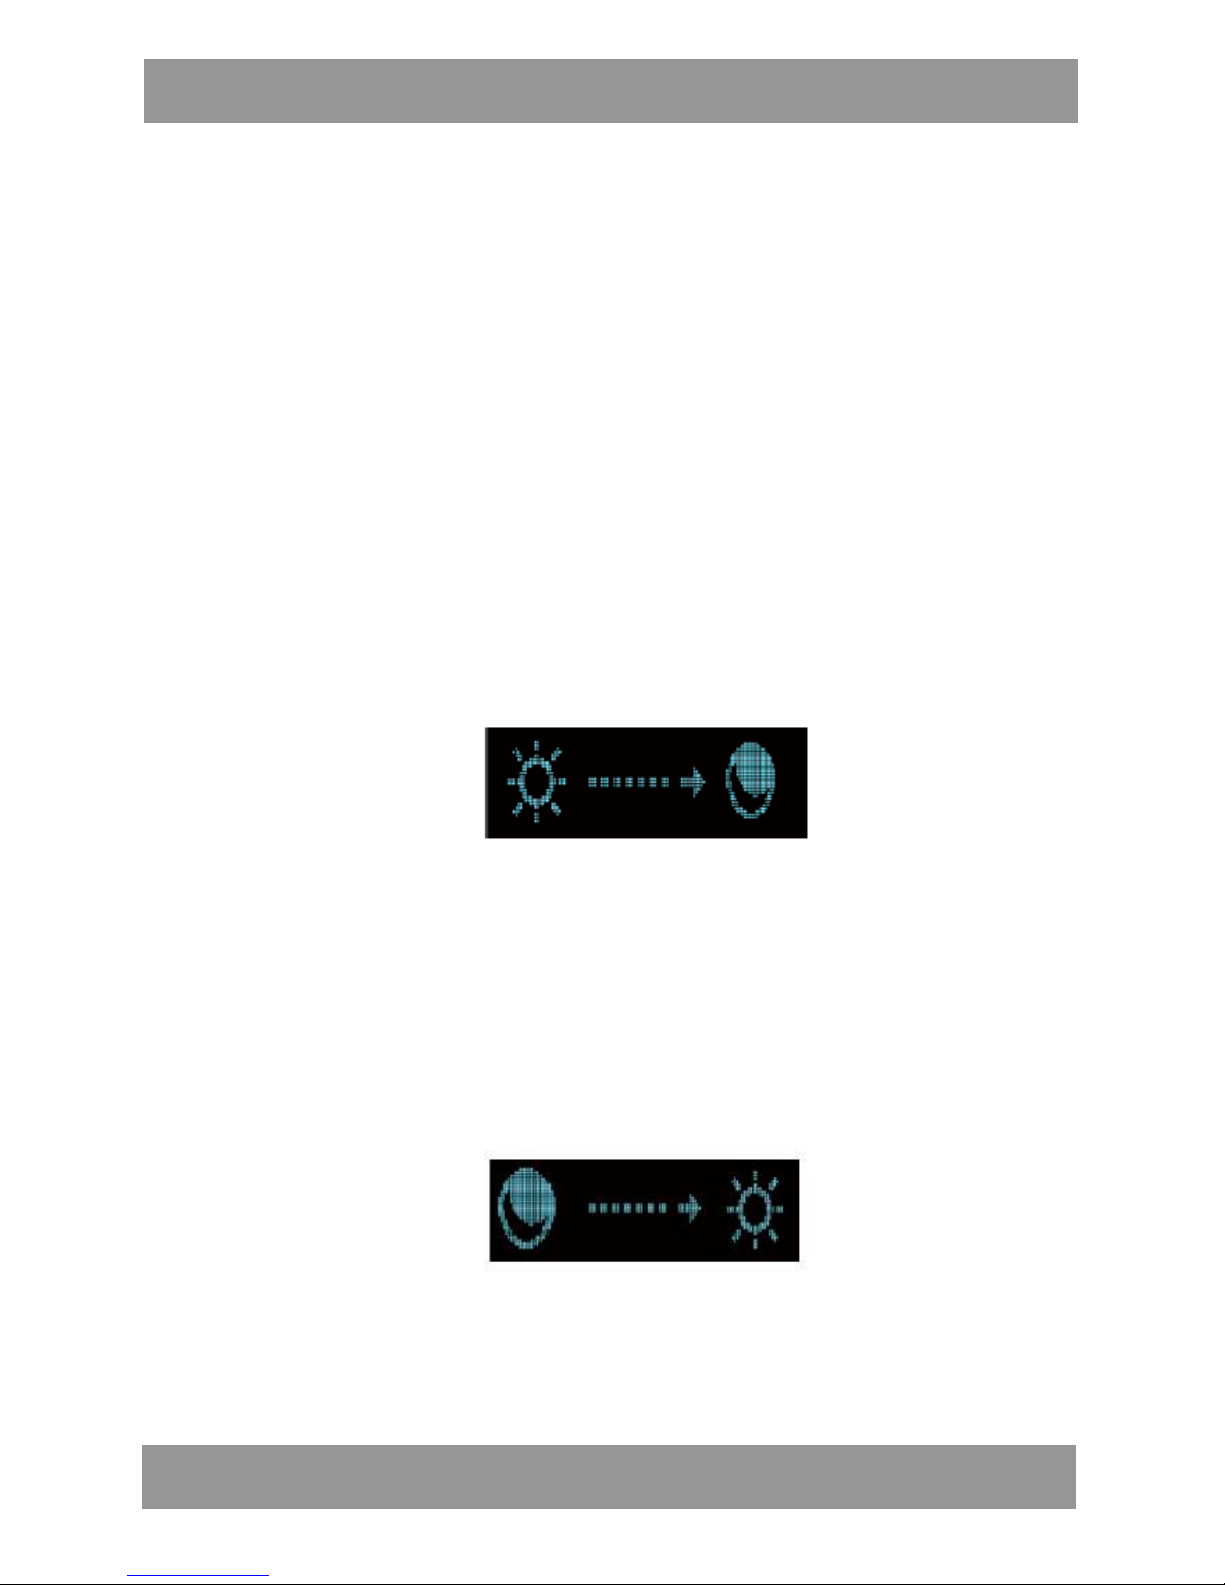
3. Naciśnij i przytrzymaj przycisk zmiany trybu około 5 sekund w celu przejścia w
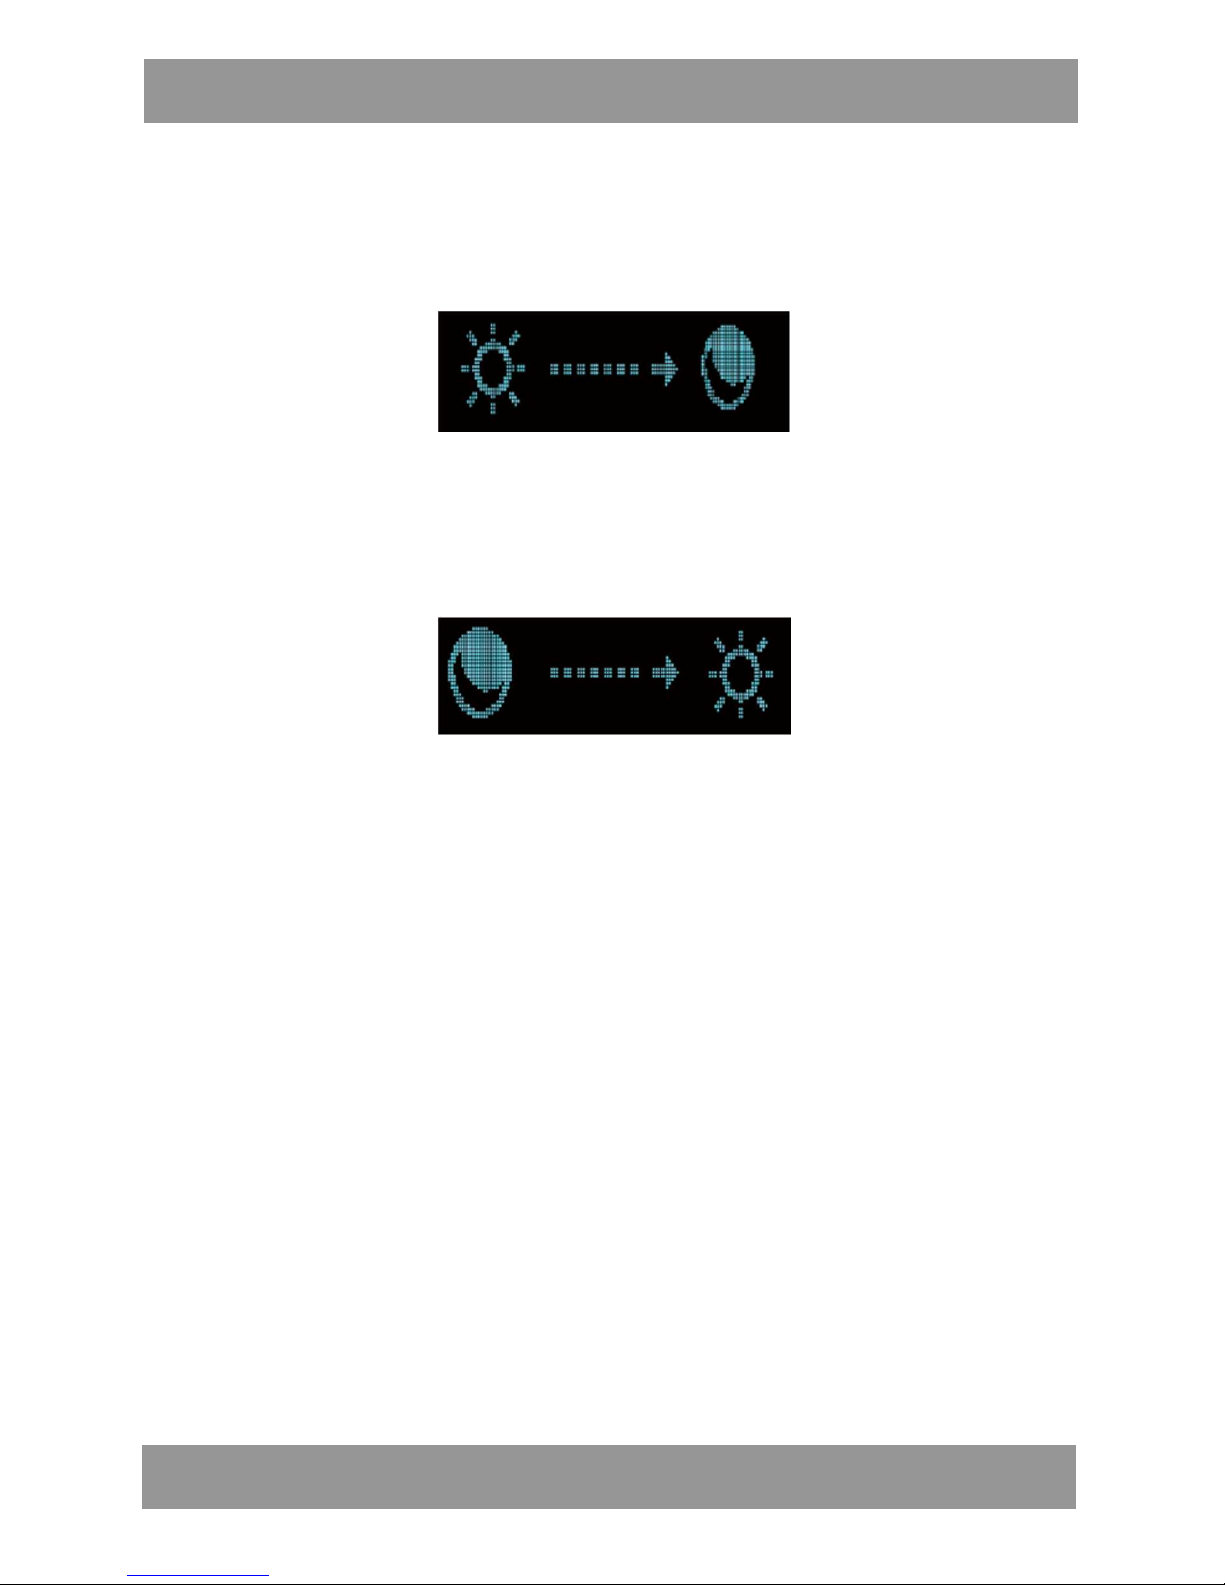
tryb monitorowania snu. Na wyświetlaczu opaski wyświetlone zostaną
następujące ikony. A monitor snu zostanie włączony.
4. Po obudzeniu, kliknij przycisk zmiany trybu na opasce, aby włączyć
wyświetlacz.
5. Naciśnij przycisk zmiany trybu ponownie, aby wyjść z trybu wyświetlania
czasu.
6. Naciśnij i przytrzymaj przycisk zmiany trybu przez około 5 sekund, aby opuścić
tryb monitorowania snu. Na wyświetlaczu opaski wyświetlone zostaną
następujące ikony
7. Po kilku sekundach wyświetlacz wróci do podstawowego trybu wyświetlania
czasu.
Page 15

Instrukcja Obsługi PL
;
15
WAŻNE
1. Po wprowadzeniu zmian zawsze synchronizuj urządzenia, gdyż dopiero
wówczas zmiany zostaną zapisane na urządzeniu sparowanym z telefonem.
2. Opaskę monitorującą zakładaj na rękę i pamiętaj, aby ją włączyć. Inaczej dane
będą niepoprawne lub nie zostaną zebrane.
3. W trybie monitorowania snu licznik kroków nie działa.
4. Pamiętaj, aby synchronizować dane z opaski z telefonem. W przeciwnym
razie dane zapisane przez opaskę po 14 dniach zostaną usunięte automatycznie
SPECYFIKACJA OGÓLNA
Źródło zasilania: wbudowany akumulator 3,7 V DC, 70mAH (0.259WH)
akumulator Li-poly; ładowany przez złącze USB: DC 5V, 100mA
Wersja BT: BLE 4.0/4.1/4.2
Zasięg skuteczny BT: 32 metry na otwartej przestrzeni
Tryb gotowości: 120 godzin
Pamięć danych: 14 dni
AKCESORIA:
instrukcja obsługi x 1
SPECYFIKACJE I AKCESORIA MOGĄ ZOSTAĆ ZMODYFIKOWAN BEZ
POWIADOMIENIA
Uwaga!
Konstrukcja produktu i parametry techniczne mogą ulec zmianie bez
wcześniejszego powiadomienia. Dotyczy to przede wszystkim parametrów
technicznych, oprogramowania oraz podręcznika użytkownika. Niniejszy
podręcznik użytkownika służy ogólnej orientacji dotyczącej obsługi produktu.
Producent i dystrybutor nie ponoszą żadnej odpowiedzialności tytułem
odszkodowania za jakiekolwiek nieścisłości wynikające z błędów w opisach
występujących w niniejszej instrukcji użytkownika.
Page 16
Instrukcja Obsługi PL
;
16
Prawidłowa utylizacja urządzenia.
To oznaczenie informuje, że produktu nie należy utylizować wraz z
odpadami z gospodarstw domowych w całej Unii Europejskiej. Aby
uniknąć ewentualnych szkód dla środowiska i człowieka
spowodowanych niekontrolowaną utylizacją odpadów, należy
poddawać je odpowiedzialnemu odzyskowi w celu zadbania o
zrównoważone ponowne wykorzystanie surowców materiałowych.
Aby zwrócić wykorzystane urządzenie, należy skorzystać z
odpowiednich systemów zwrotu i zbiórki odpadów lub skontaktować
się ze sprzedawcą urządzenia. W takim punkcie istnieje możliwość
poddania wyrobu odzyskowi w sposób bezpieczny dla środowiska.
Page 17
User’s Manual
EN
;
17
FCC INFORMATION:
This equipment has been tested and found to comply with the limits for a Class
Bdigital device, pursuant to Part 15 of the FCC Rules.These limits are designed to
This equipment generates, uses and can radiate radio frequency energy
and, if not used these instructions, may cause harmful interference to radio
communications. However, there is no guarantee that interference will not occur
in a particular installation. If this equipment does cause harmful interference to
radio or television reception, which can be determined by turning the equipment
of and on, the user is encouraged to try to correct the interference by one or
more of the following measures:
~ Reorient or relocate the receiving antenna.
~ Increase the separation between the equipment and receiver.
~ Connect the equipment into an outlet on circuit different
from that to which the receiver is connected.
~ Consult the dealer or an experienced radio radio/TV
technician for help.
LOCATION OF CONTROLO
LOCATION OF CONTROLS
NOTE: At first time to use, touch and hold the Mode
Page 18
User’s Manual
EN
;
18
Button until the display is illuminate to power
Page 19
User’s Manual
EN
;
19
Page 20

User’s Manual
EN
;
20
Notes:
Your battery will last longer if you follow simple guidelines for charging and
storing below:
A. Recharge and store the unit within the temperature
range of 5°C~35°C (40°F~95°F).
B. Do not over charge (longer than 24 hours). Excessive charging or discharging
may shorten the battery life.
C. Battery life naturally shortens slowly over time.
D. It is not recommended that users replace contained rechargeable battery in
this product by themselves.
APPS (APPLICATIONS) INSTALLATION
Before first time use, download and install the suitable Apps (Applications) from
the apps store as below:
IPhones
If you are using Apple iPhone, download and install Apps from APP Store iPhone
APP Section into your iPhone.
Android Phones
If you are using Android phones, download and install the “Isport Tracker” the
“IsportTracker” Apps from Google Play Store into your cell phone.
List of Compatible Phones
iPhones (iOS 7.0.0 and above):
iPhone 4S/5/5S/6/6 plus
iPod Touch 5
And newer version iPhone and iPod
Android Phones, Android 4.3 and above
Samsung: Galaxy S4/S5��Note III/IV
LG: Nexus4/5/7
Sony: Xperia C3/E3/T2/ZR/SP/Z/Z1
Moto: E/G/X
And newer version and other brands Android phones, for
details, please consult the phone's shop.
ANDROID PHONE:
Page 21
User’s Manual
EN
;
21
BT (BLUETOOTH) PAIRING:
In first time use, pairing the unit to your cell phone
as below:
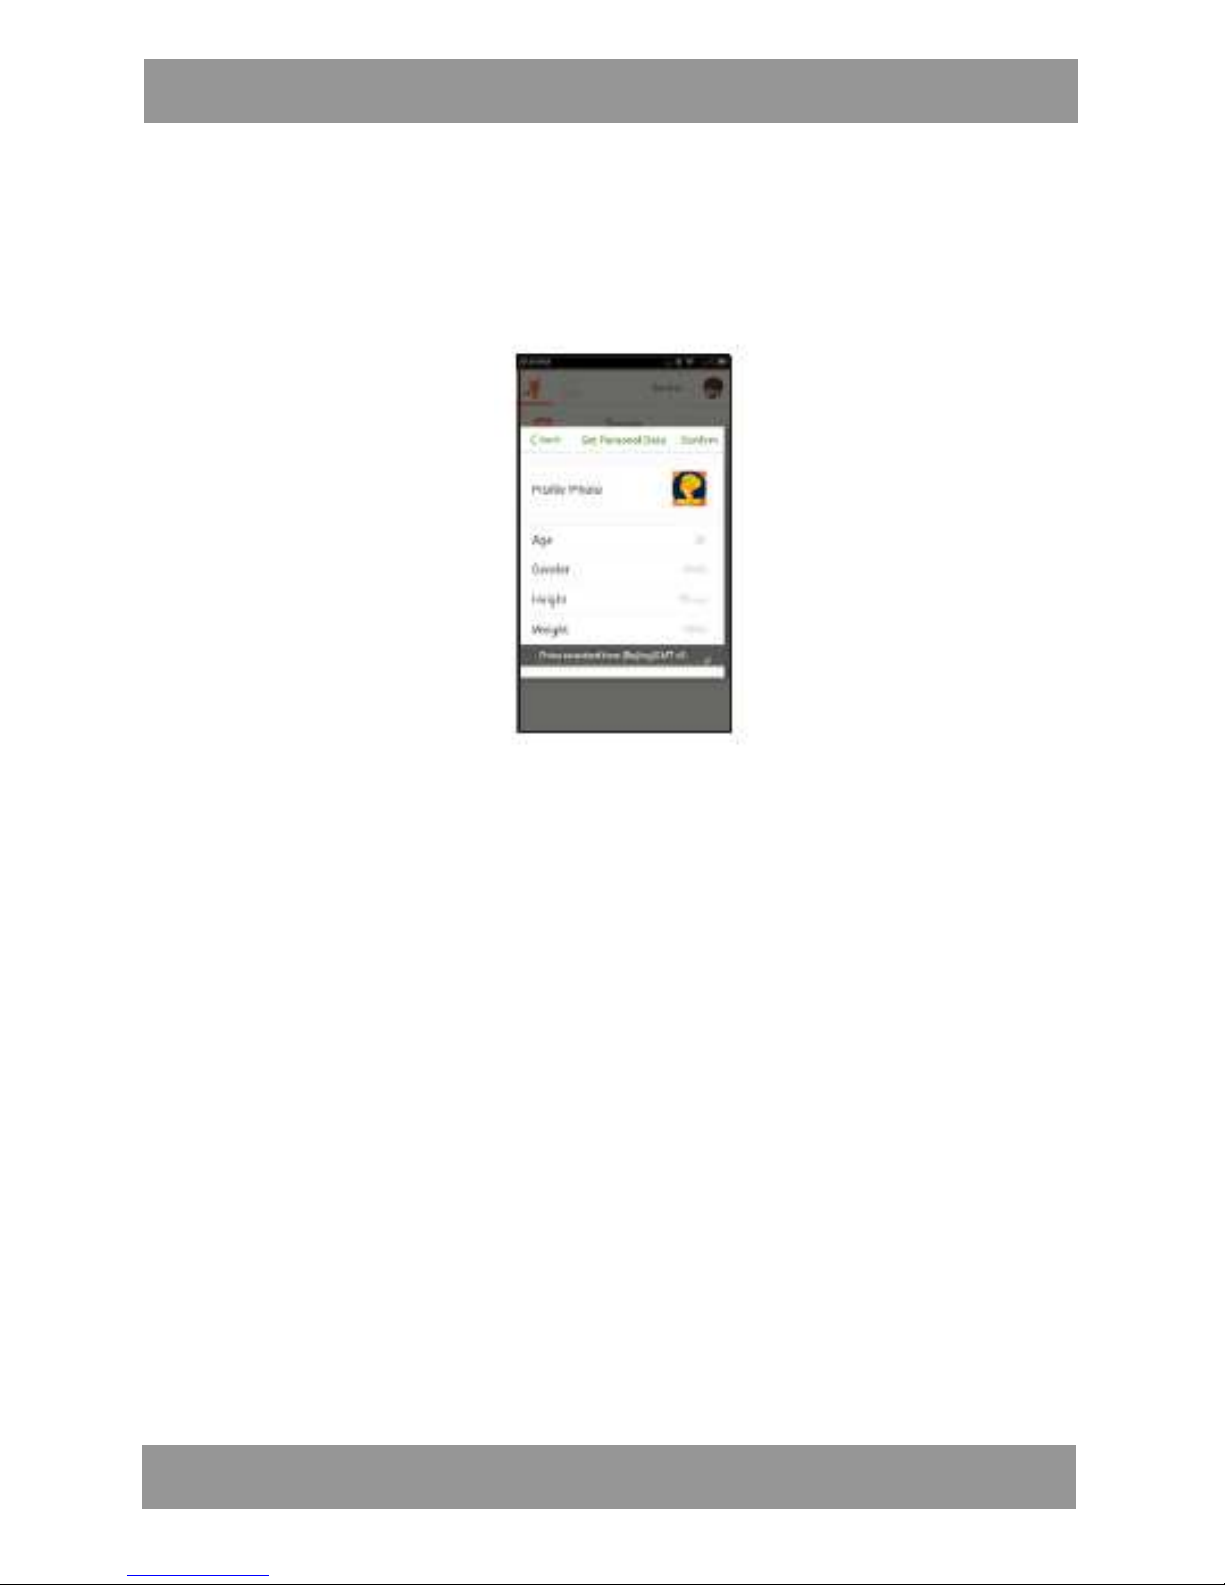
1. After installation, find the app I sport Tracke r in yourphone then open it, the
following figure will appear on the screen:
2. Touch the desired button on the screen to enter. Then start to set your
personal information into the phone as on the screen instructions as follows:
~ Profile: Assign your personal photo into the app.
~ Age: Set or reset your age.
~ Gender: Set or reset your gender.
~ Height: Set or reset your height in inch.
~ Weight: Set or reset your weight in lbs.
~ Time zone: Set the time zone you are located.
NOTE:
After time zone was set up, all your exercise records will keep in the same time
zone even though they were done in other countri es. To reset the time zone, you
need to uninstall the app from your phone then reinstall again.
Page 22
User’s Manual
EN
;
22
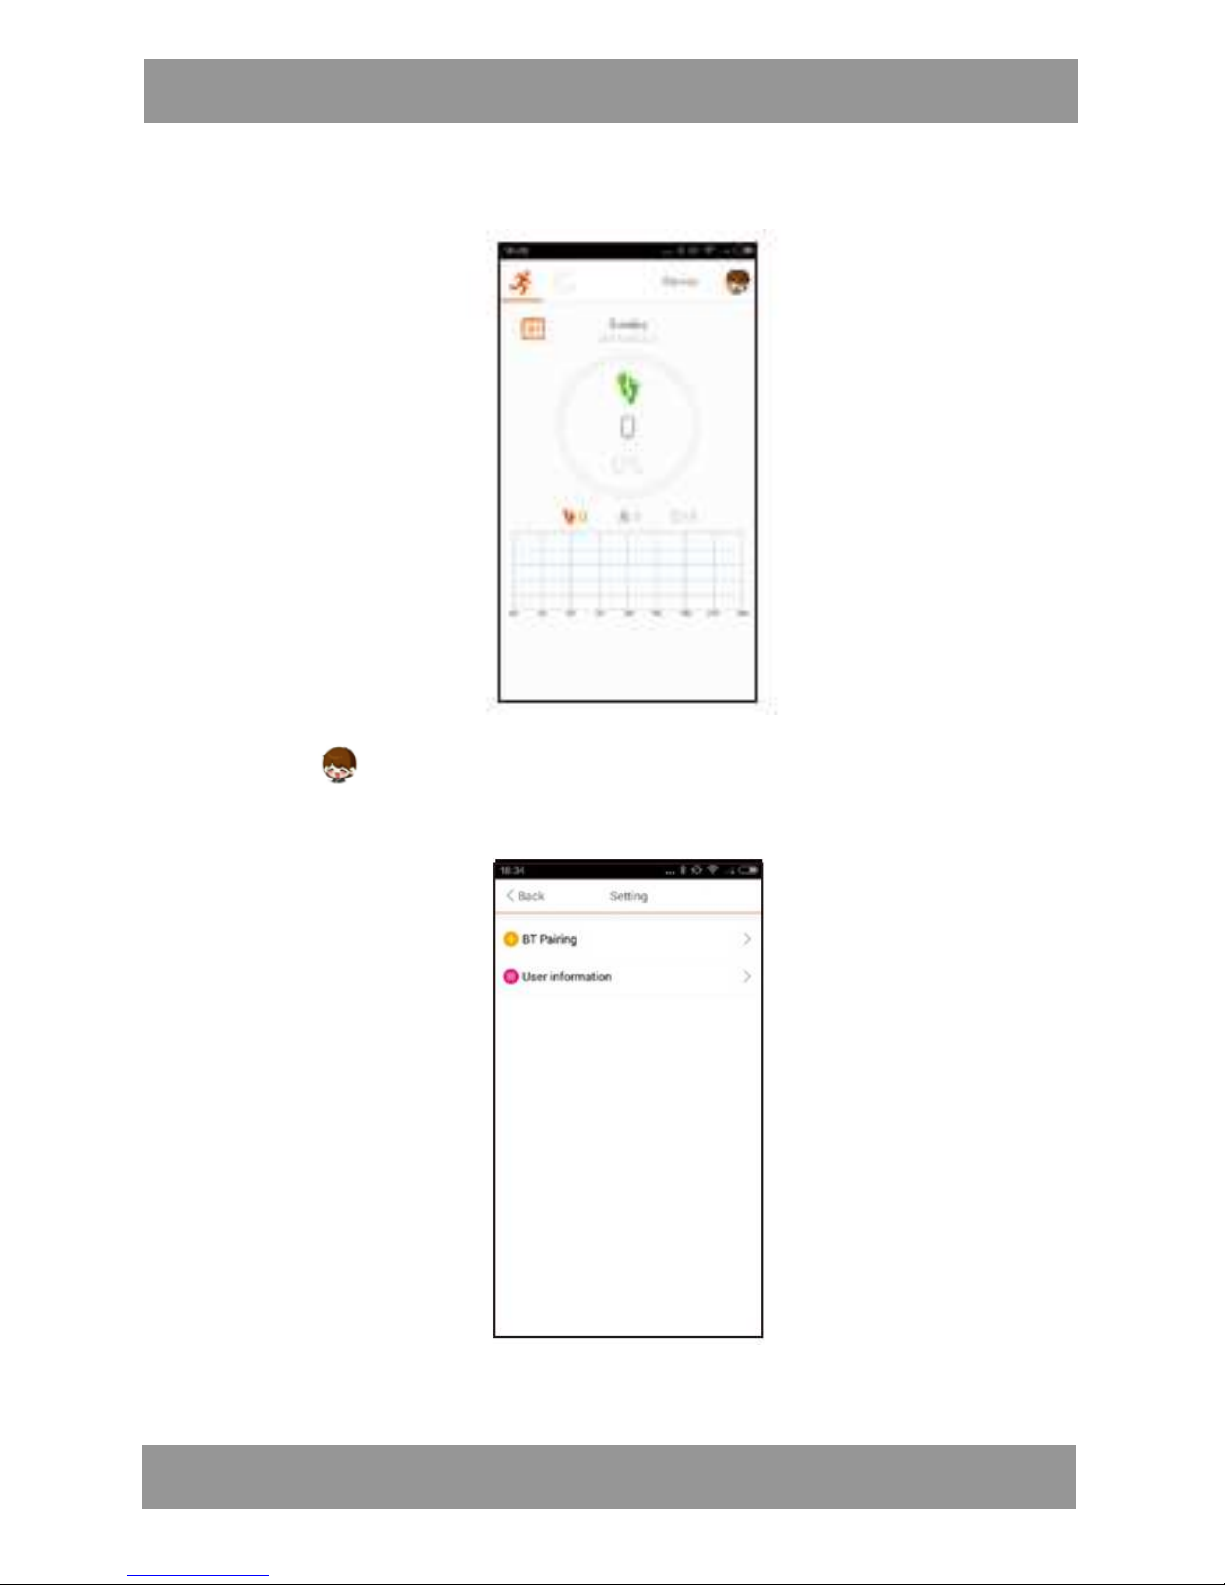
3. When finished, touch the “Confirm” Button on the right-top screen to save your
settings. The following picture will appear:
4. Touch the (or your personal picture if set) Button on the screen to enter
to Setting menu, the following picture will appear:
Page 23
User’s Manual
EN
;
23
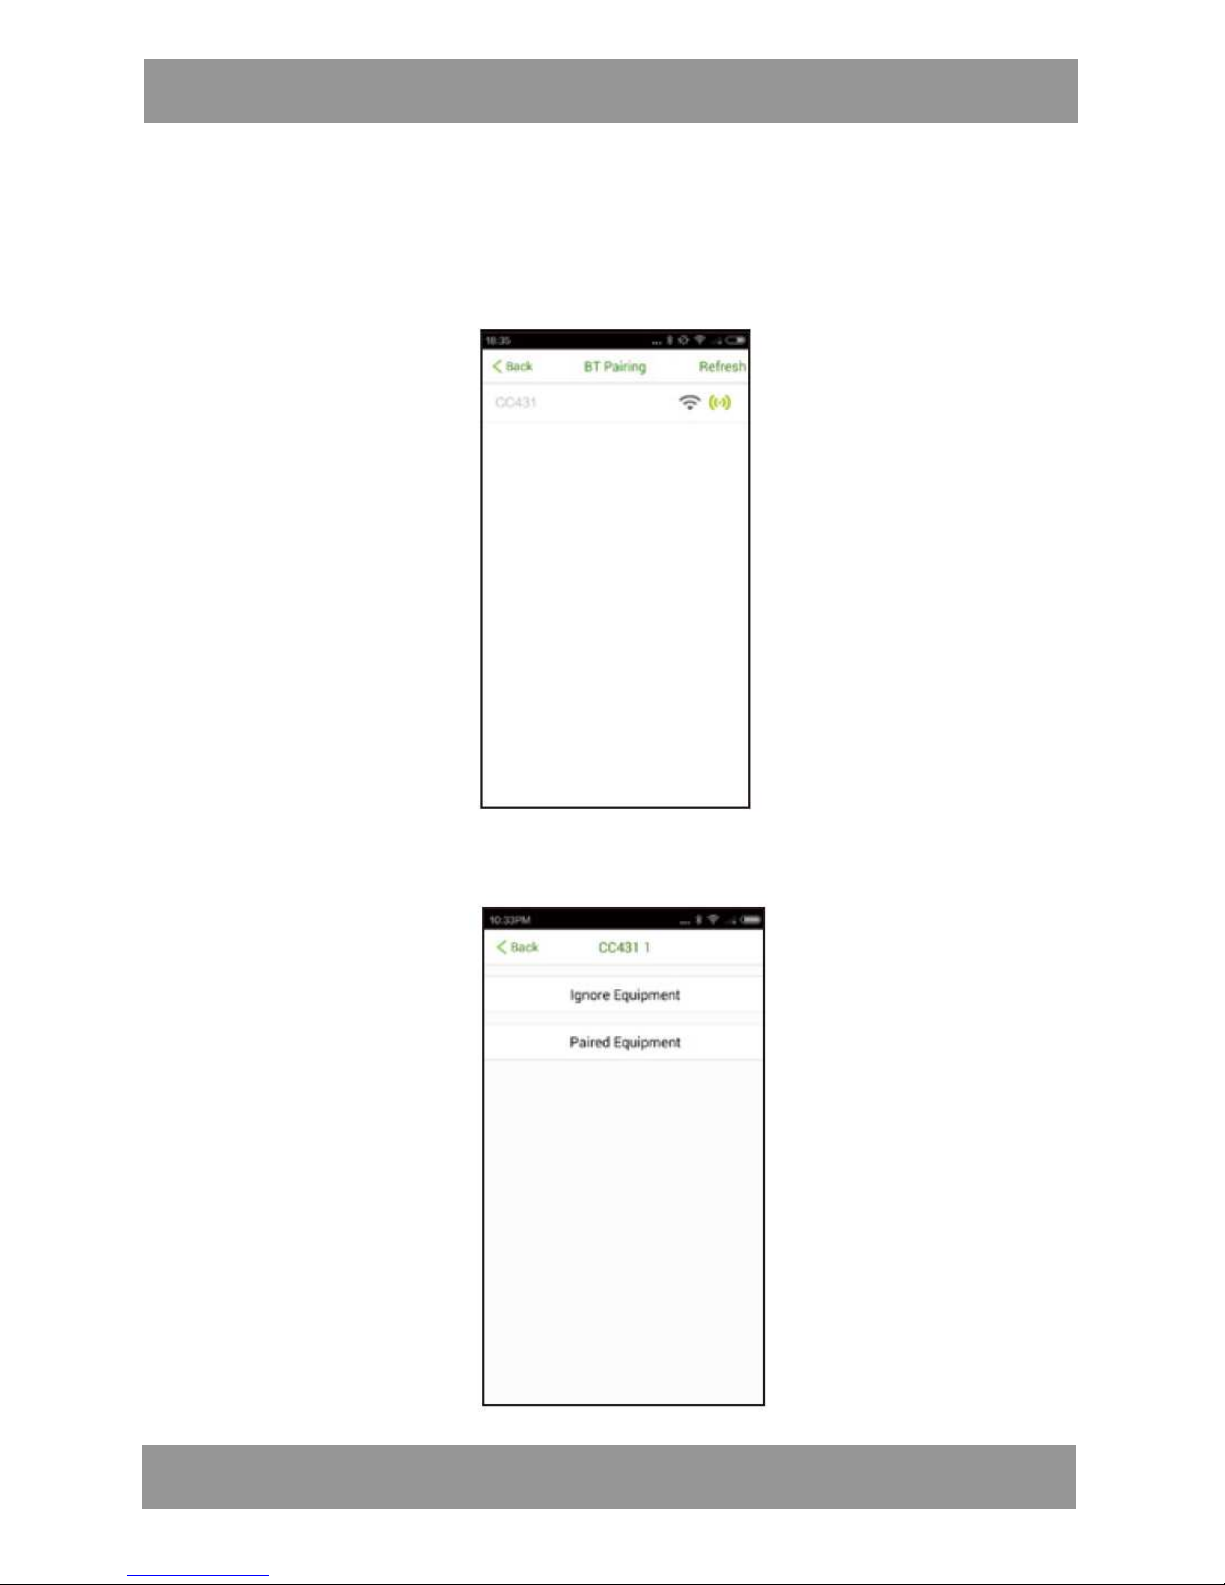
5. Touch the “ BT Pairing” Button on the screen to search all available units. The
following picture will appear:
6. Touch the “SWT302 1” Button on the screen, the following picture will appear
on the screen:
Page 24
User’s Manual
EN
;
24
Note: If more than one units are searched, the unit will automatically name it to
“SWT302 1”, “SWT302 2”, ….etc. Select and touch the correspondence one you
desired to start pairing.
7. Touch the “Paired Equipment” Button on the screen to start pairing. When
paired, a small “ ” will pop up on the screen as follows:
IMPORTANTS:
~ During pairing, make sure the display of the unit is illuminated. If it is turned off,
touch the Mode Button to turn it on again.
~ During pairing, the following warning pages may occur, touch the “Allow”
Button to continue pairing
Page 25
User’s Manual
EN
;
25
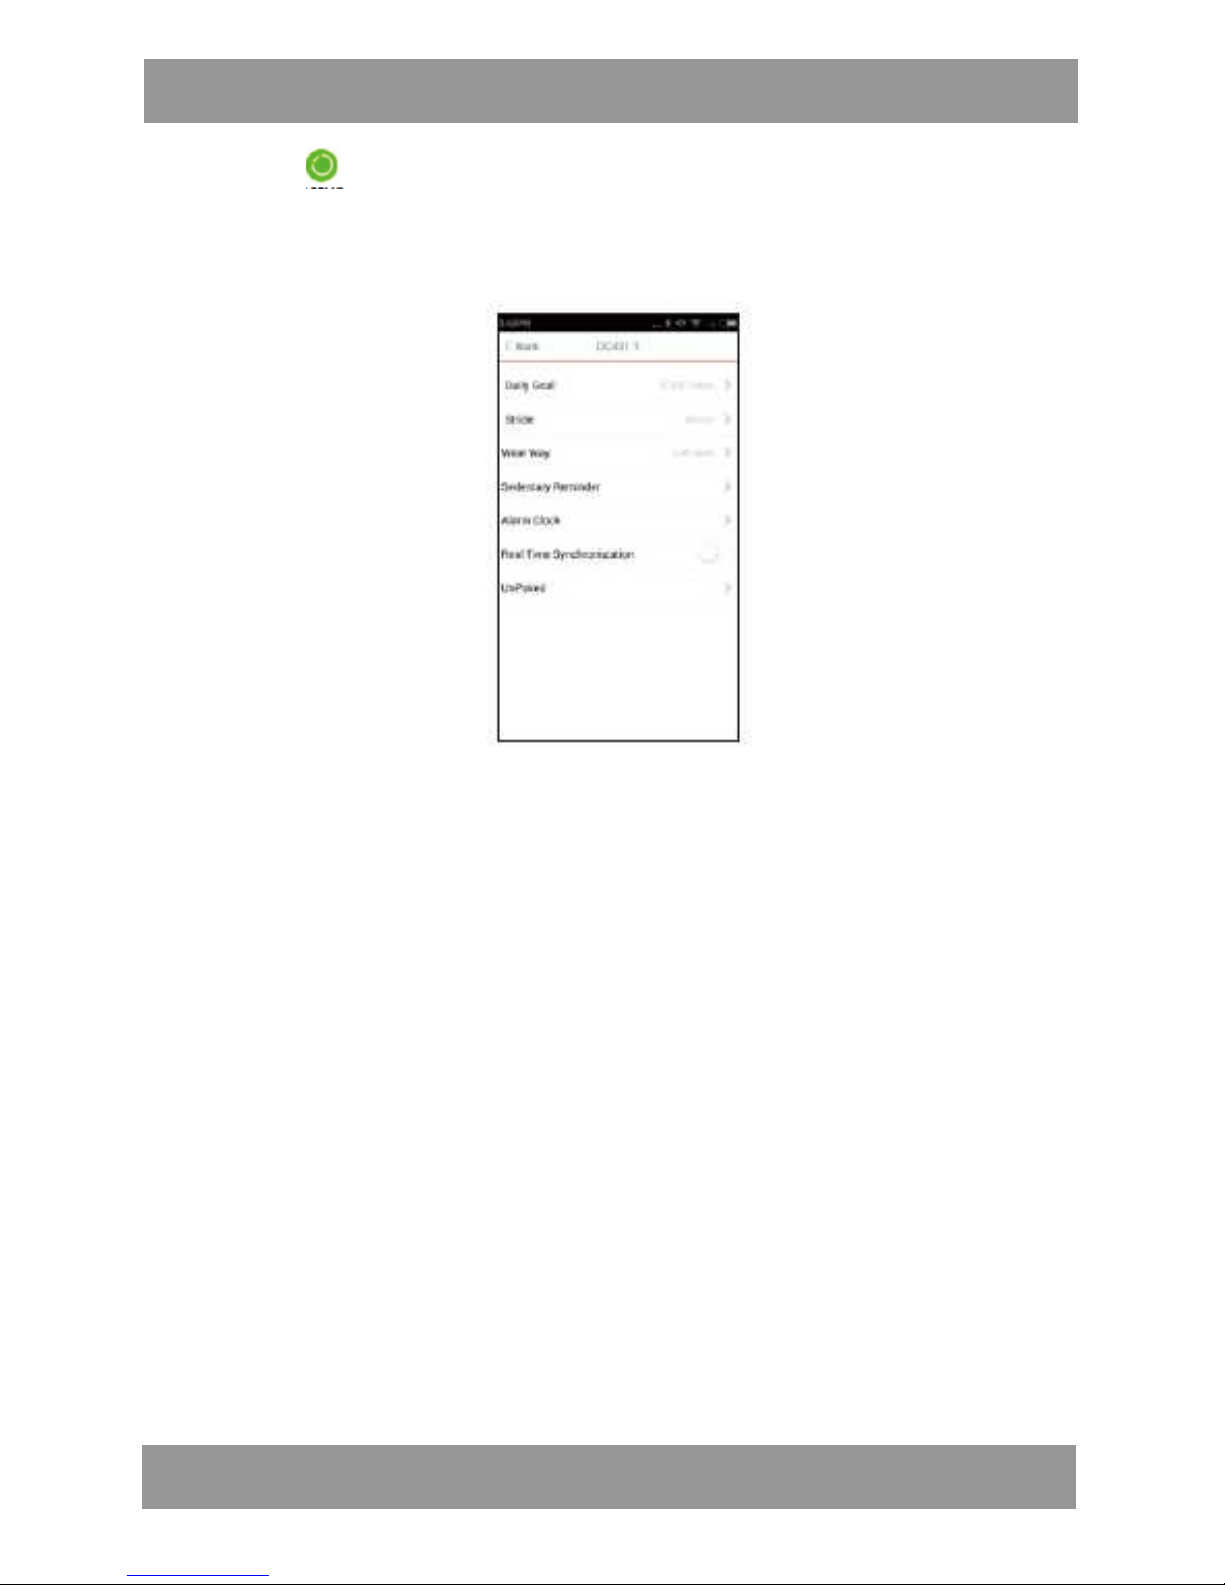
8. Touch the „SWT302” Button on the screen, the following picture will
appear. Touch the desired button on the screen to enter. Then start to set your
personal
information into the phone as on the screen instructions as follows:
~ Daily Goal: To set or reset the daily goal.
~ Stride: To set or reset the distance of your stride.
~ Wear Way: If you wear the unit on left hand then set it t o “ L e f t h a n d ”. If
you wear the unit on right hand then set it to “Right hand”.
~ Sedentary Reminder: To set or reset the alarm of the duration you have no
motion. NOTE: After setting, make sure you have set the “Switch” to ON to
activate the alarm.
~ Alarm Clock: To set or reset the alarm time. (Up to 5 alarm time can be set.)
Notes: When alarm goes off, touch the Mode Button on the unit to shut it off.
~ Real Time Synchronization: To activate or turn off the Real Time Synchronization
function.
~ UnPaired: Unpaired the unit and phone.
9. After setting, touch the “<Back” Button on the screen twice to return to home
page.
10. At home page, slide the picture downward to start synchronization. After
synchronization, the current time as the phone will auto sent into the unit.
IMPORTANT: During synchronization, make sure the display of the unit is
illuminated. If it is turned off, touch the Mode Button to turn it on again.
Page 26
User’s Manual
EN
;
26
OPERATIONS
iPhone:
BT (BLUETOOTH) PAIRING:
In first time use, pair the unit to your iPhone as below:
1. After installation, find the app Isport Tracke r in your iphone then open it, the
following figure will appear on the screen:
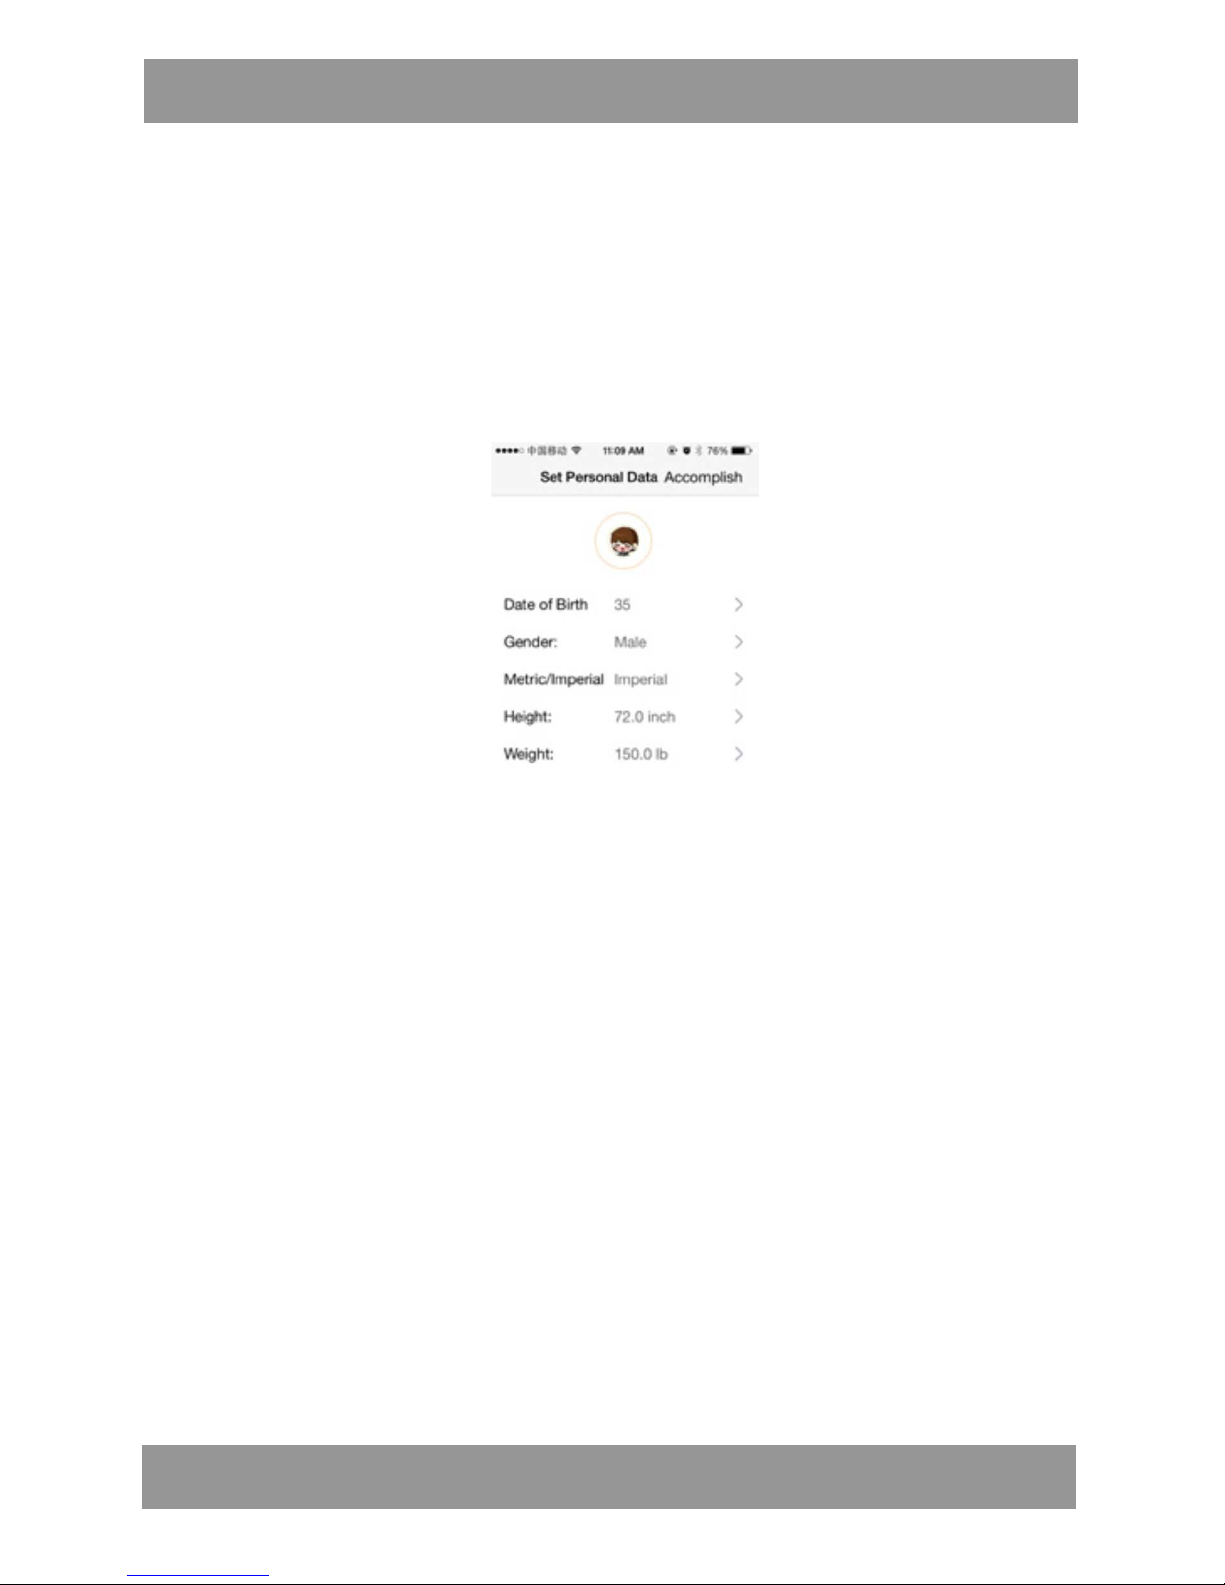
2. Touch the desired button on the screen to enter. Thenstart to set your personal
information into the iphone as the on screen instructions as follows:
~ ~Date of Birth: Set or reset your age.
~ Imperial/Metric: Set imperial/metric unit.
~ Gender: Set or reset your gender.
~ Height: Set or reset your height in inch.
~ Weight: Set or reset your weight in lbs.
NOTES: Imperial/metric can’t be changed once saved.
Photo: Assign your personal photo into the app
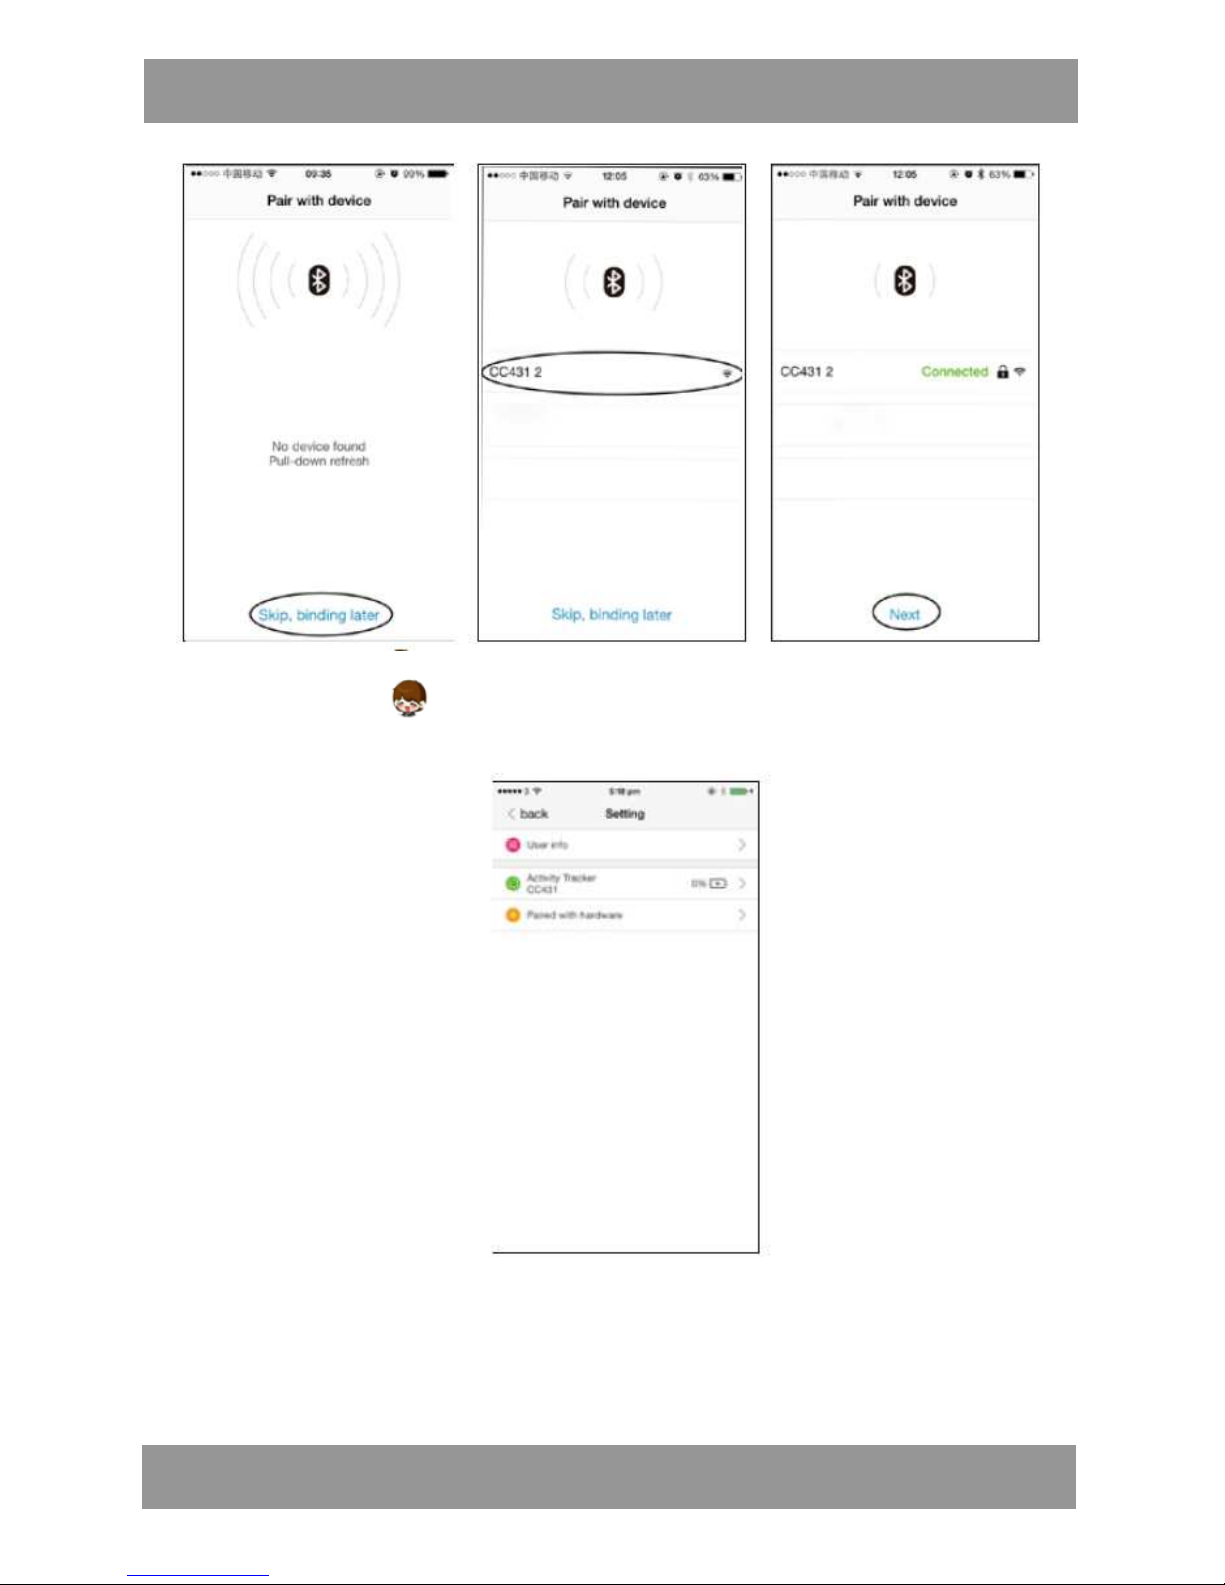
3. When finished, touch the “Accomplish” Button on the right-top corner on the
iphone's screen. The follows picture will appear. Touch the SWT302 Button to
start connecting. When paired, green "Connecting" will appear on the screen.
Touch the Next
Page 27
User’s Manual
EN
;
27
4. Touch the Button (Or your personal picture if set) on the unit to enter, the
following figure will appear on the screen:
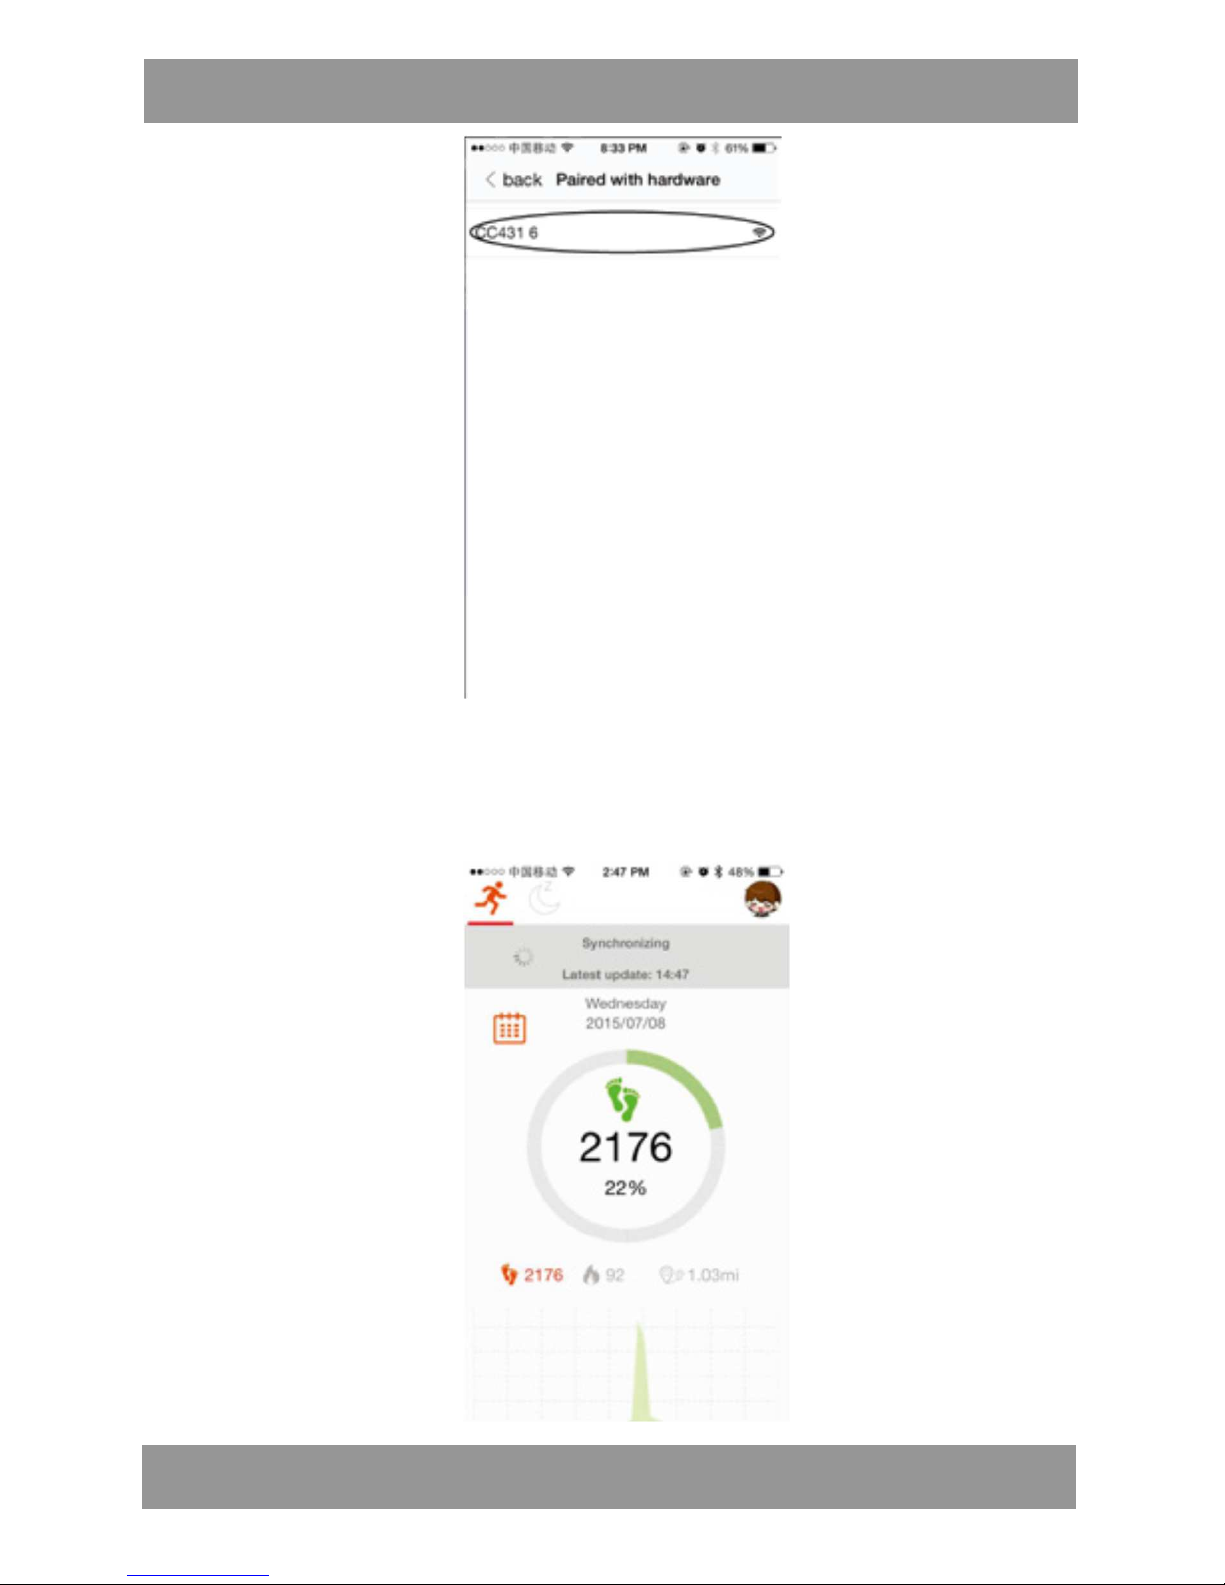
5. Touch the “ Paired with hardware” Button on the screen to read the
information of the BT connected device or touch the Unpair Button to disconnect
the BT connection. Touch the “< back” Button three times to exit to main page.
Page 28
User’s Manual
EN
;
28
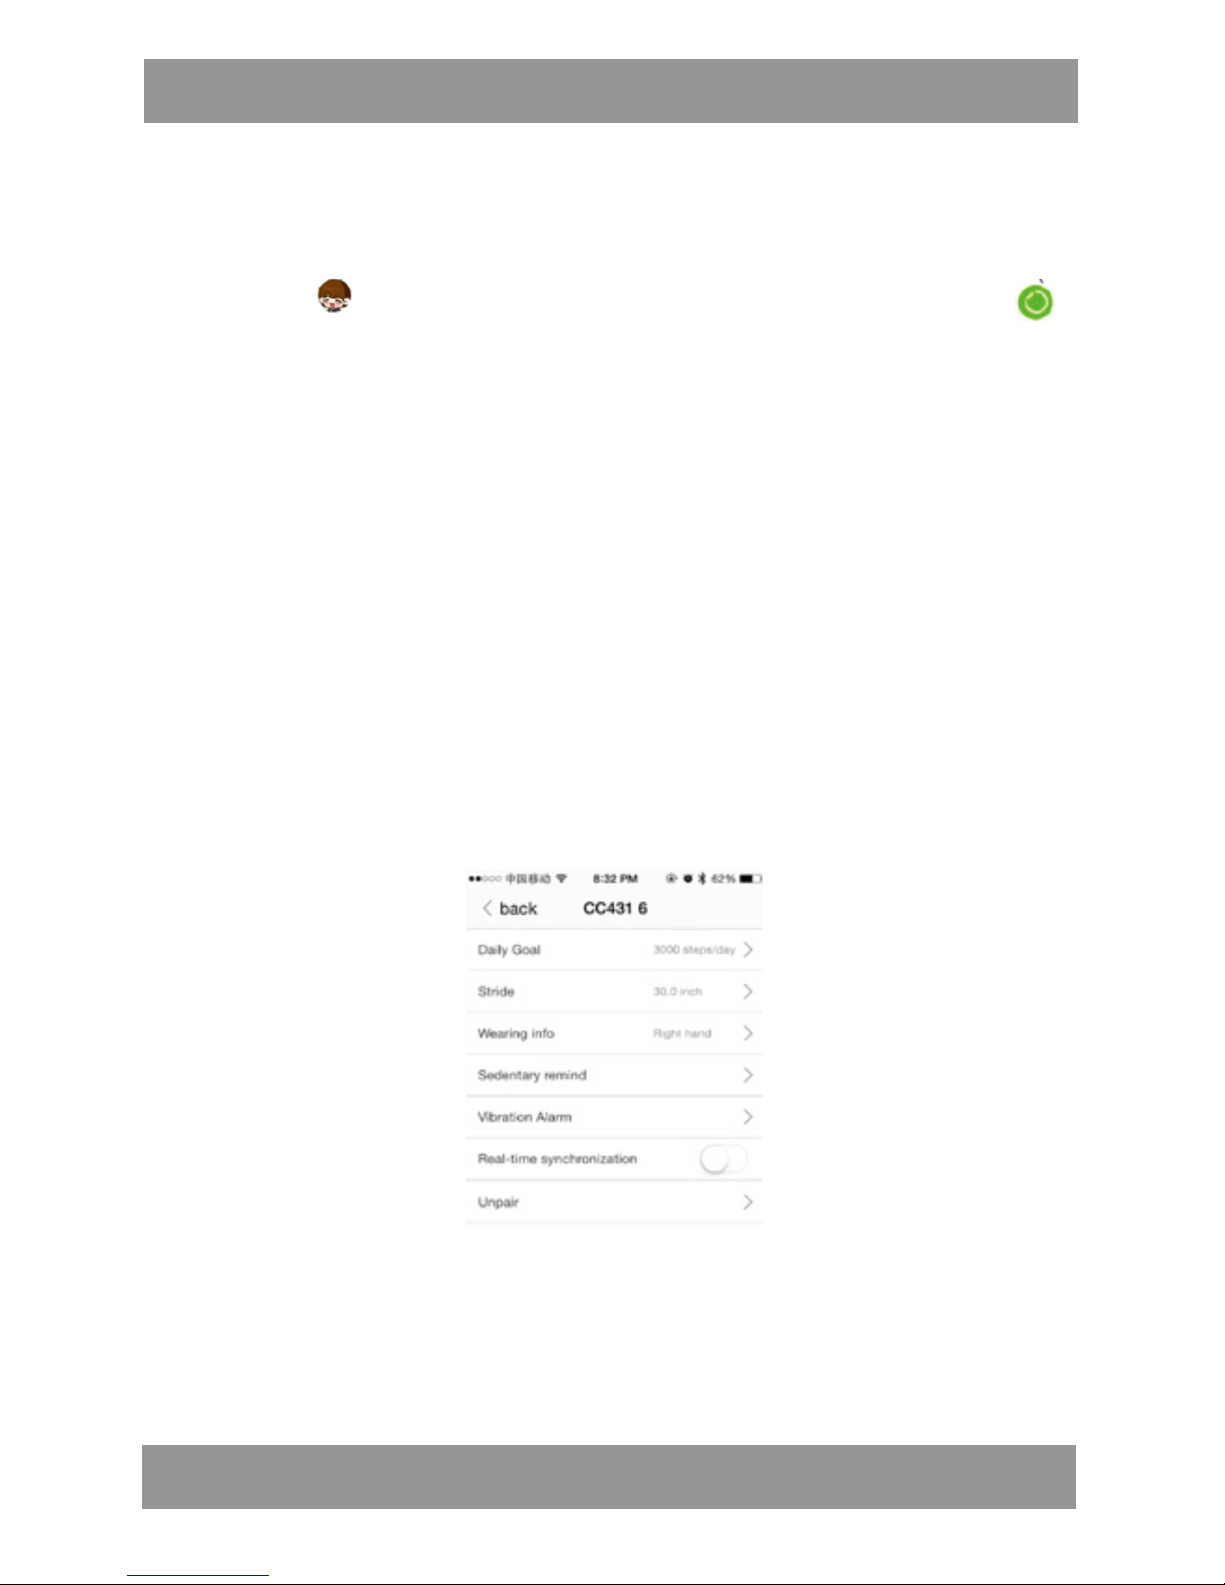
6 . On main page, slide the picture on the screen downward to start pairing. After
paired, touch the "< back" Button on the screen, the follows picture will occur.
Page 29
User’s Manual
EN
;
29
Note: If more than one units are searched, the unit will automatically name it to
“SWT302 1”; “SWT302 2”….etc. Select and touch the correspondence one to start
pairing.
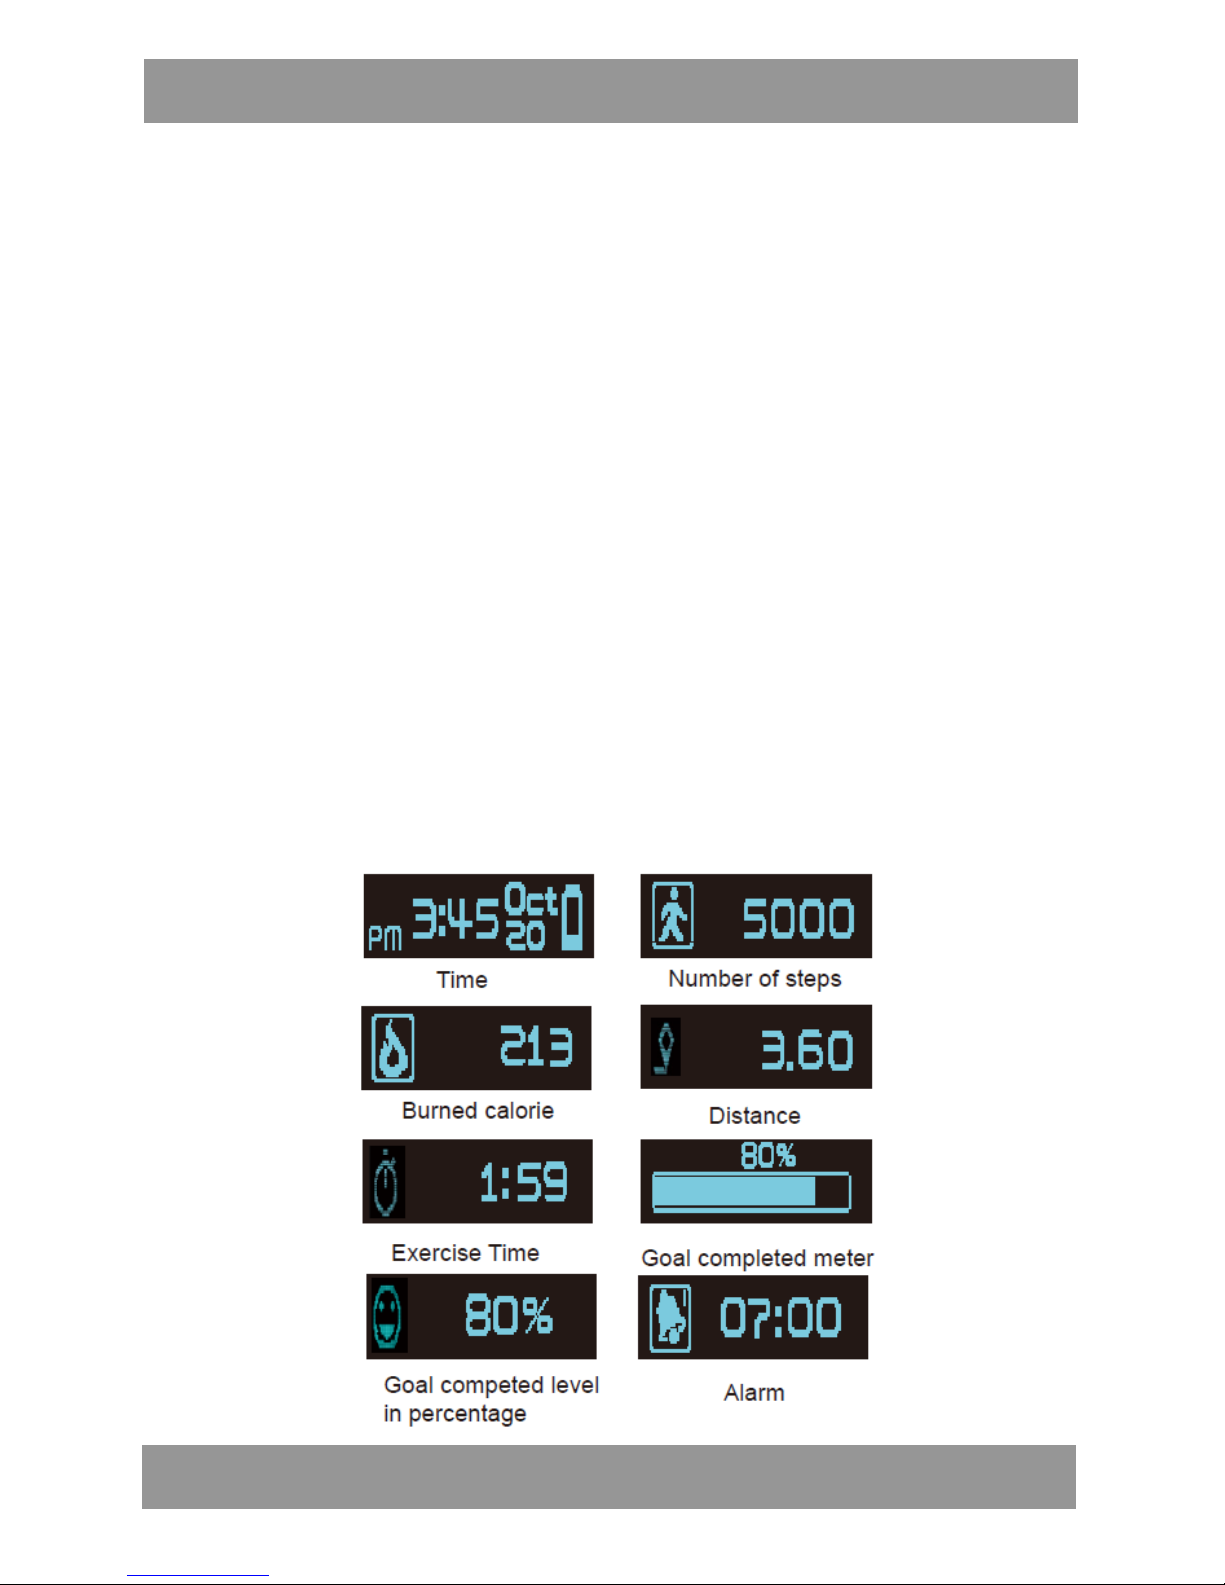
7. Touch the Button (or the personal picture if set) again then touch the
Activity Tracker” Button on the screen, the following picture will appear. Touch
the desired button on the screen to enter. Then start to set your personal
information into the iphone as the on screen instructions as follows:
~ Daily Goal: To set or reset the daily goal.
~ Stride: To set or reset the distance of stride.
~ Wear Way: If you wear the unit in left hand then set it
to “Left hand”. If you wear the unit in right
hand then set it to “Right hand”.
~ Sedentary Reminder: To set or reset the alarm of the
duration you have no movement. NOTES:
After setting, make sure you have set the
“Switch” to ON to activate the alarm. When alarm goes off, touch the Mode
Button on the unit to shut it off. desired button on the screen to enter. Then start
to set your personal information into the iphone as the on screen instructions as
follows: Touch the " " Button (or the personal picture if set)
Page 30
User’s Manual
EN
;
30
~ Vibration Alarm: To set or reset the alarm. (Up to 5 alarm time can be set).
NOTES: After setting, make sure the switch on the right of screen was turned to
ON then touch the Save Button on the right-top of screen to save the settings.
Otherwise, alarm will not activate.When alarm goes off, touch the Mode Button
on the unit to shut it off.
~ Real Time Synchronization: To activate or turn off the
Real Time Synchronization function.
~ UnPaired: Unpaired the unit and phone.
8. A fter setting, touch the “<back” Button on the screen twice to return to home
page.
9 . In home page, slide the picture downward to start synchronize.
IMPORTANT: During synchronization, make sure the display of the unit is
illuminated. If it is turned off, touch the Mode Button to turn it on again. Ever
times when you finished set or reset the data, make sure you were done the
synchronize. Otherwise, nothing changed.
CHECK AND READ THE RECORDS
After you’ve done the exercise, you can check and read the records as follows:
Unit:
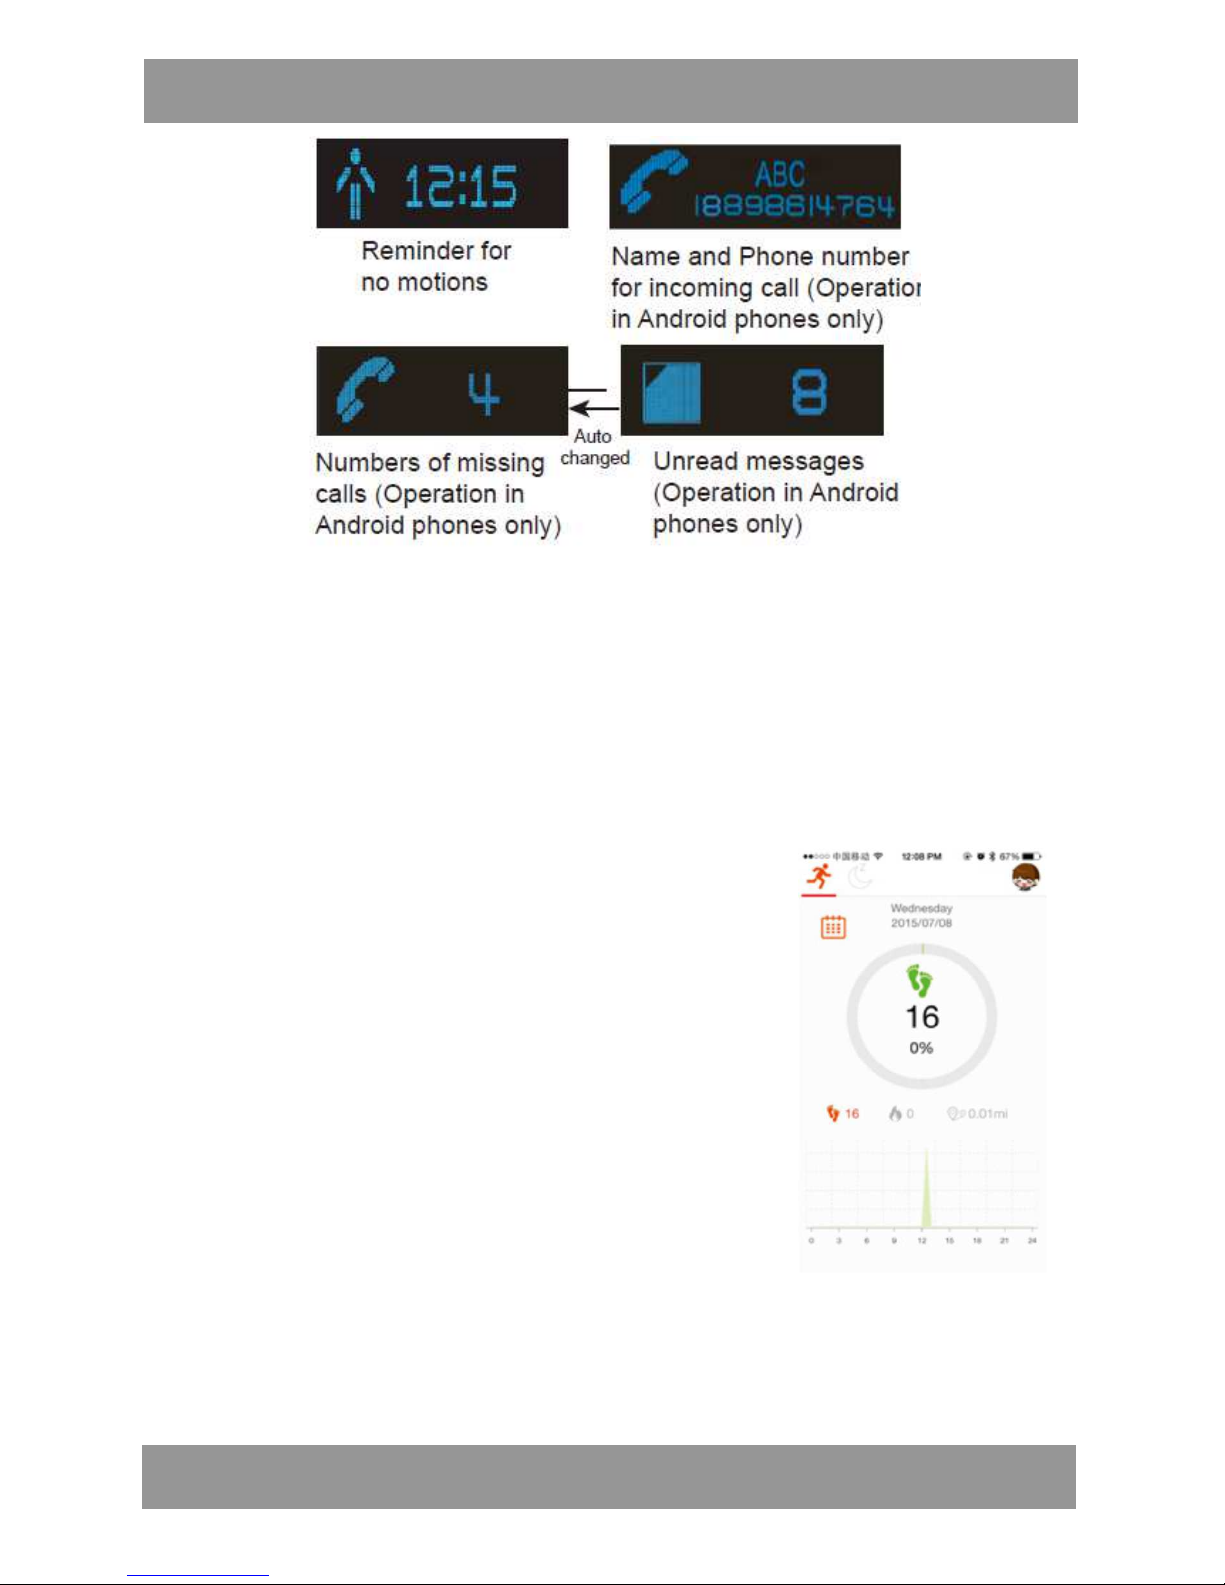
1. Touch the Mode Button on the unit repeatedly to read the records and time as
below:
Page 31
User’s Manual
EN
;
31
Phone:
1. Touch the Mode Button on the unit to turn on the display. Pairing the unit to
the phone as previous procedures.
2. After paired the unit to the phone. Enter to home page, the follows picture will
appear on the phone screen.
3. Slide the picture on the phone downward to start
synchronization.
IMPORTANT: During synchronization, make sure
the display of the unit is illuminated. If it is turned off,
touch the Mode Button to turn it on again.
4. After synchronization, touch the correspondence
button on the phone screen or slide the picture to left,
right or downward to read the records.
SLEEP MONITOR
To monitor and count your sleep time:
1. When start sleeping, touch the Mode Button on the unit to turn on the display
mode.
2. Press the Mode button again to exit from the main time display. (Note: To
avoid sleep monitor active accidentally.
Page 32
User’s Manual
EN
;
32
Sleep monitor mode is not allowed to be set in the main time display mode.)
3. Press and hold the Mode Button approximate 5 seconds to enter sleep mode,
the following picture will appear on the unit’s display. Sleep counter will activate.
4. When wake up, touch the Mode Button on the unit to turn on the display.
5. Press the Mode Button again to exit from the main time display mode.
6. Press and hold the Mode Button approximate 5 seconds to exit from sleep
monitor mode, the following picture will appear on the unit’s display
7. A few seconds later, the main time display mode will appear. seconds to exit
from sleep monitor mode, the following picture will appear on the unit’s display.
IMPORTANTS
2. Please always wear the unit on your hand and turn it
1. Every time when you set or reset the information, you
MUST synchronize the new information into your unit again. Otherwise, nothing
will be changed on. Otherwise, the calculation will be incorrect.
3 . During the sleeping period, the step counter will NOT
operate.
4. Always synchronize the records from the unit to your smartphones. Otherwise,
the past 14th day’s record in the unit will be erased automatically.
GENERAL SPECIFICATION
Power Source: Built-in DC 3.7V, 70mAH (0.259WH)
Li-poly rechargeable battery; Recharge by
DC 5V, 100mA, through USB contact
BT Version:
BT Effective Range:
Battery Power in Standby Mode:
Page 33

User’s Manual
EN
;
33
BLE 4.0/4.1/4.2
32 Feet in open area.
120 Hours
Record Keeping: 14 Days
ACCESSORY:
1 x User’s Manual
SPECIFICATIONS AND ACCESSORIES ARE SUBJECT TO CHANGE WITHOUT NOTICE
Page 34
User’s Manual
EN
;
34
Note!
Product design and Technical parameters may be change without notice.
This mainly concerns parameters technical, software and user manual
present. User’s Manual is a general orientation on service product.
Manufacturer and distributor do not assume any responsibility as
compensation for any inaccuracies errors in the descriptions appearing in
this user manual.
Correct Disposal of this product.
This marking indicates that this product should not be
disposed with other household wastes throughout the EU. To
prevent possible harm to the environment or human health
from uncontrolled waste disposal, recycle it responsibly to
promote the sustainable reuse of material resources. To
return your used device, please use the return and collection
systems or contact the retailer where the product was
purchased. They can take this product for environmental safe
recycling.
Page 35

Instrukcja Obsługi PL
;
35
NOTATKI / NOTES
Page 36
Instrukcja Obsługi PL
;
36
INFOLINIA SERWISOWA
tel: +48 22 332 34 63 lub e-mail: [email protected]
od poniedziałku do piątku w godz. 9.00-17.00
Producent zastrzega sobie możliwość wprowadzenia zmian w specyfikację
produktu bez uprzedzenia.
Strona główna www.manta.com.pl
Strona wsparcia technicznego www.manta.info.pl
SERVICE INFOLINE
tel: +48 22 332 34 63 or e-mail: [email protected]
from Monday to Friday. 9.00-17.00
The manufacturer reserves the right to make changes to product
specifications without notice.
Home: www.manta.com.pl
Home support: www.manta.info.pl
Made in P.R.C.
FOR MANTA EUROPE
 Loading...