

Page 1
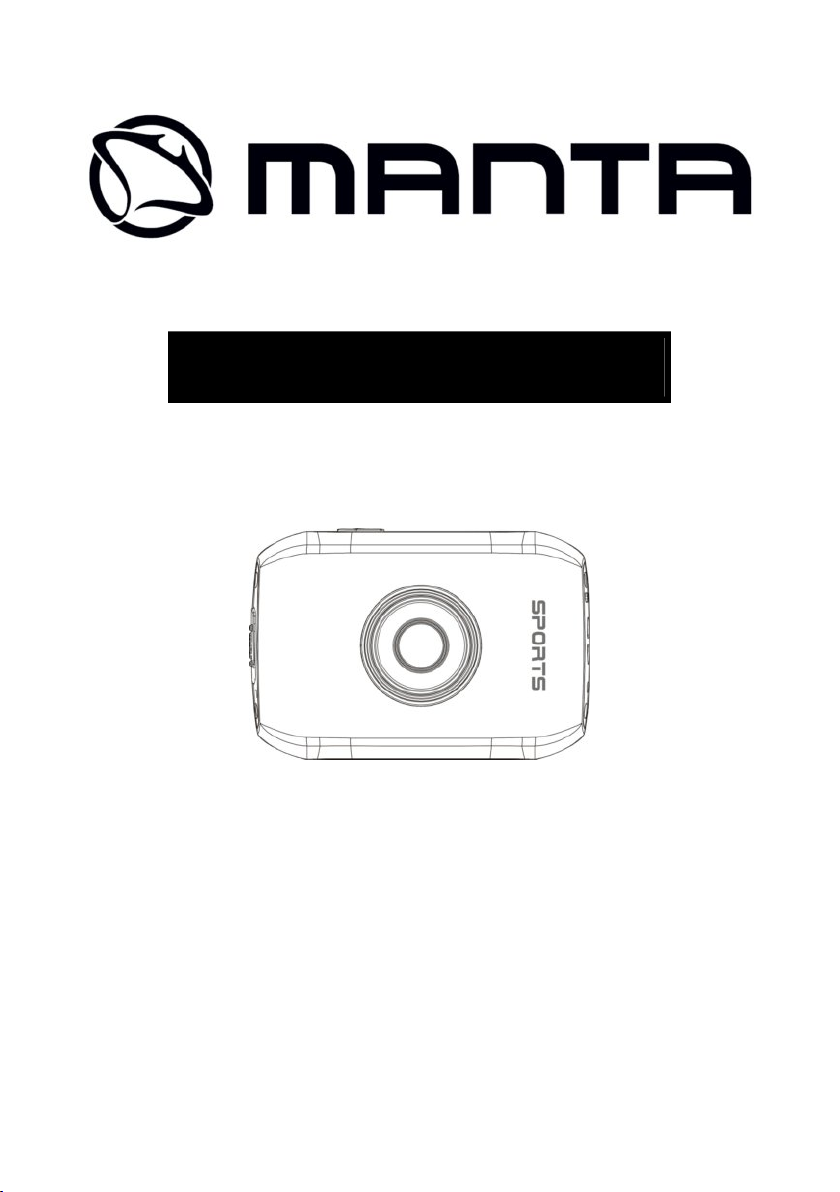
Kamera sportowa
MM337
Instrukcja obsługi
User’s Manual
Page 2

MM337 PL
2
Spis treści
Przestrogi………………………………………………………………………………………..……………………..
O produkcie……………………………………………………………………………………..…………………….
Korzystanie z obudowy wodoodpornej ……………………………………………..………………….
Wymagania systemowe………………………………………………………………..……………………….
Wygląd i wprowadzenie…………………………………………………………………..……………………
Wymiana wbudowanej baterii litowej……………………………………………….………………….
Zastosowanie karty pamięci……………………………………………………………..…………………..
Włącznik On/Off………………………………………………………………………………..…………………..
Przełączanie trybu funkcji………………………………………………………………………………………
Wskaźniki………………………………………………………………………………………..……………………..
Tryb wideo………………………………………………………………………………………..…………………..
Nagrywania wideo podczas jazdy…….……………………………………………………………………
Tryb przechwytywania……………………………………………………………………………………..……
Tryb odtwarzania……………………………………………………………………………………..……………
Menu ustawień………………………………………………………………………………………..……………
Ustawianie daty i czasu………………………………………………………………………………………….
Parametry techniczne…………………………………………………………………………………………….
Precautions………………………………………………………………………………………..…………………..
About the Product …………………………………………………………………………………………………
Waterproof Case Using Notice……………………………………………………………………………….
System Requirements……………………….……………………………………………………………………
Appearance and key introduction…………………………………………………………………………..
Charge built-in lithium battery……………………………………………………………………………….
Use memory card……………………………………………………………………………………………………
Power On/Off…………………………………………………………………………………………………………
Functional mode switchover…………………………………………………………………………………..
Indicators……………………………………………………………………………………………………………….
Video mode……………………………………………………………………………………………………………
Driving video recording…………………………………………………………………………………………..
Capture mode………………………………………………………………………………………………………..
Playback mode……………………………………………………………………………………………………….
System setup menu………………………………………………………………………………………………..
Setting date and time……………………………………………………………………………………………..
Technical Parameters……………………………………………………………………………………………..
Page 3

MM337 PL
3
Page 4
MM337 PL
4
Uwaga!
Konstrukcja produktu i parametry techniczne mogą ulec zmianie bez
wcześniejszego powiadomienia. Dotyczy to przede wszystkim parametrów
technicznych, oprogramowania oraz podręcznika użytkownika. Niniejszy
podręcznik użytkownika służy ogólnej orientacji dotyczącej obsługi produktu.
Producent i dystrybutor nie ponoszą żadnej odpowiedzialności tytułem
odszkodowania za jakiekolwiek nieścisłości wynikające z błędów w opisach
występujących w niniejszej instrukcji użytkownika.
Page 5

MM337 PL
5
INFOLINIA SERWISOWA
tel: +48 22 332 34 63 lub e-mail: serwis@manta.com.pl
od poniedziałku do piątku w godz. 9.00-17.00
Producent zastrzega sobie możliwość wprowadzenia zmian w specyfikację
produktu bez uprzedzenia.
Strona główna www.manta.com.pl
Strona wsparcia technicznego www.manta.info.pl
Made in P.R.C.
FOR MAN TA EUROPE
Page 6

MM337 PL
6
PPrreeccaauuttiioonnss
AAbboouutt tthhee PPrroodduucctt
WWaatteerrpprrooooff CCaassee UUssiinngg NNoottiiccee
Before using the camera, please carefully read th is user’s manual to ensure a correct and safe use of the camera, and to
achieve the best performance and a prolonged lifespan of it.
u
Keep the camera away from direct sunlight, and keep lens of the camera a way from directing sunshine. Otherwise,
image sensor of the camera may be damaged.
u
Please be careful with the camera to av oid water or sand entering the camera while using it on sand beach o r by water.
Water, sand, dust or particles containing salt may damage the camera.
u
Keep the camera away fr om contacting dust and chemical materials. It is a must to keep the camera at a cool and dry
place with good ventilation. Do not place th e camera at a place with high temperature, humidity or with much d usts to
prevent abnormal operation caused to the camera.
u
In case of dirt or dust a ccumulated on the camera, clean them with a piece of soft, clean and dry cloth. In case of sand
on the camera or lens, gently blow off the sands.
u
To clean the surfawce of the camera lens, it is firstly to blow off the sands on it, and then clean it with a piece of mop or
paper suitable for optical instruments. If needed, please clean camera with cleanser. It is strictly prohibited to clean the
camera with organic solution.
u
Touching surface of the lens with finger is strictly prohibited.
u
In case of the first time of using memory card of the camera, please firstly make a back-up of the data, and then format
the memory card in a one-off way.
u
External Micro SD card is a precise electronic component. The followings may cause loss or damage of the data:
1. Improper use of the memory card.
2. Bended card, fallen cards or impact against the memory card.
3. High temperature and humidity or direct sunlight.
4. Static field or electromagnetic field nearby.
5. Taking out the memory card or interference with the camera power supply during visiting the memory card with the
camera or computer (meaning reading, writing or formatting).
6. Contact metal surface of the memory card with finger or metal articl e.
7. Beyond lifespan of the memory card.
u
This product features compact size and easy installation;
u
The product features high definition video a nd dynamic images. Even under low illumination, video can be recorded,
and it also supports AVI video format.
u
Support VGA (640x480) and HD (1280x720) capturing.
u
Three sizes (including 5M, 3M and 1M) of image are for option.
u
This product supports time and date watermark function, and time and date can be synchronously d isplayed while
recording.
u
Support high-speed USB2.0.
u
Support max. 32G Micro SD card.
u
This product adopts loop coverage recording method and t he new recording can automatically cover the former images
achieving an endless rolling recording, take care of save all images when the message “Full memory” appear on the
screen, otherwise all new captures will erase the oldest.
u
This product is equipped with on-site replay function. You may check the vid eo recorded on-site with the display.
Before sealing the waterproof case, keep the camera housing’s rubber seal clean, a single hair or grain of sand can cause a
leak. You can test by closing the case without inserting the came ra. Submerse the case completely in water for about a
minute. Remove the case from the water, dry off its exterior with a towel, then open the case. If the entire interior is dry, the
case is safe for use under water.
u Remember to put the Mode Switch in your desired recording position before inserting the camera in the waterproof
case. There is no external button for the Mode Switch.
u After every use in salt water you will need to rinse the outside of the housing with non-salt water and dry. Not doing this
can eventually cause corrosion of the hinge pin and salt buildup in the seal, which can cause failure.
u To clean th e seal, rinse in fresh water and shake d ry (drying with a cloth may cause lint to compromise the seal). Re-
install the seal into the grooves in the backdoor of the housing.
Page 7

MM337 PL
7
SSyysstteemm RReeqquuiirreemmeennttss
AAppppeeaarraannccee aanndd kkeeyy iinnttrroodduuccttiioonn
Power
On/Off
Shutter
Mode switch:
-
Photograph
-
Video
-
Replay
Lens
Charging indicator
Operation indicator
Up key
OK key
Down key
LCD TFT
Operation system Microsoft Windows2000, XP, Vista, 7, or more
CPU Above Intel Pentium III 800MHz or equivalent CPU
Memory Minimum 512MB
Sound card, video card Sound card and video card should support DirectX8 or higher version
Hard disk Over 500MB free space
Others 1 standard USB1.1 or USB2.0 interface
System Requirements
Key/Indicator Function
Power On/Off
Shutter
Up key
OK key Open/exit from menu. Stop playing (when replaying video).
Down key Digital zoom out (capture/video mode); menu selection (after opening the menu).
Mode switch Switch over among modes of capture, video and replay.
Operation indicator
Power the camera on or off. When opening the menu, switch over between normal
(effect parameters and replay of image, video) and setup menu.
In recording video mode, it is used to start/stop recording. In capture mode, i t is used
as a shutter. In replay mode; it is used to play the video. When operating the menu, it is
used to confirm the selection.
Digital zoom in (capture/video mode); menu selection (after opening the menu); pau se,
continue playing (when playing and recording video in replay mode).
The upper one is a charging
indicator.
The lower one is an
operation indicator.
In power-off state, it keeps constant lighting when the
charger is connected for charging.
It flashes once during capturing, and it keeps constant
lighting when connected with computer portable disk.
Page 8

MM337 PL
8
SSttaarrtt UUssee
USB Cable
Charger indicator
1. Charge built-in lithium battery
In power-off state, when the camera is connected with computer, charging begins. At this time, the charger indicator lights
and it turns off when charged full. Generally, it costs 2-4 hours to cha rge full.
2. Use memory card
1. Follow the instructions carved by slot of the memory card, it is to insert FT card into the card slot till entirely inserted.
2. To take the FT card out, after gently pressing the end of the memory card inwards, the card will reject out.
Note: The camera is not equipped with a built-in memory, and thus a memory card is required.
3. Power On/Off:
3.1 Power-on: If to press and hold POWER key for 3 seconds, the screen starts up and the camera enters startup state.
3.2 Power-off: In idle state of the camera, if to click POWER key, the camera turns off.
Automatic power-off: When idle time set for the camera reaches, it automatically turns off to save power. The default time
of the system automatic power-off is 5 minutes;
3.3 Power-off due to low battery: In case of extremely low battery, the icon “ ”appears on the LCD screen. Please timely
charge the battery. When the icon turns red and flashes, the camera will automati cally power off.
4. Functional mode switchover
The camera is equipped with three modes: capture, video and replay mode. After power-on, the modes can be switched over
with MODE switch.
Capture mode: Take pictures.
Video mode: Record video and driving (
Replay mode: Picture and video file playback.
5min, 3min and 1min) .
Page 9

MM337 PL
9
5. Indicators
Operation indicator: When the camera works (e.g. recording video, capturing or automatic screen turn-off), the operation
indicator lights.
Charger indicator: Constant lighting is to remind user that the camera is being charged.
6 Video mode
When pushing Mode switch to video mode, click shutter in preview state to start recording video; to stop video re cording,
it is to click it again. It will also automatically stop recording in case that no free room left in the memory card or the
battery is over low:
1 00:00:01:
2 :
3
recording time is 3 minutes.
4 :
5 :
6 :
adjust zoom among 1x-4x.
7 :
8 :
9
Video menu setup
In video mode, press OK key to open menu, and then press Up and Down key to select menu. When selecting menu,
background of the selected item will be highlighted. Press Shutter to enter sub-menu. In sub-menu, press Up and Down
key for selection, press Shutter for confirmation and back to main m enu. In the main menu, press OK key to exit from the
menu.
time-meter, indicating 1 second left for recording (indicating 1 second recorded during recording).
mode icon: indicates the current mode is video recording.
loop recording video time icon: indicates the current loop video
movie size: indicates the current movie size is 720P.
indicates currently a memory card is inserted.
magnification of digital zoom: press Up and down key to
battery icon: indicates current battery level.
white balance icon: indicates the current white balance mode is automatic.
metering icon: indicates it is currently the pan overall perspective metering.
▲
Video menu
Video menu options
Main menu Sub-menu Description
Movie Sizet
REC Interval
Metering
1280x720 High resolution format.
640X480 Medium resolution format.
Off Power-off driving record.
1min
3min
5min
Center Metering subject to the central area.
Multi Metering subject to multi-points.
Spot Metering subject to one point.
Set driving record to 1 minute as a repeating
phase.
Set driving record to 3 minutes as a repeating
phase.
Set driving record to 5 minutes as a repeating
phase.
Page 10

MM337 PL
10
Using automatic white balance, suitable for most
cases.
During capturing/recording video, print date o n
right bottom corner of the file.
During capturing/recording video, print date and
time on right bottom corner of the file.
White balance
Special effect
Date stamp
Auto
Daylight Suitable for daylight environment.
Cloudy Suitable for cloudy environment.
Fluorescent Suitable for fluorescent light source environment.
Tungsten Suitable for tungsten light source environment.
Normal Normal effect.
B&W White and black effect.
Sepia Sepia effect.
Negative Negative film effect.
Red Reddish effect.
Green Greenish effect.
Blue Bluish effect.
Off Turn off printing date/time on the file.
Date
Date and time
7. Driving video recording:
Push Mode switch to Video mode, open the menu, press Down key to select “REC interval” menu, press Shutter key to enter
sub-menu, “1min, 3min, 5min” recording loop mode are for free selection. Aft er pressing OK key for confirmation, press OK
key again to exit from the menu. When Shutter is pressed, it starts video recording. During video recording, the camera will
automatically stop recording video based on 1min, 3min, 5min selected, and imm ediately starts next section of video
recording (e.g. when 5min is selected in the menu, the camera will automa tically stop when 5min recording reached, and
starts next section of video recording).
WARNING ! When the memory card is full, the earliest recoded section of file will be deleted for corresponding room for
further recording, and it repeats in such a method.
▲Open video recording menu ▲Select loop recording time ▲Exit from menu and press
and press OK to confirm. Shutter to start loop video recording
Note: After selecting OFF in “REC interval” menu, the camera turns to normal video recording. Normal recording is
beyond the limit of time, and it will not stop until the memo ry card is full.
8. Capture mode:
Push Mode switch to Capture mode. Press Shutter once in preview state for a picture taken:
1 9999:
3 :
4 :
5 :
Counter: indicates quantity of pictures available
to be taken.
2 :
mode icon: indicates it is currently the mode of capture.
movie size: click this icon to select among 1M/3M/5M.
indicates currently a memory card is inserted.
magnification of digital zoom: press Up and down key to adjust zoom among 1x-4x.
Page 11

MM337 PL
11
6 :
battery icon: indicates current battery level.
7
Self-timer icon: indicates the current self-timer mode is set to 10 seconds.
8 :
white balance icon: indicates the current white balance mode is automatic.
9
metering icon: indicates it is currently the pan overall perspective metering.
Capture menu setup
In capture mode, press OK key to open menu, and then press Up and Down key to select menu. When selecting menu,
background of the selected item will be highlighted. Press Shutter to enter sub-menu. In sub-menu, press Up and Down
key for selection, press Shutter for confirmation and back to main m enu. In the main menu, press OK key to exit from the
menu.
▲
Capture menu
Capture menu options
Main menu Sub-menu Description
Resolution
Quality
Metering
White balance
Exposure /
Self-Time
Effect
Date stamp Off Turn off printing date/time on the file.
2592x1944 5 megapixel resolution.
2048X1536 3 megapixel resolution.
1280X960 1 megapixel resolution.
Super Fine Best quality image.
Fine Good image quality.
Normal General quality image.
Center Metering subject to the central area.
Multi Metering subject to multi-points.
Spot Metering subject to one point.
Auto
Daylight Suitable for daylight environment.
Cloudy Suitable for cloudy environment.
Fluorescent Suitable for fluorescent light source environment.
Tungsten Suitable for tungsten light source environment.
Off Use general single shot mode.
2s Use 2sec. delay self-timer mode.
10s Use 10sec. delay self-timer mode.
Continuous
shooting`
Normal Normal effect.
B&W White and black effect.
Sepia Sepia effect.
Negative Negative film effect.
Red Reddish effect.
Green Greenish effect.
Blue Bluish effect.
Using automatic white balance, suitable for most
cases.
Use Left and Right key to adjust exposure
compensation.
Use continuous shooting.
Page 12

MM337 PL
12
Date
Date / time
During capturing/recording video, print date o n
right bottom corner of the file.
During capturing/recording video, print date and
time on right bottom corner of the file.
9. Playback mode:
9.1 After power-on, push Mode switch back to Playback mode:
1 :
mode icon: indicates it is currently the mode of playback.
2
:
Indicates that there is one file in current folder/totally
one folder.
3 :
indicates that the current folder is locked.
4 :
indicates the current file is a video file.
9.2 Playback menu setup
In playback mode, press OK key to open menu, and then press Up and Down key to select menu. When selecting menu,
background of the selected item will be highlighted. Press Shutter to enter sub-menu. In sub-menu, press Up and Down
key for selection, press Shutter for confirmation and back to main m enu. In the main menu, press OK key to exit from
the menu.
▲Playback menu
Playback menu options
Main menu Sub-menu Description
Lock
Delete
Slide Show
Lock/unlock this file Lock/unlock this file.
Lock all Lock all files.
Unlock all Unlock al files.
One Delete the current file.
All Delete all files.
Start Start playing slide show.
Interval 1sec.~10sec.
Repeat Yes/No.
9.3 Play movie clips:
During playing, press Shutter key to play, press Up key for pause, press Shutter key to stop playing.
9.4 Delete file:
Page 13

MM337 PL
13
1)
After selecting the file to be deleted, open the menu, press Up and Down key to select “Delete”.
2)
Press Shutter key to enter, after selecting “One”, press Shutter ke y for confirmation). “All” means to delete all files.)
3)
After selecting “Yes”, press Shutter key to delete the file. When the file is deleted, press OK key to exit from the menu.
10. System setup menu:
In capture, video recording or playback mode, press OK key to open menu, and then press Power key to switch over to
setup menu. In setup menu, press Up and Down key for selecting menu. When selecting menu, background of the
selected item will be highlighted. Press Shutter to enter sub-menu. In sub-menu, press Up and Down key for selection,
press Shutter for confirmation and back to main menu. In the main menu, pr ess OK key to exit from the menu.
System setup menu options
Main menu Sub-menu Description
Auto Review
Power frequency
Power Save
Date and time / Set up date and time format.
Language / Set up the language.
Format Yes/No Format memory card.
Reset All Yes/No Back to default value.
▲System setup menu
Off No playback performed after capture.
1 second Playback performed 1 second later after capture.
3 seconds Playback performed 3 seconds later after capture.
50Hz Set to 50Hz light source frequency.
60Hz Set to 60Hz Playback performed 1 second later after capture.
1 minute Automatic shutdown performed in case of 1 minute idle.
3 minutes Playback performed 3 seconds later after capture.
5 minutes
OFF Cancel automatic shutdown.
Playback performed 5 seconds later after capture.
Setting date and time:
Press OK key to open the menu, and then press Power key to enter setup m enu. Press Down key to select “Date&Time” item,
and press Shutter key to enter setup window.
Page 14

MM337 PL
14
AApppplliiccaattiioonn iinn PPCC
TTeecchhnniiccaall PPaarraammeetteerrss
SSttaannddaarrdd ppaacckkaaggee
Locking clip
In setup window, press Power key to select the item to be adjusted (Date, time ). The selected item will be highlighted in
yellow. Then press Up key or Down key for adjustment. At completion of adjustment, press Shutter key to confirm the
adjustment, or press OK key to cancel the setup and return. Finally press OK key to exit from setup mode.
1. Connect with PC
The camera is equipped with function of plug and play. In power-in state, aft er connecting this device to the computer
with USB cable, it can be switched over to portable hard disk mode.
Portable hard disk icon will be shown in the window of “My Computer”. Imag es/video shot by you are stored in
portable hard disk folder I:\DCIM\100MEDIA (“I” indicates equipment portabl e hard disk)
2. Use computer camera function
After connecting the camera with the computer, press OK key to enter camera mode.
Image sensor 1.3 megapixel (CMOS)
Function mode Video, capture, car mode, portable disk, PC cam
Lens F3.1 f=9.3mm
Digital zoom 4x
Shutter Electronic shutter
LCD display 1.77”TFT screen
Image resolution 5M(2592×1944), 3M(2048×1536), 1M(1280×960)
Video resolution VGA: 640x480 (60 frame/second); 720P:1280x720 (30 frame/second)
White balance
Exposure -2.0 ~ +2.0
File format
Storage medium Micro SD card (Max. support 32GB)
USB interface High-speed USB 2.0 interface
Power supply Built-in 3.7V chargeable lithium battery
Dimensions
(LxWxH)
Weight Roughly 48g
Automatic /Sunny / Cloudy / Fluorescent light / Tungsten light
Video AVI
Image JPEG
67*48*29mm
Accessories: Camera
1)Waterproof case :
The transparent case included with this product allows you to mak e movies or photos in wet conditions even in the water.
To do this, simply select the desired mode (photo or video), select the desired criteria, placing the camera in the
waterproof case and take care to well close it using the locking clip located right of the case, once installed on / off and
shutter buttons can be used by pushing the push buttons located on the top of the waterproof case.
Warning :
- Once the camera installed in the case make sure that all seals are in place to prevent
water intrusions.
- Do not use aggressive product such as acetone to clean the case to prevent permanent
damage.
User Manual USB cable
Page 15

MM337 PL
15
2) Handlebar clamp:
The handlebar mounting can hang satisfactorily camera on handlebars or other bars of the same type.
3) Helmet clamp :
Camera can be fixed on a ventilated helmet as those used for the practice of moun tain bikes, with the provided strap and the
helmet kit.
Note!
Product design and Technical parameters may be change without notice. This mainly concerns parameters technical, software
and user manual present. User’s Manual is a general orientation on service product. Manufacturer and distributor do not
assume any responsibility as compensation for any inaccuracies errors in the descriptions appearing in this user manual.
Note about disposal
Older appliances, which display the symbol as shown in the picture, may not be discarded in household waste. You
must take them to a specific disposal site (check with your local autho rity) or to your retailer. These sites will
guarantee disposal without harming the environment
Page 16

MM337 PL
16
CUSTOMER SERVICE
tel: +48 22 332 34 63 lub e-mail: serwis@manta.com.pl
FROM MONDAY TO FRIDAY, IN HOURS: 9.00-17.00
The manufacturer reserves the right to make changes to product specifications
without notice.
Main page: www.manta.com.pl
Technical suport page: www.manta.info.pl
Made in P.R.C.
FOR MANTA EUROPE
 Loading...