

Page 1

MP4 Player
MM286
Instrukcja obsługi
User’s Manual
Page 2

2
Spis treści
Functions…………………………………………………………………………………………………..……… 11
Basic Functions……………………………………………………………………………………………….… 11
Music………………………………………………………………………………………………………………… 12
Video………………………………………………………………………………………………….…………….. 13
Recordings………………………………………………………………………………………….…………….. 13
Pictures………………………………………………………………………………………………..…………… 14
EBook……………………………………………………………………………………………………………….. 14
FM radio…………………………………………………………………………………………………………… 14
Tools…………………………………………………………………………………………………………….…… 15
Set……………………………………………………………………………………………………………..……… 15
Bluetooth…………………………………………………………………………………………………..……… 16
Troubleshooting..………………….……………………………………………………….…..….............. 16
MM286 PL
Funkcje………………………………………………………………………………..….……………….…....
Podstawowe funkcje…….……………………………………………………………..……………………… 3
Muzyka.…………………………………………………………….…………….………………………………. 4
Wideo………………………………………………………………………………………………………………. 6
Nagrania………………………………………………………………………………….………………….……… 6
Zdjęcia………………………………………………………………………
Ebook…………………………………………………………………………….…………………………….. 6
Radio FM……………………………………………………………………………….….………………………… 7
Narzędzia……………………………………………………………………………………………..…..…… 8
Ustawienia………………………………………………………
Bluetooth……………………………………………………………………………………….………………… 8
Rozwiązywanie problemów……………………………..……………………..……….
....
...........................
…………………………….…………
...
………………
……………
...
……. 8
..
..
3
6
9
Page 3
MM286 PL
3
(1) Przytrzymanie przycisku oznacza naciśnięcie i przytrzymanie go przez czas dłuższy niż 1,2 s.
(2) Krótkie naciśnięcie przycisku oznacza naciśnięcie i przytrzymanie go przez czas krótszy niż 1,2 s.
Uwaga: „Naciśnięcie” w niniejszej inst rukcji będzie oznaczało „krótkie nac iśnięcie”, chyba, że wskazano inacz ej.
2.1 Podłączenie do komputera PC
Gdy odtwarzacz jest włączony/wyłączony, komputer należy podłączyć do odtwarzacza za pomocą kabla USB; komputer
wyświetli wtedy wybrane okno „Dysku przenośnego”. Należy wybrać odpowied nie fol dery w ce lu kopiowania. W celu
sformatowania dysku należy go podłączyć do komputera; system formatowania to FAT 32. Podczas ładowania odtwarzacza
przełącznik powinien być w pozycji „Włączony”.
2.2 Włącznik / Wyłącznik
Włączony: Przesunąć przełącznik zasilania do pozycji włączonej („ON”) a odtwarzacz zostanie włączony.
Wyłączony: Przesunąć przełącznik zasilania do pozycji wyłączonej („OFF”) a odtwarzacz zostanie wyłączony.
Ostrzeżenia:
Niniejsz a część zawiera po prawne informacje dot yczące obs ługi. Celem zapewnienia p oprawnego d ziałania, proszę przeczyta ć
uważnie wszystkie informacje przed użyciem odtwarzacza.
l Nie należ y narażać urządzenia na silne uderzenia.
l Nie należ y narażać urządzenia na ko ntakt z subst ancjami chemicznymi, takimi jak benzen lub rozcieńczalnik.
l Nie umi eszczać w siln ym polu magn etyczny m lub elektry cznym.
l Nie umi eszczać w bezpoś rednim świetle sł onecznym lub p rzy urządzeni ach grzewczych.
l Nie należ y samodzielnie rozm ontowywać, naprawia ć lub przerabia ć odtwarzacz a.
l Nie należy korzysta ć z odtwarz acza l ub s łuchawek podczas jazdy rowerem , sa mochodem lub motocyklem, gdyż grozi to
wypadkiem.
l Należy d ostosować głośność ta k, aby unikną ć uszkodzen ia słuchu.
l Prosimy o odpowiednią utylizację niepotrzebnych opakowań, baterii i starych urządzeń elektronicznych.
I Funkcje
1. Odtwarzanie muzyki: obsługa formatów WMA DRM WMA OGG APE FLAC WAV AAC-LC ACELP Audible itp.
2. Nagrywan ie: obsługa nagrywa nia z radia FM i mikrofon u MIC. Obsłu ga formatu W AV.
3. Przeglądanie zdjęć: obsługa formatów JPEG, BMP i GIF.
4. Wyświetlanie filmów: obsługa formatów AMV i AVI (wymagany jest konwerter wideo, lecz jest możliwość odtwarzania
na komputerze za pomocą zwykł ego odtwarzacza plików .AVI)
5. Obsługa radia FM.
6. Obsługa odczytu dokumentów tekstowych.
7. Obsługa narzędzi: kalendarz, stoper i alarm.
8. Funkcja Ustawienia: o bsługa wyświetlania i usta wień różnych at rybutów funk cjonalnych
II Funkcje podstawowe
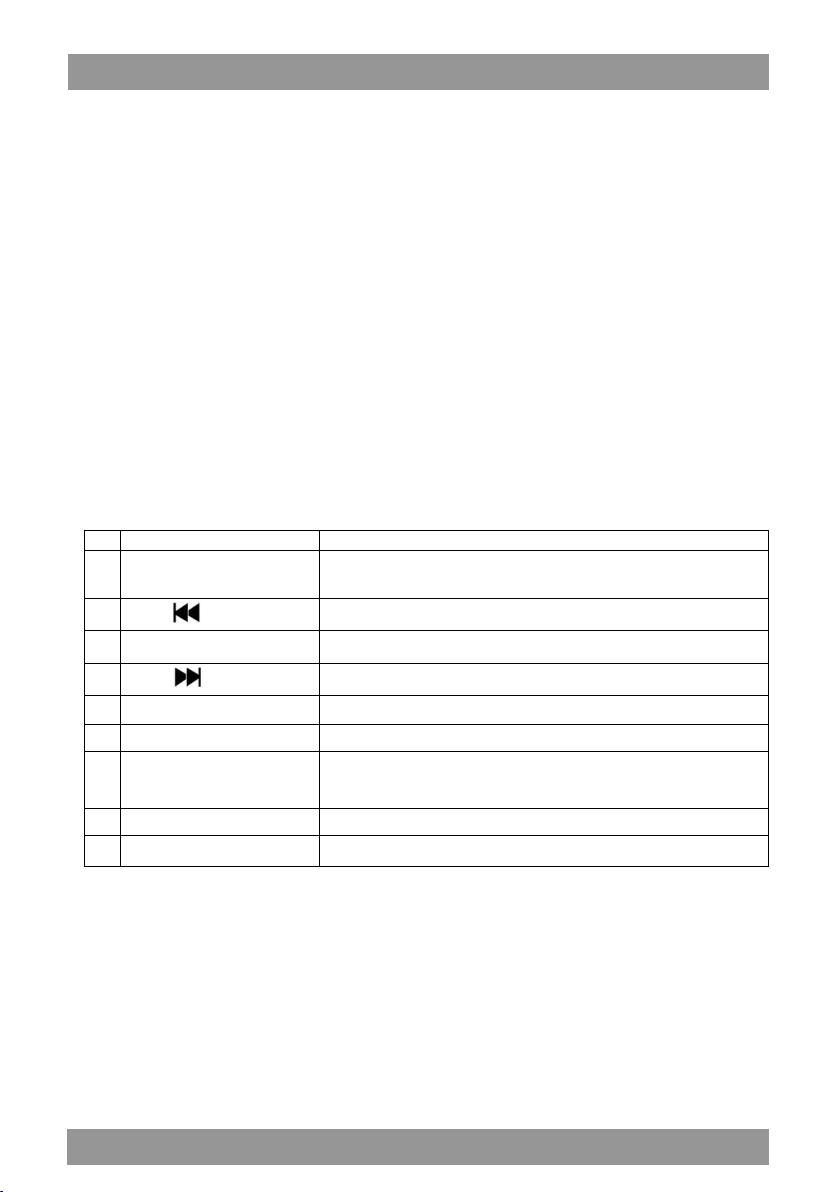
Nr Nazwa Definicja funkcji
1 Przycisk V/R
2
Przycisk
3 Przycisk ● / Przycisk Centralny
4
Przycisk
5 Przycisk M W celu wejścia do podmenu.
6 Wyświetlacz/Ekran Wyświetlanie interfejsu menu głównego.
Aby wejść do interfejsu w celu korekty głośności, w trybie podmenu odtwarzania
należy przycisnąć i przytrzymać przycisk V/R, oraz przycisnąć go krótko w celu
powrotu do poprzedniego menu.
W celu wybrania ostatniej opcji lub dokumentu.
Przycisk odtwarzania służący do Odtwarzania / Pauzy / Wprowadzania. Aby
wyłączyć odtwarzacz, należy przycisnąć i przytrzymać przycisk.
W celu wybrania następnej opcji lub dokumentu.
7 Włącznik / wyłącznik
9 Gniazdo USB Podłączenie komputera w celu kopiowania danych.
10 Gniazdo słuchawkowe W celu umożliwienia odsłuchu dźwięku z odtwarzacza.
Aby włączyć odtwarzacz, ustaw przełącznik w pozycji górnej; aby wyłączyć - w
pozycji dolnej.
Page 4

MM286 PL
4
Gdy odtwarzacz jest włączony, w celu wyłączenia go należy przycisnąć i przytrzymać przycisk centralny przez 3 sekundy z
poziomu głównego menu. (Po wyładowaniu się akumulatora, urządzenie wyłączy się automatycznie).
Odtwarzacz wyłączy się automatycznie, gdy czas bezczynności systemu osiągnie wartość czasu ustawioną przez użytkownika.
Uwaga: Gdy odtwarzacz jest podłączony do komput era, funkcja ta nie będzie działać.
2.3 Niski poziom akumulatora
Gdy poziom naładowania akumulatora będzie niski, odtwarzacz wyświetli na ekranie odpowiedni komunikat i przejdzie z trybu
automatycznego zamykania w tryb standby. W takim przypadku proszę nie uruchamiać ponownie odtwarzacza, lecz
naładować go w stosownym momencie.
Dla obecnej specyfikacji zaleca się stosowanie ładowarki 200 MA.
2.4 Konfiguracja systemu
Aby do uruchomienia niniejszego odtwarzacza cyfrowego wykorzystać komputer, konfiguracja systemu komputera powinna
spełniać następujące wymogi:
System operacyjn y: Win 7/Win dows XP i Vis ta/2K
Procesor: przynajmniej Pentium-133 MHz
RAM: przynajmniej 32 MB
Wolne miejsce na dysku twardym: co najmniej 100 MB
Karta grafiki: tryb 640*480 lub wyższy, kolory przynajmniej wzmocnione (16 bitów).
Port USB
Stacja CD -ROM
III Muzyka
3.1 Tryb odtwarzania muzyki
1. Wybrać aplikację muzyczną, nacisnąć przycisk Centralny w celu wejścia do menu odtwa rzania muzyki.
2. Obsługa breakpoint play (ostatni punkt): system powróci do tego samego miejsca menu odtwarzania, w którym ostatnio
byłeś. Ta funkcja jest obsługiwana tylko w liście odtwarzania (Now Playing List). Background Audio to funkcja a ktywna, gdy
muzyka jest odtwarzana w tle, a urządzenie może jednocześnie obsługiwać inne funkcje niekolidujące z funkcją Background
Audio.
3. Przycisk ● /Centralny: przyciśnięcie powoduje przełączenie z odtwarzania („play”) na pauzę („pause”). Gdy urządzenie jest w
trybie odtwarzania, przytrzymanie przycisku przez 3 s spowoduje wyłączenie odtwarzacza. Gdy urządzenie jest wyłączone,
należy przytrzymać dłużej ten przycisk w celu włączenia urządzenia.
4. Przytrzymanie przycisku V/R powoduje wejście do menu głośności, w którym za pomocą przycisków [9/:] można
zmieniać głośność w przedziale od 0 do 30.
5. Za pomocą przycisków[9/:] można przejść do poprzedniego lub następnego utworu.
6. Przycisk [M] służy do przejścia do podmenu.
3.2 Opcje menu muzyki
Za pomocą przycisków[9/:] można wybrać opcje, a potwierdzenie wyboru następuje po naciśnięciu przycisku Centralnego.
Opcje menu zawierają: All so ngs, Artists, Albums, Genres, Playlist, Album art, Audio books, Cre ate playlist.
All so ngs (Wszystkie utwory): wyświetla wszystkie utwory w pamięci i wszystkie utwory odtwarzane losowo.
Artists: (Wykonawcy) nazwy wszystkich wykonawców są przedstawione w porządku alfabetycznym.
Albums (Albumy): lista nazw wszystkich albumów w porządku alfabetycznym.
Genres (Gatunki): wyświetla style muzyczne określone dla utworów
Playlist (Lista odtwarzania): w tym Playlist on the go [1],Playlist on the go [2], Playlist on the go [3].
Audio books (Audiobooki): tytuły książek z autorami.
Create playlist (Utwórz listę odtwarzania): automatyczne tworzenie nowej listy odtwarzania.
3.3 Opcje podmenu
1. Gdy muzyka jest zatrzymana lub odtwarzana, należy nacisnąć [M] aby wejść do podmenu 1, którego opcje obejmują Playing
Mode (Tryb odtwarzania), Sound settings (Ustawienia dźwięku), Add to playlist (Dodaj do listy odtwarzania), Remove from
Playlist (Usuń z l isty odtwarza nia), Sleep timer (Czas przejścia w tryb uśpienia), Delete (Usuń), Bookmark (Zakładki).
2. Poruszanie się po menu następuje za pomocą przycisków [9/:]. W celu potwierdzenia wyboru, należy nacisnąć przycisk
Centralny (to samo dot yczy innych apl ikacji).
3. Jeśli w podmenu nie są dokonywane zmiany przez ponad 30 sekund, system automatycznie przejdzie do menu odtwarzacza
muzyki (to samo dotyczy innych aplikacji).
Playing mode (Tryb odtwarzania): wybrać opcje [Playing mode], wyświetlanie [play music from], [Repeat] ,[Shuffle], [Repeat
settings].
Page 5

MM286 PL
5
① Po wybraniu opcji [play music from] na wyświetlaczu pojawi się […All songs] […this artist] [….this album][…this genre]. W
celu poruszania się po m enu nal eży korz ystać z przycis ków [9/:] , a następnie nacisnąć przycisk centralny w celu
potwierdzenia wyboru. Na przykład, po wybraniu […All songs] wyświetlone zostaną wszystkie utwory z katalogu z muzyką. Po
wybraniu […this artist] wyświetlone zostaną wszystkie utwor y z katalogu danego wykonawcy. Aby powrócić do poprzedniego
menu, nacisnąć V/R i [M].
② Po wybraniu opcji [Repeat] (Powtórz) pojawią się opcje [Repeat off] [Repeat 1] [Repeat all] [View Playing]. Po wybraniu
[Repeat off] (Powtarzanie wyłączone), odtwarzacz przestanie powtarzać odtwarzanie utworów z listy. Po wybraniu [Repeat 1 ]
(Powtórz 1), powtarzany będzie wybrany utwór. Po wybraniu [Repeat all] (Powtórz wszystkie), powtarzane będą wszystkie
utwory na liście. Po wybraniu [ View Playing] (Widok odtwarzanego), odtwarzacz dokona prezentacji odtwarzanych utworów każdy z nich będzie odtwarzany przez 10 sekund.
③ Po wybraniu [Shuffle] (Losowo), wybrać opcję OFF/ON w celu rozpoczęcia lub przerwania odtwarzania w trybie losowym.
④ Po wybraniu [Repeat settings] (Ustawienia powtarzania), wyświetlą się opcje [Replay Mode] [Replay Times] [Replay
Interval],
Po wybraniu Replay Mode (Tryb powtarzania), system powróci do menu odtwarzacza muzyki. W dolnym lewym rogu ekranu
wyświetlony zostanie symbol [A-B] informujący o wprowadzeniu Trybu powtarzania. W tym czasie migać będzie symbol A
(początek odtwarzania). Nacisnąć
B (punkt zakończenia odtwarzania) zacznie migać. Następnie nacisnąć ponownie w celu potwierdzenia końca listy
odtwarzania - zakończy to ustawienia.
Replay Times (Czasy odtwarzania): nacisnąć [9/:] w celu ustawienia czasów odtwarzania od 1 do 10. Aby potwierdzić i
powrócić do menu odtwarzacza muzyki, nacisnąć klawisz Centralny.
Replay gap (Przerwa między utworami): ustawienie minimalnego czasu przerwy pomiędzy dwoma utworami, od 1 do 10,
opcjonalne (jak i sama opcja.)
Sound settings (Ustawienia dźwięku)
Po wybraniu [Sound settings] pojawią się opcje [Equalizer] [Volume limit].
① Po wybraniu funkcji [Equalizer] (Korektor), wyświetlone zostaną opcje: [OFF][Rock][Funk][Hip
pop][Jazz][Classical][Techno]][Custom].
② Należy wybrać [Volume limit] (Limit głośności) w celu dostosowania limitów głośności. Jeśli głośność jest na Poziomie 5, a
ustawiony limit głośności wynosi 8, poziom głośności nie może przekroczyć poziomu 8 (czyli ustawionego poziomu głośności).
Jeśli głośność jest na Poziomie 5, a limit głośności wynosi 3, poziom głośności zostanie zmniejszony do poziomu 3 i nie będzie
mógł go przekroczyć.
Add to playlist (Dodaj do listy odtwarzania)
Po wybraniu [Add to playlist] (Dodaj do listy odtwarzania), wyświetlone zostaną opcje Playlist on the go [1], Playlist on the g o
[2], Playlist on the go [3]. Aby wybrać pozycje z tych trzech list, należy użyć przycisków [9/:]. W celu wybrania listy, nacisnąć
centralny przycisk, po czy m ukaże się komun ikat "XXX(t he name of the song) to play list on the g o [1]/[2] /[3]?” Nal eży wybra ć
[Yes] (Tak), aby dodać utwór do nowej listy odtwarzania.
Remove from Playlist (Usuń z listy odtwarzania)
Po wybraniu opcji [Remove from Playlist], wyświetlone zostaną listy: Playlist on the go [1], Playlist on the go [2], Playlist on the
go [3]. W celu wybrania jednej z list, nacisnąć przycisk Centralny; jeśli odtwarzany utwór będzie na wybranej liście, zostanie on
z niej usunięty (utwór nie zostanie usunięty z odtwarzacza muzycznego).
Sleep timer (Czas przejścia w tryb uśpienia)
Po wybraniu opcji [Sleep timer], wyświetlone zostaną opcje [OFF][Set sleep timer…]. Aby zamknąć Power timer należy wybrać
[OFF],. Wybrać opcję [Set sleep timer…] w celu ustawienia czasu na zamkniecie odtwarzacza - czas może być wskazany w
przedziale 1 min.~99 min.
Delete
Należy wybrąć o pcję [Delete] w celu usunięcia muzyki odt warzanej w da nym momenci e z odtwarzacz a cyfrowego.
Bookmark
Po wybraniu opcji [Bookmark] (Zakładki), wyświetlone zostaną opcje [Add bookmark][Go to bookmark][Delete bookmark]
① Po wybraniu [Add bookmark] można dodać maksymalnie 10 zakładek.
② Po wybraniu [Go to bookmark] można wybrać jedną z zakładek i odtwarzanie rozpocznie się od momentu, w którym
zakładka była zaznaczona.
③ Należy wybrać [Delet e bookmark] w celu usunięci a dowolnych zakłade k.
w celu potwierdzenia, że po obecnym czasie nadejdzie punkt rozpoczęcia odtwarzania,
Page 6

MM286 PL
6
IV Wideo
4.1 Tryb wideo
1. Aby wejść do menu z listą plików wideo należy nacisnąć przycisk Centralny. Nacisnąć [9/:] w celu przeglądania pików i
przycisk Centralny w celu wyboru pliku który ma się znaleźć w menu odtwarzania filmów.
2. Obsługa odtwarzania od miejsca zatrzymania.
4.2 Opcje menu wideo
W trakcie zatrzymania lub odtwarzania, nacisnąć [M], aby wejść do menu wideo. W przypadku odtwarzania, film zostanie
zatrzymany w tle. Opcje wideo obejmują: Lightness, Repeat, De lete video , Create Playl ist.
① Brightness (Jasność): nacisnąć przycisk Centralny w celu wejścia do menu jasność; nacisnąć [9/:] w celu regulacji
poziomu jasności (w zakresie 0~11); nacisnąć klawisz Centralny w celu potwierdzenia.
② Repeat (Powtarzanie): nacisnąć przycisk Centralny w celu wejścia do menu [Repeat play] - pojawią się opcje [Repeat
off][Repeat 1][Repeat all].
[Repeat off] (Powtarzanie wyłączone): wybrać tę opcję w celu zatrzymania powtarzania.
[Repeat 1] (Powtarzanie 1): odtwarzanie obecnie wybranego filmu na okrągło;
[Repeat all] (Powtórz wszystkie): powtarzanie odtwarzania wszystkich filmów po kolei.
③ Delete video (Usuń film): usuwanie obecnie odtwarzanego filmu.
④ Create playl ist (Tworzenie listy odtwarzania): automatyczne tworzenie listy odtwarzania.
V Nagrania
Przy wciśniętej pauzie, jeśli poziom baterii jest niski, system automatycznie zapisze nag ranie i powróci do menu nagrywania.
Gdy dysk zostanie zapełniony, system wyświetli komunikat „Disk Full!” (Dysk pełny!).
Aby wejść do opcji menu należy nacisnąć [M]. Opcje menu obejmują: Start voi ce recording, Recordings library, Record format
i Record settings.
Start voice r ecording (Rozpocznij nagrywanie głosu): nacisnąć przycisk Centralny aby wejść do menu nagrywania - odtwarzacz
rozpoczn ie nagrywanie w spos ób automatycz ny. W celu z apisania nagrania nal eży nacisnąć V/R i wybrać „yes” (tak).
Recordings library (Biblioteka nagrań ): wybrać tę opcję. Jeśli w odtwarzaczu nie ma żadnych nagrań, urządzenie wyświetli
komunikat „No voice recordings found” (Nie znaleziono nagrań); jeśli na liście znajdą się nagrania, wybrać jedno do
odtwarzania. Wszystkie nagrania można usunąć.
Record format (Format nagrywania): wy brać: MP3 Rec, WAV Rec lub ACT Rec.
Record settings (Ustawienia nagrywania): wyświetlone zostaną opcje [Set rec bitrade][Tarck AVR Mode][set recordings scene].
Można wybrać tryb mikrofonu lub wejście liniowe jako źródło dźwięku. Dostępne wartości próbkowania to:
512kbps/768kbps/1024kbps/1536kbps(Format MP3:32kbps/64kbps/128kbps/192kbps). [Track AVR Mode]: można wybrać
tryb Normal lub AVR. Tryb AVR zapewnia funkcję kontroli rejestracji głosu, gdy natężenie dźwięków otoczenia j est bardzo
niskie i taki stan utrzymuje się przez pewien czas, urządzenie przejdzie do trybu Suspend (Zawieszenie) nagrywania. Po
powrocie natężenia głosu na określoną wartość progową lub jej przekroczeniu, urządzenie będzie kontynuować nagrywanie.
[set recordings scene] (ustal otoczenie nagrywania): można wybrać pomiędzy otoczeniem normalnym (normal scene),
pociągiem (train scene), spotkaniem (meeting scene), rozmową na daleką odległość (long range scene), oraz wyłączyć
tłumienie szumu (disable noise cancellation).
VI Zdjęcia
Wejście do menu Photo. Na liś cie zdjęć użyć przycisku Centralnego w celu wyświetlenia wybranego zdjęcia, a następnie
nacisnąć przycisk Centralny ponownie w celu przełączenia między odtwarzaniem a utomatycznym a ręcznym. Aby przeglądać
zdjęcia należy nacisnąć [9/:]; nacisnąć [M] w celu wprowadzenia opcji menu. Aby powrócić do menu Photo, nacisnąć V/R.
6.1 Opcje menu zdjęć
Opcje podmenu: Brightness (Jasność), Backlight timer (Czas podświetlenia), Slideshow settings (Ustawienia pokazu slajdów),
Delete picture (Usuń zdjęcie), Create playlist (Tworzenie listy odtwarzania). Poza Czasem podświetlenia i Ustawieniami pokazu
slajdów, sposób obsługi pozostałych pozycji menu jest taki sam jak w innych przypadkach.
Backlight timer (Czas podświetlenia): istnieją cztery opcje [10 seconds][20 seconds][30 seconds][always on]. Aby przeglądać
menu, nacisnąć [9/:]. Naciśnij przycisk Centralny w celu potwierdzenia wyboru - automatyczny powrót do poprzedniego
podmenu.
Slideshow settings (Ustawienia pokazu slajdów): po wybraniu tej opcji wyświetlone zostaną następujące parametry: [Time per
slide] [Repeat] [Shuffle] [Thumbnails]. Przedział czasu na wyświetlanie każdego slajdu to 2s~30s.
VII EBook
Wejście do menu EBook. Aby wybrać [Tekst] w menu głównym należy nacisnąć [9/:]. W celu wybrania pliku, nacisnąć
[9/:]. Nacisnąć przycisk Centralny w celu uruchomienia pliku tekstowego - wyświetli on numer bieżącej strony i łączną liczbę
stron. Nacisnąć [9/:] w celu przewrócenia strony. W trakcie przeglądania tekstu nacisnąć przycisk Centralny w celu
przełączania pomiędzy ręcznym a automatycznym przewracaniem stron. Przycisk [M] służy do przejścia do podmenu.
Nacisnąć V/R, aby wyjść z menu.
Page 7

MM286 PL
7
Opcje podmenu Text (Tekst)
W celu wejścia do podmenu, nacisnąć [M] w menu z listą tekstów. Podmenu zawiera opcje [Play setting] i [Delete ebook].
[Play setting] (Ustawienia odtwarzania): ustawienie odstępu czasu dla odtwarzania automatycznego, 2s~30s.
[Delete eBook] (Usuń eBook): usuwanie wybranego eBooka.
W menu z listą tekstów w ciśnij [M] w celu w ejścia do podmenu. Podmenu zawiera o pcje [Play setting] [Delete ebook]
[Bookmark select] [Delete bookmark] [Add bookmark] [Page select]. Funkcja zakładek dzi ała identycznie, jak w przypadku
plików muzycznych. Każdy plik tekstowy obsługuje maks. 16 zakładek.
[Page select] (Wybór strony): w ejść na stronę menu w yboru strony, nacisnąć [9/:] w celu w yboru numeru strony,
a następnie nacisnąć przycisk Centralny w celu potwierdzenia. Wyświetlona zostanie wybrana strona.
Widok Folderów
Przedstawia listę plików i katalogów w odtwarzaczu.
Pliki przechowywane w urządzeniu: nacisnąć [9/:] aby przeglądać pliki na liście. Aby wyjść z folderu, nacisnąć V/R.
Po ponownym wejściu do folderu można przeglądać pliki z ostatniego odwiedzanego poziomu.
Należy w ybrać jeden z plików na liśc ie i n acisnąć [M] - pojawi się komenda „delete” (usuń). Nacisnąć przycisk Centralny;
wybrać „y es” (tak), aby usunąć wybran y plik lub „no” (nie), aby go nie usuwać. Wyjście z podmenu jest możliwe po wciśnięciu
[M] lub [V/R.
VIII Radio FM
Naciśni j przycisk Cent ralny w celu wejścia do m enu Radio.
Opcje menu Radio
Presets (Zaprogramowane): wyświetla zaprogramowane stacje radiowe, może pokazać maksymalnie 30 stacji.
Zaprogramowane dane można usunąć w dowolnej chwili.
User's (Użytkownika): wyświetla stacje radiowe zaprogramowane przez użytkownika, może pokazać maksymalnie 30 stacji. Ta
opcja jest ustawiona w oprogramowaniu; stacji tych nie można zmienić ani usunąć.
Manual Tune (Strojenie ręczne): nacisnąć przycisk Centralny w celu wejścia do menu strojenia ręcznego; nacisnąć [9/:] w
celu nastro jenia radia, po znalezi eniu stacji nacisną ć [M ] ab y w ejść do podmenu, wybrać opc ję [save to preset] (zapisz w
zaprogramowanych), wybrać jedną z częstotliwości i nacisnąć przycisk Centralny w celu potwierdzenia. Wybrać „yes” (tak) po
czym s tacja radiowa zo stanie zapis ana w Zaprogra mowanych.
Auto tune (Strojenie automaty czne): po wybraniu tej opcji wyświetlony zostanie komunikat [Do you want to auto tune the
presets?] (Czy chcesz automatycznie zaprogramować stacje?) Wybrać „Yes” (Tak) w celu automatycznego zaprogramowania
radia lu b „no” (nie), aby po wrócić do menu radia.
FM Recordings (Nagrania z radia): nacisnąć przycisk Centralny w celu wprowadzenia biblioteki nag rań, a jeśli w odtwarzaczu
nie ma nagrań, pojawi się komunikat „no recordings are found” (nie znaleziono nagrań); Jeśli na l iście są nagrania, wybrać te,
które chce się odtworzyć. Wszystkie nagrania można usunąć.
Menu Radio
Manual Tune (Strojenie ręczne): Aby dostroić częstotliwość stacji radiowej należy nacisnąć [9/:]. Przytrzymać [9/:] -
urządzenie może automatycznie wyszukiwać stacje radiowe. Nacisnąć przycisk Centralny w celu ręcznego nastrojenia radia.
Nacisnąć [M] aby wejś ć do podmenu, nacisnąć V/R aby wy jść z menu odtwarzania.
Podmenu
Start FM radio recording (Rozpocznij nagrywanie z radia): nacisnąć przycisk Centralny w celu wejścia do menu nagrywania.
Save to preset (Zapisz do zaprogramowanych): wybrać dowolny punkt częstotliwości zaprogramowanych stacji radiowych i
nacisnąć przycisk Centralny w celu potwierdzenia. Stacja zostanie zapisana wśród stacji zaprogramowanych.
Clear preset (Wyczyść zaprogramowane stacje): po naciśnięciu przycisku Centralnego nastąpi wejście do listy
zaprogramowanych stacji radiowych; następnie wcisnąć [9/:] aby wybrać dowolną stację radiową, nacisnąć przycisk
Centralny, po czym men u pokaże komun ikat pytający , czy usunąć za programowaną s tację. Odpowi edz Tak (Yes) l ub Nie (No).
Auto tune (Strojenie automatyczne): po wybraniu tej opcji, odtwarzacz rozpocznie automatyczne strojenie kanałów radiowych
FM. Po odnal ezieniu stacji FM system zapis ze je automatycznie i podczas wyszukiwan ia pokaże komunika t 01.Go - stacje
radiowe zostaną zapis ane w kolejnoś ci. Aby przerwać wyszuki wanie należy nacisnąć przyci sk V/R . Po wyszukan iu i zapisaniu
stacji radiowych można przeglądać stacje radiowe naciskając przycisk Centralny.
Tuner Reg ion (Region tunera): normalne pasmo—zakres: 87,5MHZ-108,00MHZ
Japońskie pasmo---zakres: 76,00MHZ-90,00MHZ
Europejskie pasmo---zakres: 87,50MHZ-108,00MHZ
Via Bluetooth play (Odtwarzanie przez Bluetooth): sposób działania jest taki sam, jak w przypadku powyższej aplikacji
Bluetooth.
Page 8

MM286 PL
8
IX Tools (Narzędzia)
Wejście do menu narzędzi.
1. Kalendarz: nacisnąć [M] aby zmienić rok, miesiąc i dzień. Naciśnij [9/:] w celu zwiększenia lub zmniejszenia liczby.
2. Stopwatch (Stoper): nacisnąć przycisk Centralny aby rozpocząć odmierzanie czasu. (Maksymalny czas to 99 godzin 59 minut
59 sekund i 99 milisekund. Nacisnąć ponownie przycisk Centralny aby zatrzymać stoper. Nacisnąć [9/:] aby rozpocząć
kolejny zapis. Pamięć maksymalnie do 5 czasów. Aby zatrzymać stoper i wyczyścić wszystkie czasy, nacisnąć przycisk [M]. Aby
wyjść z funk cji stopera, nacisnąć V/R.
3. Alarm: wejście do menu Budzik. Wyświetlone zostaną [Alarm on /off], [Alarm time], [Alarm cycle], [Alarm music], [Alarm
volume]
① Alarm on/off: wyświetlone zostaną opcje [Alarm off] (Budzik wyłączony) i [Alarm on] (Budzik włączony), nacisnąć [9/:]
w celu wybo ru.
② Alarm time (Czas włączenia budzika): nacisnąć [9/:] w celu zmiany godziny. Nacisnąć [M] w celu zmiany HH (godziny),
MM (minuty), AM/PM. Nacisnąć V/R aby wyjść z [Czas włączenia budzika].
③ Alarm cycle (Cykl budzika): trzy opcje.[Once] (Raz) [Daily] (Codziennie) [Work day] (W dni robocze). Nacisnąć [9/:] aby
przeglądać, nacisnąć przycisk Centralny w celu potwierdzenia, lub V/R aby wyjść z menu.
④ Alarm music (Dzwonek budzika): nacisnąć [9/:] aby przeglądać, nacisnąć przycisk Centralny w celu potwierdzenia, lub
V/R aby wyjść z menu. Wyświetlone zostaną opcje [Ring embedded] i [Music in flash]. [Ring embedded] (Dzwonek urządzenia)
oznacza, że ustawiony jest dzwonek będący domyślną melodią w systemie. [Musi c in flash] (Muzyka na pamięci flash) oznacza,
że dzwonki pochodzą z wewnętrznej pamięci.
⑤ Alarm volume (Głośność budzika): zakres głośności od 0 do 31. Domyślny poziom głośności wynosi 15.
X Set (Ustawienia)
Opcje menu ustawień
① [Play mode ] (Tryb odtwarzania): taki sam, jak w przypadku funkcji związanych z muzyką.
② [Sound settings] (Ustawienia dźwięku): takie sam, jak w przypadku funkcji związanych z muzyką.
③ [Slee p timer] (Czas przejścia w stan uśpienia): przedział czasowy to 1 min.~99 min., możliwość ustawienia z dokładnością
do 1 minuty.
④ [Display settings] (Ustawienia wyświetlania): dostępne są trzy opcje [Brightness], [Backlight timer], [Screensaver].
Brightness (Jasność): przedziałem jest 0~11, domyślny poziom to 5.
Backlight timer (Czas podświetlenia): dostępne są cztery opcje: [10 seconds] (10 sekund), [20 seconds] (20 sekund), [30
seconds] (30 sekund), [Always on] (Zawsze włączone). Tryb wyłączonego światła nie będzie działać przy następujących
czterech interfejsach : Interfejs odtwarza cza wideo, Int erfejs czytnika eb ooków, Interf ejs podłączenia USB
Wygaszacz ekranu: dostępne są następujące opcje: [None](Brak), [Digital clock] (Zegar cyfrowy), [Album art] (Sztuka z
albumu), [Screen off] (Ekran wyłączony), [Demo mode] (Tryb demo).
Date and time (Data i godzina): ustawianie daty i czasu.
Nacisnąć [M] aby z mienić r ok, mies iąc, dzień, godzinę, minuty i sek undy. Nacisnąć [9/:] w celu zmiany wartości. Nacisnąć
przycisk Centralny, aby zapisać ustawienia. Nacisnąć V/R, aby wyjść z menu.
⑤ [Slideshow settings] (Ustawienia pokazu slajdów): tak samo, jak w przypadku funkcji Zdjęć.
⑥ [Language ] (Język): Urządzenie obsługuje następujące języki: Uproszczony chiński, tradycyjny chiński, angielski, japoński,
korea ńsk i, f rancu ski, niem iec ki, w łos ki, ho len ders ki, p ortu gals ki, h isz pańs ki, s zwed zki, czesk i, du ński , pol ski, rosy jsk i, tur eck i,
węgierski, rumuński, a rabski, hebrajs ki, tajski, indonezy jski, grecki.
⑦ [Information] (Informacja): wyświetli opcje [Player information], [Disk space], [File type supported].
Player information (Informacje o odtwarzaczu): pokazuje nazwę modelu, wersję oprogramowania i adresy gdzie można
uzyskać wsparcie.
Disk space (Przestrzeń dyskowa): pokazuje wolną przestrzeń, łączną przestrzeń, liczbę utworów, zdjęć i filmów.
⑧ [File typ e supported] (Obsługiwane typy plików): wyświetla obsługiwane formaty muzyki, zdjęć i filmów.
⑨ [Factory settings] (Ustawienia fabryczne): wcisnąć przycisk Centralny a wyświetli się odpowiednie pytanie, wybrać „yes”
(tak) w celu przywrócenia ustawień fabrycznych.
XI Bluetooth
Opcje menu
Aby zobaczyć menu obsługi należy wejść do menu Bluetooth. Nacisnąć [9/:] w celu przeglądania plików, nacisnąć przycisk
Centralny, aby wprowad zić odpowiednią opcję.
[Bluetooth switch control] (Włącznik Bluetooth): nacisnąć przycisk Centralny aby wejść do menu, nacisnąć [9/:] w celu
wybrania [T urn BT On] (Włącz BT) lub [Turn BT Off] (Wyłącz BT).
[Search device] (Wyszukiwanie w urządzeniu): nacisnąć przycisk Centralny - pojawi się interfejs wyszukiwania, a jeśli
znalezione zostanie jakieś narzędzie, zostanie ono wskazane w liście urządzeń. Wybrać [Connect] (Połącz) aby połączyć się z
urządzeniem Bluetooth.
[Device’s li st] (Lista urządzenia): aby obsługiwać urządzenie, nacisnąć przycisk Centralny. Nacisnąć [9/:] aby wybrać
urządzenie i wejdź do menu urządzenia. Wyświetli się lista dostępnych opcji z zakresu obsługi, odpowiednio do statusu
urządzenia.
Gdy urządzenie ma status Usable (Do wykorzystania), można je podłączyć do innego urządzenia.
Page 9
MM286 PL
9
Gdy urządzenie ma status Paired (Połączone), można wybrać opcję [Disconnect] (Rozłącz).
Po poprawnym podłączeniu ukaże się menu odtwarzania.
[All musi c] (Wszystkie utwory): nacisnąć przycisk Centralny, po czym można wybierać z listy utwory które chce się odtwarzać.
[BT now playing] (Odtwarzanie BT): gdy istnieje urządzenie o statusie „podłączony”, nacisnąć przycisk Centralny aby wejść do
menu. Wyświetlane menu i treść są takie same, jak w menu odtwarzania muzyki. Nacisnąć [M] w celu wejścia do podmenu
Korektora.
XII Troubleshooting (Rozwiązywanie problemów)
Jeśli odtwarzacz nie działa poprawnie, należy sprawdzić następujące kwestie:
1. Odtwarzacz nie ma zasilania.
Sprawdzi ć, czy bateri a nie uległa wyczerpaniu i spróbo wać ponownie włączy ć odtwarzacz p o jego podł ączeniu do USB
lub ładowarki celem załadowania.
2. Brak dźwięku ze słuchawek.
Upewnić si ę, czy głośność n ie jest ustawiona na 0 i czy słuchawka jest dob rze podłączona.
3. Znaczne szumy.
Sprawdzi ć, czy słuchawki ni e są zatkane. W przypadku us zkodzenia pl iku audio, ha łas będzie różny lub niem ożliwe
będzie jego odtworzenie. Prosimy upewnić się, że plik jest kompletny
4. Zły odbiór sygnału FM.
Należy zm ienić kierun ek i pozycję odtwarzacza i rozciągnąć przewód s łuchawkowy. Prosimy sprawdzić, czy inne
urządzenia elektroniczne nie powodują zakłóceń.
5. Nieczytelny kod
Prosimy upewnić się, że wybrali Państwo odpowiedni język. Należy wyłączyć odtwarzacz i włączyć go ponownie.
6. Niemożność przesyłania / pobierania plików.
Należy u pewnić się, ż e podłączeni e odtwarzacza z komputerem jest po prawne.
Należy sp rawdzić, czy pamięć nie jes t pełna.
Należy sp rawdzić, czy przewód USB nie jest uszkodzony.
7. Urządzenia nie można wyłączyć, gdy się zawiesi.
Prosimy zmienić pozycję przełącznika ON/OFF w celu zrestartowania urządzenia.
Uwaga!
Konstrukcja produktu i parametry techniczne mogą ulec zmianie bez wcześniejszego powiadomienia. Dotyczy to przede
wszystkim parametrów technicznych, oprogramowania oraz podręczni ka użytkownika. Niniejszy podr ęcznik użytkownika służy
ogólnej orientacji dotyczącej obsługi produktu. Producent i dystrybutor nie ponoszą żadnej odpowiedzialności t ytułem
odszkodowania za jakiekolwiek nieścisłości wynikające z błędów w opisach występujących w niniejszej instrukcji użytkownika.
Page 10

MM286 PL
10
INFOLINIA SERWISOWA
tel: +48 22 332 34 63 lub e-mail: [email protected]
od poniedziałku do piątku w godz. 9.00-17.00
Producent zastrzega sobie możliwość wprowadzenia zmian w specyfikację
produktu bez uprzedzenia.
Strona główna www.manta.com.pl
Strona wsparcia technicznego www.manta.info.pl
Made in P.R.C.
FOR MANTA EUROPE
Page 11
MM286 PL
11
(1) Long Press means press a key and hold it for more than 1.2s.
(2) Short Press means press a key and hold it no more than 1.2s.
Note: “Pr ess” in this manual shall m ean “Short P ress”, unles s otherwise sp ecified.
2.1 Connected to PC
When the player is on/off, use the USB cable p rovided by random to connect P C with the player, and the PC will indicate a
select window of “Removable Disk”. Select corresponding folders to copy. Connect the PC to f ormat the disk, the system is
FAT 32. When ch arging the pla yer, the sw itch shall be turned at the “ON” position.
2.2 Power On/Off
Power on: Slide the power key to (ON) and the player will be turned on.
Power off: Slide the power key to (OFF) and the player will be turned on.
Cautions:
This part contains correct operational information. For better performance, please read all the information carefully before
you use the player.
l Do not impact the machine severely.
l Do not come into contact with chemicals such as benzene or thinner.
l Please keep away from strong magnetic field and electric field.
l Please keep away from direct light or heating appliances.
l Do not dismantle, repair or transform the player personally.
l Do not use the player and the earphone when riding a bike, driving a car or a motorcar in order to avoid traffic accidents.
l Select su itable volume in order to avoid bad i nfluence to your ears .
l Please classify the discarded packages, battery and old electronic products properly.
I. Functions
9. Music Play: support WMA, DRM, WMA, OGG, APE, FLAC, WAV, AAC-LC, ACELP, Audible etc.
10.Recording: support FM and MIC recording. Support WAV format.
11.Picture Browse: support formats of JPEG, BMP and GIF.
12.Video Play: support formats of AMV and AVI (Video converter is needed, but it can be played on PC by an ordinary AVI
player.)
13.Support FM Radio.
14.Support text document reading.
15.Support tools: Calendar, Stopwatch, and Alarm.
16.Setup Function: support the display and setup of various functional attributes.
Ⅱ Basic Functions
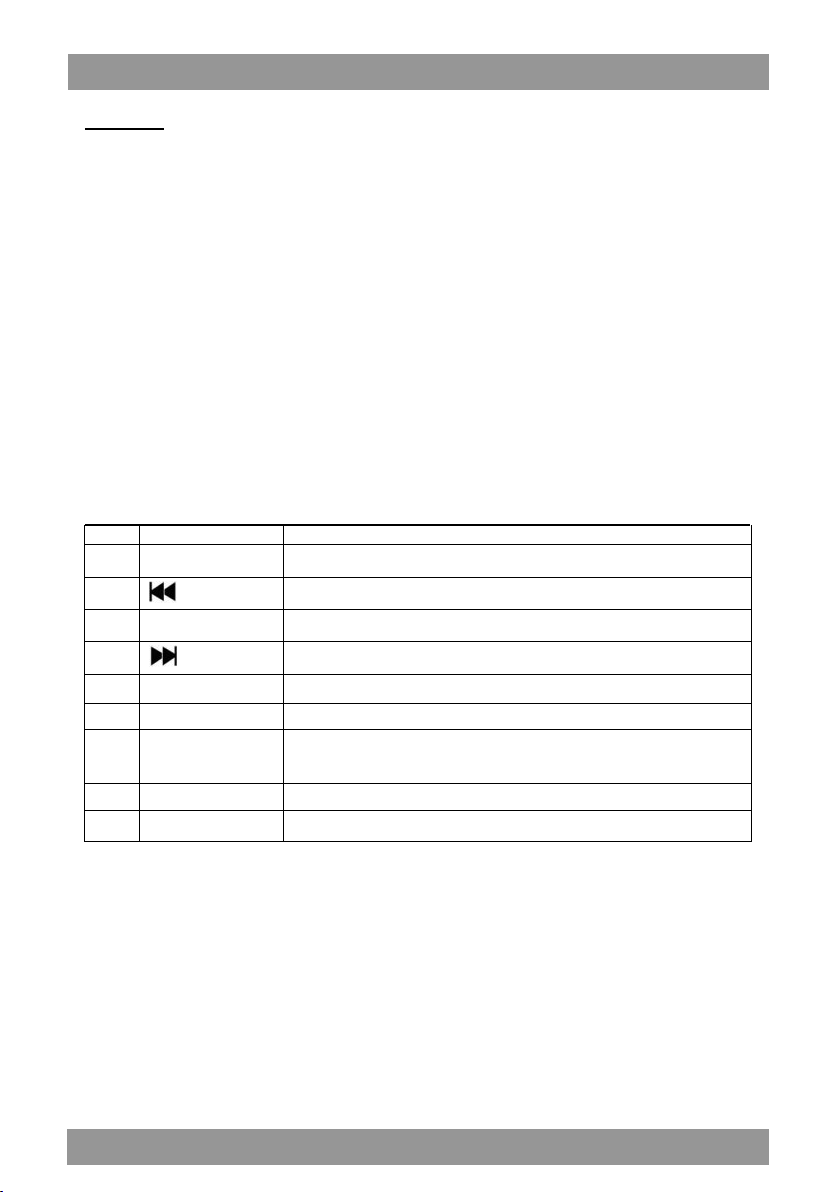
No. Name Function D efinition
1
V/R
Key
2
3 ● Key/Centr e Key Play key for Play/Pause/Enter. Long press to turn off the player.
4
5
6 Display/Screen Display the main menu interface
7 Switch on /off
9 USB interfa ce Connect t he PC, and t ransfer data.
10 Earphone interface To listen to the audio in the player
M
Key
Key
Key
in the submenu play mode, long press V/R to enter the interface to adjust volume,
short press to return to the previous menu
To choose the last option or document.
To choose the next option or document.
To enter the submenu.
Push the power switch on the player to the top position, and the player will be
powered on; push the power switch to the bottom position, and the player will be
powered off.
Page 12

MM286 PL
12
When the player is on, press and hold Centre key for 3 seconds in main interface to turn off. (When the battery runs out, it will
be turned off automatically.)
The player will power off automatically when the idle time of the system reaches the off time set by the user.
Note:wh en the player is connected with PC,this function will not b e working.
2.3 Low Battery
When the battery is low, the player will show a tip in the screen and it will turn from automatic shutdown into standby. At this
time, please do not restart the player but charge in time.
The charger with the current specification of 200MA is suggested.
2.4 System Configuration
If you want to use the PC to start this digital media player,then the PC system configuration should satisfy these requirements
below:
Operating system: Win 7/Windows XP &Vista/2K
CPU: at least Pentium-1 33 MHz
RAM: at least 32MB
Hard Disk Idle Time: at least 100MB
Video Card: 640*480 mode or above, at least the enhanced color (16 bits).
USB Port
CD-ROM Driver
Ⅲ Music
3.1 Music Mode
1. Choose music application, press Centre key to enter the music playing interface.
2. Support the breakpoint play: the system will enter the playing interface where you previously exited. Only support this
function in the Now Playing List. Background Audio means when the player is playing the music in the background, it can run
other functions at the same time which is not conflict with the Background Audio function.
3.● key/Centre key : press it to switch between “play” and “pause”; When it is in the power state, long press it for 3s to turn
off the player. When it is in the shutdown state, long press it to turn it on.
4. Long press the V/R to enter the volume interface, then you could press [9/:] to a djust the volume f rom 0 to 30.
5. Press[9/:] to choose the previ ous and next track.
6. Press [M] to enter the submenu.
3.2 Music Menu Options
Press [9/:] to choose the options, press the Centre key to confirm.
The menu options include:All so ngs,Artists,Albums,Genres,Playlis t,Album art, Audio books, Create playlist.
All so ngs: display all the songs in the memory and all the random playing songs..
Artists: all the names of the singers in the memory are listed in alphabetical order or the according to th e order of the first
letter of the spelling.
Albums: list all the albums’ name according to the first letter of the spelling.
Genres: display the styles according to the built-in style in the music
Playlist: including Playlist on the go [1],Playlist on the go [2], Playlist on the go [3].
Audio books: including books and the writers.
Create playl ist: create a new playlist automatically.
3.3 Submenu Options
1.When the music is in a stopped or playing state, press [M] to enter the submenu 1 for which options include Playing M ode,
Sound settings, Add to playlist,Romove from Playlist,Sleep timer,Delete,Bookmark.
2. Press [9/:] to navigate through the menu. Press the Centre Key to confirm your selection, (ditto for other applications).
3. If there is no operation for more than 30 seconds under the submenu, the system will enter the corresponding music player
interface automatically (ditto for other applications).
Playing m ode: choose [Playing mode], display [play music from],[Repeat],[Shuffle],[Repeat settings] options.
①Choose [play music from] option, and will list […All songs] […this artist] [….this album][…this genre].Press [9/:] to
navigate through the menu, then press the centre key to confirm this option. For example, if choose […All songs], then the
playing songs are all from the music catalog. If choose […this artist], then the playing songs are all from the singers catalog.
Press V/R and [M] to return to the previous menu.
②Choose [Repeat], and it will display [Repeat off] [Repeat 1] [Repeat all] [View Playing] options. Choose [Repeat off], the
player will stop to repeat the songs in the list. Choose [Repeat 1], it will play the music you choose repeatedly. Choose [Repeat
all], it will play all the songs in the list repeatedly. Choose [View Playing], the player will browse the play files, each for 10
seconds of preview.
③Choose [Shuffle], select OFF/ON to start or stop the Random Playing Mode.
④Choose [Repeat settings], it will display [Replay Mode] [Replay Times] [Replay Interval],
Page 13

MM286 PL
13
After choosing the Replay Mode, the system will return to the music player interface. Then the bottom left corner of the LCD
will be added with [A -B] to show that the Replay Mode is entered. Meanw hile, A (the starting point of replay) is blinking. Press
to confirm that after the current time is the starting point of replay, B (the ending point of replay) begins to blink. Then
press again to confirm the ending timetable replay, then setup is finished.
Replay Times: Press [9/:] to set the replay times from 1 to 10. Press Cen tre Key to confirm and th en return to the music
player interface.
Replay gap: Set the minimum time interval between two replays, which is optional from 1 ~10.(Ditto for the operation.)
Sound settings
Choose [So und settings], it will display [Equalizer] [Volume limit].
①Choose[Equalizer],it will display[OFF][Rock][Funk][Hip pop][Jazz][Classical][Techno]][Custom].
②Choose[Volume limit],have a try to listen to the music when adjust the volume limits. If volume is Level 5 and the volume
limit is Level 8, then the volume can not be exceed level 8(that is to say, not to exceed the volume limit).If the volume is Level
5 and the volume limit is Level 3, then the volume will fall to Level 3, and the volume can not be exceed Level 3.
Add to playlist
Choose[A dd to playlist],it w ill disp lay Playlist on the go [1],Playlist on th e go [2], Playlist o n the go [3]. Press[9/:] to select
from these three lists. Press centre key to choose the list and pop up an interface” XXX(the name of the song)” to playlist on
the go [1]/[2]/[3]?”Choose [Yes] to add the song to the now playlist.
Remove from Playlist
Choose [Remove from Playlist],it wil l display Playlis t on the go [1],Playlist o n the go [2], Playl ist on the go [3].Pres s Centre K ey
to select one Playlist, if the song now playing is in this Playlist on the go that you choose, then this song will be deleted from
this Playlist ( not delete the song in the music player).
Sleep timer
Choose [Sleep time r], it will display [OFF][Set sleep tim er…].Choose[O FF] to close t he Power timer. Choose [Set sl eep timer…]
to set up the time to shut off the player, the time range can be 1min~99min.
Delete
Choose [Delete] to delete the now pla ying music from the digital media player.
Bookmark
Choose [Bookmark], it wi ll display [A dd bookmark][Go to bookmark ][Delete bookma rk]
①Choose [Add bookmark], you can add 10 bookmarks at most.
②Choose [Go to bookmark], you can choose one of the bookmarks and it will play from where had been bookmarked.
③Choose [Delete bookmark] to delete any bookmarks you want.
Ⅳ Video
4.1 Video Mode
1. Press Centre Key to enter the video file list interface. Press [9/:] to browse the files,and press the Centre Key to ch oose
the file to enter the video playing interface.
2. Support the breakpoint play.
4.2 Video Menu Options
When it is in a stopped or playing state, press [M] to enter the video menu. If it is playing the video, then the video will be
paused in the background. Video options include: Lightness , Repeat, Dele te video, Create Playli st.
①Brightness: press the Centre Key to enter lightness interface, Press [9/:] to adjust the lightness level (ranger is 0~11),
press the Centre Key to confirm.
②Repeat: press the Centre Key to enter [Repeat play] interface, it will display [Repeat off][Repeat 1][Repeat all].
[Repeat off]: choose this to stop repeat.
[Repeat 1]: play the present chosen video again and again;
[Repeat all]: play all the videos in order circularly.
③Delete video: delete the now playing video.
④Create playlist: to create a playlist automatically.
V Recordings
During the pause, if the battery power is low, the system will save the recording automatically and return to the recording
interface.When the disk is fully stored, the system will remind with “Disk Full!”.
Press [M] to enter the menu options. The menu options include: Start voice r ecording, Re cordings library, Record format,
and Recor d settings.
Page 14

MM286 PL
14
Start vo ice recording: press the Centre Key to enter the record interface and the player will start to record automatically.
Press V/R and choose “yes” to save the recording.
Recordings library: choose this opt ion. If there are no any record ings in the player, then it will sa y” No v oice recordings
found”; If there are recordings in the list, then choose one to play. All of these recordings can be deleted.
Record format:choose: MP3 Rec,WAV Rec or ACT Rec.
Record settings: It will display [Set rec bitrade][Tarck AVR Mode][set recordings scene].You can choose microphone or line-in
mode as record source.Record Bit rate choices are: 512kbps/768kbps/1024kbps/1536kbps MP3
Format: 32kbps/64kbp s/128kbps/19 2kbps. [Tar ck AVR Mode]:you can choos e Normal M ode or AVR Mode. AVR Mode s upport
voice control recording function,when the envi ronment sound’s volume is very low and are kept for some time,it will enter
Suspend re cord mode.When th e volume recove r to the thres hold value or above,it will go on to record. [set reco rdings
scene]:you can choose normal scene,train scene,metting scene,long range scene,disable noise cancellation.
VI Pictures
Enter the Photo interface. In the photo list, press the Centre Key to see this chosen photo, and then press the Centre Key again
to switch between auto play and manual play. Press [9/:] to browse the photos, press [M]to enter the menu options. Press
V/R to retu rn to the Photo interface.
6.1 Pictures Menu Options
Submenu options: Brightn ess, B acklight timer, Slideshow settings, Delete picture, Create playlist. Except Backlight timer and
Slideshow setti ngs, the other menu operat ions’ ways a re the same with th e previous appl ication.
Backlight timer: There are [10 seconds][20 seconds][30 seconds][always on] four options. Press[9/:] t o browse t he menus.
Press the Centre Key to confirm and it will return to the previous submenu automatically.
Slideshow settings: Choose this option, it will display [Time per slide] [Repeat] [Shuffle] [Thumbnails].Time range for each
slide is 2S~30S.
VII EBook
Enter the EBook interface. Press [9/:] to select [Text] in the main menu. Press[9/:] to select the f ile. Press Centre Key to
start the text file, it will display the current Page Number and Total Page Number. Press [9/:] to turn the page. In the
process of browsing the text, press the Center Key to switch between manual page-turning and auto page-turning. Press [M]
to enter the submenu. Press V/R to exit.
Text submenu opti ons
In the text list interface, press [M] to enter the submenu. Submenu contains [Play setting], [Delete ebook].
[Play setting]: set up the auto play Time interval, 2S~30S.
[Delete eBook]: to delete the ebook you are reading.
In the text reading interface, press [M] to enter the submenu. Submenu contains [Play setting] [Delete ebook] [Bookmark
select] [Delete bookmark] [Add bookmark] [Page select].The bookmark function is the same as that in the music. Support 16
bookmarks at most for each text file.
[Page select]: enter page select interface, Press [9/:]to choose the page number, then press the Centre Key to confirm. And
the chosen page will appear.
Folder View:
List all of the files and catalogs in the player.
Internal storage: Press [9/:] to browse the files in the list and stop on one of the files. Press V/R to exit from the folder
view. Enter again, and you can browse the file from where you quit last time.
Choose one of the files in th e list and press [M], it will display “delete”. Press the Centre Key; choose “yes” to delete th e
chosen f ile and “no” not to delet e the file. If press [M] or [V/R], you can quit from the submenu.
VIII FM radio
Press Centre Key to enter the Radio interface.
Radio Menu Options
Presets: display the preset radio channels, it can show 30 channels at most. It can be reset at any time.
users : display the user radio channels, it can show 30 channels at most. This is set by the software and can not be changed or
deleted.
Manual Tune: Press the Centre Key to enter the manual tune interface, Press [9/:] t o tune the radio, when a radio channel
founded, press [M] to enter submenu, choose [save to preset], choose one of the frequency points and press the Centre Key
to confirm. Choose “yes”, and then the radio chann el has been saved to Preset.
Auto tune : choose this option, and it will display [Do you want to auto tune the presets?].Choose “Yes” to auto tune the radio
.Choose “no” to return to the radio menu.
FM Recordings: press the Centre Key to enter the recordings library, if there are no any recordings in the player, then it will
say “no recordings are found”; If there are recordings in the list, then choose one to play. All of these recordings can be
deleted.
Page 15

MM286 PL
15
Set Menu Options
①[Play mode ]:the same as that in the music function.
②[Sound settings]: the same as that in the music function.
③[Sleep timer]:time range is 1min~99min,time step is 1 min.
④[Display settings]:there are three options[Brightness],[Backlight timer],[Screensaver].
Brightness: range is 0~11, default level 5.
Backlight timer: There are four options:[10 seconds][20 seconds][30 seconds][Always on].The Light-off Mode will be invalid in
the following four interfaces: Video Player Interface, E-book Reader Interface, USB Connecting Interface
Screens aver: There are options of [None][D igital clock] [Album art][ Screen off][Dem o mode].
Date and time: to set up the date and time.
Press [M] to switch Year, Month, Day, Hour, M inutes and Seconds. Press [9/:] to adjust the numbers. Press the Centre Key
to save the settings. Press V/R to exit.
⑤[Slideshow settings]: the same as Photo function.
⑥[Language]: The player supports the following languages: Simplified Chinese, Traditional Chinese, English, Japanese, Korean,
French, Germany, Ita lian, Du tch, Portugu ese, Spanish, Swedish, Czech, D anish, Polis h, Russ ian, Turkish, H ungarian, Romanian,
Arabic, Hebrew, Thai, Indonesian, and Greek.
⑦[Information]: it will display[Player information][Disk space][File type supported].
Player information: show model name, software version name and supporting sites.
Disk space: show the Free space, Total space, the number of songs, pictures and videos.
⑧[File type suppo rted]: display the Music,Pictures,Video formats that supported.
⑨[Factory settings]:press the Centre Key and it will display a question, choose “yes” to restore the factory settings.
Radio interface
Manual Tune: Press [9/:] tune the radio finely. Long press [9/:], it can searc h the radio channels automatica lly. Press the
Centre K ey to tune th e radio manuall y.
Press [M] to enter the submenu, press V/R quit from the playing interface.
Submenu:
Start FM radio recording: press the Centre Key to enter the record interface.
Save to preset: choose an arbitrary frequency point in the preset FM radio, press the Centre Key to confirm. Then the radio
has been saved in the Preset.
Clear preset: press the Centre Key, and will enter preset radio channels list, press[9/:]to choose an arbitrary radio channel,
press the Centre Key, then an interface shows up” do you want to clear the preset? Yes of No”
Auto tune : choose th is option, and the p layer will start to auto tu ne the FM radio chann els. When t he FM radios are founded,
the system will save the channels automati cally and show 01.Go on searching, it will save the radio in order. In the tuning
process, press V/R to stop the search. After search the FM radio channels and save them successfully, you can switch the radio
channels by pressing the Centre Ke y.
Tuner Reg ion: normal band—range: 87.5MHZ-108.00MHZ
Japanese band---range: 76.00MHZ-90.00MHZ
European band---range: 87.50MHZ-108.00MHZ
Via Bluetooth play: the operation way is the same as Bluetooth application above.
IX Tools
Enter tools interface.
1. Calendar: Press [M] to switch Year, Month and Day. Press [9/:] to enlarge or decrease the number.
2. Stopwatch: press the Centre Key to start timing. (The longest timing is 99 hours 59 minutes 59 seconds and 99 milliseconds.
Press the Centre Key again to pause the timing. Press [9/:] to start another record. Support 5 times at most. Press [M] to
stop the stopwatch and clear all the records. Press V/R to quit from the stopwatch.
3. Alarm: enter Alarm interface. it will display [Alarm on /off][Alarm time][Alarm cycle][Alarm music][Alarm volume]
①Alarm on/off: it will display[Alarm off] and [Alarm on], Press [9/:] to choose.
②Alarm time: Press [9/:] to enlarge or decrease the time number. Press [M] to switch HH (hour), MM (minutes),
AMPM.Press V/R to quit from the [Alarm time].
③Alarm cycle: three options.[Once][Daily][Work day]. Press [9/:] to browse, press the Centre Key to confirm, press V/R to
quit.
④Alarm music: Press [9/:] to browse, press the Centre Key to confirm, press V/R to quit. It will display [Ring embedded]
and [Music in flash]. [Ring embedded] means the music is the default song in the system. [Music in flash] means rings are from
the internal memory.
⑤Alarm volume: volume range is from 0 to 31.Default volume level is 15.
X Set
Page 16

MM286 PL
16
XI Bluetooth
Menu Options
Enter Bluetooth interface to see the operation interface. Press [9/:] to b rowse the files, press the Centre Key to enter the
correspon ding option.
[Bluetooth switch control]: press the Centre Key to enter, press [9/:] to choose [Turn BT On] or [Tu rn BT Off].
[Search device]: press the Centre Key to enter and the searching interface shows up, i f a device is found, then it will be list ed
in the device list. Choose [Connect] to connect with Bluetooth device.
[Device’s list]: press the Centre Key to operate the player. Press [9/:] to choose the device, and enter the device menu
interface. It will list the available operation options according to the status of the device.
When the device is in the Usable status, it can be paired with the device.
When the device is in the Paired status, you can choose [Disconnect].
When it is connected successfully, it will show the playing interface.
[All musi c]: press the Centre Key to enter, and you can choose the music from the list to play.
[BT now playing]: when there is a device in the connected status, press the Centre Key to enter. The interface display and
contents are the same with the mus ic playing i nterface. Press [M] t o enter the s ubmenu of E qualizer.
XII Troubleshooting
If the player does not work properly, check the followings:
1. The player can not be powered on.
Please check if the battery has run out. Try to turn on the player again after it has been connected to USB or charger to
make charging.
2. No sound from earphone.
Please make sure the volume is not at setting 0 and the earphone is well connected.
3. Serious noise.
Please make sure the earphone is clean. If audio file is damaged, it will show different nois e or can not be played. So
please make sure the file is completed
4. Bad action of FM receipt signal.
Please adjust the direction and position of the player, and lengthen the earphone line. Please check whether there are
other electronically products interferences.
5. Unreadable code
Please make sure you have chosen the right language. Please turn off the player and start again
6. Cannot upload/download files.
Make sure the connection between the player and PC is correct.
Check if the mem ory is full.
Check if the USB connecting line is da maged.
7. Can not turn it off when crash.
Please slide the ON/OFF switch to restart the player.
Please slide the ON/OFF switch to restart the player.
Note!
Product design and Technical parameters may be change without notice. This mainly concerns parameters technical, software
and user manual present. User’s Manual is a general orientation on service product. Manufacturer and distributor do not
assume any responsibility as compensation for any inaccuracies errors in the descriptions appearing in this user manual.
Note about disposal
Older appliances, which display the symbol as shown in the picture, may not be discarded in household waste. You
must take them to a specific disposal site (check with your local authority) or to your retailer. These sites will
guarantee disposal without harming the environment
Page 17

MM286 PL
17
CUSTOMER SERVICE
tel: +48 22 332 34 63 lub e-mail: [email protected]
FROM MONDAY TO FRIDAY, IN HOURS: 9.00-17.00
The manufacturer reserves the right tomake changes to product specifications
without notice.
Main page: www.manta.com.pl
Technical suport page: www.manta.info.pl
Made in P.R.C.
FOR MANTA EUROPE
 Loading...