

Page 1
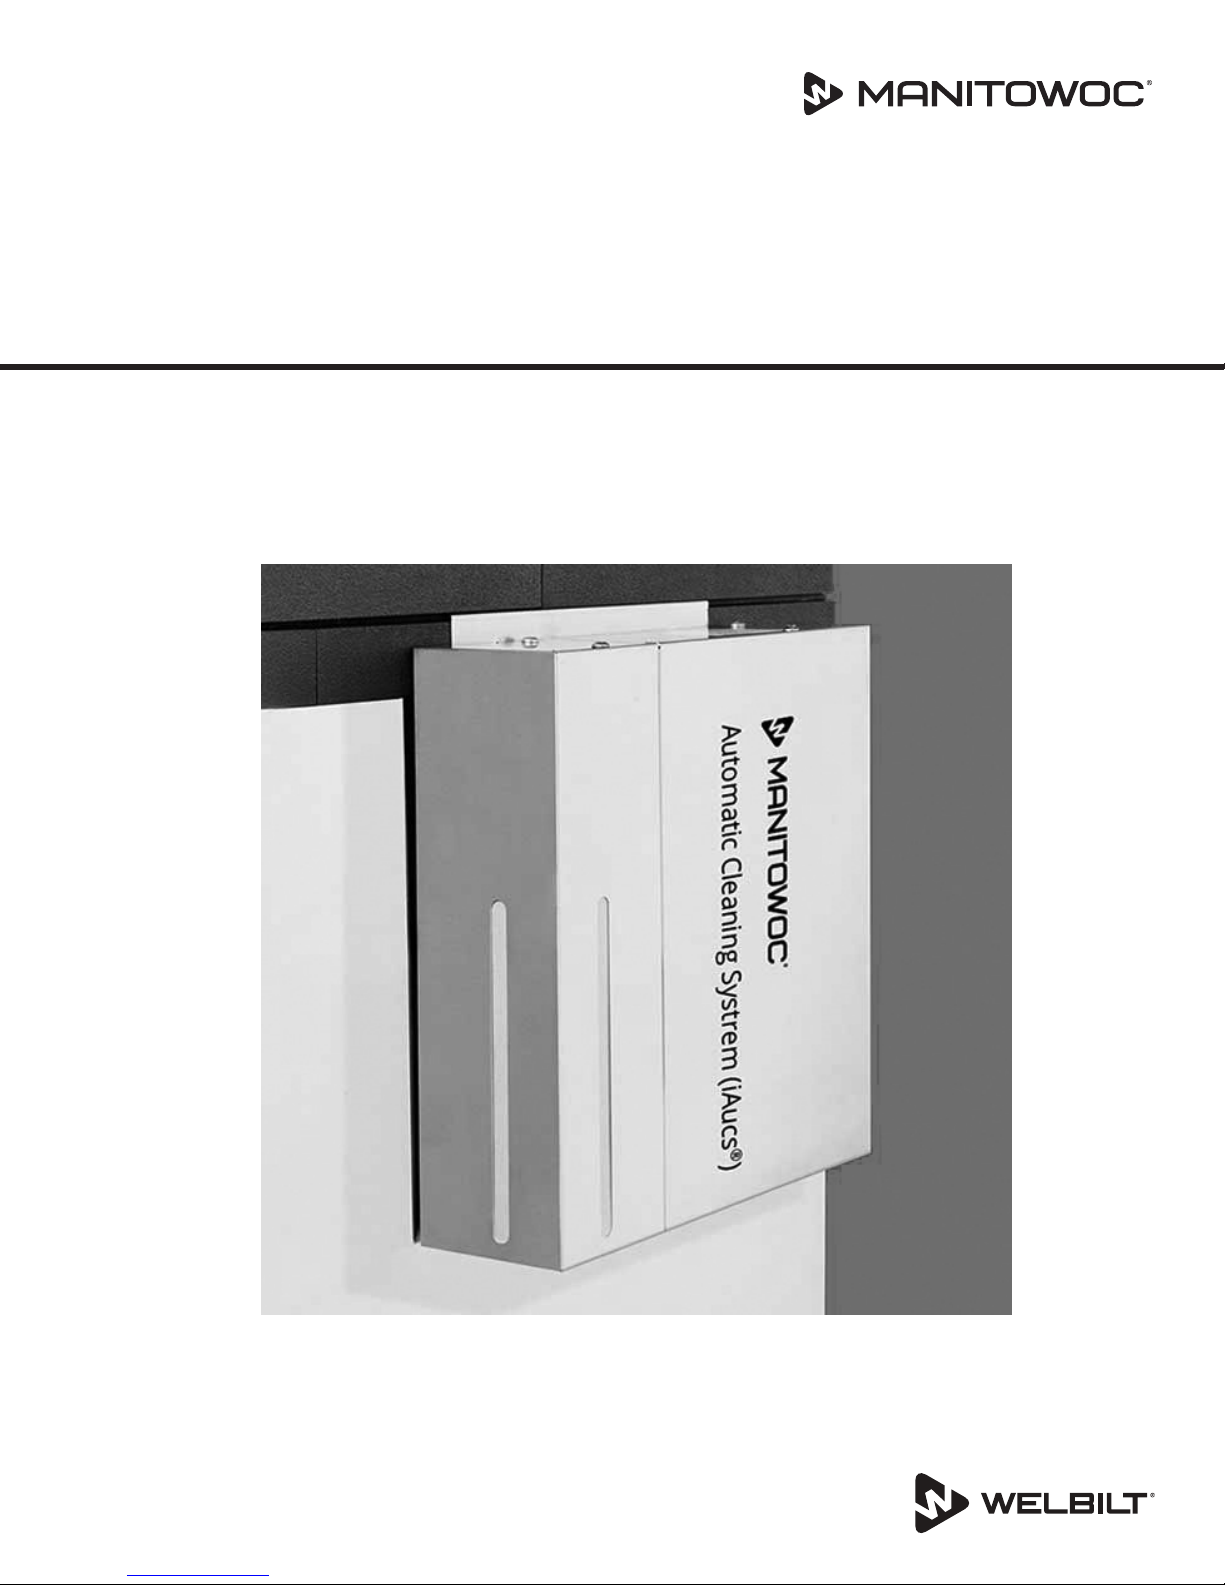
iAuCS®
Automatic Cleaning System
Installation, Operation and Maintenance Manual
Original Document
Part Number 000009036 Rev03 6/18
Caution
,
Read this instruction before operating this equipment.
Page 2

Page 3
Safety Notices
Safety Notices
Read these precautions to prevent personal injury:
• Read this manual thoroughly before operating,
installing or performing maintenance on the
equipment. Failure to follow instructions in this manual
can cause property damage, injury or death.
• Routine adjustments and maintenance procedures
outlined in this manual are not covered by the
warranty.
• Proper installation, care and maintenance are
essential for maximum performance and troublefree operation of your equipment. Visit our website
www.manitowocice.com for manual updates,
translations, or contact information for service agents
in your area.
• This equipment contains high voltage electricity and
refrigerant charge. Installation and repairs are to be
performed by properly trained technicians aware of
the dangers of dealing with high voltage electricity and
refrigerant under pressure. The technician must also
be certified in proper refrigerant handling and servicing
procedures. All lockout and tag out procedures must be
followed when working on this equipment.
• This equipment is intended for indoor use only. Do not
install or operate this equipment in outdoor areas.
DEFINITIONS
DANGER
Indicates a hazardous situation that, if not avoided, will
result in death or serious injury. This applies to the most
extreme situations.
Warning
n
Indicates a hazardous situation that, if not avoided, could
result in death or serious injury.
Caution
,
Indicates a hazardous situation that, if not avoided, could
result in minor or moderate injury.
Notice
Indicates information considered important, but not
hazard-related (e.g. messages relating to property
damage).
Warning
n
Follow these electrical requirements during installation of
this equipment.
• All field wiring must conform to all applicable codes of
the authority having jurisdiction. It is the responsibility
of the end user to provide the disconnect means to
satisfy local codes. Refer to rating plate for proper
voltage.
• This appliance must be grounded.
• This equipment must be positioned so that the plug is
accessible unless other means for disconnection from
the power supply (e.g., circuit breaker or disconnect
switch) is provided.
• Check all wiring connections, including factory
terminals, before operation. Connections can become
loose during shipment and installation.
Warning
n
Follow these precautions to prevent personal injury
during installation of this equipment:
• Installation must comply with all applicable equipment
fire and health codes with the authority having
jurisdiction.
• To avoid instability the installation area must be
capable of supporting the combined weight of the
equipment and product. Additionally the equipment
must be level side to side and front to back.
• Ice machines require a deflector when installed on
an ice storage bin. Prior to using a non-OEM ice
storage system with this ice machine, contact the
bin manufacturer to assure their ice deflector is
compatible.
• Do not damage the refrigeration circuit when installing,
maintaining or servicing the unit.
• Connect to a potable water supply only.
• Some 50 Hz models may contain up to 150 grams
of R290 (propane) refrigerant. R290 (propane)
is flammable in concentrations of air between
approximately 2.1% and 9.5% by volume (LEL lower
explosion limit and UEL upper explosion limit). An
ignition source at a temperature higher than 470°C is
needed for a combustion to occur. Refer to nameplate
to identify the type of refrigerant in your equipment.
Only trained and qualified personnel aware of the
dangers are allowed to work on the equipment.
NOTE: Indicates useful, extra information about the
procedure you are performing.
Page 4

Warning
n
Follow these precautions to prevent personal injury while
operating or maintaining this equipment:
• Read this manual thoroughly before operating,
installing or performing maintenance on the
equipment. Failure to follow instructions in this manual
can cause property damage, injury or death.
• Crush/Pinch Hazard. Keep hands clear of moving
components. Components can move without warning
unless power is disconnected and all potential energy is
removed.
• Moisture collecting on the floor will create a slippery
surface. Clean up any water on the floor immediately to
prevent a slip hazard.
• Objects placed or dropped in the bin can affect human
health and safety. Locate and remove any objects
immediately.
• Never use sharp objects or tools to remove ice or frost.
Do not use mechanical devices or other means to
accelerate the defrosting process.
• When using cleaning fluids or chemicals, rubber gloves
and eye protection (and/or face shield) must be worn.
DANGER
Do not operate equipment that has been misused, abused,
neglected, damaged, or altered/modified from that of
original manufactured specifications. This appliance is
not intended for use by persons (including children) with
reduced physical, sensory or mental capabilities, or lack
of experience and knowledge, unless they have been
given supervision concerning use of the appliance by a
person responsible for their safety. Do not allow children
to play with, clean or maintain this appliance without
proper supervision.
DANGER
Follow these precautions to prevent personal injury
during use and maintenance of this equipment:
• It is the responsibility of the equipment owner to
perform a Personal Protective Equipment Hazard
Assessment to ensure adequate protection during
maintenance procedures.
• Do Not Store Or Use Gasoline Or Other Flammable
Vapors Or Liquids In The Vicinity Of This Or Any Other
Appliance. Never use flammable oil soaked cloths or
combustible cleaning solutions for cleaning.
• All covers and access panels must be in place and
properly secured when operating this equipment.
• Risk of fire/shock. All minimum clearances must be
maintained. Do not obstruct vents or openings.
• Failure to disconnect power at the main power supply
disconnect could result in serious injury or death. The
power switch DOES NOT disconnect all incoming power.
• All utility connections and fixtures must be maintained
in accordance with the authority having jurisdiction.
• Turn off and lockout all utilities (gas, electric, water)
according to approved practices during maintenance or
servicing.
• Units with two power cords must be plugged into
individual branch circuits. During movement, cleaning
or repair it is necessary to unplug both power cords.
• Never use a high-pressure water jet for cleaning on
the interior or exterior of this unit. Do not use power
cleaning equipment, steel wool, scrapers or wire
brushes on stainless steel or painted surfaces.
• Two or more people are required to move this
equipment to prevent tipping.
• Locking the front casters after moving is the owner’s
and operator’s responsibility. When casters are
installed, the mass of this unit will allow it to move
uncontrolled on an inclined surface. These units must
be tethered/secured to comply with all applicable
codes.
• The on-site supervisor is responsible for ensuring that
operators are made aware of the inherent dangers of
operating this equipment.
• Do not operate any appliance with a damaged cord
or plug. All repairs must be performed by a qualified
service company.
Page 5

Safety Notices
Section 1
General Information
Section 2
Installation
Section 3
Operation
Table of Contents
Safety Notices ................................................................................................................... 3
Definitions ....................................................................................................................... 3
Compatible Ice Machine Models........................................................................................ 7
Model Compatibility........................................................................................................7
Indigo® NXT ....................................................................................................................... 7
iAuCS® Location ................................................................................................................. 7
Warranty Information........................................................................................................ 7
General ............................................................................................................................. 9
Electrical Service ............................................................................................................... 9
General ............................................................................................................................ 9
iAuCS® Installation ............................................................................................................9
Location/Mounting .........................................................................................................9
Height Requirement ......................................................................................................10
Distance Requirement ...................................................................................................10
Mounting.......................................................................................................................10
Connection to Ice Machine ........................................................................................... 11
Determine Type of Solution Needed ................................................................................ 15
Manitowoc Ice Machine Cleaner ..................................................................................15
Manitowoc Ice Machine Sanitizer .................................................................................15
Installing/Replacing Cleaner or Sanitizer Bottles .............................................................. 15
Indigo® NXT Model Procedures ....................................................................................... 16
Indigo® NXT Automatic Operation ................................................................................16
Indigo® NXT Setting Frequency of Cleaning ..................................................................16
Indigo® NXT Hose Priming .............................................................................................16
Indigo® NXT Manual Start Operation ............................................................................17
Indigo® NXT Changing the Solution Type ......................................................................17
Indigo® Model Procedures ............................................................................................... 18
Indigo® Model Automatic Operation ............................................................................18
Setting Frequency of Cleaning Indigo® Models .............................................................18
Indigo® Model Hose Priming ......................................................................................... 18
Indigo® Model Changing the Solution Type ..................................................................19
Indigo® Model Manual Start Operation ........................................................................19
Changing Switch Position During Operation .................................................................19
Removal from Service/Winterization ............................................................................... 20
Part Number 000009036 Rev03 6/18 5
Page 6

Table of Contents (continued)
THIS PAGE INTENTIONALLY LEFT BLANK
6 Part Number 000009036 Rev03 6/18
Page 7
Section 1
General Information
Compatible Ice Machine Models
The iAuCS® accessory can be used on Manitowoc Indigo®
Series ice machines.
NOTE: Automatic Cleaning Systems are not compatible
with S3000 Series, Flake/Nugget, NEO or SM50 model ice
machines.
MODEL COMPATIBILITY
Indigo®
Self-Contained
Air-Cooled
ID0302A
IY0304A
ID0322A
IY0324A
ID0452A
IY0454A
IR0500A
ID0502A
IY0504A
IR0520A
ID0522A
IY0524A
ID0602A
IY0604A
----
---IR0850A
ID0852A
IY0854A
---IR0906A
ID0906A
IY0906A
ID1002A
IY1004A
----
---ID1202A
IY1204A
ID1402A
IY1404A
---IR1800A
ID1802A
IY1804A
----
----
Self-Contained
Water-Cooled
ID0303W
IY0305W
ID0323W
IY0325W
ID0453W
IY0455W
IR0501W
ID0503W
IY0505W
IR0421W
ID0423W
IY0425W
ID0603W
IY0605W
----
---IR0851W
ID0853W
IY0855W
---IR0906W
ID0906W ID0906WM
IY0906W IY0906WM
ID1003W
IY1005W
ID1003WM
---ID1203W
IY1205W
ID1403W
IY1405W
ID1403WM
IR1801W
ID1803W
IY1805W
----
----
Remote
----
----
----
----
----
---IR0590N
ID0592N
IY0594N
----
----
---ID0692N
IY0694N
----
---IR0890N
ID0892N
IY0894N
---IR0996N
ID0996N
IY0996N
ID1092N
IY1094N
----
----
----
---ID1492N
IY1494N
---IR1890N
ID1892N
IY1894N
----
----
QuietQube
Models
----
----
----
----
----
----
----
----
----
----
----
---ID0682C
IY0684C
IB0694YC
IB0692DC
ID0872C
IY0874C
IB0894YC
IB0892DC
ID0976C
IY0976C
---ID1072C
IY1074C
IB1094YC
IB1092DC
ID1272C
IY1274C
ID1472C
IY1474C
ID1872C
IY1874C
---ID2172C
IY2174C
Indigo® NXT
Self-Contained
Air-Cooled
IDF0300A
IYF0300A
IDT0420A
IYT0420A
IDT0450A
IYT0450A
IDT0500A
IYT0500A
IRT0500A
IDF0600A
IYF0600A
IDT0620A
IYT0620A
IRT0620A
IDP0620A
IDF0900A
IYF0900A
IRF0900A
IDT1200A
IYT1200A
IDT1500A
IYT1500A
IDT1900A
IYT1900A
IRT1900A
----
----
Self-Contained
Water-Cooled
IDF0300W
IYF0300W
IDT0420W
IYT0420W
IDT0450W
IYT0450W
IDT0500W
IYT0500W
IRT0500W
IDF0600W
IYF0600W
IDT0620W
IYT0620W
----
---IDF0900W
IYF0900W
---IDT1200W
IYT1200W
IDT1500W
IYT1500W
IDT1900W
IYT1900W
----
----
----
Remote
----
----
----
----
----
---IDT0500N
IYT0500N
---IDF0600N
IYF0600N
----
----
----
---IDF0900N
IYF0900N
---IDT1200N
IYT1200N
IDT1500N
IYT1500N
IDT1900N
IYT1900N
IRT1900N
----
----
QuietQube
Models
----
----
----
----
----
----
----
----
----
IYF0600C
IBF0620C
----
----
---IBF0820C
IYF0900C
IBT1020C
IDT1200C
IYT1200C
IDF1400C
IYF1400C
IDF1800C
IYF1800C
---IDF2100C
IYF2100C
iAuCS® Location
The iAuCS® is mounted on the wall near the ice machine, or
on the bin with the included bracket and hardware.
The iAuCS® must be installed by a trained and qualified
technician.
Warranty Information
Visit www.manitowocice.com for:
• Warranty Verification
• Warranty Registration
• View and download a copy of your warranty
Part Number 000009036 Rev03 6/18 7
Page 8

General Information Section 1
THIS PAGE INTENTIONALLY LEFT BLANK
8 Part Number 000009036 Rev03 6/18
Page 9

Section 2
Installation
General
These instructions are provided to assist the qualified
installer. Check your local Yellow Pages for the name of the
nearest distributor, or contact Manitowoc Ice for information
regarding start-up services.
Please contact you local Manitowoc Distributor or contact
Manitowoc Ice for assistance if you encounter a problem that
is not covered by this manual.
Notice
Failure to follow these installation guidelines may affect
warranty coverage. Improper installation will affect
dispensing rate. Install only within the parameters
outlined in this installation manual.
Electrical Service
GENERAL
Warning
n
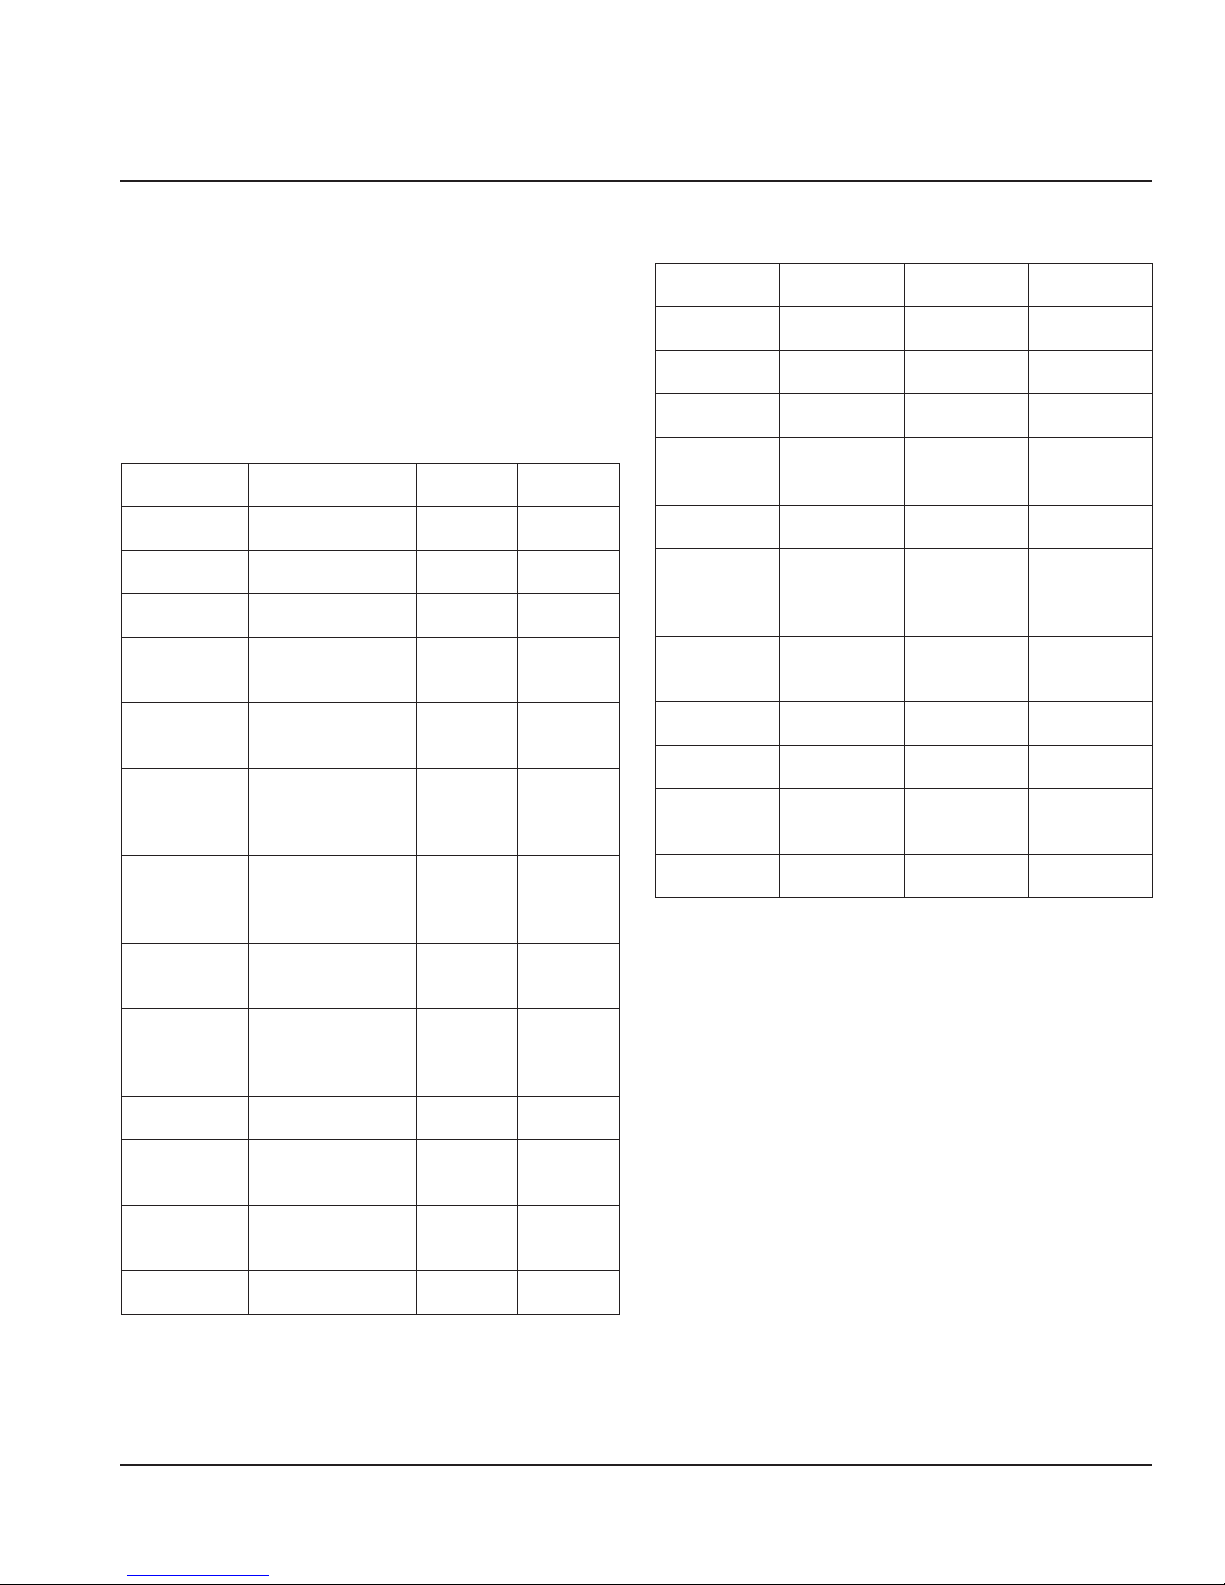
A trained and qualified technician must install the iAuCS®.
Voltage Phase Cycle Amperage
115/1/60 0.3
208-230/1/60 0.1
Line voltage is obtained from the ice machine. Refer to the
Model/Serial plate on the ice machine and iAuCS® to verify
both voltages are the same.
iAuCS® Installation
LOCATION/MOUNTING
Warning
n
All wiring must conform to local, state and national codes.
Warning
n
The ice machine and iAuCS® must be grounded in
accordance with national and local electrical codes.
Important
Observe correct polarity of incoming line voltage.
The location selected must meet the following criteria. If any
of these criteria are not met, select another location.
• The location must be free of airborne and other
contaminants.
• The air temperature must be at least 40°F (4°C), but must
not exceed 110°F (43°C).
• The location must not be near heat-generating
equipment or in direct sunlight.
Notice
The iAuCS® accessory must be protected if it will be
subjected to temperatures below 32°F (0°C). Failure
caused by exposure to freezing temperatures is not
covered by the warranty. See “Removal from Service/
Winterization” on page 20.
Part Number 000009036 Rev03 6/18 9
Page 10

Installation Section 2
HEIGHT REQUIREMENT
Either the base or the top of the iAuCS® accessory must
be within 2" (5 cm) of the base of the ice machine. Do not
mount the iAuCS® unit too high or too low.
Notice
The cleaner or sanitizer may siphon (or dispense
improperly) into the ice machine water trough if the
iAuCS® unit is mounted too high or too low.
DISTANCE REQUIREMENT
The iAuCS® unit must be mounted within 9 feet (2.7 m)
of the ice machine to accommodate the low voltage
communication wire and tubing. The tubing may be
shortened to accommodate a run of less than 9 feet (2.7 m).
Notice
Do not extend the length of the 9-foot (2.7 m) low voltage
communication wire or tubing. The correct amount of
solution will not dispense.
Base of Ice
Machine
MOUNTING
Parts
1/2" PVC Conduit
Fitting
Hose Clamps
Locknut
Bumper
Foam Tape
2"
(5 cm)
Box Base or Box Top Must
Be Within 2"
(5 cm) of Ice Machine
Base
Bracket
Notice
The iAuCS® unit may be mounted to the bin or dispenser
only when permitted by local electrical codes.
Mounting to Bin or Dispenser
NOTE: The ice machine’s serviceability may be reduced when
the iAuCS® unit is mounted to the bin or dispenser. Wall
mounting is recommended.
1. Set the mounting bracket over the bin top rail at desired
location.
2. Remove the backing from the foam adhesive tape. Apply
tape to mounting bracket, and along the entire bin rail.
3. Align the iAuCS® key slots with the mounting bracket
tabs. Verify the tabs are at the top of the key slots and
that the iAuCS® unit is level.
10 Part Number 000009036 Rev03 6/18
Page 11

Section 2 Installation
4. Remove the backing from the adhesive bumpers. Attach
bumpers to the mounting bracket directly above the
iAuCS® control box. This eliminates upward movement
and stops the tabs from disengaging the key slots.
Mounting
Bracket
Bumper
Gasket
Mounting to Ice Machine
Mounting to Wall
The iAuCS® is mounted to the wall using the two key slots in
the back wall of the accessory. Screw fasteners (not supplied)
must hold the entire weight of the iAuCS® (approximately 10
lbs. [4.5 kg]).
6.56"
(16.6 cm)
CONNECTION TO ICE MACHINE
Electrical Connections
1. Check electrical code for your area.
• When local code allows, the included wire and strain
relief can be used for line voltage wiring. Remove
knockout from ice machine and install strain relief
and wire.
• When conduit is required, remove strain relief and
ice machine electrical knockout. Install conduit as
required by your electrical code.
Warning
n
Disconnect the electrical power supply to the ice machine
at the electrical disconnect before proceeding.
• Connections on ice machines vary. Refer to the
diagram for the ice machine you are working on.
2. Remove the front, top, and right side panels from the ice
machine.
3. Route line voltage wires through control box line voltage
Heyco fitting. Connect line voltage wires to incoming
power supply of contactor and ground screw.
NOTE: On QuietQube Ice Machines the power connection
is made at the incoming power supply (L1 and L2). Cut-off
yellow terminal (L2) and purple terminal (L1) on iAuCS®
harness. Strip insulation back 1/2" and connect.
Key Slot Dimensions
Low Voltage
Heyco
Fittings
Connect
ground wire
to ground
screw
Line Voltage
Heyco
Fittings
Connect to incoming
power supply of
contactor observing
proper polarity for
115V
Part Number 000009036 Rev03 6/18 11
Page 12

Installation Section 2
Communication Wire and Vinyl Tubing
The communication wire and vinyl tubing must be installed in
conduit to protect them from damage.
1. Remove the 7/8" knockout hole plug located on the back
of the ice machine.
2. Install conduit from the iAuCS® unit to the ice machine.
A pulling elbow is recommended for easier routing of
the vinyl tubing and modular wire.
3. Route low voltage communication wire and vinyl tubing
together through the conduit.
4. Route modular wire through control box low voltage
Heyco fitting. Do not route with line voltage wiring, as
erratic operation could result. Connect modular wire to
control board.
5. Connect the communication wire to the iAuCS® control
board.
iAuCS®
Communication
Plug Connection
Vinyl Tubing Connection
1. Remove the water trough.
A. Depress tabs on right and left side of the water
trough.
B. Allow front of water trough to drop as you pull
forward to disengage the rear pins.
2. Locate the water inlet tube on the right hand side (see
below) of the ice machine base.
• After serial number 1101246915 - Use a screwdriver
to remove membrane.
• Before serial number 1101246915 - Press up on the
plug until it is out.
Control Board
Press up on
bottom of plug
to pop out
Plug Location
Water Inlet
Tubing
After Serial Number
1101246915 use
screwdriver to remove
membrane
12 Part Number 000009036 Rev03 6/18
Page 13

Section 2 Installation
3. Locate and remove either the membrane material or the
plug from the ice machine.
4. Apply food grade silicone and install Y connector through
the hole in the ice machine base. Connect the clear vinyl
tubing to one side of the Y branch. The other side is for
the plug removed in step 3 or the plug provided with the
iAuCS®.
Route tubing
to this area
Insert Y
connector
with tubing
Top View
5. Determine the amount of tubing required in the iAuCS®
control box and cut off the excess tubing.
6. Slide the tubing on the iAuCS® pump.
Slide the tubing
on the iAuCS®
pump
Install plug
provided with
iAuCS®
or
plug removed in
Step 3
Connect
Tubing
Into Base of
Ice Machine
Y-Connector
Part Number 000009036 Rev03 6/18 13
Page 14

Installation Section 2
THIS PAGE INTENTIONALLY LEFT BLANK
14 Part Number 000009036 Rev03 6/18
Page 15

Section 3
Operation
Determine Type of Solution Needed
Caution
,
Use only Manitowoc approved Ice Machine Cleaner
& Sanitizer. It is a violation of Federal law to use these
solutions in a manner inconsistent with their labeling.
Read and understand all labels on the bottles before use.
The iAuCS® accessory will dispense Cleaner OR Sanitizer. It
cannot dispense both at the same time.
MANITOWOC ICE MACHINE CLEANER
Part Number 9405463
Ice Machine Cleaner is used to control buildup and to remove
lime scale or other mineral deposits. It will not “sanitize” the
ice machine.
It is recommended for use in places that have lime scale or
other mineral deposits, but no problems with slime.
Model Amount of Cleaner Dispensed
22" or 30"
Ice Machine
48" Ice Machine 6 oz (177 ml)
3 oz (88 ml)
Important
Using the iAuCS® accessory is supplemental to regular
cleaning and sanitizing. The iAuCS® accessory will clean
surfaces that come in contact with the water distribution
system. Periodic maintenance must be performed every
six months that includes sanitizing the bin (or dispenser)
and adjacent surface areas, which cannot be contacted
by the water distribution system. Refer to the ice machine
installation operation and maintenance manual for
cleaning/sanitizing procedures.
Installing/Replacing Cleaner or Sanitizer Bottles
Caution
,
Do not mix Cleaner and Sanitizer solutions together. It
is a violation of Federal law to use these solutions in a
manner inconsistent with their labeling.
1. Remove left iAuCs®panel.
MANITOWOC ICE MACHINE SANITIZER
Part Number 9405653
Ice Machine Sanitizer is used for sanitizing and controlling
algae buildup (slime) and other bacterial growth. The ice
machine (and bin or dispenser) must be sanitized on a
regular schedule, following Manitowoc recommendations
and local regulations.
It is recommended for use in places such as pizzerias, bars,
bakeries, etc., that have airborne bacteria (yeast). Sanitizing
is also recommended in places that do not have lime scale
(or other mineral deposit problems).
Model Amount of Sanitizer Dispensed
22" or 30"
Ice Machine
48" Ice Machine 6 oz (176 ml)
3 oz (88 ml)
2. Unscrew nozzle/tubing from bottle, then remove bottle.
3. Remove bottle cap and foil seal from new bottle.
4. Install nozzle/tubing on new bottle.
5. Reinstall left panel.
Unscrew cap and remove bottle
Remove cap and foil seal from new
bottle and install
Part Number 000009036 Rev03 6/18 15
Page 16

Operation Section 3
Indigo® NXT Model Procedures
INDIGO® NXT AUTOMATIC OPERATION
The following occurs when the ice machine is in ice making
mode:
• A cleaning sequence starts when the time interval equals
the Frequency of Cleaning setting of the iAuCS®.
• When the clean sequence is complete
(approximately 35 minutes depending on model), ice
making resumes until the next cleaning setpoint.
INDIGO® NXT SETTING FREQUENCY OF CLEANING
1. Navigate to iAuCs® on the touchscreen:
Menu/Settings/iAuCs®.
2. Use the arrows to select the frequency of cleaning - from
once a month, up to once every six months.
3. Select On, then press the Home icon. Priming the pump
is required if initial installation or the dispense hose does
not contain cleaner or sanitizer.
INDIGO® NXT HOSE PRIMING
The dispense pump requires priming after initial installation,
or if the hose between the iAuCS® reservoir and pump has
been pumped dry or the tubing between the iAuCS® pump
and the ice machine has been pumped dry.
Warning
n
Do not blow into or suck on the hose in an attempt to
prime it.
Important
iAuCS® does not operate when the CLEAN button is used
to start a clean cycle. To prime the hose, activation is
required through the Service Menu/iAuCS® icon.
Perform the following procedure:
1. Remove all ice from the evaporator(s) before priming.
2. Place a bottle of cleaner or sanitizer in the
iAuCs®cabinet. Insert the pump inlet hose into the bottle
and verify the pump outlet hose is correctly attached to
the ice machine. Refer to “Installing/Replacing Cleaner
or Sanitizer Bottles” on page 15.
3. Navigate to iAuCs® on the touchscreen:
Menu/Service/iAuCs®.
4. Select On - A cleaning cycle will start by purging the
water in the water trough. When the water trough refills
and water contacts the water level probe, the iAuCs®
pump will energize and prime the pump (touchscreen
displays step 4).
NOTE: After the iAuCs® pump dispenses, the washing, rinsing
and flushing cycles must complete before an ice making cycle
can start.
16 Part Number 000009036 Rev03 6/18
5. The ice machine will turn off at the end of the cycle.
To automatically start ice making when the cycle is
complete, press the power button Off, then On during
either the wash or rinse cycles. The clean cycle will
resume from the beginning of either the washing
or rinsing/flushing cycle, depending on the point of
interruption.
Page 17

Section 3 Operation
INDIGO® NXT MANUAL START OPERATION
Step 1 Ice must not be on the evaporator during the
clean/sanitize cycle. Follow one of the methods below:
• Press the power switch at the end of a harvest cycle after
ice falls from the evaporator(s).
• Press the power switch and allow the ice to melt.
• Use the touchscreen to initiate a manual harvest cycle
Menu/Service/Manual harvest/press to start harvest.
Step 2 Navigate to iAuCs® on the touchscreen:
Menu/Service/iAuCs®/Select On
A cleaning cycle will start by purging the water in the water
trough. When the water trough refills and water contacts
the water level probe, the iAuCs® pump will energize
(touchscreen displays step 4).
NOTE: After the iAuCs® pump dispenses, the washing, rinsing
and flushing cycles must complete before an ice making cycle
can start.
Step 3 The ice machine will turn off at the end of the
cycle. To automatically start ice making when the cycle
is complete, press the power button Off, then On during
the wash cycle (step 5 Washing is displayed). The clean
cycle will resume from the beginning of the washing cycle
and automatically start ice making when the clean cycle is
complete.
INDIGO® NXT CHANGING THE SOLUTION TYPE
Caution
,
Wear rubber gloves and safety goggles (and/or face
shield) when handling Cleaner and Sanitizer.
Caution
,
Do not mix Cleaner and Sanitizer solutions together. It
is a violation of Federal law to use these solutions in a
manner inconsistent with their labeling.
Notice
Do not use 1 gallon bottles of Cleaner or Sanitizer on the
iAuCS® accessory.
Use the following procedure to flush the system prior to
changing from Cleaner to Sanitizer or from Sanitizer to
Cleaner.
1. Remove all ice from the evaporators before proceeding.
2. Remove the bottle of Cleaner or Sanitizer from the
iAuCS®. Flush the bottle thoroughly, then fill with water.
3. Repeat the following a minimum of two times:
A. Navigate to iAuCs® on the touchscreen and select :
Menu/Service/iAuCs®.
Important
Opening the curtain switch will interrupt the clean
sequence. The sequence will resume from the point of
interruption when the curtain re-closes.
B. A cleaning cycle will start by purging the water in
the water trough. When the water trough refills and
water contacts the water level probe, the iAuCs®
pump will energize and prime the pump
4. Install a new bottle of cleaner or sanitizer solution.
Refer to “Installing/Replacing Cleaner or Sanitizer
Bottles” on page 15.
Part Number 000009036 Rev03 6/18 17
Page 18

Operation Section 3
Indigo® Model Procedures
INDIGO® MODEL AUTOMATIC OPERATION
The following occurs when the ice machine is in ice making
mode:
• A cleaning sequence starts when the time interval equals
the Frequency of Cleaning setting of the iAuCS®.
• When the clean sequence is complete
(approximately 25 minutes depending on model), ice
making resumes until the next cleaning setpoint.
SETTING FREQUENCY OF CLEANING INDIGO® MODELS
The iAuCS® unit is factory-set to initiate and complete a clean
sequence approximately once every two weeks.
iAuCS®
For less frequent cleaning, use the controller to select an
interval.
1. Press Menu.
2. Scroll to Setup and press right arrow.
3. Scroll to iAuCS Runtime and press right arrow.
Display reads:
iAuCS on
iAuCS off
Set interval
Exit
4. Select iAuCS on and press check mark.
5. Select Set interval. Display reads:
.5 mo
1 mo
2 mo
3 mo
4 mo
5 mo
6 mo
Exit
6. Select desired time period and press check mark
(15 days, 1 month, 2 months, etc.).
7. Press left arrow repeatedly to exit to Main screen.
INDIGO® MODEL HOSE PRIMING
The dispenser pump requires priming after initial installation,
or if the hose between the iAuCS® reservoir and pump has
been pumped dry or the tubing between the iAuCS® pump
and the ice machine has been pumped dry.
Warning
n
Do not blow into or suck on the hose in an attempt to
prime it.
Perform the following procedure:
1. Press the CLEAN button.
2. The water pump and dump valve will turn on. The dump
valve will shut off after approximately 45 seconds.
3. The control waits until water contacts the water level
probe then energizes the iAuCS® pump (22" or 30" ice
machines - 30 seconds, 48" ice machines - 60 seconds).
4. Allow the ice machine to complete the cleaning or
sanitizing cycle.
Important
The priming procedure starts the automatic cleaning
mode. After starting an ice making cycle, the ice machine
will run through 6 rinse and dump cycles before making
ice.
18 Part Number 000009036 Rev03 6/18
Page 19

Section 3 Operation
INDIGO® MODEL CHANGING THE SOLUTION TYPE
Caution
,
Wear rubber gloves and safety goggles (and/or face
shield) when handling Cleaner and Sanitizer.
Caution
,
Do not mix Cleaner and Sanitizer solutions together. It
is a violation of Federal law to use these solutions in a
manner inconsistent with their labeling.
Notice
Do not use 1 gallon bottles of Cleaner or Sanitizer on the
iAuCS® accessory.
Use the following procedure to flush the system prior to
changing from Cleaner to Sanitizer or from Sanitizer to
Cleaner.
1. Remove the bottle of Cleaner or Sanitizer from the
iAuCS®. Flush the bottle thoroughly then fill with water.
2. Repeat the following until the water bottle is empty
(approximately 8 times):
A. Press the CLEAN button.
B. The water pump and dump valve will turn on.
The dump valve will shut off after approximately
45 seconds.
C. The control waits until the water contacts the water
level probe then energizes the iAuCS® pump (22" or
30" ice machines - 30 seconds, 48" ice machines - 60
seconds).
D. Press the POWER button after step C is completed.
3. Install a new bottle of cleaner or sanitizer solution.
INDIGO® MODEL MANUAL START OPERATION
Step 1 Press the power button after ice falls from the
evaporator at the end of a Harvest cycle. Or, press the power
button and allow the ice to melt off the evaporator.
Notice
Never use anything to force ice from the evaporator.
Damage may result.
Step 2 To start the automatic cleaning system, press the
CLEAN button. The water will flow through the water dump
valve and down the drain. The clean light will turn on to
indicate the ice machine is in Clean Mode.
The iAuCS® pump energizes automatically to add cleaner or
sanitizer to the ice machine.
Step 3 The ice machine will automatically time out a wash
cycle, followed by rinse cycles, and stop. This entire cycle
lasts approximately 24 minutes for Indigo® Series.
Step 4 The ice machine will start and finish the clean
sequence, then automatically start ice making again.
CHANGING SWITCH POSITION DURING OPERATION
If a clean cycle is started and then stopped before the water
inlet valve energizes or the water pump starts (45 seconds
into the cycle), the clean cycle will be aborted.
If a clean cycle is started and then stopped after the water
inlet valve energizes (more than 45 seconds into the cycle)
and is then switched to:
ICE MAKING The clean sequence resumes from the point of
interruption. After completion of the cleaning
sequence, the counter resets and the ice
machine starts making ice.
CLEAN The clean sequence resumes from the point of
interruption.
After the clean cycle is complete, the ice
machine will stop and wait until either Ice
Making or Clean is manually selected.
Part Number 000009036 Rev03 6/18 19
After the iAuCs® pump energizes, the ice machine must
complete the wash and rinse cycles before ice making can
start.
Page 20

Operation Section 3
Removal from Service/Winterization
Notice
Leaving solutions in the iAuCS® in freezing temperatures
may result in severe damage to the dispensing pump. A
failure of this nature is not covered by the warranty.
If the iAuCS® is to be removed from service for extended
periods, or if it is to be exposed to ambient temperatures
32°F (0°C) or below, follow this procedure:
1. Remove the Cleaning or Sanitizing solution bottle.
2. Follow the instructions for your model ice machine to
pump all of the solution out of the dispensing pump and
lines:
• “Indigo® NXT Hose Priming” on page 16
• “Indigo® Model Hose Priming” on page 18
20 Part Number 000009036 Rev03 6/18
Page 21

Page 22

Page 23

Page 24

MANITOWOC ICE
2110 SOUTH 26TH STREET, MANITOWOC, WI 54220
WWW.MANITOWOCICE.COM
844-724-2273
Welbilt provides the world’s top chefs, and premier chain operators or growing independents with industry leading equipment and soluons.
Our cung-edge designs and lean manufacturing taccs are powered by deep knowledge, operator insights, and culinary experse.
All of our products are backed by KitchenCare® – our aermarket, repair, and parts service.
CLEVELAND
CONVOTHERM®
©2017 Welbilt Inc. except where explicitly stated otherwise. All rights reserved.
Part Number 000009036 Rev03 6/18
DELFIELD®
FITKITCHEN™
FRYMASTER®
GARLAND
KOLPAK®
LINCOLN
WWW.WELBILT.COM
MANITOWOC®
MERCO®
MERRYCHEF®
MULTIPLEX®
 Loading...