

Manikin Electronic Schrittmacher User Manual
User Manual
OS V1.0d

Preface
Thank you very much for buying the Schrittmacher from Manikin Electronic. The Schrittmacher
extends your music studio by an exceptionally high-performance step sequencer. It allows you intuitive
generation of sequences and grooves. Play with it and discover for yourself the new possibilities of
step sequencing. We hope you will get many ideas for your music by working with your new
sequencer: Enjoy using it.
The Schrittmacher’s development team
Thorsten Feuerherdt : Hardware, housing, design, manual
Markus Horn : Software, design, manual
Mario Schönwälder : Manual, Beta test
Detlef Keller : Beta test
Helga Busch : Translation
Version : 1.0d, July 2008
Our special thanks to
Klaus Schulze, Bas B. Broekhuis, Till Kopper, Thomas Fanger, Andreas Schneider, Pamela und Nele,
Kathja and Niels, … as well as everybody else we may have forgotten to mention here.
Note
Manikin Electronic will not assume any responsibility for errors which may occur in this manual. The
contents of these instructions is subject to change without prior notice. When this manual was created
good care was taken to exclude any mistakes and contradictions. Manikin Electronic will not accept
any guarantees for this manual except those provided by commercial law.
No part of this user manual is allowed to be reproduced without the express written consent of the
manufacturer.
Manikin Electronic, Attilastraße 87k, D-12247 Berlin, Germany
Schrittmacher - Manual
1

Table of contents
Preface..........................................................................................................................1
The Schrittmacher’s development team.................................................................................. 1
Our special thanks to..............................................................................................................1
Table of contents.........................................................................................................2
Operating elements & connections...........................................................................4
Front panel.............................................................................................................................. 4
Back panel.............................................................................................................................. 5
Introduction..................................................................................................................6
About this manual................................................................................................................... 6
Symbols used..................................................................................................................... 6
Marking of parameters........................................................................................................ 6
General safety notes............................................................................................................... 7
Suitable location.................................................................................................................7
Mains connection................................................................................................................ 7
Operation............................................................................................................................ 7
Maintenance....................................................................................................................... 7
Proper use.......................................................................................................................... 7
Setup.............................................................................................................................8
Parts supplied......................................................................................................................... 8
Installation............................................................................................................................... 8
Connections............................................................................................................................ 8
Basic Operation...........................................................................................................9
Power ON............................................................................................................................... 9
Power OFF.............................................................................................................................. 9
Playing sequences.................................................................................................................. 9
Input using the endless dials................................................................................................... 9
Working with the Schrittmacher..............................................................................10
Selecting a line...................................................................................................................... 10
Editing a line.........................................................................................................................10
Editing the step values..................................................................................................... 10
Editing the step modes.....................................................................................................10
Editing the line parameters...............................................................................................11
Linking lines..........................................................................................................................11
Line Parameters.................................................................................................................... 13
Type................................................................................................................................. 13
Mode................................................................................................................................ 15
First, Last.......................................................................................................................... 15
Sync Mode, Sync Base....................................................................................................15
Gate................................................................................................................................. 15
Len................................................................................................................................... 15
Midi................................................................................................................................... 16
Vel.................................................................................................................................... 16
Add................................................................................................................................... 16
Schrittmacher - Manual
2

ID...................................................................................................................................... 16
Editing aids........................................................................................................................... 17
Add................................................................................................................................... 17
Rotate............................................................................................................................... 17
Setup Menu................................................................................................................18
MIDI Settings........................................................................................................................ 18
Information............................................................................................................................ 20
Preset Menu...............................................................................................................21
Load Preset........................................................................................................................... 21
Save Preset..........................................................................................................................22
Init Preset.............................................................................................................................. 23
Dump Preset......................................................................................................................... 23
Other Functions.........................................................................................................24
Preload Preset......................................................................................................................24
Sync...................................................................................................................................... 24
Loop...................................................................................................................................... 24
Step mode............................................................................................................................. 24
Global................................................................................................................................... 25
Updating the operating software...........................................................................................26
Annex..........................................................................................................................29
Time and clock table............................................................................................................. 29
Technical data....................................................................................................................... 30
MIDI implementation chart....................................................................................................32
Glossary................................................................................................................................ 33
Schrittmacher - Manual
3
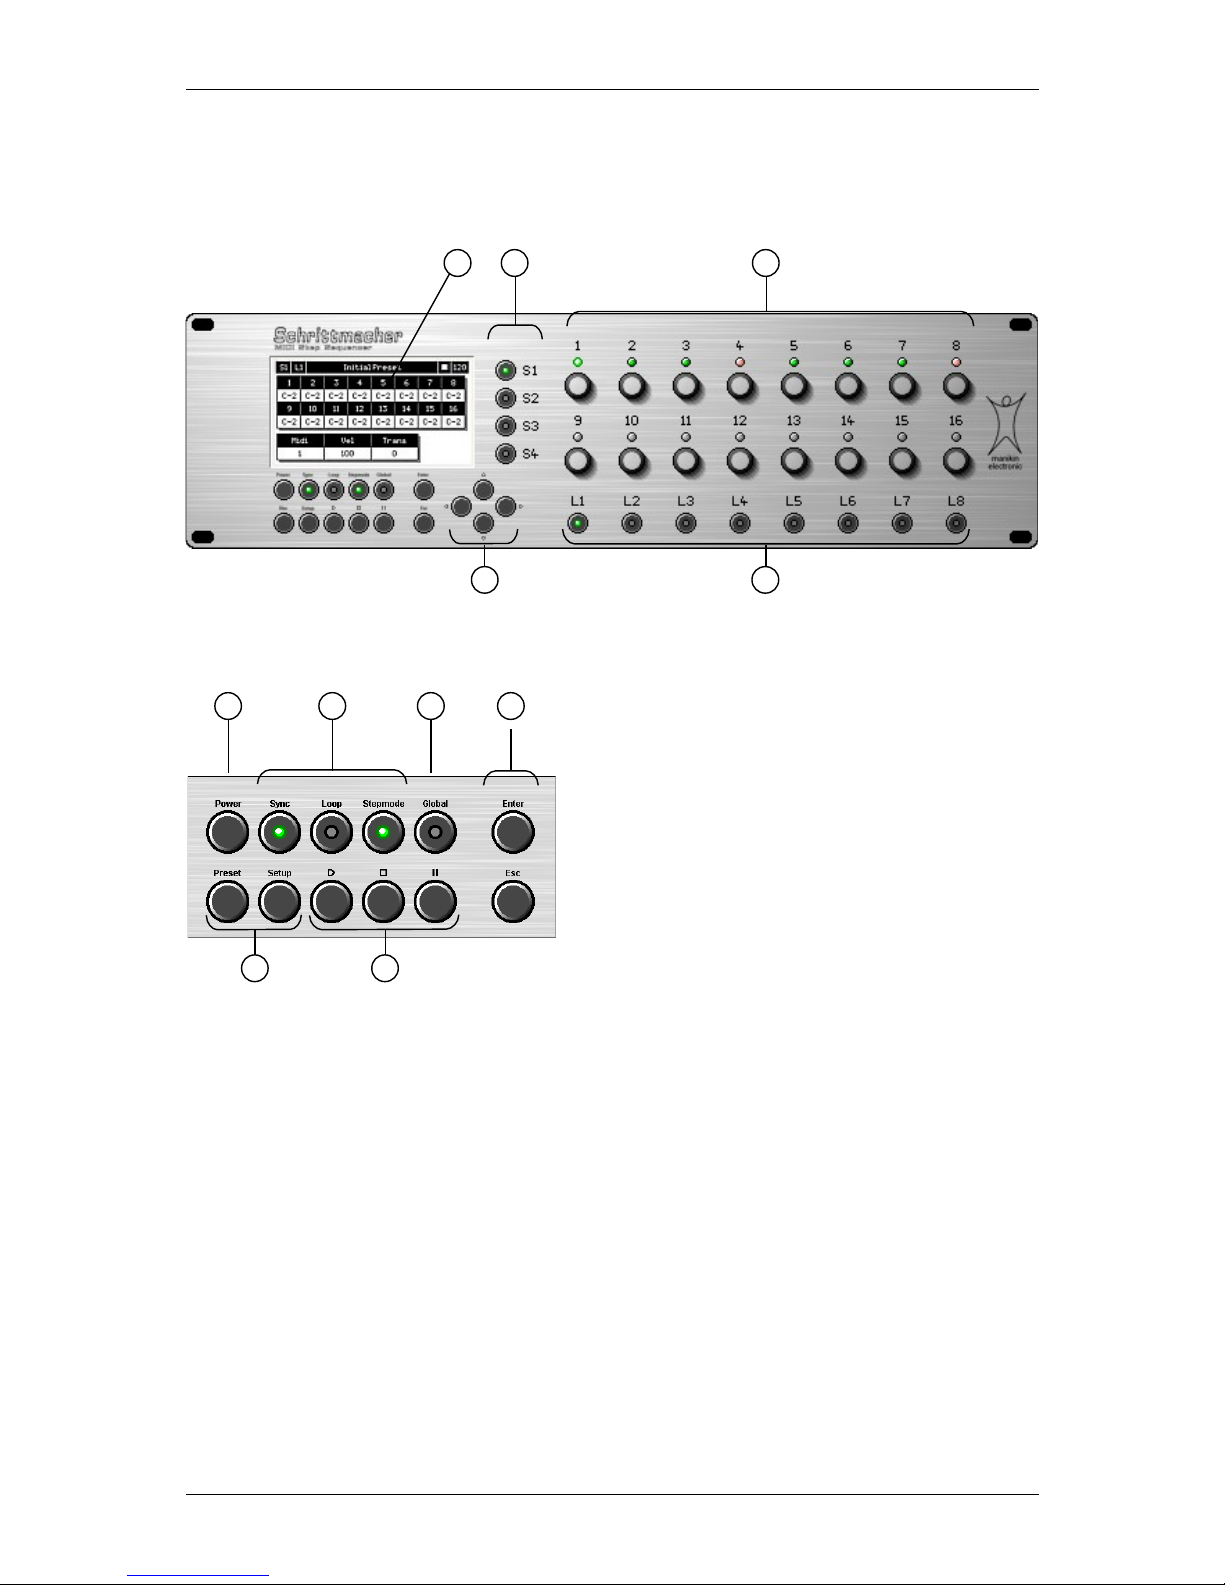
Operating elements & connections
Front panel
1 2 3
4 5
6 7 8 9
10 11
Schrittmacher - Manual
4
1. Display
2. Sequence buttons for selecting the
active sequence range
3. Endless dial with LEDs to edit the 16
steps
4. Cursor buttons
5. Line buttons to select the active line
6. Power button
7. Sync, Loop and Step mode button
8. Global button
9. Enter and Escape
10. Preset and Setup menus
11. Start, Stop and Pause
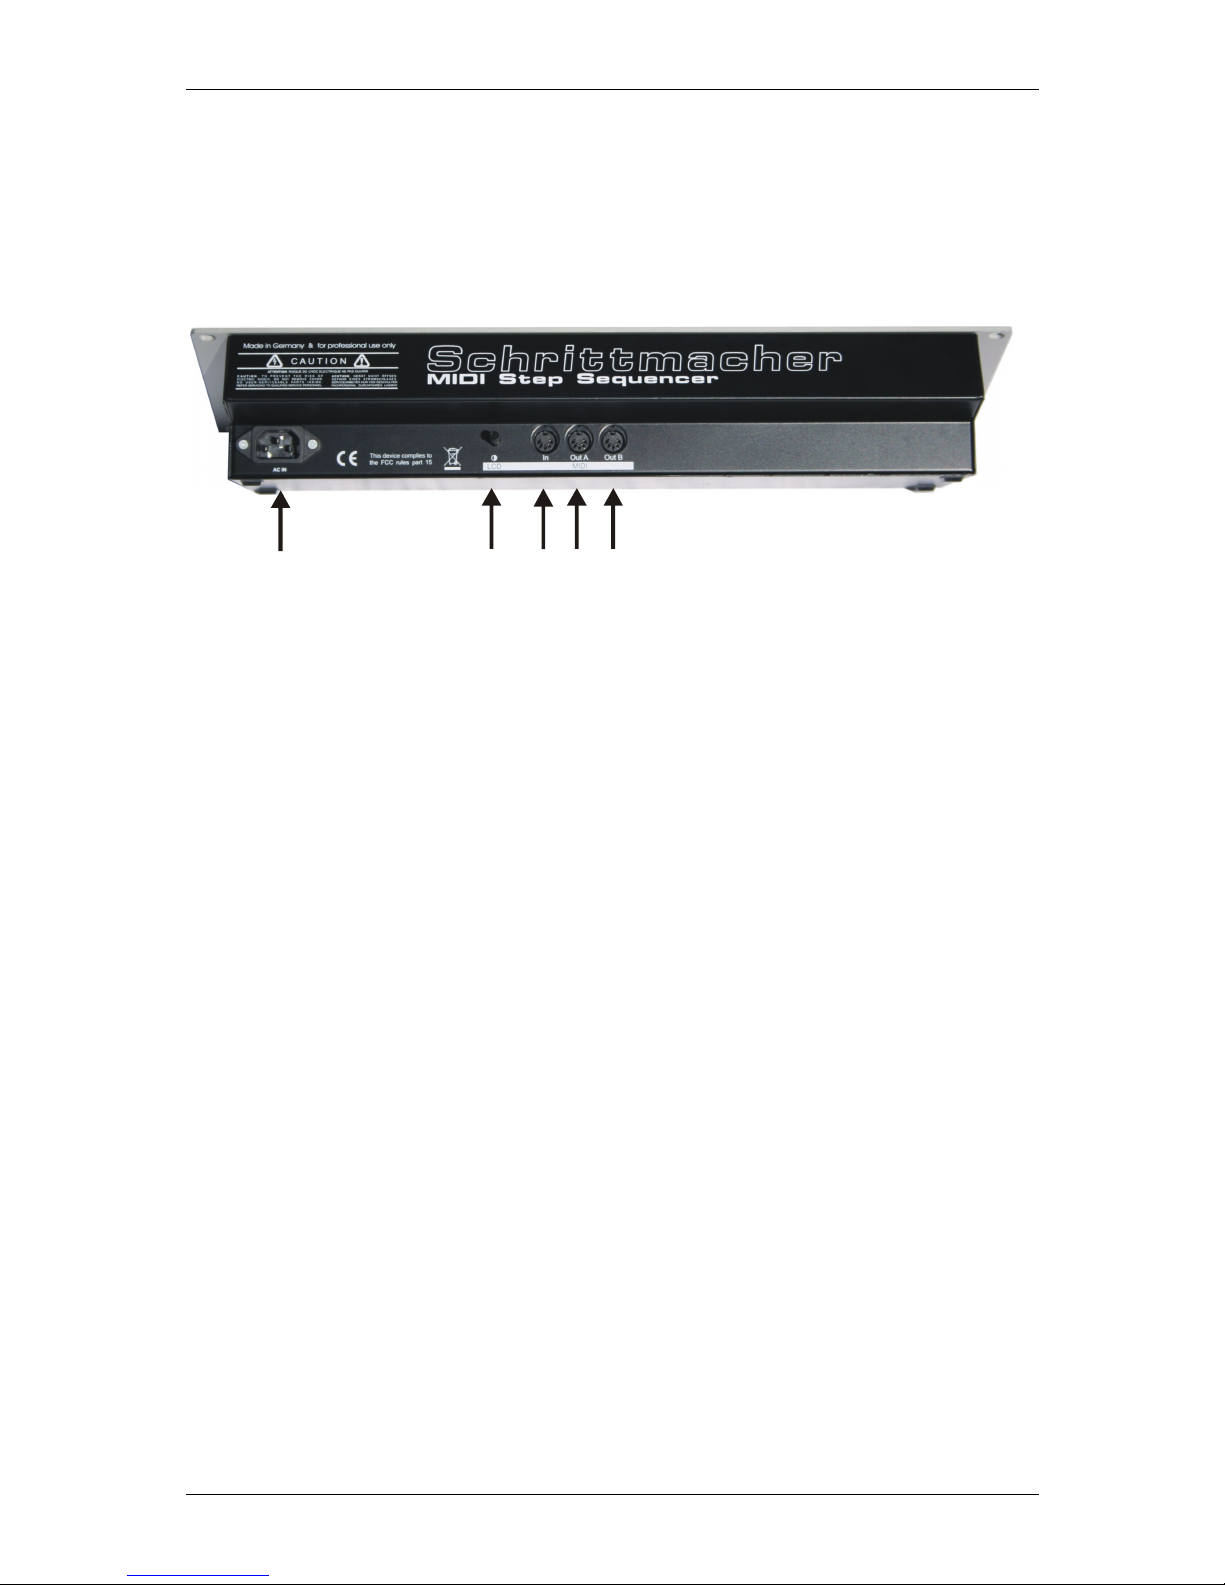
Back panel
1. Voltage supply socket for the connection of the supplied power supply
2. LCD contrast
3. MIDI IN socket to receive MIDI data
4. MIDI OUT socket A to transmit MIDI data
5. MIDI OUT socket B to transmit MIDI data
Schrittmacher - Manual
5
4
5
3
2
1

Introduction
Even if you are a professional in using studio equipment and sequencers it will be useful to read this
user manual right through to the end. The Schrittmacher features many new functions never before
implemented in a hardware sequencer.
About this manual
This manual is intended to make the first steps for using the Schrittmacher easier for you. Moreover it
also provides support and tips to the experienced user for his daily work.
For simplicity’s sake all technical terms in these instructions are identical with the Schrittmacher’s
parameter designations.
Symbols used
To ensure a better overview, this manual uses standardized spelling and symbols which are explained
below. Important notes are highlighted in bold print.
! Attention – Pay special attention to this note to avoid malfunctions.
i Gives some short additional information.
Instructions – Observe these instructions to execute the requested function.
Marking of parameters
All designations of buttons, controllers and parameters of the Schrittmacher in the text are highlighted
in bold print.
Example:
Press the Power button.
The value range permitted for parameter setting is highlighted by indicating the maximum and
minimum values in italics separated by three dots. Settings which cannot be represented by a value
range are separated by a comma.
Example:
Midi A01 ... A16, B01 ... B16
Schrittmacher - Manual
6

General safety notes
Please read the safety notes below very carefully. They comprise some basic rules for the use of
electric devices. Please read all the notes before you start using the device.
Suitable location
Only operate the device in closed rooms.
Never operate the device in humid environments such as bathrooms, washing rooms or swimming
pools.
Do not operate the device in extremely dusty or dirty environments.
Ensure unhindered air supply to all sides of the device. Do not place the device in close proximity
of heat sources such as radiators.
Do not expose the device to direct sunlight.
Do not expose the unit to heavy vibration.
Mains connection
Only use the supplied connection cable.
If the supplied mains connector does not fit into your socket you should consult a qualified
electrician.
Disconnect the mains connector from the socket if you do not use the device for a longer period of
time.
Never touch the mains connector with wet hands.
When disconnecting, always pull the connector and never the cable.
Operation
Never place any vessels containing liquids on top of the device.
Ensure that the device cannot move during operation. Use a solid base or a suitable built-in rack
(19‘‘ format).
Ensure that no objects can get inside the device. Should this happen against all odds, switch the
device off and disconnect it from the mains. Then contact a qualified supplier.
Maintenance
Do not open the device. Any repair or maintenance should be done by qualified personnel only.
There are no parts inside the device that could be maintained by the user. You will also lose your
right to claim warranty if you open the device.
Only use a dry, smooth cloth or brush for cleaning the device. Do not use any alcohol, solvents or
similar chemicals. They will damage the surfaces.
Proper use
This device is exclusively intended for creating and processing control signals according to the MIDI
standard. Any other use is not permitted and will exclude any warranty claims towards Manikin
Electronic.
Schrittmacher - Manual
7

Setup
Parts supplied
Please check when unpacking if all parts are included. Should something be missing contact your
specialist supplier immediately.
The Schrittmacher is supplied with:
Power supply with cable,
this manual.
We recommend to keep the original packaging for further transports.
Installation
Place the Schrittmacher on a clean, even base. Installation in a solid 19" rack is recommended. The
required space for the height is 132mm which corresponds to 3U. The installation depth is 85mm.
Connections
You need a mains outlet and at least one sound generator with MIDI interface.
i The Schrittmacher allows internal generation of transposing and other MIDI
control commands. However, the fun factor in using the Schrittmacher for your work
will be increased by at least 10000%, if a master keyboard whose MIDI controllers
can be freely assigned is connected to the MIDI input.
How to make the necessary connections:
1. Ensure that the Schrittmacher and your MIDI devices are switched off.
2. Connect the supplied mains cable to the mains connector into a suitable mains outlet.
3. Connect the MIDI outputs of the Schrittmacher to the MIDI inputs of the sound generator.
4. Connect the MIDI input (MIDI IN) of the Schrittmacher to the MIDI output of a master keyboard
(not required).
5. Switch the Schrittmacher and your MIDI devices on.
6. Continue with the chapter “Basic Operation“ on the next page.
Schrittmacher - Manual
8
Basic Operation
Power ON
For Power ON press the Power button. After being switched on the Schrittmacher needs a few
seconds to initialize.
Power OFF
To switch the device off press the Power button and keep it pressed until the device is separated from
the mains. The off-delay of approx. 5 seconds is to prevent unintentional switching off. Thus pressing
the Power button briefly will not result in an unintended and possibly embarrassing stop during a live
concert.
Playing sequences
By pressing the Start button the loaded preset is started. All active lines of the 4 sequence ranges will
now create MIDI events which are sent via the MIDI outputs.
A running preset can be stopped by pressing the Pause button with the preset not being reset. By
pressing the Start button again playing of the preset will be continued starting from that point where it
was stopped.
Using the Stop button you will stop playing and reset the preset to the initial position.
Input using the endless dials
The endless dials used in the Schrittmacher do not have an end stop position – as opposed to
potentiometers. They also have a pushbutton. Depending on the assigned function, parameters can
be input using the endless dials:
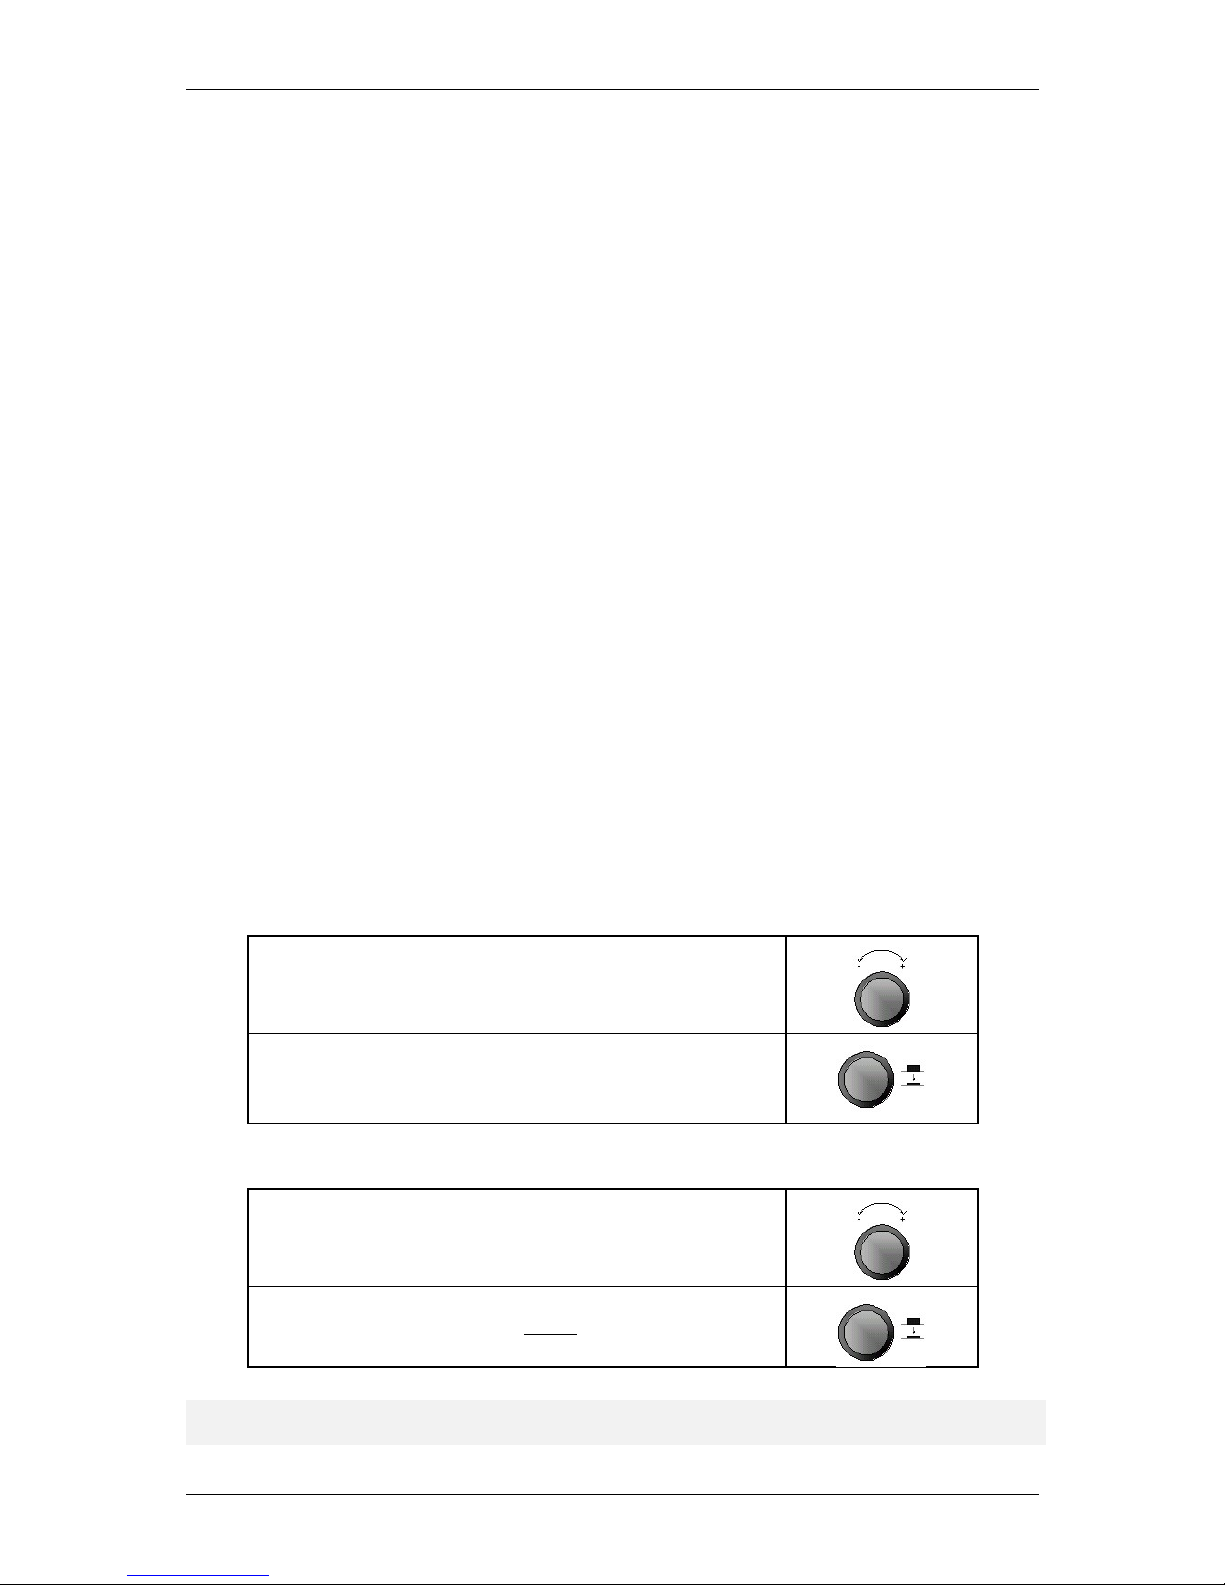
Editing parameters
By turning an endless dial clockwise, the respective value is
incremented. By turning it counter-clockwise the respective value is
decremented.
By pressing the endless dial the mode of a step (play / mute / skip)
can be changed. It depends on the set step mode between which
modes you can change. For more information read the “Step Mode”
section on page 24.
Menu navigation
You can mark a menu item using the endless dial 9. By turning it
clockwise you move the marking downward. By turning it counterclockwise you move it upward. Alternatively you can also move the
marking using the cursor buttons ◄▲▼►.
You can select the menu item by pressing the endless dial or the
Enter button. You exit the menu without making any selection by
pressing the Esc button.
i When an endless dial can be used for a selection function, the respective LED
lights orange.
Schrittmacher - Manual
9
 Loading...