

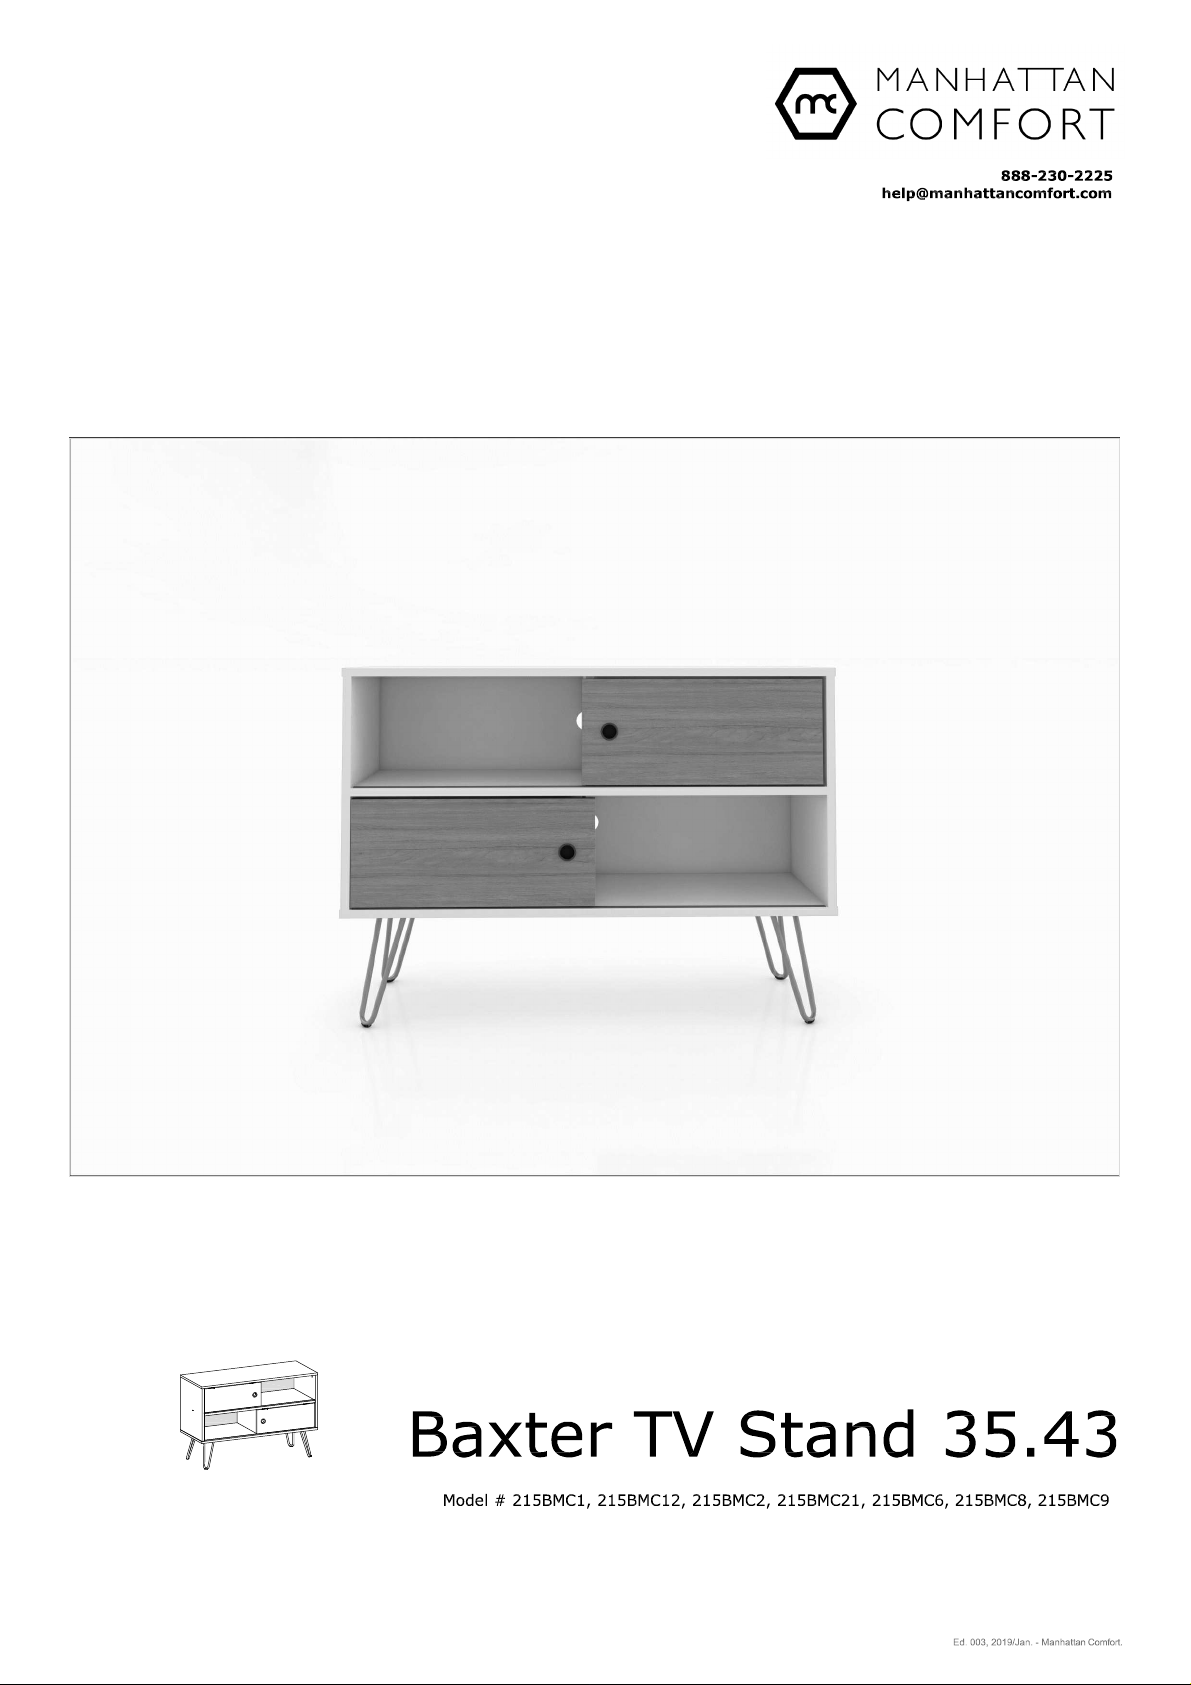
Page 1
Page 2
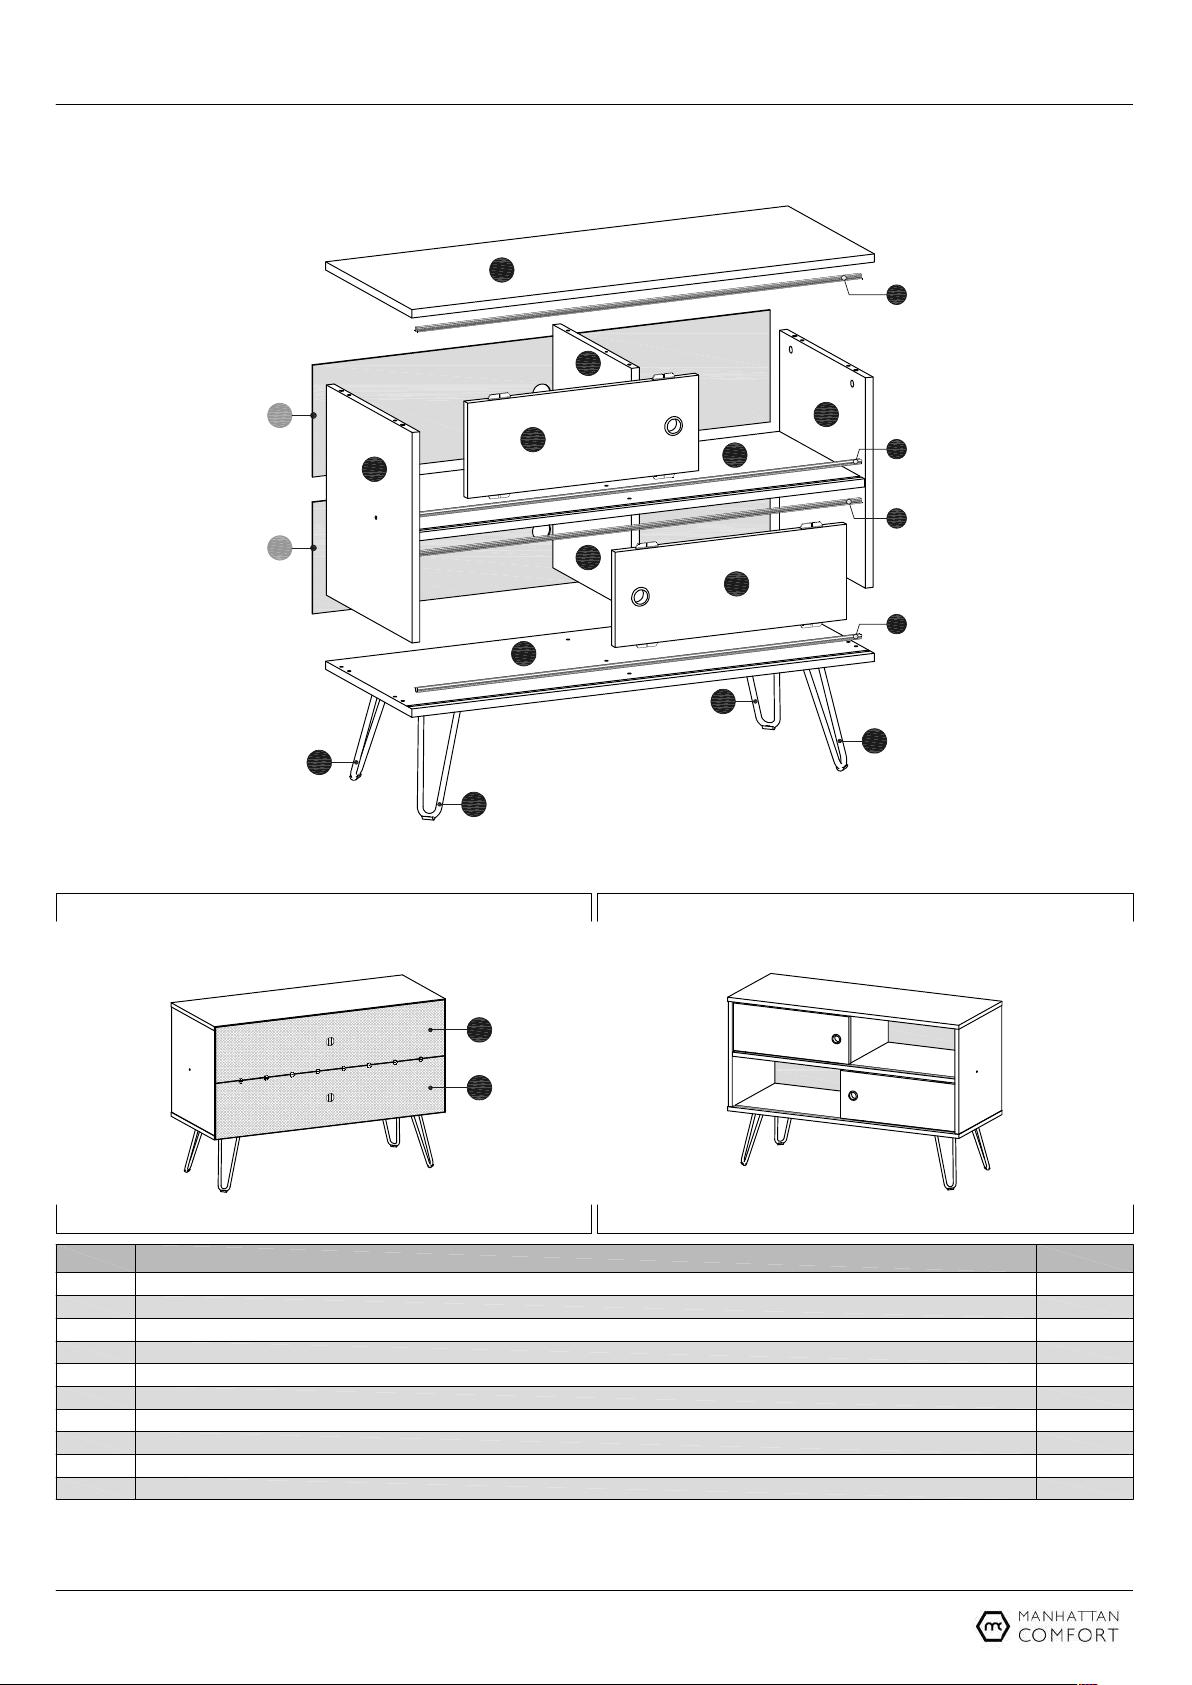
INCLUDED IN THE PACKAGE
07
09
02
REAR VIEW
08
08
10
03
10
06
05
01
02
05
10
FINAL APPEARANCE - FRONT VIEW
04
09
09
09
10
n.° ID
01
02
03
04
05
06
07
08
09
10
Parts Identification (Description)
Middle Shelf
Partition
Left Side Panel
Right Side Panel
Sliding Door
Base
Top Panel
Back Panel
Plastic Profile Rail 865mm
Metallic Feet H200mm
08
08
Quantity
1
2
1
1
2
1
1
2
4
4
2
Page 3

TOOLS NEEDED
INCLUDED IN THE PACKAGE
A
20x
D E F
4x 4x
G
38x 16x 8x
B
8x
H I
C
4x
8x
J
2x
3
Page 4

STEP 1
STEP 2
01
• Connect the Middle Shelf (01)
onto one of the Partitions (02)
with dowels (A) and bolt (B).
02
STEP 3
04
09
03
01
02
09
• Connect the Left Side Panel
(03) and the Right Side Panel
(04) to the Middle Shelf (01)
with dowels (A) and bolts (B).
• Insert the plastic rail (09)
into the channels of the
upper and lower faces of
the Middle Shelf (01).
Preparing the Doors:
• Apply the plastic guides (I) to
the holes in the upper and
05
05
lower edges of the Doors (05).
• Apply the plastic ring (J)
to the indicated hole in the
Doors (05).
4
Page 5

STEP 4
• Insert the plastic rail (09)
into the channel in the
Base (06).
• Insert the dowels (A) in the
Partition (02) and in the
Side Panels (03) and (04)
and then connect these
parts to the Base (06).
01
STEP 5
03
02
07
06
09
09
04
05
• Install one of the Doors (05)
by attaching the guides (I)
into the plastic rails (09)
under the Middle Shelf (01)
and on the Base (06).
• Finish the fastening of the
Base (06) in the Partition
(02) and in the Side Panels
(03) and (04) applying the
bolts (B).
• Fit the Partition (02) on the
Shelf (01) with dowels (A).
• Insert the plastic rail (09)
into the channel under the
Top Panel (07).
• Insert the dowels (A) in
the Partition (02) and in the
Side Panels (03) and (04)
and the Minifix bolts (C) in
the Top Panel (07). After
that, fit the parts together.
03
06
02
02
01
09
09
05
05
04
• Install the other Door (05)
by attaching the guides (I)
into the plastic rails (09) on
the Middle Shelf (01) and
under the Top Panel (07).
• Finish the fastening of the
Top Panel (07) on the
Side Panels (03) and (04)
applying and tightening the
Minifix drums (D), and
finally apply the adhesive
covers (E).
5
Page 6

STEP 6
03
10
05
01
10
02
07
06
05
04
• Fix the metallic feet (10)
under the Base (06) with
bolts (H).
Pay attention to the
position of the feet, as
shown in DETAIL 1.
• Apply the adhesive
protective felt to the
lower end of the feet (10).
10
Adhesive
Protective
Felt
10
DETAIL 1
BOTTOM VIEW / POSITION OF THE FEET
STEP 7
06
04
07
08
08
• Connect the Back Panels
(08) with metal plates (F)
and nails (G), applying
them to the positions
shown in drawing.
REAR VIEW
6
 Loading...