

Page 1
MSKL MS-3020 User Manual
User Guide
MSKL MS-3020
Page 2
MSKL MS-3020 User Manual
FCC Compliances Statement
This equipment has been tested and found to comply with the limits for a Class B digital device,
pursuant to Part 15 of the FCC rules. These limits are designed to provide reasonable protection
against harmful interference in residential installations. This equipment generates, uses, and can
radiate radio frequency energy, and if not installed and used in accordance with the instructions, may
cause harmful interference to radio communications. However, there is not guarantee that
interference will not occur in a particular installation. If this equipment does cause interference to
radio or television equipment reception, which can be determined by turning the equipment off and
on, the user is encouraged to try to correct the interference by one or more of the following
measures:
1. Reorient or relocate the receiving antenna.
2. Move the equipment away from the receiver.
3. Plug the equipment into an outlet on a circuit different from that to which the receiver is
powered.
4. Consult MSKL or an experienced radio/television technician for help.
All external connections should be made using shielded cables.
Page 3

MSKL MS-3020 User Manual
Chapter 1 – Introduction
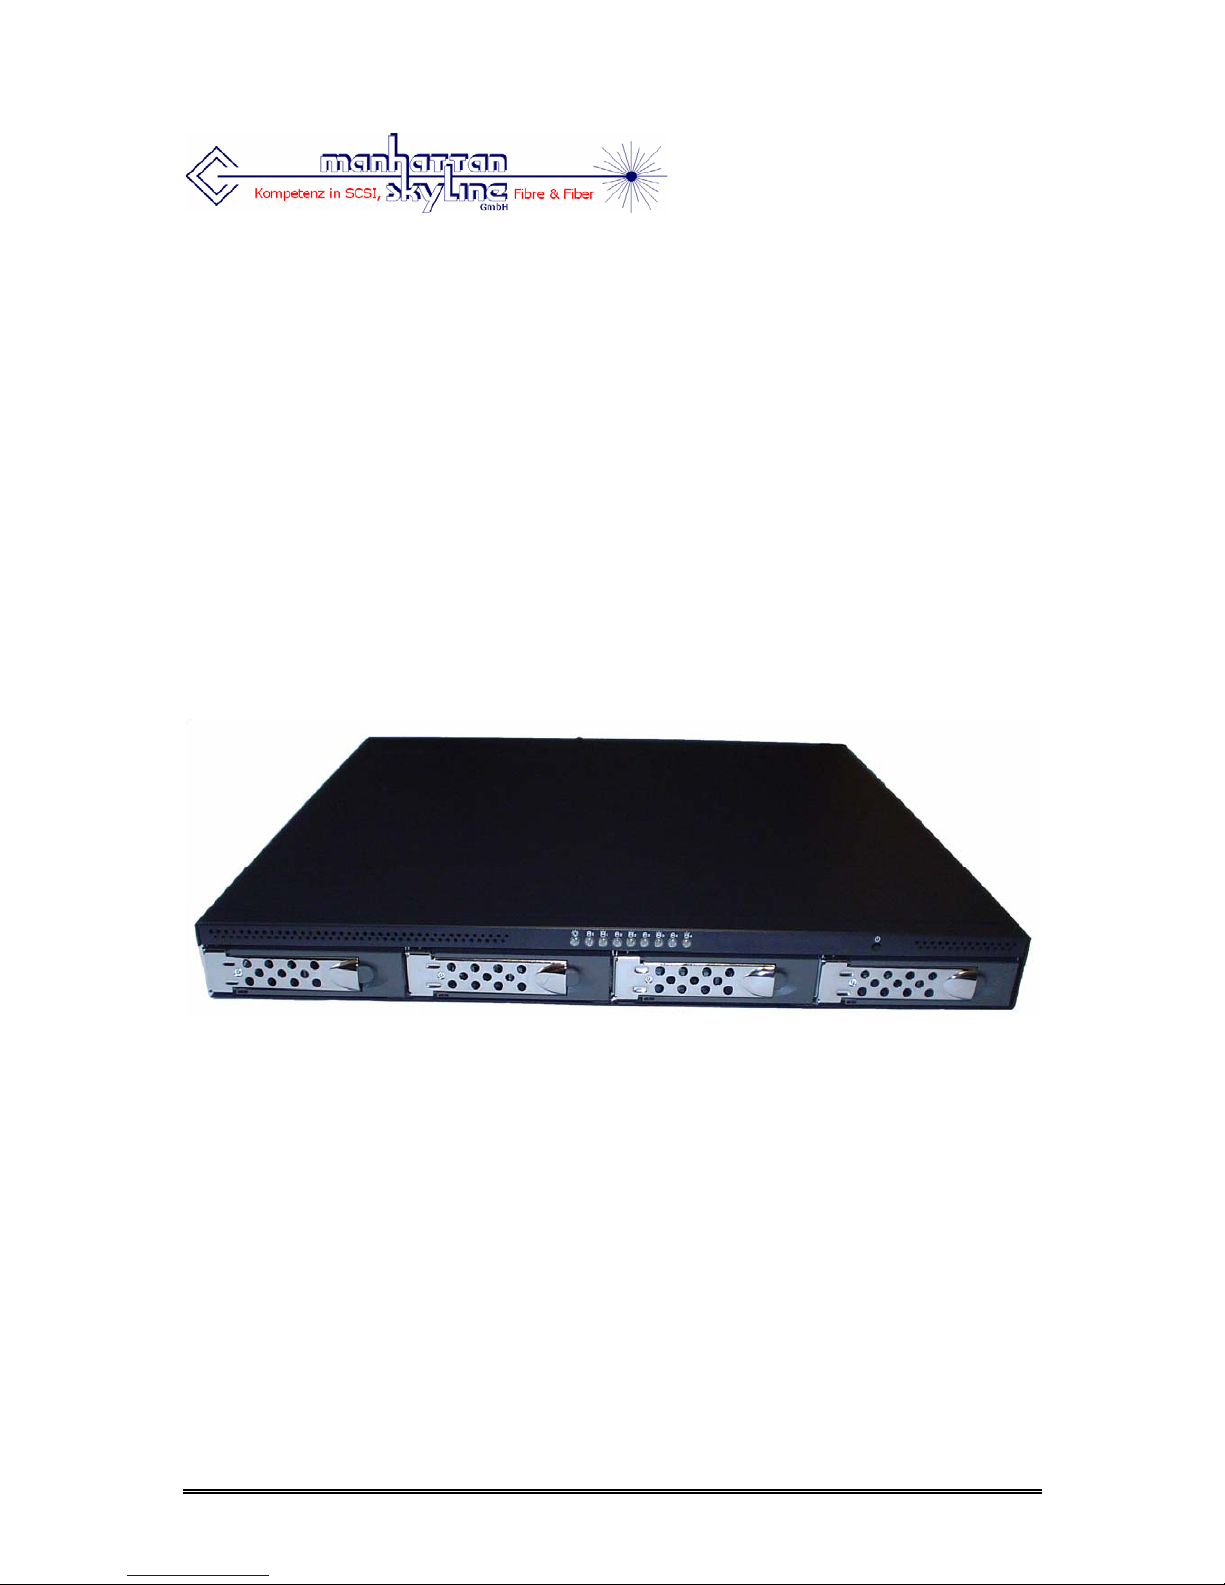
1.1 Overview
The MS-3020 is an external data storage equipment. It provides JBOD solution, and meets the
requirement of large data capacity in Digital Video Recording (DVR)/Digital Audio Recording
(DAR)/Media Streaming. Its capacity can reach 24TB by installing 400GB x 60 hard disk drives; that is,
15 sets. It uses leading SCSIDE technology, that lets you enjoy the best SCSI performance by using
inexpensive IDE hard disk drives.
1.2 Features
• Capacity up to 1.6TB by connecting 400GB x 4 hard disk drives
• Offers 4 swappable trays for convenient replacing of hard disk drives
• High scalability up to 15 sets with 40MB/s of data transfer rate; maximum capacity up to 24TB
by connecting 400GB x 60 hard disk drives
• High scalability up to 8 sets with 160MB/s of data transfer rate; maximum capacity 12.8TB by
connecting 400GB * 32 hard disk drives
• Support 48-bit LBA Big Drive Technology (hard disk drives over 137GB)
• Built-in RISC microcontroller core for improving chip performance
• On-board flash ROM for easy firmware update
• Cost-effective and high performance
1.3 Specifications
• 1U rack mount of 44 (H) x 483 (W) x 400 (D) mm
• Host interface: Supports Ultra160 LVD SCSI feature with data transfer rate up to 160MB/s.
Selectable SCSI ID from 0 to 15
• Device interface: Supports UDMA mode with data transfer rate up to 133 MB/s. Supports Ultra
ATA 133/100/66 HDDs
• JBOD/Normal mode set by DIP switch
• Safety: FCC, CE
• Temperature: Operation 0°C ~ 50°C (not condensed). Non-operation -20°C ~ 70°C
• Power: AC input voltage 47 ~ 63Hz, 100 ~ 127V/3A, 200 ~ m240V/1.5A, 162W
1.4 Hardware Requirement
The MSKL MS-3020 needs a host system with SCSI LVD interface or Ultra2 Wide or higher standard.
1.5 Package
After opening the package, check the following items:
• 1 x MS-3020
• 1 x External LVD cable (1m)
• 1 x Terminator
• 1 x Power cord
• 1 x User manual
• 1 x CD containing Utility for F/W update and HA! CD burner
• 4 x Pack of screws
Page 4

MSKL MS-3020 User Manual
1.6 About SCSI
Be aware of the following issues before using SCSI devices.
1. SCSI ID: Each device attached to the SCSI host adapter must be assigned a unique SCSI ID,
which distinctively identifies a SCSI device for its data transfer and processing. While
connecting more than one SCSI device, each device should have different ID numbers.
2. Terminator: SCSI is featured with high scalability. In order to ensure reliable data
transmission on the SCSI bus, an electrical pathway that consists of adapters and devices,
there should be installed a terminator at the end of the bus. No matter how many SCSI
devices (up to 15) are attached to the bus, a terminator must be added to the last device.
Page 5

MSKL MS-3020 User Manual
Chapter 2 – Installation
This chapter contains 6 parts:
• The Signal LEDs
• Set the SCSI ID
• Set the Mode
• Install the hard disk drives
• Connect the SCSI port
• Replace the hard disk drives
Notice: Make sure to power off the system during installation or changing any configuration.
2.1 The Signal LEDs
The signal LEDs of the MS-3020 is as figure 2-1 shows. Besides the power LED, there are 8 LEDs on
the front panel of the MS-3020. Every 2 LEDs indicate the status of a hard disk drive.
Power Switch
1
2
345
67
8
9
Figure 2-1
No. The LED The Display Status
1 Power LED
Green light: Online
No light: Offline
2
Primary Master HDDs
Power Signal LED
Green light: Online
Red light: offline
Blinking red light: Bad sector
3
Primary Master HDDs
Access Signal LED
Yellow light: Access
No light: No access
4
Primary Slave HDDs
Power Signal LED
Green light: Online
Red light: Offline
5
Primary Slave HDDs
Access Signal LED
Yellow light: Access
No light: No access
6
Secondary Master HDDs
Power Signal LED
Green light: Online
Red light: Offline
Blinking red light: Bad sector
7
Secondary Master HDDs
Access Signal LED
Yellow light: Access
No light: No access
8
Secondary Slave HDDs
Power Signal LED
Green light: Online
Red light: Offline
Blinking red light: Bad sector
9
Secondary Slave HDDs
Access Signal LED
Yellow light: Access
No light: No access
Page 6

MSKL MS-3020 User Manual
2.2 Set the SCSI ID
On the rear panel of the MS-3020 there is a SCSI ID switch as figure 2-2 shows. Set the SCSI ID by
adjusting the switch up or down. (Don’t set ID 7. It is normally reserved for the SCSI host adapter)
Setting SCSI ID and configuration mode: Be sure that each device has a unique ID number (see 1.6).
No matter how many MS-3020s (up to 15) are installed and connected, the SCSI ID set on every
switch cannot be the same. The selectable number for the MS-3020 is from 0 to 15.
DIP S wi t ch
SCSI I D Swi tch
Tw o HD68 SCSI
Connectors
AC P ower Connector
Figure 2-2
2.3 Set the Mode
Mode Transfer Rate Pin 1 Pin 2 Pin 3 Pin 4
160MB/sec OFF OFF OFF ON
80MB/sec OFF OFF OFF OFF
JBOD
40MB/sec OFF OFF ON OFF
160MB/sec OFF ON OFF ON
80MB/sec OFF ON OFF OFF
Normal
40MB/sec OFF ON ON OFF
Table 2-2
1. Pin 1: Reserved
The default is OFF.
2. Pin 2: JBOD Mode vs. Normal Mode
The default is JBOD. It combines 2 or more hard disk drives into a big one. The enlarged
capacity is convenient for mass data storage. In Normal mode the SCSI adapter will detect
the hard disk drives you have connected. You need to enable the SCSI adapter’s LUN support.
Take Adaptec AHA-39160 as example. In SCSI Bios under point SCSI options you need to set
the Multiple LUN to the on state so that the computer can detect all hard disk drives.
3. Pin 3: SCSI Host Transfer Rate at 80MB/s vs. 40MB/s
The default is 80MB/s. If the SCSI adapter is not capable or the signals become unstable after
connecting some MS-3020, lower the speed to 40MB/s.
4. Pin 4: SCSI Host Transfer Rate at 160MB/s
The default is off, but if pin 4 is adjusted to ON, the highest transfer rate will reach 160MB/s.
Page 7

MSKL MS-3020 User Manual
2.4 Install the Hard Disk Drives
Follow the steps below to install the hard disk drives into the trays of the MS-3020.
1. Open the tray by pressing its handle.
Figure 2-4
2. Pull the handle to let the tray out.
Figure 2-5
3. Put a hard disk drive into the tray.
Figure 2-6
4. Turn the tray, fasten with 4 screws and put it back into the MS-3020.
Figure 2-7
Page 8

MSKL MS-3020 User Manual
5. Install the other hard disk drives by repeating step 1 to 4.
Then, set the hard disk drives as Master or Slave in accordance with figure 2-8. Connect in this way,
otherwise the signal LEDs cannot display correctly.
HDD1_PRI_MASTER
HDD2_PRI_SLAVE HD D3_SEC_MASTER HDD4_SEC_SLAVE
Figure 2-8
2.5 Connect the SCSI Port
Connect one MS-3020
Connect any one of the SCSI ports on the back of the MS-3020 to the external SCSI port on the host
PC with the enclosed SCSI LVD cable. Then, plug a terminator into another SCSI port on the back of
the MS-3020. If there is no SCSI port on the host PC, insert a SCSI adapter like the Adaptec AHA39160 or AHA-39320.
Daisy chain of MS-3020
Use SCSI LVD cables to connect two or more MS-3020, and add a terminator to the last MS-3020. See
figure 2-9 and refer to 2.2 for installing more MS-3020.
Host E x ternal
SCSI Port
MS-3020 SCSI P or ts
Terminato
r
Figure 2-9
Page 9

MSKL MS-3020 User Manual
Notice
1. It is recommended not to attach any single-ended device to the SCSI adapter where the MS3020 is connected. It will drop the performance of the MS-3020.
2. It is invalid to adjust DIP switch during operation. Before changing the setting, power off the
host PC and the MS-3020 first. You had better set JBOD or Normal mode right in the
beginning. The later change may damage the stored data.
Page 10

MSKL MS-3020 User Manual
Chapter 3 – Troubleshooting
If the installed MS-3020 does not function normally, please check the following items.
1. LEDs do not display normally after powering on
Examine if DIP switch was set right, and if signal line was connected badly.
2. Red LED lights after installing a HDD
If you have installed a hard disk drive, but the red LED lights, please do the following three
things:
• Re-plug the IDE cables and the status signal lines, which are 3-pin color cables
connecting to CN6.
• Replace the hard drive if the red LED still lights.
• Contact the distributor if the problem still exists.
Figure 3-1
Page 11

MSKL MS-3020 User Manual
Figure 3-2
3. HDDs power LED blinks red for 1 second and green for 9 seconds
The system has detected a bad track. Please get a good hard disk drive.
4. The System doesn’t show all HDDs in normal mode
Inspect the BIOS screen while booting up the system. See if it display LUN=3. If not, follow
the BIOS setup procedure stated in 2.3.
5. The HDDs capacity isn’t found in the system
There let’s take Windows XP as an example.
• Right-click “My Computer” and enter “Manage”.
• Choose “Disk Management” under “Storage”, and a given hard disk drive ID will
appear on the right lower corner of the windows.
• If the newly installed hard disk drive doesn’t appear on the screen, it might be
improperly installed or damaged. Try again.
Page 12

MSKL MS-3020 User Manual
Appendix – Update the Firmware
Please follow the steps below to update the firmware of the MS-3020.
1. Put the support CD into CD-ROM, and find the program by the following path:
E:\Utility\Bridge_Smart_Uti\Setup.exe
2. Click “Next” to install according to the instructions of the setup wizard.
3. Execute the program from Start\Programs\SCSIDE Firmware Utility.
Page 13

MSKL MS-3020 User Manual
4. Click the icon of the host adapter, where the MS-3020 is connected. Click on the icon of the
hard disk. Pay attention to the last 3 numbers and an alphabet of the SCSIDE model like
150L. If the old versions alphabet is L, you should choose a new version with L, too.
5. Click “Update SCSIDE Firmware”, choose the new firmware, and click “Open”. The System will
ask if you want to update. Click “Yes”. The successful update is as the following figure shows.
Re-boot your system.
 Loading...