

Page 1
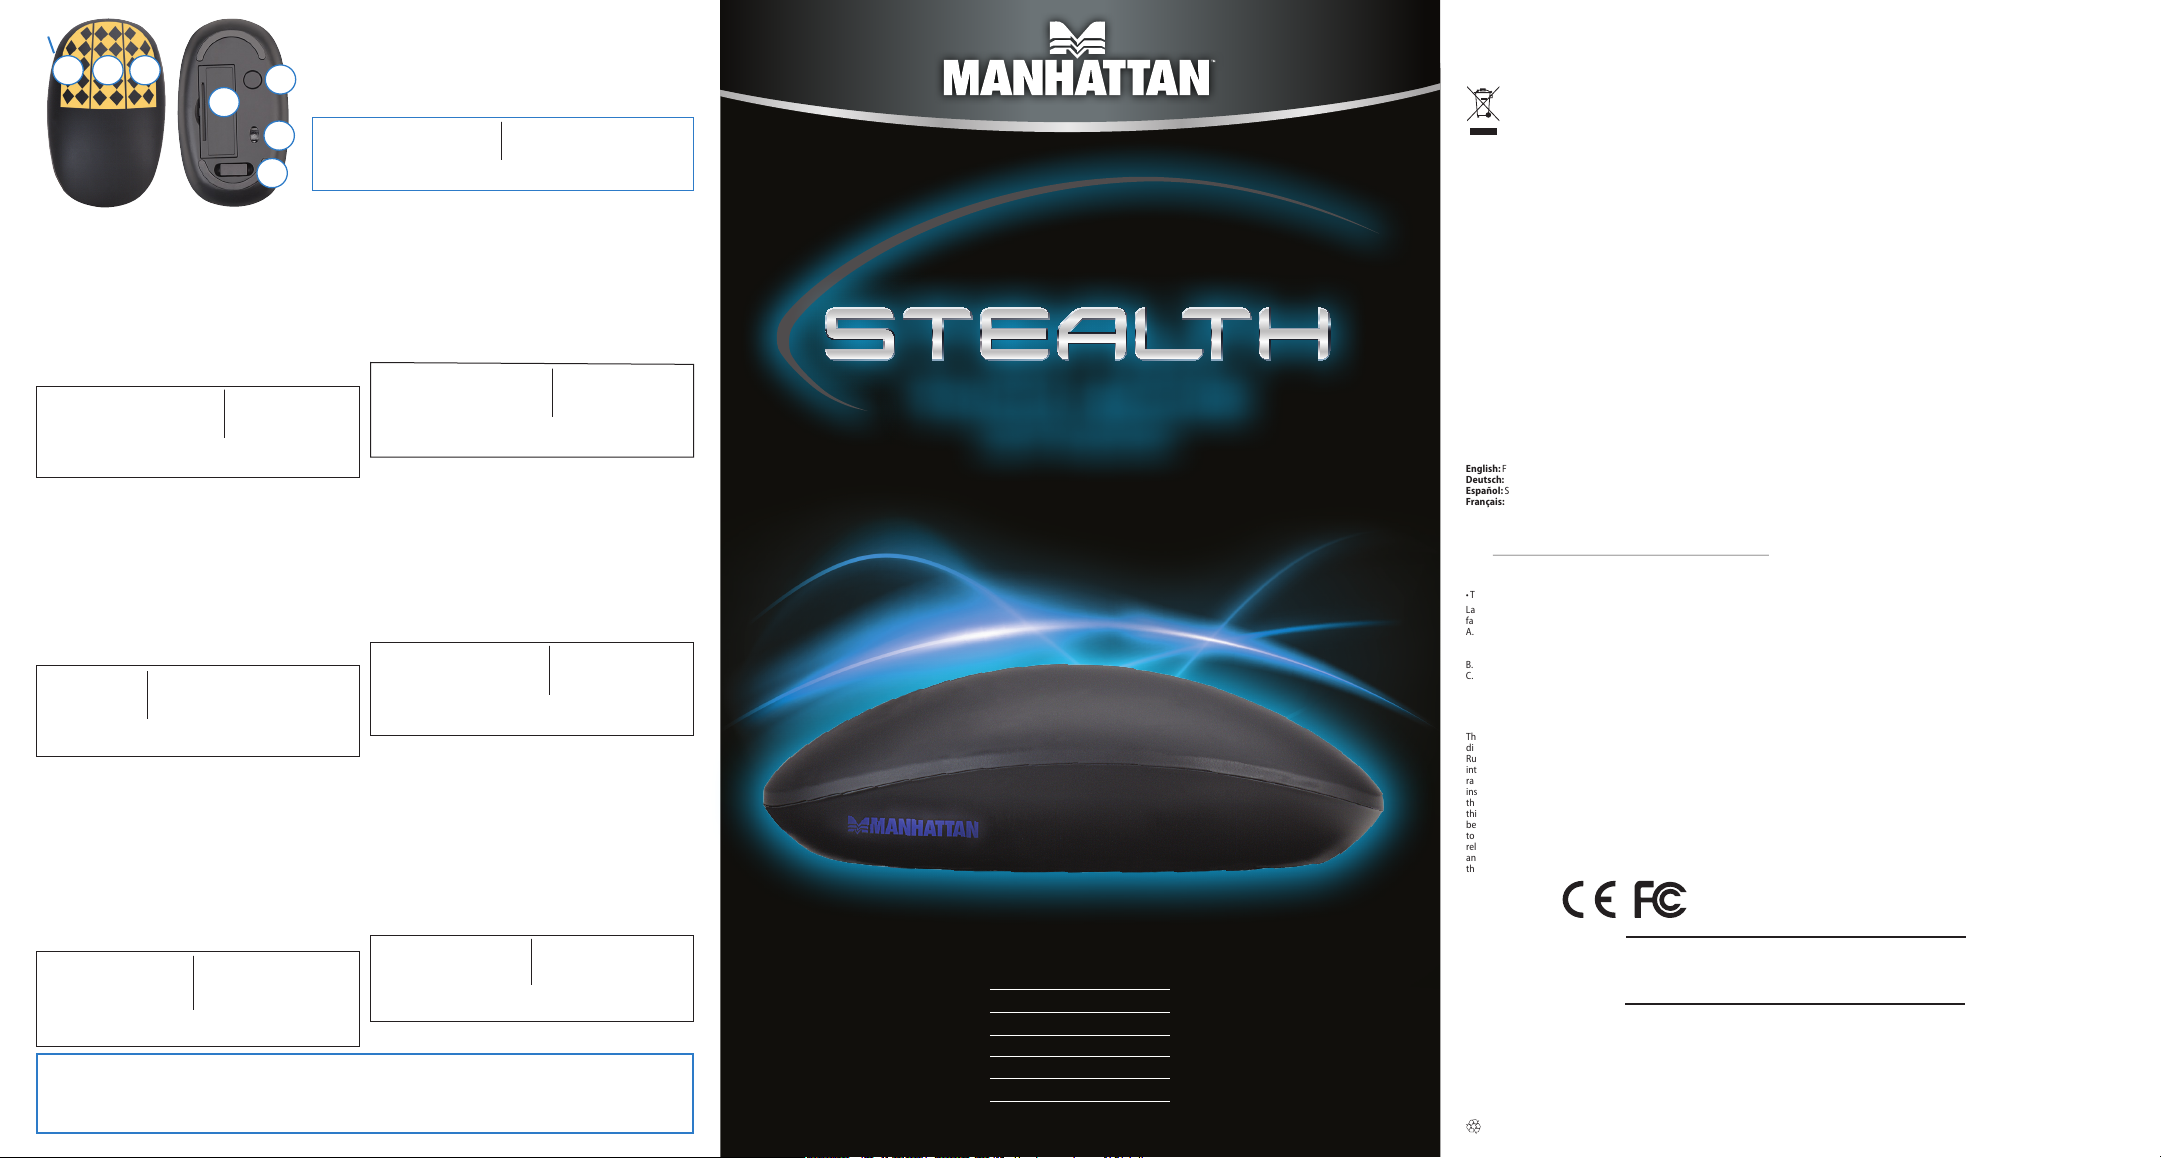
LED
1 23
6
Deutsch
1 Berühren = Auswähle n /
Interagieren
Zweimal antippen & halten =
Verschieben / Markieren
2 Berühren = Kontextmenü
3 Wischbewegung nach oben =
Hochscrollen
Wischbewegung nach unten =
Herunterscrollen
Zweimal antippen & halten =
Schnell hoch-/herunterscrollen
LED Bedeutung
Blau Hoher Akkuladezustand
Rot Niedriger Akkuladezustand < 2,2 V
An Betriebsbereit
Aus Leerer Akku oder Sleep-Modus*
* Wird die Maus über 90 Sekunden lang nicht genutzt, wechselt sie in den Sleep-Modus.
Bewegen od er berüh ren Sie sie, u m sie zu rea ktivie ren. Wir d die Maus 1 Stu nde lang
nicht genu tzt, sc haltet si e sich ab. Dr ücken Sie P ower/Res et, um sie zu r eakti vieren.
Maus aufnehmen: Wechsel
in Presentermodus
• Wischbewegung nach links =
Zur vorherigen Seite/Folie
• Wischbewegung nach rechts =
Zur nächsten Seite/Folie
4 Power/Reset = Drücke n zum Ein-/
Ausschalten
5 Slot = Staufach für USB-Empfänger
6 Abdeckung = Akkufach
7 Laser: Schauen Si e nicht di rekt in
den Laser.
LED Bedeutung
Schnelles Verbindungsaufbau
Blinken mit PC
Langsames
Blinken erfo lgreich
1 To uch = Se lect / Int eract
Double-Touch & Hold = Grab /
Highlight
2 To uch = Co mmand Menu
3 Swipe Forward = Scroll Up
Swipe Backward = Scroll Dow n
4
Double-Touch & Hold = Quick
Scro ll Up / Down
LED Indication
Blue High power level
7
Red Lo w power leve l: < 2.2V
On Ready for u se
* After 90 sec onds wit hout use, t he mouse e nters Sle ep mode. M ove or touc h it to wake it u p. After
5
1 hour withou t use, the mo use turn s off. Press Po wer/Rese t to re-ac tivate i t.
Verbindung mit PC
Français
1 Toucher = Sélectionner / Interagir
Touch er deux fo is = Déplace r /
Marquer
2 Toucher = Menu de contex te
3 Glissement vers le haut =
Défilement vers le haut
Glissement vers le bas =
Défilement vers le bas
Touch er deux fo is et teni r =
Défilement rapide
DEL Affichage
Bleue Batterie pleine
Rouge Batterie faible
< 2,2 V
Activé e Prêt à l’usag e
* Après 90 secondes d’usage, la souris entre en mode d’économie de l’énergie. Bougez ou
touchez po ur la réac tiver. Apr ès une heu re sans us age, la sou ris se dés active . Appuyez
sur Power/Re set pour la r éacti ver.
Enlevez la souris: Changer au
mode Présentateur
• Glisseme nt vers le g auche =
Page/Diapositive précédente
• Glissement vers la droit = Page/
Diapositive prochaine
4 Power/Reset = Appuyer p our
Activer/Désactiver
5 Emplacement = Stockage d u
récepteur USB
6
Couvercle = Compart iment de b atteri e
7
Laser: Ne jamais fixe r le faisce au ni le
regarder sans instruments optiques.
DEL Affichage
Éteint Vide batterie ou mode
d’économie de l’énergie*
Clignot ement rap ide La pa ire avec le P C
Clignotement lent Connexion à l’ordinateur
Italiano
1 Touc h = selezionare
Doppio-Touch & Attesa =
trascinare / evidenziare
2 Touc h = menu comandi
3 Scorrere in Avanti = scorrere
verso l’alto
Scorrere indietro = scorrere verso
il basso
Doppio-Touch & Attesa =
scorrimento rapido verso l’alto e
verso il basso
LED Indicazione
Blu livello di p otenza el evato
Rosso li vello di pot enza bas so: <2.2V
Acceso pronto p er l’uso
Spento mo dalità s tand-b y o spento*
*
Dopo 90 sec ondi di inu tiliz zo, il mouse e ntra in mo dalità s tand-b y. Muovere o to ccare
l’area di tocc o per riat tivarl o. Dopo un’or a di inuti lizzo, il m ouse si spe gne. Prem ere il
tasto Power/Reset per riattivarlo.
For specifications and Tech Support contact information, go to:
Spezifikationen und Kontaktinformationen des technischen Supports finden Sie auf:
Para más esp ecificacio nes e informac ión de contac to para sopo rte técnico, v isite:
Vous trouve z les spécific ations et les in formations d e contact du su pport tech nique sur:
Accedere alla modalità
presentazione tenendo in
mano il mouse
• Scorrere a sinistra = pagina
precedente / diapositiva precedente
• Scorrere a destra = pagina
success iva / diapo sitiva s uccessi va
4 Accensione/Spegnimento =
premere per accendere / spegnere
5 Slot = alloggio ricevitore USB
6 Copertura = vano batterie
7
Laser: Non fissare i l raggio o no n
osservare direttamente con strumenti
ottici.
LED Ind icazione
Lampeg gio in attes a di conne ssione al
rapido computer
Lampeggio connessione al computer
lento avvenuta
manhattan-products.com/en-US/products/9630
Pick up fo r Presente r mode
• Swipe L eft = Page Back / Previous Slide
• Swipe Right = Page Forw ard / Nex t Slide
4 Power/Reset = Press to Tur n On / Off
5 Slot = USB R eceiver St orage
6 C over = Batter y Compar tment
7 L aser: Do not stare in to beam or vie w
directly with optical instruments.
LED Indication
Off Sle ep mode or n o power*
Rapid blinking Pairing with computer
Slow blinking Successful connection
Español
1 Un toqu e = Elegir / Int eractu ar
Toque dos veces y mantenga
presionado = Arrastrar / Seleccionar
2 Un toqu e = Menú emergente
3 Deslice hacia adelante =
Desplazamiento hacia arriba
Deslice hacia atrás =
Desplazamiento había abajo
Toque dos veces y mantenga
presionado = Desplazamiento
rápido
LED Indicación
Azul Nivel de energía alto
Rojo Niv el de energ ía bajo < 2.2V
Encendido Listo para usarse
Apagado Sin ene rgía o en mod o de esper a*
*
Después d e 90 segun dos en des uso, el rató n cambia rá al modo d e espera. M ueva o toqu e
para act ivarlo n uevamen te. Despu és de 1 hora en d esuso, el r atón se ap agará. Pr esione e l
botón de Encendido para reactivarlo.
Polski
1 Dotyk = Wybór / In terakcja
Podwójn y dotyk & P rzyt rzym anie =
Uchwyt / Podświetlenie
2 Dotyk = Menu kont ekstow e
3 Przesunięcie do przodu =
Przewijanie w górę
Prz esunię cie do ty łu =
Przewijanie w dół
Podwójn y dotyk & P rzyt rzym anie =
Szybk ie przew ijanie Gó ra / Dół
Dioda Wskazanie
Niebies ka Wysok i poziom na ładowan ia
Czerwona Niski poziom naładowania: <2.2V
Włączo na G otowa do uż ycia
Wyłąc zona B rak zasil ania lub tr yb uśpie nia*
* Po 90 sekunda ch bezcz ynnoś ci mysz pr zechod zi w stan u śpienia. P orusz ją l ub dotkn ij w
celu wybudzenia. Po godzinie bezczynności mysz wyłącza się. Wciśnij Power/Reset, aby
ponownie j ą włącz yć.
Русский
1 Прикосновение
Двойное прикосновение и
удерживание = Выделение,
перенос текста
2 Прикосновение = стандартные
функции правой кнопки мыши
3 Прокрутка вверх = проведит е
пальцем вверх
Прокрутка вниз = прове дите
пальцем вниз
Двойное прикосновение и
удерживание = Быстрая
прокрутка вверх/вниз
LED Индикационные светодиоды
Синий Максимальная мощность
Красн ый Низ кий уро вень мощн ости: < 2 .2V
Включение готово к использованию
Выключение
спящий режим, отключение*
* Устройст во перех одит в спя щий режи м через 90 с екунд б ез исполь зовани я.
Прикосни тесь к нему д ля начал а работы . По истеч ении 1 часа б ез испол ьзован ия
мышь отключается. Нажмите кнопку “Включение” для начала работы.
Specy fikację techn iczną oraz in formacje o pom ocy techni cznej znajdz iesz na:
Per informa zioni e per cont atto di suppo rto tecnico va i a:
Для вопросов по технической поддержке используйте следующую контактную
информацию:
Levante e l ratón: Para a ctivar
el modo presentador
•
Deslice hacia la izquierda = Regresa
a la página/diapositiva anterior
•
Deslice hacia la derecha = Avanza
a la página/diapositiva siguiente
4 Encendido/Reinicio = Presione
para Encender/Apagar
5
Ranura = Guarde aq uí el Recep tor USB
6
Tapa = Compartimento de las baterías
7
Laser: No mire fijame nte el haz o ve a
directamente con instrumentos ópticos
LED Indicación
Parpadeo Emparejamiento con la
rápido computadora
Parpadeo Conexión exitosa
lento
Podniesienie myszy:
Uruchomienie trybu prezentacji
• Przesunię cie w lewo = St rona do
tyłu / Poprzedni Slajd
• Przesunię cie w pra wo = Strona do
przodu / N astępny S lajd
4 Zasilanie/Reset = Wciśnij, aby
Włącz yć / Wyłąc zyć
5 Slot = Magazy nek na odb iornik US B
6 Zaślepka = Komora n a bateri e
7 Moduł lasera: Nie należy patrzeć
bezpośrednio w strumień wiązki
lasera ani przez urządzenia ptyczne.
Dioda Wskazanie
Szybk ie P arowanie z k omputer em
miganie
Powolne Połączenie
miganie
Работа с презентациями
(функция Presenter)
•
Передвижение пальца влево =
просмотр предыдущего слайда,
страницы
•
П
ередвижение пальца вправо =
просмотр следующего слайда,
страницы
4 Включение/Выключение
5 Слот д ля USB реси вера
6 Отсек д ля батар еек
7 Лазер: может предс тавлять
опаснос ть, если с мотрет ь на него
через оптические инструменты.
LED Индикационные светодиоды
Быстрое сопряжение с компьютером
мигание
Медленное успешное подключение
мигание
.
TOUCH MOUSE
and Presenter
MODEL 178013
For optimal performance, some practice required.
Die optimale Bedienung erschließt sich erst nach einiger Eingewöhnungszeit.
Se requiere práctica para un óptimo rendimiento.
Pour des performances optimales, une certaine pratique est nécessaire.
Aby uzyskać optymalną wydajność, praktyka i
Richiede un pò di pratica per avere una resa ottimale.
Потребуется некоторое количество времени для практики, и Вы сможете управлять данным
устройством в совершенстве.
trening może okazać się niezbędna.
TM
Disposal of Electric and Electronic Equipment (applicable in the European Union and other European countries with separate collection systems)
English
This symbol on the product or its packaging indicates that this product shall
not be treate d as househ old waste. I nstead, it should be ta ken to an appli cable
collection point for the recycling of electrical and electronic equipment.
By ensurin g this produ ct is dispo sed of corre ctly, you will help preve nt
potential negative consequences to the environment and human health,
which coul d otherwi se be cause d by inappro priate was te handling o f
this produ ct. If your e quipmen t contains easily remova ble batte ries or
accumulators, dispose of these separately according to your local requirements.
The recy cling of mater ials will help t o conserve na tural resou rces. For mor e detailed
information about re cycling o f this produ ct, contact your lo cal city o ffice, your
househo ld waste disposal se rvice or the shop wh ere you purchased th is product.
In countri es outside of t he EU: To discard this p roduct, co ntact your l ocal autho rities
and ask for th e correct ma nner of dispo sal.
Deutsch
Dieses au f dem Produkt oder de r Verpackung angeb rachte Symbol zeigt an , dass
dieses Produkt nicht mit dem Hausmüll entsorgtwerden darf. In Übereinstimmung
mit de r Richtl inie 2002 /96/E G des Europ äisch en Parla ments un d des Rate s über Ele ktro- und Elek tronik-Altgeräte (WEEE) darf dieses Elekt rogerät nicht im normalen
Hausmüll od er dem Gelben Sack e ntsorgt werden . Wenn Sie dieses Produ kt entsorgen möchten, bringen Sie es bitte zur Verkaufsstelle zurück oder zum Recycling-
Sammelpunkt Ihrer Gemeinde.
Español
Este símbolo en el pro ducto o su emb alaje indica que el pro ducto no de be
tratars e como residuo doméstico. De conformi dad con la Directi va 2002/96/CE de la
UE sobre residuos de aparatos eléctricos y electrónicos (RAEE), este producto eléc-
trico no pue de desecharse se co n el resto de residuos no c lasificados. Deshágase
de este pro ducto devolvién dolo a su punto de venta o a un pu nto de recolección
municipal para su reciclaje.
Français
Ce symbol e sur Ie produit o u son emballag e signifie que ce p roduit ne doit p as être
traité comme un déchet ménager. Conformémen t à la Directive 2002/96/EC sur les
déchets d’équipements électriques et élec troniques (DEEE), ce produit électrique
ne doit en auc un cas être mis au rebut so us forme de déchet mun icipal non t rié.
English: For warrant y informati on, go to :
Deutsch: Garantieinformationen finden Sie unter :
Español: Si desea obtene r informaci ón sobre la gar antía, visit e:
Français: Pour consulter le s informati ons sur la garant ie, visitez:
Polski: Info rmacje dot yczące gwa rancji znajd ują się na stro nie:
Italiano: Per informazioni sulla garanzia, accedere a:
Русский: Для получения информации о гарантии посетите страницу:
En Méxic o: Póliza de Gar antía MANHATTAN – Datos de l importad or y responsab le
ante el consumidor IC Intracom México, S.A. de C.V. • Av. Interceptor Poniente # 73,
Col. Parque Industrial La Joy a, Cuautitlán Izcalli, Estado de México, C. P. 54730, México
• Tel. (55)1500 -45 00
La presente garantía cubre los siguientes productos contra cualquier defecto de
fabrica ción en sus mater iales y mano de o bra.
A. Garantizamos los productos de limpieza, aire comprimido y consumibles,
por 60 dia s a partir de la fecha de entrega, o por el tiempo en que se agote
totalm ente su conteni do por su prop ia función d e uso, lo que suce da primero.
B. Gar antizamos los produ ctos con partes móviles por 3 años.
C. Gara ntizamos l os demás productos por 5 a ños (produ ctos sin partes m óviles),
bajo las siguientes condiciones:
This equip ment has been teste d and found to comply w ith the limits for a Cl ass B
digital device, p ursuant to Part 15 of Federa l Communica tions Commi ssion (FCC)
Rules. These limits are designed to provide reasonable protection against harmful
interference in a residential installation. This equipment generates, uses and can
radiate ra dio freque ncy energ y, and if not insta lled and use d in accordanc e with the
instructions may cause harmful interference to radio communications. However,
there is no gu arantee that inter ference will not occ ur in a particular i nstallation. If
this equip ment does ca use harmful i nterfer ence to radio or T V recept ion, which ca n
be determi ned by turning th e equipment off an d on, the user is enco uraged to try
to correc t the interference b y one or more of the follo wing measures: reo rient or
relocate the receiving antenna; increase the separation between the equipment
and the rece iver; conn ect the eq uipment to an o utlet on a ci rcuit diffe rent from
the receiv er; or consult t he dealer or an e xperienc ed radio/ TV technic ian for help.
manhattan-products.com/warranty
Все торговые марки или торговые названия являются собственностью их соответствующих владельцев.
© IC INTRACOM . All rights rese rved. MANHATTAN is a tr ademark of IC IN TRACOM, regist ered in the U.S. an d other countrie s.
Printed on recycled paper.
WASTE ELECTRICAL & ELECTRONIC EQUIPMENT
Veuillez vou s débarrasser d e ce produit en Ie re nvoyant à son point d e vente ou au
point de ram assage loc al dans votre mu nicipalité, à d es fins de rec yclage.
Polski
Jeśli na pro dukcie lub jego opa kowaniu umieszcz ono ten symbol, wów czas w czasie
utyliz acji nie wolno wyr zucać tego produk tu wraz z odpadami k omunalnymi.
Zgodnie z Dyrek tywą N r 2002/96/ WE w sp rawie zuż ytego sp rzętu ele ktryczne go
i elektronicznego (WEEE), niniejszego produktu elektrycznego nie wolno usuwać
jako nie posortowanego odpadu komunalnego. Prosimy o usuniecie niniejszego
produk tu poprzez jeg o zwrot do punkt u zakupu lub odda nie do miejscowego ko munalnego punktu zbiórki odpadów przeznaczonych do recyklingu.
Italiano
Questo sim bolo sui prodot to o sulla relativa co nfezione indic a che il prodotto n on
va trat tato come un riuto domes tico. In ot temperanza alla Dirett iva UE 2002/9 6/
EC sui riuti di apparecchiature elettriche ed elettronich e (RAEE), questa prodotto
elettr ico non deve esse re smaltito come r ifiuto municip ale misto. Si preg a di smaltire il prodotto riportandolo al punto vendita o al punto di raccolta municipale locale
per un opportuno riciclaggio.
Русский
Д
анный знак на изделии либо на его упаковке означает, что настоящий
продук т нельзя у тилизи ровать вм есте с бы товыми от ходами. В место
этого его с ледует до ставит ь в подход ящий пунк т сбора д ля перер аботки
электрического и электронного оборудования. Путем правильной утилизации
продук та вы пред отвращаете возмож ные негативные пос ледст вия
человек а и окружающе й среды, которы е могли бы наст упить при нена длежащем
способе утилизации. Если в оборудовании применяются съемные батареи
или акку мулятор ы, их след ует ути лизиров ать отдельн о в соответствии с
местными требованиями. Переработка материалов помогает экономить
природные ресурсы. Для получения подробной информации об утилизации
и переработке настоящего продукта обратитесь в местное городское
управле ние, слу жбу ути лизации о тходов и ли в магазин , где было прио бретен о
изделие . В страна х за преде лами ЕС: ес ли вы хотит е избавить ся от данн ого
изделия , обратит есь к мес тным влас тям за ук азаниям и по процед уре
утилизации.
WARRANTY INFORMATION
FCC Class B
North & So uth Ameri ca
IC INTRACOM AMERICAS
550 Commerce Blvd .
Oldsmar, FL 34677
USA
All tradem arks and tr ade names are th e proper ty of their re spective o wners.
Todas las marcas y nombres comerciales son propiedad de sus respectivos dueños.
Toutes les marq ues et noms comm erciaux so nt la proprié té de leurs pro priétair es respec tifs.
Tutti i marchi registrati e le dominazioni commerciali sono di proprietà dei loro rispettivi proprietari.
REGULATORY STATEMENTS
Far Eastern Technology Center
7-F No. 125, Section 2 , Da Tong Rd.
Alle Marken und Markennamen sind Eigentum Ihrer jeweiligen Inhaber.
Wszyst kie znaki tow arowe i nazw y handlowe na leżą do ich wł aścicieli .
1. Tod os los pro ductos a q ue se ree re esta ga rantía, amp ara su camb io físico,
sin ningún cargo para el consumidor.
2. El comercializador no tiene talleres de servicio, debido a que los productos que
se garanti zan no cuentan c on reparacio nes, ni refacc iones, ya que s u garantía
es de camb io físico.
3. La garantía cubre exclusivamente aquellas partes, equipos o sub-ensambles
que hayan sido i nstaladas de fábri ca y no incluye en ningún c aso el equipo
adicional o cu alesquiera q ue hayan sido adic ionados al mism o por el usuario
o distribuidor.
Para hacer ef ectiva esta g arantía bastará c on presentar el pr oducto al distr ibuidor
en el domicilio donde fue adquirido o en el domicilio de IC Intracom México, S.A. de
C.V., junto con los acc esorios conte nidos en su empa que, acompañad o de su póliza
deb idame nte llen ada y sell ada por la casa ven dedo ra (indi spens able el sello y fec ha
de compra) donde lo adquirió, o bien, la factura o ticket de compra original donde
se menc ione claram ente el mo delo, númer o de serie (cuando apl ique) y fech a de
adquisic ión. Esta gara ntía no es válida e n los siguientes c asos: Si el produ cto se hubiese utilizado en condiciones distintas a las normales; si el producto no ha sido operado conf orme a los inst ructivos d e uso; o si el produc to ha sido alte rado o tratad o
de ser repa rado por el con sumidor o terce ras perso nas.
English: This device complies with the requirements of R&TTE Directive 1999/5/EC.
The Decla ration of Conf ormity fo r this produ ct is availab le at:
Deutsch: Diese s Gerät ens prich t der Dire ktive R&T TE Dire ktiv e 1999/5/EC .
Die Konfor mitätser klärung fü r dieses Pro dukt finden S ie unter::
Español: Este dispositivo cumple con los requerimientos de la Directiva R&TTE 1999/5/EC.
La declar ación de conf ormidad par a este produ cto esta di sponible e n:
Français: Cet appar eil sati sfait aux exige nces de la di recti ve R&TTE 1999/5/CE.
La Déclar ation de Conf ormité pour c e produit es t disponibl e à l’adresset :
Polski: Urz ądzen ie speł nia wym agani a dyrek tyw y R&TTE 1999 /5/EC.
Deklaracja zgodności dostępna jest na stronie internetowej producenta:
Italiano: Quest o disposi tivo è con forme al la Diret tiva 199 9/5/EC R&T TE.
La dichiarazione di conformità per questo prodotto è disponibile al:
Русский:
Данное устройство соответствует требованиям Директивы R&TTE
1999/5/EC. Декларацию соответствия для данного устройства вы
можете по лучить по а дресу:
Asia & Africa
IC INTRACOM AS IA
Shijr, Taipei
Taiwan, ROC
CE / R&TTE
manhattan-products.com
Europe
IC INTRACOM EUR OPE
Löhbacher St r. 7
D-58553 H alver
Germany
MAN-178013-UM-ML-0812-08-0
для
Page 2
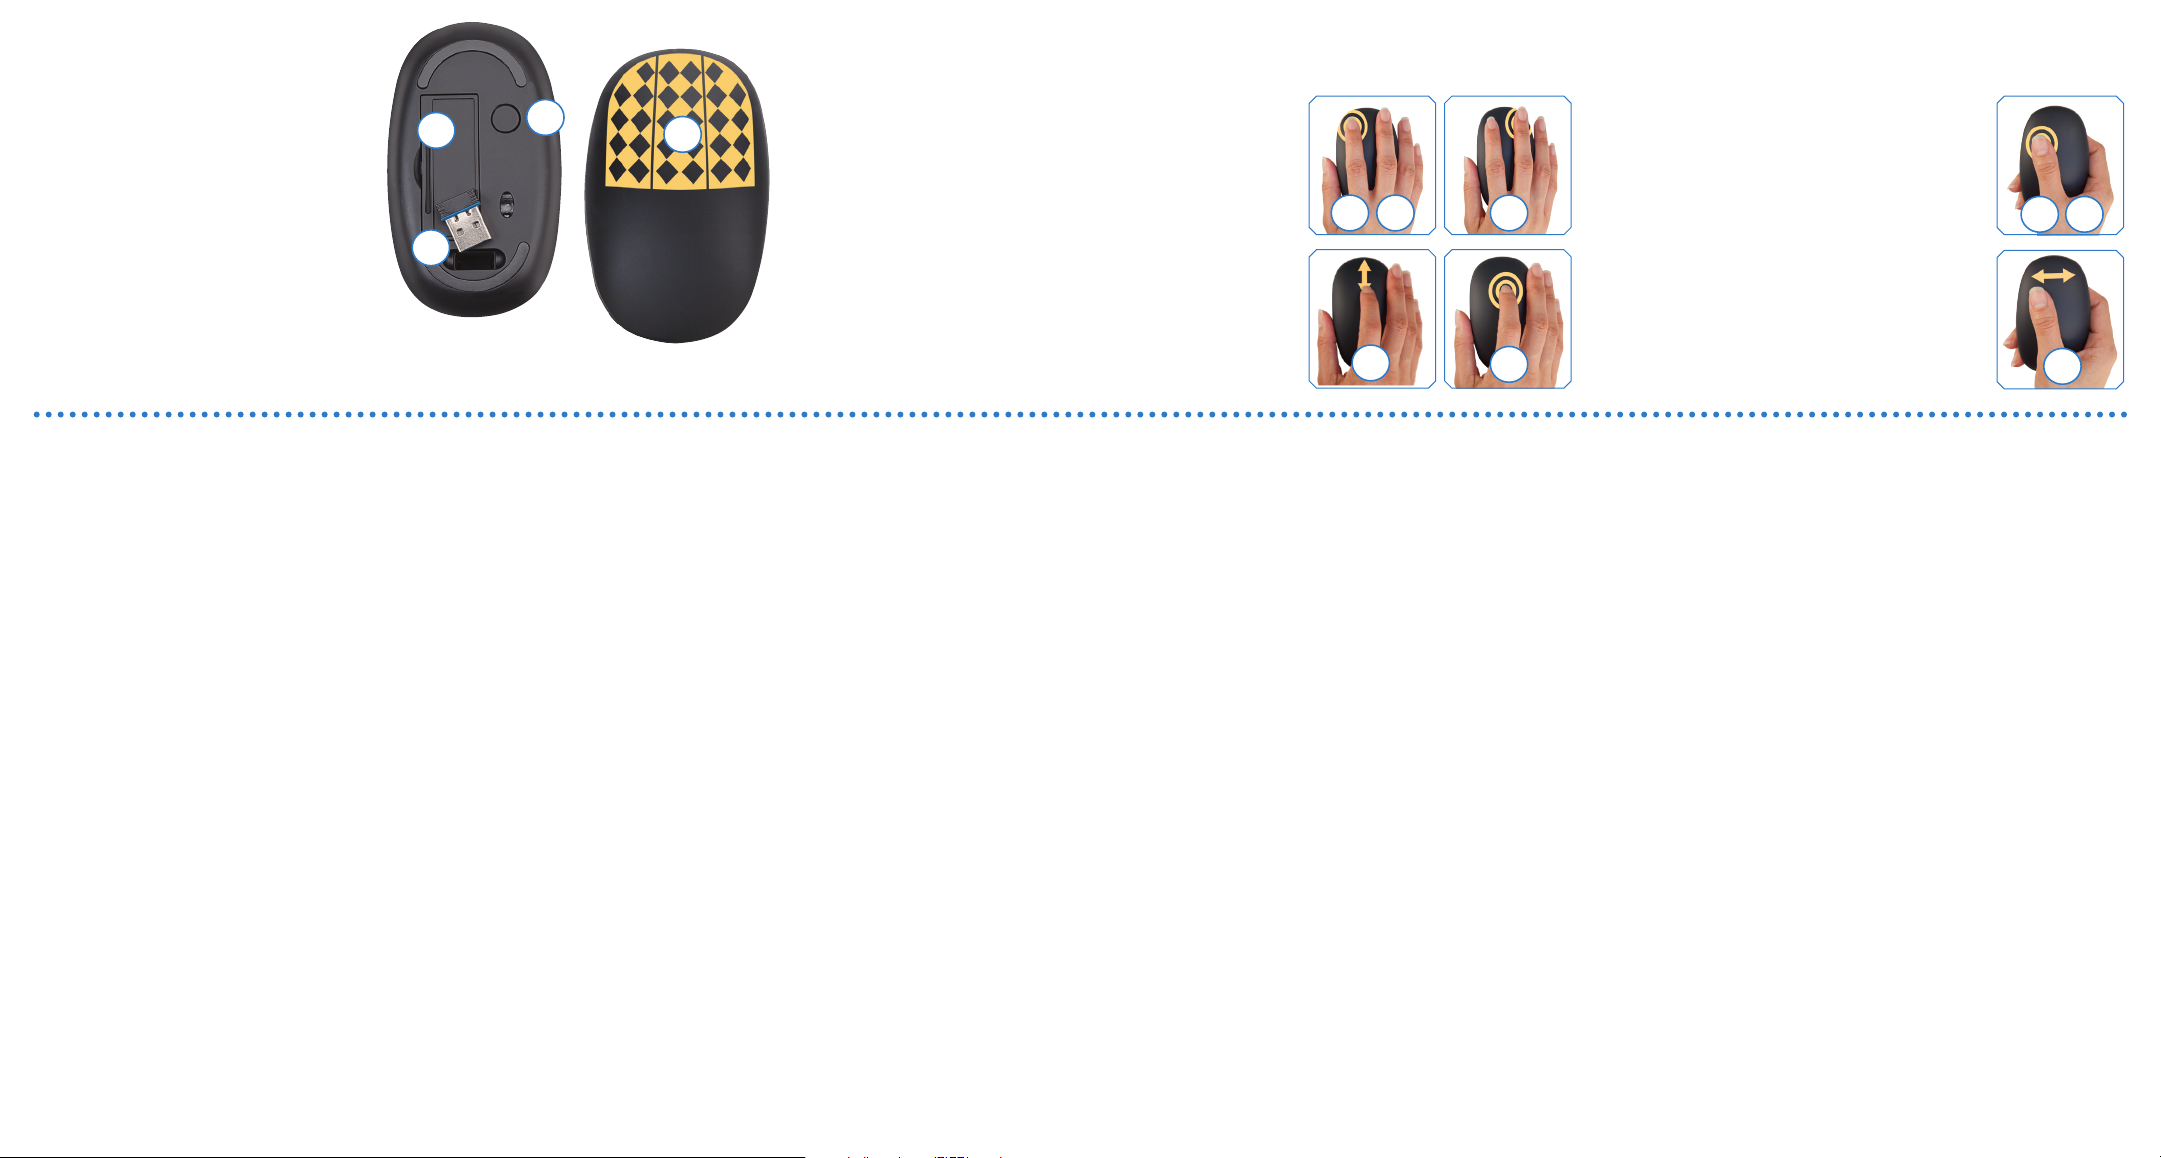
Set It Up
Use as a Mouse
Use as a Presenter
Setting up the mouse begins with removing
1
the battery compartment cover on the
bottom of the mouse. Insert the 2 included
1
3
4
AAA batteries and replace the cover.
Next, remove the USB receiver from its
2
storage slot and plug it into a USB port on
your computer.
Press Power/Reset.* The blue MANHATTAN
3
logo on the left side of the mouse will blink
2
slowly to indicate the mouse is powered on.
Your operating system will automatically install the correct drivers.
* Mac users may see a Keyboard Setup Assistant window on-screen. Close the window and continue.
Deutsch
1
Entfernen Sie die Abdeckung des Batteriefachs an der Unterseite der Maus.
Legen Sie die beiden beiliegenden AAA-Batterien ein und setzen Sie die
Abdeckung wieder auf.
2 Nehmen Sie den USB- Empfänger aus se inem Staufach und sc hließen Sie
ihn an einen USB -Port Ihres PCs a n.
3
Drücken Si e auf Power/Reset.* Das blaue M ANHATTAN-Logo an der li nken
Seite der Mau s blinkt und zeigt s o an, dass die Maus eing eschaltet ist. Ihr
Betriebssystem installiert den passenden Treiber automatisch.
* Bei Mac-Nut zern öffnet sich ev tl. ein Tastatur-Einric htungsassistent.
Schließen Sie diesen und setzen Sie den Vorgang fort.
4 Zur Verwendung als Desktop-Maus, legen Sie Ihre Finger auf die Touch-
Fläche.
5 Berühren Sie die linke Fläche für klassische Linksklick-Funktionen, z. B.
das Öffnen von Dateien.
6
Zweimal antip pen um Text zu markier en oder Objekt e wie Dateien, E-Ma ils
o. ä. aufzunehmen und zu verschieben.
7 Berühren Sie die re chte Fläche für klassis che Rechtsklic k-Funktionen; z. B .
das Einblenden von Kontextmenüs.
8 Bewegen Sie Ihre Fingerspitze entlang der mittleren Touch-Fläche, um
nach oben oder unten zu scrollen.
9 Tippen Sie zwei mal auf die mittle re Touch-Fl äche und bewegen Sie d ann
die Maus nac h oben, unten, recht s oder links, um di e Autoscroll-Funk tion
zu aktivieren. Um sie zu deaktivieren, tippen Sie erneut zweimal.
10 Zur Ver wendung als Presente r-Maus, tippen Sie z weimal, um eine
Folienpräsentation in einem PowerPoint- oder PDF-Dokument zu starten.
Hinweis: Wenn Sie die Maus im Presenter-Modus verwenden, achten Sie
darauf, dass Ihre Finger nicht den optischen Sensor an der Unterseite
verdecken.
11 Bewegen Sie d en Daumen nach recht s, um zur nächsten od er nach links,
um zur vorherigen Folie zu gelangen.
12 Tippen Sie erneut zweimal, um die Präsentation zu beenden.
Angaben zur Änderung der Mauszeiger-geschwindigkeit finden Sie im
Handbuch Ihres PCs.
Español
1
La configuración del ratón comienza retirando la tapa del compartimento
de la baterí a en la parte inferi or del ratón. Inser te las 2 baterías AA A
incluidas y coloque la tapa.
2 A continuación, reti re el receptor USB de su ran ura y conéctelo en u n
puerto USB de la computadora.
3
Presione Powe r/Reset .* El logo de MA NHATTAN ubicad o a la izquierda del
ratón parpadeará lentamente indicando que el ratón está encendido. El
sistema operativo automáticamente instalará los controladores.
* Los usuarios de M ac pueden visuali zar el asistente de con figuración del
tecl ado en la pantalla. Ci erre la ventana y contin úe.
4 Para utilizarse co mo un ratón de escrito rio, coloque sus ded os sobre el
área sensitiva táctil.
5 Toque a la izqui erda como si fuera un cl ic izquierdo; por ej emplo, para
abrir archivos.
6
Haga un dob le toque para sel eccionar texto o ar rastrar archivos , correos, etc.
7 Toque a la derecha como si fuera un clic derecho; por ejemplo, para
desplegar un menú de opciones.
8 Deslice su dedo hacia a rriba o abajo en la pa rte superior cent ral del ratón
para desplazarse.
9 Realice un doble toque en la parte superior central, después mueva el
ratón en cualquier dirección para auto desplazarse. Para salir, nuevamente
realice un doble toque.
10 Para u tilizarse como un r atón de presentaci ones, con su pulgar ha ga un
doble toque para comenzar una presentación de diapositivas en Power
point o PDF pres entation. Nota: Cuan do utilice el ratón en mo do
present ación, asegúrese q ue su dedo no cubra el s ensor óptico en la par te
inferior del ratón.
11
Deslice su pu lgar a la derecha par a pasar a la siguiente d iapositiva; desli ce
a la izquierda para retroceder.
12 Para terminar la presentación nuevamente haga un doble toque con su
pulgar.
Si requie re ajustar la sens ibilidad del di spositivo, consul te el manual de
usuario de su computadora.
Français
1 Soulevez le couvercle du compartiment batterie au verso de la souris.
Insérez les deux batteries AAA et replacez le couvercle.
2
Sorte z le récepteur USB de son e mplacement et bran chez le à un port USB
de votre ordinateur.
3 Appuyez sur Power/Rese t.* Le bleu logo MANHATTAN à gauc he de la
souris clignote pour afficher que la souris est alimentée. Votre système
d’exploitation installe les pilotes correctes automatiquement.
* Chez les utili sateurs Mac, un assi stant d’install ation pour clavier p ourrait
To use as a desktop mouse, first position your fingers over the
4
touch-sensitive area.
Left-touch for normal left-click operations; for example, opening
5
files.
Double-touch to highlight text or grab and drag files, emails, etc.
6
Right-touch for normal right-click operations; for example,
7
displaying menu options.
Slide your fingertip up or down the top center to scroll.
8
Double-touch the top center, then move the mouse up and down
9
or left and right to auto-scroll. To exit, double-touch again.
s’afficher. Fermez cette fenêtre et continuez.
4 Pour l’utilisation com me souris de bureau, p lacez vos doigts sur l a surface
tactile.
5 Touchez la surface à gauche pour les fonctions clique-gauche classiques
comme ouvrir des fichiers.
6 Toucher deux fois pour marquer du texte et déplacer des objets comme
des fichiers, emails etc.
7 Touchez la surface à droite pour les fonctions clique-droit classiques
comme ouvrir des menus contextuels.
8 Faites gliss er votre doigt vers le ha ut ou vers le bas pour l e défilement.
9
Touchez le centre e n haut deux fois, pui s bougez la souris ve rs le haut, bas,
la gauche ou droite pour le défilement auto. Pour sortir, touchez le centre
en haut deux fo is à nouveau.
10 Pour l’utilisation comme présentateur, touchez deux fois pour lancer un
diaporama d ans une présentati on PowerPoint ou PDF. Remarque: En
utilisant l a souris en tant que pré sentateur, assurez-vo us que vos doigts ne
couvrent pas l e capteur à la face infé rieure de la souris .
11 Faites glisser votre po uce vers la droite pou r la diapositive proc haine;
vers la gauche pour la diapositive précédente.
12 Touchez deux fois à nouveau pour terminer la présentation.
Pour chang er la sensibilit é de la souris, cons ultez le manuel uti lisateur de
votre ordinateur.
Polski
1 Konfigurację mysz y należy rozpo cząć od zdjęcia p okryw y komory na
baterie zn ajdującej się na spodn iej części mysz y. Do komor y należy włoż yć
dołącz one 2 baterie typ u AAA i zamknąć ko morę.
2 Następnie należ y wyjąć z magaz ynku odbiorni k USB i włożyć go do
wolnego portu USB komputera.
3
Wciśnij Power/Res et.* Niebieskie lo go MANHATTAN po lewej stroni e mysz
mignie deli katnie sygnalizu jąc, że mysz jest zas ilona. System oper acyjny
automatycznie zainstaluje wym agane sterowniki.
* W przyp adku systemu MAC na ek ranie może pojawi ć się Asystent
konfiguracji Klawiatury. Zamknij, okno aby kontynuować.
4 Aby użyć funkcji z wykłej mysz y, po prostu p ołóż palce na obs zarze
dotykowym myszy.
5 Dotyk po prawej s tronie działa, ja k prawy przy cisk; przyk ładowo
otwieranie plików.
6 Podwójnie dotknij , aby zaznacz yć tekst lub chwyć i p rzeciągnij plik ,
e-mail, itp.
To use as a presenter mouse, double-touch to
10
begin a slide show in a PowerPoint or PDF
presentation. Note: When using the mouse in
presenter mode, make sure your finger doesn’t
cover the optical sensor on the bottom of the
5 6
8
7
Dotyk po lewej stronie działa, jak lewy pr zycisk; przykładowo wyświetlanie
menu konteks towego.
8 Przesuń palec od ś rodka myszy w gór ę lub w dół, aby użyć op cji scroll.
9 Dotknij dwukro tnie na środek mysz y, następni e przesuń mysz w górę /
dół lub lewo / p rawo, aby użyć opcji au to-scroll. Aby w yjść, ponowni e
dotknij dwukrotnie.
10
Aby użyć funkcjonalności prezentera, dotknij dwukrotnie, aby rozpocząć
prezenta cję w PowerPoint lub pliku PD F. Uwaga: Podczas uż ywania tryb u
prezenter a, należy zwró cić szczegól ną uwagę, aby palce nie z asłaniały
sensora las erowego na spodni ej części myszy.
11
Przesuń kci uk w prawo, aby wyświ etlić następnym sla jd, przesuń w lewo,
aby wyświ etlić poprzed ni slajd.
12 Ponownie dotknij dwuk rotnie, aby zakończyć prezentację.
Aby uzys kać informacje na t emat ustawień c zułości myszy, z apoznaj się z
instrukcją użytkownika komputera.
7
9
mouse.
Move your thumb to the right for the next slide;
11
move to the left for the previous slide.
Double-touch again to end the presentation.
12
For sensitivi ty settings, if ne eded, refer to your
computer’s user manual.
Italiano
1 Il funzionamento del mouse inizia rimuovendo il coperchio del vano
batterie nella parte inferiore del mouse. Inserire le 2 batterie AAA incluse
e richiudere il coperchio.
2 Successivamente, rimuovere il ricevitore USB dal suo slot di memoria e
inserirlo in una porta USB del vostro computer.
3
Premere Powe r/Reset.* Il l ogo blu MANHATTAN sul lato sinis tro del mouse
lampegge rà lentamente per i ndicare che il mous e è acceso. Il vostro
sistemo operativo installerà automaticamente i driver corretti.
* Agli utenti Mac p uò comparire sullo s chermo una finestr a di assistenza
di funzionamento. Chiudere la finestra e continuare.
4 Per util izzare come des ktop mouse, prim a posizionare le vos tre dita
y
sull’area touch.
5 Touch-sinistro per le normali operazioni di click-sinistro; per esempio per
aprire dei file.
6 Doppio-touch selezione testo, afferrare e trascinare file, e-mail, ecc.
7 Touch-destro per le normali operazioni di click-destro; per esempio per
visualizzare le opzioni di menù.
8 Far scorrer e la punta del dito vers o l’alto o verso il basso po sizionandosi
nella parte centrale alta del mouse per scorrere.
9 Doppio-touc h nella parte centr ale alta, quindi sp ostare il mouse su e giù
o sinistro e destro per lo scorrimento automatico. Doppio-touch alla fine.
10 Da uti lizzare come un p resenter mouse, dop pio-touch pe r avviare una
101112
presenta zione diapositiv a in PowerPoint o PDF. Nota: quanto si usa il
mouse in mod alità presenter, assicu rarsi che le dita non c oprano il
sensore ot tico posto in testa al m ouse.
11
Far scorrere il p ollice verso dest ra per la diapositiv a successiva, far sco rrere
verso sinis tra per la diaposi tiva precedente.
12 Doppio -touch nuovamente alla fine della presentazione.
Per impos tazioni di sensi bilità, se biso gno, fare riferi mento al manuale
utente.
Русский
1 Вс тавьте 2 батарейки А АА в отсек для бата реек.
2 Затем достаньте USB -ресивер из отсека , расположенного в ни жней
части уст ройства, и подк лючите его к USB порт у вашего ПК.
3 Нажмите кнопку включение.* Логотип MANHATTAN начнет медленно
мигать на левой стороне мышки синим цветом. Ваша операционная
система автоматически установит необходимые драйвера.
* У пользоват елей Mac OS может появ иться окно “Мас тер установки
нового оборудования” на рабочем столе. В случае появления
закройте э то окно.
4
Для начал а работы помес тите пальцы на чувс твительную ча сть мышки.
5 Левое прикосновение выполняет все стандартные операции
обыкновенной мыши.
6
Для выделения текста и переноса файлов используйте двойное касание.
7 Правое прикосновение также выполняет все стандартные операции
обыкновенной мыши.
8 Для прокрут ки передвигайт е пальцами сверх у вниз по центру
устройства.
9
Для автоматической прокрутки дважды прикоснитесь в центре верхней
части мыши . Перемещайте мы шь вверх-вниз, вле во-вправо. Д ля
выхода из реж има: дважды на жмите по центру в ерхний части мыши .
10 Дл я работы с презент ациями (например, Pow er Point или с PDF
файлами) два жды нажмит е на мышку, как показа но на рисунке.
Внимание: при работе в фу нкции Presenter, не зас лоняйте пальца ми
оптически й сенсор мышки.
11
Передвигайте большим пальцем вправо для просмотра след ующего
слайда , влево - для дл я предыдущего.
12
Дваж ды коснитесь по мышке к ак показано на уст ройстве дл я выходы
из режима.
Для настройки чувствительности мыши, используйте настройки
Вашем компьютере.
 Loading...