

Page 1
USB MODEM
USER MANUAL
MODEL 154109
MAN-154109-UM-0413-05
Page 2

INTRODUCTION
Bay B
(slave/target)
Thank you for purchasing the Manhattan® USB Modem, Model 154109. Just plug
the modem into a USB port for the fastest and easiest route to the Web using a
standard phone line, then enjoy these popular features:
• Quick Connect, auto dial/answer, tone/pulse dialing, improved download speeds
• Supports Digital Telephone Answering Machine (TAM)
• Downstream speeds up to 56 kbps
• Lifetime Warranty (For a complete list of country-specic warranties, go to
manhattan-products.com/warranty.)
SPECIFICATIONS
Data Mode Capabilities
• ITU-T V.92 data mode with receive rates up to 56 kbps; transmit rates up to 48 kbps
• ITU-T V.90 data mode with receive rates up to 56 kbps; transmit rates up to 33.6 kbps
• ITU-T V.44, V.42 vis and MNP 5 data compression
• ITU-T V.42 LAPM and MNP 2.4 error correction
• ITU-T v.34, V.32bis, V.32, V.23, V.22bis, V.22, V.21; Bell 212A and Bell 103
FAX Mode Capabilities
• Fax mode with send and receive rates up to 14.4 kbps
• ITU-T V.17, V.29, V.27 ter and V.21 channel 2
• EIA/TIA 578 Fax Class 1 or T.31 Fax Class 1.0 commands
TAM
• 8-bit U-Law/A-Law coding (G.711) and 8-bit/16-bit linear coding; 8 kHz sample rate
• TAM supports with concurrent DTFM Detect, Ring Detect and Caller ID
Caller ID
• Caller ID detect
• On-Hook Caller ID detection
• Off-Hook Call Waiting, Caller ID detection during data mode in V.92, V.90, V.34, V.32
• Hardware-based modem controller and DSP
Hardware
• RJ11 port
• USB A-type male connection
• Weight: 31.2 g (1.1 oz.)
• Dimensions: 178 x 25.5 x 19 mm (7 x 1 x 0.75 in.)
Operating System Requirements
• Windows 98SE/Me/2000/XP/Vista/7/8; Linux compatible
Package Contents
• USB Modem, driver CD with user manual, quick install guide
2
Page 3
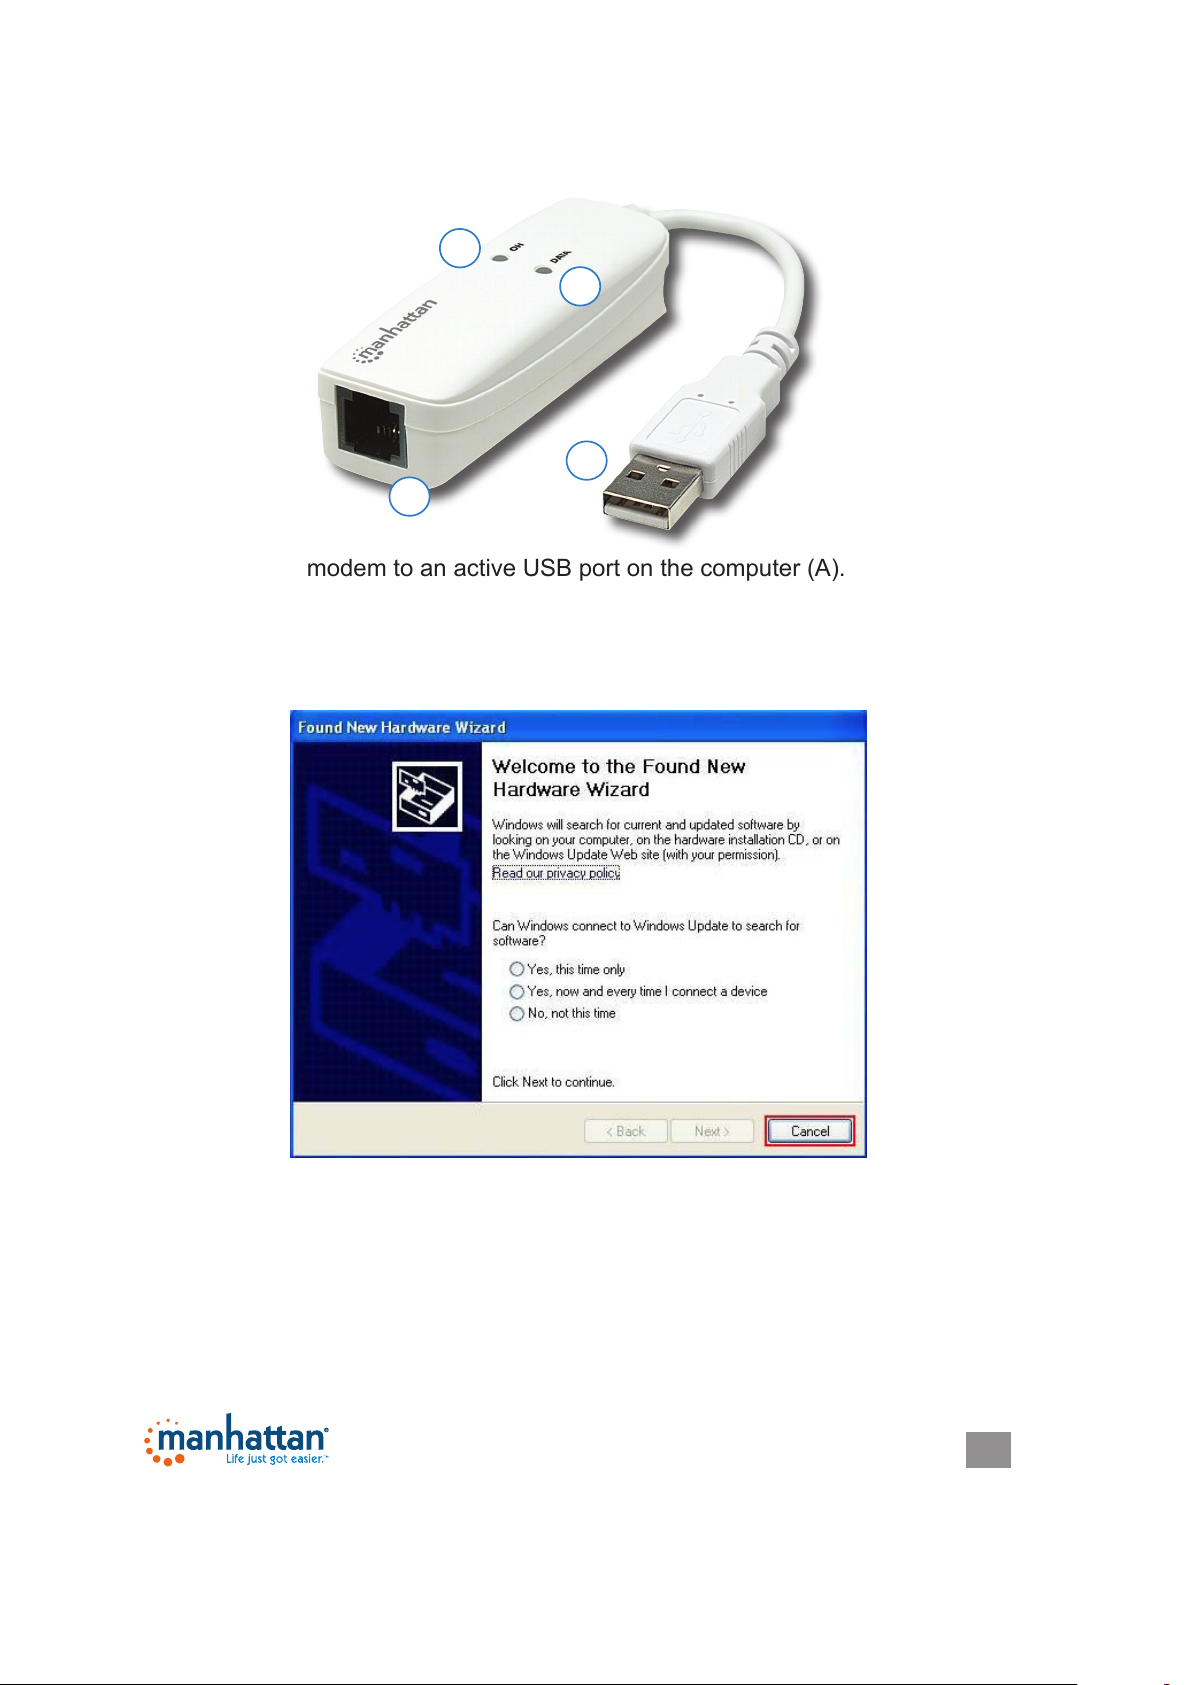
DEVICE INSTALLATION
C
D
A
B
1. Connect the modem to an active USB port on the computer (A).
2. Connect your RJ11 phone jack to the modem (B). When the Welcome to the
Found New Hardware Wizard screen displays, click “Cancel.”
• The OH LED (C) lights during dial-up and connection; off when disconnected.
• The Data LED (D) ashes while receiving/transmitting.
3
Page 4
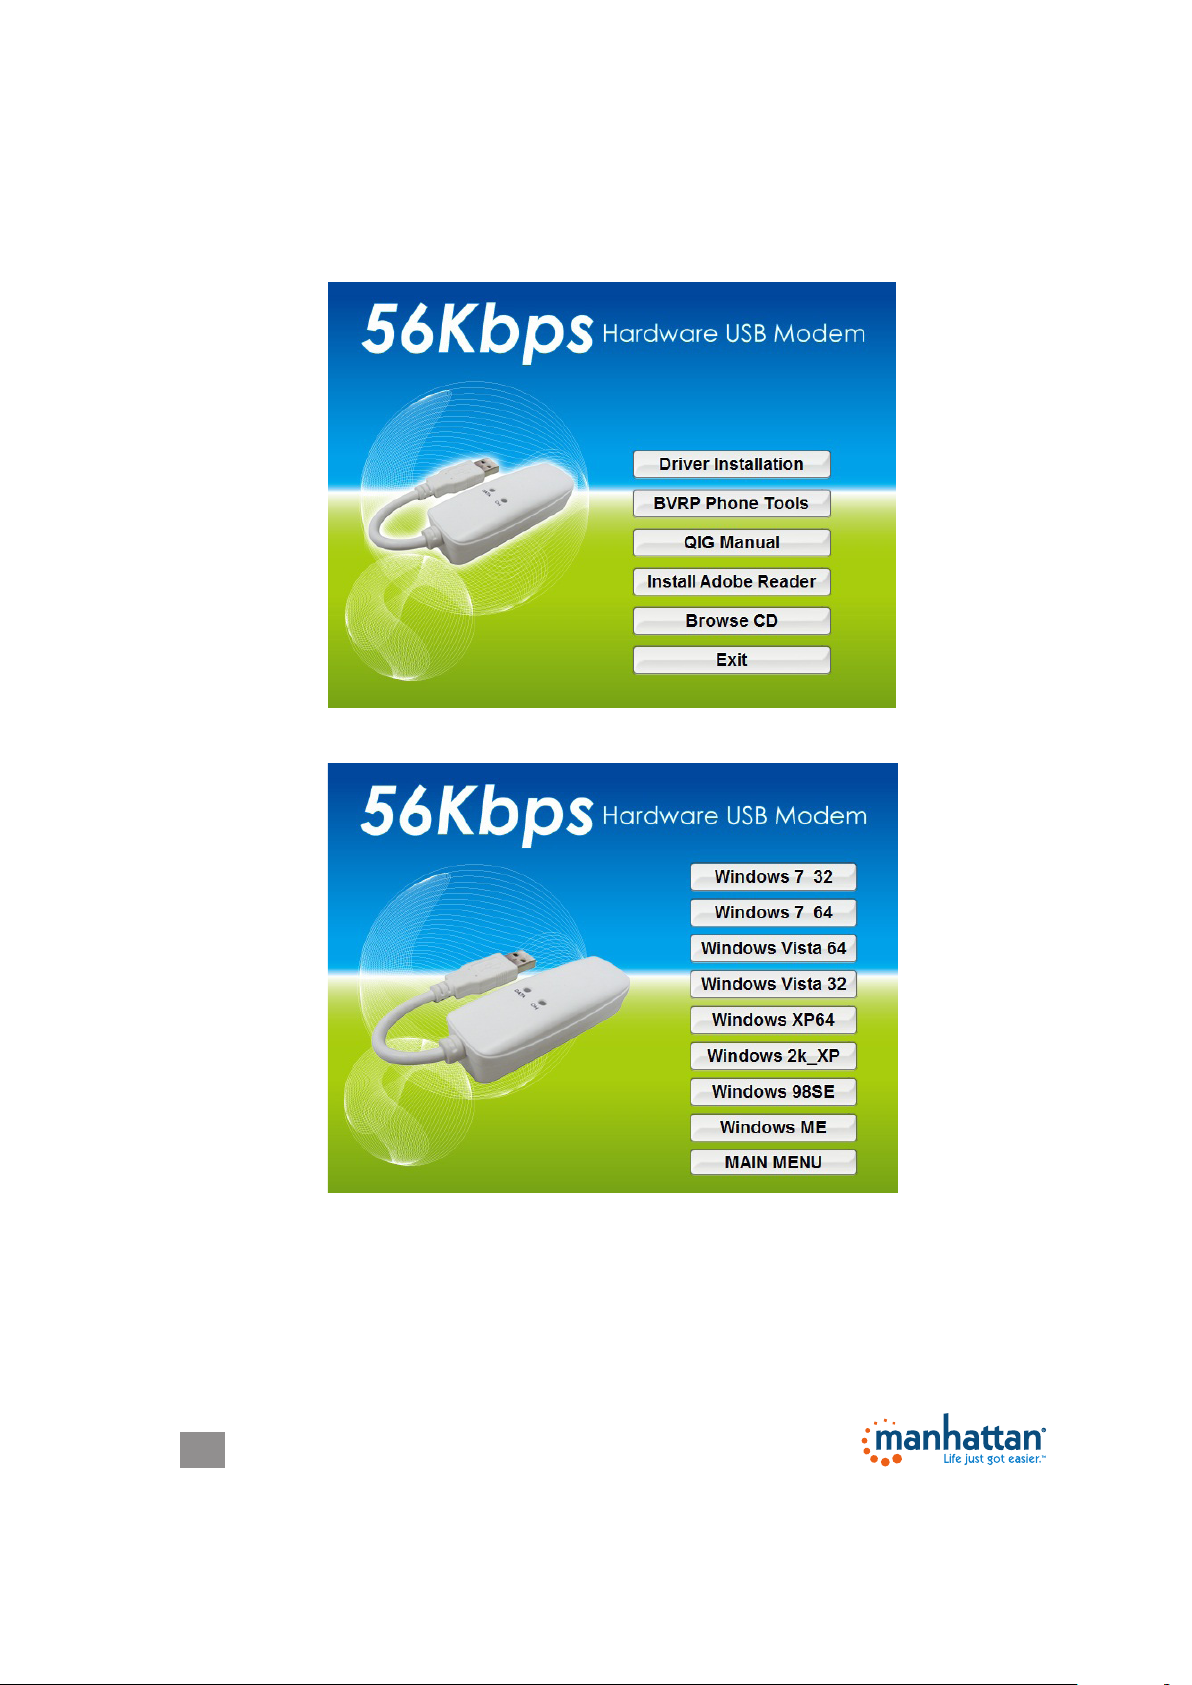
DRIVER INSTALLATION
1. Load the included Driver Installation CD. It will automatically activate the auto run instllation program and display the menu screen below. Click “Driver
Installation.”
2. Select/click your operating system.
4
Page 5

3. When the Welcome screen displays, click “OK.”
4. Click “Continue Anyway.”
5
Page 6

5. When the driver installation is complete, click “OK.”
MANUAL DIAL-UP CONNECTION SETTINGS
1.
On the
connection.”
Control Panel, go to Network Connections and click “Create a new
6
Page 7

2. When the Welcome to the New Connection Wizard screen displays, click “Next.”
3. When the Network Connectiion Type screen displays, select “Connect to the
Internet” and click “Next.”
7
Page 8

4. When the Setting Ready screen displays, select “Set up my connection
manually” and click “Next.”
5. When the Internet Connection screen displays, select “Connect using a dial-up
modem” and click “Next.”
8
Page 9

6. When the Connection Name screen displays, enter the name of your Internet
service provider in the ISP Name eld and click “Next.”
7. When the Internet Account Information screen displays, enter your information in
the text elds and select “Use this account name and password when anyone
connects to the Internet from this computer.” Click “Next.”
9
Page 10

8. When the Completing the New Connection Wizard screen displays, click “Finish”
to complete the manual dial-up connection.
9. When the nal screen displays, click “Dial” to connect to the Internet.
10
Page 11

WARRANTY INFORMATION
ENGLISH: For warranty information, go to manhattan-products.com/warranty.
DEUTSCH: Garantieinformationen nden Sie unter manhattan-products.com/warranty.
ESPAÑOL: Si desea obtener información sobre la garantía, visite manhattan-products.com/
warranty.
FRANÇAIS: Pour consulter les informations sur la garantie, visitez manhattan-products.com/
warranty.
POLSKI: Informacje dotyczące gwarancji znajdują się na stronie manhattan-products.com/
warranty.
ITALIANO: Per informazioni sulla garanzia, accedere a manhattan-products.com/warranty.
EN MÉXICO: Póliza de Garantía Manhattan — Datos del importador y responsable
ante el consumidor IC Intracom México, S.A.P.I. de C.V. • Av. Interceptor Poniente # 73,
Col. Parque Industrial La Joya, Cuautitlán Izcalli, Estado de México, C.P. 54730, México. •
Tel. (55)1500-4500
La presente garantía cubre los siguientes productos contra cualquier defecto de
fabricación en sus materiales y mano de obra.
A. Garantizamos los productos de limpieza, aire comprimido y consumibles, por 60 dias
a partir de la fecha de entrega, o por el tiempo en que se agote totalmente su
contenido por su propia función de uso, lo que suceda primero.
B. Garantizamos los productos con partes móviles por 3 años.
C. Garantizamos los demás productos por 5 años (productos sin partes móviles),
bajo las siguientes condiciones:
1. Todos los productos a que se reere esta garantía, ampara su cambio físico,
sin ningún cargo para el consumidor.
2. El comercializador no tiene talleres de servicio, debido a que los productos
que se garantizan no cuentan con reparaciones, ni refacciones, ya que su
garantía es de cambio físico.
3. La garantía cubre exclusivamente aquellas partes, equipos o sub-ensambles
que hayan sido instaladas de fábrica y no incluye en ningún caso el equipo
adicional o cualesquiera que hayan sido adicionados al mismo por el usuario
o distribuidor.
Para hacer efectiva esta garantía bastará con presentar el producto al distribuidor
en el domicilio donde fue adquirido o en el domicilio de IC Intracom México, S.A.P.I. de
C.V., junto con los accesorios contenidos en su empaque, acompañado de su
póliza debidamente llenada y sellada por la casa vendedora (indispensable el sello
y fecha de compra) donde lo adquirió, o bien, la factura o ticket de compra original
donde se mencione claramente el modelo, número de serie (cuando aplique) y
fecha de adquisición. Esta garantía no es válida en los siguientes casos: Si el
producto se hubiese utilizado en condiciones distintas a las normales; si el producto
no ha sido operado conforme a los instructivos de uso; o si el producto ha sido
alterado o tratado de ser reparado por el consumidor o terceras personas.
11
Page 12

© IC Intracom. All rights reserved. Manhattan is a trademark of IC INTRACOM, registered in the U.S. and other countries.
 Loading...