

Mangrove Jack's Kegerator Instructions Manual

KEGERATOR
INSTRUCTIONS
NO MORE BOTTLING!
PERFECTLY CARBONATED BEER ON TAP
FOR WHENEVER THE MOOD STRIKES.
Cheers!
BREWING.
OUR OBSESSION.

IMPORTANT SAFETY INSTRUCTIONS
This appliance is not intended for use by persons (including children) with reduced physical,
sensory or mental capabilities, or lack of experience and knowledge, unless they have been given
supervision or instruction concerning use of the appliance by a person responsible for their safety.
Children should be supervised to ensure that they do not play with the appliance. If the supply
cord is damaged, it must be replaced by the manufacturer, its service agent or similarly qualified
persons in order to avoid a hazard. This appliance is intended to be used in household and similar
applications such as: – sta kitchen areas in shops, oces and other working environments;
– farm houses and by clients in hotels, motels and other residential type environments;
– bed and breakfast type environments; – catering and similar non-retail applications.
• If pressurised aerosol containers bear the word “flammable” and/or a flame symbol, do not store them
inside the Kegerator. If you do so, you may cause an explosion.
INFORMATION ON DISPOSAL
• Most of the packing materials are recyclable. Please dispose of those materials through your
local recycling depot or by placing them in appropriate collection containers.
• If you wish to discard this product, please contact your local authority and ask for the correct
method of disposal.
• This appliance contains insulation formed with flammable blowing gases. Avoid safety hazards
by carefully disposing of this appliance.
• When you dispose of your old refrigerator, remove any doors. Children can suocate if they get
trapped inside.
WWW.MANGROVEJACKS.COM

ASSEMBLY IN BRIEF
1. Remove trays and parts from inside Kegerator.
2. If you want the Kegerator on wheels then fit the wheels.
3. Fit the top rails.
4. Fit the CO
5. Thread the pipes attached to the tower into the Kegerator.
6. Secure the tower.
7. Crimp the black liquid disconnects to these tubes.
8. Attach spare tubing to prong of the brass gas splitter. Thread
that tube from the inside of the Kegerator through the hole
cover (insert a hole through the centre of the hole cover to do
this) at top right hand corner.
9. Crimp the regulator to this tube.
cylinder holder if required.
2
10. Leave the Kegerator upright in its final place for 1 hour before
turning it on.
BREWING.
OUR OBSESSION.
1. PREPARATION
• Remove all trays from inside the Kegerator body.
• Read your CO
• Sit ends of your tubing that are not connected to anything in a jug of warm water to
make the ends more malleable and easier to fit on to attachments if you wish to.
• Remove any plastic protective layer on the stainless steel. This layer can become
hard to remove if the unit is operated with it on.
Cylinder Safety Instructions that are provided with your cylinder.
2
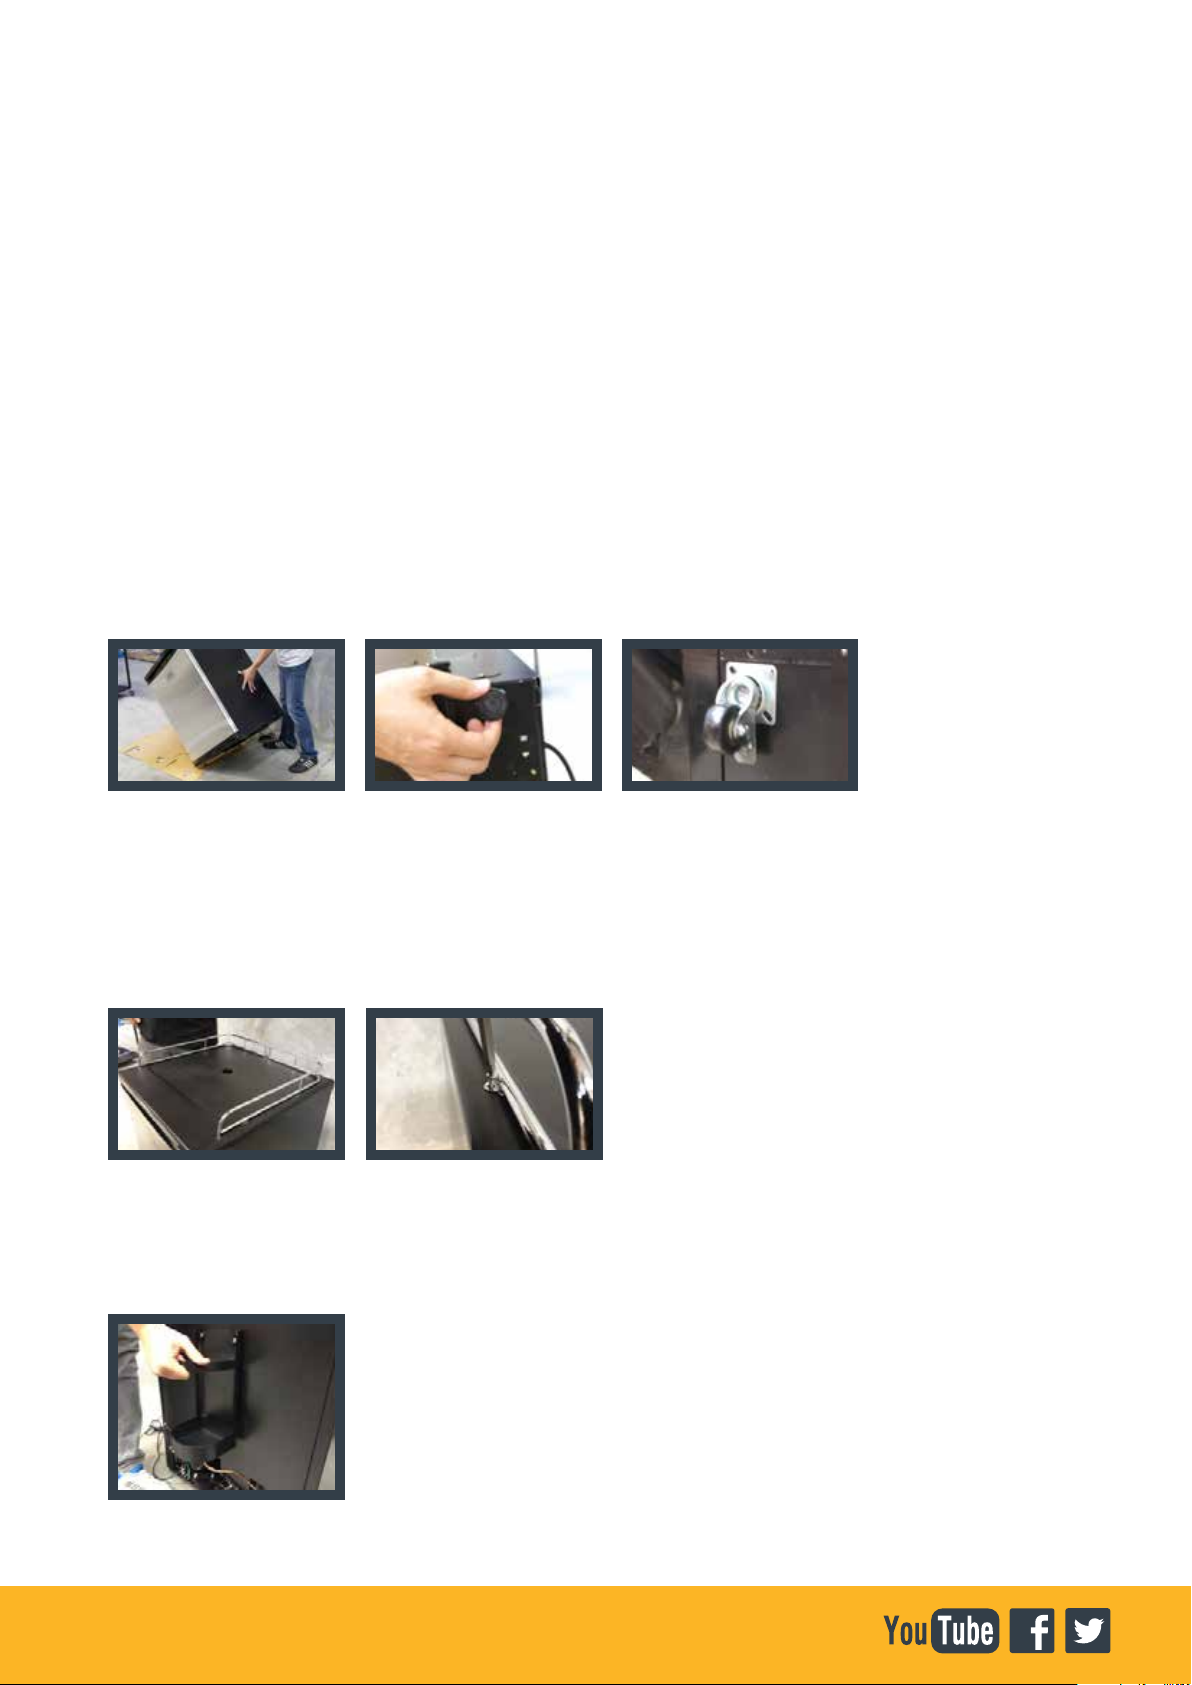
2. FITTING THE WHEELS
• If you would like to fit the wheels to your Kegerator - Turn the Kegerator onto its side.
NOTE: You may like to lay down some cardboard first if assembling on a hard surface.
• Remove the 4 adjustable feet on the base of the Kegerator.
• Screw on the wheels using the screws from the larger bag of 16 screws.
The 2 locking swivel castors should be installed in the front of the Kegerator for
easy access.
• Position Kegerator back uprigh
NOTE: The Kegerator body should be left upright for at least 1 hour before turning it on. This
allows for the refrigerant gas to settle, in order to work properly.
t.
3. FITTING THE RAILS TO THE TOP OF KEGERATOR
• Place the 2 metal rails on top of the Kegerator so the curved sides face
upwards and the screw holes line up.
• Empty the remaining packet of screws.
• Using the 4 small screws, screw in the rails to the top of the Kegerator
.
4. ATTACHING THE CO2 CYLINDER SUPPORT
• Attach the cylinder support rack onto the 4 studs located at the back of the Kegerator.
Align the holes in the cylinder support with the studs and push down firmly.
WWW.MANGROVEJACKS.COM
 Loading...