

Page 1

Mission Side Table
Thank you for purchasing our Mission Side Table. Assembly of
this product requires a Phillips screwdriver and a hammer. We
have found it helpful to have a second person present in at least
one step of the assembly.
7644
Page 2
Read through these instructions
thoroughly. We have found this to be of
great value when first assembling this
product.
Remove all parts and hardware from
packing material. Place wooden parts on
non-abrasive surface (like carpet or
carton) to prevent damage to finish.
Assembly of this product requires a
Phillips screwdriver and a hammer.
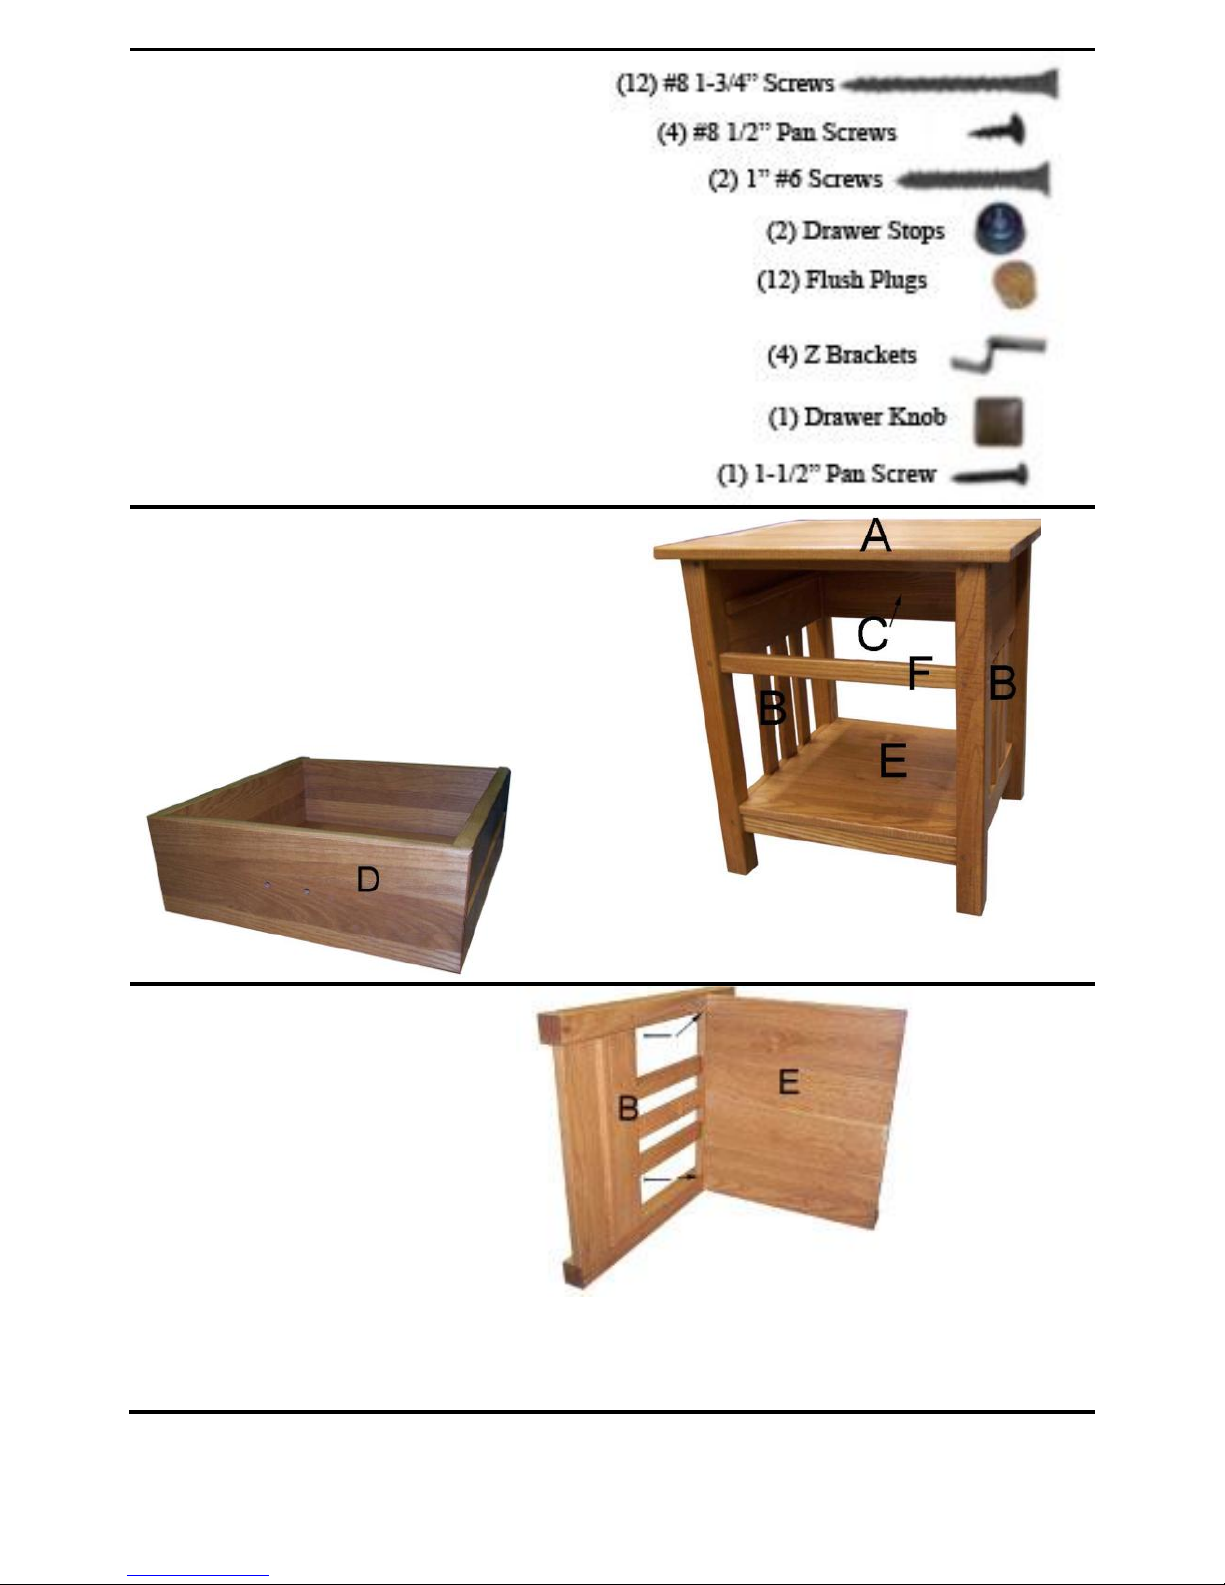
Identify and count hardware using
diagram at right.
Identify all parts using diagram at right.
1 Top (A)
2 Side Assemblies (B)
1 Back Stretcher (C)
1 Drawer (D) (Shown Below)
1 Bottom Shelf (E)
1 Front Cleat (F)
STEP 1
Attach Bottom Shelf (E) to Side
Assembly (B) using two 1-3/4”
screws inserting them through
the Side Assembly (B) then into
the predrilled holes in cleats.
Page 3

STEP 2
Attach Front Cleat (F) to Side Assembly
(B) using one 1-3/4” screw inserting it
through Side Assembly (B) then into the
predrilled hole in cleat.
STEP 3
Attach Back Stretcher (C) to Side
Assembly (B) using two 1-3/4” screws
inserting them through the Side Assembly
(B) then into the predrilled holes in Back
Stretcher (C).
Repeat steps 2-4 to attach second Side
Assembly. Leaving each screw loose to
fit easier onto top.
STEP 4
Lay Top (A) on non-abrasive
surface (like cardboard or carpet) so
surface doesn’t get damaged. The
cleat is the front of the unit.
STEP 5
Turn pre-assembled Side
Assemblies (B) over and attach to
Top (A) using two 1-3/4” screws
inserting them through the Side
Assemblies (B) then into the
predrilled holes in the top Cleat.
Tighten all screws.
STEP 6
Line the Z brackets into the slot
(shown with black line) over
predrilled holes in the Top (A) and
attach using four #8 ½” pan screws.
Page 4

STEP 7
Attach Drawer Knob to Drawer (D)
by inserting through hole in Drawer
(D) and securing with Pan Screw
provided.
STEP 8
Slide Drawer (D) into cabinet.
Attach Drawer Stops to Drawer (D)
inserting two 1” #6 screws through
Drawer Stop then into predrilled
holes in the bottom of Drawer (D).
STEP 9
Turn unit over with assistance from
another person if necessary. Insert
flush plugs to cover screws in Side
Assemblies (B) and tap lightly into
place.
CARE
Dust as needed with soft cloth.
Clean with damp cloth and mild
solution of dish soap. Polish with
soft cloth and polish that contains
no pigment or silicone.
www.manchesterwood.com
Product Support 1 800 660 6930
 Loading...