

Mammoth Tents EliteHC 240 Assembly Instructions Manual
EliteHC 240
mammothtents.nl
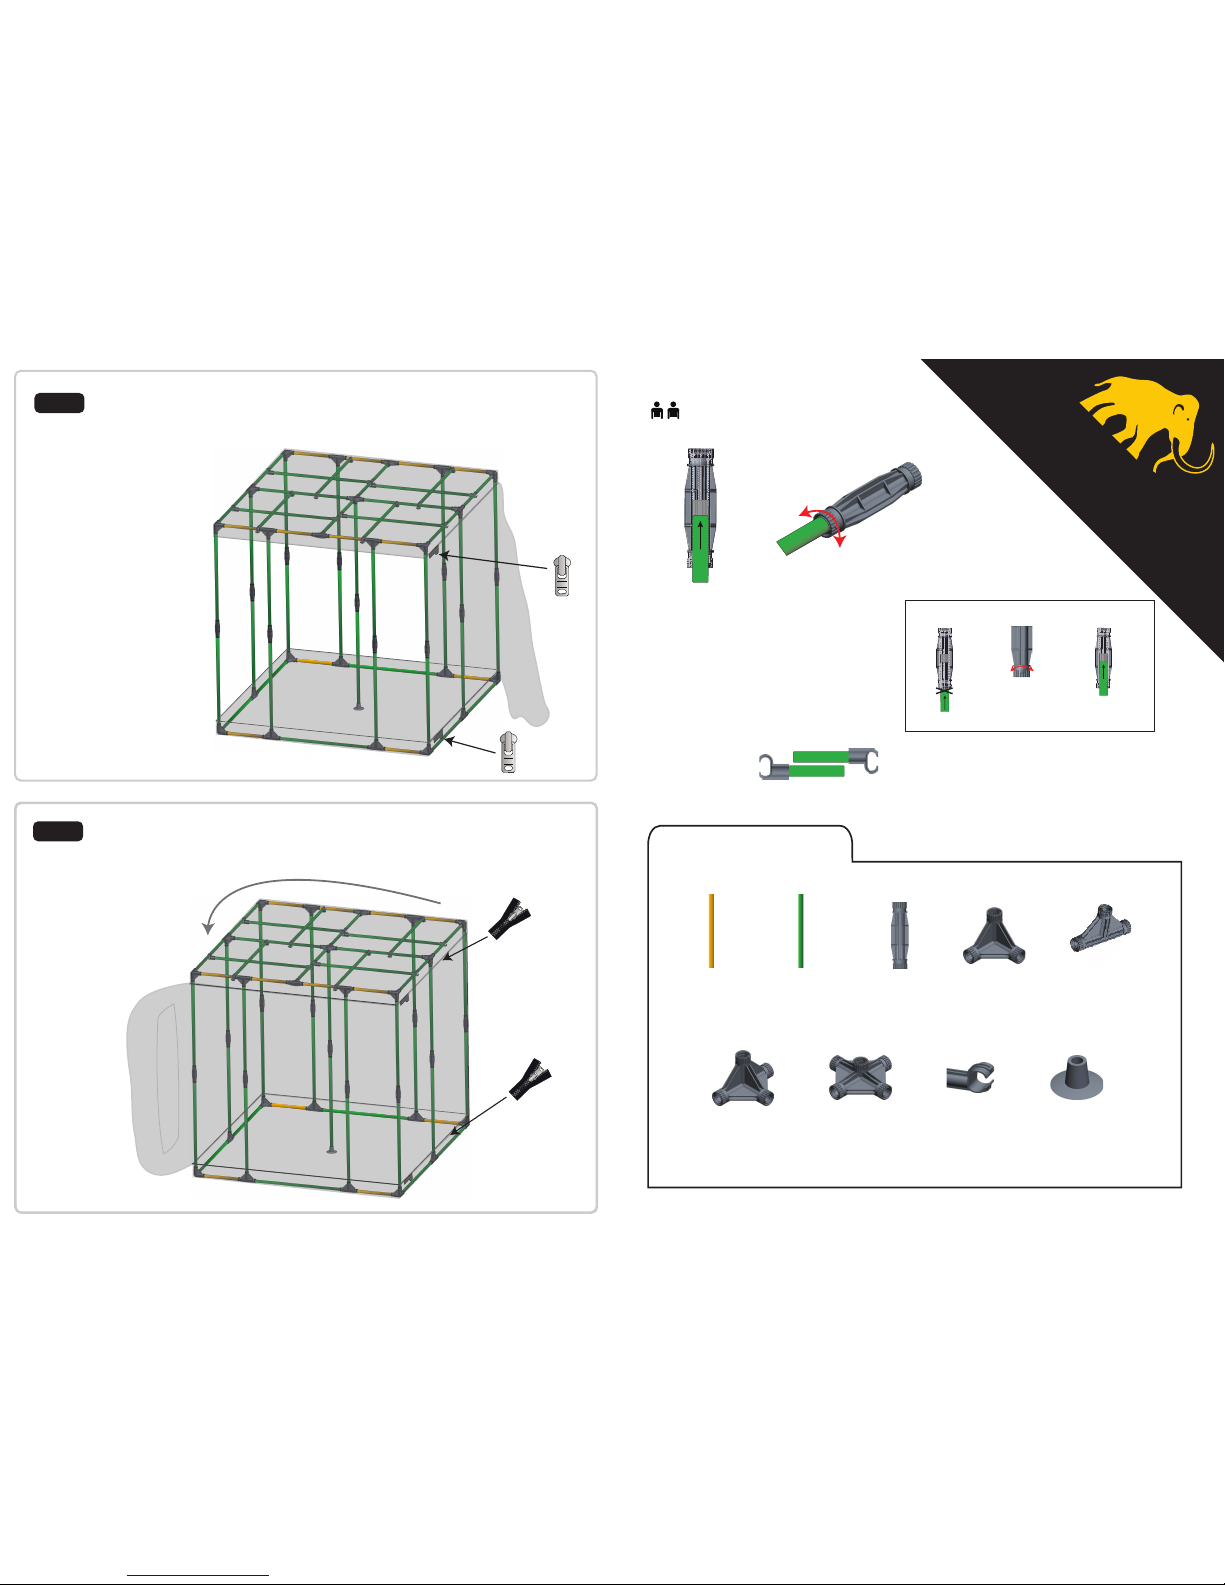
Two Person Assembly Recommended
Assembly Instructions
Insert pole into connector
(ensure poles are fully inserted)
Lock poles into connecters
by rotating left or right
Equipment Hangers
Upper Equipment Hanger
Lower Equipment Hanger
Parts List
Green Pole
x44
Straight
Connector
x11
3-Way
Corner
x8
Equipment
Hanger Ends
x16
3-Way
T Piece
x12
4-Way
Join
x2
5-Way
Join
x1
Support Pole
Foot
x1
Yellow Pole
x12
Rotate locking
mechanism until it clicks
Insert pole into connector
(ensure poles are fully inserted)
If unable to Insert pole
CLICK!
NOTE
Connect wall panel zip to the roof
and base zips (under Velcro flaps).
Step 5
Zip the wall panel to the roof and base.
Step 6

Lay out base ensuring Velcro flap is in front right corner.
Assemble floor poles, 3-way corners and 3-way T pieces as shown.
3-Way Corner
Velcro Flap
Step 1
3-Way T Piece
Insert lower wall poles into 3-way corners and 3-way T pieces.
Fit straight connectors.
Insert upper wall poles into straight connectors.
Fit 3-way corners, 3-way T pieces and 4-way joins on top.
3-Way Corner
Straight Connector
Step 2
3-Way T Piece
4-Way Join
Insert ceiling poles into 3-way corners, 3-way T pieces, 4-way joins and 5-way join.
Fit equipment hanger ends to poles. Position equipment hangers as required.
Fit support pole into 5-way join at the top and support pole foot at the bottom.
Equipment
Hanger End
Step 3
5-Way Join
Support Pole
Foot
3-Way T Piece
Fit roof ensuring Velcro
flap is in front right corner.
Step 4
Velcro Flap
 Loading...