

Mami VeriCAM 4 Operation Manual
USER MANUAL
VeriCAM 4
3G / WiFi Outdoor
Waterproof Security Camera

BEFORE YOU BEGIN
Make sure you use only the recommended power supplies. Damage
incorrect voltage or wiring is not
1 FEATURES
……………………………………………………………………
1
Fi technology, you can access live
video stream or recorded footage from anywhere any time using our
1
1. Before the product is installed, please read the operation manual
carefully.
2. Please unpack all boxes carefully and identify that all the
parts are present.
3.
caused to the camera or receiver by
covered by the warranty.
4. Cutting any cable will void the warranty.
5. Do not drop, pierce or dismantle the camera.
INDEX
2 CAMERA CONTENTS…………………………………………………...…..2
3 CAMERA PARTS……………………………………………………...……...2
4 INSTALLATION & SETUP……………………………………………………3
5 BASIC OPERATION………………………………………………………….4
6 SPECIFICATIONS ..................................................................... 10
1. Features
1. Offers High Resolution 720P images in light levels of 0.3 lux and
above.
2. 3.4mm Lens for a wide viewing angle of 120°
3. Features IR LEDs for up to 15 meters Night Vision
4. Compatible with latest 3G and Wi-
free mobile iOS & Android apps.
5. Designed for Wall Mounting
6. Suitable for Internal or External use

Veri
CAM
4
3x Scr
ews
&
Wall Plugs
Antenna
s
5V DC Power Adaptor
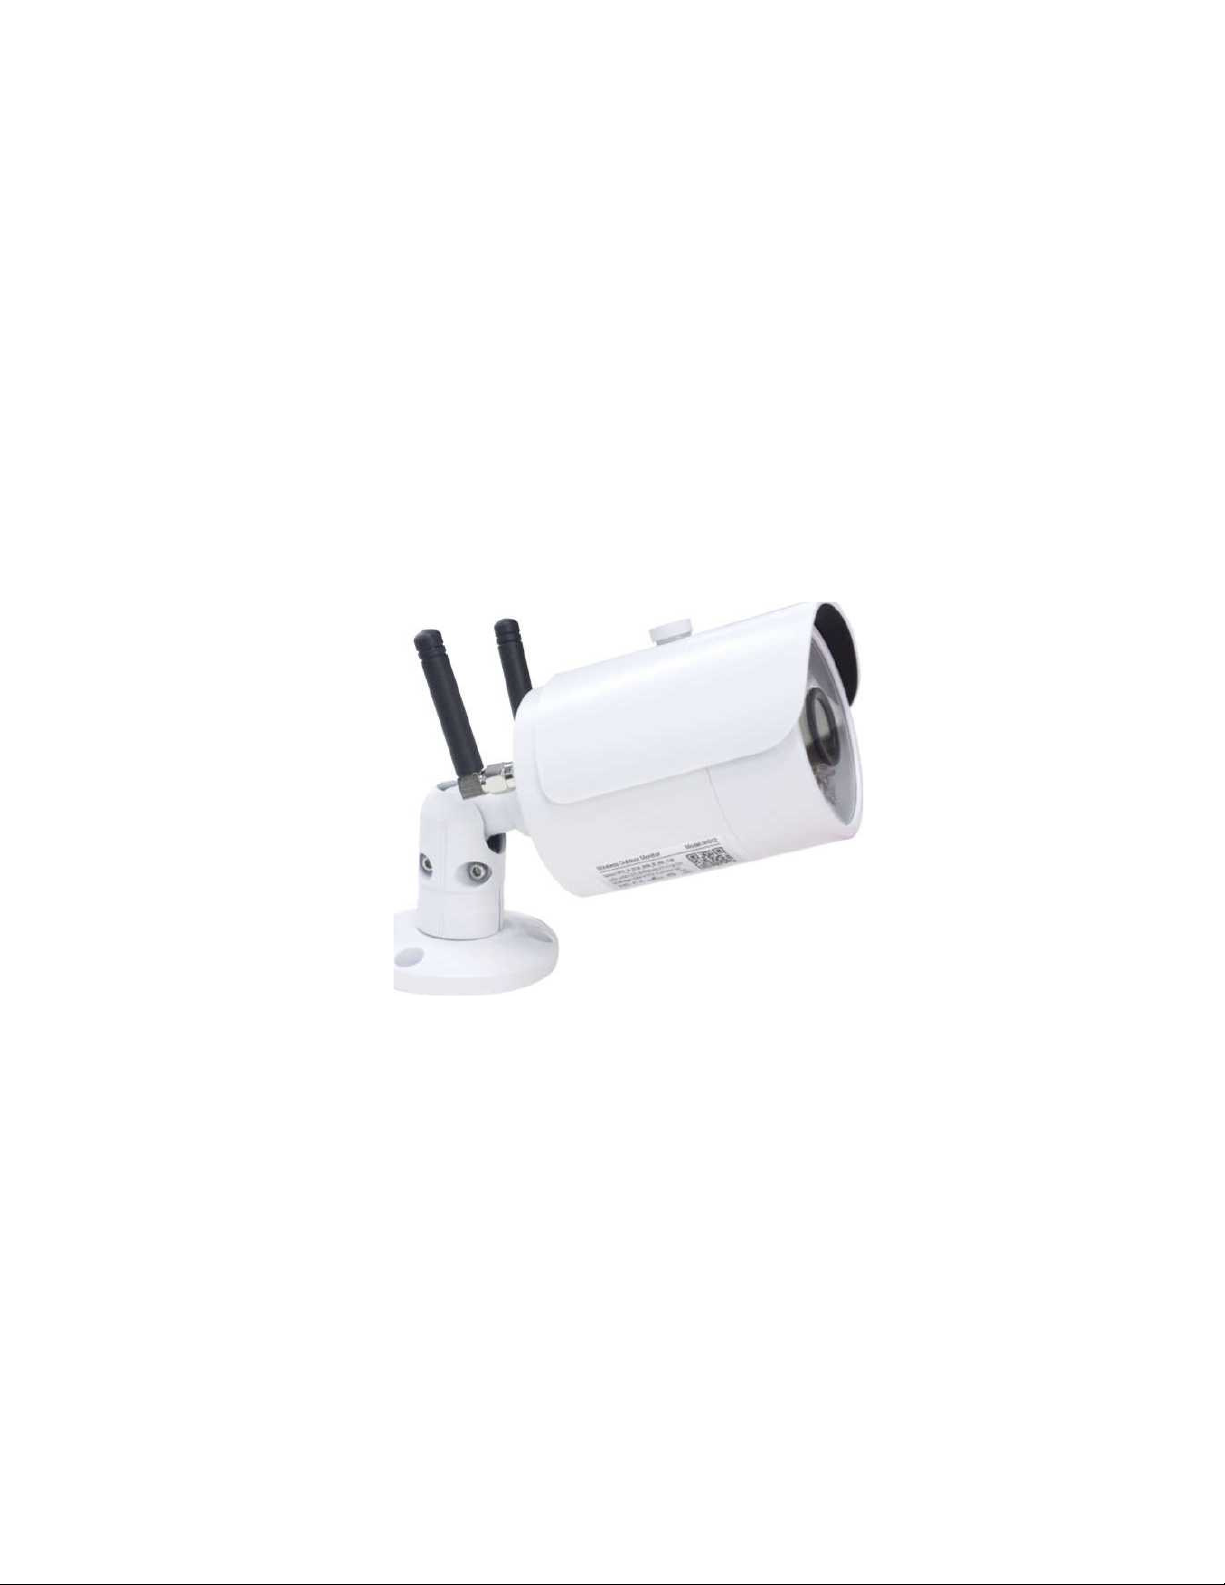
Camera Parts
FRONT
BACK
2
2. Camera Contents
Wireless Camera & Bracket
3.
Camera
Sunshield
Power
LED
IR LEDs
camera
3
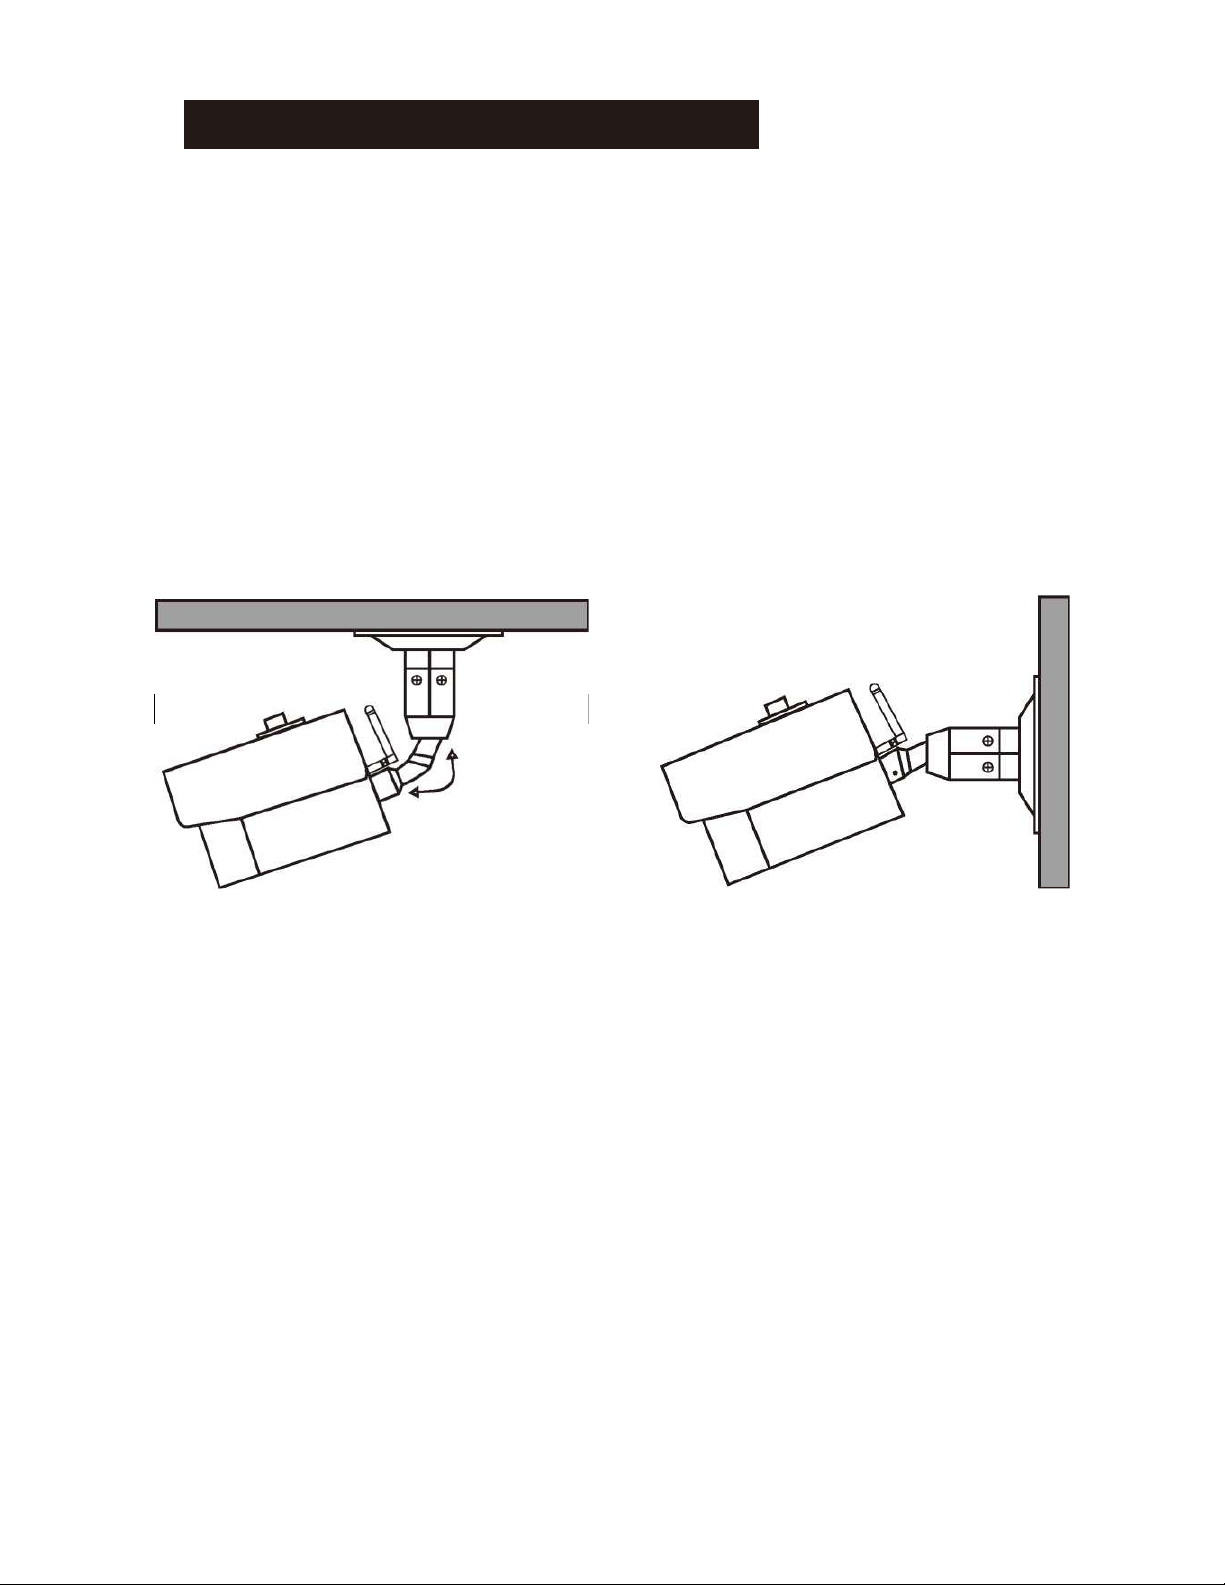
4. INSTALLATION & SETUP
1. Select a suitable position on the wall or ceiling to install the camera and
map out the holes for the bracket.
2. Drill a hole in the middle of the area on the wall or ceiling where the
is to be mounted, to allow the power and video cable to be fed through.
Alternatively, the cable can be surface mounted by taking the cabling out
through the side of the bracket.
3. Screw the bracket base to the wall or ceiling using the Wall Plugs and
screws supplied.
4. To change the bracket position during installation, the different screws on
the bracket can be adjusted as shown in the diagram.
5. Connect the power adaptor to the camera and plug into the main power
supply. The RED Power LED will light up. The Camera is now ready to
use.
 Loading...