

Mami HomeGuard 32 User Manual
X00383 November 2012 Portable_HomeGuard_32_instr_v01.cdr
Portable Monitor
for
wireless outdoor and indoor sensors
MAMI
Preliminary issue
MAMI
MANUFACTURING AND MINOR INVENTIONS
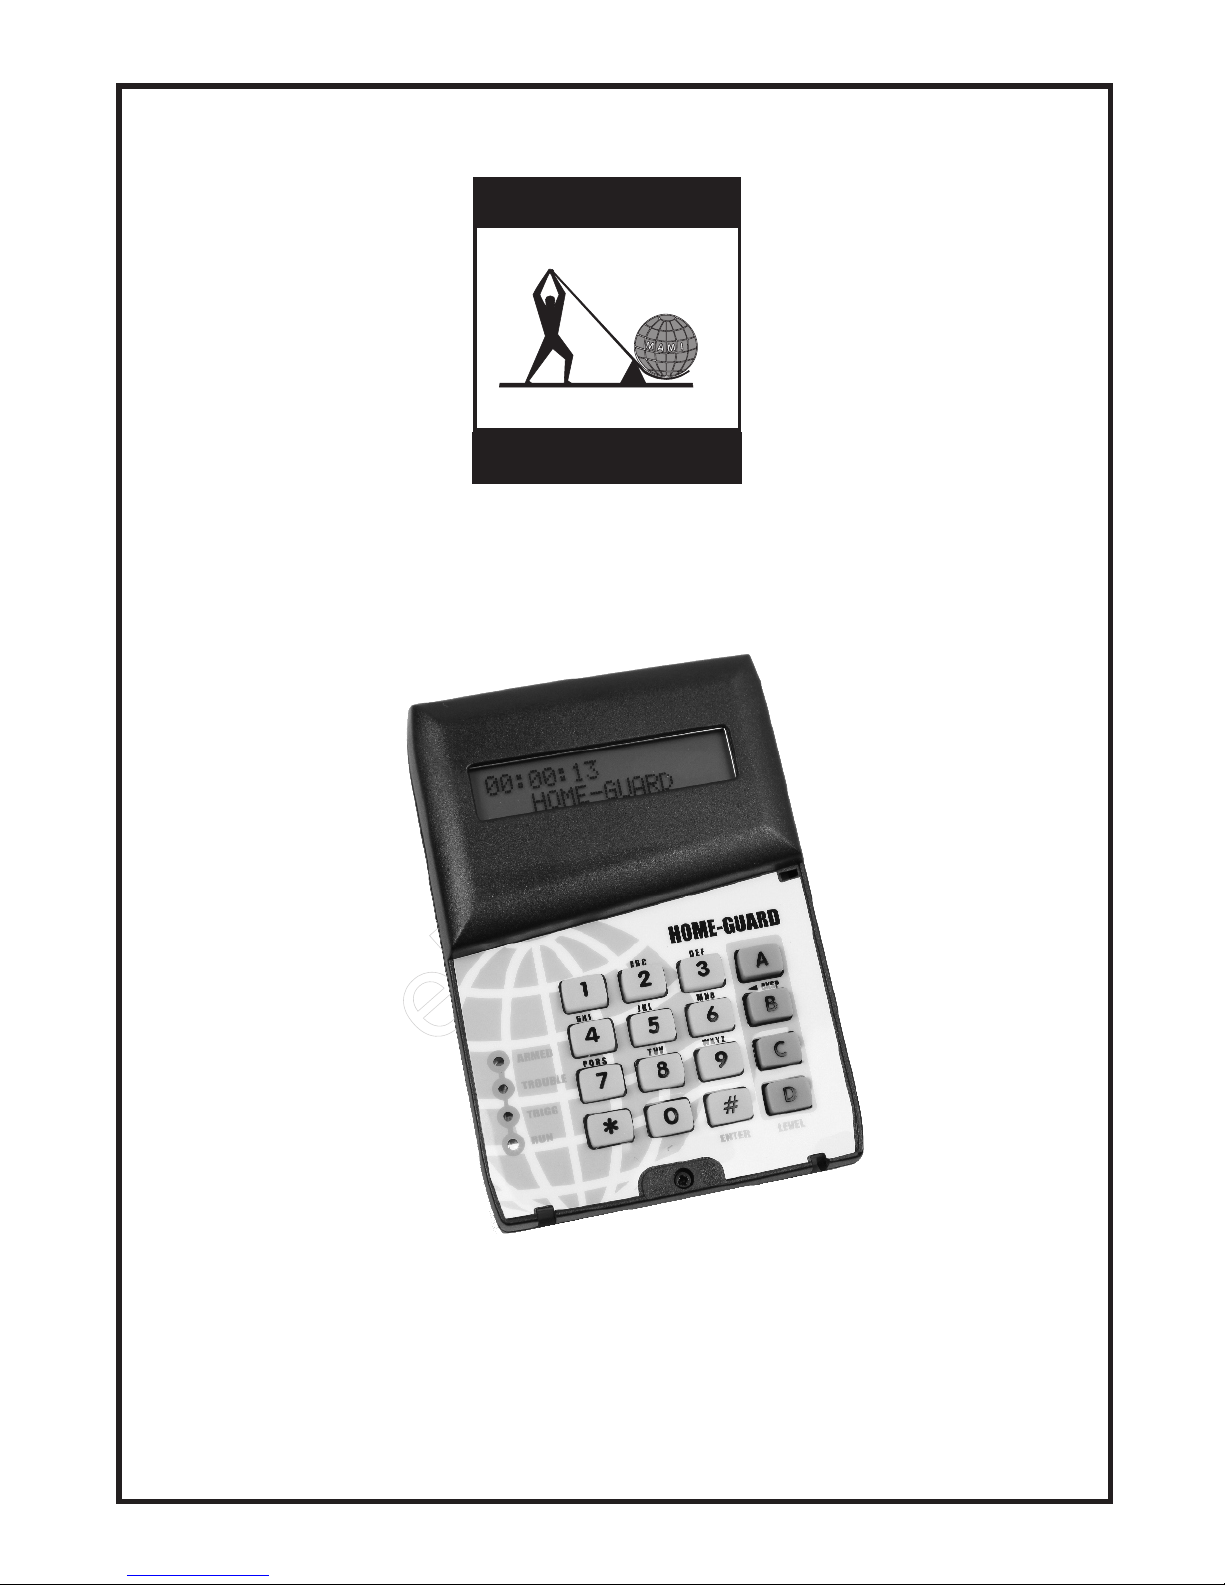
HomeGuard 32

TABLE OF CONTENTS
HomeGuard 32
REGUARD R64 - FEATURES.......................................................................................................................................
G E N E R A L D E S C R I P T I O N..........................................................................................................................
QUICK START GUIDE..............................................................................................:.....................................................
WIRELESS DETECTORS AND REMOTE CONTROL OPERATION........................................................................
HOW TO TRIGGER DEVICES FOR PROGRAMMING....................................................................
HOW TO TRIGGER MAMI REMOTE..................................................................
HOW TO TRIGGER MAMI PIR DETECTORS....................................................
HOW TO TRIGGER MAMI DOOR GUARD........................................................
HOW TO TRIGGER SILENTRON DETECTORS................................................
HOW TO TRIGGER ROBOGUARD DETECTORS.............................................
PROGRAMMING MODE................................................................................................................................................
POWER ON/POWER OFF................................................................................................................
SETTING TIMED SCHEDULES........................................................................................................
AUXILIARY OPTIONS.....................................................................................................................
INTERNAL BUZZER...........................................................................................
SCHEDULE BYPASS.........................................................................................
SETTING THE SYSTEM TIME & DATE............................................................................................
SETTING THE TRANSMITTER CODE.............................................................................................
NAMING OF ZONES........................................................................................................................
SETTING LEVELS............................................................................................................................
CHANGING USER CODE.................................................................................................................
SELF LEARNING DETECTORS.......................................................................................................
SELF LEARNING REMOTE’S..........................................................................................................
NAMING DEVICES IN A ZONE.........................................................................................................
CLEARING DETECTORS IN A ZONE...............................................................................................
CLEARING REMOTE CONTROLS...................................................................................................
DEFAULTING THE ENTIRE SYSTEM..............................................................................................
WARN MODE ON THE SYSTEM..................................................................................................................................
ARMING THE SYSTEM..................................................................................................................................................
ALARMS ON THE SYSTEM.........................................................................................................................................
EXTERNAL TRIGGERS..................................................................................................................
VIEWING ALARM LOG....................................................................................................................
PANIC ACTIVATION......................................................................................................................................................
DIS-ARMING THE SYSTEM........................................................................................................................................
ALERTS ON THE UNIT.................................................................................................................................................
BATTERY LOW ALERT...................................................................................................................
WIRELESS SUPERVISION ALERT..................................................................................................
TAMPER ALERT...............................................................................................................................
SYSTEM CONNECTIONS............................................................................................................................................
-1-
-2-
-3-
-5-
-5-
-5-
-6-
-6-
-6-
-6-
-7-
-7-
-7-
-8-
-8-
-9-
-9-
-10-
-10-
-10-
-11-
-11-
-11-
-12-
-12-
-4-
-4-
-4-
-4-
-4-
-4-
-4-
-6-
-10-
-11-
-12-
-12-
-12-
-13-
GENERAL FEATURES:
:
- Completely Portable.
- Supports a maximum of 64 wireless detectors .
- 8 different zones
- Supports up to 9 Remote Controls with different codes.
- LCD Display.
- Individual naming of Zones(up to 16 characters)
- Individual naming of Detectors(up to 16 characters)
- Arm/disarm via Keypad or Remote Control
- Panic activation via Keypad or Remote Control
- Buzzer output for auxiliary signals (arm, disarm, battery-low etc....).
- Flash memory for retention of both options and code selections during "power-down".
- Programmable Schedule for arming and disarming time windows ( hands free).
- Four preset active zone levels “A, B, C, or D”.
- Easy Arming.
- Easy programming and display of current options and settings .
- Self Learning function for the Remote Control code and Wireless Detectors.
- On Board wireless receiver.
- Monitoring and reporting of Tamper on Wireless Detector
- Monitoring and reporting of Battery low on wireless detectors(if supported)
- Keypad wrong-code alert (allows 3 entries).
- Optional External Antenna.
- On Board wireless receiver and Transmitter.
- Receiver frequency at 433MHz
- Transmitter at 403MHz
- 6 External triggers through transmitter.
- Supports MAMI, Silentron and Other devices available on the market.
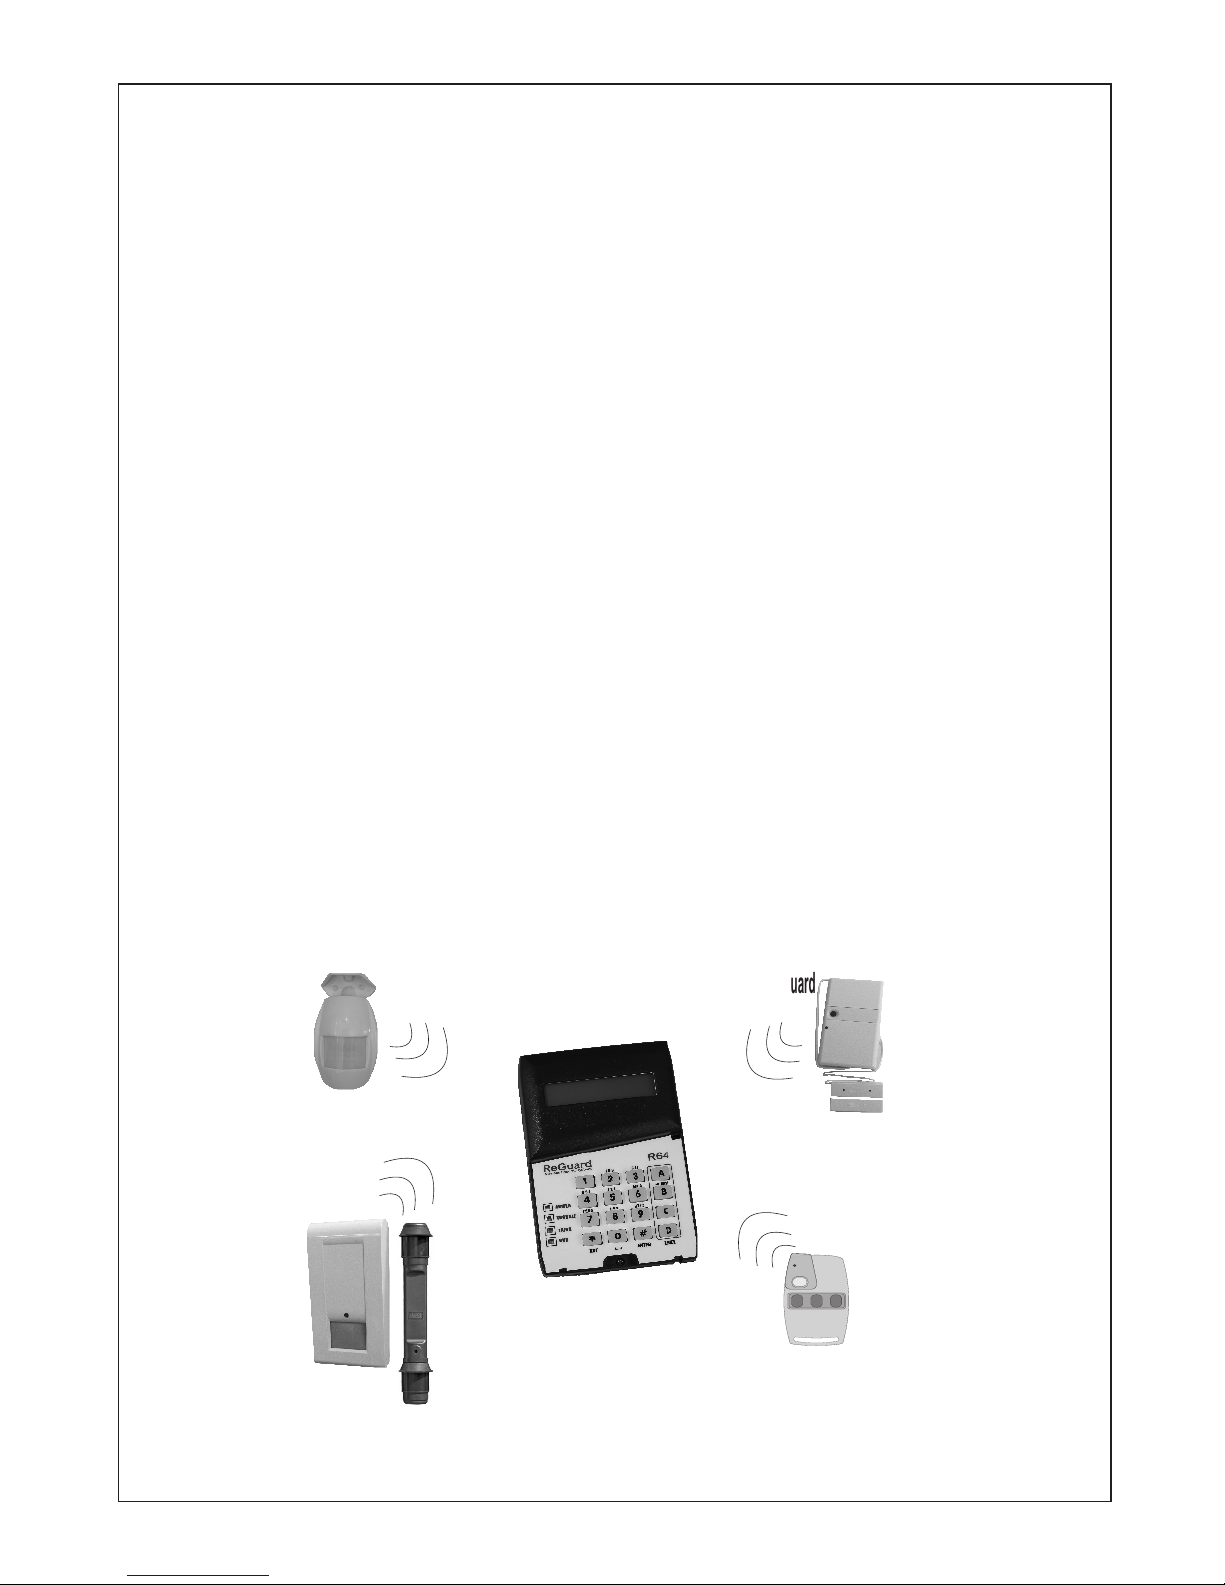
REGUARD R64
The “HomeGuard32“ is a D.I.Y. Portable stand-alone alarm panel, limited to receiving wireless signals. The
“HomeGuard32“ is capable of monitoring 64 wireless movement detectors divided into 8 different zones.
The “HomeGuard32“ support 9 different remote controls for arming, disarming and panic activation
The “HomeGuard32“ is fully programmable with an easy user interface. The external connections are limited to
power supply. Since the wireless receiver is onboard no other connections are required, making installation an
easy task. Adding wireless detectors and remote controls to the system is easy with the self learning feature.
The unit is also equipt with a transmitter for 6 External triggers to interface to a Radio module or siren.
The “HomeGuard32“ offers great flexibility and features
(Indoor and Outdoor)
Indoor Wireless Detector
Wireless Door Guard
Outdoor wireless Detector
Four Button Remote
-1-
1
234

-2-
GENERAL INFORMATION
- Charging: The unit has a 3.7V 1800mAh LiOn battery, The unit requires a 12V charger to charge the battery. The
maximum time for a low battery to charge is approximately 8 hours.
- Battery Life: The battery has a running life span of up to a maximum of 5 days.
“HomeGuard32“
- Zone Names: The zone names must be set by the user, this is to allow the user to easily identify which zone is in
alarm. If the zone name is not set the Zone number will be shown on alarm. setting the zone names can be seen
under the programming section - set Zone names.
- Detector Names: The detector names must be set by the user, this is to allow the user to easily identify which
detector is in alarm. If the detector name is not set the detector number will be shown on alarm. setting the
detector names can be seen under the programming section - set detector names.
“HomeGuard32“
“HomeGuard32“
“HomeGuard32“ nly the MAMI 4 button remote is
used (
“HomeGuard32“
“HomeGuard32“
External LED indicator: The “HomeGuard32“ has an external LED output to display the state of the system, if
the unit is armed the LED will illuminate and on a trigger the LED will flash.
- External Buzzer: The “HomeGuard32“ has a 12V buzzer output, which operates in parallel with the internal
buzzer power is only available if the Home Guard is plugged to the charger.
notifying the user which device and zone has the battery low
- Wireless Supervision: All Sensors attached to the unit are monitored should a sensor not check in or trigger
within 24 hours an alarm is activated.
- Alarm Log: All alarms on the unit is stored on the units EEPROM. the user could view all past alarms, date zone
and device that caused the alarm. (check page 9 view alarm log)
- Continuous Alarm Display: In the disarmed state the unit will continue to receive alarms, the alarms will
only be visible on the LCD and no alerts will go off. The most recent alarm will only be displayed.
- System state Retention: On power down the unit retains the current state(ARMED/DISARMED). Suppose the
unit is armed and power is switched off and on the unit will remain armed after it switches back ON.
- Warn/Chime mode: The“HomeGuard32“ is capable of going into a Warn/Chime mode. In this mode the unit
will sound a chime if any of the detectors armed are triggered. Refer to page 9 Warning Mode.
- Zones: The has 8 zones for allocation of wireless devices.
- Wireless Detectors: The can allow for a maximum of 64 wireless (Indoor and Outdoor)
detectors in all Zones. The supports both M.A.M.I. Detectors, Silentron detectors and
Roboguard detectors. Adding wireless devices is an easy task. The user simply has to follow the instructions
under the Add detectors section of Programming mode.
- Remote’s: The supports a maximum of 9 Remote’s. O
smart code (16 bit) )
- Antenna: The has an option for an external antenna. The external Antenna will allow
for a longer range. Typically the unit should be situated central to all detectors.
- Schedules: The has 2 programmable Schedules to automatically arm and disarm the unit at
a specific time. Schedules can be disabled individually. The user can set the schedules to be bypassed for one
day. Note. It is Recommended that the Schedules be used with a backup power supply.
(see Programming mode Schedules and schedule bypass)
-
- Tamper: If any of the detectors are tampered with, the detectors will send out a Tamper Signal. The unit
sounds an alarm notifying the user which device and zone has been tampered with.
- Battery Low: If any of the detectors send a battery low signal the unit will illuminate the Trouble led and sound an
alarm . The battery low signal will only be received in
the Disarmed state.
- Four Programmable levels: The Programmable levels is a feature whereby the user can select which zones are
to be monitored when the system is armed. If a zone is not in the level the zone will not be monitored for alarms.
This unit has four levels which can be modified under the programming mode (set level’s A,B,C,D).
- Options: The user can adjust the options of the unit. The options that the user can adjust is the buzzer and
Schedule bypass options. If the user sets the Internal buzzer off, the buzzer will only sound on
an alarm.
0 # 1 B01 0
Add Remote Controls (Press Panic Button)
Pg 8
0 # 1 A01 0
Add RoboGuards (Trigger Tamper Switch)
Pg 8
0 # 1 A01 0
Add Indoor Pir (Trigger Tamper Switch, Switch 8=OFF)
Pg 8
0 # 1 A01 0
Add DoorGuards (Press Panic Button)
Pg 8
0 # 0 401 0
Naming Zones
Pg 7
0 # 1 D01 0
Naming Devices
Pg 9
0 # 0 301 0
Changing System Date and Time
Pg 6
Adding Zones into Partition Levels
Pg 7
0 # 0 A01 0
0 B
/ /
0 C 0 D
/
0 # 0 101 0
Add Schedules for Arm/Disarm (Arms to Level A only)
Pg 5
Setting Transmitter code
Pg 6
0 # 0 501 0
0 # 1 101 0
Change User Code
Pg 7
0 # 2 201 0
Clear All Remote Controls
Pg 10
0 # 2 101 0
Deleting Devices
Pg 9
Warning Mode Level A-D(Press and Hold for 5 Seconds)
*
A
+
B
/
C
/
D
/
Arming Level A-D (Press and Hold for 5 Seconds)
A B
/
C
/
D
/
Arming Level A/B via Remote
1
234
Arm Level A
Yellow Button
Arm Level B
Green Button
Panic (Press and Hold for 5 Seconds)
*
#
+
1
234
Panic Button
Red
Disarm
0 01 0 # #
1
234
Disarm
Blue Button
Clear Tamper or Trouble Alerts (Press and Hold for 5 Seconds)
*
Quick Start Guide
-3-
Disable/Enable Onboard Buzzer (1=Enable, 0=Disable)
Pg 6
0 # 0 201 0
1
 Loading...