

Malmbergs 99 190 25 Instruction Manual
1. Technical Specifications
Product type Independent DALI sensor (Daylight harvest)
Operating voltage 120~277VAC 50/60Hz
Switched power 2 x 2000W (resistive) 2 x 800W (capacitive)
Power consumption < 1W
Detection angle 360
o
Detection range 10% / 50% / 100%
Hold time 2s / 30s / 1min / 5min / 10min / 30min
Stand-by time 0s / 10s / 1min / 10min / 30min / +
Stand-by dimming level 10% / 20% / 30%
Daylight threshold 2 ~ 50Lux , Disable
Warmming-up time 20s
Operating temperature -20
o
C ~ +50oC
IP rating IP65
8
3. Functions
Daylight sensor measures the available surrounding natural light, calculates how much electrical light is
needed to reach the total lux expected. The demand is given to the LED driver by DALI signal, so as to
deliver the needed amount of electric light.
3.1 Daylight Harvest (Daylight Regulating)
Sometimes also know as “Potential-Free” or “Volt-Free” sensor, the dry contact sensors from Hytronik are
designed to operate with external monitoring systems. They operate as conventional occupancy sensors, with
the output available as shown in the table below:
3.2 Dry Contact Control
Double “L” “N” terminal makes it easy for wire loop-in and loop-out, and saves the cost of terminal block and
assembly time.
3.3 Loop-in and loop-out
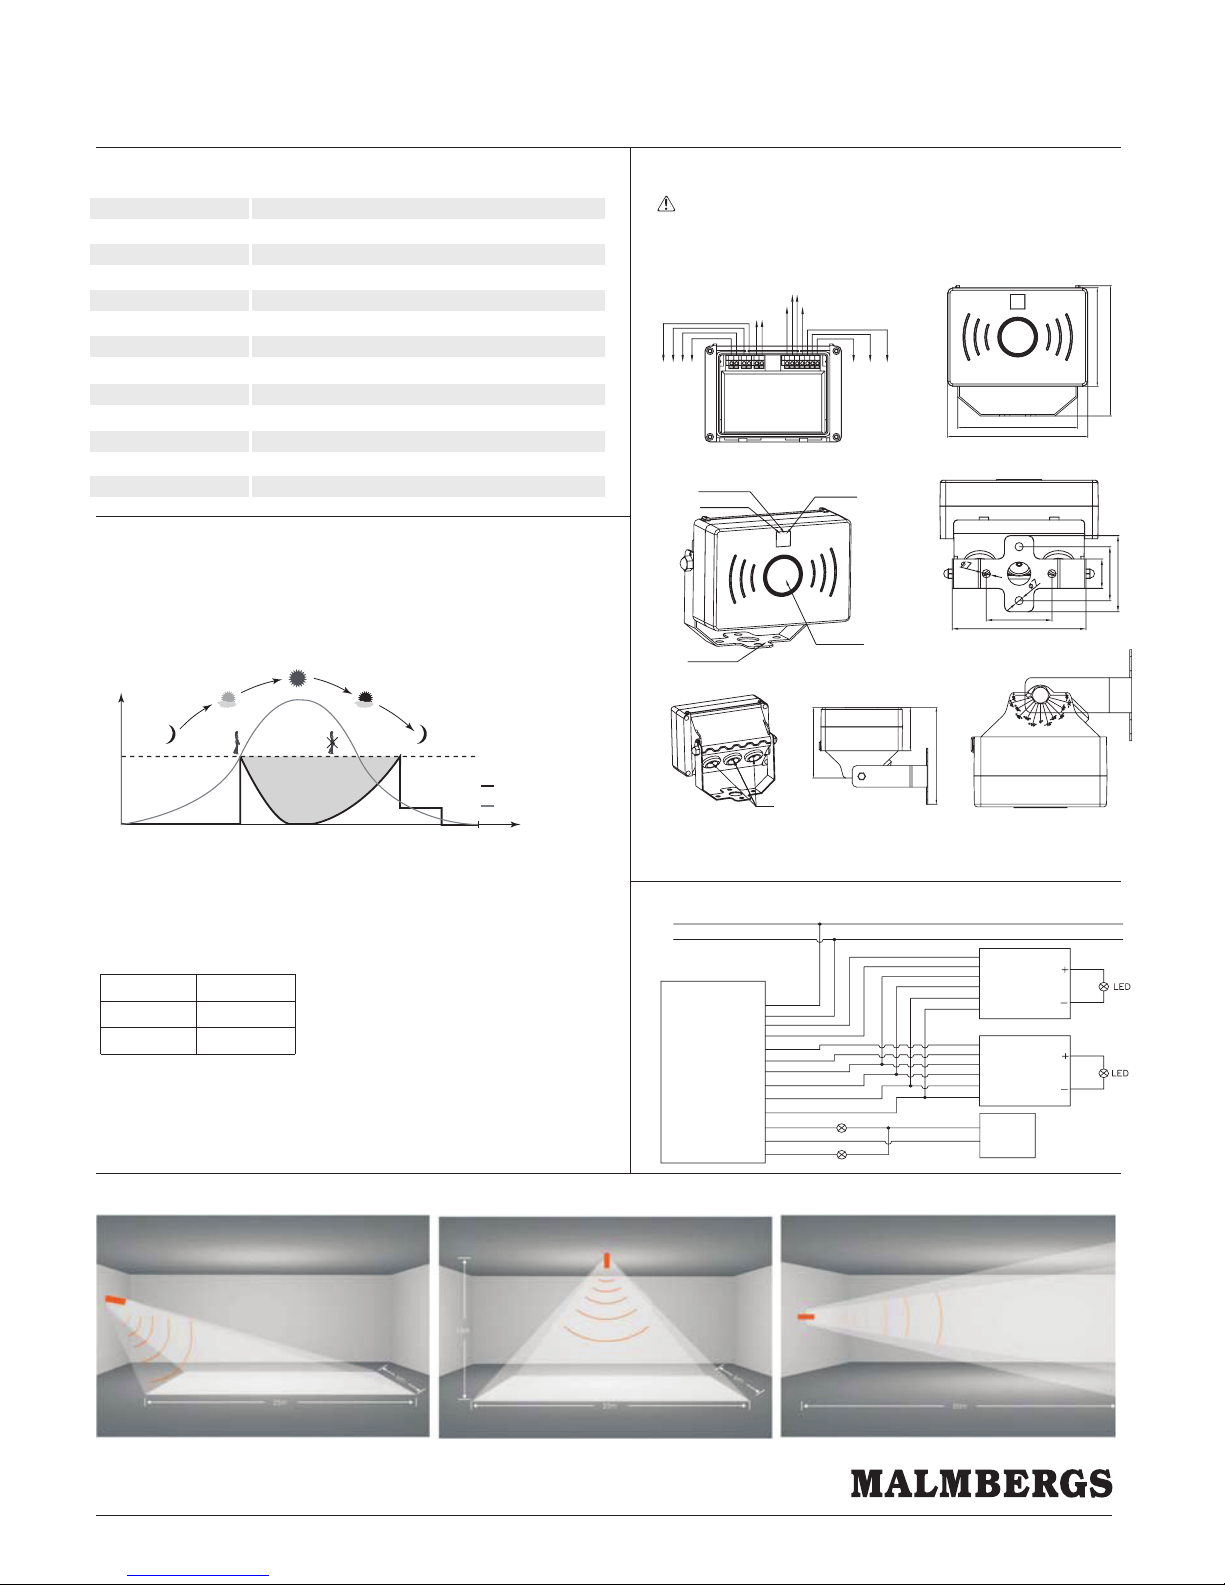
HF Aisle Sensor with DALI Control 99 190 25
Installation and Instruction Manual
2. Instruction and Dimension
Warnings:
1. Installation of the sensor involves connecting it to the mains supply. This work must be
carried out by a specialist in accordance with electrotechnical regulations.
2. Disconnect supply before installing.
4. Wiring Diagram
5. Detection Pattern
420
Light level
Time (hrs)
Normal Electric Light
Daylight controlled light
Energy Saving Zone
Natural light
Hold time
Stand-by time
Wire out
Infra red remo te receiv er
Dayli ght sens or
Insta llation rack
Senso r Antenn a
LED i ndication
125.5
135
115.4
95
L
LLN N
N
N
N
1
2
C
O
C
OM
+
1-10V
+
DALI
-
DALI
1-10V
-
25
46
65
112.9
50.6
82.
3
114
56
Detection State Contacts Made
Presence
Absence Nc - Com
No - Com
LED Driver
LED Driver
99 190 25
Power
N
N
N
N
L
L
N
L
L
1
L
2
1-10V
+
1-10V
-
1-10V
+
1-10V
-
+
DALI
-
DALI
+
DALI
-
DALI
N
L
1-10V
+
1-10V
-
+
DALI
-
DALI
N
N
C
O
C
OM
thgieh gnitnuom m5 @ htgnel noitceted m05thgieh gnitnuom m51 @ egarevoc m6 x m52thgieh gnitnuom m8 @ egarevoc m6 x m52
Varning!
Stäng av strömmen, ta ut säkringen på elcentralen eller ställ automatsäkringen till läge ”AV”, innan
installationsarbetet påbörjas.
Skall installeras av behörig installatör och i enlighet med gällande föreskrifter.
www.malmbergs.com
2017.03.01Art.no: 99 190 25
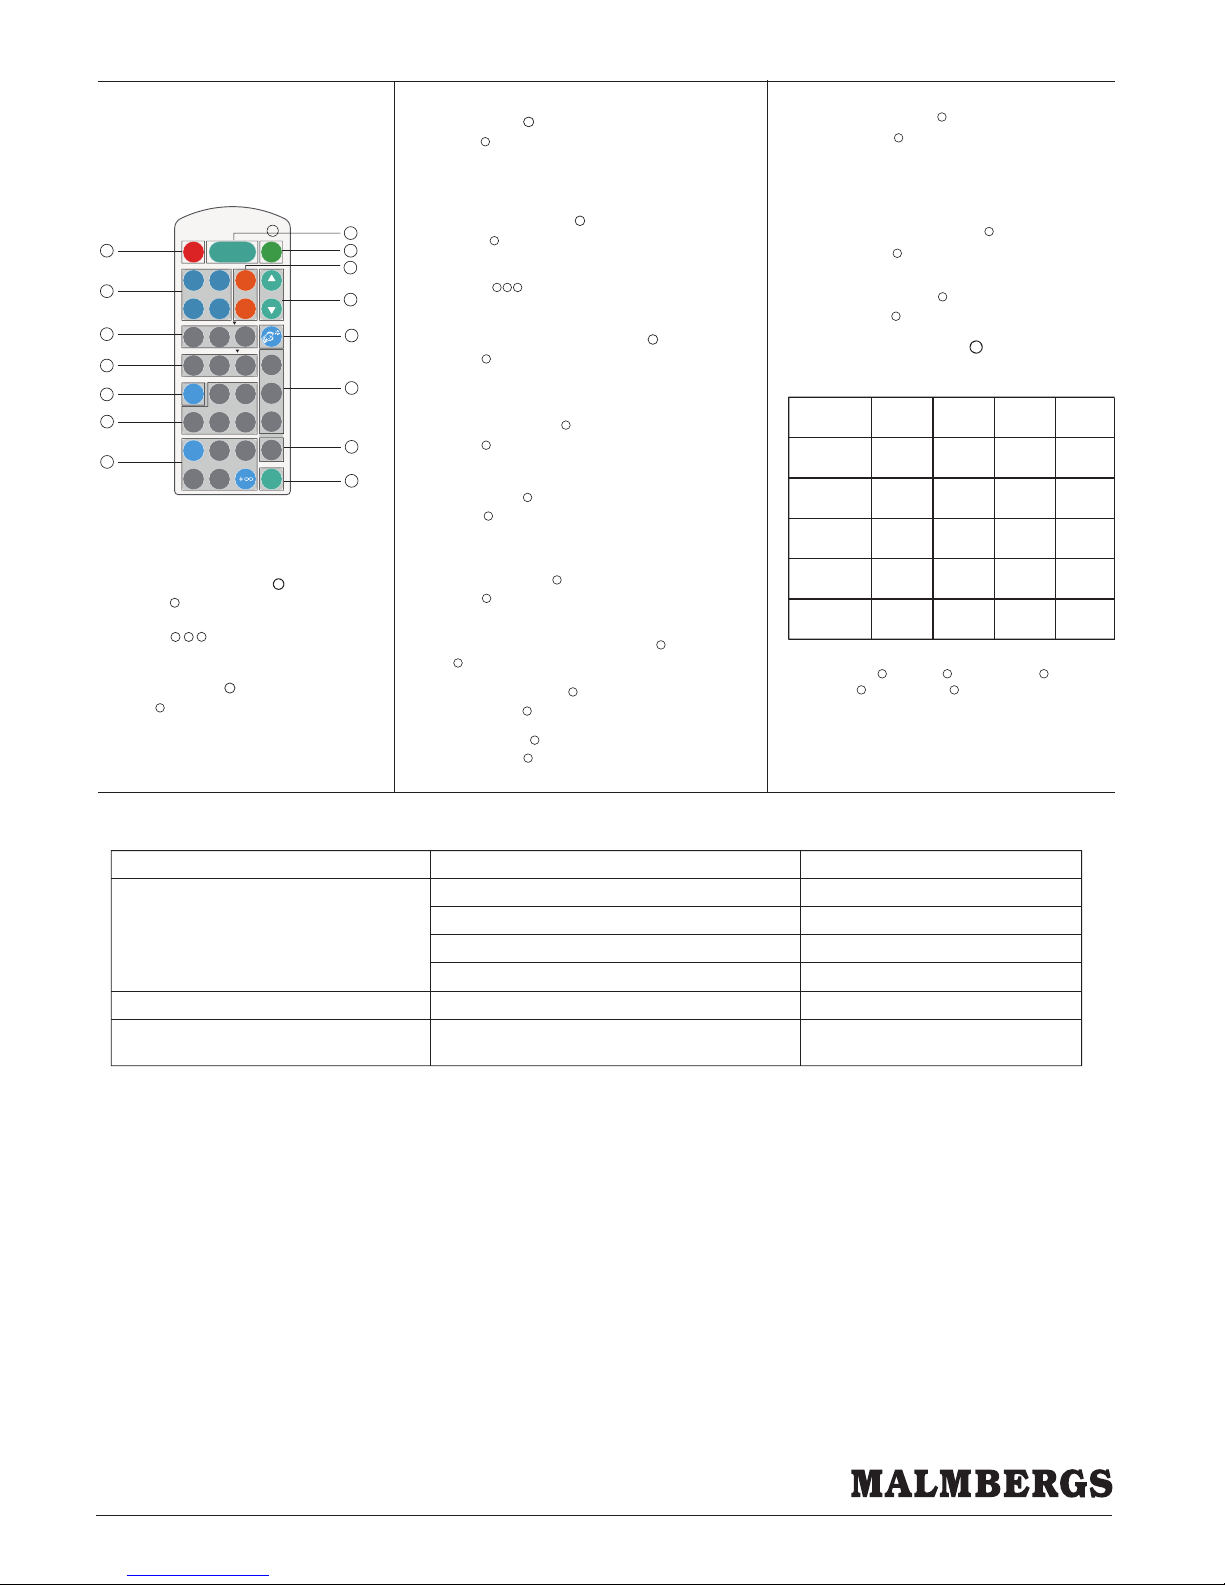
7. Trouble Shooting
Description of the
Button Functions
(remote control 99 190 26)
YDEMERESUACYDEMER ESUAC NOITCNUFLAM
The fixture does not light up
The fixture is always on
Check detection area setting
The fixture is on when it should not
Incorrect daylight threshold setting
Continued movement in the detection zone
Sudden change in temperature due to weather (wind, rain, snow) or air
expelled from fans, open windows
Detection zone not targeted
Faulty fixture
No power supply
Adjust daylight threshold setting
Replace fixture
Check power to sensor
Check detection area setting
Adjust zone, change installation site
6.
Permanent ON/OFF [ ]
1. Press button , to select permanent ON or permanent
OFF mode.
2. Press button to resume automatic operation.
(Please refer to explanation below)
Auto Mode [ ]
Press button to in initiate automatic mode.The sensor
starts working and all settings remain as before the light was
switched ON/OFF.
RESET [ ]
1
2
2
3
4
button
1
button
2
Press button , all settings go back to the values as below:
Detection range: 100% Hold-time: 5min
Stand-by period: 10min Stand-by dimming level: 10%
Daylight sensor: disabled
3
button
3
Test 2s function [ ]
1.Press button , the sensor goes into testmode (hold time 2s).
N.B. the stand-by period and daylight sensor settings are disabled in
test mode.
2.Press button to exit from this mode, and the sensor settings
are changed accordingly.
8
3 4
11
button
8
Ambient daylight threshold [ ]
Press button , the latest surrounding lux value overwrites previous
lux value learned, and is set as the daylight threshold. This feature
enables the fixture to function well in any environment.
10
button
10
Power output [ ]
Press button , the output shifts between 80% and 100%, for energy
saving purposes.
5
button
5
Dim +/- [ ]
Press button to adjust the light brightness between 10%~100%
during hold-time. “+” increases the light level, “-” will decrease the
light level.
9
button
9
Lux disable [ ]
Press button , the built-in daylight sensor is disabled, the light will
always operate upon detection regardless of ambient light level.
14
button
14
Button is disabled.
15
Manual override/ Semi-auto [ ]
button
15
Detection range [ ]
Press buttons in zone to set detection range at 100%/50%/10%.
6
zone
6
Hold time [ ]
Press buttons in zone to set hold time at 30s / 1min / 5min
/ 10min / 30min.
11
zone
11
Stand-by period [ ]
Press buttons in zone to set the stand-by period at 0s / 10s / 1min /
10min / 30min / +∞.
Note: “0s” means on/off control; “+∞” means bi-leve of dimming
control, the light will never switch off. (i.e. the light remains at the
stand-by dimming level until motion is detected.)
12
zone
12
Stand-by dimming level [ ]
Press buttons in zone to set the stand-by dimming level at 10%
/20%/30%.
7
zone
7
Daylight sensor [ ]
Press buttons in zone to set daylight sensor at 2lux / 10lux / 50lux.
13
zone
13
5
9
4
11
12
Stand-by dimming level
Detection range
ON/
OFF
Auto Mode
Reset
Power
80%
Test
2s
10%
20%
30s 1min
100%
30min10min5min
0s 10s 1m in
30%
SC1 SC2
SC3
Scene mode
10min
50% 10%
30min
Hold-time
Stand-by period
5min
Lux
Disable
2Lux
10Lux
50Lux
Daylight Sensor
SC4
Power
100%
+
-
Dim
M/A
31
2
7
8
6
10
13
14
15
99 190 26
Note: the buzzer beeps one time when RC
receives signal successfully
There are 4 scene modes built into the remote control for
different applications:
Scene mode options [ ]
zone
4
Scene
options
Detection
range
Hold
time
Stand-by
period
Stand-by
dimming leve
Daylight
sensor
SC1 SC2 SC3 SC4
100% 100% 100% 100%
10% 10% 10% 10%
1min 5min 10min 10min
2Lux 2Lux 10Lux 50Lux
10min 10min 30min +
8
6
11
13
12
7
Note: the end-user can fine tune the settings by pressing buttons
of detection range / hold time / stand-by period / stand-by
dimming level /daylight sensor , the last setting will over-write
that feature of the pre-set scene.
Malmbergs Elektriska AB
|
PO Box 144, SE-692 23 Kumla, SWEDEN
| Phone: +46 19 58 77 00 |
Fax: +46 19 57 11 77
| info@malmbergs.com | www.malmbergs.com
www.malmbergs.com
 Loading...