

Malloca MH-03I N Installation Manual
Operating and Installation Instructions
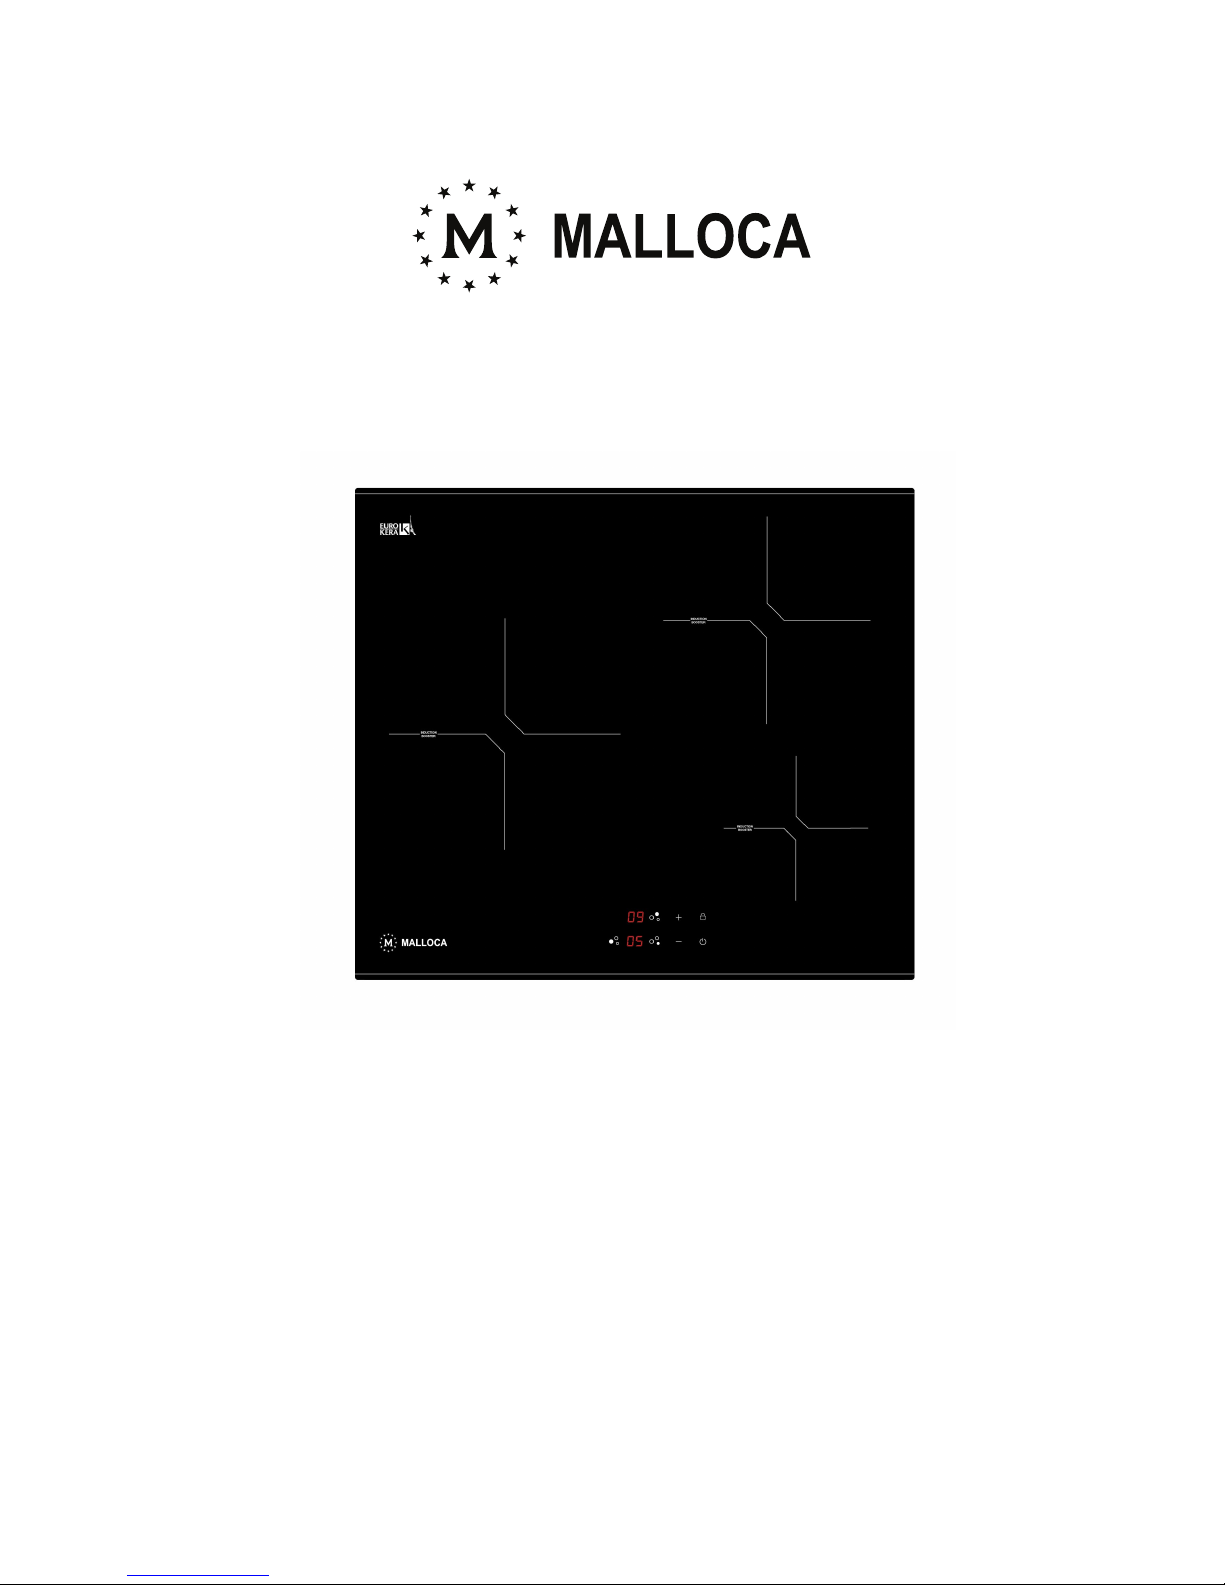
Induction hobs
MH-03I N
Hướng Dẫn Sử Dụng


1.
INSTALLATION INSTRUCTIONS ............................................................................................................... 5
1.1. INSTALLATION CONDITIONS ...................................................................................................................... 5
1.2. PRINTING ON GLASS ................................................................................................................................ 5
1.3. TYPE OF GLASS ....................................................................................................................................... 5
1.4. USER INTERFACE INITIAL CALIBRATION ..................................................................................................... 5
1.5. INITIAL LIGHT CONDITIONS ....................................................................................................................... 6
2.
BASIC CONTROL FUNCTIONS .................................................................................................................. 7
3. SWITCHING ON/OFF THE COOKTOP ....................................................................................................... 8
4. SWITCHING ON A HEATER ....................................................................................................................... 9
4.1. SELECTING A HEATER ............................................................................................................................. 9
4.2. SELECTING A POWER LEVEL FOR A HEATER ............................................................................................. 10
5. FAST BOIL (BOOSTER) FUNCTION........................................................................................................ 12
6. SWITCHING OFF A HEATER ................................................................................................................... 12
7. POWER MANAGEMENT .......................................................................................................................... 13
7.1. SETTING COOKTOP ECO POWER LIMIT ................................................................................................. 13
7.2. POWER MANAGEMENT FOR ECO COOKTOP ........................................................................................... 15
8. KEY LOCK ................................................................................................................................................ 15
9. AUTOMATIC SAFETY OFF ....................................................................................................................... 16
10. OPERATING THE TIMER ...................................................................................................................... 16
10.1. ACTIVATING THE TIMER ....................................................................................................................... 16
10.2. SELECTING THE TIME. ......................................................................................................................... 17
10.3. STARTING TIMER COUNTDOWN. ........................................................................................................... 17
10.4. CHANGING THE TIME. .......................................................................................................................... 18
10.5. TIMER COUNTDOWN END. .................................................................................................................... 18
11. DISPLAYING SOFTWARE VERSIONS .................................................................................................. 19
12. DISPLAYING SPECIAL STATUSES ..................................................................................................... 20
13. ERRORS/ALARMS ................................................................................................................................ 21
3
Contents

1.
HƯỚNG DẪN LẮP ĐẶT............................................................................................................................. 23
1.1. ĐIỀU KIỆN LẮP ĐẶT ..............................................................................................................................................23
1.2. PHẦN IN TRÊN KÍNH . ...........................................................................................................................................23
1.3. LOẠI KÍNH.............................................................................................................................................................. 23
1.4. GIAO DIỆN NGƯỜI DÙNG . ................................................................................................................................. 23
1.5. ĐIỀU KIỆN ÁNH SÁNG.......................................................................................................................................... 24
2.
CHỨC NĂNG ĐIỀU KHIỂN CƠ BẢN ........................................................................................................ 25
3.
PHÍM ON/OFF CỦA BẾP ........................................................................................................................... 26
4.
PHÍM MỞ VÙNG NẤU................................................................................................................................. 27
4.1. LỰA CHỌN VÙNG NẤU......................................................................................................................................... 27
4.2. LỰA CHỌN CÔNG SUẤT VÙNG NẤU .................................................................................................................. 28
5.
CHỨC NĂNG NẤU NHANH........................................................................................................................ 30
6.
PHÍM TẮT VÙNG NẤU................................................................................................................................ 30
7.
QUẢN LÝ CÔNG SUẤT ............................................................................................................................. 31
7.1. CÀI ĐẶT GIỚI HẠN CÔNG SUẤT ECO CHO BẾP................................................................................................ 31
7.2. QUẢN LÝ CÔNG SUẤT ECO CỦA BẾP................................................................................................................ 33
8.
KHÓA AN TOÀN ........................................................................................................................................ 33
9.
TỰ ĐỘNG NGẮT ....................................................................................................................................... 34
10.
VẬN HÀNH CHỨC NĂNG HẸN GIỜ........................................................................................................ 34
10.1. KÍCH HOẠT CHỨC NĂNG HẸN GIỜ .................................................................................................................. 34
10.2. LỰA CHỌN CHỨC NĂNG HẸN GIỜ. ................................................................................................................. 35
10.3. KHỞI ĐỘNG CHỨC NĂNG ĐẾM NGƯỢC. ....................................................................................................... 35
10.4. THAY ĐỔI THỜI GIAN. ...................................................................................................................................... 36
10.5. ĐẾM NGƯỢC HẸN GIỜ KẾT THÚC. ................................................................................................................. 36
11.
HIỂN THỊ TRẠNG THÁI PHẦN MỀM ...................................................................................................... 37
12.
HIỂN THỊ TRẠNG THÁI ĐẶC BIỆT ....................................................................................................... 38
13.
LỖI/CHUÔNG BÁO ................................................................................................................................ 39
4
Nội dung
1. Installation instructions
1.1. Installation conditions
All the infrared sensors must be in contact with the glass surface.
No movement of the control under the glass ceramic after installation must be assured.
1.2. Printing on glass
The glass printing area over the sensors must be centred with the sensor.
Glass printing thickness in an area of 10mm around the center of the keys <= 0.5mm.
1.3. Type of glass
Glass thickness 4mm. Glass infrared light transmission wavelength range of 925nm.
1.4. User interface initial calibration
The User Interface has implemented an initial keyboard calibration focused to adapt the sensibility of the keys, to the
final mechanical, environmental and user conditions.
Any time the Cooktop is plugged or there is a power failure that generates a reset in the user interface, the first time the
Key Lock is touched the sensitivity of the keyboard is readjusted. This first touch of the Key Lock must be done in certain
conditions:
Do not use gloves
Use a clean finger.
Touch the glass (smooth touching).
5
Installation Instructions
1.5. Initial Light Conditions
When power is initially applied to the Cooktop, the touch control conducts a calibration process for the touch keys, which
requires a low level of ambient light in the area of the touch keys.
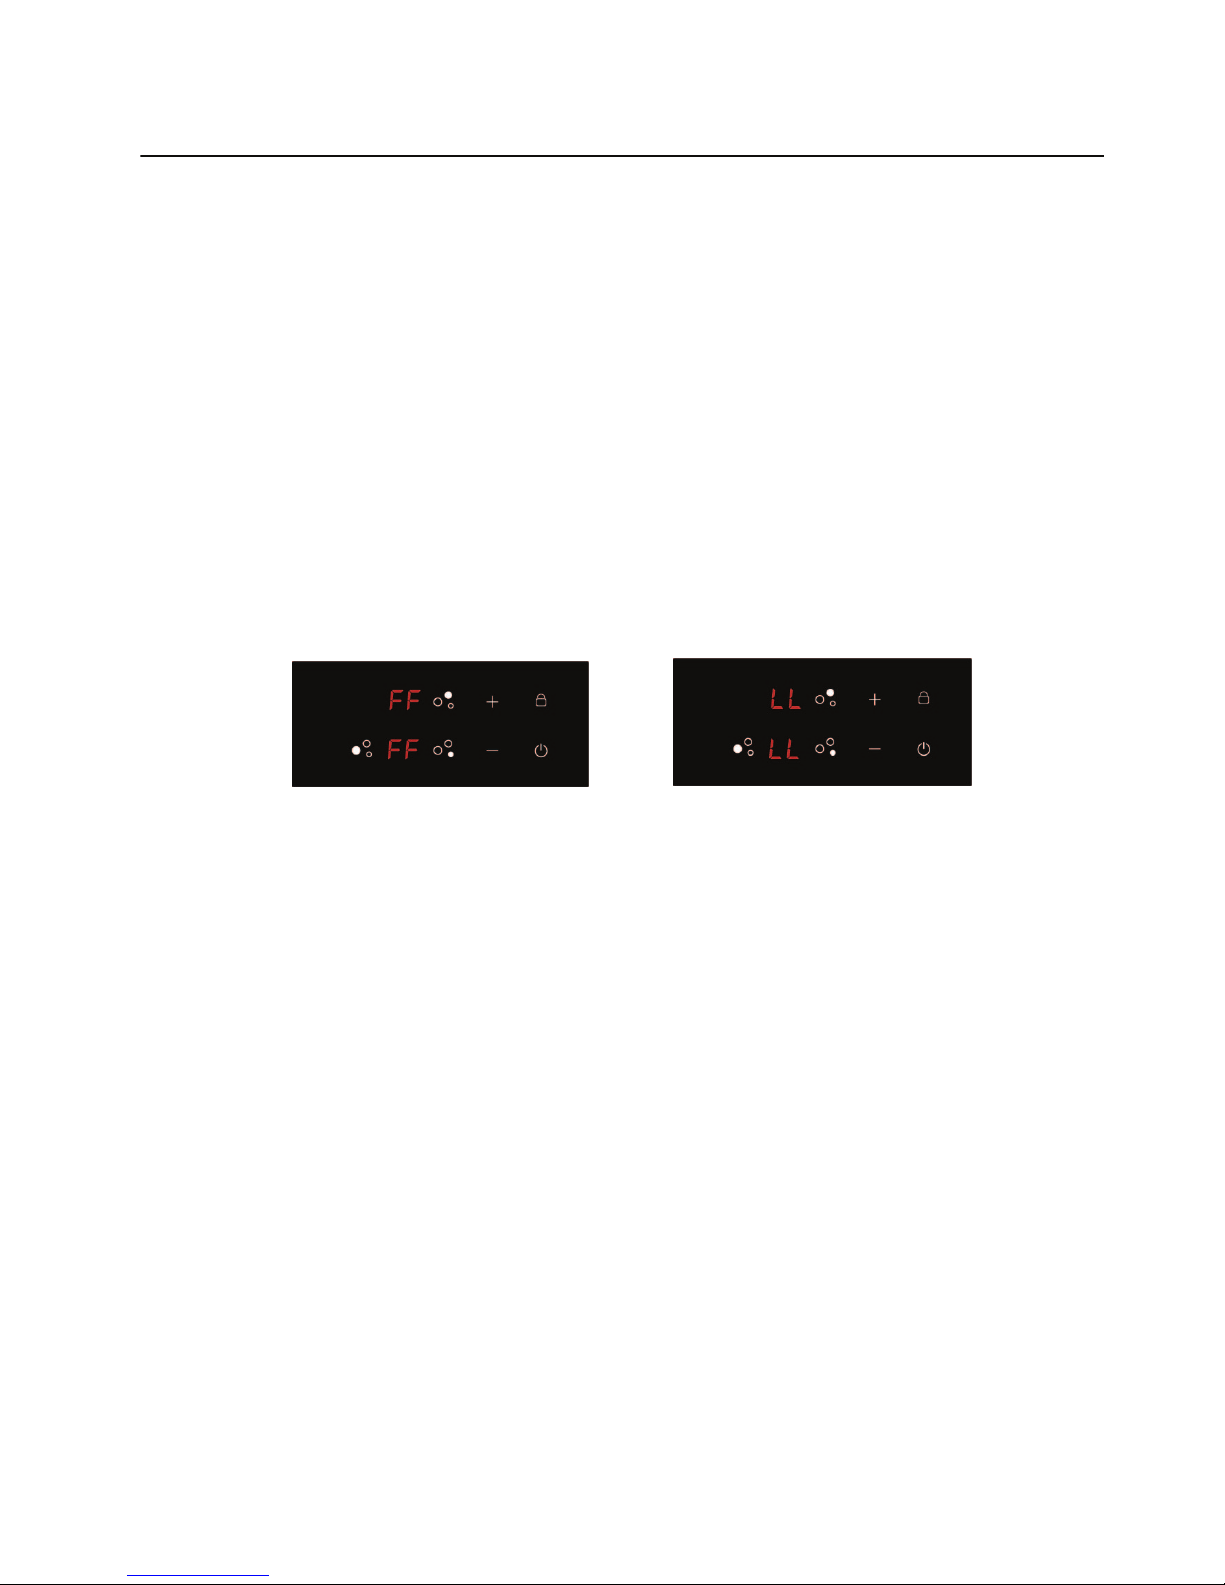
If during this calibration process excessive ambient lighting is detected the User Interface displays "FL" (Infrared
Ambient Light Error) and the control calibration process is suspended. In order to rectify the process any lighting that could
affect the calibration process should be switched off (e.g. halogen cooker hood lighting). The error will disappear when
satisfactory ambient lighting is detected and the touch control calibration procedure will now complete satisfactorily.
Notes:
1) The "FL" error can only be generated within approx 3s of initial power being applied to the cooktop.
2) We recommend that the user switches off all cooker hood lighting and lighting directed towards the cooktop when
power is initially applied to the cooktop.
3) After the touch control has conducted its initial calibration process, (approx 3s) any cooker hood or other lighting can
be switched on as normal and will not affect the operation of the touch control.
Fig. 1.: Infrared Ambient Light Error
6
Installation Instructions
2. Basic control functions
• The control allows different layout configurations:
o Full Induction cooktops with 3 or 4 heaters
• KeyLock function.
• Fast Boil function.
• Independent timer for each heater.
• Indication of residual heat for each heater.
• Thermal control protection.
• Protection from accidental activation of keys:
- One or more keys activated for more than 10 sec. -> Switching off the touch control. A warning beep sounds every 10
sec., while the key/s is/are activated.
- With all heaters at zero power during 10 sec. -> The Cooktop is switched off. If the switching off is due to an accidental
activation of keys, the touch control actuates as above.
• Acoustic warning to attract the user’s attention.
• Pan detection for induction heaters; After 60 sec. with no pan, the heater switches off.
GENERAL KEYS
- 1 key for switching On/Off the Cooktop [ON/OFF].
- 1 key for locking the keyboard [KEYLOCK].
- 2 keys to select the cookset [-] [+].
HEATER KEYS
- 1 selection key for each heater [HEATER_SELECTION].
BUZZER SOUNDS
- 3 beeps for switching Off the Cooktop [OFF_SOUND].
Fig. 2.: UI complete configuration
7
Basic Control Functions
3. Switching On/Off the Cooktop
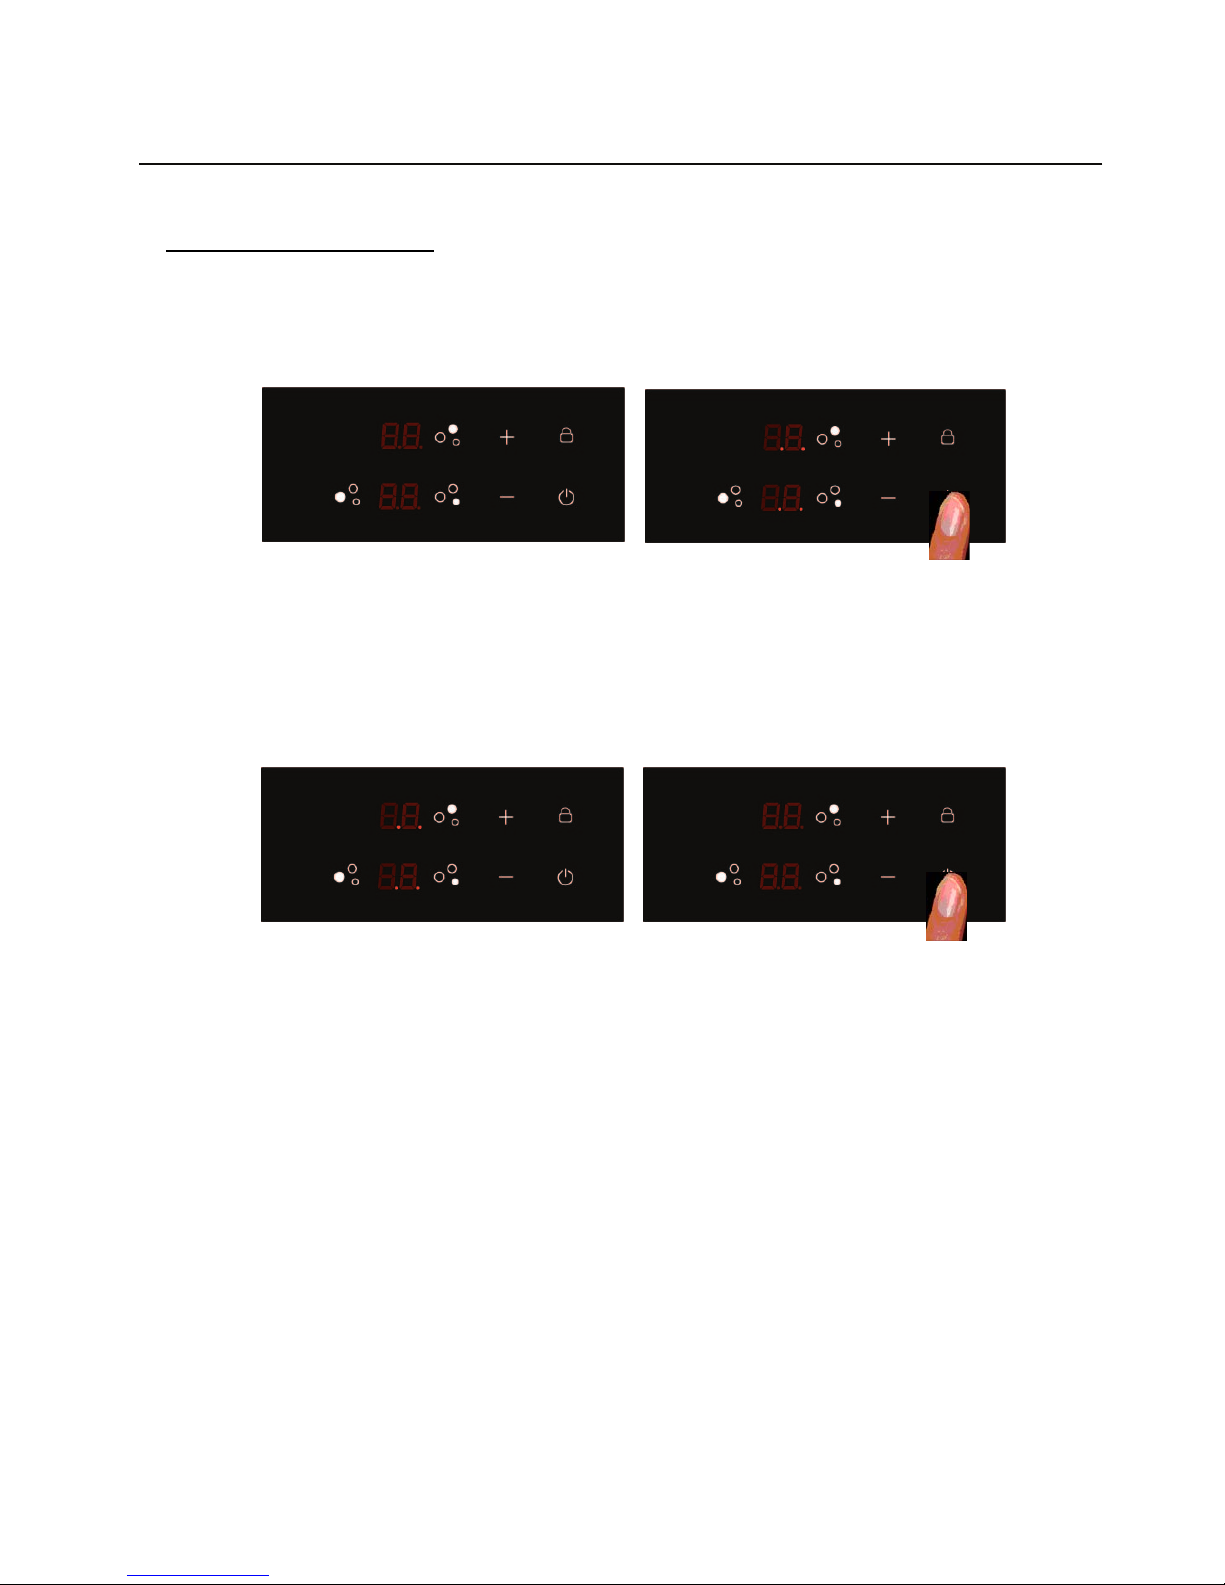
The cooktop is switched On by touching the [ON/OFF] key for 1 sec. An beep sounds and all the heater displays show
the digit point.
Fig. 3.: Switching On t he cooktop
If the selection of a heater is not done in 10 seconds, the cooktop will be turned off automatically.
The cooktop is switched Off by touching the [ON/OFF] key for 1 sec. An [OFF_SOUND] sounds and all the heaters are
switched Off. The purpose of these [OFF_SOUND] is to distinguish the OFF action over all others.
Fig. 4.: Switching Off the cooktop
When the cooktop is OFF, after 5 sec whitout any error/alarm to display and without any message to indicate (residual
heat), the control switches off the (KEYLOCK LED) in order to reduce as much as possible the power consumption. As soon
as we Touch a key, the (KEYLOCK LED) goes ON and we can continue to operate us normal unlocking the keyboard if
necessary and touching the [ON/OFF] key to switch ON the cooktop. The (ON/OFF) key will be locked to switch On the
cooktop:
if the key lock is activated (KEYLOCK LED on),
or if there is any appliance error.
8
Switching On/Off the Cooktop
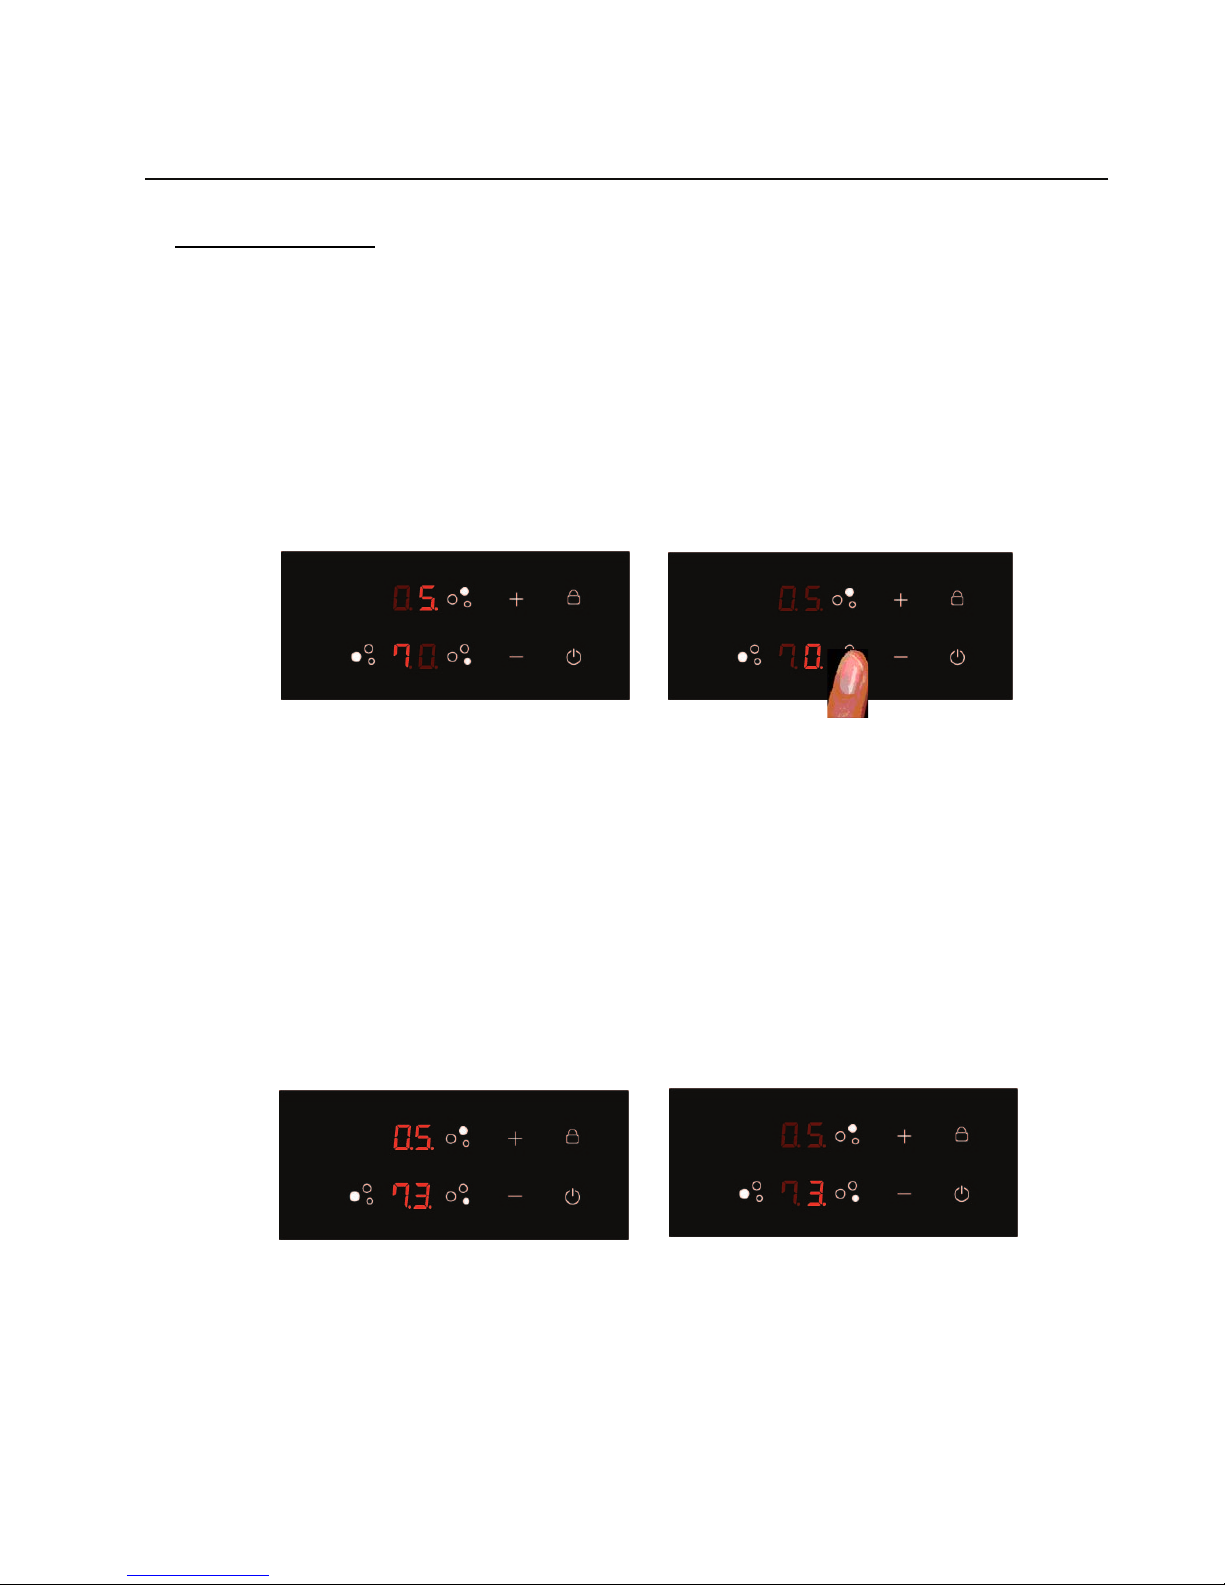
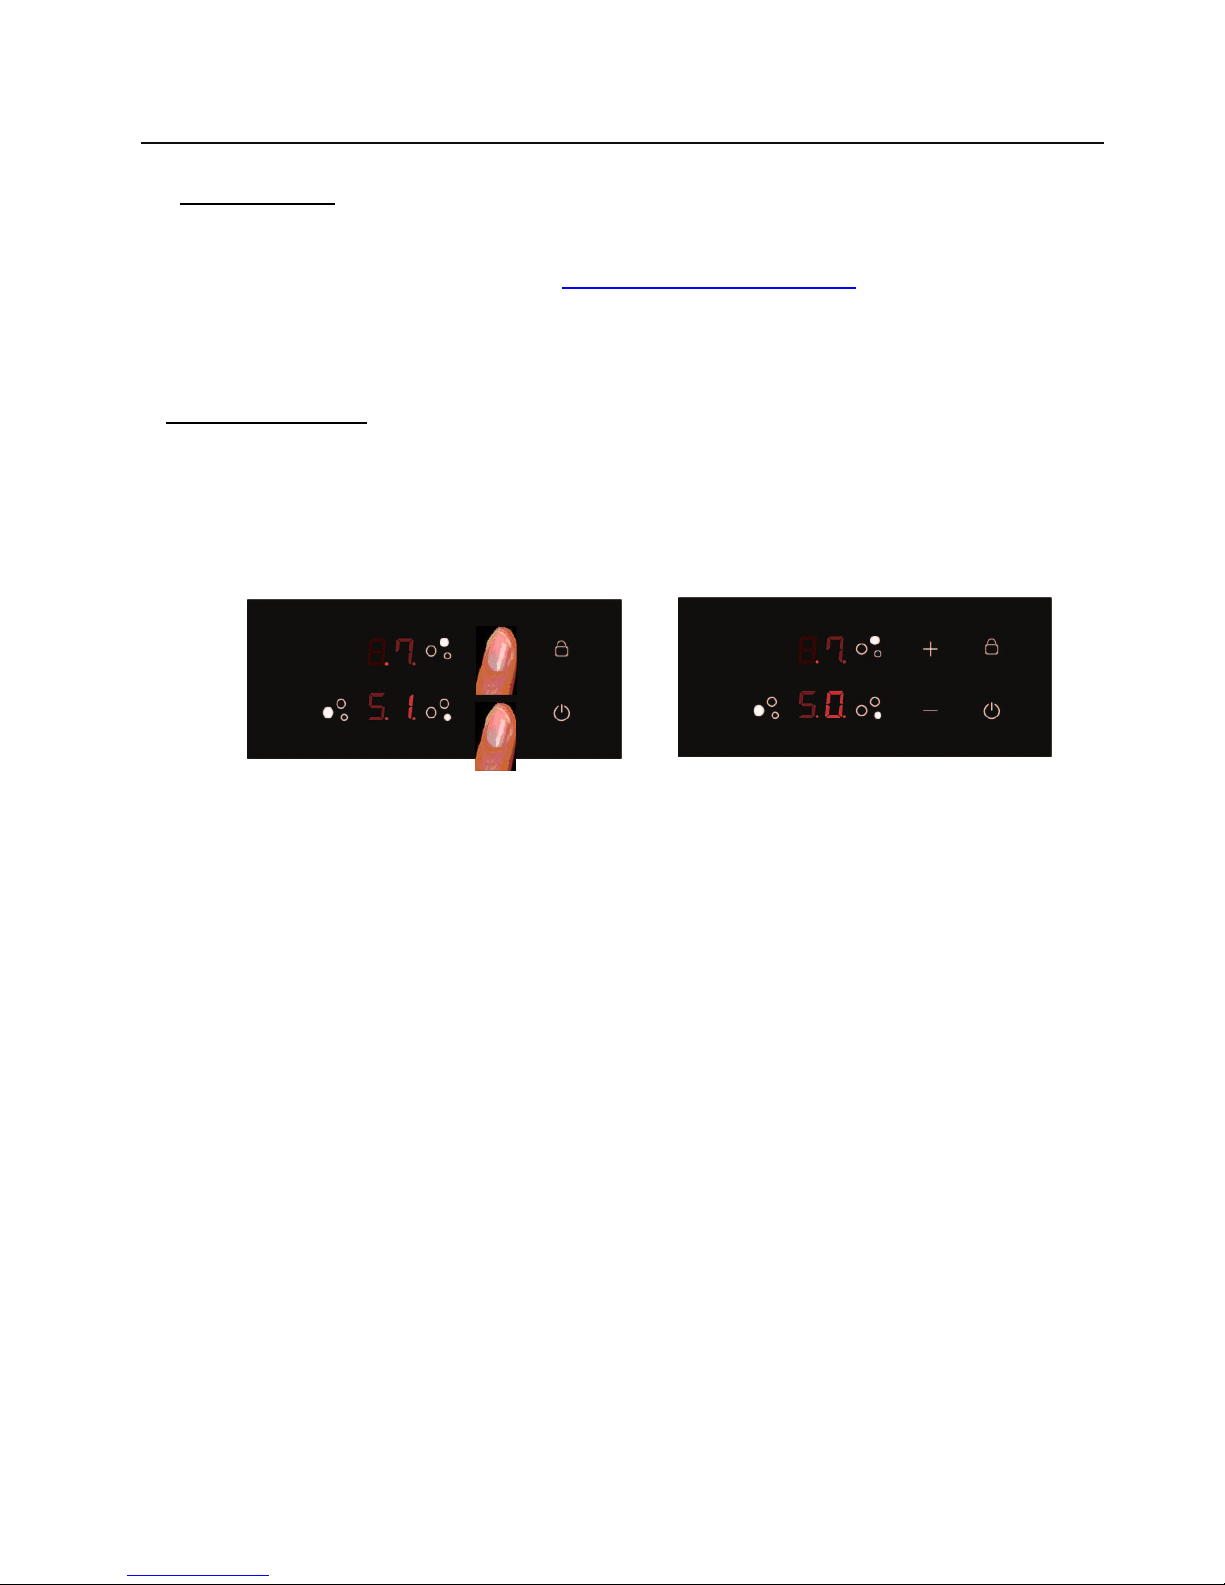
4.1. Selecting a heater
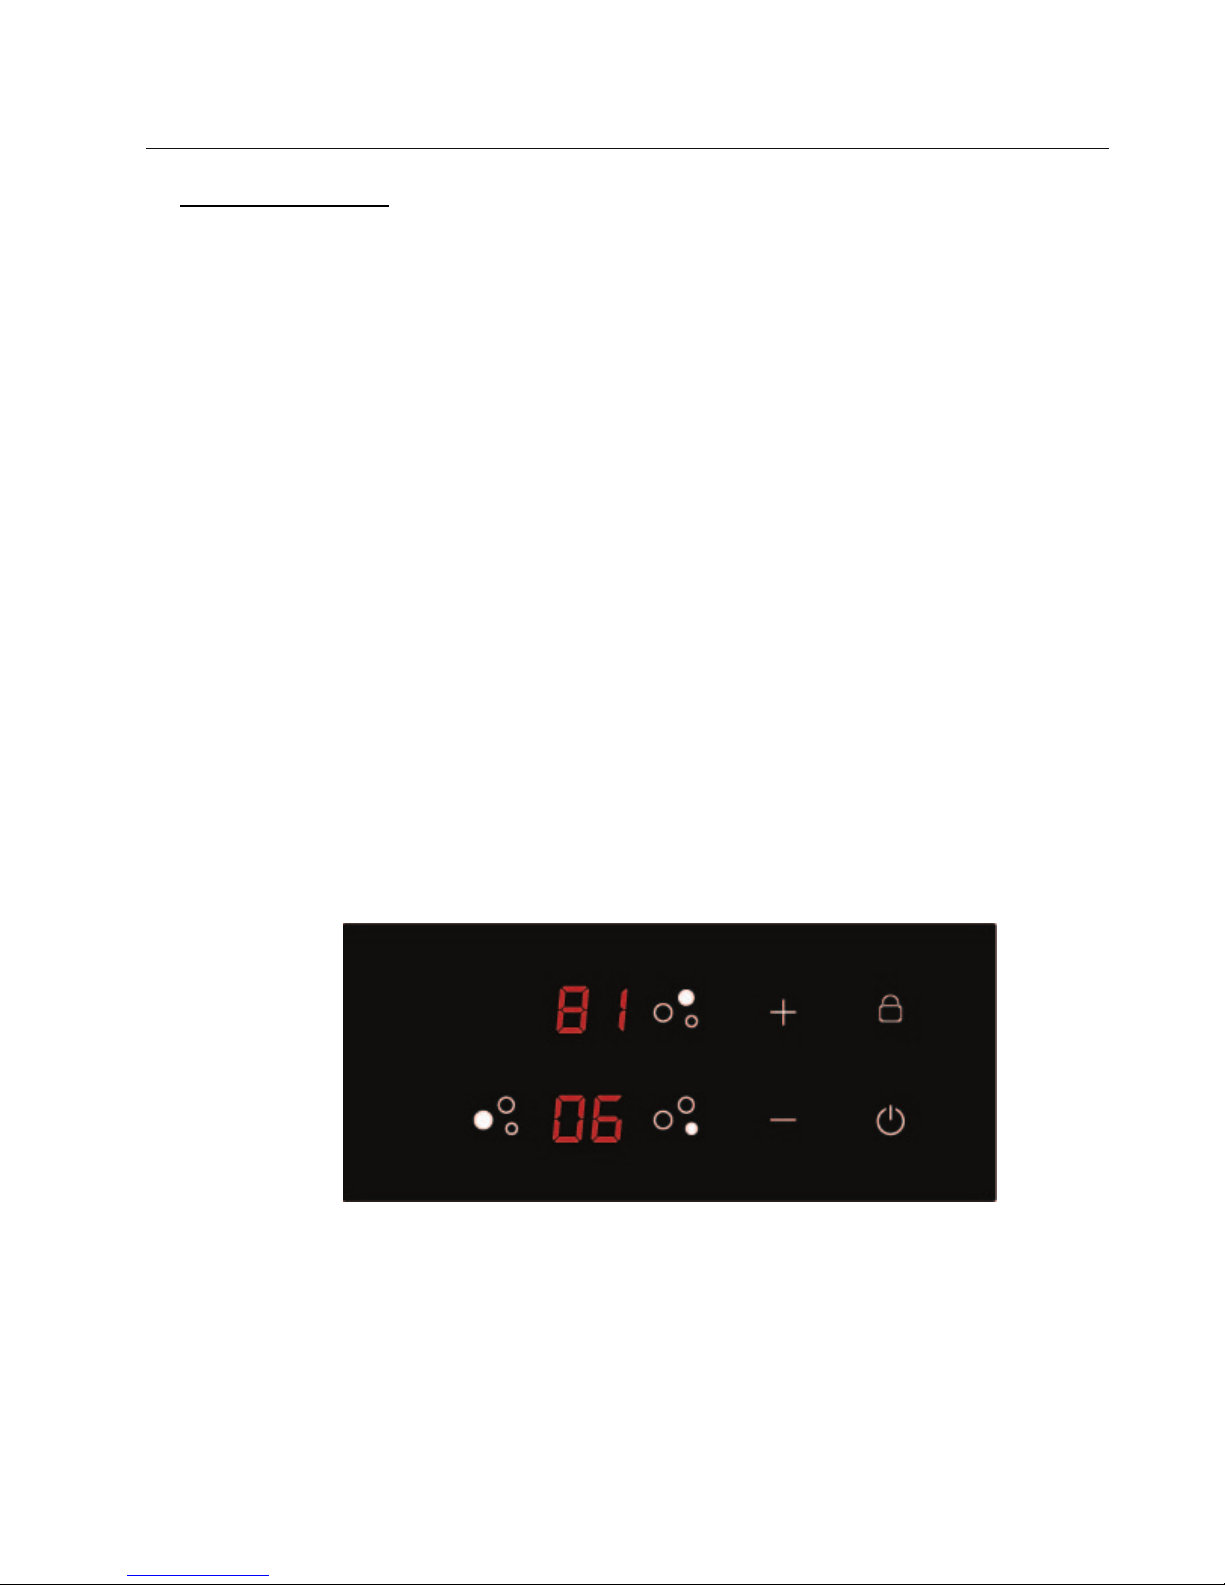
A heater is selected by touching the heater [HEATER_SELECTION] key for 500 ms, a beep sounds and the heater
display shows the power level with normal brighness. The heaters that are not selected are dimmed.
Fig. 5.: Heater selection
The [HEATER_SELECTION] key will be locked to select a heater:
o If the cooktop is off (all the heater displays off), or
o if the key lock is activated (KEYLOCK LED on), or
o if there is any heater or appliance error.
If more than one heater is on, the heater selection will finish 10 second after the last touch of the [-], [+] key or if
another heater is selected. If only one heater is on, the heater selection will finish if another heater is selected.
When the heater selection is finished after 10 seconds, a beep sound and all the heater displays that were dimed show
the power levels with normal brightness.
Fig. 6.: Selected cookset 3. Heater selectio n f inished
When the heater selection finishes, if the selected cookset is 0, the heater display will be switched off.
9
4. Switching On a Heater
To switch on a heater it is necessary to actuate every cooking zone by means of two operations:
Select a heater
Select the desired cookset
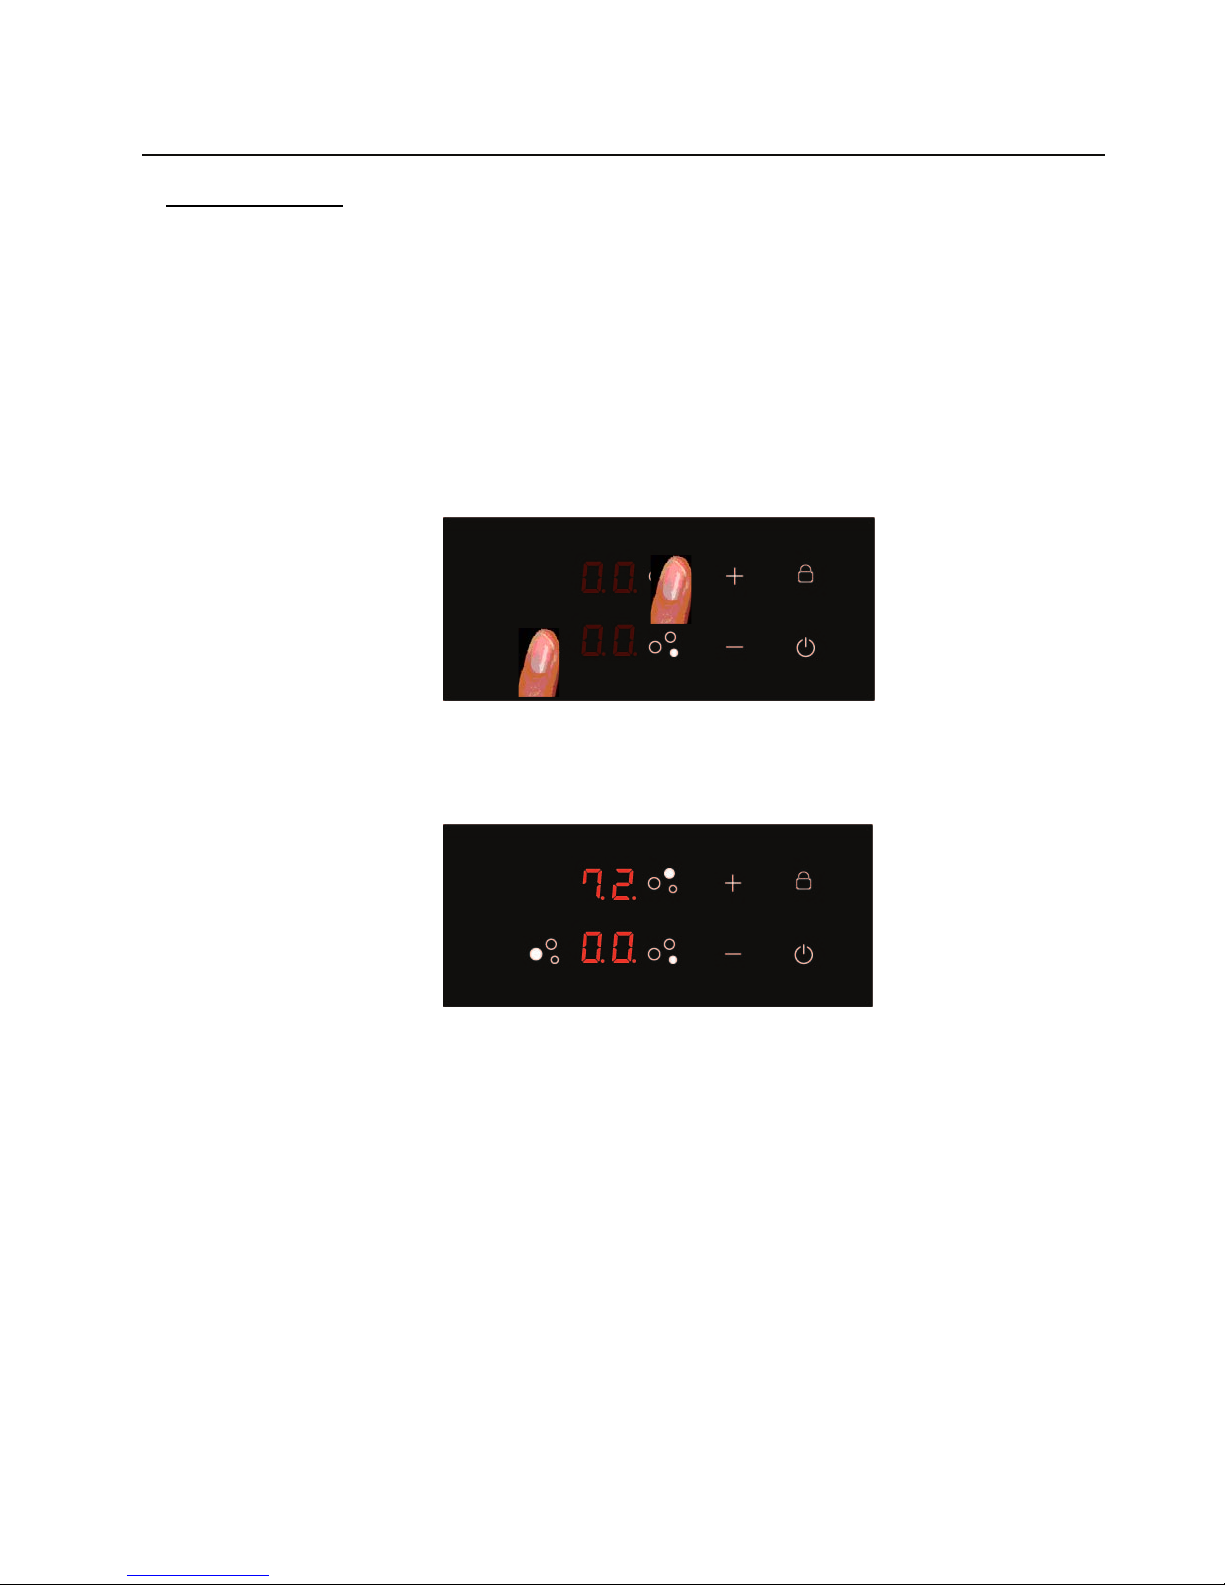
Switching On a Heater
When the heater selection finishes, if all the heaters are off, all the heater displays will show the digit point, waiting a
heater selection.
Fig. 8.: Selected cookset 0 for a ll th e heaters. Heater selection finished
4.2. Selecting a power level for a heater
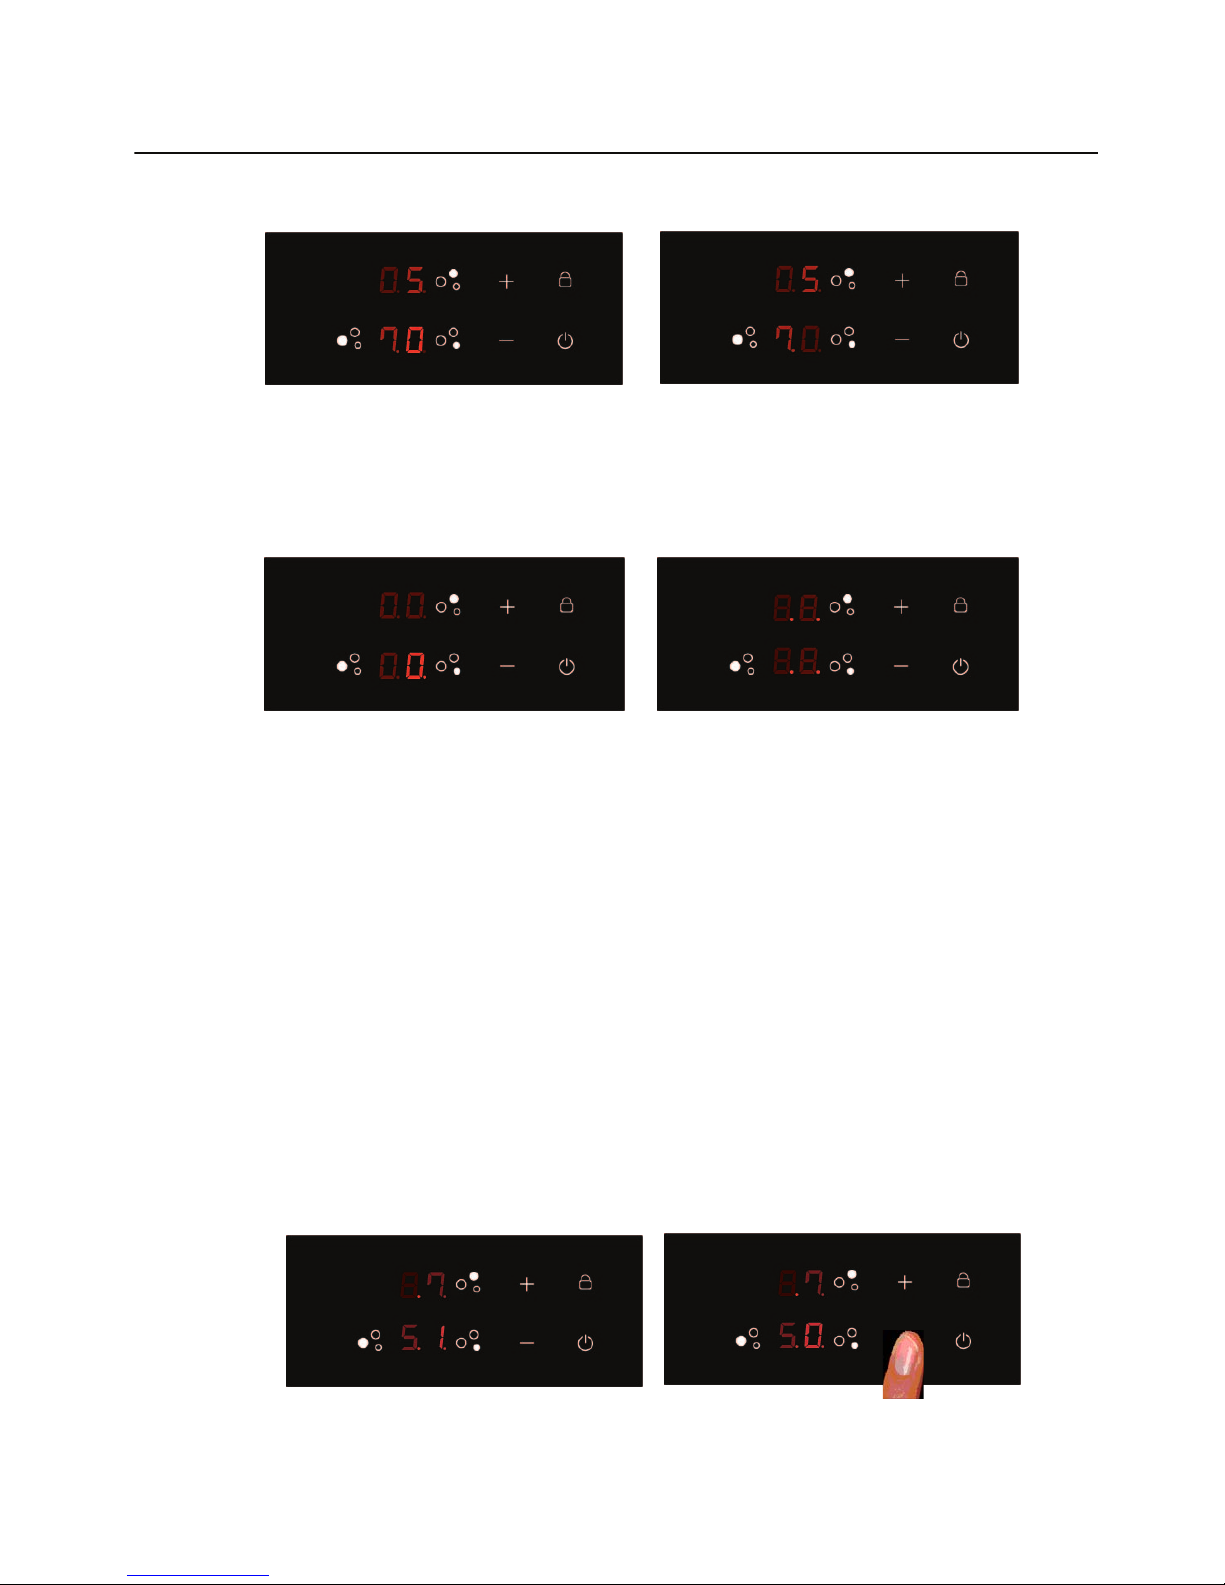
Once the heater is selected, the power level can be selected by touching the [-][+] keys. In each increase/ decrease a
beep sounds and the corresponding display shows the new power level.
Touch MERKE sends the new power level to the Control Unit.
The [-][+] keys will be locked:
o If no heater is selected, or
o if the key lock is activated (KEYLOCK LED on), or
o if there is any heater error.
If the finger is held down on the key, the action is repeated twice every second. The [+] key raises the cooking level to
9, whereas the [-] key reduces the cooking level to 0.
Fig. 9.: Selecting a cookset for a he ater
10
Fig. 7.: Selected cookset 0. Heater selectio n f inished
Switching On a Heater
With the heater at power level 0, the [-] key raises
the cooking level to 9.
Fig. 10.: Selecting a power level with [+][-] keys
With the heater at power level 9, the [+] key raises the cooking level to Booster level a beep sounds and the heater
display shows “P” (see
5. Fast Boil (Booster) Function).
Fig. 11.: Selecting a power level with [+][-] keys
With the heater at Booster level, if the [+] key is Touched an error beep sounds and the cookset doesn’t change.
Fig. 12.: Selecting a power level with [+][-] keys
With the heater at Booster level, if the [-] key is Touched a beep sounds and the cookset is reduced to 9.
Fig. 13.: Selecting a power level with [+][-] keys
11
Switching On a Heater
5. Booster Function
After a heater has been selected, touch the [+] key until level 9. To select the Fast Boil function touch the [+] key. A
beep sounds and the heater display shows “P” (see 4.2 Selecting a power level for a heater )
The heater will work at maximum power level for 10 minutes. After these 10 minutes a beep sounds and the heater will
return to level “9”.
6. Switching Off a Heater
Once the heater is selected, the heater can be switched off by touching the [-] and [+] keys simultaneously. A beep
sounds and the corresponding display shows “0”.
Touch MERKE sends the new power level to the Control Unit.
Fig. 14.: Switching off a heater touching the [+] and [-] keys
12
Booster Function - Switching Off a Heater
7. Power Management
The cooktop maximum power limit is 7200W. This power limit can be reduced by the user to 2800W, 3500W or 6000W.
7.1. Setting CookTop ECO Power Limit
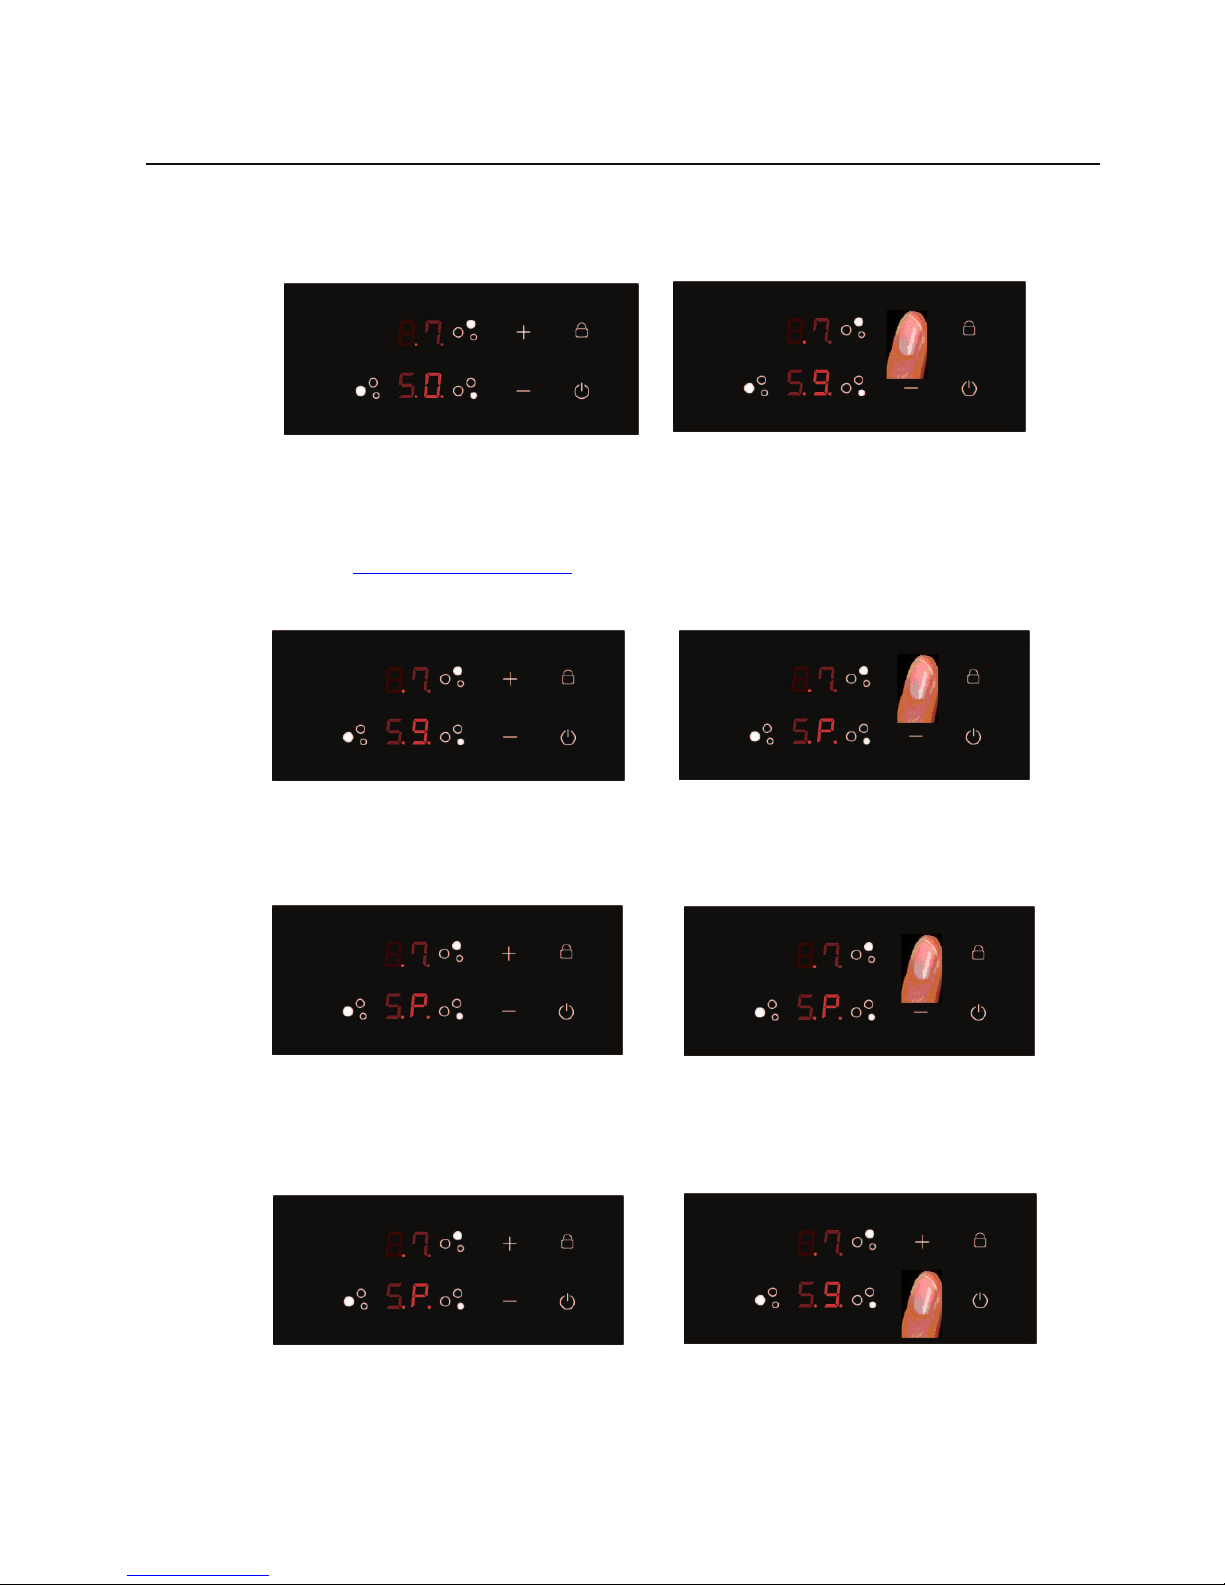
The sequence to set a new Cooktop Power Limit is:
• During the first 30 seconds after plugging the appliance
• The Touch has to be unlocked and all Heaters Off
• Press at the same time Heater 1 and Heater 3 selection keys
Fig. 15.: Setting CookTop ECO Power Limit
• Once this is done, a beep sounds and the actual Cooktop Power Limit will be shown in the heater displays.
Fig. 16.: Displays showing CookTop ECO Power Limit
13
Power Management
 Loading...