

Revision Sheet
HD-10 User Manual Page i
MALLINCAM HD-10
[Version 1.1]
Michael Burns
Rock Mallin
[Mallincam HD-10 User Manual]
This document will quickly introduce you to the wonders of the Mallincam HD-10
Camera. We will include instructions on how to install the Software and Drivers and
how connect the HD-10 to your HDMI Monitor or computer along with explanations of
the camera’s major settings. The purpose of this guide is to quickly get you up and
running with the HD-10 Camera so that you can image the skies and share your
passion with others.

Revision Sheet
HD-10 User Manual Page ii
Revision History
Version
Date
Revision Description
1.0
07/07/2017
Template Creation
1.1
02/01/2018
Typo Corrections

Mallincam HD-10 User Manual July 7, 2017
HD-10 Quick Guide Page 0
Table of Contents
Contents
Revision History .................................................................................................................................................. ii
Table of Contents
........................................................................................................................................0
1. Introduction
..........................................................................................................................................3
The Contents of the HD-10 - Package ................................................................................................4
Specifications ....................................................................................................................................................... 4
Included in Package ............................................................................................................................................. 5
2. Installing Driver and Software ............................................................................................................6
System Requirements ..............................................................................................................................6
Installing the Software ............................................................................................................................6
3. The Mallincam HD-10 with a HDMI Monitor ...................................................................................7
Connecting the HD-10 to your HDMI Monitor ....................................................................................7
HD-10 Control Icons ...............................................................................................................................9
Detailed Icon Description .................................................................................................................................. 10
Camera Icon ................................................................................................................................................... 10
Settings Icon ................................................................................................................................................... 10
Settings Control .............................................................................................................................................. 10
Image Action Window ................................................................................................................................... 11
Imaging with the Camera ................................................................................................................................... 13
Gamma ......................................................................................................................................................... 14
Contrast ....................................................................................................................................................... 14
Saturation .................................................................................................................................................... 14
Brightness ..................................................................................................................................................... 15
Sharpness..................................................................................................................................................... 15
Denoise ......................................................................................................................................................... 15
4. The Mallincam HD-10 with a Computer ..........................................................................................17
Connecting the HD-10 to your Computer ...........................................................................................17
First Time Installation of Software .................................................................................................................... 17
Starting on the HD-10 on the Computer ............................................................................................................ 23
The ISCapture Window ..................................................................................................................................... 24
HD-10 Quick Setup and Pictorial Work-Flow ....................................................................................25
Detailed Work-Flow Procedures........................................................................................................................ 26
Exposure ........................................................................................................................................................ 26
Gain ................................................................................................................................................................ 27
Gamma, Contrast, and Saturation .................................................................................................................. 28
Monochrome .................................................................................................................................................. 28
Red, Green, and Blue ..................................................................................................................................... 29
Denoise and Sharpen ...................................................................................................................................... 29
Sharpness..................................................................................................................................................... 29

Mallincam HD-10 User Manual July 7, 2017
HD-10 User Manual Page 1
Denoise ......................................................................................................................................................... 29
White Balance ................................................................................................................................................ 30
Histogram (Brightness) .................................................................................................................................. 32
Capture a Still Image ................................ ................................................................ ................................ ...... 34
Capture a Video Sequence ............................................................................................................................. 35
5. HD-10 Control Software ....................................................................................................................36
HD-10 Control Bar ................................................................................................................................36
Connected Camera Selector ................................................................................................................... 36
Action Tabs ............................................................................................................................................36
Capture Tab ...........................................................................................................................................37
Main Control Tab .............................................................................................................................................. 37
Live Image Resolution ................................................................................................................................... 38
Captured Image Resolution ............................................................................................................................ 38
Resolution Lock ............................................................................................................................................. 38
Quick Exposure Adjustment .......................................................................................................................... 38
Lock WB ........................................................................................................................................................ 39
White Balance Wizard ................................................................................................................................... 39
Default Settings .............................................................................................................................................. 39
File Save Tab ..................................................................................................................................................... 39
Saved Image Format ...................................................................................................................................... 40
Save Structure ................................................................................................................................................ 40
File Name ....................................................................................................................................................... 41
File Path ......................................................................................................................................................... 41
Continuous Shooting ...................................................................................................................................... 41
Record Video ................................................................................................................................................. 42
Video Format ................................................................................................................................................. 42
Exposure Tab ..................................................................................................................................................... 44
Auto Exposure ................................................................................................................................................ 44
Manual Exposure ........................................................................................................................................... 45
Gain ................................................................................................................................................................ 46
Frame Speed ................................................................................................................................................... 46
Data Width ..................................................................................................................................................... 46
Color Control Tab .............................................................................................................................................. 47
Gamma ........................................................................................................................................................... 47
Contrast .......................................................................................................................................................... 48
Saturation ....................................................................................................................................................... 48
Color / Monochrome ...................................................................................................................................... 48
White Balance ................................................................................................................................................ 49
Black Balance/Flat Fielding ........................................................................................................................... 49
Red Balance ................................................................................................................................................... 49
Green Balance ................................................................................................................................................ 50
Blue Balance .................................................................................................................................................. 50
Denoise .......................................................................................................................................................... 50
Sharpen .......................................................................................................................................................... 51
Default ............................................................................................................................................................ 51
Fluorescence Tab ............................................................................................................................................... 51
Blacklevel....................................................................................................................................................... 52
Histogram ....................................................................................................................................................... 52
Black Balance ................................................................................................................................................ 53
Capture Mode ................................................................................................................................................. 53

Mallincam HD-10 User Manual July 7, 2017
HD-10 User Manual Page 2
Parameter Tab .................................................................................................................................................... 54
To save a Parameter Setting ........................................................................................................................... 54
To Load a previously saved Parameter Setting .............................................................................................. 54
To Delete a Parameter Group Setting............................................................................................................. 54
Capture Tab Action Keys .....................................................................................................................55
Browse Tab ............................................................................................................................................56
Changing Path Location ............................................................................................................................ 56
Browse Tab Action Keys ......................................................................................................................57
6. Appendix .............................................................................................................................................58
Appendix A: Connecting to Night Skies Network (NSN) using the HD-10 Software .....................58
Introduction .................................................................................................................................................... 58
Appendix B – First Aid for the HD-10 ................................................................................................66
The HD-10 Software says it can’t find the Camera ............................................................................. 66
My Image is all White. .................................................................................................................................. 66
My Images is looking all wrong, colors, blotchy. .................................................................................. 66
When I save my AVI Video it only saves part of the Video. ............................................................. 67
My HD-10 is frozen, or the commands do not seem to be working correctly. ............................ 67
My Image on the Screen is great, but when I try to Modify it, the image is all White. .............. 67
Appendix C: Notes ................................................................................................................................68

Mallincam HD-10 User Manual July 7, 2017
HD-10 User Manual Page 3
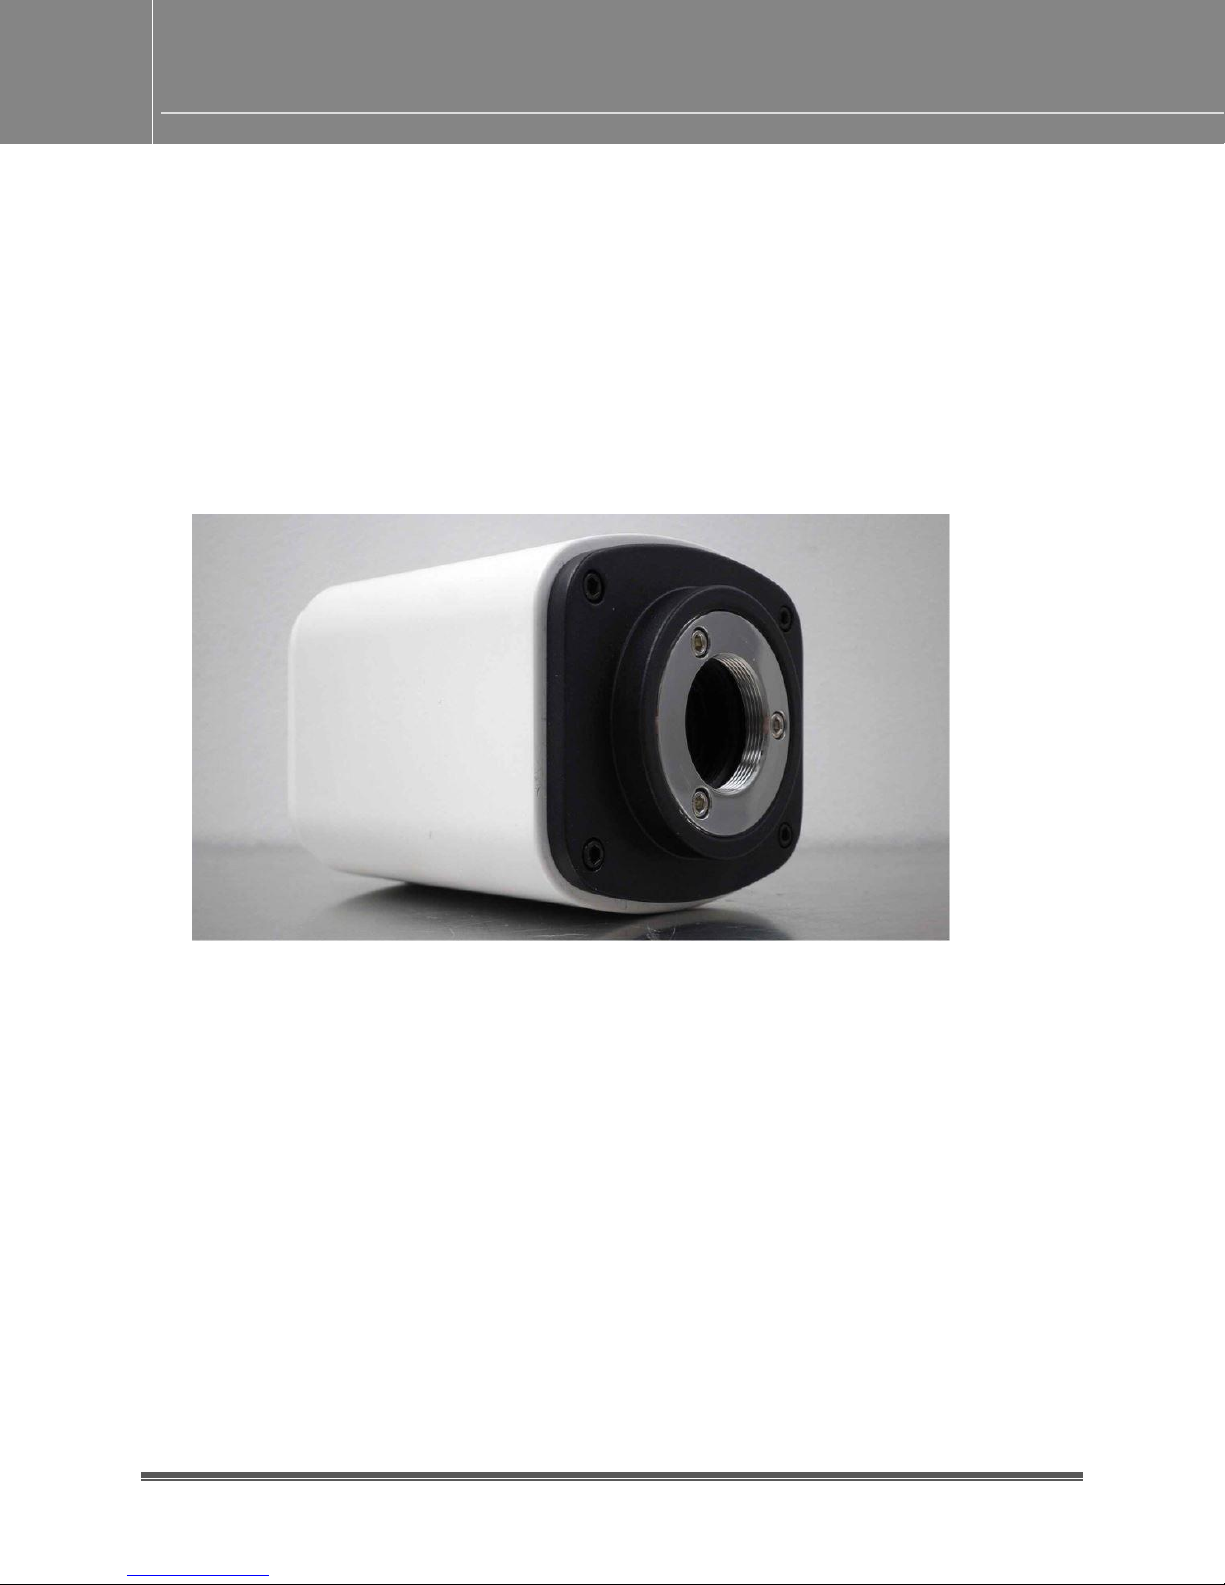
1. Introduction
The Mallincam HD-10 is a world first ever produced true HD High Definition live video camera for
astronomical work, whose output is HDMI. The new MallinCam HD-10 has a computer, memories
and processor all built in the camera which can be used as a stand-alone unit without any
external computer assistance. If a user does want to use a computer however, the USB2 permits full
camera control via computer and software. The MallinCam HD-10 is a true versatile astronomical
video camera making it easy to operate.
The USB2 connectivity has dual function. It can be used for the camera mouse control and access
the full built-in camera software without a computer or a user may choose to connect to
computer for full control and image acquisition to a PC. The back bone of this newest MallinCam
Video Observational System is the use of a 2.1 megapixel High Performance, Back Illuminated,
High Definition Sony CMOS sensor delivering 1 ms second up to 10 seconds of exposures for many
popular deep sky objects, Planetary views, Lunar views, Solar observation (when used with proper
solar filter) with spectacular results when observed on a HDMI monitor (user supplied) of any size
ready to impressed your audience when viewing astronomical features on a large HD monitor in
16:9 resolution at 1080P.
For the first time, an HDMI camera is equipped with complete exposure and gain settings. It allows
to exposure settings from 1ms to up to 10 seconds and 63 levels of gain adjustment making the
sensitivity of the sensor up to 300 times higher. Built in video and image Recorder via SD card
(supplied) in 1080P. Just click on the button to start recording 1080P videos at 30fps. The recorded
video files will be saved to the high-speed SD card directly built-in the camera. It also allows
playback of the recorded videos from the SD card directly allowing a user to show the previous
night observation when cloudy or rainy condition exist.
The Built-in Mouse control is the significant innovation of the MallinCam HD-10 embedding the
application software inside the camera. The user can control the camera with just a mouse. There
is no need for a PC. The dual-core processor of the MallinCam HD-10 adopts an innovative FPGA
dual-core processor, FPGA1 high-definition image quality processor and FPGA2 image output
controller, to ensure high speed high quality images live. 3D Noise Reduction with up to seven
times sampling (averaged stacking) is included. Increase of the exposure time increases the image
noise. But the integrated fully adjustable 3D noise reduction function keeps the MallinCam HD-10
image always clean and sharp.
So, thank you for your purchase, and let the adventure begin.
Mallincam HD-10 User Manual July 7, 2017
HD-10 User Manual Page 4
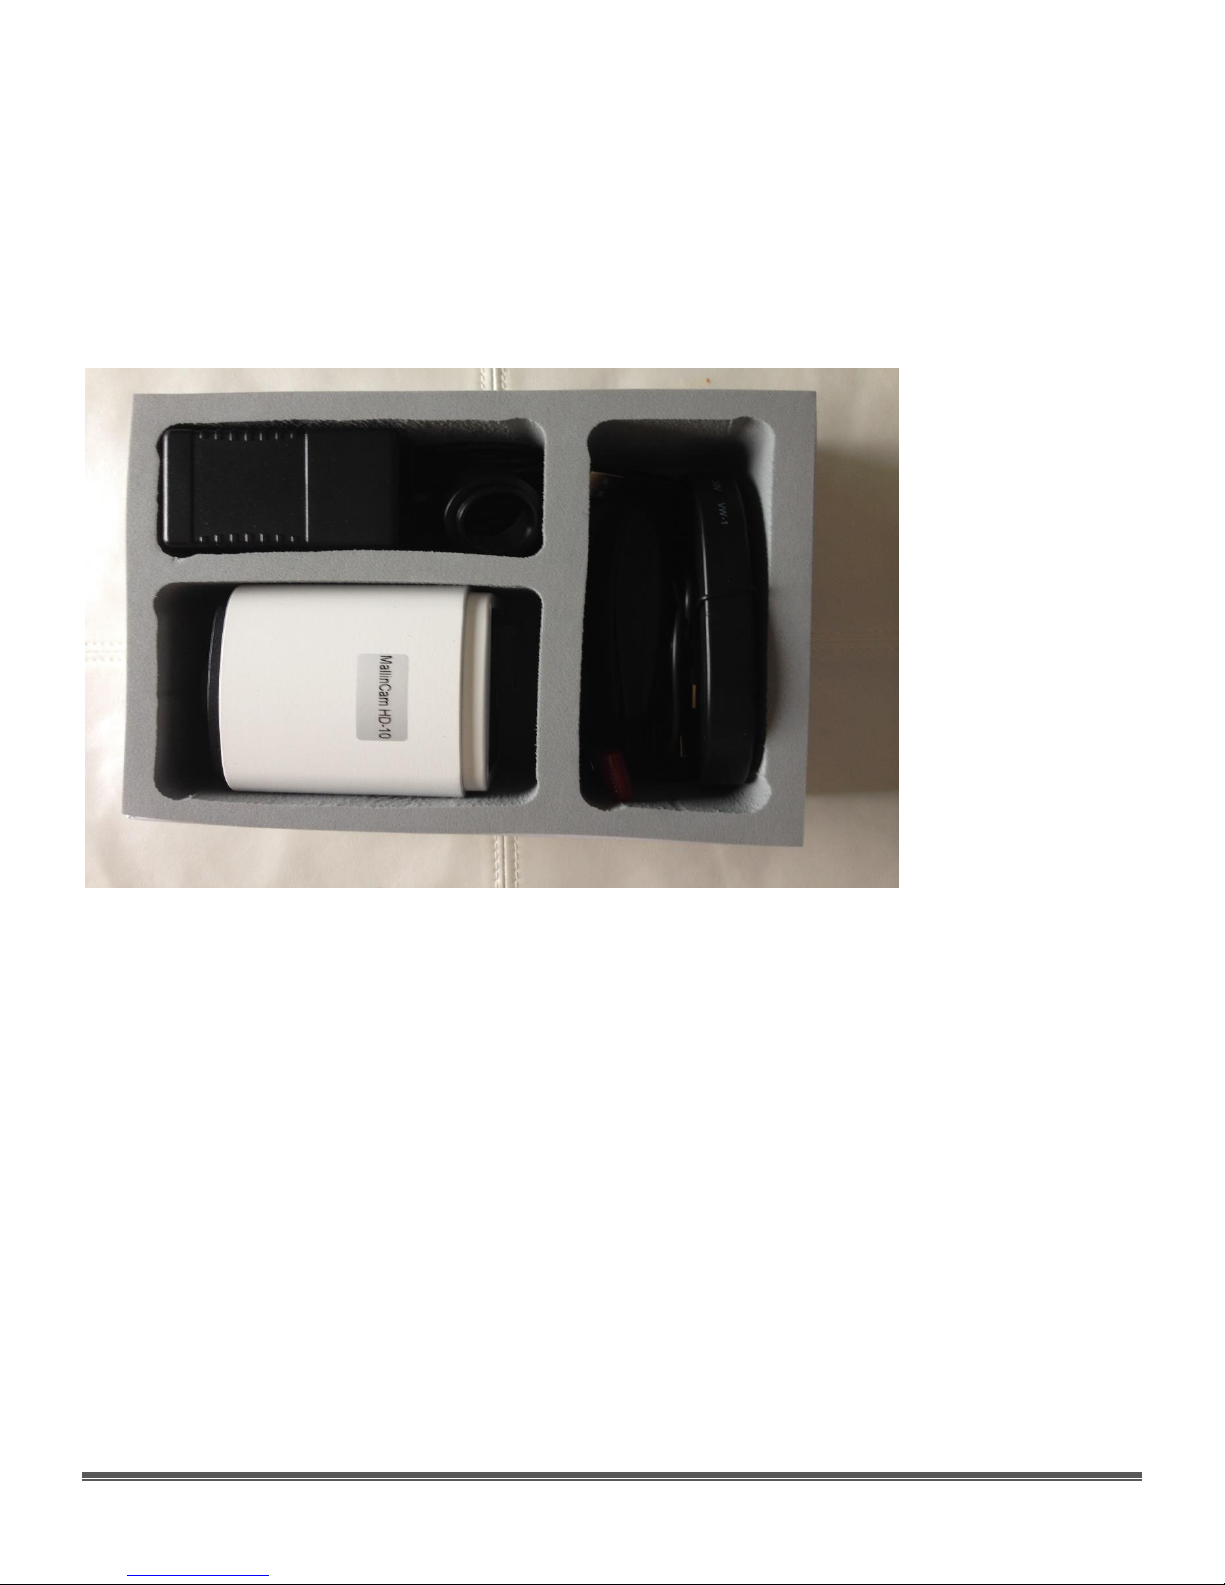
The Contents of the HD-10 - Package
Specifications:
CCD sensor: Sony CMOS sensor
Sensor size: 5.6. x 3.2 mm
Active pixel array size: 1945 (H) × 1097 (V) (2.1 Mega Pixels)
Pixel size: 2.9 x 2.9 microns
Analog-to-Digital conversion: 12-bit output
Exposure time range: 1 milli-seconds to 10 seconds
Weight: 15.7 oz. (446 gm)
Mounting interface: c-Mount
Mallincam HD-10 User Manual July 7, 2017
HD-10 User Manual Page 5
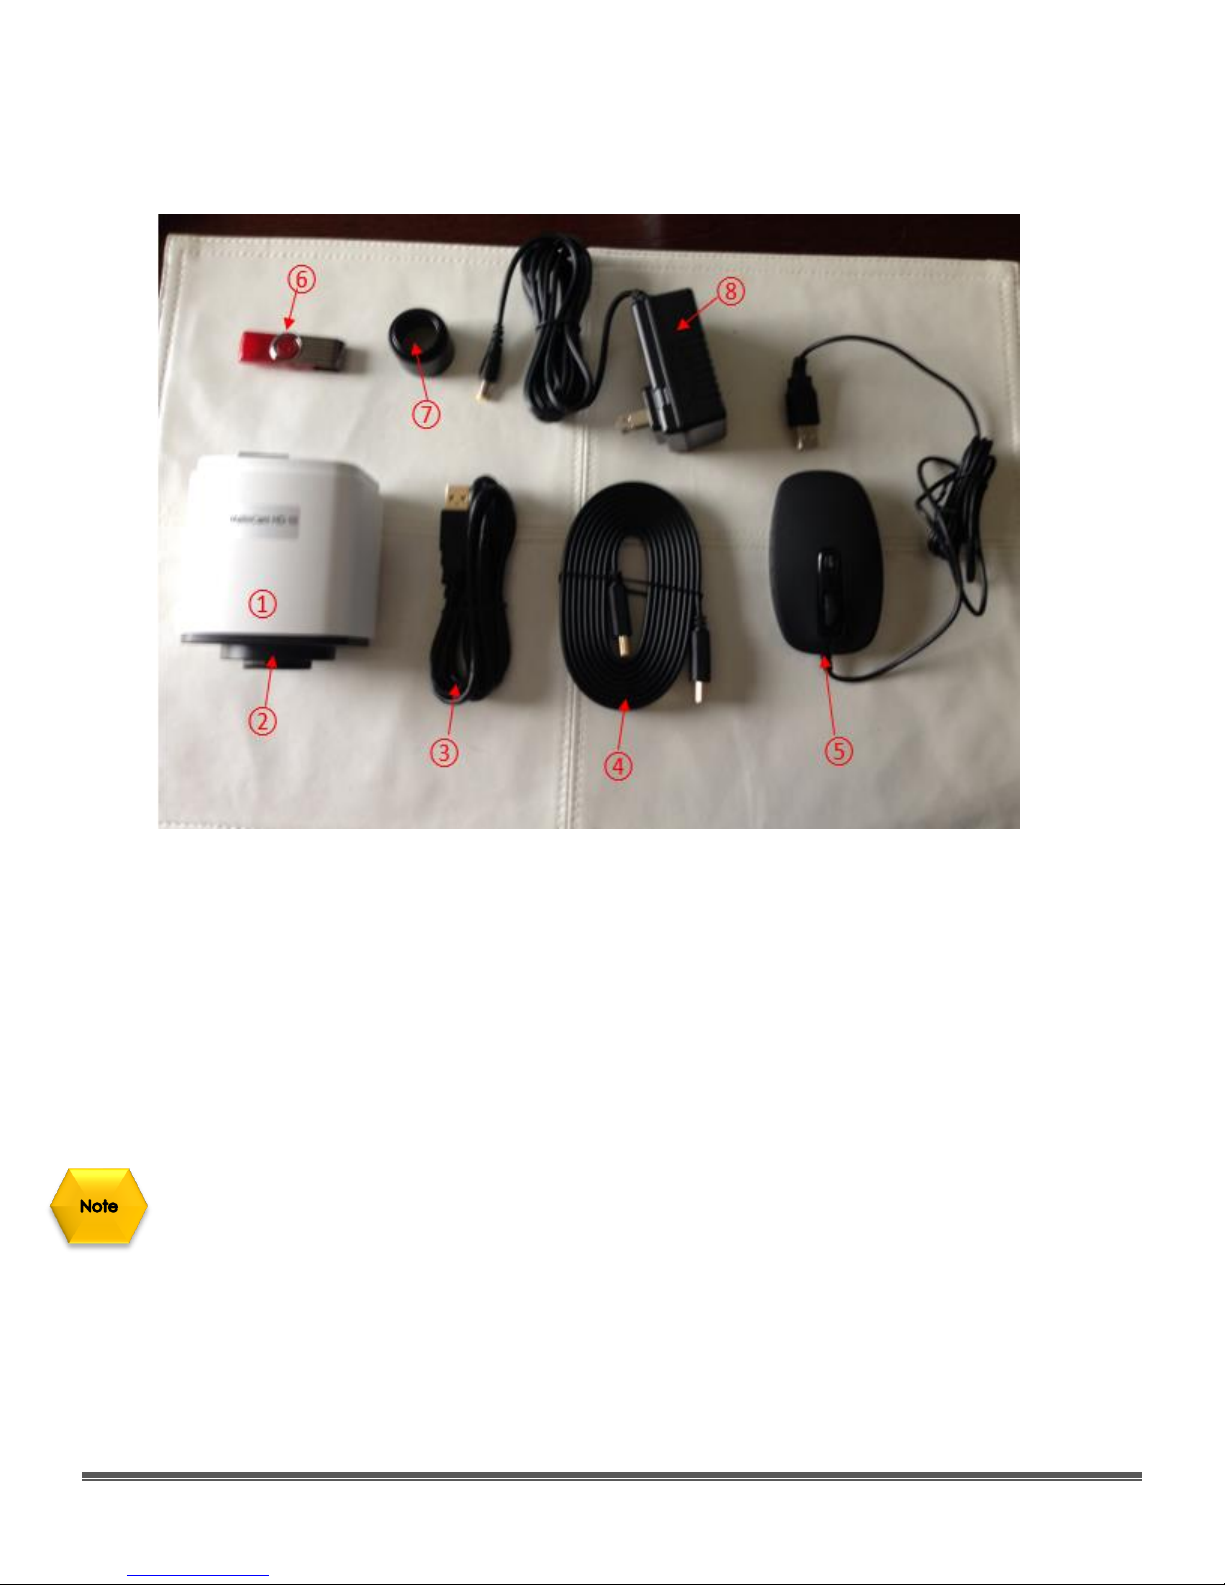
Included in Package:
① MallinCam HD-10 CMOS① imaging camera
② High Speed SD Card
③ USB 2.0 Cable
④ HDMI Cable
⑤ USB Mouse
⑥ Flash drive containing software installation files
⑦ 1.25” eyepiece adapter
⑧ AC Power Supply
You can use your own wireless mouse with the HD-10. This will make it easier to control the
camera, rather than be tethered so close to the camera.
Mallincam HD-10 User Manual July 7, 2017
HD-10 User Manual Page 6
2. Installing Driver and Software
System Requirements
PC running either Windows ® (32-bit & 64-bit) XP, Vista, 7, 8, 8.1, 10
Performance is not guaranteed if the following specification cannot be reached.
• Equal to Intel Core2 2.8GHz or Higher
• Memory: 4GB or More
• USB port: USB 2.0 Port
• Display Monitor: 17" or Larger Recommended
• A video display capable of rendering 1024x768 resolution minimum; 1280x1024 or higher is
recommended, and in 24-bit color
• One available fully-specified high-speed USB 2.0 port
• 120V AC Power for adapter, or 12V, 2.0A AC Source
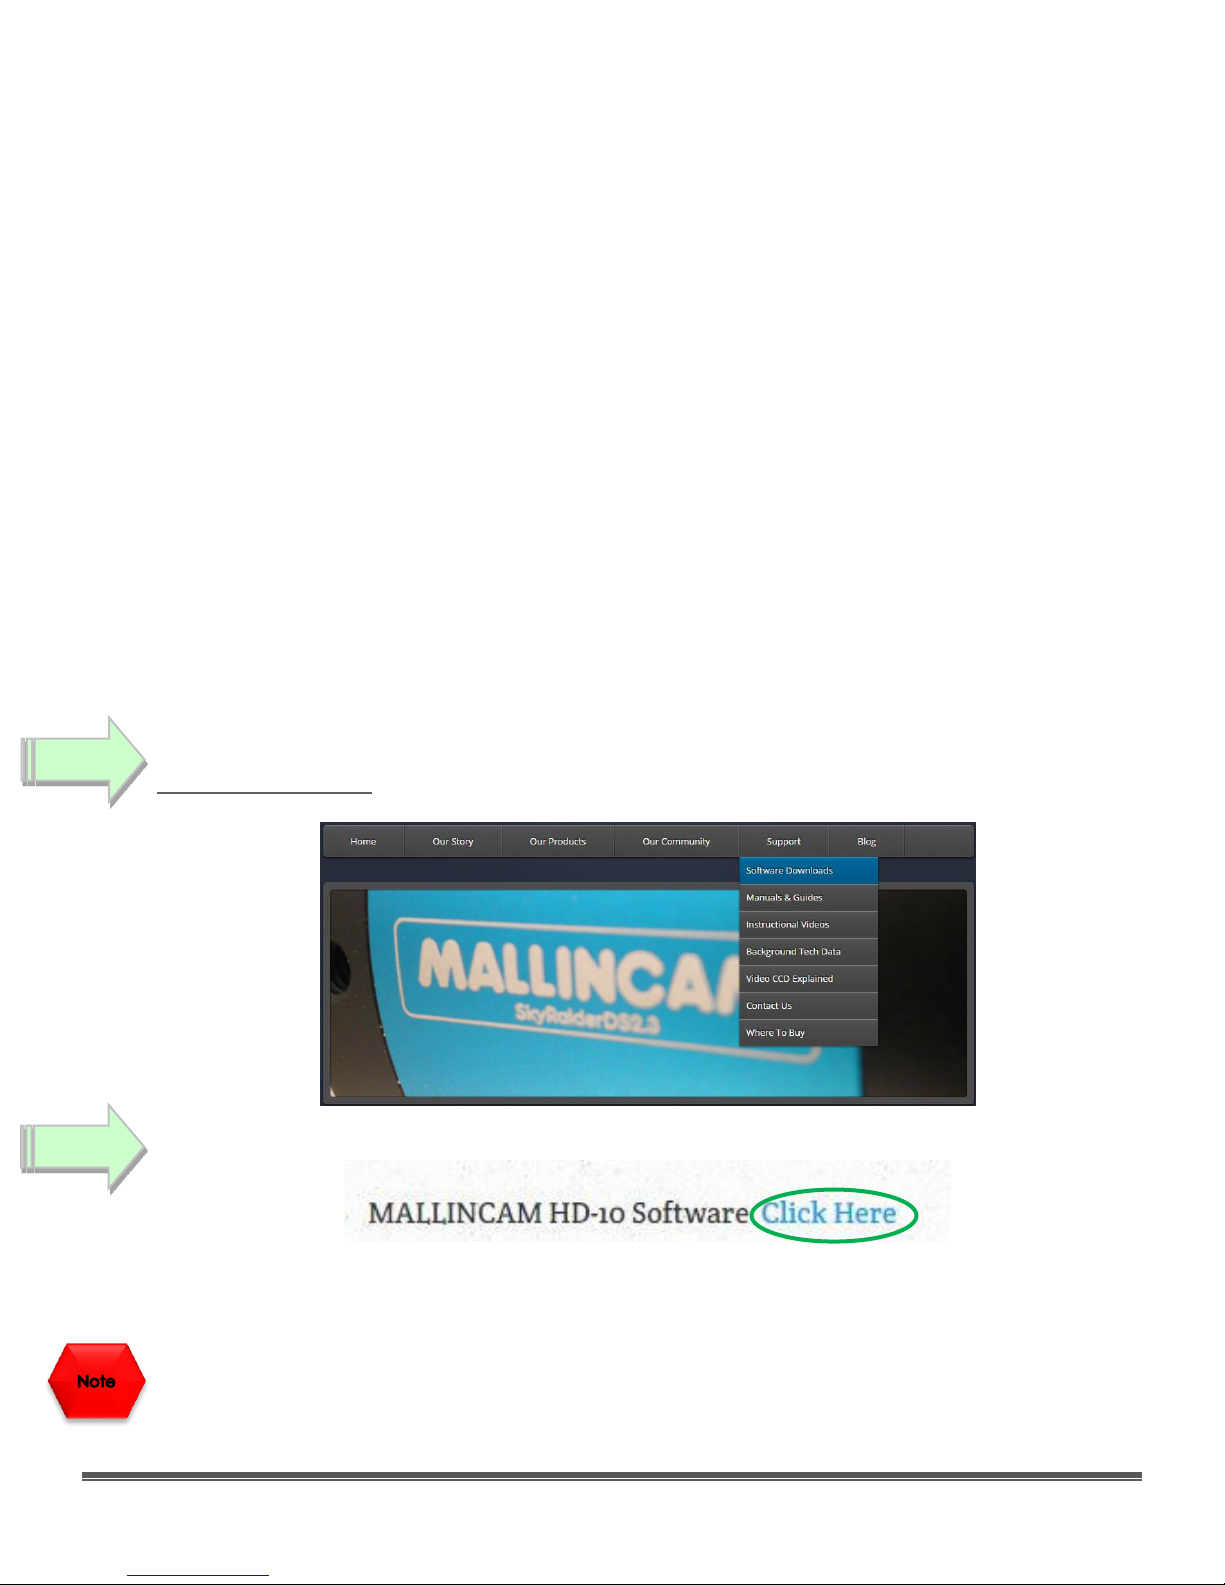
Installing the Software
Visit the Software Downloads Page in the Support Tab located on the website:
www.mallincam.net
Select the Blue Click Here Button to download the HD-10 Driver.
After you have clicked on the Blue Click Here indicator, a zipped file will be downloaded
onto your computer.
Make sure that the HD-10 is not plugged into the computer.
Step 1
Step 2
Mallincam HD-10 User Manual July 7, 2017
HD-10 User Manual Page 7
3. The Mallincam HD-10 with a HDMI Monitor
Connecting the HD-10 to your HDMI Monitor
First make sure you have the following pieces of equipment:
• Mallincam HD-10 Camera
• 1.25” C nose-piece adapter
• SD Card (inserted into SD slot on back of Camera)
• 12V Power Adapter
• HDMI Cable
• USB Mouse (one is provided, or use your own wireless mouse)
• HDMI Monitor (with power cable)
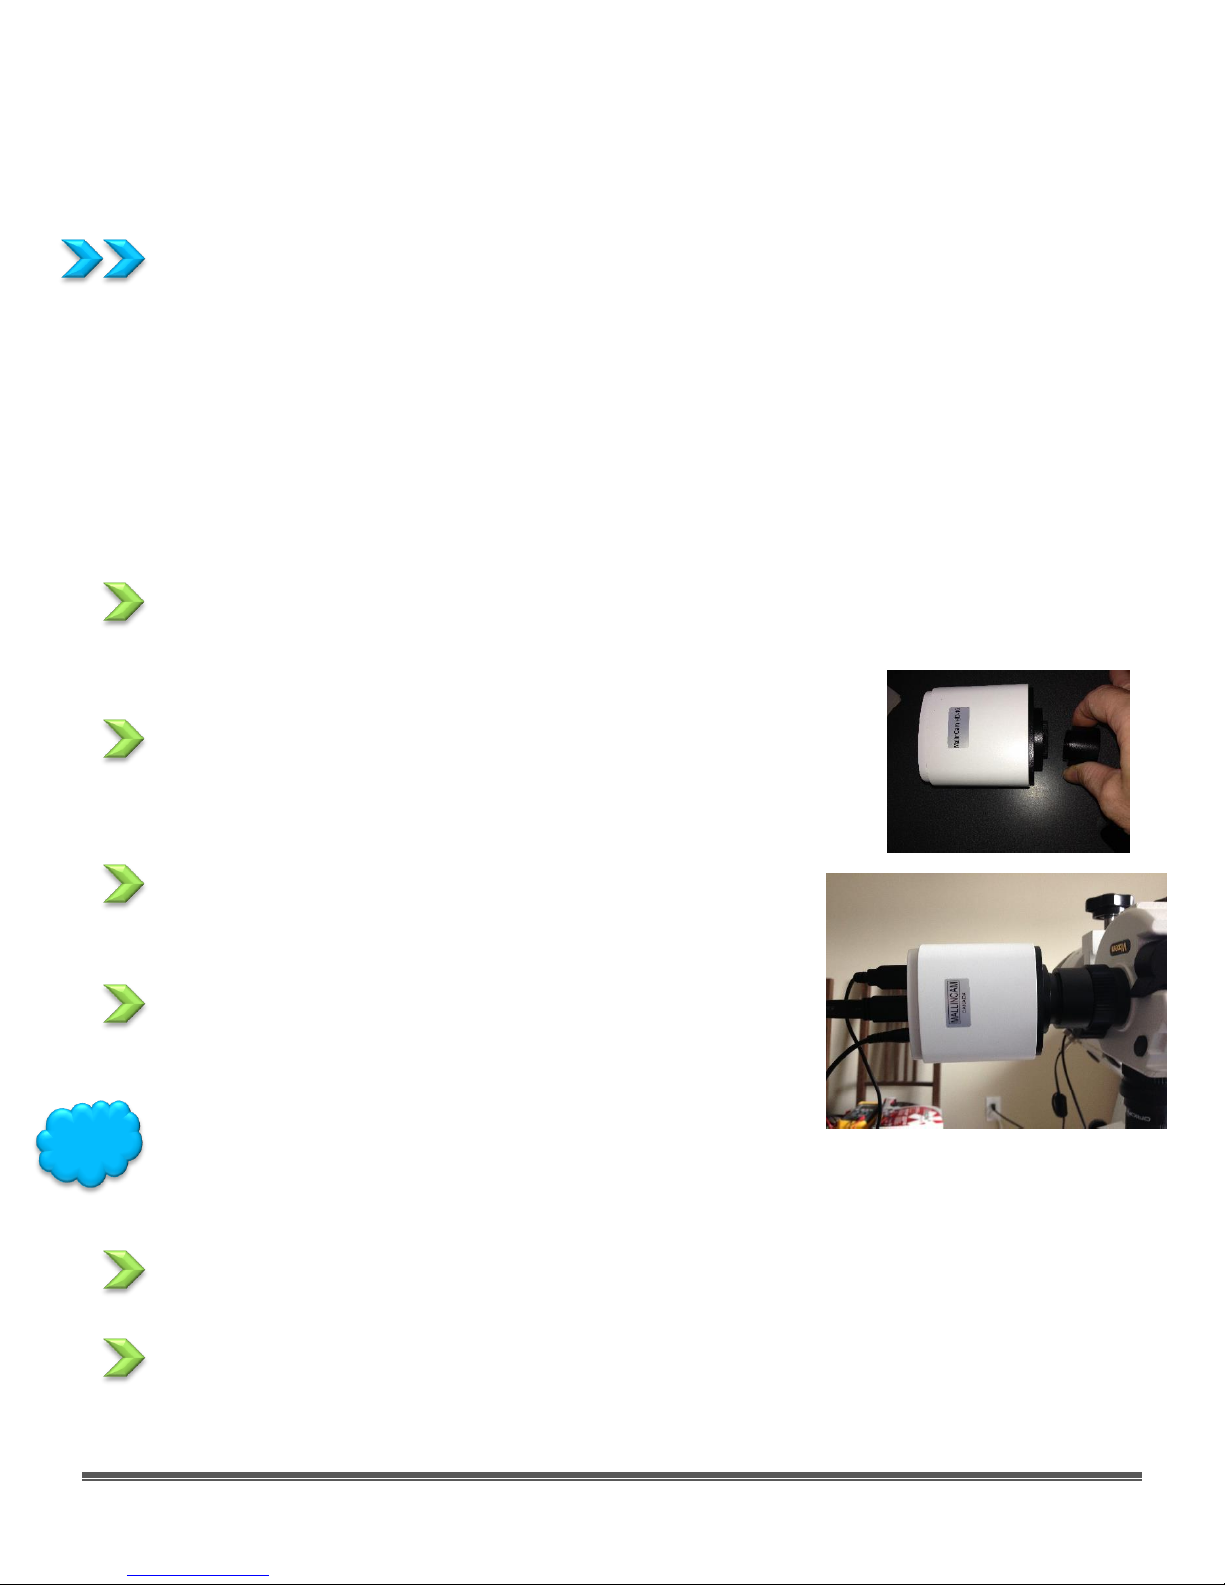
Remove the rubber dust cover from the front of the HD-10 camera (place it back in the box
for safe keeping).
Screw in the 1.25” nose piece adapter to the front of the HD-10.
(You may need to remove the blue protection screen covering
the CMOS sensor prior to attaching nose-piece).
Insert the Mallincam HD-10 camera (with .125” adapter
attached) into the 1.25” piece holder of your Telescope.
Attach the USB Mouse Cable, the HDMI Cable, and Power
Cable to the back of the HD-10. A Red LED power indicator
will turn on.
Now is a good time to balance your telescope (with the HD10 camera attached) on your mount.
Attached the other end of your HDMI Cable to your HDMI Monitor.
Power on the Monitor.
Hint
Mallincam HD-10 User Manual July 7, 2017
HD-10 User Manual Page 8
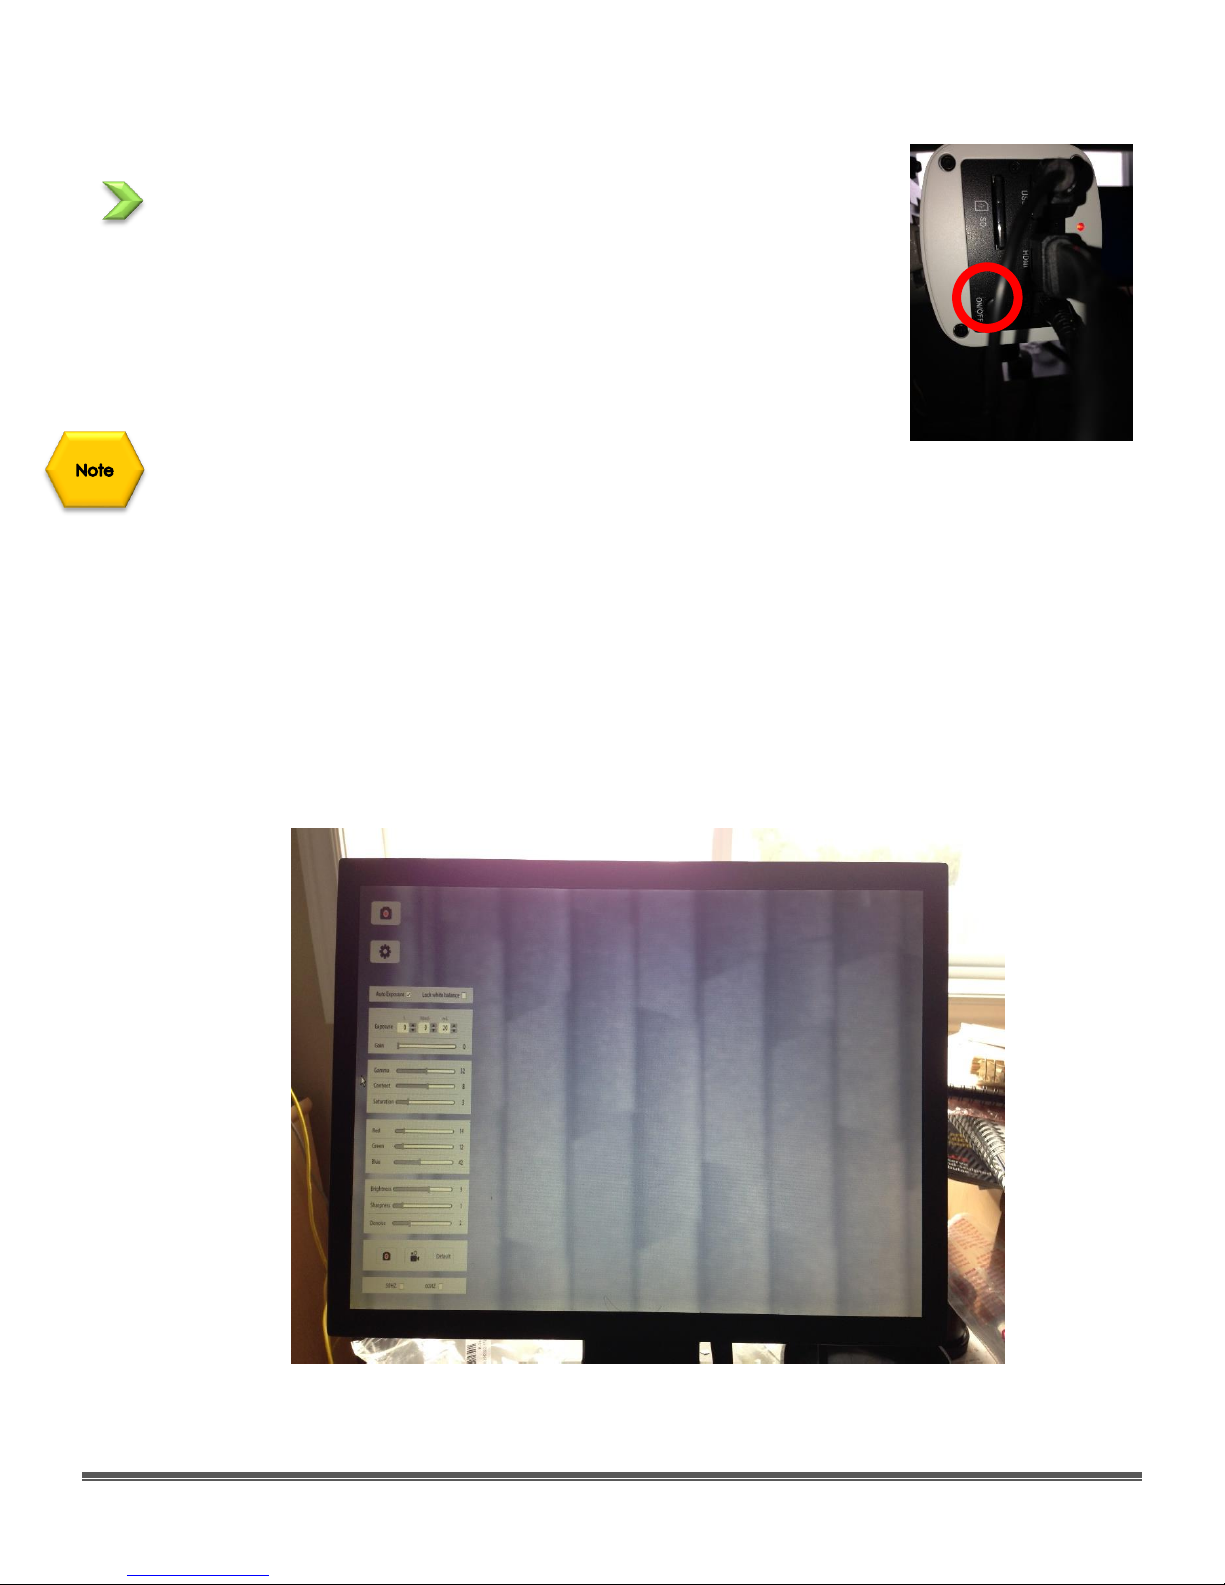
Power on the HD-10 Camera by Pressing the ON/OFF Button on the
back of the camera. A blue LED should turn on.
Your HDMI Monitor should now display the image coming from the
Mallincam HD-10 camera.
Move the mouse to the Left Side of the screen and the Photo and Setting Icons will appear
on the monitor’s screen.
➢ Clicking on Photo Icon will have the HD-10 take an image and store it on the SD card.
➢ Clicking on the Settings Icon will open of the setting control panel on the monitor’s
screen.
Move the mouse to the Right Side of the screen and the HD-10’s image control Icons will
appear.
Moving the mouse away from the sides of the monitor will remove the Icons from the screen.
Mallincam HD-10 User Manual July 7, 2017
HD-10 User Manual Page 9
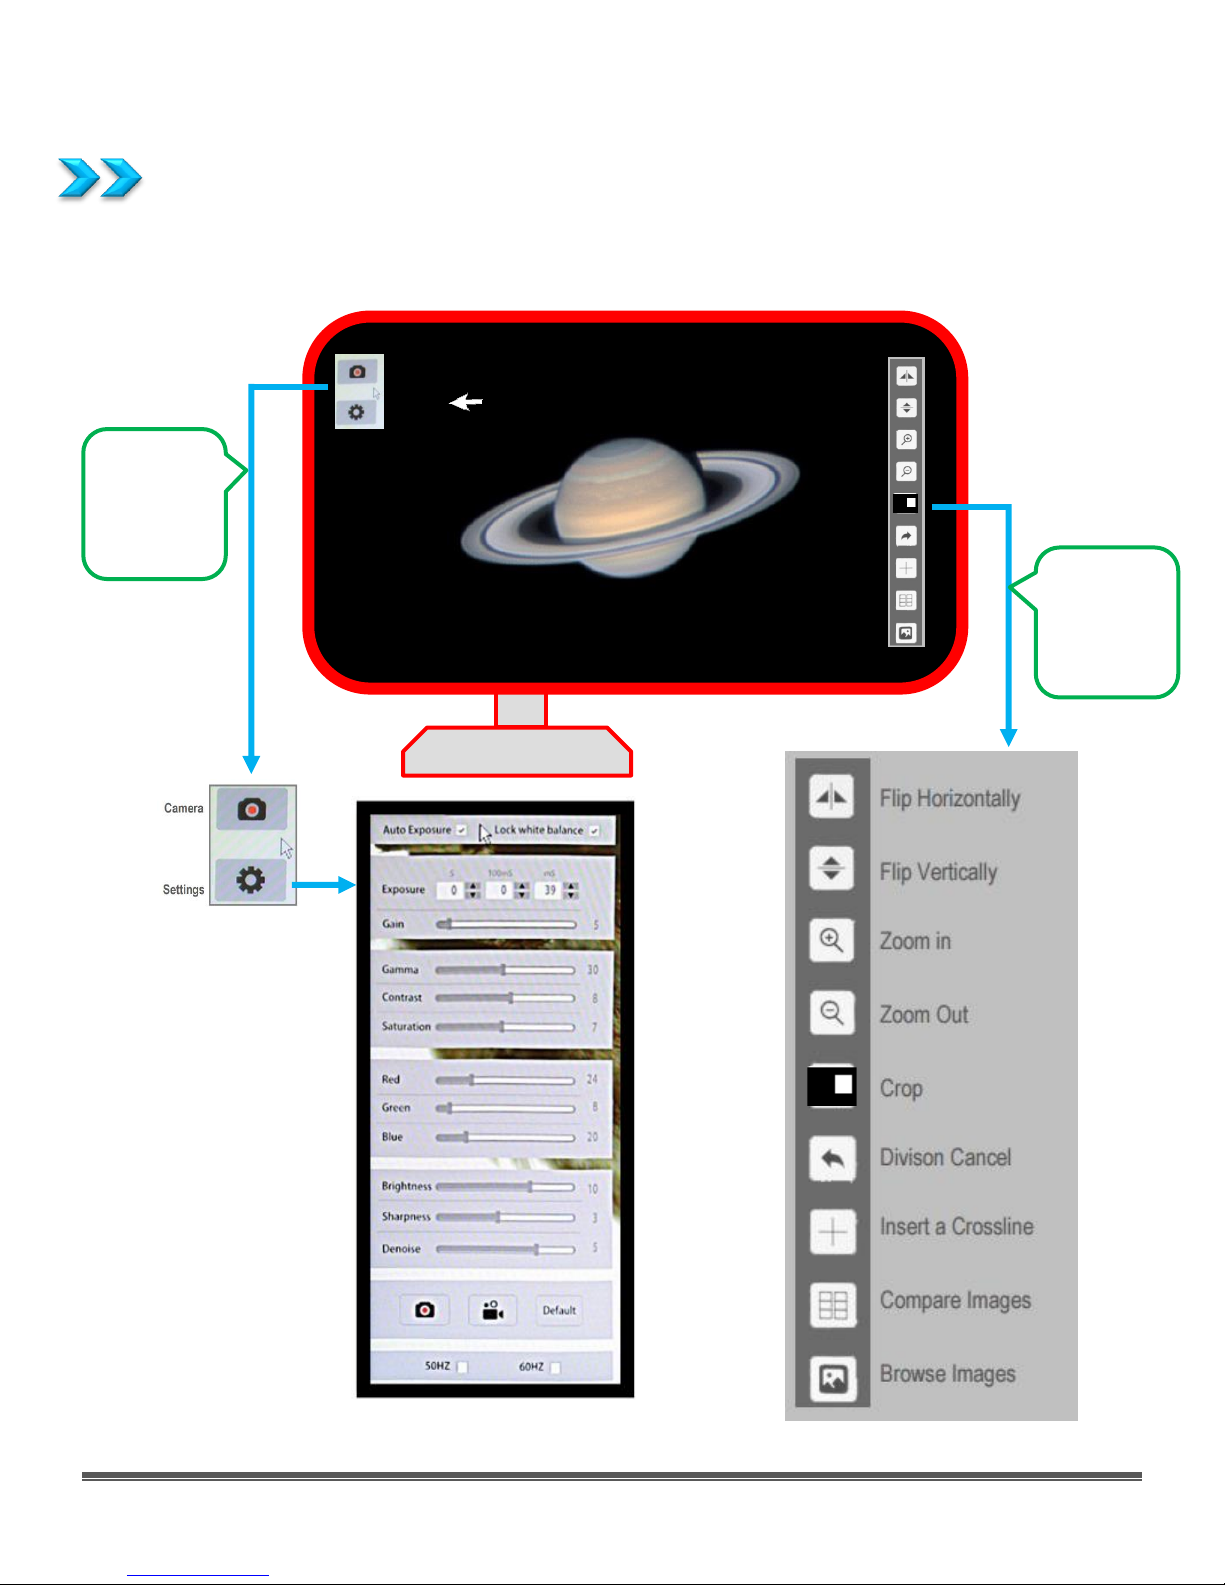
HD-10 Control Icons
The following image provides a fast description and location of the various Control Icon that
are available for you to control the Mallincam HD-10 camera using just a HDMI Monitor.
Mouse
on Left
Side of
Monitor
Mouse
on Right
Side of
Monitor
Mallincam HD-10 User Manual July 7, 2017
HD-10 User Manual Page 10
The Action Icons appropriate icons appear on the various sides of the Monitor when the
Mouse Cursor is placed in that area. Moving the mouse away from the sides causes the
Icons and Open Windows to disappear.
Detailed Icon Description
Camera Icon
Clicking on this Icon will tell the Mallincam HD-10 to save the current image on the SD card
inserted into the back on the camera. The format of the image will be JPEG (.jpg). Once the
image has been saved, the HD-10 Camera will revert back to live view.
Settings Icon
Clicking on this Icon will tell the Mallincam HD-10 to pop-up a settings Window on the Left
Side of the Monitor.
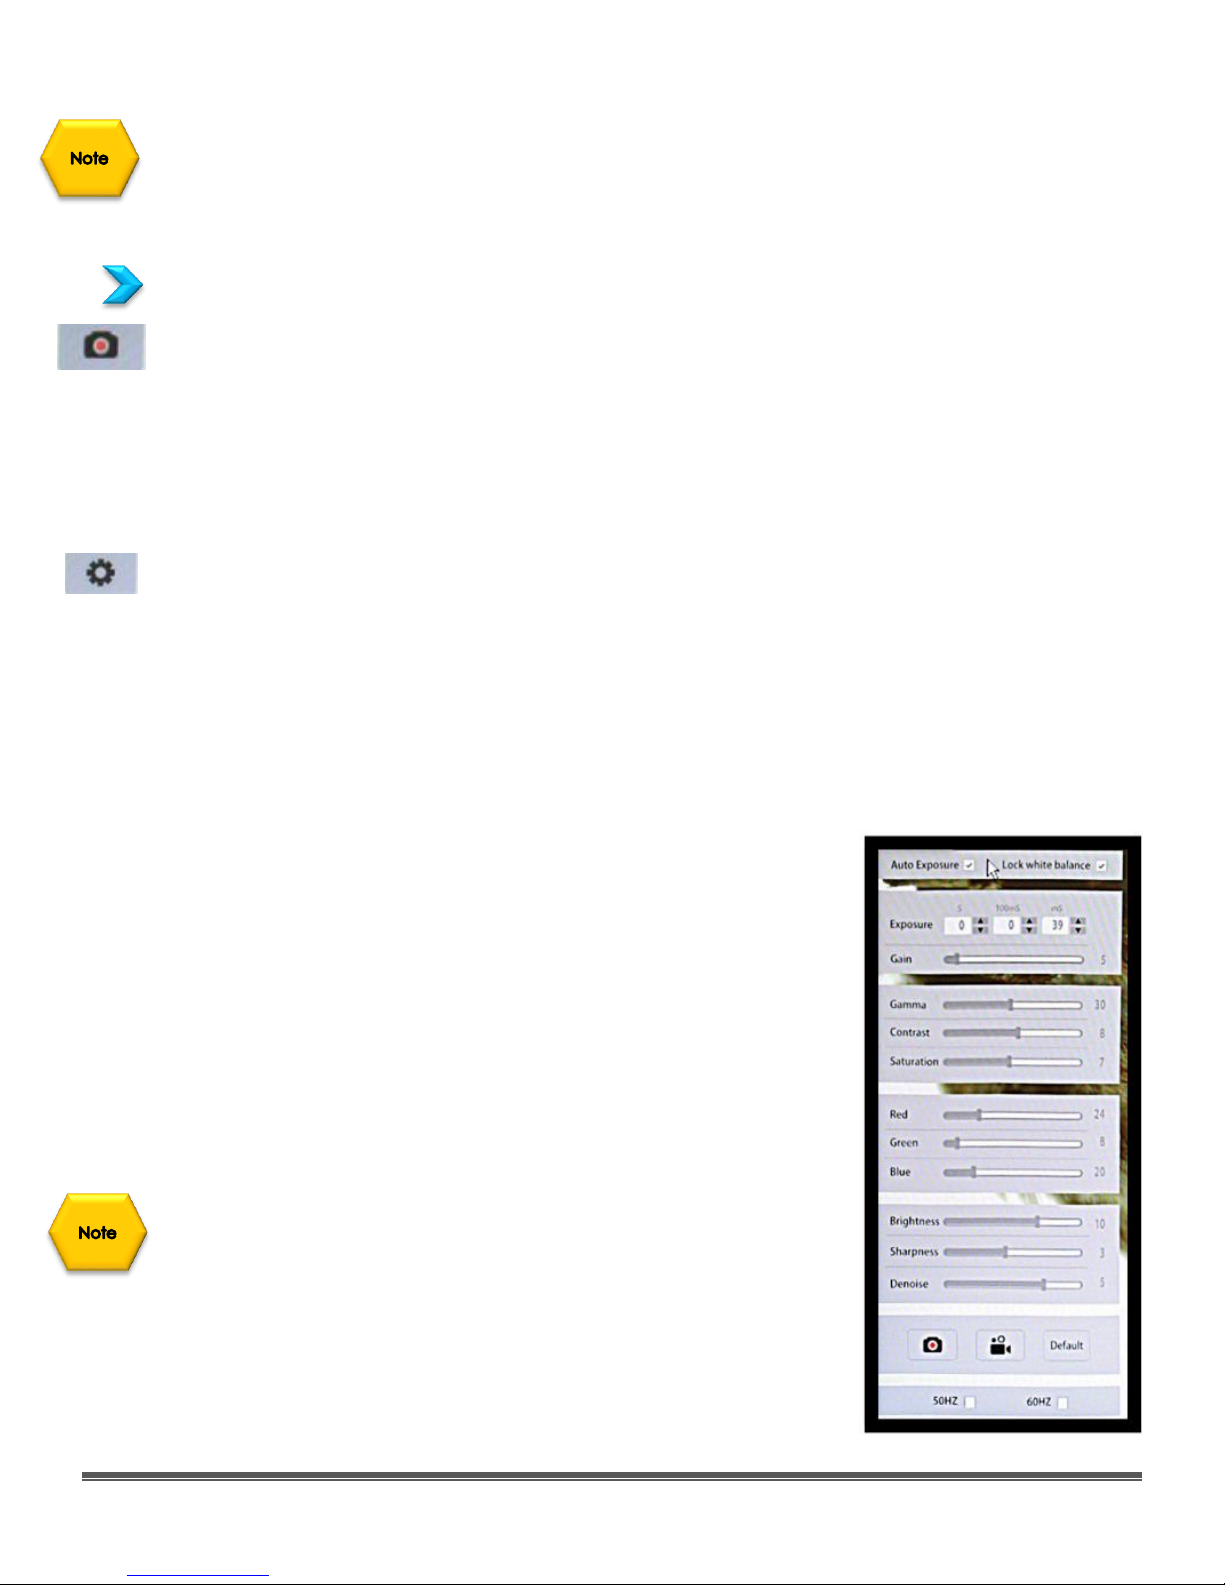
Settings Control
Clicking on the Settings Icon will open-up or close the Settings Control Window.
This window allows you to:
• turn on or off auto exposure.
• Set exposure
• Set Gain, Gamma, Contrast, and Saturation
• Tweak the Color values
• Set the Brightness, Sharpness, and Denoise values
• Take a Snapshot
• Take a Video
• Choose anti-flicker frequency
Moving the mouse cursor away from the left-side of the HDMI
Monitor’s Window will cause the Icons and Settings Control
Window to disappear, Moving the mouse cursor back to the leftside of the HDMI Monitor’s Window will bring back the Icons and
Settings Control Window.
Mallincam HD-10 User Manual July 7, 2017
HD-10 User Manual Page 11
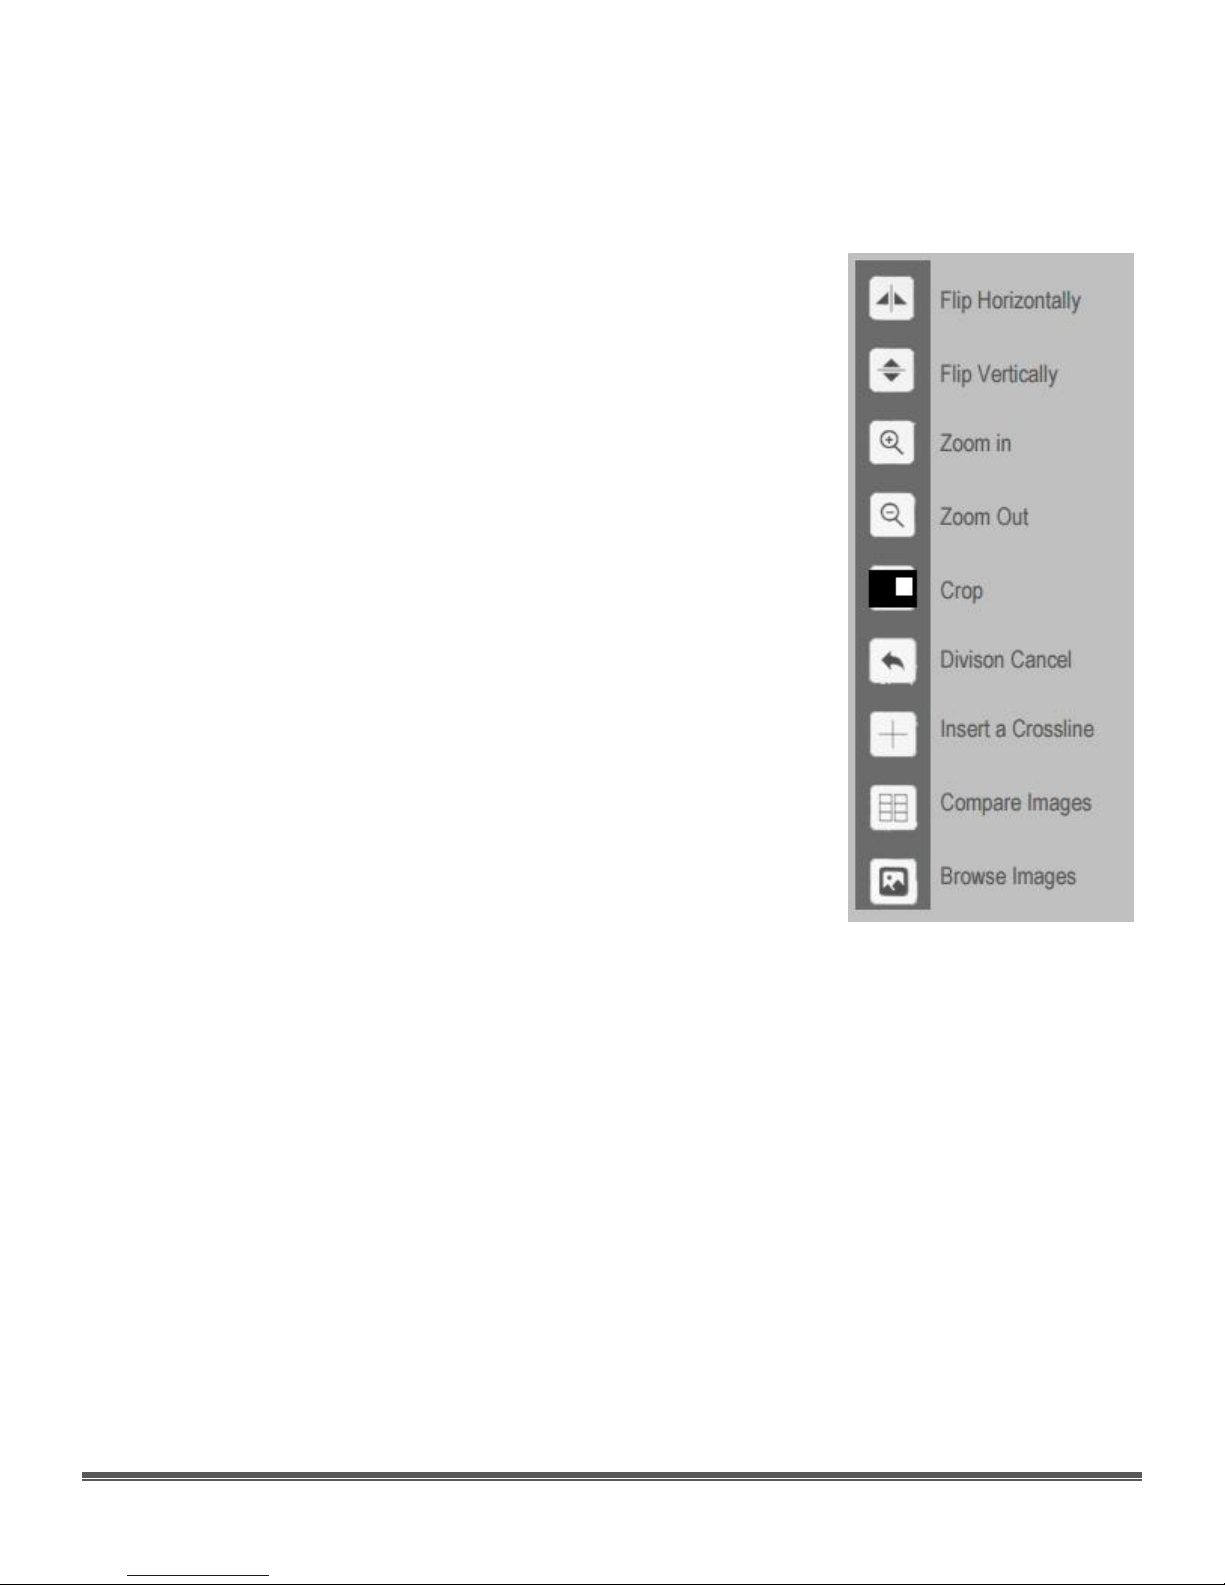
Image Action Window
Flip Horizontally Click on this Icon to Move the left side of
the image to the right side, and the right
side of the image to the left.
Flip Vertically Click on this Icon to Move the top of the
image to the bottom of the window and
the bottom of the image to the top of the
window.
Zoom in Click on this Icon to zoom in, or click and
hold to zoom in continuously until maximum
is reached. Zoom Range from 1x to 10x.
Zoom out Click on this Icon to zoom out, or click and
hold to zoom out continuously until
minimum is reached. Zoom range from 10x
to 1x.
Mask Click on this Icon and the mouse cursor will
change to a hand. Now Click-Hold-andDrag the hand-cursor to create a box on
the screen. Only the portion of the image
inside the box will be visible, the remainder
will be blacked-out. You can now place
your hand cursor inside the box, and Click-
Hold-and-Drag the box to various areas of
the screen to view different parts of the
total image. To return the Image Window to
full screen just Right-Click anywhere on the
screen.
Division Cancel Click on this Icon to return the Image
Window to the full current image being
picked up by the HD-10. This Icon control is
used after using the Compare Images Icon.
Inset a
Crossline Click on this Icon to place a Red Crosshair on the Image Window. Click
on the Icon again to change the crosshairs to Green. Click on it again to
remove the crosshairs from the Image Window.

Mallincam HD-10 User Manual July 7, 2017
HD-10 User Manual Page 12
Compare Images Click on this Icon to Display currently saved images on the SD card. A
larger box will contain the live image from the HD-10 camera. Located
on the bottom of the screen are controls to scan forward (right arrow) or
backward (left arrow) through other images on the SD card. The Home
Icon will return the Image window the full live image.
Left-Clicking on any of the Saved images will split the screen with that
Saved Image on the left half of the Image Window, and the current live
image on the right half of the Image Window. You can Left-Click-Holdand Drag both the left-half (saved image) and right-half (live image) so
that you can compare the part of the saved image to a particular part
of the live image. To return back to your full live image, use the Division
Cancel Icon.
Browse Images Clicking on this Icon will display the first 12 saved images located on the
SD card. Use Left or Right arrows located on the bottom of the screen to
load the previous or the next set of images.
Clicking on a saved image will make that image full size for viewing
pleasure, or start the Video File if you clicked on a video recording.
Clicking on the X Icon will provide you an option to permanently delete
that saved image from the SD Card. Click on the House Icon to return
back to the 12 Panel Saved Image Window.
Once in the 12 Panel Saved Image Window, clicking on the House Icon
will return you back to the live full screen image being displayed by the
Mallincam HD-10 camera.

Mallincam HD-10 User Manual July 7, 2017
HD-10 User Manual Page 13
Imaging with the Camera
You have attached the Mallincam HD-10 camera to the telescope, and have connected
the power, mouse, and HDMI cables. You have also removed the lens cap from the
telescope (how many times do we forget this step). And, you are now read to image.
You should be seeing an image (it may be out of focus, too bright, or even too dim) on your
HDMI monitor.
Move the mouse icon to the left side of your monitor, you should see two icons
automatically pop-up.
Click on the bottom icon (the Settings Icon), and a Settings Control Window will pop-up. The
HD-10 remembers when this window is clicked open, and it will automatically appear when
you next move the mouse icon to the left side of your monitor.
We will use this window to help get the correct exposure and set other adjustments to tweak
the image to our satisfaction.
Step 1
Step 2

Mallincam HD-10 User Manual July 7, 2017
HD-10 User Manual Page 14
As a starting point, move the mouse cursor to the Auto
Exposure box, and make sure it is checked. This will give us a
starting point for the exposure setting.
The current exposure value (as determined by the Auto
Exposure Control), will now appear in the Exposure box.
You can select an exposure range from 1 micro-seconds all the way to 10 seconds
Uncheck the Auto Exposure (the exposure setting will not change), and now by using your
mouse icon. Click on the little up and down arrows in the appropriate Exposure settings
control (s-seconds, 100ms, and ms), to provide an exposure value to your liking.
You can also now adjust the Gain (Left-Click-Hold-and-Drag the gain slider) to make the
image brighter or dimmer. You will get more comfortable with finding to best exposure/gain
values for your image. Play with them to see how the exposure and the gain values affects
your image. Gain is a setting that controls the amplification of the signal from the camera
sensor to the screen. Too much amplification can cause noise in the image.
The next three commands will allow us to tweak the image further by
adjusting the Gamma, Contrast, and Saturation values on the HD-10.
By using the mouse cursor, Left-Click-Hold-and-Drag the slider bar of each of the Gamma,
Contrast, and Saturation controls to produce an image that meets your requirements.
Gamma - Each pixel in an image has brightness level, called luminance. This value is
between 0 to 1, where 0 means complete darkness (black), and 1 is brightest
(white). Different display devices (monitor, phone screen, TV) do not display
luminance correctly. So, one needs to correct them, therefore the gamma
correction function allows you to brighten the dimmer area for the image, or
darken the brighter area of the image.
Contrast - Contrast is the scale of difference between black and white in your images.
Without contrast you wouldn't have an image because there wouldn't be any
differentiation between light and dark; everything would be black, white, or a
single shade of grey somewhere in between.
Saturation - Saturation is similar to contrast, however instead of increasing the separation
between shadows and highlights, we increase the separation between colors.
Step 3
Step 4
Step 5
Mallincam HD-10 User Manual July 7, 2017
HD-10 User Manual Page 15
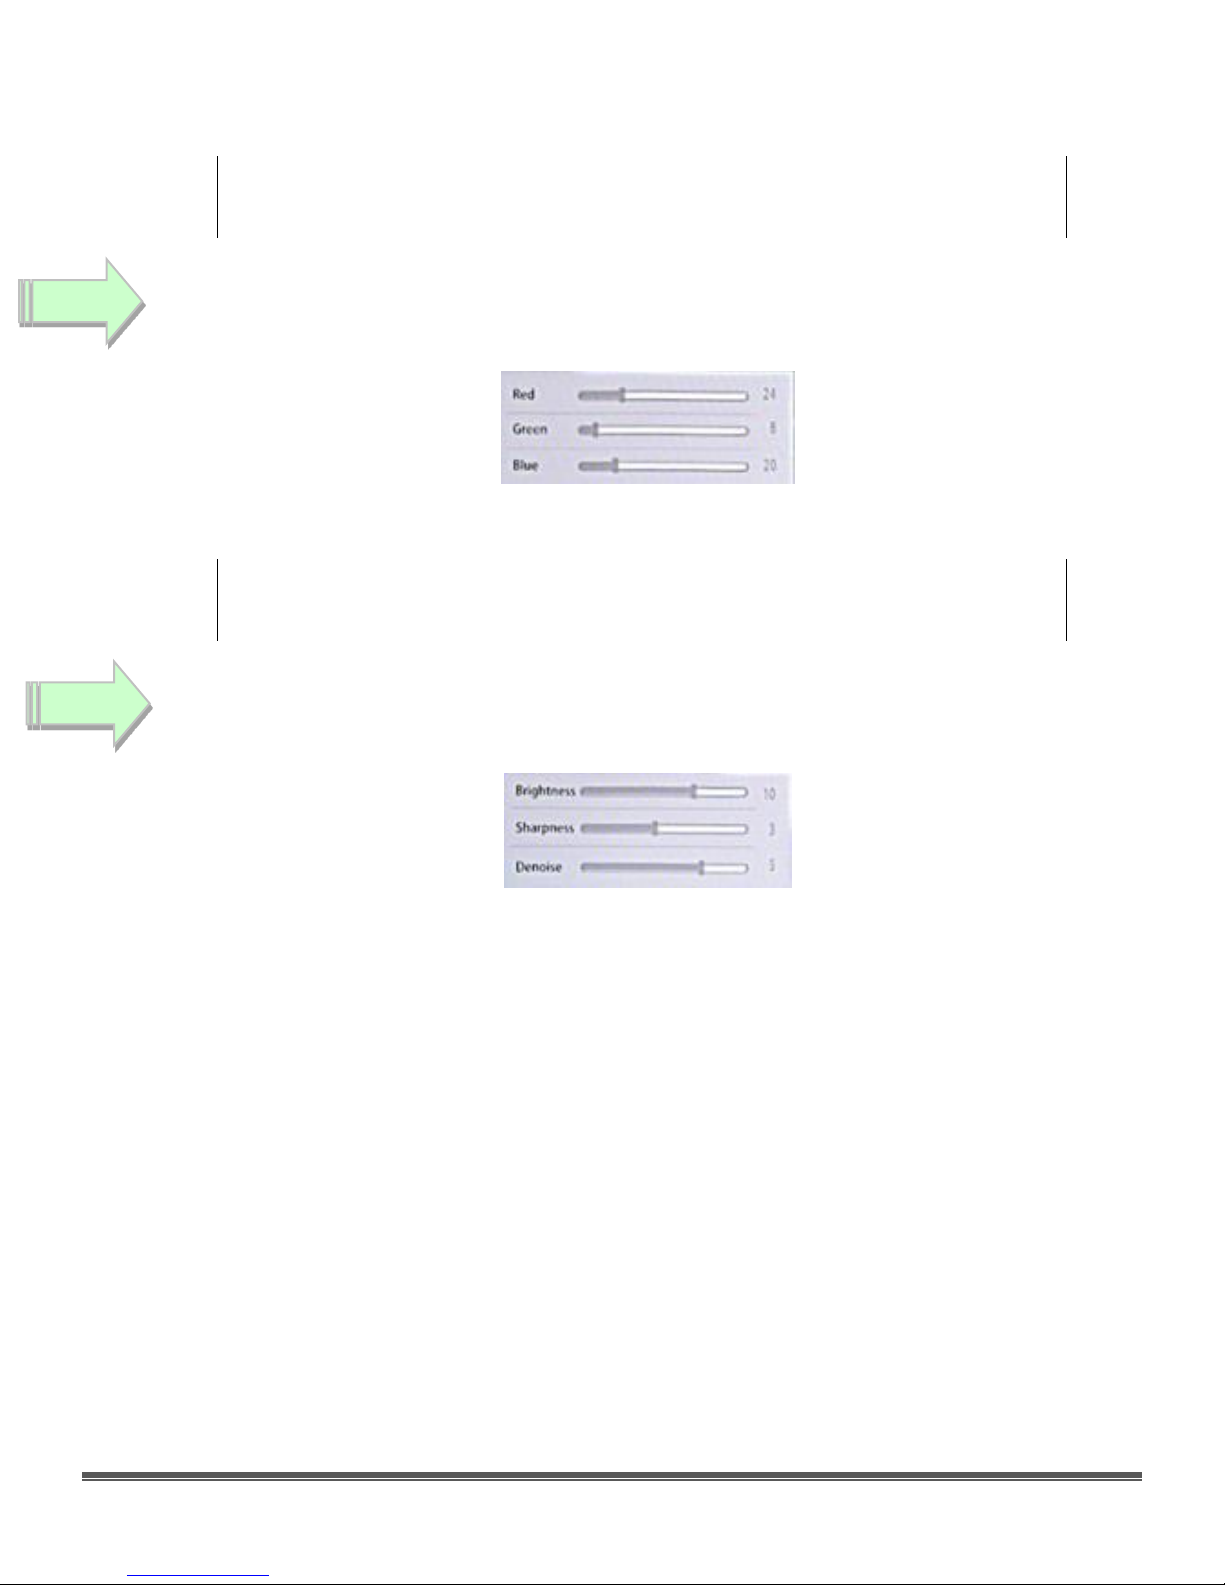
The next three commands will allow us to tweak the colors of the image
further by adjusting the Red, Green, and Blue values.
By using the mouse cursor, Left-Click-Hold-and-Drag the slider bar of each of the Red,
Green, and Blue controls to produce an image whose colors that meets your requirements.
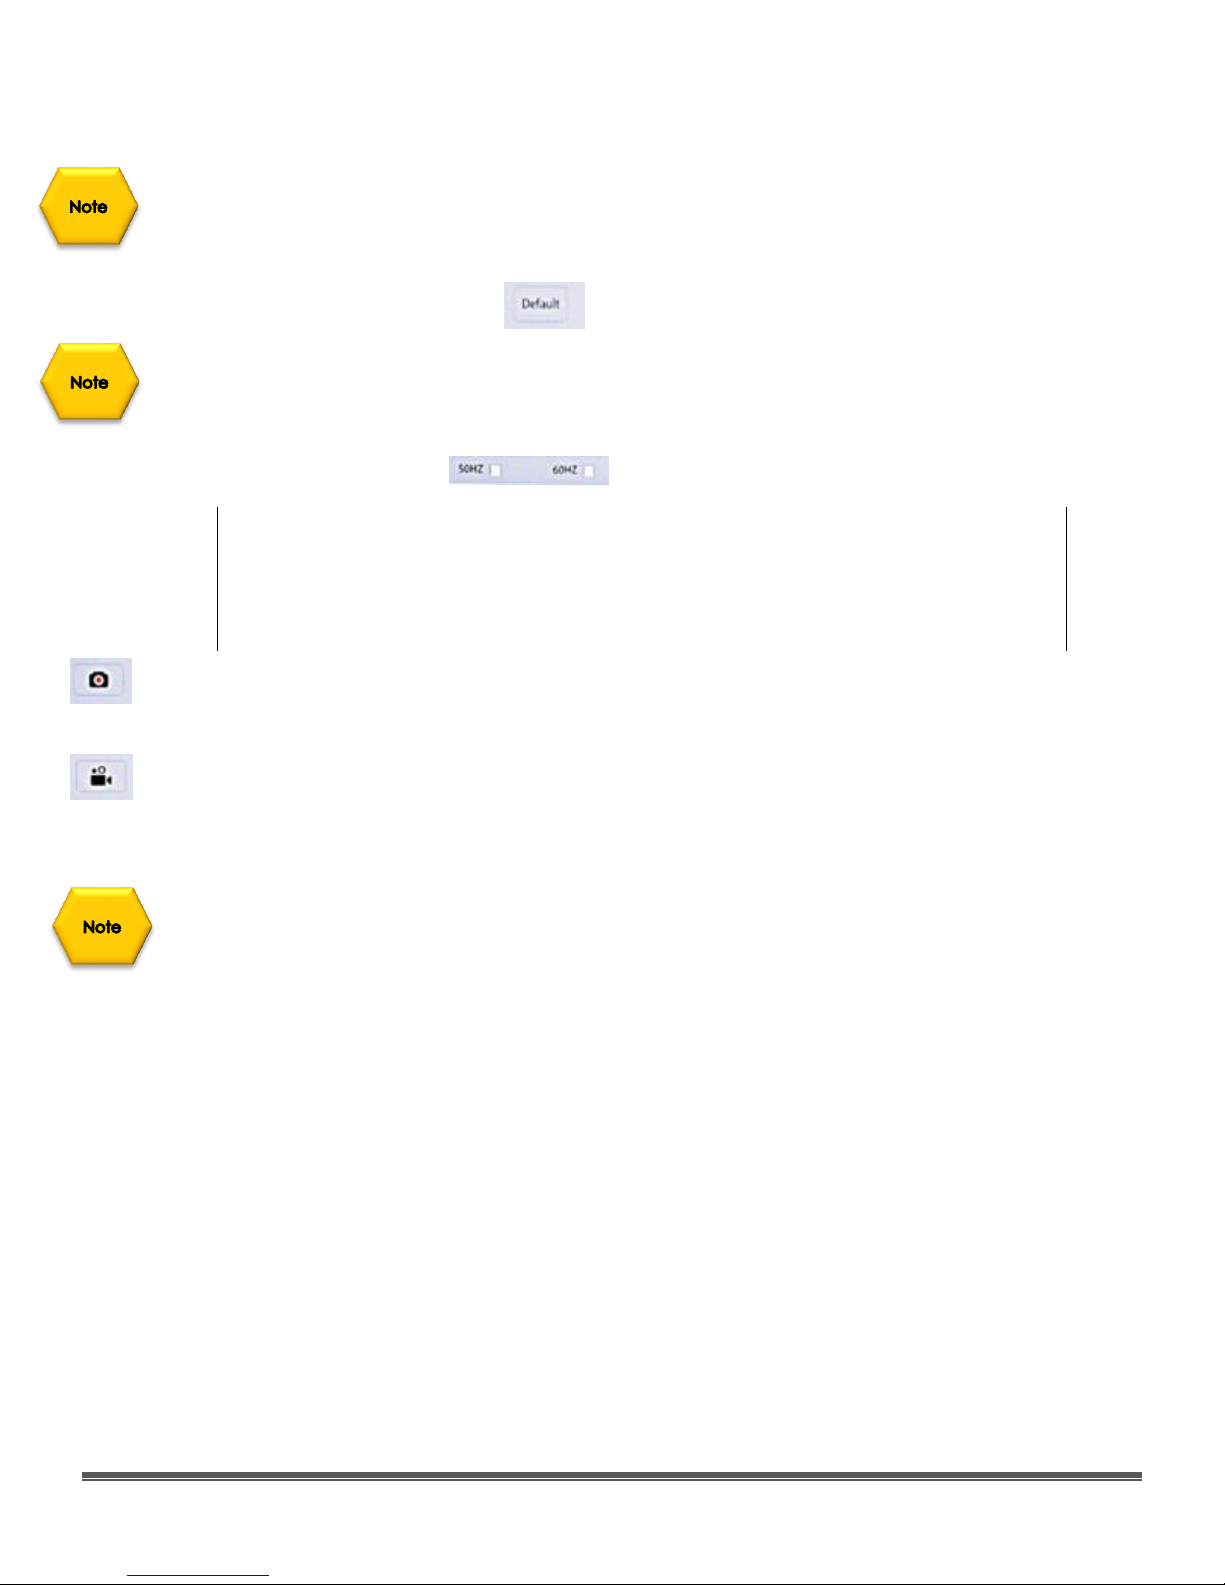
The Final three commands will allow us to tweak the display of the image
further by adjusting the Brightness, Sharpness, and Denoise values.
By using the mouse cursor, Left-Click-Hold-and-Drag the slider bar of each of the Brightness,
Sharpness, and Denoise controls to produce an image that meets your requirements.
Brightness - Traditional brightness simply brightens the entire image from the shadows to
the highlights equally. When increasing brightness, you may find that you lose
some contrast on the brightest details in the image while the rest of the
image has the same contrast as before.
Sharpness - Sharpness can be defined as edge contrast, that is, the contrast along edges
in a object in the image. When we increase sharpness, we increase the
contrast only along/near edges in the object while leaving smooth areas of
the image alone.
Denoise - All cameras produce some form of noise (especially when you increase the
exposure time), the denoise control can help eliminate the typical noise that
is picked-up. Be careful, as the more aggressive you set the denoise control,
the more often actual captured data will be removed on your image.
Balance is the key.
Step 6
Step 7
Mallincam HD-10 User Manual July 7, 2017
HD-10 User Manual Page 16
If after making control adjustment of your image and it looks worse that when you started
(this happens as you slowly learn what controls best work for your system), you can display
click on the Default Button located on the bottom right of the Control window. The
Mallincam HD-10 will reset all of the controls back to their defaults.
Your electrical power system way cause cycle flickering of the image, if this rare case
occurs click on either the 50 Hz (Europe) or 60 Hz (North America) check boxes to see if this
improves the image. Normally 60 Hz is the default setting for our equipment.
Now that you have the image tweak to your perfection (it takes a while to
learn what controls work best for your telescope combination. You now can
either Save a snapshot or start a video recording of what is being captured.
Images and recordings are saved onto your SD data card.
To save a JPEG snapshot of whatever image is currently on your monitor, just click on the
Camera Icon. The Mallincam HD-10 will automatically save the image on the SD Card (the
image name will temporarily pop-up in the middle of the screen, such as IMG0001.JPG.
To Start a .avi (VID001.AVI) recording of the images being captured on HD-10, just click on
the Video Camera Icon. The status timer will appear and the lower right side of the image
indicating how long the video currently is. To stop the recording, just click again on the
Video Camera Icon.
You can use the Browse Images Icon (from the right side of the screen), to view or delete
the saved snapshot or video file.
Mallincam HD-10 User Manual July 7, 2017
HD-10 User Manual Page 17
4. The Mallincam HD-10 with a Computer
Connecting the HD-10 to your Computer
First make sure you have the following pieces of equipment:
• Mallincam HD-10 Camera
• 1.25” C nose-piece adapter
• SD Card (inserted into SD slot on back of Camera)
• 12V Power Adapter
• USB Cable
• Recommended USB extension cable
• Laptop or Computer
First Time Installation of Software
Copy the ISCaptue Software from the provided USB Stick (or the latest download from
Mallincam.net) into folder of your choice on your computer.
Unzip the ISCapture Software
➢ Right-Click -> Extract All
Open the extracted ISCapture Folder.
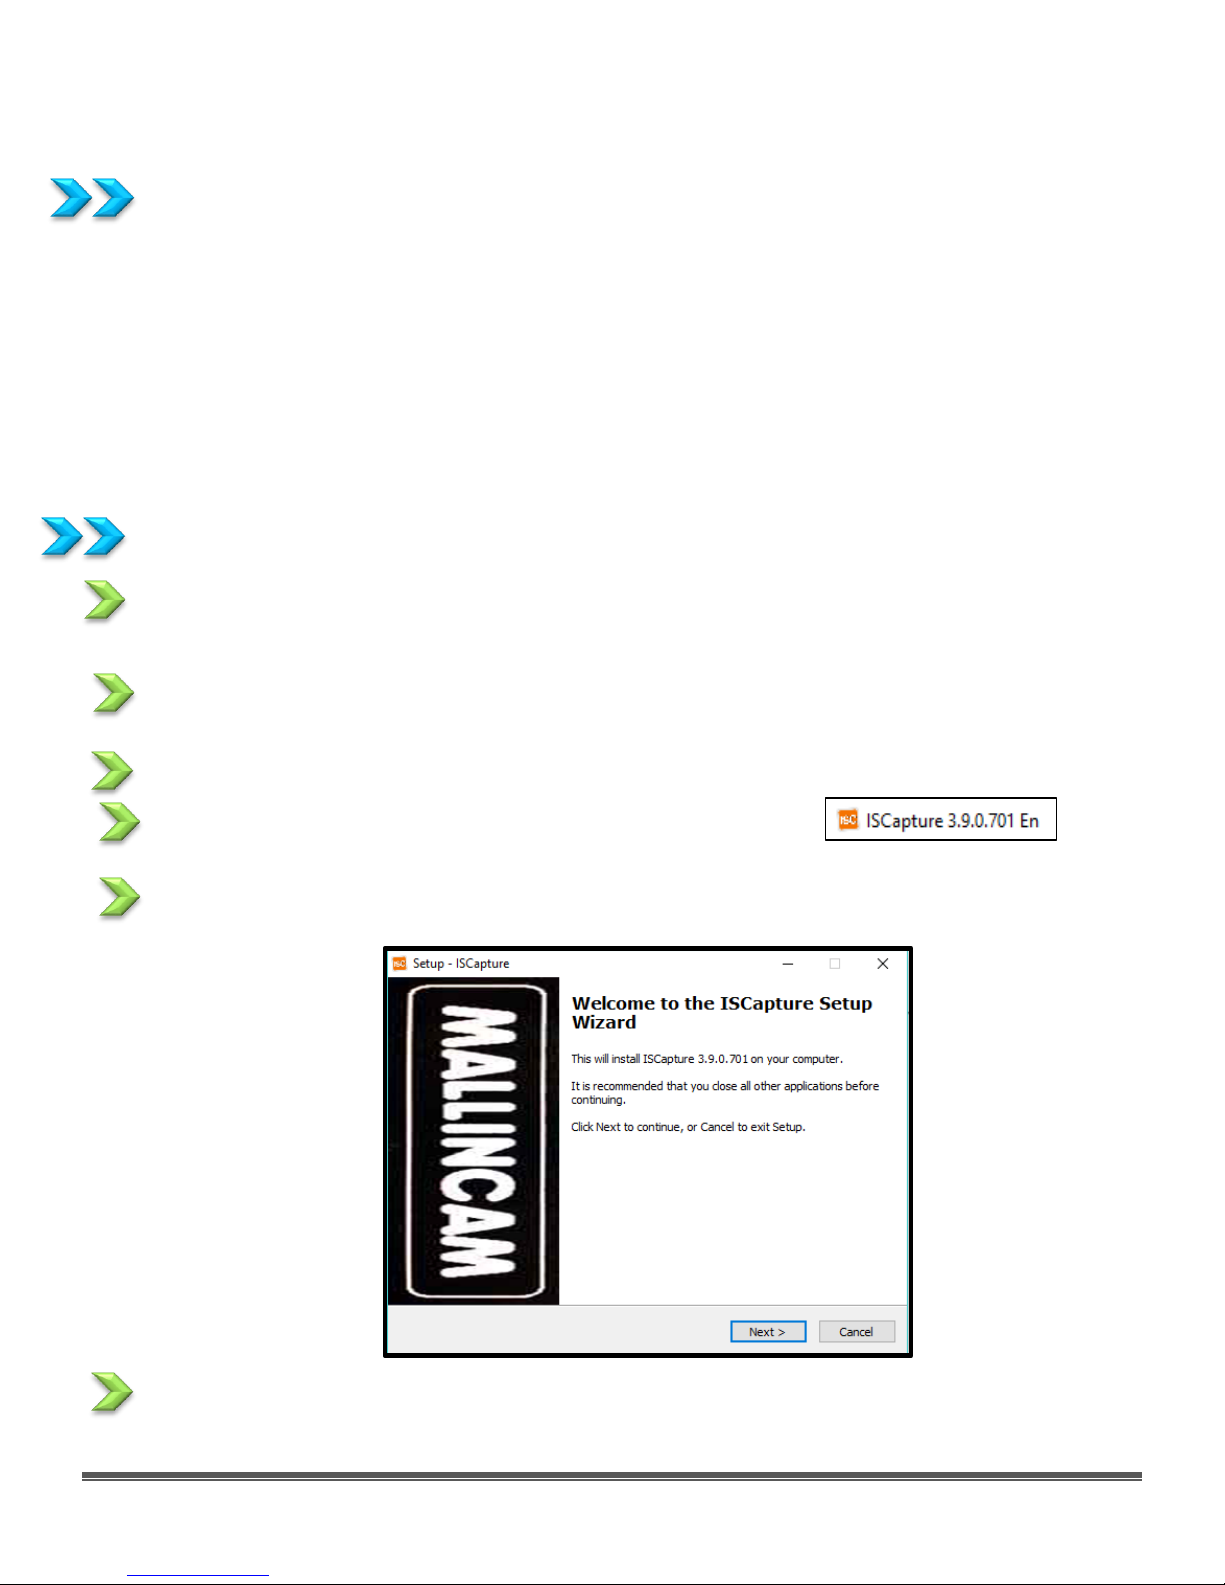
The ISCapture install program will be inside this folder.
Double-Click on the program to start the installation process.
The following window should appear:
Click on Next to continue the installation process.
Mallincam HD-10 User Manual July 7, 2017
HD-10 User Manual Page 18
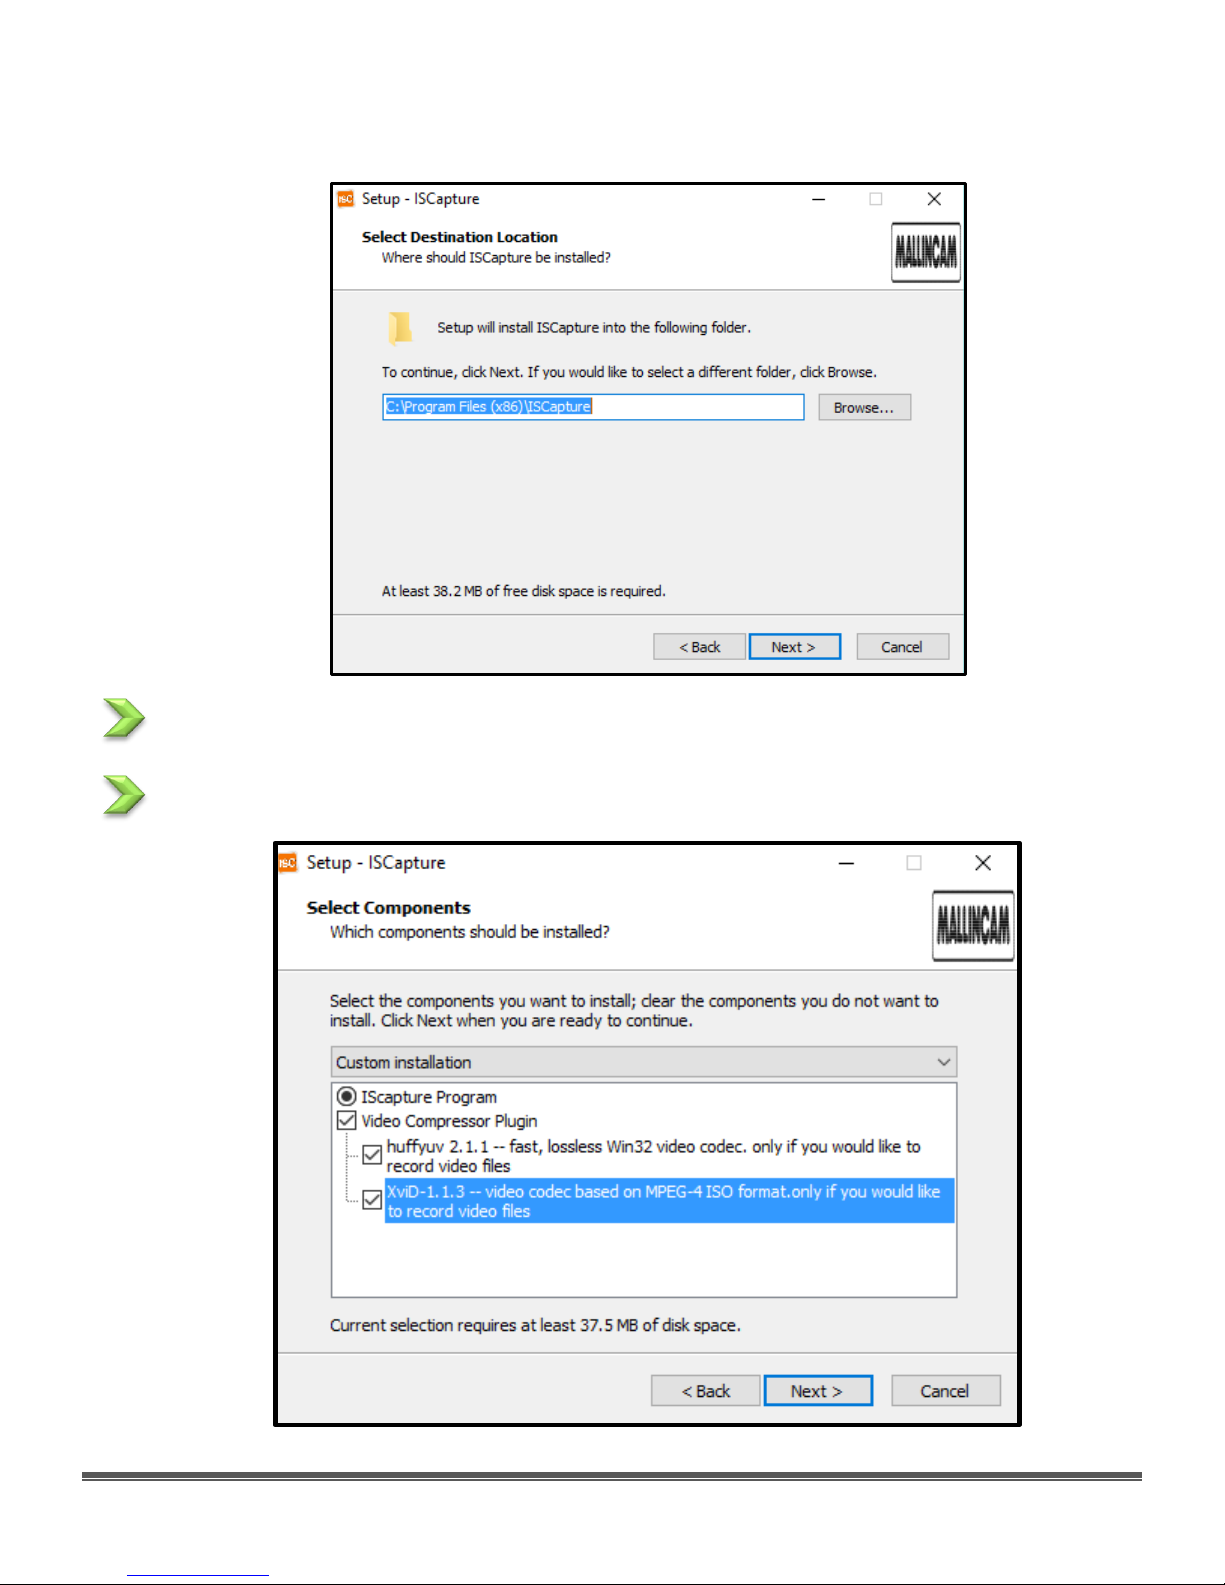
An Acceptance Window will now appear.
Either accept the file location for the ISCApture Software to be installed in or choose a folder
of your choice. We recommend accepting the default location.
Click on Next to pop-up the Codec Plugin window.
Mallincam HD-10 User Manual July 7, 2017
HD-10 User Manual Page 19
Select the codecs to include if you plan on recording your imaging.
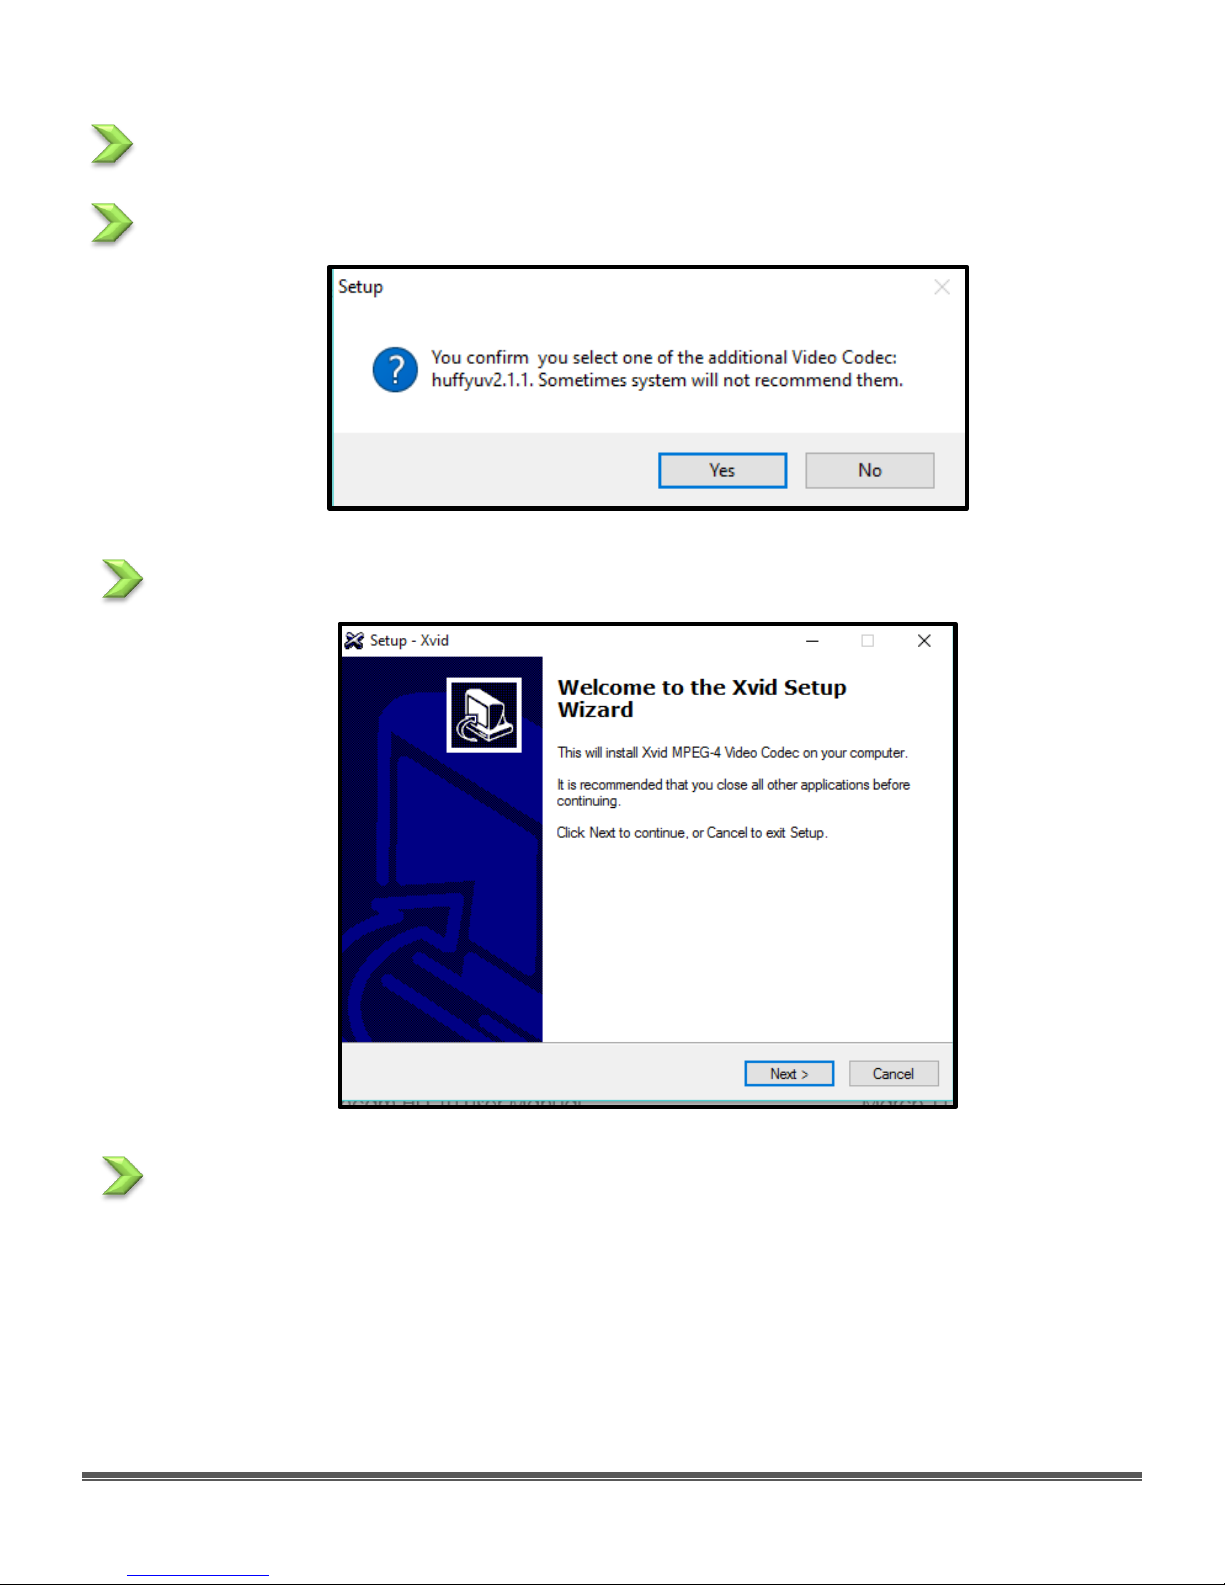
Click on Next to accept the Confirmation Windows.
Click on Yes to accept and then the Xvid Setup Window will appear.
Click on Next to accept the Window and then the Licence Agreement Acceptance
Window will appear.

Mallincam HD-10 User Manual July 7, 2017
HD-10 User Manual Page 20
Choose the “I accept the agreement” bubble, then Click on Next to accept the agreement
and then the final setup verification Window will appear.

Mallincam HD-10 User Manual July 7, 2017
HD-10 User Manual Page 21
A sequence of Windows will now appear for choosing the folder location and names. We
recommend choosing the default and selecting Next.

Mallincam HD-10 User Manual July 7, 2017
HD-10 User Manual Page 22
Once the software is installed the final Completed Window will appear to inform you that
the installation is finished.
Click on Finish to acknowledge.
Once complete, you will now have a ISCapture Icon on your desktop.

Mallincam HD-10 User Manual July 7, 2017
HD-10 User Manual Page 23
Starting on the HD-10 on the Computer
Attach the provided usb cable from the MallinCam HD-10 to a usb
port on your Computer.
Plugin the AC Power Adapter into the back of the HD-10 (a Red LED
will indicate that the camera has power)
Power on the HD-10 by pressing on the ON/OFF button located on the
back of the camera. A Blue LED should turn on.
Double-Click on the ISCapture Icon (located on your Desktop) to start the software.
The ISCapture Window should open with current image displayed in the Video window.

Mallincam HD-10 User Manual July 7, 2017
HD-10 User Manual Page 24
The ISCapture Window
The IsCapture Software Window is segmented into a few regions to make viewing and
adjusting the HD-10 camera easy and intuitive.
① The Camera Selection Bar
② Display Window.
③ Feature Tabs.
④ Image Action Tabs.
⑤ Image Tray.
The Feature Tab Panel provides a variety of Drop-down tabs to open-up more controls within
the Feature Tab Panel. When the little black triangle next to the tab descriptor is pointing to
the right, the tab is closed. When the little black triangle is pointing down, the Tab is open
(thus displaying more controls)
Clicking in the little black triangle toggles the tab from being open or closed, thus allowing
you more control of what information controls are available for you to use.

Mallincam HD-10 User Manual July 7, 2017
HD-10 User Manual Page 25
HD-10 Quick Setup and Pictorial Work-Flow
A typical workflow when using the HD-10.
Start HD-10
Stop HD-10
Set Exposure
Computer
HDMI Monitor
Adjust Image
Save Images
Exit Program
Set Exposure
Adjust Image
Save Images
Exit Program

Mallincam HD-10 User Manual July 7, 2017
HD-10 User Manual Page 26
Detailed Work-Flow Procedures
This section describes the typical procedures in imaging using a computer. For a more
detailed explanation of each control see the section HD-10 Control Software below.
Exposure
Once you have HD-10 ISCapture program up and running, you should see an image of
whatever the HD-10 camera is looking at (at whatever exposure setting the software is set
at).
At the Top of the Window you should see MallinCam HD-10 displayed in the camera
selector.
The first thing you should do (until you become more familiar with the operation of the
Camera) is to turn on the Auto Exposure. The ISCapture Software provides a couple of
locations where you can adjust the exposure:
or
But, we recommend that you use the actual Exposure Control tab from the Feature Tab.
Click on the Auto Exposure Bubble Button to activate Auto Exposure. The Mallincam HD-10
will use its internal processor to produce an exposure time that it believes is best for the
current image.
You can tweak this expose time by using the Left-Click-Hold-and-Drag technique on the
slider to the right of the Auto Exposure.
Step 1

Mallincam HD-10 User Manual July 7, 2017
HD-10 User Manual Page 27
Now if you would like to set the Manual Exposure time to the current Auto
Exposure time then follow this technique.
Click on the Manual Exposer Bubble Button to select it.
Now, Click back on the Auto Exposer Bubble Button to
again select it. Finally select the Manual Exposure Bubble
Button again, and the time that the Auto Exposure had will
automatically be set in to the Manual Exposure time
settings.
Now that you have an image with an exposure setting that produces an
image that is satisfactory to you, you should now be able to bring your
telescope in to proper focus.
Gain
When on Manual Exposure, you can also now adjust the Gain (Left-Click-Hold-and-Drag the
gain slider) to make the image brighter (larger Gain value) or dimmer (smaller Gain value).
You will get more comfortable with finding to best exposure/gain values for your image.
Play with them to see how the exposure and the gain values affects your image. Gain is a
setting that controls the amplification of the signal from the camera sensor to the screen.
Too much amplification can cause noise in the image.
Step 2

Mallincam HD-10 User Manual July 7, 2017
HD-10 User Manual Page 28
Gamma, Contrast, and Saturation
Located in the Color Control Tab are the three controls called Gamma, Contrast, and
Saturation. By using the mouse cursor, Left-Click-Hold-and-Drag the slider bar of each of the
Gamma, Contrast, and Saturation controls to produce an image that meets your
requirements.
Gamma - Each pixel in an image has brightness level, called luminance. This value is
between 0 to 1, where 0 means complete darkness (black), and 1 is brightest
(white). Different display devices (monitor, phone screen, TV) do not display
luminance correctly. So, one needs to correct them, therefore the gamma
correction function allows you to brighten the dimmer area for the image, or
darken the brighter area of the image.
Contrast - Contrast is the scale of difference between black and white in your images.
Without contrast you wouldn't have an image because there wouldn't be
any differentiation between light and dark; everything would be black, white,
or a single shade of grey somewhere in between.
Saturation - Saturation is similar to contrast, however instead of increasing the separation
between shadows and highlights, we increase the separation between
colors.
Monochrome
Some objects (the moon and the Sun in particular), can provide more detail when viewed
in Black and White. You can select this option by checking the Monochrome checkbox
located beneath the Saturation Control. Once selected, the color of the image will be
transformed into shades of grey. Unchecking the checkbox will return the image to its
colors.
Step 3
Step 4

Mallincam HD-10 User Manual July 7, 2017
HD-10 User Manual Page 29
Red, Green, and Blue
Different optical paths, and different seeing conditions can affect the color balance of your
images. By using the mouse cursor, Left-Click-Hold-and-Drag the slider bar of each of the
Red, Green, and Blue controls to produce an image whose colors meet your requirements.
Denoise and Sharpen
By using the mouse cursor, Left-Click-Hold-and-Drag the slider bar of each of the Sharpness,
and Denoise controls to produce an image that meets your requirements. The higher the
number that more aggressive the control works on your image.
Sharpness - Sharpness can be defined as edge contrast, that is, the contrast along edges
in a object in the image. When we increase sharpness, we increase the
contrast only along/near edges in the object while leaving smooth areas of
the image alone.
Denoise - All cameras produce some form of noise (especially when you increase the
exposure time), the denoise control can help eliminate the typical noise that
is picked-up. Be careful, as the more aggressive you set the denoise control,
the more often actual captured data will be removed on your image.
Balance is the key.
If after making control adjustment of your image and it looks worse that when you started
(this happens as you slowly learn what controls best work for your system), you can display
Click on the Default Button located beneath the Sharpen Control. The Mallincam HD-10 will
reset all of the controls back to their defaults.
Step 5
Step 6
Step 7

Mallincam HD-10 User Manual July 7, 2017
HD-10 User Manual Page 30
White Balance
Different planetary objects in combinations with difference
telescopes, may throw off the colour balance of the HD-10.
We can bring everything back to normal by using the White
Balance control which is located in the Main Control.
Unlock the White Balance by unchecking the Lock WB check
box.
Click on the WB Wizard button, and follow the instructions.
Even though the procedure was designed for microscopes
control, it works very well for telescopes.
Now lock the White Balance.
If you don’t like the White Balance adjustments, you can go back to the default settings by
Clicking on the Default Setting button beneath the White Balance controls.

Mallincam HD-10 User Manual July 7, 2017
HD-10 User Manual Page 31
White Balance controls are also available in the Color Control Tab,
You have the option of selection an area of your image, and using that portion of the
image as your white standard.
Click on the Area WB button, and your Mouse Arrow will turn to multiple colors. You then
Left-Click-Hold-and-Drag to draw a rectangle around the portion of your image that will be
your standard. Once you release your mouse button, you will be provided with options to
Cancel or OK to accept the area.
Click on OK.
The software will then automatically adjust your White Balance.
Beneath the Area WB buttons are to other commands, that are a work in progress.
Black Balance will provide a similar technique to White Balance but dealing with the Blacks.
Flat Fielding will help in improving your image by removing optical defects.
Currently we recommend you leave these controls alone, until the software engineers work
out the best way to implement these for astronomical objects.
If you experiment and the colors get weird and out of whack, just Click on the Default
Setting Button in the Main Control Tab.
Step 8

Mallincam HD-10 User Manual July 7, 2017
HD-10 User Manual Page 32
Histogram (Brightness)
Hiding in the Fluorescence Tab has useful tools that will
assist you in imaging astronomical objects quickly and
easily. The Live Image Histogram allows you to either
manually control the brightness of each of the channels or
let the software perform this task for you. This allows you to
pull out as much detail hidden in the image as you can.
Again, if you get messed up with in making adjustments,
this Tab provides a Default Button that will reset everything
back to the default settings.
It will take you the most amount of time to become
comfortable with the tools in this Fluorescence Tab. Don’t
be afraid to experiment with the settings.
These tools allow you to manually or automatically adjust the image levels of all color
components the image that the HD-10 camera is producing.
You have manual control of the image levels when the Auto checkbox is un-checked.
Left-Click and Hold to drag the Black, Grey, and White arrow slider underneath the Live
Histogram.
The Blue (active) Histogram provides a pictorial view of the image intensities from dark to
bright. In a dark image, the blue will be more towards the left, and in a bright image will
have the blue histogram pushed towards the right. Adjust the exposure to get a Histogram
that uses most of the window, then move the White and Black sliders to just touch the left
and right sides of the Histogram. If the arrow sliders are inside the Histogram, then the
brightness’ are clipped (which sometimes is beneficial when too bright or too dark an
image is on the screen).
This tool will take you the most amount of time to become comfortable with, use the Auto
checkbox to see how it works.

Mallincam HD-10 User Manual July 7, 2017
HD-10 User Manual Page 33
Black Arrow Slider
When moved to the right will reveal more detail in bright areas of the image, when moved
to the left will produce less detail in bright area of image
Grey Arrow Slider
When moved to the left or right, adjusts the detail in the brightness zones in the image.
White Arrow Slider
When this arrow is moved to the left, it will provide more detail in the dark areas of the
image. When it is moved to the right, it will provide less detail in the dark areas of the image.
You can manually enter in the value for the sliders if required.
Once image levels are at your satisfaction Left-Click on the Apply Button for the system to
lock in these settings.
The Default Button resets the Fluorescence settings back to normal.

Mallincam HD-10 User Manual July 7, 2017
HD-10 User Manual Page 34
Capture a Still Image
You now have your masterpiece on the screen (the Moon, a Planet), and
you would like to save it for bragging rights. But, before we perform this
task we need to tell the software the format we would like to save our
images in, and more importantly, where we would like to save our images.
We will save our images in Bitmap (bmp) format in this example.
Left-Click on the File Save Tab.
Located in the File Save Tab’s expanded window, you will
see Image File Format with a dropdown format selector
with the current chosen format (.tif in image to the right). If
not set to .bmp, then change it to .bmp.
Left-Click on the Radio Button Use File Save Config and
Check the Use Time-stamped option.
Now, for the location.
Under the Path heading, Left-Click on the Browse Button to
choose a directory (folder) location that you would like to
save your images and videos.
Note: Once the Path is selected, any images or video in
that folder location will appear in the Image Tray.
So, now it’s time to save our masterpiece.
Left-Click on the Capture Button (looks like a camera icon)
just above the Main Control Tab.
You should now see a small picture in the Image Tray of
your newly saved image with its unique name displayed
underneath it. The image is automatically saved in the
chosen directory on your computer when you Left-Click
on the Capture Button.
Step 9

Mallincam HD-10 User Manual July 7, 2017
HD-10 User Manual Page 35
Capture a Video Sequence
So, you might be thinking that still captures are good, but video captures
are better. Well, let’s save a short video of what our Mallincam HD-10 is
looking at.
Since we have already told the software which folder to save our image in (see above), it is
now time to save a video sequence. But first, notice beside the Video Button, is the Rec
Config Button (a control that allows us to set up our video recording) both being located at
the bottom of the File Save Tab.
Left-Click on Rec Config and a Video Compressor Settings pop-up window will appear.
We will leave the codec at No Compressor, and will tell the software to automatically save
10 seconds worth of video.
Left-Click on the Auto, and set Automatic Stop to 10 Sec. Once set, Click on the OK button.
We are now ready to save our video sequence.
Left-Click on the Video Button (has video camera icon).
The computer will save about 10 seconds worth of video in the location specified in the Path
directory. Once completed, you will see a small preview image (white with black borders on
the top and bottom) appear in the Saved Images window. The file name will be numbers
with an avi extension. That is your saved video file. You can view that file with any video
viewing software (such as Window Media Player, VLC, etc).
Step 10

Mallincam HD-10 User Manual July 7, 2017
HD-10 User Manual Page 36
5. HD-10 Control Software
This section covers in detail all the controls and settings in the various regions of the HD-10 Control
Software. It will take a while to become comfortable with them, but the reward is worth the effort.
HD-10 Control Bar
The top of the HD-10 Control Software window contains a Control Bar.
The Control Bar will allow you to:
• Select a HD-10 camera (if you have more than one.)
• Access the Help Manual (when available) and check current Software Version Number.
• Minimize and resize the software window.
• Shut down the HD-10 Control Software.
Connected Camera Selector
If you have installed more than one Mallincam HD-10 camera then this control will provide you the
option of selecting a HD-10 camera that you have currently connected to your computer. Note:
You will need to Stop the live capture display from the Capture Tab before the software will allow
you to choose an alternate camera. If you only have one HD-10 camera attached to your
computer then that model of camera will automatically appear in this window.
Action Tabs
The Mallincam HD-10 Control Software provide you with two major Action Tabs: Capture, and
Browse.
• The Capture Tab displays what the HD-10 is currently imaging in real time and allows you to
adjust the image and exposure values, save still shots or save video sequences.
• The Browse Tab allows you to load a saved image and check its properties or rename it.

Mallincam HD-10 User Manual July 7, 2017
HD-10 User Manual Page 37
Capture Tab
The Capture Tab is the main Tab used for viewing your live images
form the HD-10 camera. The top line will indicate the current frame
rate in fps (frames per second). The faster your computer (or the
lower resolution of your HD-10) the higher the display rate.
Just underneath your will see two buttons Capture and Stop. Pressing
the Capture button will cause the software to take a snapshot of the
current on-screen image (location and resolution are located in the
File Save Tab).
When is present, then the HD-10 is displaying continuous
image updates in real time at the current exposure rate.
➢ Pressing will change the icon to and the
screen will freeze at the current frame.
➢ Again pressing will have the HD-10 start displaying
updated images again and changing the icon back to the
symbol
Finally, the Capture Tab has 6 Feature Tab Lines: Main Control, File Save, Exposure Control, Color
Control, Fluorescence, and Parameter. Each of these Tabs can be expanded by Left-Clicking on
the symbol.
Main Control Tab
Main Control Tab allows you to set the resolution in which your
Mallincam HD-10 camera is both displaying (Preview Resolution) the
image and when it saves the images (Capture Resolution). In this tab
you can also quickly adjust the Exposure rate as well as set the White
Balance.
To open up the Main Control Tab, just click on the symbol.

Mallincam HD-10 User Manual July 7, 2017
HD-10 User Manual Page 38
Feature
Title
Usage
Live Image
Resolution
This drop-down selector allows you to choose from
a list of available resolutions that your HD-10
camera can display in. The smaller the resolution (2
x 2 binning) the faster the frames per second the
HD-10 can produce. The different resolutions have
different maximum exposure settings.
The HD-10 currently only provides a 1920 x 1080
resolution.
Captured
Image
Resolution
This drop-down selector allows you to choose from
a list of available resolutions that your HD-10
camera can save the images in. The smaller the
resolution (2 x 2 binning) the smaller files. For video,
the HD-10 will be able to save more frames per
second in the video sequence when a smaller
resolution is chosen.
The HD-10 has two Capture Resolutions available:
➢ 1920 x 1080
➢ 3264 x 1836
Resolution Lock
By Clicking on this symbol, you can have the
Capture Resolution automatically match the
Preview Resolution.
Click on the Lock symbol again and it will remove
the connection lines and each resolution can be
set independently from the other.
Quick Exposure
Adjustment
By Holding Down the Left-Mouse Button, you can
drag the slider to the right or left to increase or
decrease the exposure setting. You may find it
easier to just Left-Click on the Slider Bar Arrow,
then use your left or right arrow keys on your
keyboard to adjust the exposure setting.
As you make exposure adjustments you will notice
the exposure value change in the display window
above the Exposure slide bar.
By Checking the Auto Exposure Check-Box, you
will allow the software to choose what it feels is the
optimum exposure. If you de-select Auto Exposure,
you will again have full control, and the system will
display what it had chosen as the optimum
exposure value in the display window.

Mallincam HD-10 User Manual July 7, 2017
HD-10 User Manual Page 39
Lock WB
By Left-Clicking on this check-box the software will
lock the current white balance.
White Balance
Wizard
This Wizard was designed for a microscope
application, but I found it works well for astronomy
(I set it on a day time object) then activate the
Wizard. Just follow the instruction on the screen
and compare results.
Default Settings
Left-Clicking on this button restores all of the
parameters to their default settings. This is a very
useful tool, as sometimes you get lost in all of the
tuning that you have been doing, and you are
having difficulties getting the image back to a
view that is decent.
File Save Tab
The File Save Tab contains all the options that allow you to choose
what format and at what location you would like to save your
images in.
You can also configure the type of compression to be used when
saving your avi videos, along with how long each video segment
should be.
The File Save Tab also provides some naming options that can
make managing your images easier.
To open up the File Save Tab, just click on the symbol

Mallincam HD-10 User Manual July 7, 2017
HD-10 User Manual Page 40
Feature
Title
Usage
Saved Image
Format
This drop-down selector allows you to choose from
a list of available formats that the HD-10 software
can save your image in.
Formats include:
• bmp (Bitmap) – can be read by most
graphics programs
• jpg (JPEG) a compressed format for saving
files
• tif (TIFF) this is a tagged Image File Format, It
is used by most astronomical image
software.
Save Structure
When the Use File Save Dialog is selected, then
every time you Left-Click on the Capture or the
Video Buttons, a file save window will pop-up
allowing you the choice of file name, file location
and file format.
When the Use File Save Config is selected, the
system will automatically use the File Name and
Path settings to save the image or video. See
below for instructions on File Name and Path.

Mallincam HD-10 User Manual July 7, 2017
HD-10 User Manual Page 41
File Name
When the Use Time-stamped is selected
(checked), the image or video will be saved using
a Time Format structure. This structure is in the form
of MMDDHHmmss
➢ MM –two digit Month
➢ DD – two digit Day
➢ HH – two digit Hour
➢ mm – two digit Minute
➢ ss –two digit Second
When Use Time-stamped is un-checked then you
can enter a name into the box below. Note: you
can leave the name fixed, and any successive
Captures or Videos will add a number following the
name. For example:
➢ MC
➢ MC_1
➢ MC_2
File Path
You can use the Browse Button to have a pop-up
window appear that will allow you to choose a
location where you would like the software to save
your images or videos. Once chosen, any current
images or videos in that folder will appear in the
Image Tray.
The current location will appear in the Path Box
above the Browse Button.
Continuous
Shooting
Left Click on the Config Button and a pop-up
window will appear:
Using this window select an interval time between
each image, and the number of images to take.
Click on the OK button to accept.

Mallincam HD-10 User Manual July 7, 2017
HD-10 User Manual Page 42
Now if the Continuous Shooting checkbox is
selected, then when you Click on the
Button (located at top of the Capture Tab), the
software will start the image taking process saving
them in the designated Path with the chosen File
Name settings indicating the image names (name
or time stamped) to use.
Note: to abort the Continuous Shooting run, Click
on the Button next to the
Button. Don’t forget to Click on the now displayed
Button to have the software display the
real-time video image again.
Record Video
Clicking on this button starts the Video Capture
routine as determined by the settings in the Rec
Config button.
Once the recording has started, you can again
Click on the Video Button to abort the process.
The name and location of the video will be
determined by the settings in the File Name and
Path settings.
Video Format
It is here that you choose
which compression
Codec to use (we
recommend you choose
No Compressor so that
you have complete
video data).
You can choose to either
Manually Stop the video
capture process, or to
have the software
Automatically Stop the capture process after any
number of seconds or frames.
Click on the OK Button to have the software
accept your settings.

Mallincam HD-10 User Manual July 7, 2017
HD-10 User Manual Page 43
Note: Large time or frame values will create large
video avi files. Sometimes the length of these files is
larger than the Windows avi format allows and the
image may look totally Black when being viewed
from a video viewer such as Windows Media Player
(the avi index is not created correctly). If you are
having problems viewing your video file, we
recommend that you use VirtualDub to load and
fix the avi file (it will fix it automatically). You can
then have VirtualDub re-save the fixed file.

Mallincam HD-10 User Manual July 7, 2017
HD-10 User Manual Page 44
Exposure Tab
It is here in the Exposure Tab that you have complete control of the
exposure process. You can have the HD-10 camera try to pick the
best exposure for the current image, or you can take control of the
exposure yourself.
You can adjust the exposure either by entering an exposure value
or by sliding an exposure bar. This tab also allows you to adjust the
Gain of the camera. Finally, you can also choose the Frame Rate
(Normal or High), with the Data Width is fixed at 8 Bit, to suit your
needs.
To open up the Exposure Tab, just click on the symbol
Feature
Title
Usage
Auto Exposure
When Auto Exposure is selected, the software will
continuously attempt to find the best exposure
setting required to display the image being
captured by the HD-10 camera. You will now also
have the ability to adjust this slider.
This is the Auto Exposure Target Value slider. You
use this slider to set a reference exposure time for
the Auto Exposure to target on. For example, if the
image you are looking at is dim, you would move
the slider to the right (higher value), thus instructing
the Auto Exposure that it will need to start looking
at longer exposure times.
Since the Auto Exposure is a continuous process,
once you have determined that the image is
correctly exposed, you can lock (pause the Auto
Exposure process) by Left-Clicking on the
symbol. The software will now also indicate in the
Exposure Time Window, what the system is using for
the current exposure if you lock then unlock then
lock again.

Mallincam HD-10 User Manual July 7, 2017
HD-10 User Manual Page 45
Manual
Exposure
This setting allows you to manually adjust the
Exposure Time for the HD-10 camera. You will
currently be able to adjust the time from about 0
seconds to 10 seconds.
Once selected you can now adjust the exposure in
several ways.
Method 1
The first method is to actually enter in an exposure
time into the Exposure Time Window.
Choose either the (M)inute, (S)econd,
(m)illisecond, or (μ)second Window and enter in a
value from the keyboard. Once you have started
entering a value the symbol beside the
numbers will change to a green check mark, .
Once you have finished entering in the value, you
will need to Left-Click on the symbol to have
the software accept your entered value.
Method 2
The second method is to Left-Click on the up and
down arrows ( ) adjacent to the time value you
are interested in changing. This will scroll up or
down the time values and you will immediately see
the changes on the image.
Method 3
The third method allows you to slide the Exposure
Slider Arrow.
Left-Click and Hold the mouse button and drag
the slider to the left or right. This rapidly adjusts the
Exposure times from shortest to longest exposure
values (currently, from 0 seconds to 10 seconds on
HD-10). Alternatively, if you Left-Click on the
Exposure Slider Arrow, you can then use the left
and right arrow keys on your keyboard to adjust
the Slider (this gives you fine mS adjustments).

Mallincam HD-10 User Manual July 7, 2017
HD-10 User Manual Page 46
Gain
This control allows you to adjust the Gain on the
camera. The higher the value the brighter the
image will become.
• Left-Click and Hold to drag the slider arrow
along the slider to adjust the gain.
• Left-Click on the slider arrow, the use the left
and right keyboard arrows to adjust the
gain.
When using too high a gain you can amplify noise
in the image.
Frame Speed
You can adjust the Frame per Second rate by
either choosing the Normal or the High.
When set to Normal, you can obtain a lower frame
rate than when set to High. The Normal setting also
allows for a longer maximum exposure time, while
the High selection will reduce the maximum
possible exposure time.
Data Width
You can adjust the number of data bits to use for
the displaying the image.
16 bit contains more data information, thus puts
more strain on the cpu of your computer.
Theoretically 8 bit provides 2^8 = 256 grey levels to
represent the image, while 16 bit provides 2^16 =
65536 grey levels.
Note: Either setting saves the image at 24 bits with
the HD-10 series of cameras.

Mallincam HD-10 User Manual July 7, 2017
HD-10 User Manual Page 47
Color Control Tab
It is here in the Color Control Tab that you can adjust the visual
appearance of the displayed image. You have the ability to adjust the:
• Gamma
• Contrast
• Saturation
• Color or Monochrome
• White Balance
• Red Balance
• Green Balance
• Blue Balance
• Denoise
• Sharpen
You will spend some time in this tab tweaking your image to produce a
final output that matches your equipment. If you ever get lost in the
image, the Color Control Tab provides a Default Button to set the image
back to the default settings.
Feature
Title
Usage
Gamma
This control allows you to adjust the Gamma, that
is, how the brightness is distributed across the
spectrum of the monitor. You adjust the Gamma
value to obtain the correct reproduction of
intensity of the image on your monitor.
To adjust the Gamma:
• Left-Click and Hold to drag the slider arrow
to the left or right.
• Left-Click on the slider arrow and use the
keyboard’s left and right arrow keys to
move the slider.
Adjust the Gamma value to produce the best
image for your equipment. The default value for
Gamma is 0, and this value is recommended for
most situations.

Mallincam HD-10 User Manual July 7, 2017
HD-10 User Manual Page 48
Contrast
This setting allows you to manually adjust the
Contrast of the image, that is, the difference scale
between dark and light parts of your image.
A high contrast value will make the shadows
become darker and highlights become brighter,
thus loosing image details.
To adjust the Contrast:
• Left-Click and Hold to drag the slider arrow
to the left or right.
• Left-Click on the slider arrow and use the
keyboard’s left and right arrow keys to
move the slider.
Adjust the Contrast value to produce the best
image for your equipment. The default value for
Gamma is -20, but I find the contrast value of 0 a
great place to start.
Saturation
This control allows you to adjust the Saturation on
the camera, that is, the intensity of the color in the
image. The higher the value the more intense the
colors of image will become.
To adjust the Saturation:
• Left-Click and Hold to drag the slider arrow
along the slider to adjust the gain.
• Left-Click on the slider arrow, the use the left
and right keyboard arrows to adjust the
gain.
The Saturation slider can only be adjusted if the
Color Enhancement box is checked (see below).
Color /
Monochrome
To make the color image for vivid, uncheck the
Monochrome box, then use the above Saturation
Control to enhance the colors.
Checking the Monochrome box gives you a grey
scale image.

Mallincam HD-10 User Manual July 7, 2017
HD-10 User Manual Page 49
White
Balance
These controls allow you to control the White
Balance for your image, that is, get the colors of
your image as accurate as you can.
To obtain the best white balance use the following
procedures:
• Move to and Image a blank area
(preferably white) or blank object.
• Left-Click on the Area WB Button (then Left-
Click and Hold to draw rectangle around
blank area).
• Software will correct the colors of the image
automatically.
• Move back to you object.
You can then lock in the White Balance by
checking the Lock WB checkbox.
Black
Balance/Flat
Fielding
Just as in using the White Balance, you can Click
the Black Balance button. You will notice that the
Red, Green, and Blue color balance values are all
set to 0.78.
To undo the Black Balance control, just click on
the Default Button at the bottom of the Color
Control Tab.
Flat Fielding is a work in progress, when the
software tries a remove any optical distortions.
Just click on the Flat Fielding button to activate
(the checkbox will become checked), and
uncheck the checkbox to disable the process.
Red Balance
This control allows you to control the intensity of
Red color in your image.
To adjust this parameter:
• Left-Click and Hold on the slider arrow to
drag it to the left or right to adjust the Red
intensity.
• Left-Click on the slider arrow and then use
the left or right arrow keys on your keyboard
to move the slider.

Mallincam HD-10 User Manual July 7, 2017
HD-10 User Manual Page 50
Green Balance
This control allows you to control the intensity of
Green color in your image.
To adjust this parameter:
• Left-Click and Hold on the slider arrow to
drag it to the left or right to adjust the Green
intensity.
• Left-Click on the slider arrow and then use
the left or right arrow keys on your keyboard
to move the slider.
Blue Balance
This control allows you to control the intensity of
Blue color in your image.
To adjust this parameter:
• Left-Click and Hold on the slider arrow to
drag it to the left or right to adjust the Blue
intensity.
• Left-Click on the slider arrow and then use
the left or right arrow keys on your keyboard
to move the slider.
Denoise
All cameras produce some form of noise
(especially when you increase the exposure time),
the denoise control can help eliminate the typical
noise that is picked-up.
To adjust this parameter:
• Left-Click and Hold on the slider arrow to
drag it to the left or right to adjust the
Denoise intensity from a range of 0 to 7.
• Left-Click on the slider arrow and then use
the left or right arrow keys on your keyboard
to move the slider
Be careful, as the more aggressive you set the
denoise control, the more often actual captured
data will be removed on your image. Balance is
the key.

Mallincam HD-10 User Manual July 7, 2017
HD-10 User Manual Page 51
Sharpen
This control allows you to adjust the Sharpness of
the camera, that is, how distinct the image looks.
The higher the value the more precise the edges of
image will become.
To adjust the Sharpness:
• Left-Click and Hold to drag the slider arrow
along the slider to adjust the Saturation.
• Left-Click on the slider arrow, the use the left
and right keyboard arrows to adjust the
Saturation.
Adjust the Sharpness value to produce the best
image for your equipment. The value for Sharpen
start at 0 and can go as high as 7.0.
Default
Resets all of the adjusted parameters in the Color
Control Tab back to their defaults.
Fluorescence Tab
The Fluorescence Tab has useful tools that will assist you in
imaging astronomical objects quickly and easily. The Live Image
Histogram allows you to either manually control the brightness of
each of the channels or let the software perform this task for
you. This allows you to pull out as much detail hidden in the
image as you can.
Again, if you get messed up with in making adjustments, this Tab
provides a Default Button that will reset everything back to the
default settings.
It will take you a while to become comfortable with the tools in
this Fluorescence Tab. Don’t be afraid to experiment with the
settings.

Mallincam HD-10 User Manual July 7, 2017
HD-10 User Manual Page 52
Feature
Title
Usage
Blacklevel
This control (which is currently not activated) allows
you to adjust the BlackLevel, that is, how the
brightness level at the darkest part of the image is
distributed. The larger the value the more detail
that can be seen in the dark areas of the image.
To adjust the BlackLevel:
• Left-Click and Hold to drag the slider arrow
to the left or right.
• Left-Click on the slider arrow and use the
keyboard’s left and right arrow keys to
move the slider.
Adjust the BlackLevel value to produce the best
image for your equipment. The default value for
BlackLevel is 1.
Histogram
These tools allow you to manually or automatically
adjust the image levels of all color components
the image that the HD-10 camera is producing.
You have manual control of the image levels when
the Auto checkbox is un-checked.
Left-Click and Hold to drag the Black, Grey, and
White arrow slider underneath the Live Histogram.
The Blue dynamic Histogram provides a pictorial
view of the image intensities from dark to bright. In
a dark image, the blue will be more towards the
left, a bright image will have the blue histogram
towards the right. Adjust the exposure to get a
Histogram that uses most of the window, then
move the White and Black sliders to just touch the
left and right sides of the Histogram. If the arrow
sliders are inside the Histogram, then the
brightness’ are clipped (which sometimes is
beneficial when too bright or too dark an image is
on the screen).
This tool will take you the most amount of time to
become comfortable with, use the Auto checkbox
to see how it works.

Mallincam HD-10 User Manual July 7, 2017
HD-10 User Manual Page 53
Black Arrow Slider
When moved to the right will reveal more detail in
bright areas of the image, when loved to the left
will produce less detail in bright area of image
Grey Arrow Slider
When moved to the left or right adjusted the detail
in the brightness zones in the image.
White Arrow Slider
When this arrow is moved to the left, it will provide
more detail in the dark areas of the image. When it
is moved to the right, it will provide less detail in the
dark areas of the image.
You can manually enter in the value for the sliders
if required.
Once image levels are at your satisfaction Left-
Click on the Apply Button for the system to lock in
these settings.
The Default Button resets the Fluorescence settings
back to normal.
Black Balance
This control will automatic balance the Red, Green,
and Blue settings (all three will be set to 0.78).
To turn off the Black Balance, use the Default
button located in the Color Control Tab.
Capture Mode
This Control is planned for future releases. Its
purpose is to improve the capture quality of
images taken from the Mallincam HD-10 camera.

Mallincam HD-10 User Manual July 7, 2017
HD-10 User Manual Page 54
Parameter Tab
Because of the varied setting adjustments that can be made
when fine tuning the image, the software provides this Parameter
Tab to save those settings. The Parameter Tab will provide you the
ability to save up to 4 Parameter sets. Each set contains the
following information:
• Exposure Time
• Gain
• Data Width
• Gamma
• Contrast
• Saturation
• Color Enhancement
• Monochrome
• RGB Gain
• Black Levels
To save a Parameter Setting
➢ Enter a Name you will use for the current settings in the available Drop-down Box.
➢ Left-Click on the Save Button.
The Software will pop-up a window letting you know that it successfully saved the Parameter
Settings. Left-Click on OK to acknowledge the message.
To Load a previously saved Parameter Setting
➢ Left-Click on the Button to open the Drop-Down Menu.
➢ Left-Click on the Parameter Setting Name that you would like to use.
➢ Left-Click on the Button to activate those settings.
To Delete a Parameter Group Setting
➢ Left-Click on the Button to open the Drop-Down Menu.
➢ Left-Click on the Parameter setting Name that you would like to delete.
➢ Left-Click on the Button to remove those group settings.

Mallincam HD-10 User Manual July 7, 2017
HD-10 User Manual Page 55
Capture Tab Action Keys
On the right-hand side of the HD-10 Control Software screen you will see Action keys with symbolic
icons. The action keys for the Capture Tab is slightly different for the action keys for the Browse Tab.
Just Left-Click on the icon and the software will perform its task immediately.
The following Action Keys are available when the Capture Tab is active
Flips the image Horizontally.
Flips the image Vertically.
Increases the zoom factor on the image (the zoom
percent is displayed at top of Action Keys bar).
Decreases the zoom factor on the image (the zoom
percent is displayed at top of Action Keys bar).
Sets the zoom factor to 100%.
Sets the zoom factor to fit the complete image in window.
Uses Full Screen for the image (click on Exit, to return to normal screen).
Allow you to Crop out all but a small window (once cropped,
you can zoom in or out on this piece).
Resets the cropped image back to normal.

Mallincam HD-10 User Manual July 7, 2017
HD-10 User Manual Page 56
Browse Tab
The Browse Tab is the location where you will examine saved images
from this session or from previous sessions. You can think of this Tab
location as the Image Management area of the Software.
The Browse Tab will have its own set of Action Keys located on the
Right of the screen to speed up the process of maintaining the
current image.
Any image that is selected from the Image Tray will be loaded into
the main Display Zone, and the Image details will be displayed in the
Browse Tab.
The Browse Tab will display the following data about the image:
• File Name (extension determines format of image).
• Date and Time image was taken.
• Data Bit value of image.
• Image size.
• Any notes that you added about the image.
You can also Left-Click on the FileName Window and can change
the name of the current image, or Left-Click in the Note Window and
add or change the comments about the image. Left-Clicking on the
Save Button will save the data in the current Path location.
Changing Path Location
You can Load images from other directories by Left-Clicking on the
Browse Button and choosing a directory of interest. The software will
automatically load the images into the Image tray for you, and will
change the Path to represent the now chosen Folder.
Don’t Forget that you can use the Action Keys from the Right side of the screen to: Zoom in and
out, Print, Delete, and a variety of other actions (see section on Action Keys for more detail).

Mallincam HD-10 User Manual July 7, 2017
HD-10 User Manual Page 57
Browse Tab Action Keys
On the right-hand side of the HD-10 Control Software screen you will see Action keys with symbolic
icons. The action keys for the Browse Tab is slightly different for the action keys for the Capture Tab.
Just Left-Click on the icon and the software will perform its task immediately.

Mallincam HD-10 User Manual July 7, 2017
HD-10 User Manual Page 58
6. Appendix
Appendix A: Connecting to Night Skies Network (NSN) using
the HD-10 Software
Introduction
I found that when I first started connecting to NSN, things started happening too fast for me to keep track of
everything at once. So, pre-planning was the most the most crucial step for me. I found that by doing test runs in the
comfort of my house allowed me to develop my techniques that work for the equipment and software that I use.
Below are the results and steps that I use to broadcast on NSN, feel free to follow them and/or made modification as
you deem as necessary.
Computer real-estate will be your nemesis. So, the size of the monitor (laptop), number of screens
that you are using, and the number of software programs being used simultaneously will dictate how
you will manage your windows. I will describe how I have organized my windows under a variety of
situations (1 computer, 1 computer with 2 monitors, which software packages am I using, and what
am I trying to do this session). Remember, it’s all about having fun, and time and patience are your
best friends (not to mention all the guys and gals, and the Yahoo – MallinCam site :
https://groups.yahoo.com/neo/groups/mallincam/conversations/messages
One of the most important decisions you will need to make with broadcasting the image of the HD-10 is what Video
capture software are you going to use. Some simple suggestions:
The HD-10 Control Software is not capable of modifying the Video Image and having that Video Image be directly
captured by NSN Flash. So, if you want to use all the features of the HD-10 software and broadcast those results, as
well as save screen shots and videos of your images, then we need another program to capture the HD-10’s Software
output and have the output from that program linked to NSN’s Flash grabber.
You currently have three choices for that other program: Splitcam, Manycam, and WebcamMax. All three have about
the same features, some of these have versions that will cost you, but all have a version that is free (reduced
functions, advertisements, etc…). My current program of choice is Splitcam (I can live with the Advertisements), but
all three work just as well. Find the video capture software that works best with your browser.
You will then use Manycam/Splitcam/Webcam Max along with HD-10 Control Software.
Plug in the HD-10 camera into an USB Port on your computer.
Always use the same port for your connected devices. I even mark on my laptop which usb
port is for which device.
Note
Note
Step 1

Mallincam HD-10 User Manual July 7, 2017
HD-10 User Manual Page 59
Double Click on the HD-10 Control Software icon.
Get the image of your object on the Image Window of the HD-10 Software, adjust the settings on the software
for your planned object and size the window so you have room for other software on your monitor real-estate.
If you have a dual Monitor system, move the HD-10 Software to the second monitor.
During your initial NSN experience, you will find it difficult to even get the object of interest
onto the HD-10 Software window. Spend some time playing and adjusting the settings prior
to connecting to NSN. As you become more comfortable, you will find that you won’t worry
about this step and will adjust the setting while connected to NSN (with the whole universe
watching you tweak it live).
Start Manycam/Splitcam/WebcamMax
Size the Manycam/Splitcam/WebcamMax window so that is beside the HD-10 Software
Window and you can see both with little overlap. If you have a dual monitor system you can
slide both the HD-10 Software Window and the Manycam/Splitcam/WebcamMax window to
the second monitor.
Have Manycam/ Splitcam/Webcam Max grab the Desktop image
All of these packages have the ability to get a Desktop Image. Choose this option and overlay
the sizing window on top of your HD-10 Software Image Window. You may need to play with
the sizes until you obtain the ideal combination of both that fit in your screen. You want to
ensure that you get a good image of whatever the HD-10 Software is looking at inside the
Manycam/Splitcam/Webcam Max window.
Note
Note
Note
Step 2
Step 3

Mallincam HD-10 User Manual July 7, 2017
HD-10 User Manual Page 60
Adjust the Resolution and frames/second (fps) value on Manycam/Splitcam/WebcamMax
This will be trial and error; it all depends upon resolution, bandwidth, and what over
members on NSN experience from your broadcasted image. You will end up adjusting both
on the Manycam/Splitcam/Webcam Max side as well and on the NSN side to get the best
image. A helpful hint: I slide over the Manycam/ Splitcam/Webcam Max window so that
some of the text appears in the Manycam/Splitcam/Webcam Max window. Can the members
on NSN read the words? If not, adjust. Remember, this may take a couple of sessions until
you obtain the ideal resolutions for your particular setup. For me I have set Splitcam at
800x800 and NSN at HDCAM.
Minimize the Manycam/Splitcam/Webcam Max software window
Click on the little underscore on the top right side of the Manycam/Splitcam/Webcam Max window. This will
eliminate the Manycam/Splitcam/Webcam Max window from your desktop (it should now appear on the
bottom of your desktop monitor), but note that the software is still running and still has hold of your desktop
(HD-10 VIDEO Software) image location.
This allows you to select
the size and location of
the desktop that you
want on SplitCam. Just
slide and adjust the
overlay on top of your
HD-10 Software image.
Note
Step 6

Mallincam HD-10 User Manual July 7, 2017
HD-10 User Manual Page 61
Do not move the HD-10 Window around your desktop when broadcasting, since Manycam
/Splitcam/WebcamMax is just grabbing the real-estate location that currently your HD-10
Software image is situated at. If you move the HD-10 Software Window, then Manycam
/Splitcam/ Webcam Max will still grab the desktop location, but may not grab the whole HD10 Video Image. Don’t be afraid to practice moving the HD-10 Software window when not
broadcasting to learn how it affects the displayed Manycam/ Splitcam/ WebcamMax
Window. If you need to, you can again use the Manycam/ Splitcam/ WebcamMax desktop
select icon and select or change the location or size of the window for it to grab.
If you have a dual monitor, you can leave the Manycam/Splitcam/WebcamMax window open
on the second monitor since real-estate will not be an issue in the situation. In fact with
Splitcam, you have an option to view the displayed image in full screen mode by clicking on
the”[ ]” symbol in the upper right side of the screen (the escape key returns you back to
normal size).
Start your Web Browser of Choice
You may have to play with a number of Browsers to see which one works well with your particular computer
setup. I have had success with 3 browsers: Chrome, Internet Explorer, and Maxthon. My current favourite
browser to use for NSN broadcast is Chrome.
Log into Night Skies Network (NSN)
Have your Web Brower go to the location: http://www.nightskiesnetwork.ca/ . Locate and click on the
BROADCASTERS AND MEMBERS SIGN IN button. The next Login screen will ask you to enter your username
and password. You will next be presented with the Channel Line Up screen for Night Skies network. Click on
the Login selection on the upper right-hand side of the screen.
You will be presented with the Channel Launch Sign In screen for NSN. Again, enter your Username and
Password and click on Publish Channel button.
Note

Mallincam HD-10 User Manual July 7, 2017
HD-10 User Manual Page 62
Allow Adobe Flash to use your Manycam/Splitcam/WebcamMax
The Adobe Flash Player Settings window will pop up on your screen asking you for permission to use your
camera and your microphone. Select Allow.
Turn off your Microphone
Until you have your microphone figured out, it is best to initially turn it off. If you do not, the viewers on NSN
may hear an extreme loud buzzing (feedback noise). Later on we will look at using the microphone, but until
then I recommend CLICKING on the little microphone symbol on the upper right corner of the NSN video
display window to disable the microphone.
Step 9

Mallincam HD-10 User Manual July 7, 2017
HD-10 User Manual Page 63
Set a message for the NSN observers
It is a good idea to display a message above the NSN display window, so that the other NSN views understand
what you are doing. When initially setting up (which usually takes longer when you are learning), I usually
type the message “Setting Up the Camera” then CLICK on the SEND button to have it displayed.
When you are us and running and everything is working as it should, you will change the
message to indicate, what telescope, mount, and camera you are using. For that is the most
frequently asked question from the NSN viewers.
Select the Camera
Now is the time to activate the camera, or in our case have NSN driver point to our
Manycam/Splitcam/Webcam Max output.
➢ RIGHT CLICK inside the NSN Video window to bring up a Settings Window
➢ CLICK on the Settings choice and you will be presented with the Adobe Flash Player Settings
Window.
➢ CLICK on the Camera Icon and you will be presented with a pull down menu to select your camera.
➢ CLICK on the Pull Down list to select your camera of choice.
Note
Step 12
Step 11

Mallincam HD-10 User Manual July 7, 2017
HD-10 User Manual Page 64
➢ CLICK on CLOSE to Continue (After you have selected WebCamMax , SplitCam, or ManyCam).
NSN will remember what camera you chose from the last visit. So usually you only have to go
through this process whenever you want to change what camera device you would like the
NSN flash driver to use.
Choose your Camera Settings
We will now select the settings for our camera. We have the option of changing: The Bandwidth, Picture,
Resolution, Framerate, and even the microphone rate (when you are ready). The changes will not be
activated until you CLICK on the Green OK symbol in the window.
➢ LEFT CLICK inside the NSN video Window to bring up the Camera Settings Window.
➢ Use the sliders for Band Width and Picture values. I usually have both of my sliders way on the right.
Over time you will find the sweet spot for your system.
➢ Select your Resolution from the Pull Down Menu. I select HDCAM (800 x 600) for my system (this
seems to give the sharpest image with my 800 x600 settings in Manycam/Splitcam). Again, play with
these to see what settings the NSN viewers say is the best.
➢ Select your Frame Rate. From its Pull Down Menu. I usually leave it at 15 fps, but I have used 30 fps
at times. Again trial and error for your system.
➢ CLICK on the green OK symbol to accept these settings.

Mallincam HD-10 User Manual July 7, 2017
HD-10 User Manual Page 65
That’s it, you are done. If everything is working well and the Window’s gods are in a good mood, you should be
broadcasting whatever object the HD-10 is capturing. You should now enter another Message and SEND it out to
indicate what system you are using and what object you are viewing.
There is a time delay on what you say (if you have you microphone activated) and do on your
computer as compared to what others see (and hear) on the NSN broadcast.
You will freeze (and I don’t mean like what Chris does when he broadcasts in winter till 3am),
I mean from time to time your NSN connection will freeze for no apparent reason. It happens
to us all. When this happens, you can simply terminate the Web browser program (Ctrl –AltDel). Then restart your browser and Log back into NSN. This usual is a very quick process. But,
sometimes we all have to restart our computer (this takes longer for we need to power down
hardware and software) and reactivate everything before login back in. Don’t worry, the NSN
viewers sense what is happening and will keep the conversations going while waiting for you
to come back on.
Don’t be afraid to ask for advice by typing in on the Video chat window, as we are all learning and are willing to assist
whenever we can.
When ready, try activating the microphone (click on the microphone symbol). Other will let you know if they can hear
you, or if there is noise. Remember there are settings for the microphone in the camera settings window.
When you are finished with your session, you simply say your good nights to the crowd of
NSN viewers to let them know that your session is ending. CLICK on the red STOP button on
your NSN Window and NSN will shut down your channel and you can power down your
system and call it an evening (It won’t force the NSN viewers off the channel and some
viewers will continue chatting long after you have gone to bed).
Note
Note
Note

Mallincam HD-10 User Manual July 7, 2017
HD-10 User Manual Page 66
Appendix B – First Aid for the HD-10
The HD-10 Software says it can’t find the Camera
Diagnosis: This software automatically looks for the HD-10 camera when it starts. If it cannot
locate the camera attached to a USB Port, it will present this message.
Cure: First step: Make sure the blue LED light on the camera is lit. If not reseat the USB cable
into both the computer and the HD-10 camera (also check power).
• Restart the Software
Second step: Verify that in Device Manager that the driver for the HD-10 doesn’t
have a yellow exclamation mark beside it.
If Yes, then Windows is having issues with the driver (too many possible issues to
explain all) so first reboot the computer to see if that resolves the issue.
• If not: uninstall software, reboot, reinstall software, reboot, check camera.
• Still not: try another USB Port (I had difficulties with using my USB3 Port).
• Still not: do a malware check there may be viruses and other ugly stuff on your
computer.
• Still not: check with the Mallincam Yahoo group to see if other can assist
My Image is all White.
Diagnosis: The exposure setting is too high for the current object being imaged.
Cure: Go to the Exposure Tab, and lower the exposure all the way down. Give the system
some time to get caught up (if your exposure was set to 10 seconds, it will take 10
seconds before it can lower the exposure). Now the image should be black, so you
can now increase the exposure until you start seeing the object appear in the display
window.
My Images is looking all wrong, colors, blotchy.
Diagnosis: The HD-10 software can control so many aspects of the camera that sometimes we
get lost in making adjustments, we need to put everything back to normal.
Cure: Go to the Color Control Tab, locate and Left-Click on the Default Button. Now
go to the Exposure Control Tab and lower its value (or Click on Default) to get
the image back to expected values.

Mallincam HD-10 User Manual July 7, 2017
HD-10 User Manual Page 67
When I save my AVI Video it only saves part of the Video.
Diagnosis: This is a limitation with the AVI format in Windows. Microsoft's Video for
windows has some hardwired limitations that impose a maximum video file
size of 1-2GB depending on the version of the RIFF parser code in the MCIAVI
driver.
Surprisingly enough, much video software was written to these standards and
this is where much of today's incompatibility stems from.
The AVI file header is 32-bits in length. As a result there is a 4GB limitation in its
file size.
Cure: Use VirtualDub and see if it can extract all of the frames. If not. Rather than use
the HD-10 Software, use the DirectShow driver (Discover C15) with another
video imaging software such as VirtualDub, or SharpCap and let these
software packages save your videos. ManyCam, Spltcam, and WebCamMax
also have the ability to save videos.
My HD-10 is frozen, or the commands do not seem to be working correctly.
Diagnosis: Somehow the HD-10 internals have become corrupted (power surge, static, cosmic
ray) and all we need to do is reboot the camera and software.
Cure: The best advice is to close the HD-10 Software Window (if possible, remember the
Ctrl-Alt-Del process to bring up the task Manager). Now reboot the computer and
reconnect to the HD-10 camera to see if the issue is resolved.
My Image on the Screen is great, but when I try to Modify it, the image is all White.
Diagnosis: This most likely is caused by you trying to modify (under the Image Tab) the image
before you have actually saved the image. You can adjust the properties of the live
view in the Capture Tab, but if you want to modify the image in the Image Tab, you
must first save the Image, then select the Image from the Image Tray.
Cure:
• Left-Click on the Snap-Shot Button in the Capture Tab to save the image (it will
now appear in the Image Tray.
• Left-Click on the Image Tab (the screen may be White).
• Left-Click on the Saved Image in the Image Tray (it will now appear on the
Display Zone.
You can now use the tools in the Image Tab to adjust the image properties.

Mallincam HD-10 User Manual July 7, 2017
HD-10 User Manual Page 68
Appendix C: Notes
_______________________________________________
_______________________________________________
_______________________________________________
_______________________________________________
_______________________________________________
_______________________________________________
_______________________________________________
_______________________________________________
_______________________________________________
_______________________________________________
_______________________________________________
_______________________________________________
_______________________________________________
_______________________________________________
_______________________________________________
_______________________________________________
_______________________________________________
_______________________________________________
_______________________________________________
_______________________________________________

Mallincam HD-10 User Manual July 7, 2017
HD-10 Quick Guide Page 1
 Loading...