

Page 1
SYNC MANUAL V.1
www.malekkoheavyindustry.com
814 SE 14TH AVENUE
PORTLAND OR 97214
USA
Page 2

TABLE OF CONTENTS
SPECIFICATIONS 1
INSTALLATION 2
DESCRIPTION 3
OVERVIEW 4
SYNC TO MAC 5
SYNC TO WINDOWS 6
SYNC TO OTHER DEVICES 7
EXPANDER MODULES 8
WARRANTY 9
MALEKKOHEAVYINDUSTRY.COM
Page 3

SPECIFICATIONS
FORMAT:
EURORACK
DIMENSIONS:
4HP, 30mm deep
INTERNAL AND EXTERNAL SIGNALS (3.5mm jacks):
0-5V Logic I/O
MAX CURRENT:
+12V: 37mA
-12V: 6mA
+5V: n/a
PG. 1
MALEKKOHEAVYINDUSTRY.COM
Page 4
INSTALLATION
Remove module from packaging.
Power down your modular synthesizer and disconnect the power cable from the
wall outlet.
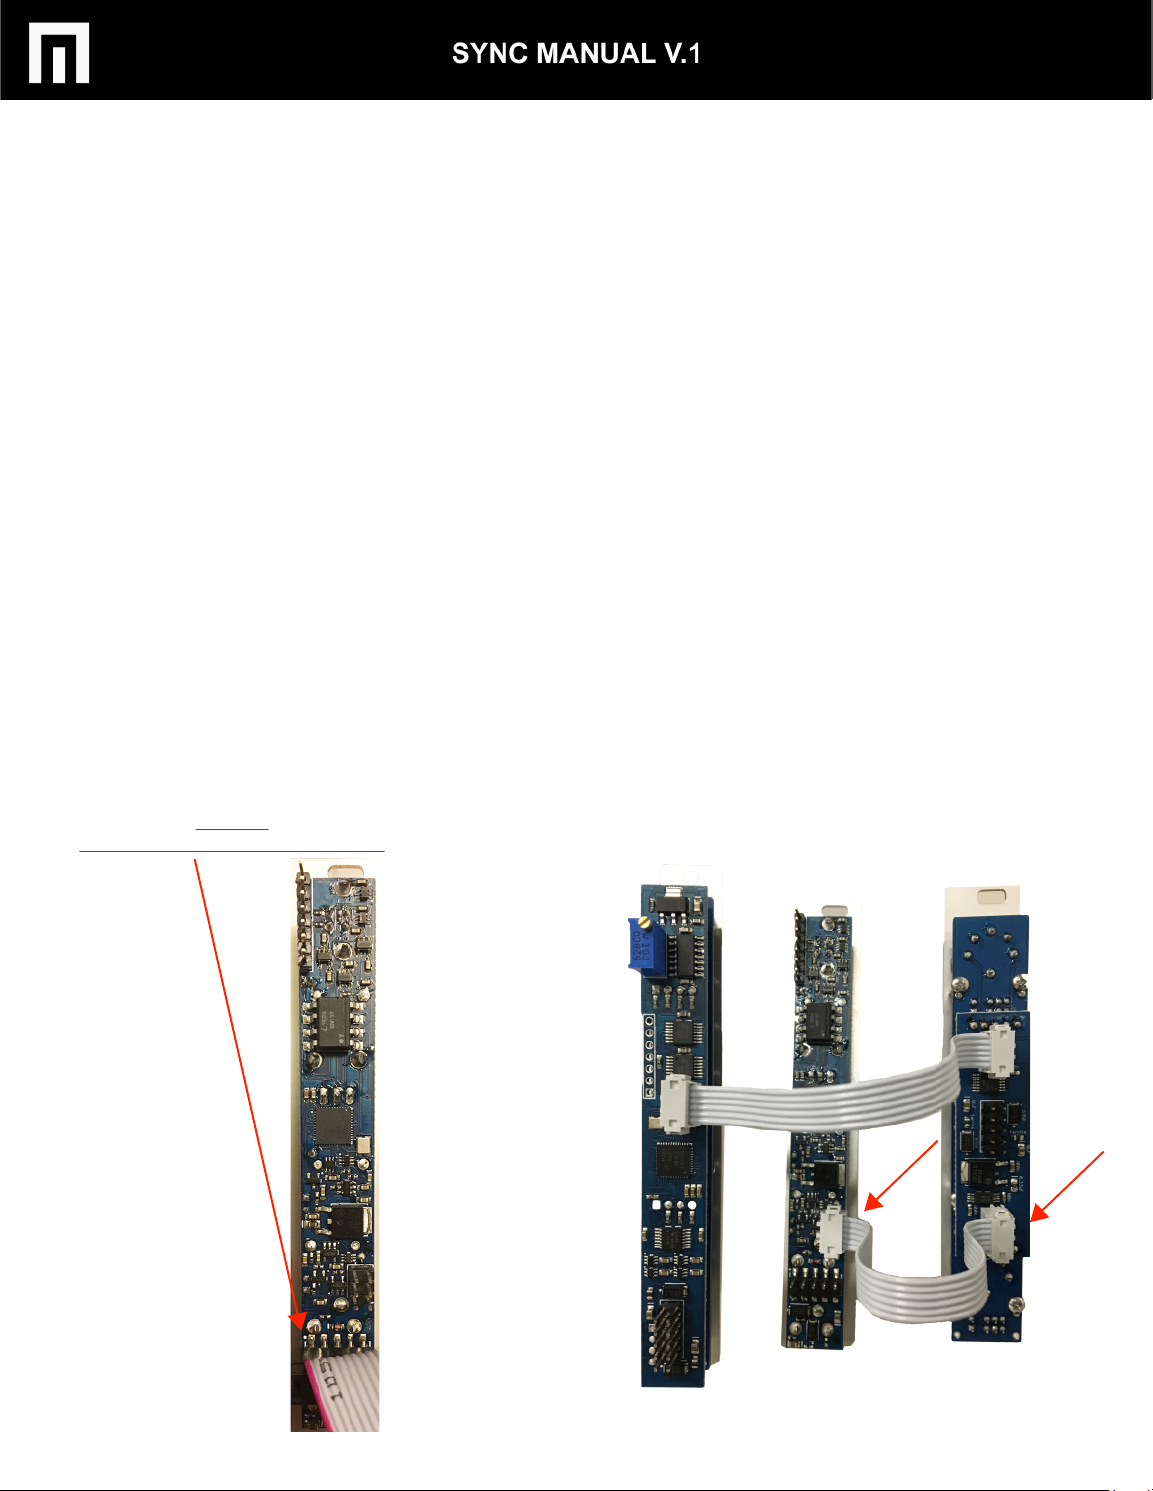
Attach the included power cable to the module’s power connector and connect
the other end to the power distribution bus in your EuroRack synthesizer case.
Match the red stripe of the cable to the solid white line on back of your unit.
Position the module on the mounting rails in your EuroRack case and screw
down mounting screws. Power up! If your case does not turn on properly then
you have installed the module incorrectly. Simply power down and make sure to
follow the diagram when reconnecting the module.
6-PIN CONNECTION TO MALEKKO CV/GATE AND
DIN SYNC:
POWER:
LINE UP RED STRIPE TO THIS SIDE
CV GATE SYNC DIN SYNC
PG. 2
MALEKKOHEAVYINDUSTRY.COM
Page 5

DESCRIPTION
Sync your modular to your computer or other hardware MIDI gear via USB or Malekko Pink MIDI/3.5 cable (included). Class compliant on both PC and Mac.
FEATURS INCLUDE:
USB connection (class compliant)
Reset output
Fixed 1/16 note clock output
Variable clock output
MIDI in (over 3.5mm)
MIDI out/thru (over 3.5mm)
PG. 3
MALEKKOHEAVYINDUSTRY.COM
Page 6
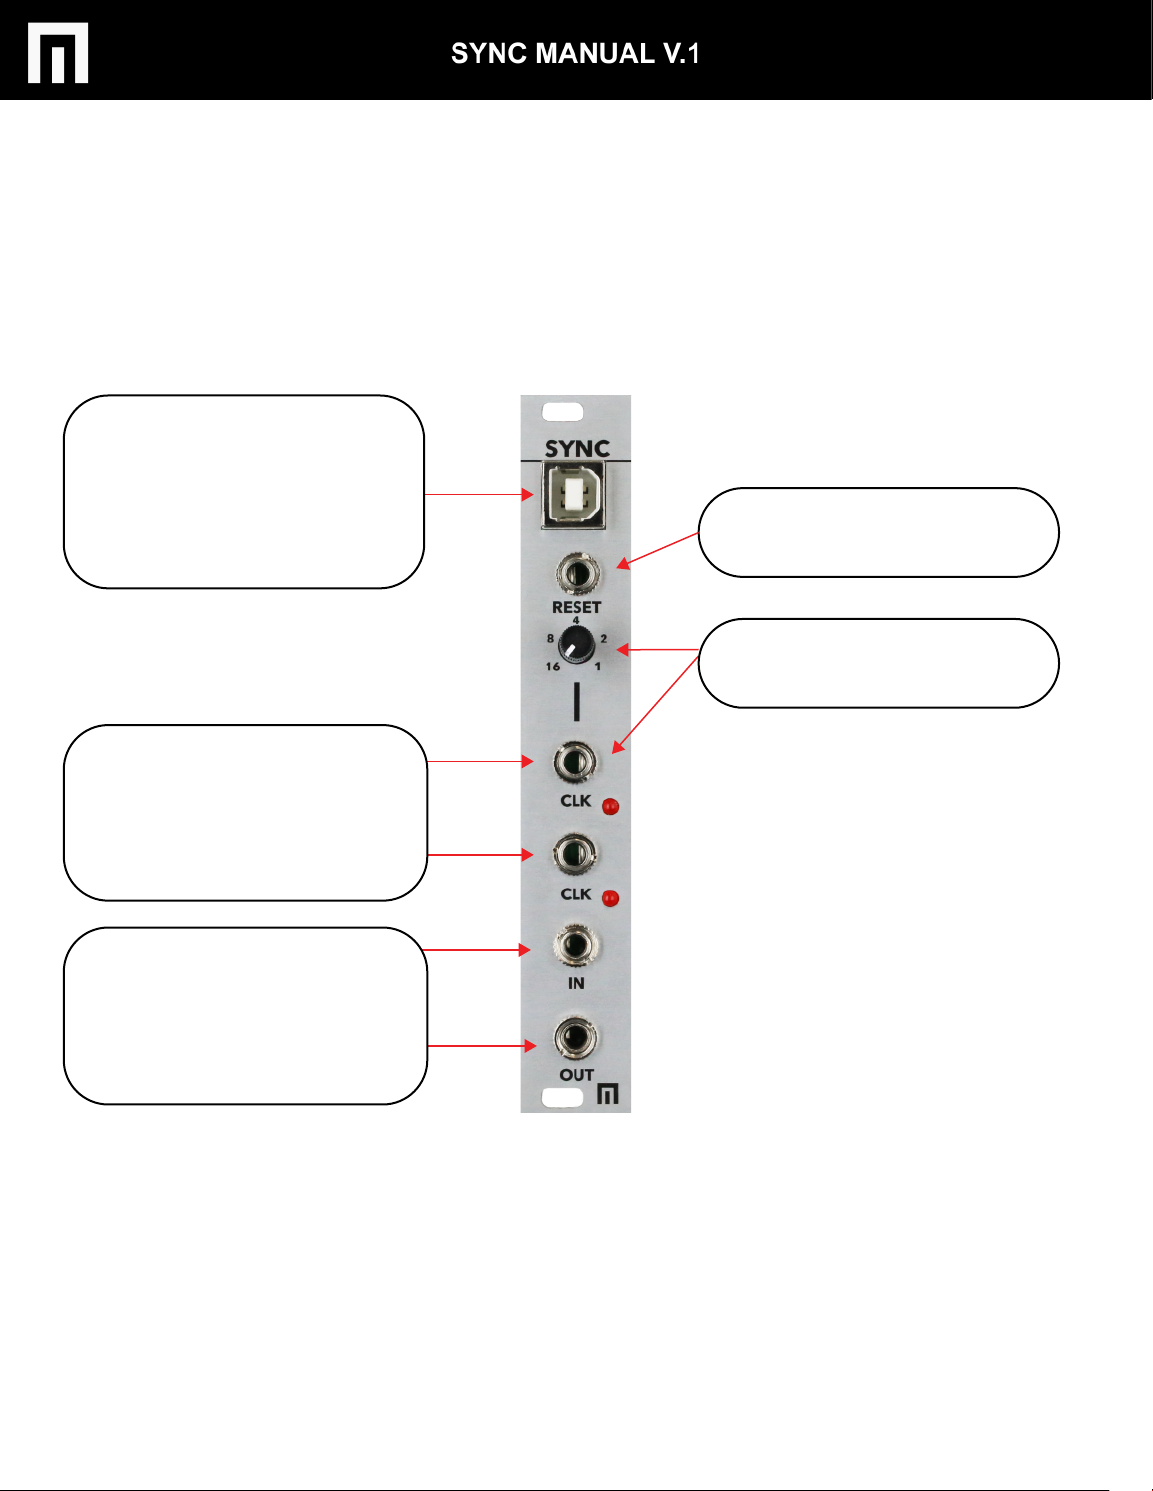
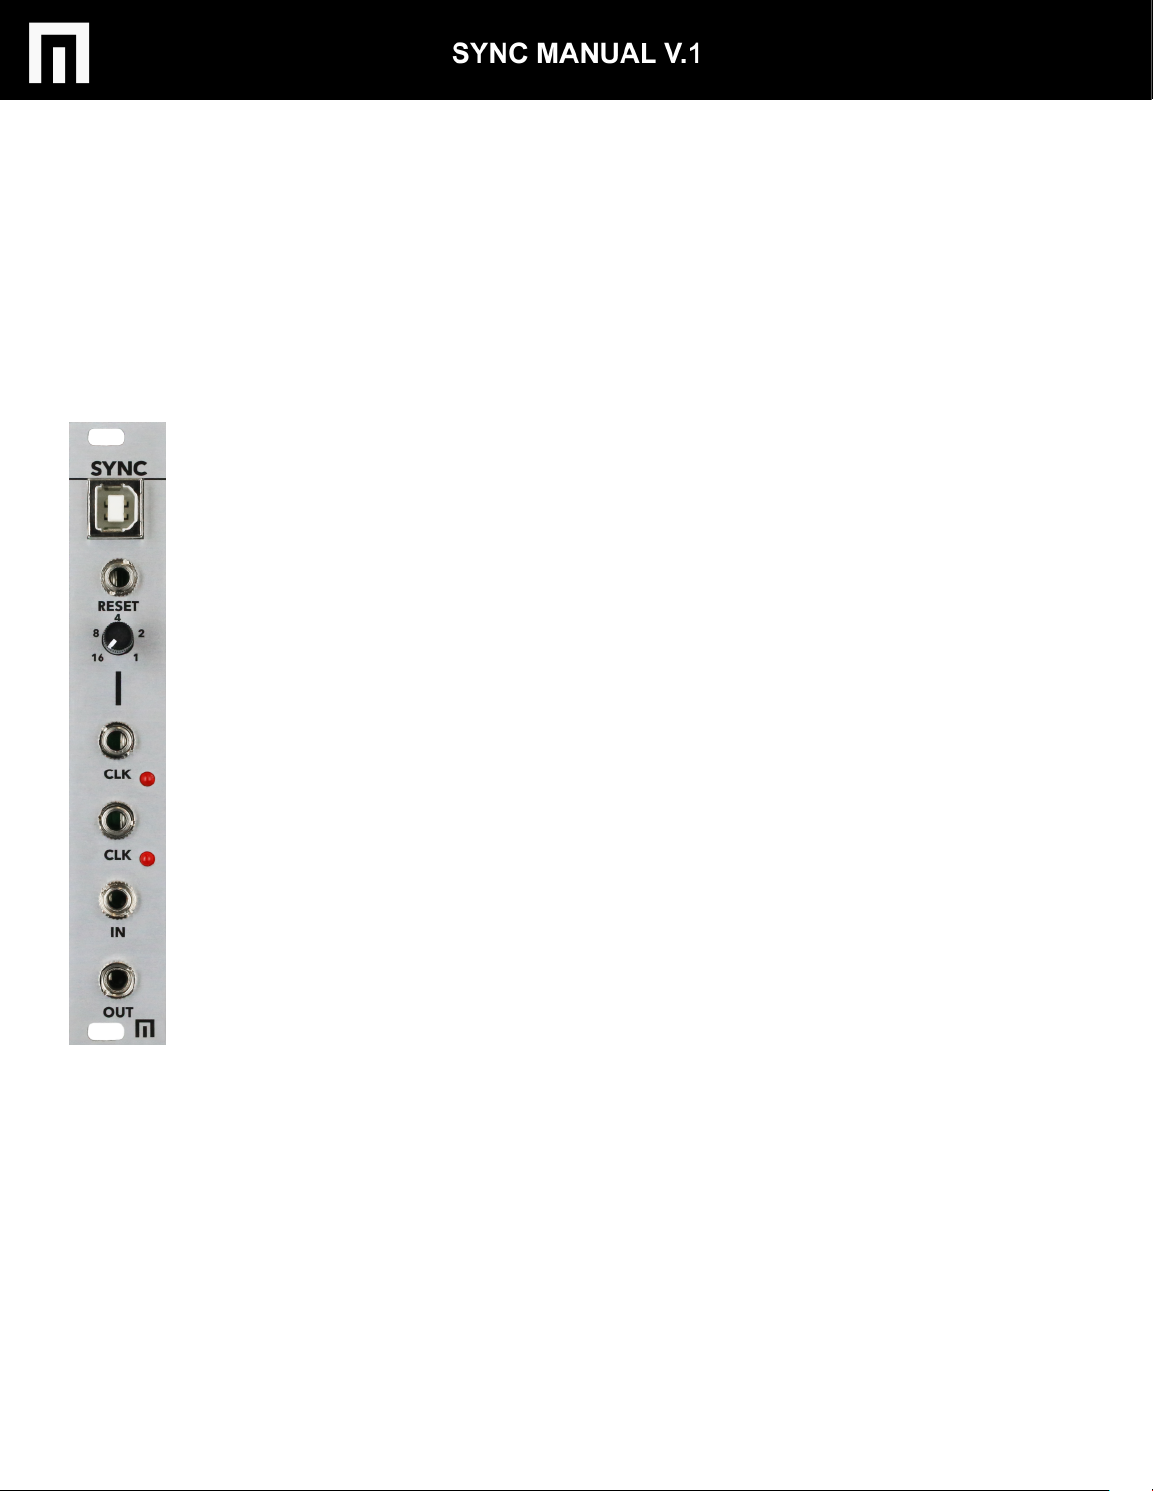
SYNC directly with your MAC,
PC or hardware gear via USB.
If you are syncing directly to
hardware you will need a
Type B to B cable.
VARIABLE CLOCK OUT
with LED indicator
FIXED CLOCK OUT (16th note)
with LED indicator
OVERVIEW
RESET output
Variable clock divider for
Variable Clock output
MIDI input over 3.5mm
included cable.
MIDI out/thru over 3.5mm
included cable.
PG. 4
MALEKKOHEAVYINDUSTRY.COM
Page 7
SYNC TO MAC
1. Make sure your case is powered up and that SYNC is connected to
your computer via USB. It is recommended to connect directly without
using a usb hub.
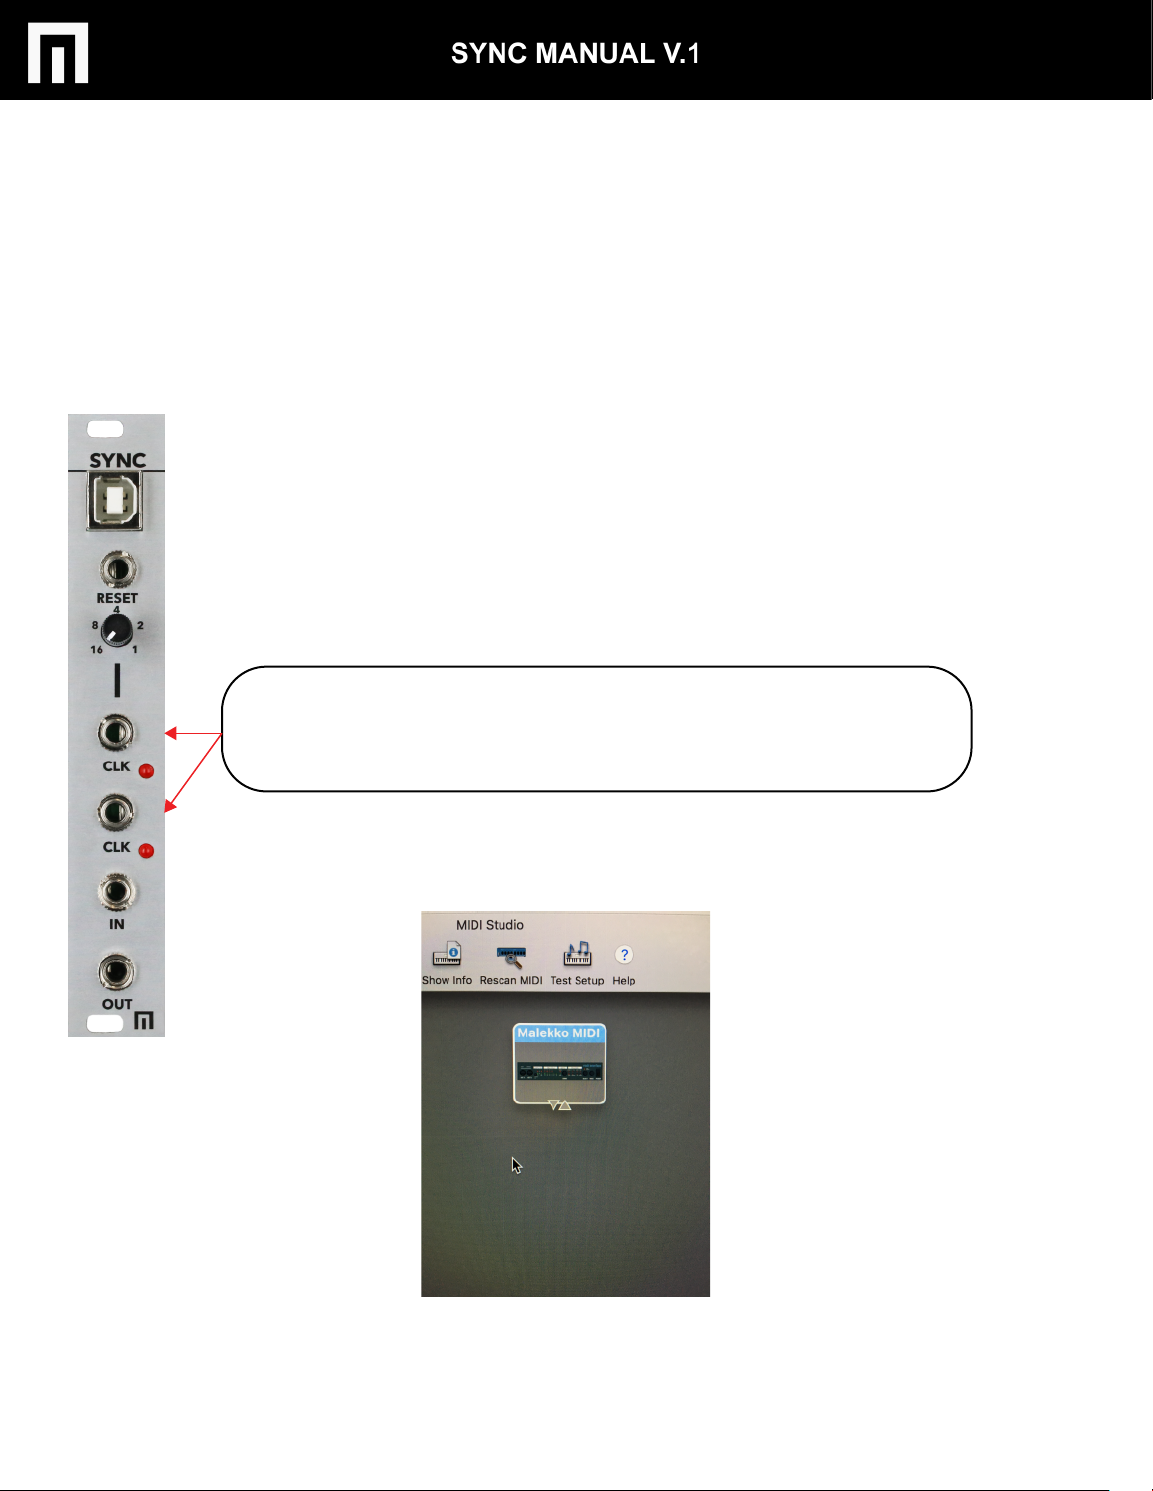
2. Launch “Audio MIDI Setup” from your Apps > Utilities.
3. Go to “Window” > “Show MIDI Studio”
4. “Rescan MIDI” and you will see “Malekko MIDI” is now showing up.
5. Launch your DAW and select “Malekko Midi” as your MIDI clock out
(make sure your DAW is set to transmit MIDI clock).
When you hit play on your DAW, MIDI clock is then send to SYNC. SYNC
then distributes clock to both clock outputs.
PG. 5
MALEKKOHEAVYINDUSTRY.COM
Page 8
SYNC TO WINDOWS
1. Make sure your case is powered up and that SYNC is connected to
your computer via USB. It is recommended to connect directly without
using a usb hub.
2.Once connected you should hear a chime indicating that SYNC has
loaded the class compliant MIDI driver (you would need to have your
computer volume turned up to hear the chime).
3. Launch your DAW and select “Malekko Midi” as your MIDI clock out
(make sure your DAW is set to transmit MIDI clock).
PG. 6
MALEKKOHEAVYINDUSTRY.COM
Page 9
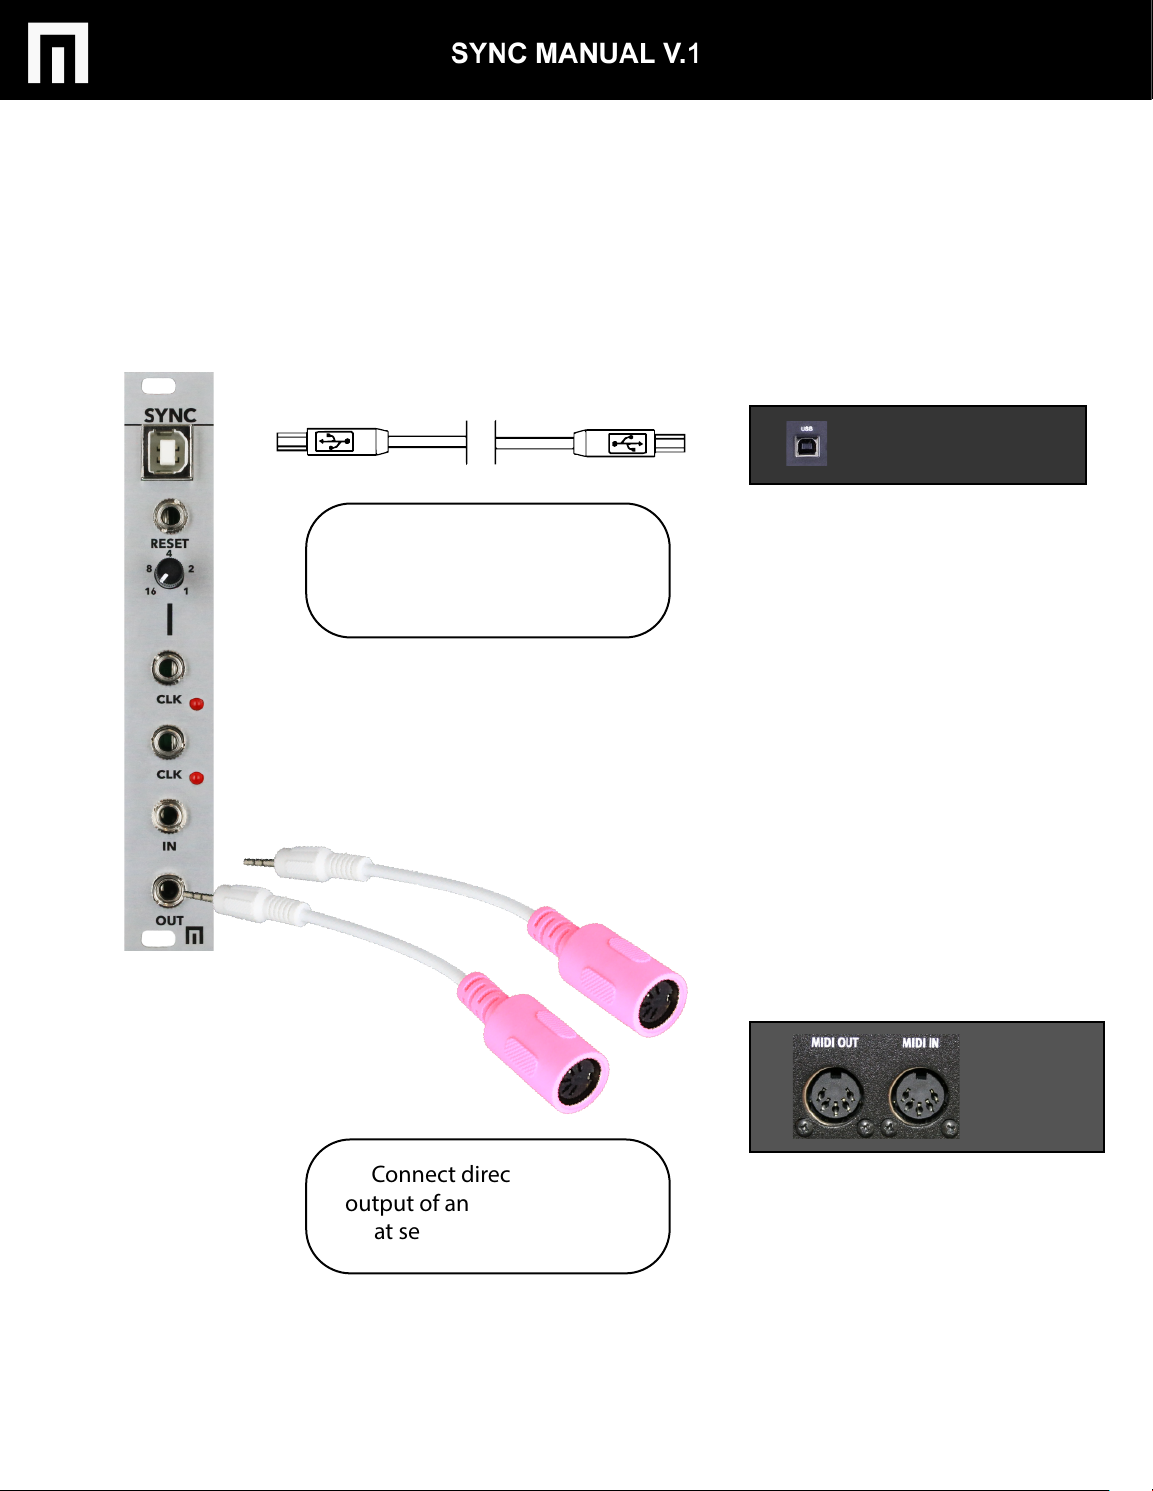
SYNC TO OTHER DEVICES
Connect directly to the
output of an external device
that sends clock over USB.
Connect directly to the
output of an external device
that sends clock over MIDI.
PG. 7
MALEKKOHEAVYINDUSTRY.COM
Page 10
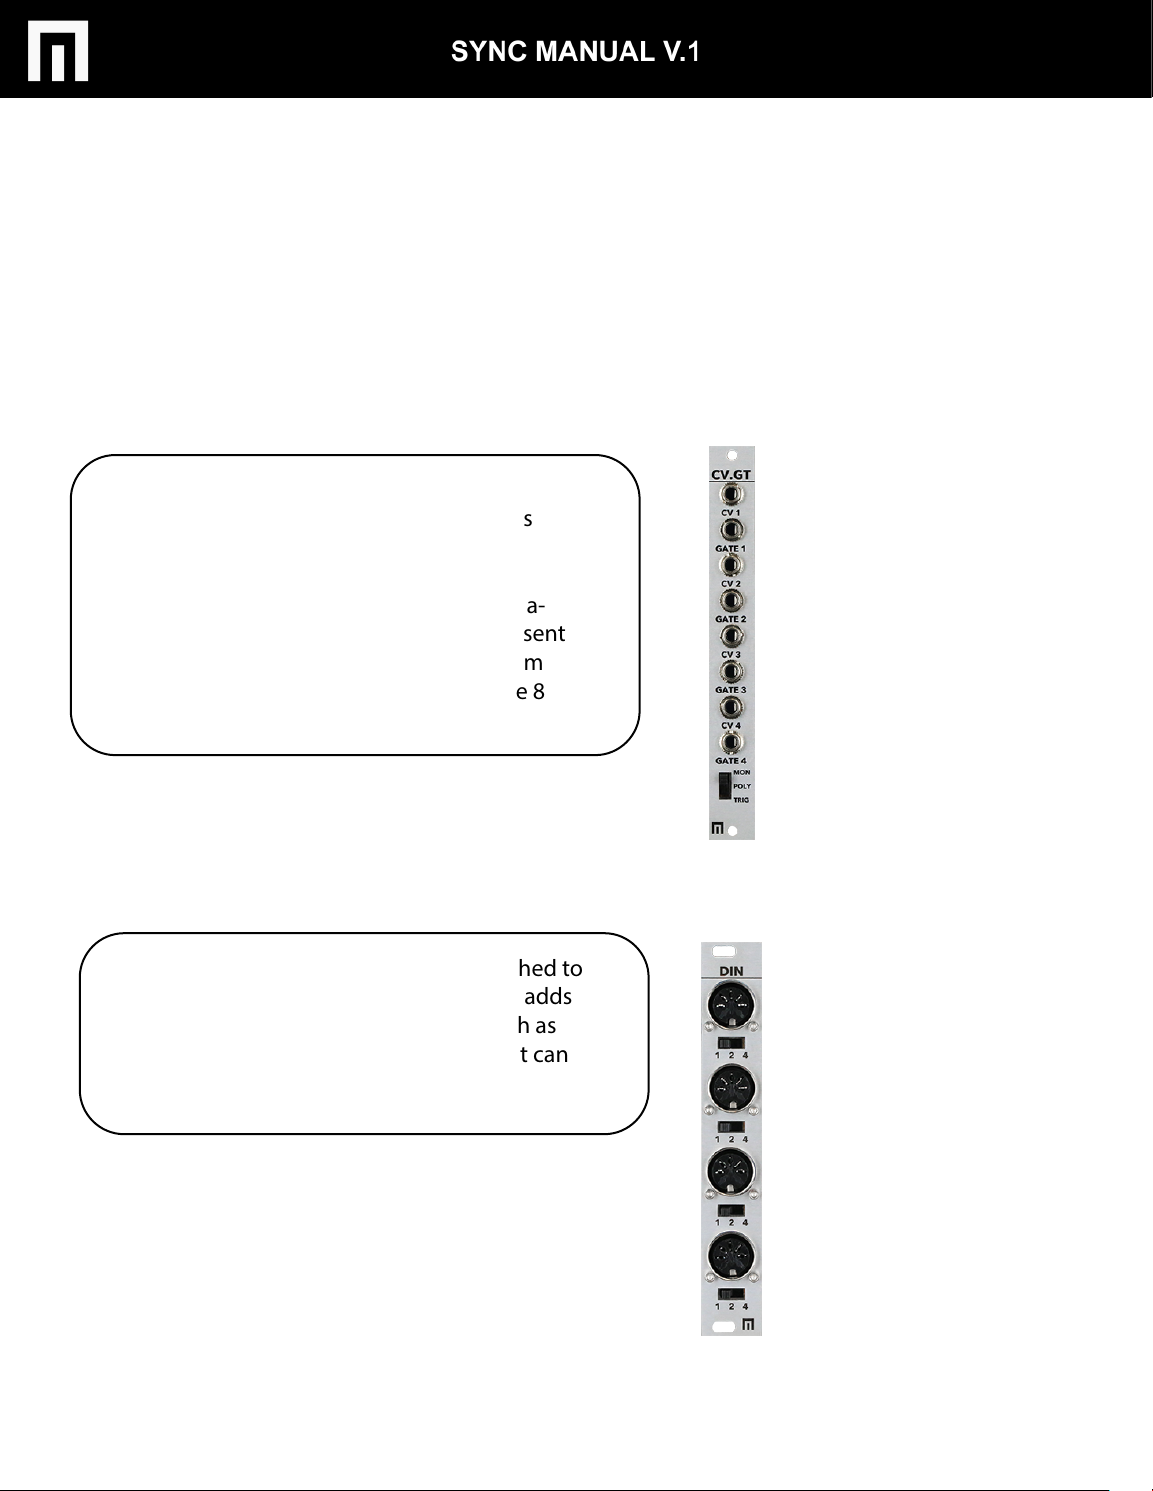
SYNC EXPANDERS
When plugged into the same busboard as
SYNC module, the CV/GATE expander adds
4 sets of CV/Gate connections
3 way mode switch
Modes : Mono (MIDI channels 1-4 sent sepa-
rately out cv/gate jacks 1-4), Poly (4 notes sent
over channel 1 to the 4 cv/gate jacks), Drum
Trigger (notes C1-G1 send gates out of the 8
jacks).
When the DIN SYNC module, when attached to
the same busboard as the SYNC module, adds
4 clocked DIN SYNC outputs for gear such as
the Roland TB303, TB808 etc. Each output can
be divided up to 4 x.
PG. 8
MALEKKOHEAVYINDUSTRY.COM
Page 11

WARRANTY
This product is covered by the Malekko Heavy Industry warranty, for one year following the
date of purchase. This warranty covers any defect in the manufacturing of this product. This
warranty does not cover any damage or malfunction caused by incorrect use – such as, but
not limited to, power cables connected backwards, excessive voltage levels, or exposure to
extreme temperature or moisture levels. The warranty covers replacement or repair, as
decided by Malekko Heavy Industry. Please visit our website malekkoheavyindustry.com
to obtain full warranty information and to register your product for coverage.
PG. 9
MALEKKOHEAVYINDUSTRY.COM
 Loading...