

Malanbao Blizzard 600 User Manual
Blizzard 600
Model Number: SM600
Please note that as part of our ongoing commitment to continuous product development, specifications
are subject to cha nge without notice. Wh ilst every care is taken in the preparation of this manual we
reserve the right to change specifications in the course of product improvement. The publishers cannot be
held responsible for the accuracy of the information herein, or any consequence arising from them.
V1.3
201310
1. INTRODUCTION
Thank you for purchasing MLB Blizzard 600. Please read this user
manual carefully and thoroughly before operation. Please keep this
user guide for future reference. This device has left our premises in
absolutely perfect condition. In order to maintain this condition and
to ensure a safe operation, it is absolutely necessary for the user to
follow the safety instructions and warning notes written in this manual.
The manufacturer/distributors/dealers will not accept liability for any
resulting damages caused by the non-observance of this manual or
any unauthorized modification to the device.
1.1 What is Included
a) 1X MLB Blizzard 600
b) 1X user manual
c) 1X Wireless Remote controller
d) 1X Power Lead
Carefully unpack the carton, check the contents to ensure that all
parts are present and in good condition. Contact your supplier if any
part is missing or damaged.
1.3 Safety Instructions
WARNING!!! To reduce risk of fire, electric shock, or
injury, follow these important safety instructions
▪ Avoid brute force when installing or operating the fixture.
▪ This device is for adult use only and must be installed out of reach
of children.
▪ When choosing the installation spot, please make sure that the
fixture is not exposed to extreme heat or dust.
1/10 ©PHANTOS® Distribu ted in Australia by PHANTOS www.phantos.com.au
▪ Avoid using the unit in locations subject to possible impacts.
▪ This unit is designed for indoor/undercover use only.
▪ Always turn off, unplug power and allow fixture to cool before
servicing.
▪ Ensure that fixture is properly grounded. Do not attempt to remove
or break off the ground prong from the electrical cord. This prong is
used to reduce the risk of electrical shock and fire in case of an
internal short.
▪ Always make sure that you are connecting to the proper voltage
and that the line voltage you are connecting t o is not higher than
that stated on decal or rear panel of the fixture.
▪ To prevent risk of fire or shock, do not expose fixture to rain or
moisture.
▪ Make sure power cord is never crimped or damaged. Do not
attempt to operate this unit if the power cord has been frayed or
broken.
▪ Do not remove the cover under any conditions, unless consent
given by distributor. There are no user serviceable parts inside.
▪ DO NOT connect this product to a dimmer or rheostat.
▪ ONLY connect this product to a grounded and protected circuit.
▪ ONLY use the hanging/mounting bracket to carry this product.
▪ USE a safety cable when mounting this product overhead.
▪ Never aim the output nozzle directly at people.
▪ Locate the snow machine in a well-ventilated area. Never cover
the unit’s vents. In order to guarantee adequate ventilation, allow a
free air space of at least 20 cm around the sides and top of the unit.
▪ Never add flammable liquids of any kind (oil, gas, perfume) to the
snow liquid.
▪ Never drink snow liquid. If ingested, call a doctor immediately. If
snow liquid comes in contact wit h skin or eyes, rinse thorou ghly with
water.
▪ Use only the h ig h-q uality snow li q ui d th a t yo ur de a le r re c om me nd s.
▪ Always make sure there is sufficient liqui d in the snow liquid tank.
Operating this unit without liquid may cause permanent damage.
2. SET UP
2.1 Mounting
This unit may be free standing, or clamp mounted. If the unit is to be
mounted using the bracket, avoid suspending the unit such that snow is
emitted directly toward any one’s face. Whatever installation method
you choose, do not allow the unit to have more than a 15 degree angle
of inclination.
IMPORTANT!!! Safety cables must always be used for overhead
mounting. The safety cable must be capable of holding 10 times
the weight of the fixture.
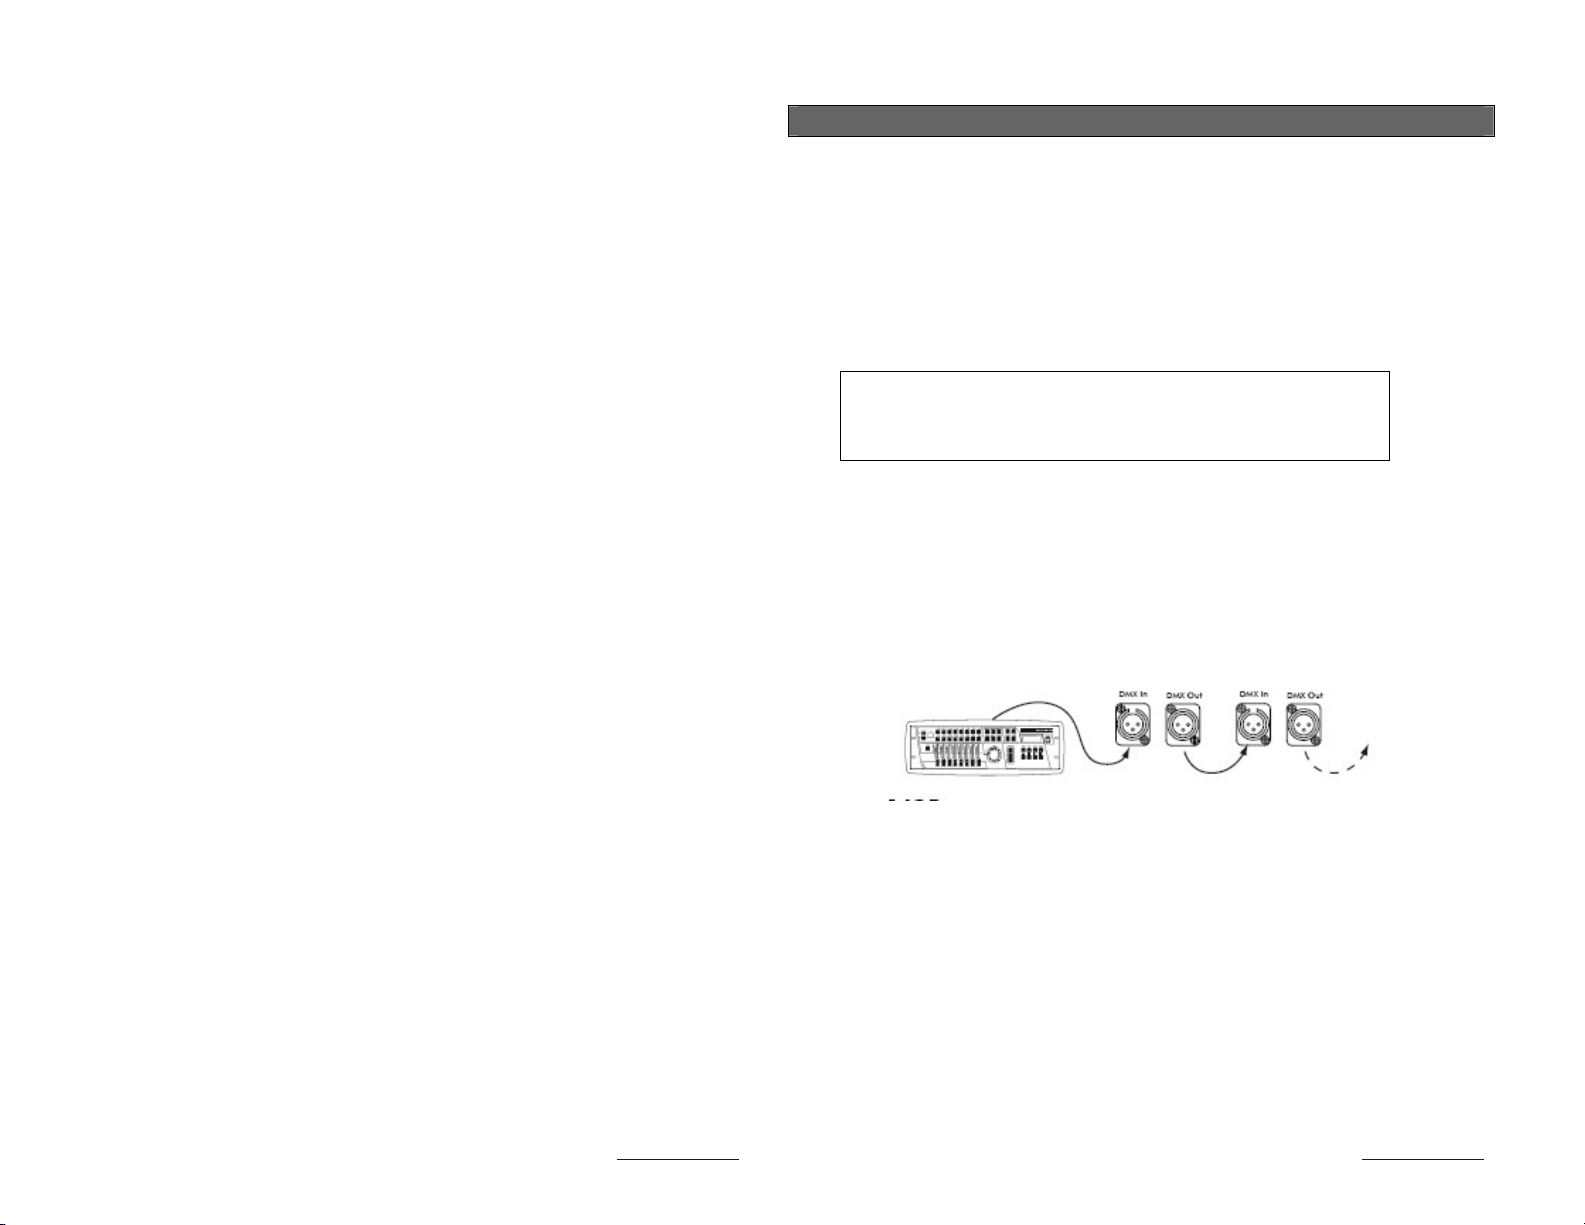
2.2 Fixture Linking
To run your show of one or more fixtures using a DMX-512 controller or to
run synchronized shows on two or more fixtures in master/slave
operating mode, you need DMX cables to link the units from DMX IN to
DMX OUT.
Only use standard 110-120 Ohm shielded cable. These are 2
core-screened cables, with each core having at least a 0.5mm
diameter. Do not use the ground lug on the XLR connector. Do not
connect the cable’s shield conductor to the ground lug or allow the
shield conductor to come in contact with the XLR’s outer casing.
Grounding the shield could cause a short circuit and erratic
behavior.
2/10 ©PHANTOS® Distribu ted in Australia by PHANTOS www.phantos.com.au
3/10 ©PHANTOS® Distribu ted in Australia by PHANTOS www.phantos.com.au
 Loading...