

Page 1
1
ENGLISH (Original instructions)
INSTRUCTION MANUAL
DOUBLE INSULATION
IMPORTANT: Read Before Using.
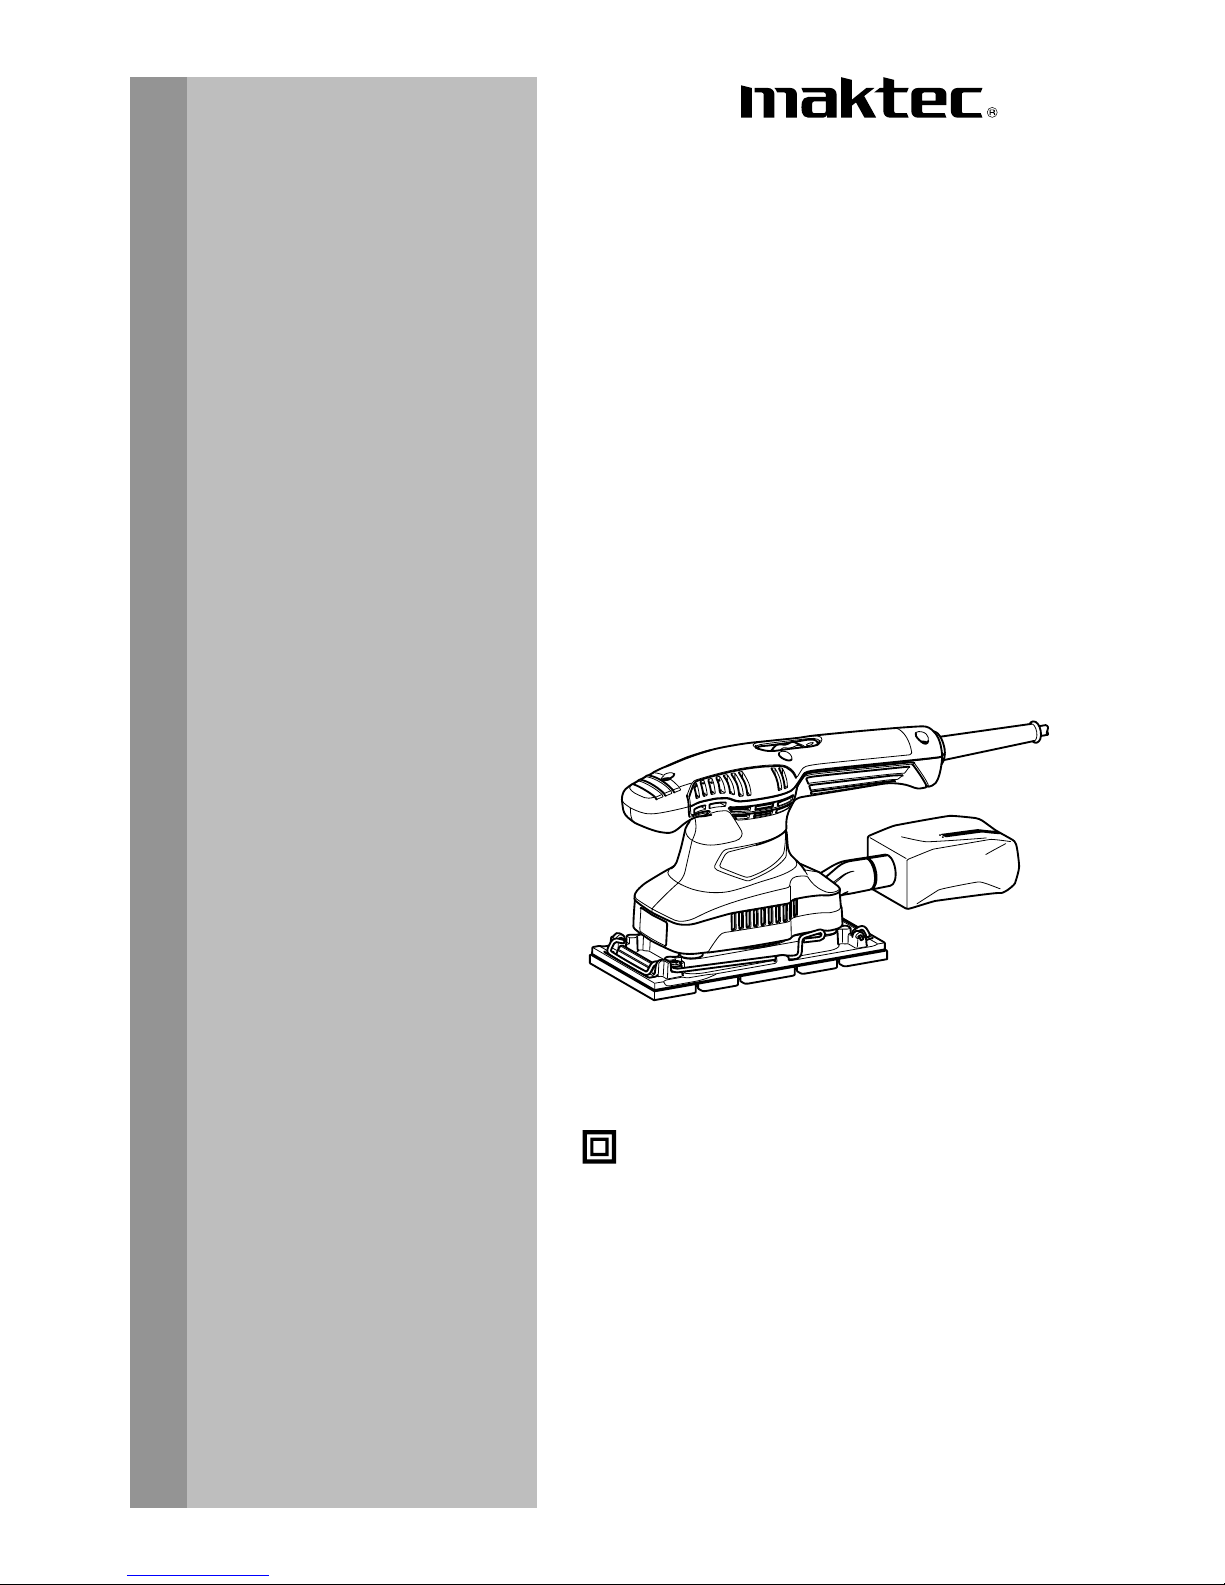
Finishing Sander
MT923
011316
Page 2
2
ENGLISH (Original instructions)
SPECIFICATIONS
Model MT923
Pad size 92 mm x 185 mm
Abrasive paper size 93 mm x 228 mm
Orbits per minute (min-1) 12,000
Overall length 252 mm
Net weight 1.4 kg
Safety class /II
• Due to our continuing programme of research and development, the specifications herein are subject to change without notice.
• Specifications may differ from country to country.
• Weight according to EPTA-Procedure 01/2003
END201-5
Symbols
The following show the symbols used for the equipment.
Be sure that you understand their meaning before use.
・ Read instruction manual.
・ DOUBLE INSULATION
・ Only for EU countries
Do not dispose of electric equipment
together with household waste material!
In observance of European Directive
2002/96/EC on waste electric and
electronic equipment and its
implementation in accordance with
national law, electric equipment that
have reached the end of their life must
be collected separately and returned to
an environmentally compatible recycling
facility.
ENE052-1
Intended use
The tool is intended for the sanding of large surface of
wood, plastic and metal materials as well as painted
surfaces.
ENF002-2
Power supply
The tool should be connected only to a power supply of
the same voltage as indicated on the nameplate, and can
only be operated on single-phase AC supply. They are
double-insulated and can, therefore, also be used from
sockets without earth wire.
GEA005-3
General Power Tool Safety
Warnings
WARNING Read all safety warnings and all
instructions. Failure to follow the warnings and
instructions may result in electric shock, fire and/or
serious injury.
Save all warnings and
instructions for future reference.
The term "power tool" in the warnings refers to your
mains-operated (corded) power tool or battery-operated
(cordless) power tool.
Work area safety
1. Keep work area clean and well lit. Cluttered or
dark areas invite accidents.
2. Do not operate power tools in explosive
atmospheres, such as in the presence of
flammable liquids, gases or dust. Power tools
create sparks which may ignite the dust or fumes.
3. Keep children and bystanders away while
operating a power tool. Distractions can cause
you to lose control.
Electrical safety
4. Power tool plugs must match the outlet. Never
modify the plug in any way. Do not use any
adapter plugs with earthed (grounded) power
tools. Unmodified plugs and matching outlets will
reduce risk of electric shock.
5. Avoid body contact with earthed or grounded
surfaces such as pipes, radiators, ranges and
refrigerators. There is an increased risk of
electric shock if your body is earthed or grounded.
6. Do not expose power tools to rain or wet
conditions. Water entering a power tool will
increase the risk of electric shock.
7. Do not abuse the cord. Never use the cord for
carrying, pulling or unplugging the power tool.
Keep cord away from heat, oil, sharp edges or
moving parts. Damaged or entangled cords
increase the risk of electric shock.
8. When operating a power tool outdoors, use an
extension cord suitable for outdoor use. Use of
a cord suitable for outdoor use reduces the risk of
electric shock.
Page 3

3
9. If operating a power tool in a damp location is
unavoidable, use a residual current device
(RCD) protected supply. Use of an RCD reduces
the risk of electric shock.
10. Use of power supply via a RCD with a rated
residual current of 30mA or less is always
recommended.
Personal safety
11. Stay alert, watch what you are doing and use
common sense when operating a power tool.
Do not use a power tool while you are tired or
under the influence of drugs, alcohol or
medication. A moment of inattention while
operating power tools may result in serious
personal injury.
12. Use personal protective equipment. Always
wear eye protection. Protective equipment such
as dust mask, non-skid safety shoes, hard hat, or
hearing protection used for appropriate conditions
will reduce personal injuries.
13. Prevent unintentional starting. Ensure the
switch is in the off-position before connecting
to power source and/or battery pack, picking
up or carrying the tool. Carrying power tools with
your finger on the switch or energising power tools
that have the switch on invites accidents.
14. Remove any adjusting key or wrench before
turning the power tool on. A wrench or a key left
attached to a rotating part of the power tool may
result in personal injury.
15. Do not overreach. Keep proper footing and
balance at all times. This enables better control
of the power tool in unexpected situations.
16. Dress properly. Do not wear loose clothing or
jewellery. Keep your hair, clothing, and gloves
away from moving parts. Loose clothes,
jewellery or long hair can be caught in moving
parts.
17. If devices are provided for the connection of
dust extraction and collection facilities,
ensure these are connected and properly used.
Use of dust collection can reduce dust-related
hazards.
Power tool use and care
18. Do not force the power tool. Use the correct
power tool for your application. The correct
power tool will do the job better and safer at the
rate for which it was designed.
19. Do not use the power tool if the switch does
not turn it on and off. Any power tool that cannot
be controlled with the switch is dangerous and
must be repaired.
20. Disconnect the plug from the power source
and/or the battery pack from the power tool
before making any adjustments, changing
accessories, or storing power tools. Such
preventive safety measures reduce the risk of
starting the power tool accidentally.
21. Store idle power tools out of the reach of
children and do not allow persons unfamiliar
with the power tool or these instructions to
operate the power tool. Power tools are
dangerous in the hands of untrained users.
22. Maintain power tools. Check for misalignment
or binding of moving parts, breakage of parts
and any other condition that may affect the
power tool’s operation. If damaged, have the
power tool repaired before use. Many accidents
are caused by poorly maintained power tools.
23. Keep cutting tools sharp and clean. Properly
maintained cutting tools with sharp cutting edges
are less likely to bind and are easier to control.
24. Use the power tool, accessories and tool bits
etc. in accordance with these instructions,
taking into account the working conditions
and the work to be performed. Use of the power
tool for operations different from those intended
could result in a hazardous situation.
Service
25. Have your power tool serviced by a qualified
repair person using only identical replacement
parts. This will ensure that the safety of the power
tool is maintained.
26. Follow instruction for lubricating and
changing accessories.
27. Keep handles dry, clean and free from oil and
grease.
GEB021-4
SANDER SAFETY WARNINGS
1. Always use safety glasses or goggles.
Ordinary eye or sun glasses are NOT safety
glasses.
2. Hold the tool firmly.
3. Do not leave the tool running. Operate the tool
only when hand-held.
4. This tool has not been waterproofed, so do not
use water on the workpiece surface.
5. Ventilate your work area adequately when you
perform sanding operations.
6. Some material contains chemicals which may
be toxic. Take caution to prevent dust
inhalation and skin contact. Follow material
supplier safety data.
7. Use of this tool to sand some products, paints
and wood could expose user to dust
containing hazardous substances. Use
appropriate respiratory protection.
8. Be sure that there are no cracks or breakage
on the pad before use. Cracks or breakage
Page 4
4
may cause a personal injury.
SAVE THESE INSTRUCTIONS.
WARNING:
DO NOT let comfort or familiarity with product
(gained from repeated use) replace strict adherence
to safety rules for the subject product. MISUSE or
failure to follow the safety rules stated in this
instruction manual may cause serious personal
injury.
FUNCTIONAL DESCRIPTION
CAUTION:
• Always be sure that the tool is switched off and
unplugged before adjusting or checking function on
the tool.
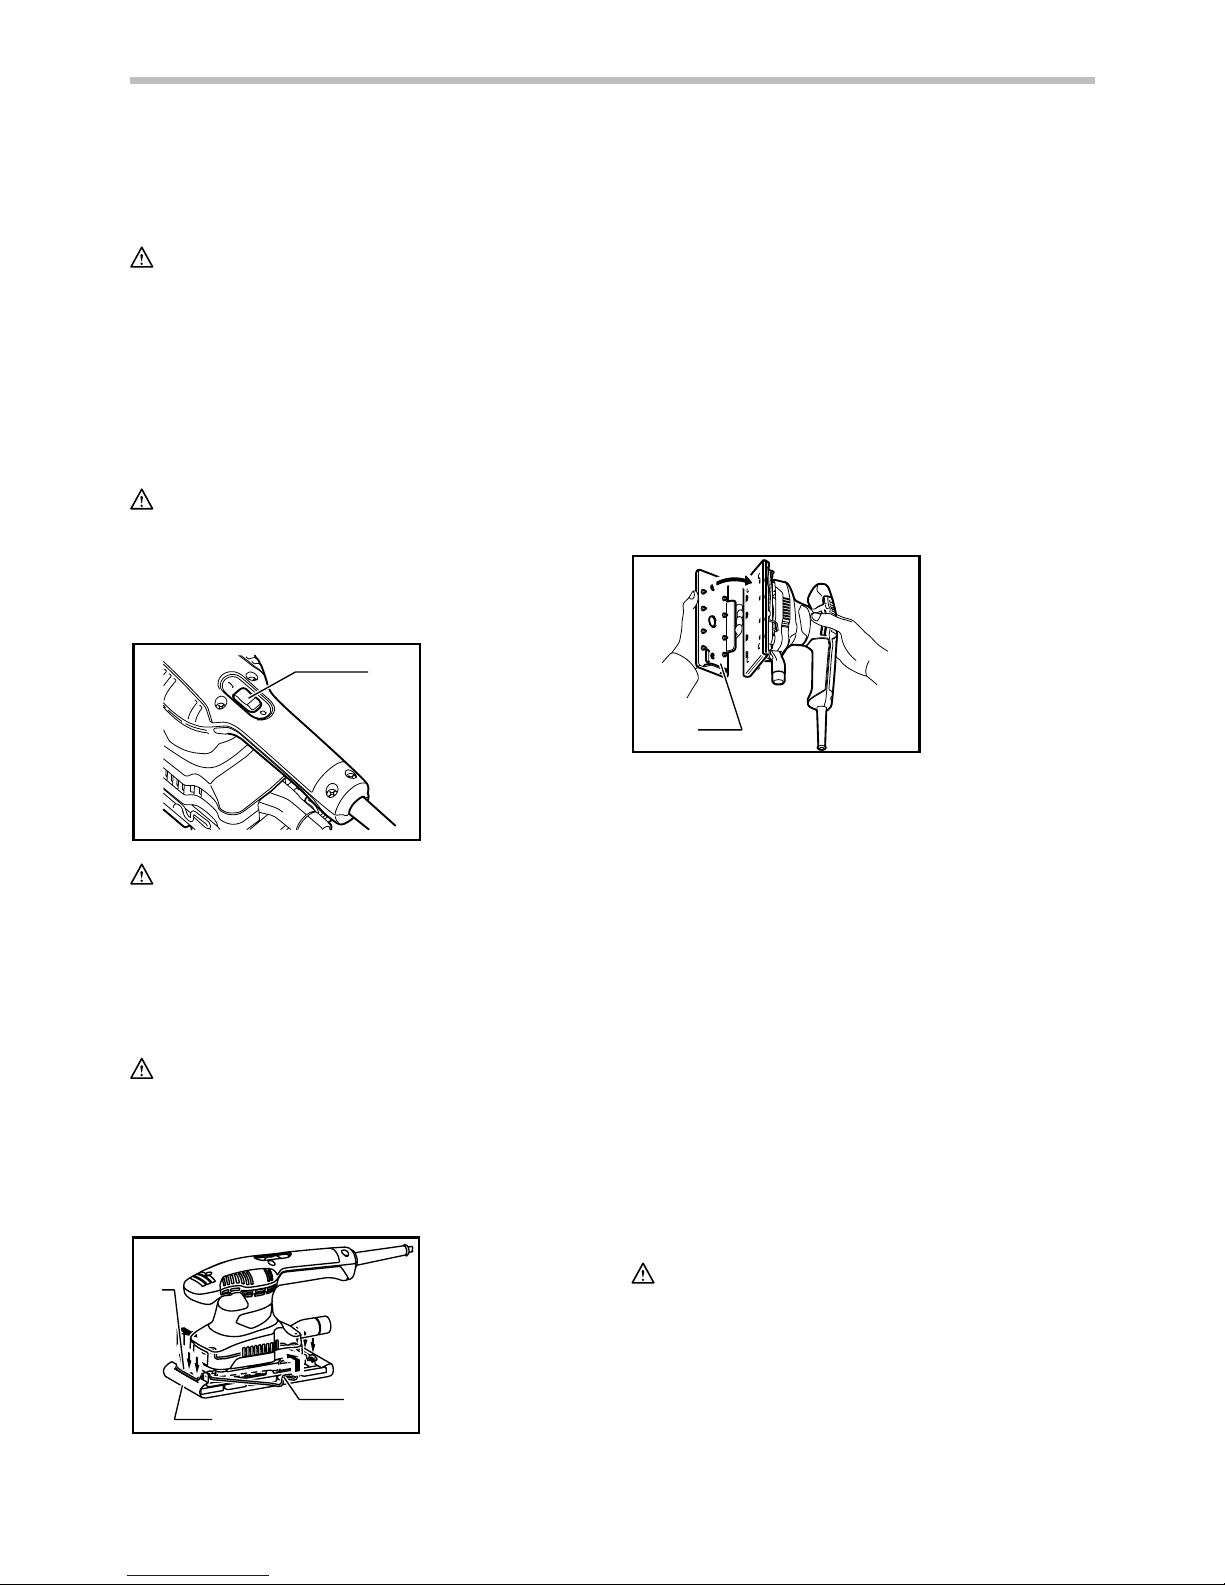
Switch action
1
011317
CAUTION:
• Before plugging in the tool, always check to see
that the tool is switched off.
To start the tool, press the "ON ( I )" side of the switch. To
stop the tool, press the "OFF (O)" side of the switch.
ASSEMBLY
CAUTION:
• Always be sure that the tool is switched off and
unplugged before carrying out any work on the tool.
Installing or removing abrasive paper
For conventional type of abrasive paper with
pre-punched holes (standard equipment):
1
2
3
011318
Open the paper clamp by raising on the lever to release
from the locking port and then insert the paper end into
the clamping part, aligning the paper edges even and
parallel with the sides of the base. (Bending the paper
beforehand makes attachment easier). Once the paper is
in place, return the lever to its original position.
Repeat the same process for the other end of the base,
maintaining the proper paper tension.
After inserting the paper, make sure the clamping part
hold it securely. Otherwise the paper will be loose and
subject to slippage, resulting in uneven sanding
operation.
To remove the paper, release the clamper as stated
above.
For conventional type of abrasive paper without
pre-punched holes (available on the market):
1
011320
Open the paper clamp by raising on the lever to release
from the locking port and then insert the paper end into
the clamping part, aligning the paper edges even and
parallel with the sides of the base. (Bending the paper
beforehand makes attachment easier). Once the paper is
in place, return the lever to its original position.
Repeat the same process for the other end of the base,
maintaining the proper paper tension.
After inserting the paper, make sure the clamping part
hold it securely. Otherwise the paper will be loose and
subject to slippage, resulting in uneven sanding
operation.
Place the punch plate (optional accessory) over the
paper so that the guide of the punch plate is flush with the
sides of the base. Then press the punch plate to make
holes in the paper.
To remove the paper, release the clamper as stated
above.
For hook-and-loop type of abrasive paper with
pre-punched holes (optional accessory):
CAUTION:
• Always use hook-and-loop type of abrasive papers.
Never use pressure-sensitive abrasive paper.
1. Punch plate
1. Clamping part
2. Abrasive paper
3. Clamp lever
1. Switch
Page 5
5
2
1
011322
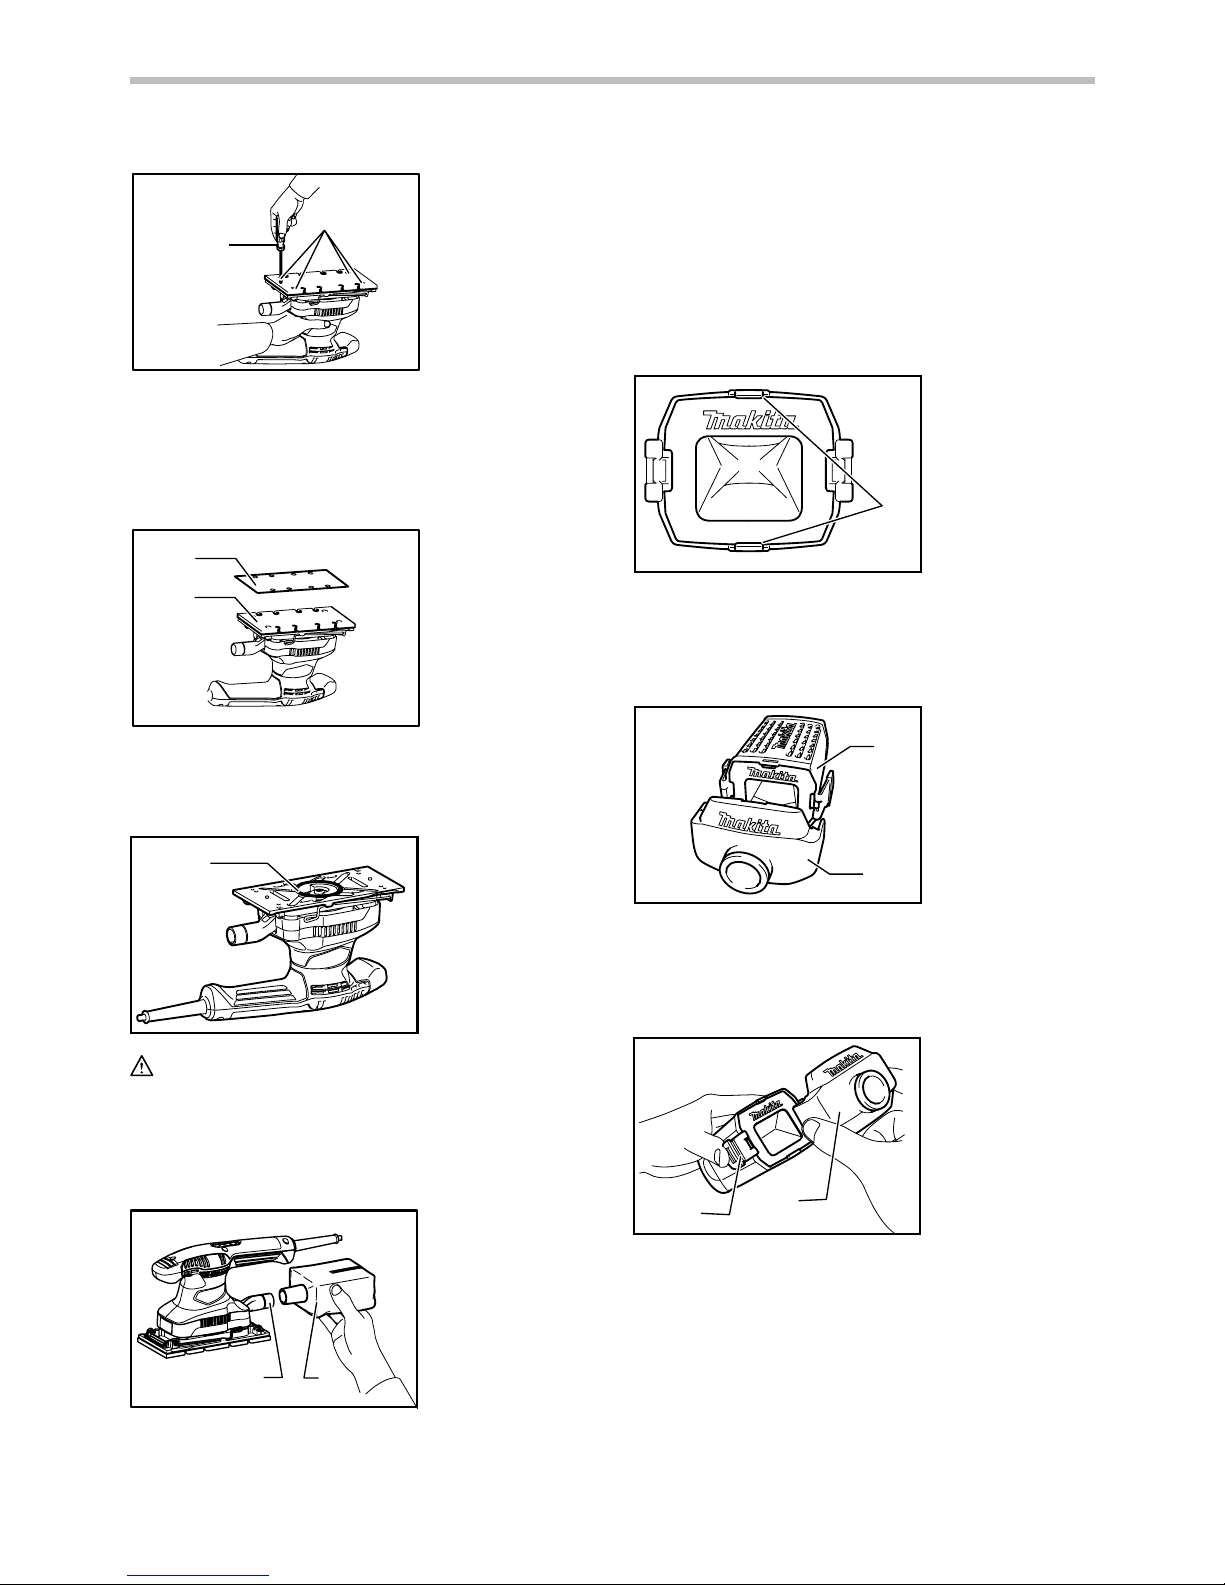
Remove the pad for the conventional type of abrasive
paper from the tool with a screwdriver. Install the pad for
the hook-and-loop type of abrasive paper (optional
accessory) on the tool. Tighten the screws firmly to
secure the pad.
1
2
011323
Remove all dirt or foreign matter from the pad. Attach the
paper to the pad, aligning the holes in the paper with
those in the pad.
1
011358
CAUTION:
• When removing the pad, O ring may come out of
the tool. When this occurs, return the O ring to the
original position and then install the pad.
Dust bag (optional accessory)
1
2
011324
Attach the dust bag onto the dust spout. The dust spout
is tapered. When attaching the dust bag, push it onto the
dust spout firmly as far as it will go to prevent it from
coming off during operation.
For the best results, empty the dust bag when it becomes
approximately half full, tapping it lightly to remove as
much dust as possible.
Installing filter (Optional accessory)
1
009094
Make sure that the logo on the cardboard lip and the logo
on the dust box are on the same side, then install the
filter by fitting the cardboard lip in the groove of each
holding tab.
1
2
009095
Make sure that the logo on the cardboard lip and the logo
on the dust nozzle are on the same side, then install the
dust nozzle on the dust box. Removing dust box and
filter.
1
2
009092
Remove the dust nozzle by pushing the two latches.
1. Latch
2. Dust nozzle
1. Dust box
2. Dust nozzle
1. Holding tab
1. Dust spout
2. Dust bag
1. O-ring
1. Abrasive paper
2. Pad
1. Screwdriver
2. Screws
Page 6
6
009093
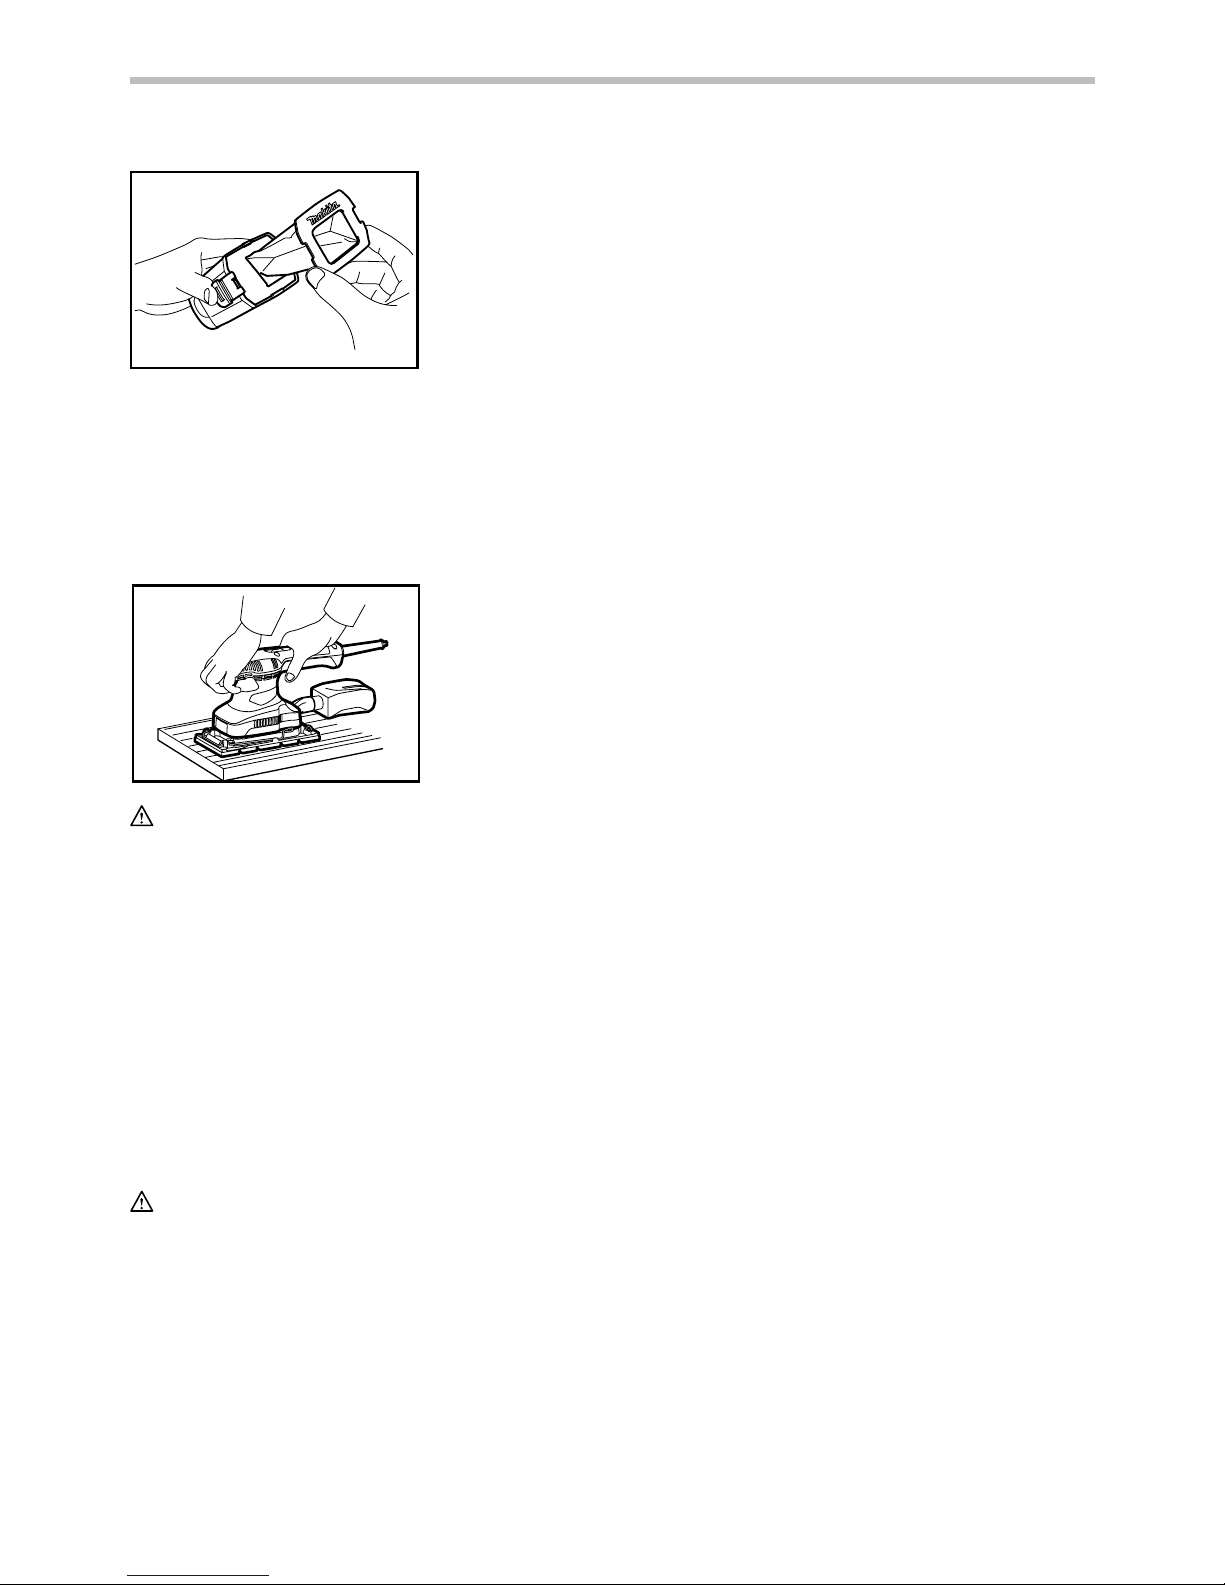
Remove the filter first by pinching the logo side of its
cardboard lip, then by pulling the cardboard lip
downwards to move it out of the holding tab of the dust
box.
OPERATION
Sanding operation
011319
CAUTION:
• Never run the tool without the abrasive paper. You
may seriously damage the pad.
• Never force the tool. Excessive pressure may
decrease the sanding efficiency, damage the
abrasive paper and/or shorten tool life.
Hold the tool firmly. Turn the tool on and wait until it
attains full speed. Then gently place the tool on the
workpiece surface. A finishing sander is generally used
to remove only a small amount of material at a time.
Since the quality of the surface is more important than
the amount of stock removed, do not bear down on the
tool. Keep the base flush with the workpiece at all times.
MAINTENANCE
CAUTION:
• Always be sure that the tool is switched off and
unplugged before attempting to perform inspection
or maintenance.
• Never use gasoline, benzine, thinner, alcohol or the
like. Discoloration, deformation or cracks may
result.
To maintain product SAFETY and RELIABILITY, repairs,
carbon brush inspection and replacement, any other
maintenance or adjustment should be performed by
Makita Authorized Service Centers, always using Makita
replacement parts.
Page 7

7
Page 8

8
Makita Corporation
www.makita.com
884981B4
 Loading...